

Samsung GALAXY S3, Cricket GALAXY S III Owner's Manual

1
TABLE OF CONTENTS
YOUR PHONE 3
Front View Features 3
Bottom View 4
Side by Side View 5
Cool Apps 6
SIM Card 7
Memory Card 10
Battery 12
Power 14
Making a Call 15
Sending a Message 15
Home Screen 17
Ringtone 23
Volume 24
Voicemail 25
Contacts 26
Email 27
Bluetooth 30
TABLE OF CONTENTS
cricket_GSIII_QRM.indd 1
10/26/2012 2:45:35 PM

TABLE OF CONTENTS
2
Camera & Camcorder 31
Near Field Communication 33
Battery & Memory Management 36
HEALTH AND SAFETY 40
Exposure to Radio Frequency (RF)
Signals 40
Specific Absorption Rate (SAR)
Certification Information 51
FCC Part 15 Information to User 54
Commercial Mobile Alerting
System (CMAS) 56
Smart Practices While Driving 56
Battery Use and Safety 59
Samsung Mobile Products and
Recycling 63
UL Certified Travel Charger 65
Display / Touch-Screen 66
WARRANTY 90
Standard Limited Warranty 90
End User License Agreement for
Software 101
cricket_GSIII_QRM.indd 2
10/26/2012 2:45:35 PM
3
YOUR PHONE
YOUR PHONE
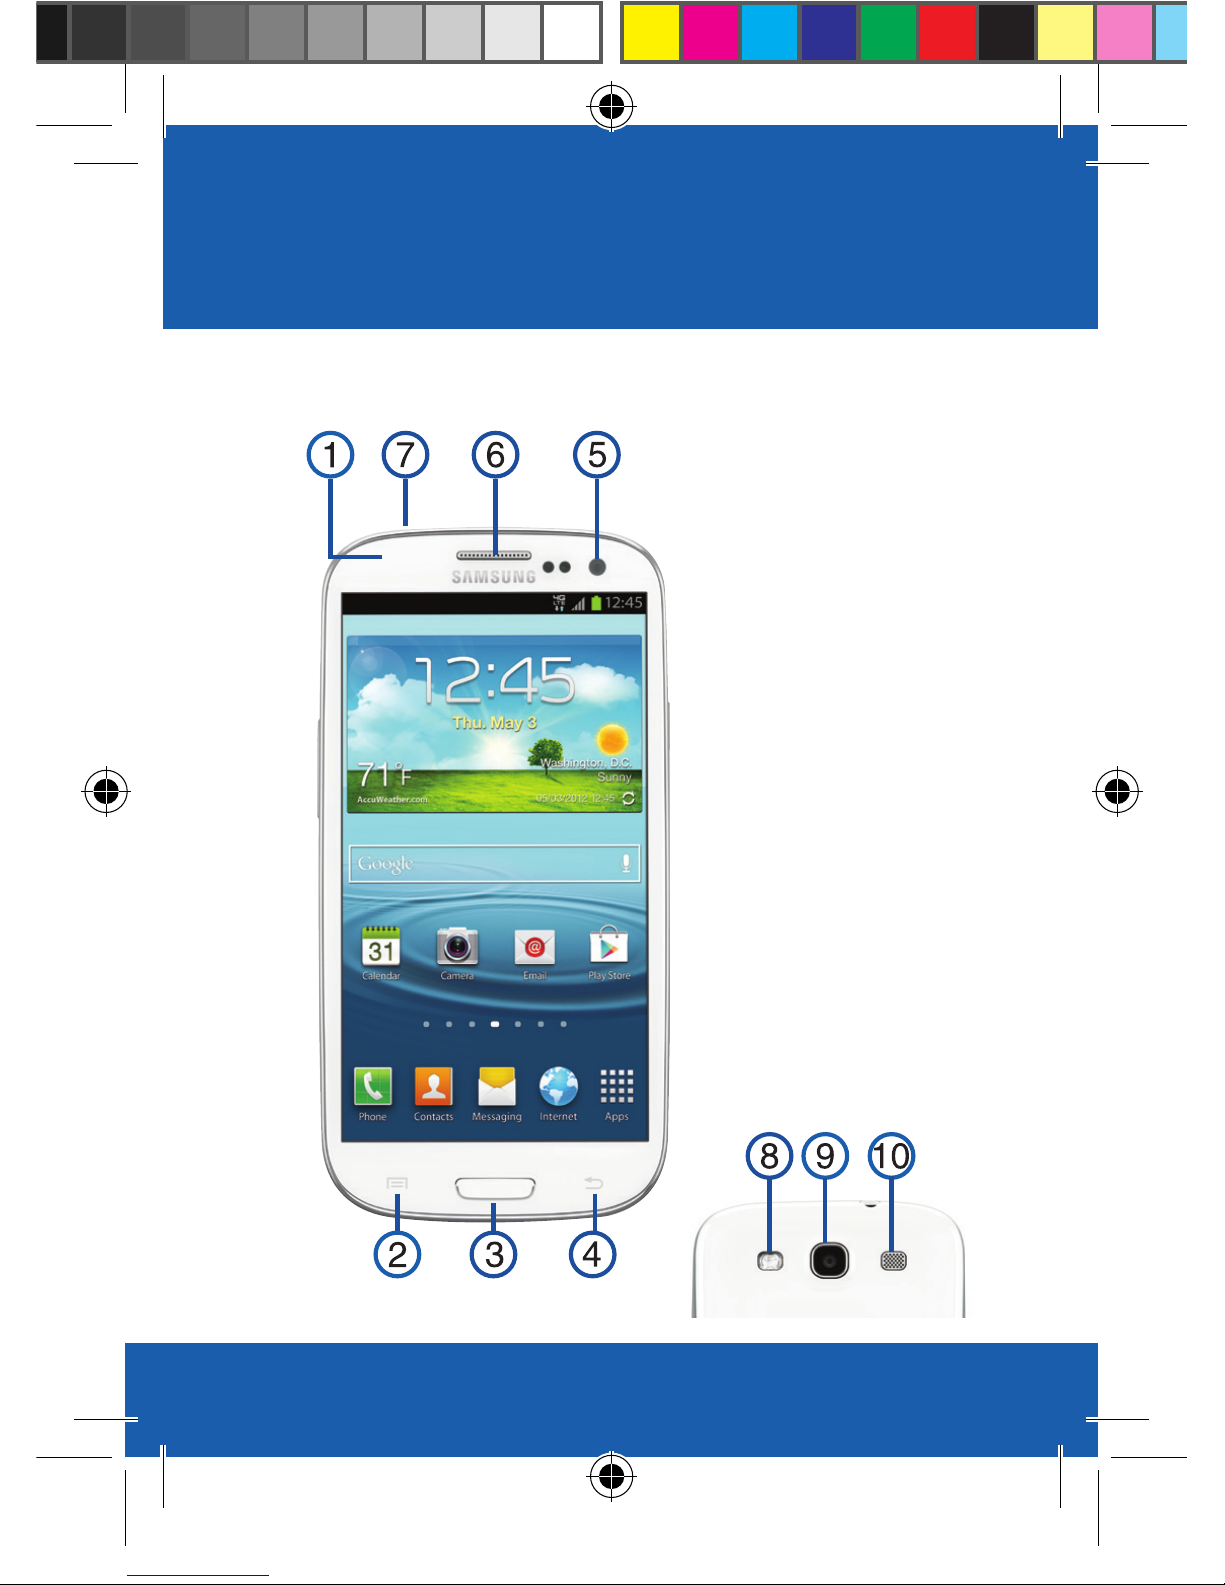
FRONT VIEW FEATURES
1. LED INDICATOR
2. MENU KEY
3. HOME/RECENT APPS
KEY
4. RETURN KEY
5. FRONT FACING
CAMERA
6. EARPIECE
7. HEADSET JACK
8. FLASH
9. CAMERA
10. SPEAKER
cricket_GSIII_QRM.indd 3
10/26/2012 2:45:40 PM
YOUR PHONE
4
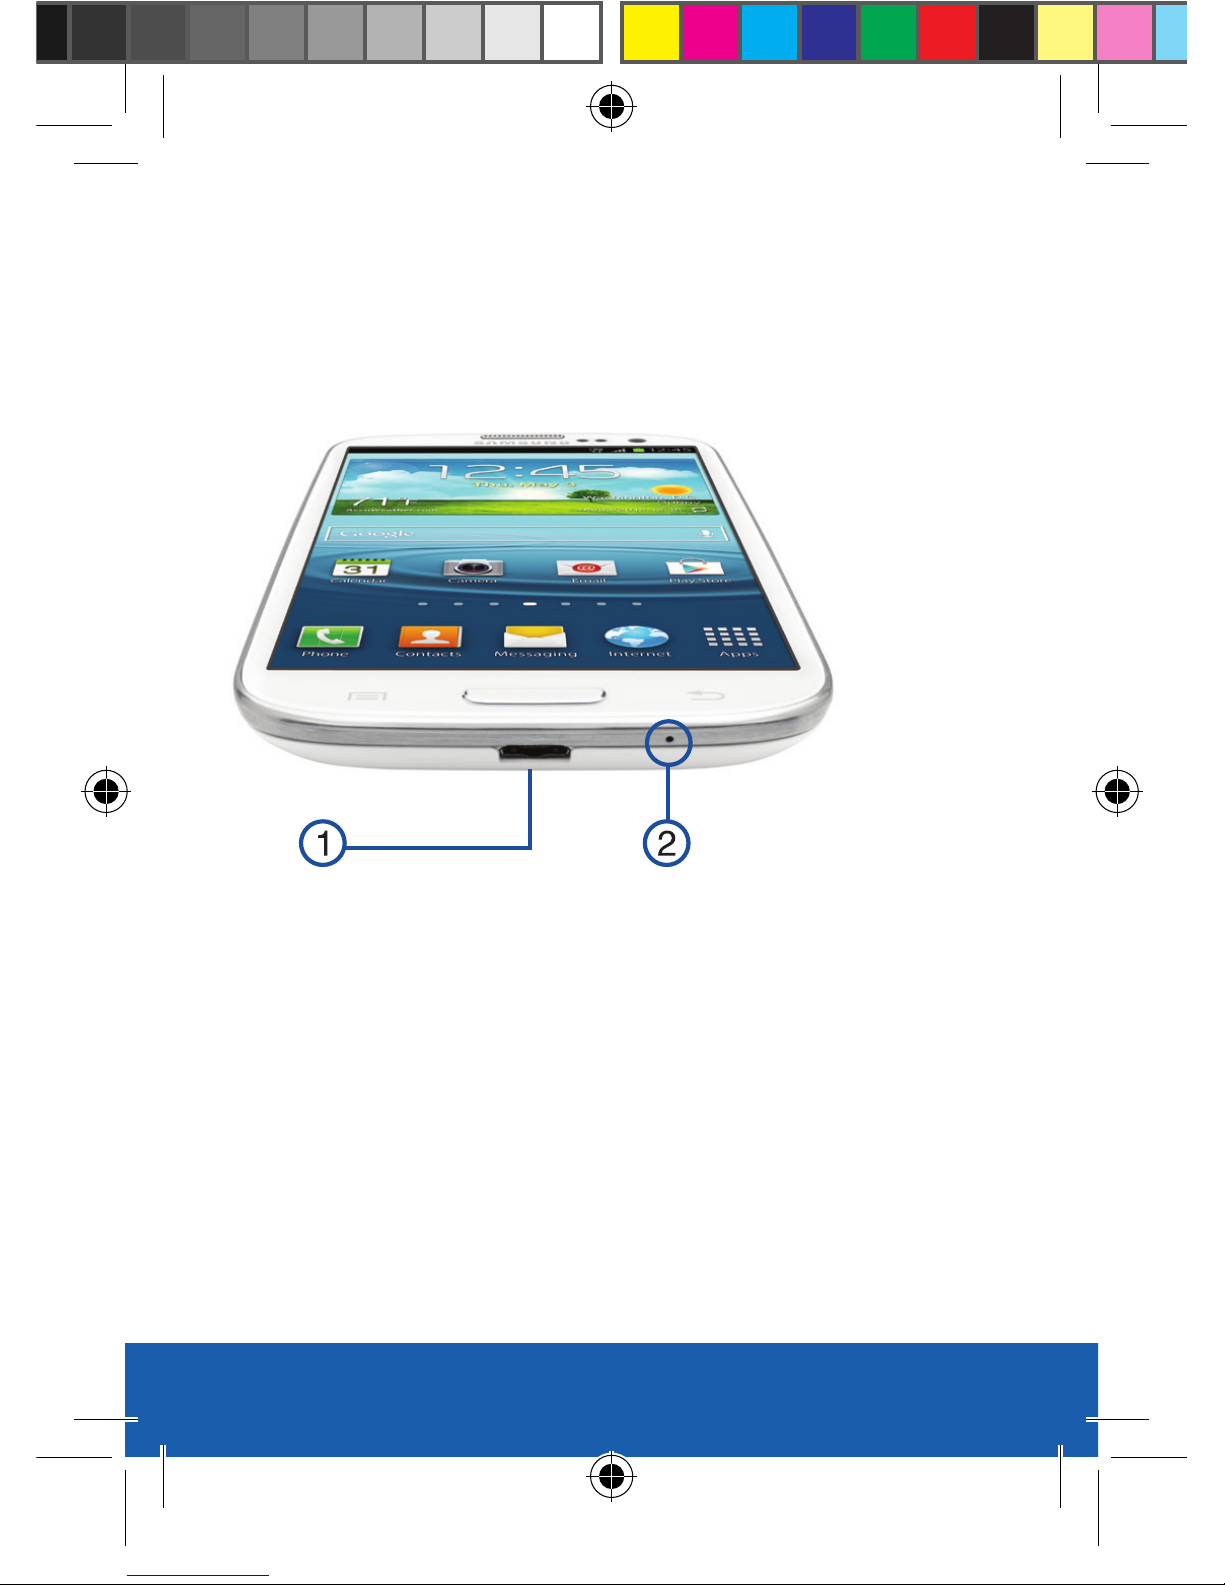
BOTTOM VIEW
1. CHARGING
PORT
2. MICROPHONE
cricket_GSIII_QRM.indd 4
10/26/2012 2:45:41 PM
5
YOUR PHONE
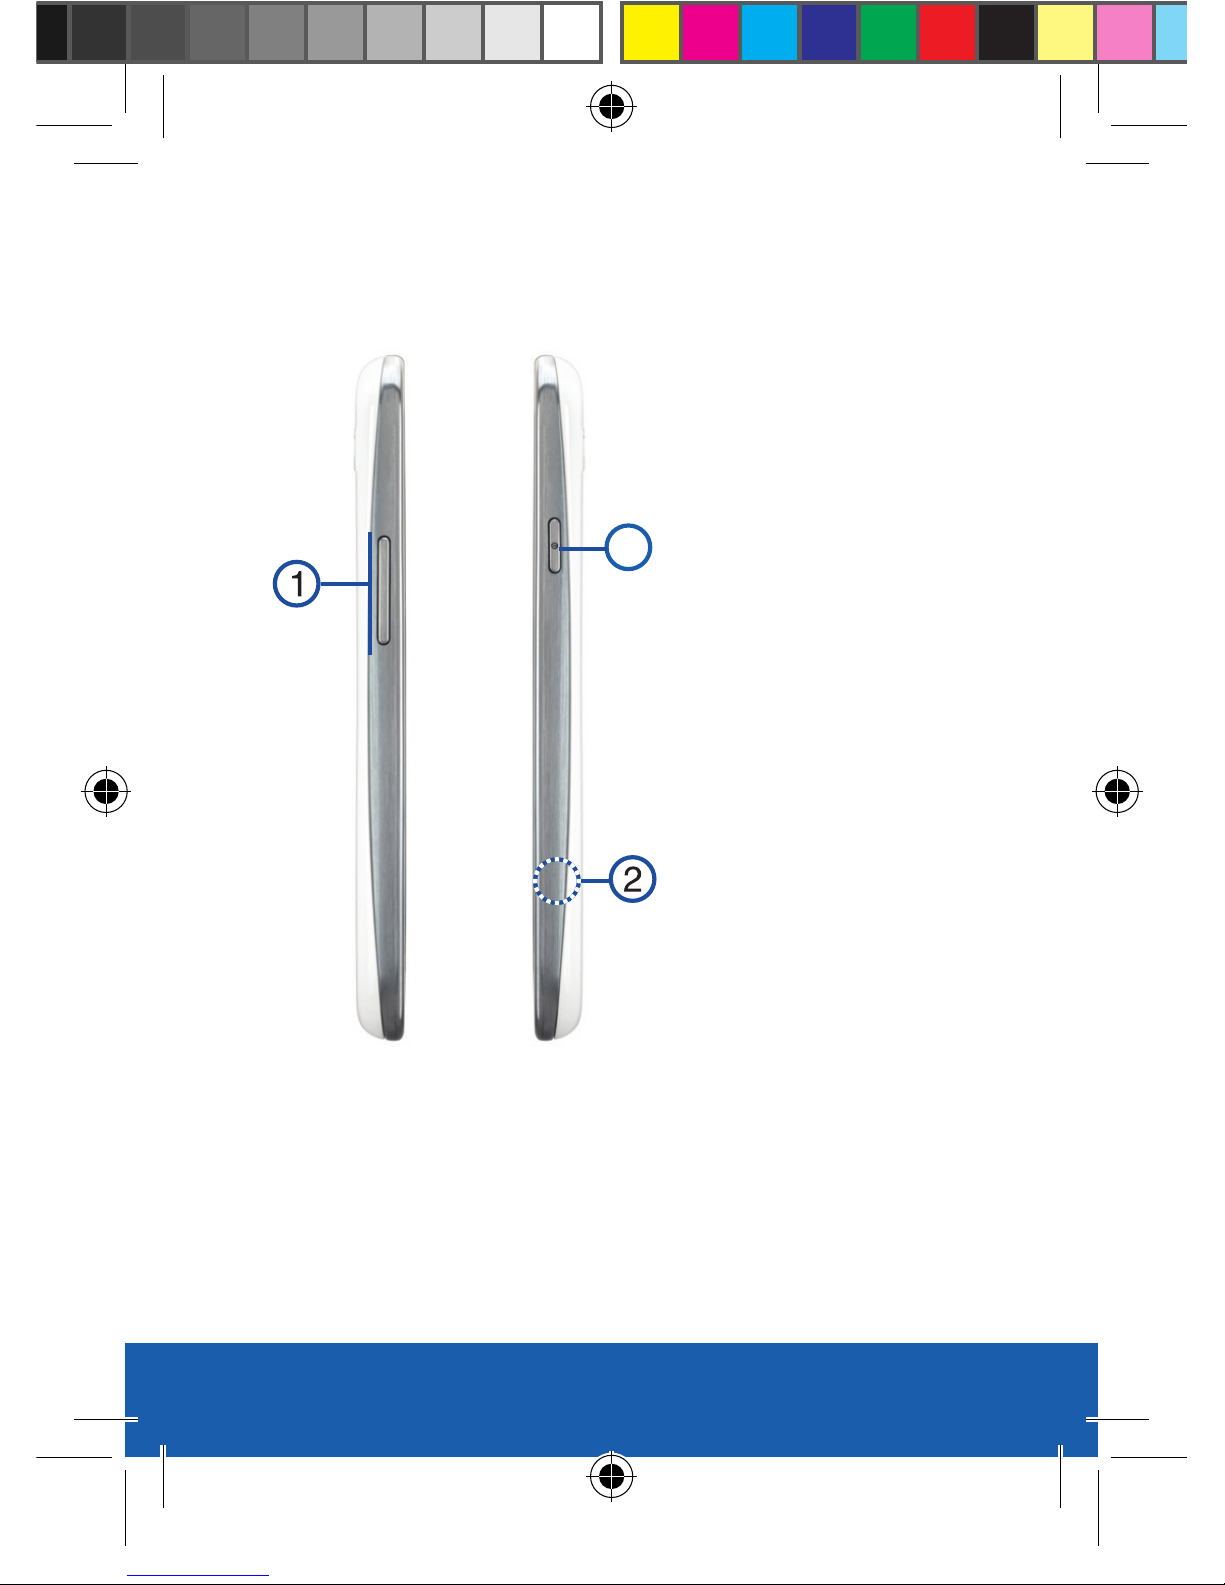
SIDE BY SIDE VIEW
3
1. VOLUME KEY
2. MEMORY CARD
SLOT*
3. POWER KEY
*The Memory Card
Slot is located
under the battery
cover.
cricket_GSIII_QRM.indd 5
10/26/2012 2:45:42 PM

YOUR PHONE
6
COOL APPS
Samsung AllShare Play
Share your on-device media content with other
external devices, such as an HDTV, using DLNA®
(Digital Living Network Alliance) technology.
S Voice
Provides a built-in voice recognition system that
allows you to initiate several common tasks by using
natural speech.
Media Hub
Access a one-stop shop for all of the hottest movie
and TV content. Rent or purchase HD content and
watch it all from either your device or streamed to an
external compatible device.
Mobile HotSpot
Share your phone’s mobile data connection via either
a direct USB connection (between your device and a
single computer) or wirelessly by providing Internet
connectivity to multiple devices.
cricket_GSIII_QRM.indd 6
10/26/2012 2:45:42 PM
SIM CARD
This device uses a micro SIM. The new micro SIM
(Subscriber Identity Module) card identifies your
phone to the wireless network. You cannot make
or receive calls or browse the Internet without a
properly installed micro SIM card. Other larger SIM
cards will not function or fit within this slot.
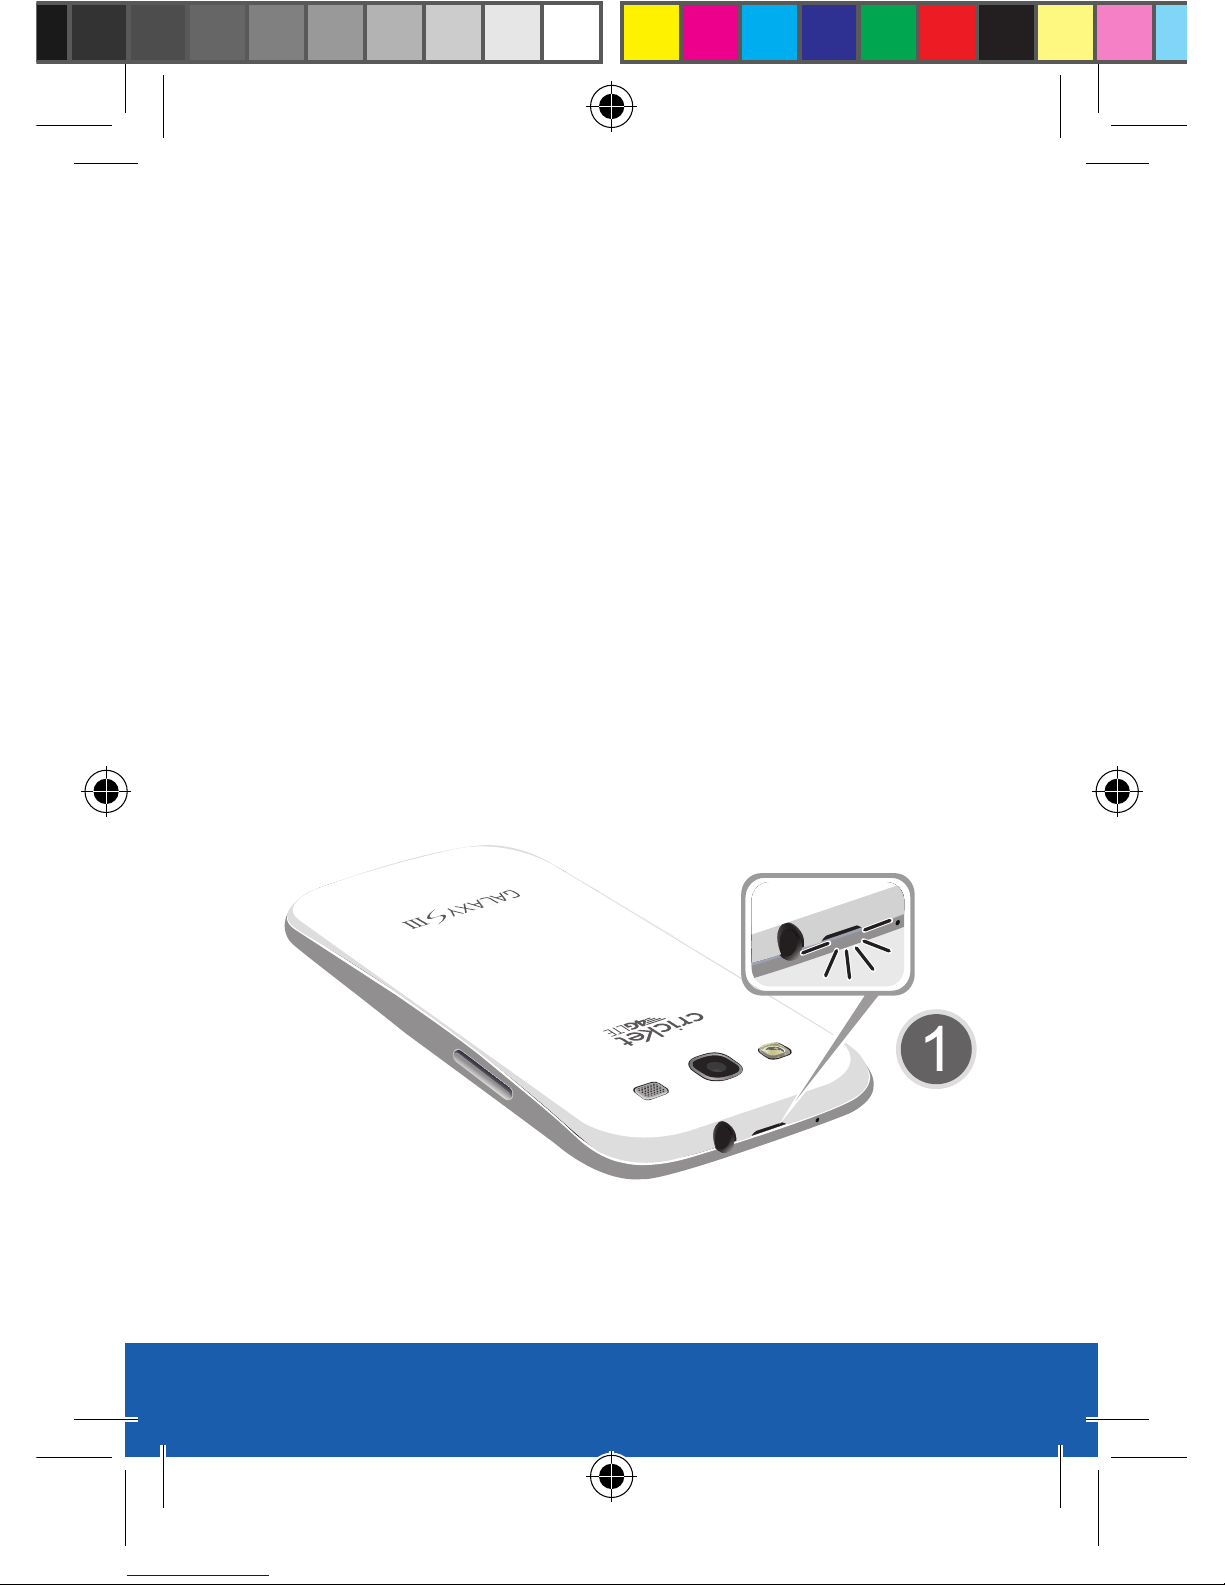
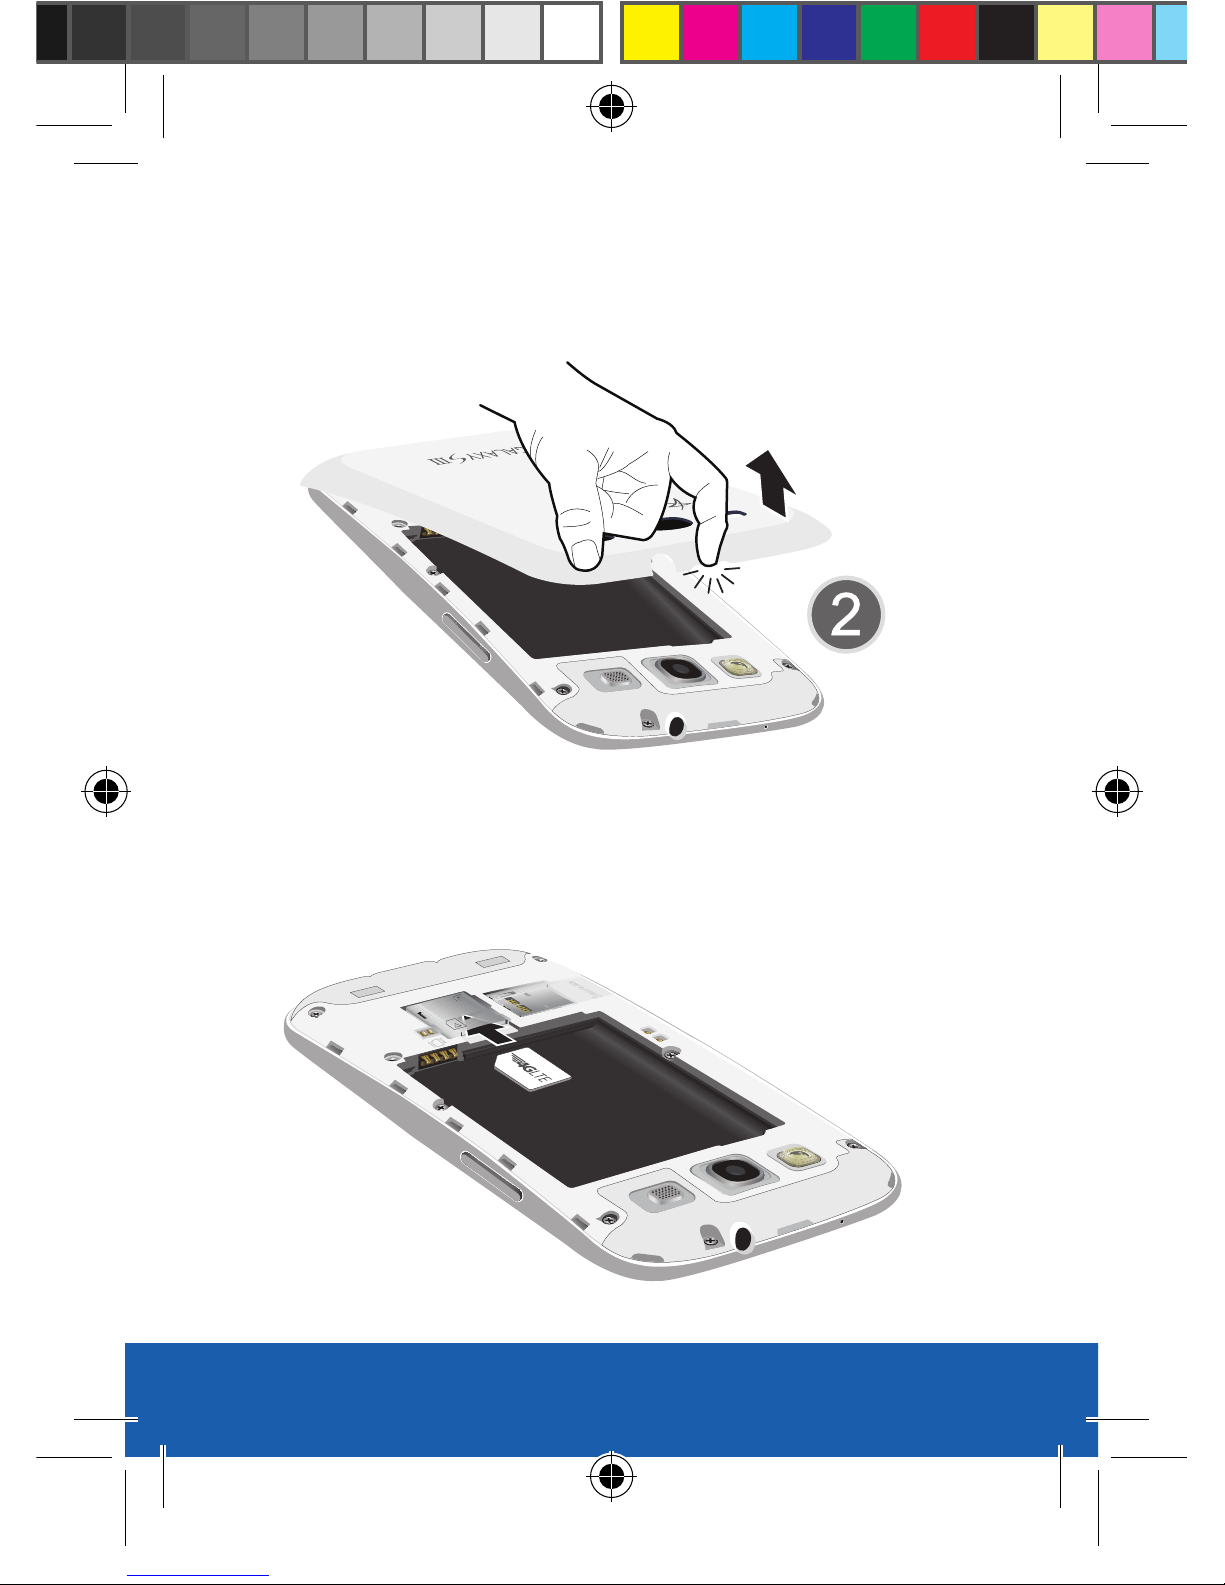
Insert the SIM card
1. Detach the SIM card from its packaging.
2. Hold the device firmly and locate the cover
release latch (1).
7
YOUR PHONE
cricket_GSIII_QRM.indd 7
10/26/2012 2:45:44 PM
YOUR PHONE
8
3. Place your fingernail in the opening and firmly
“pop” the cover off the device (2).
4. Carefully slide the micro SIM card into the SIM
card socket until it clicks into place.
cricket_GSIII_QRM.indd 8
10/26/2012 2:45:48 PM

9
YOUR PHONE
NOTE: This device requires a SIM card. Please insert the SIM card
included in the package prior to turning on the device. This SIM
card will only work with this device. Once the SIM card has
been inserted, do not remove!
If your SIM card is ever separated from the device or damaged,
your device will not function. If you experience any issues with
your device, contact Customer Service at
800-CRICKET (274-2538) or dialing 611 on your Cricket®
handset or visit your nearest Cricket retail location.
cricket_GSIII_QRM.indd 9
10/26/2012 2:45:48 PM

YOUR PHONE
10
MEMORY CARD
Your phone does not come with a microSD memory
card. However, you can purchase one separately and
use it to store your multimedia files.
NOTE: microSD memory cards include capacities of up to 2GB.
microSDHC™ memory card types can range from 4GB to up
to 32GB.
NOTE: This phone supports up to a 64GB microSD memory card. The
phone comes in either a 16GB or 32GB model.
WARNING: Applications, personal settings and other stored data may
be lost or may not function properly if the memory card
is removed.
cricket_GSIII_QRM.indd 10
10/26/2012 2:45:48 PM

11
YOUR PHONE
Install the memory card
1. Locate the microSD card slot on the inside of
the phone.
2. Orient the card with the gold strips facing
down.
3. Carefully slide the microSD card into the card
socket until it clicks into place.
cricket_GSIII_QRM.indd 11
10/26/2012 2:45:50 PM
YOUR PHONE
12
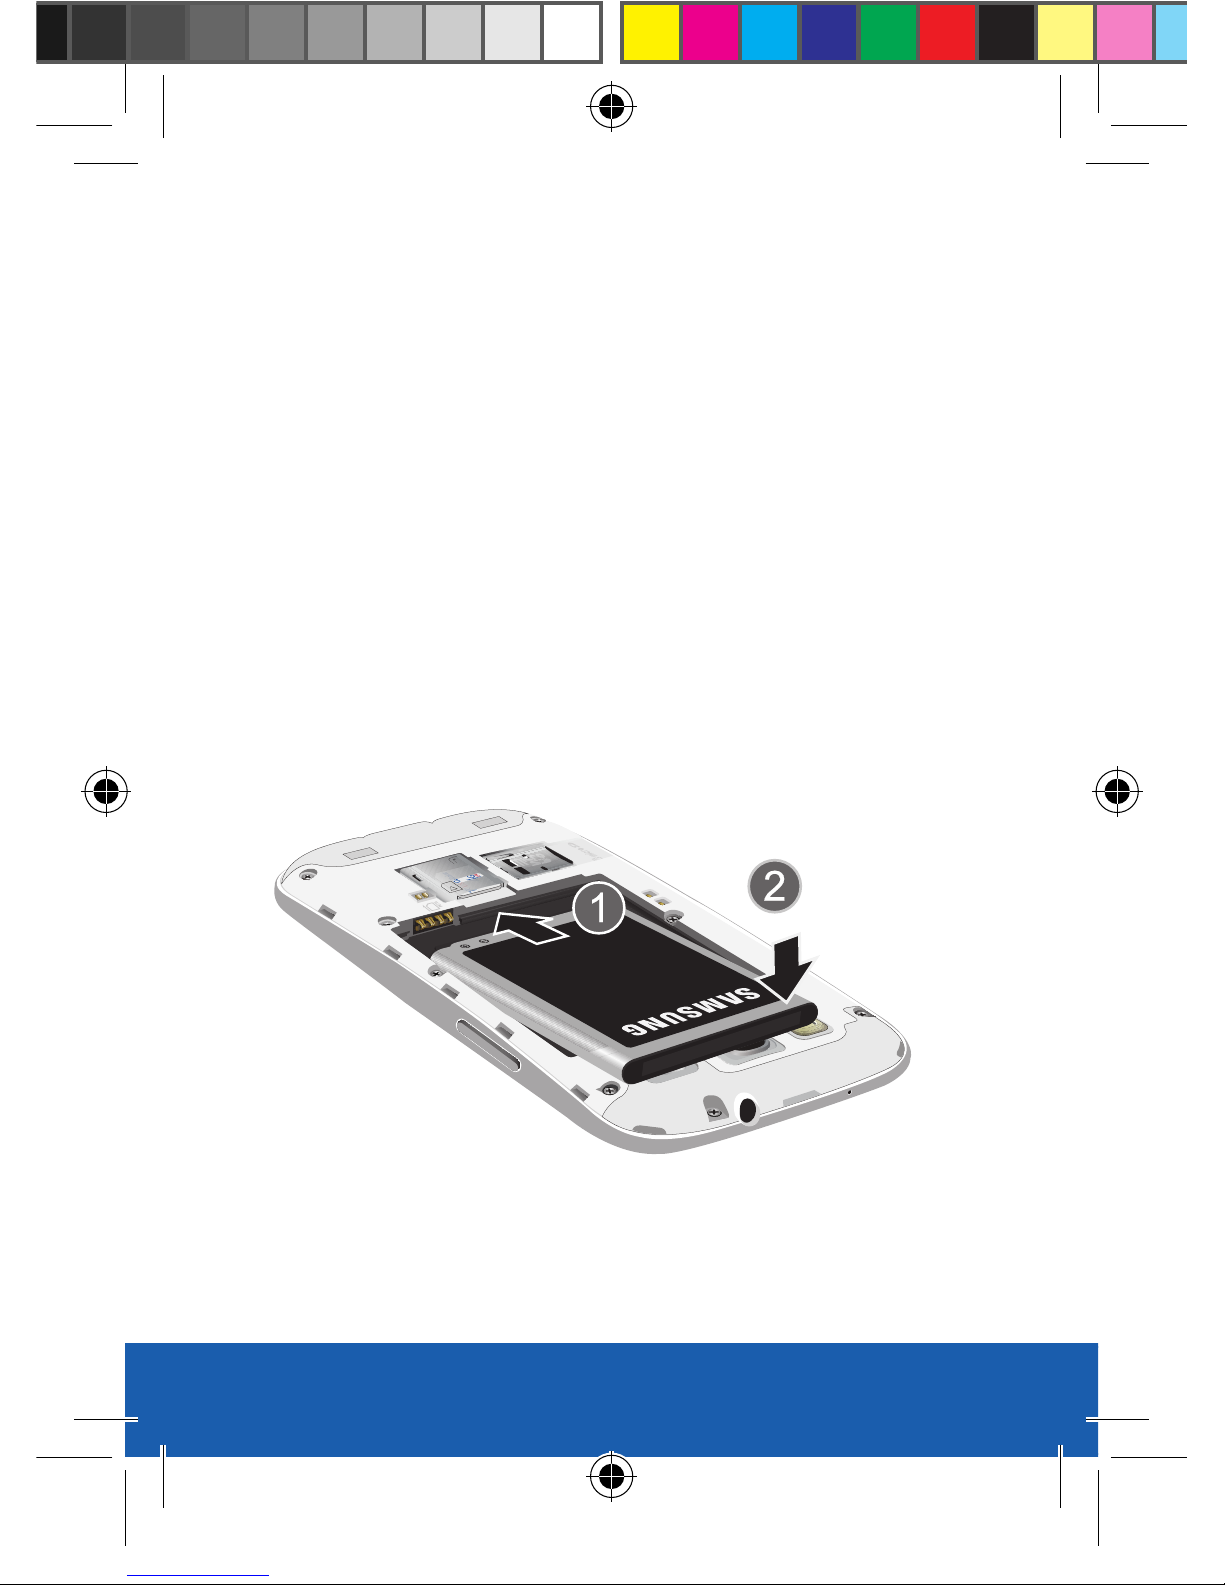
BATTERY
Your phone is shipped with the battery partially
charged. Please charge it fully before using it for the
first time.
Install the Battery
1. Slide the battery into the compartment (1) so
that the tabs on the end align with the slots
at the bottom of the phone, making sure the
connectors align.
2. Gently press down to secure the battery (2).
cricket_GSIII_QRM.indd 12
10/26/2012 2:45:52 PM

13
YOUR PHONE
Charge the battery
1. Connect the USB cable to the charging head.
2. Insert the USB cable into the device’s Charger/
Accessory jack.
3. If using a wall charger, plug the charging head
into a standard AC power outlet. If using a
computer, remove the charging head and plug
the USB cable into computer’s USB port.
cricket_GSIII_QRM.indd 13
10/26/2012 2:45:53 PM

YOUR PHONE
14
POWER
Turn the phone on
X Press and hold (Power/Lock) until the
phone switches on. It searches for your
network and after finding it, you can make or
receive calls.
Turn the phone off
1. Press and hold (Power/Lock) until the
Device options screen appears.
2. Tap (Power off) g OK.
Restarting the phone
1. Press and hold (Power/Lock) until the
Device options screen appears.
2. Tap (Restart) g OK.
cricket_GSIII_QRM.indd 14
10/26/2012 2:45:53 PM
15
YOUR PHONE
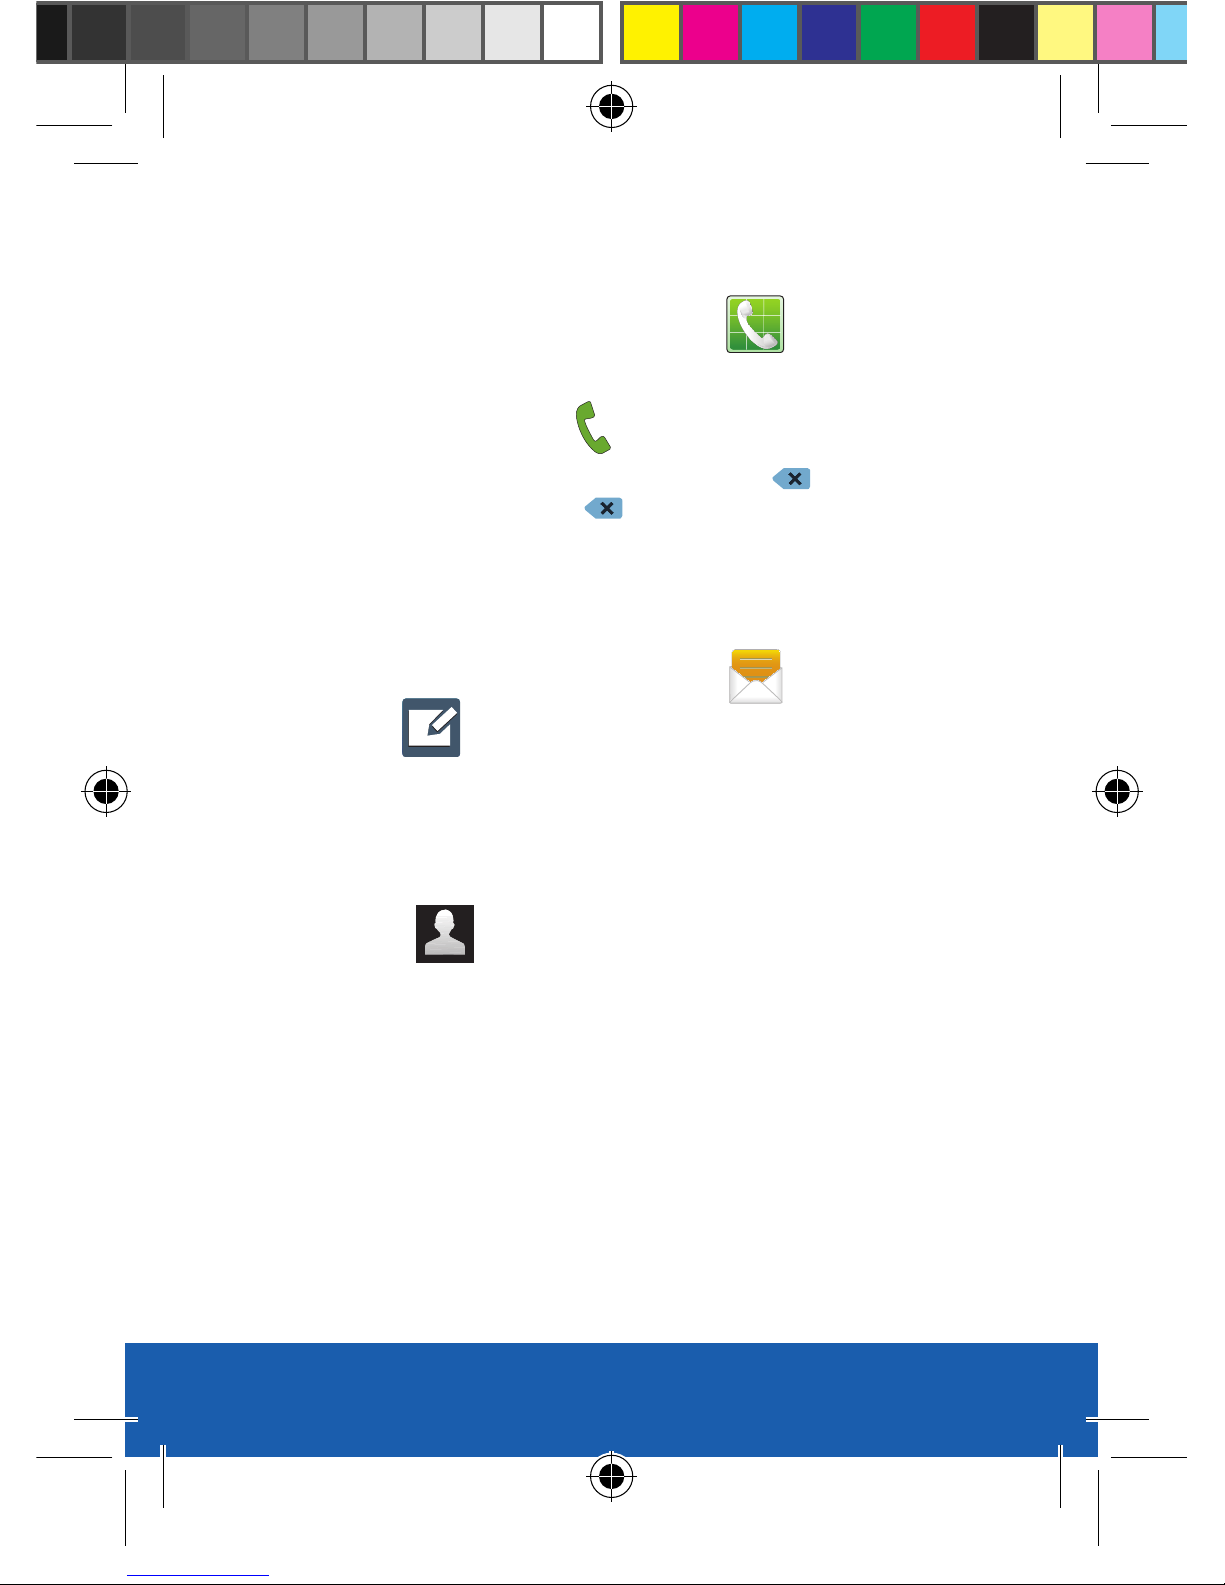
MAKING A CALL
1. From the Home screen, tap (Phone).
2. Enter the number you wish to call (using the
keypad) and tap (Send) to place a call.
NOTE: If you make a mistake while dialing, touch to clear the last
digit. Touch and hold to clear the entire sequence.
SENDING A MESSAGE
1. From the Home screen, tap (Messaging)
g (Compose).
2. Tap the Enter recipient field to manually enter
a recipient.
– or–
Tap to select from one of the following:
Contacts: to select a recipient from your Contacts
list (valid entries must have a wireless phone
number or email address).
Groups: to select a recipient from the Group list.
Favorites: to select a recipient from the Favorites
list.
Logs: to select a recipient from a list of recently
sent messages.
cricket_GSIII_QRM.indd 15
10/26/2012 2:45:56 PM
YOUR PHONE
16
3. If adding a recipient from either Logs, Contacts,
or Group, tap the contact to place a checkmark
then tap Done. The contact displays in the
recipient field.
NOTE: Delete any unnecessary members by tapping their name/
number in the recipient area and selecting Delete.
4. Add more recipients by tapping either the Enter
recipient field or and selecting recipients.
5. Tap the Enter message field and use the on-
screen keypad to enter a message.
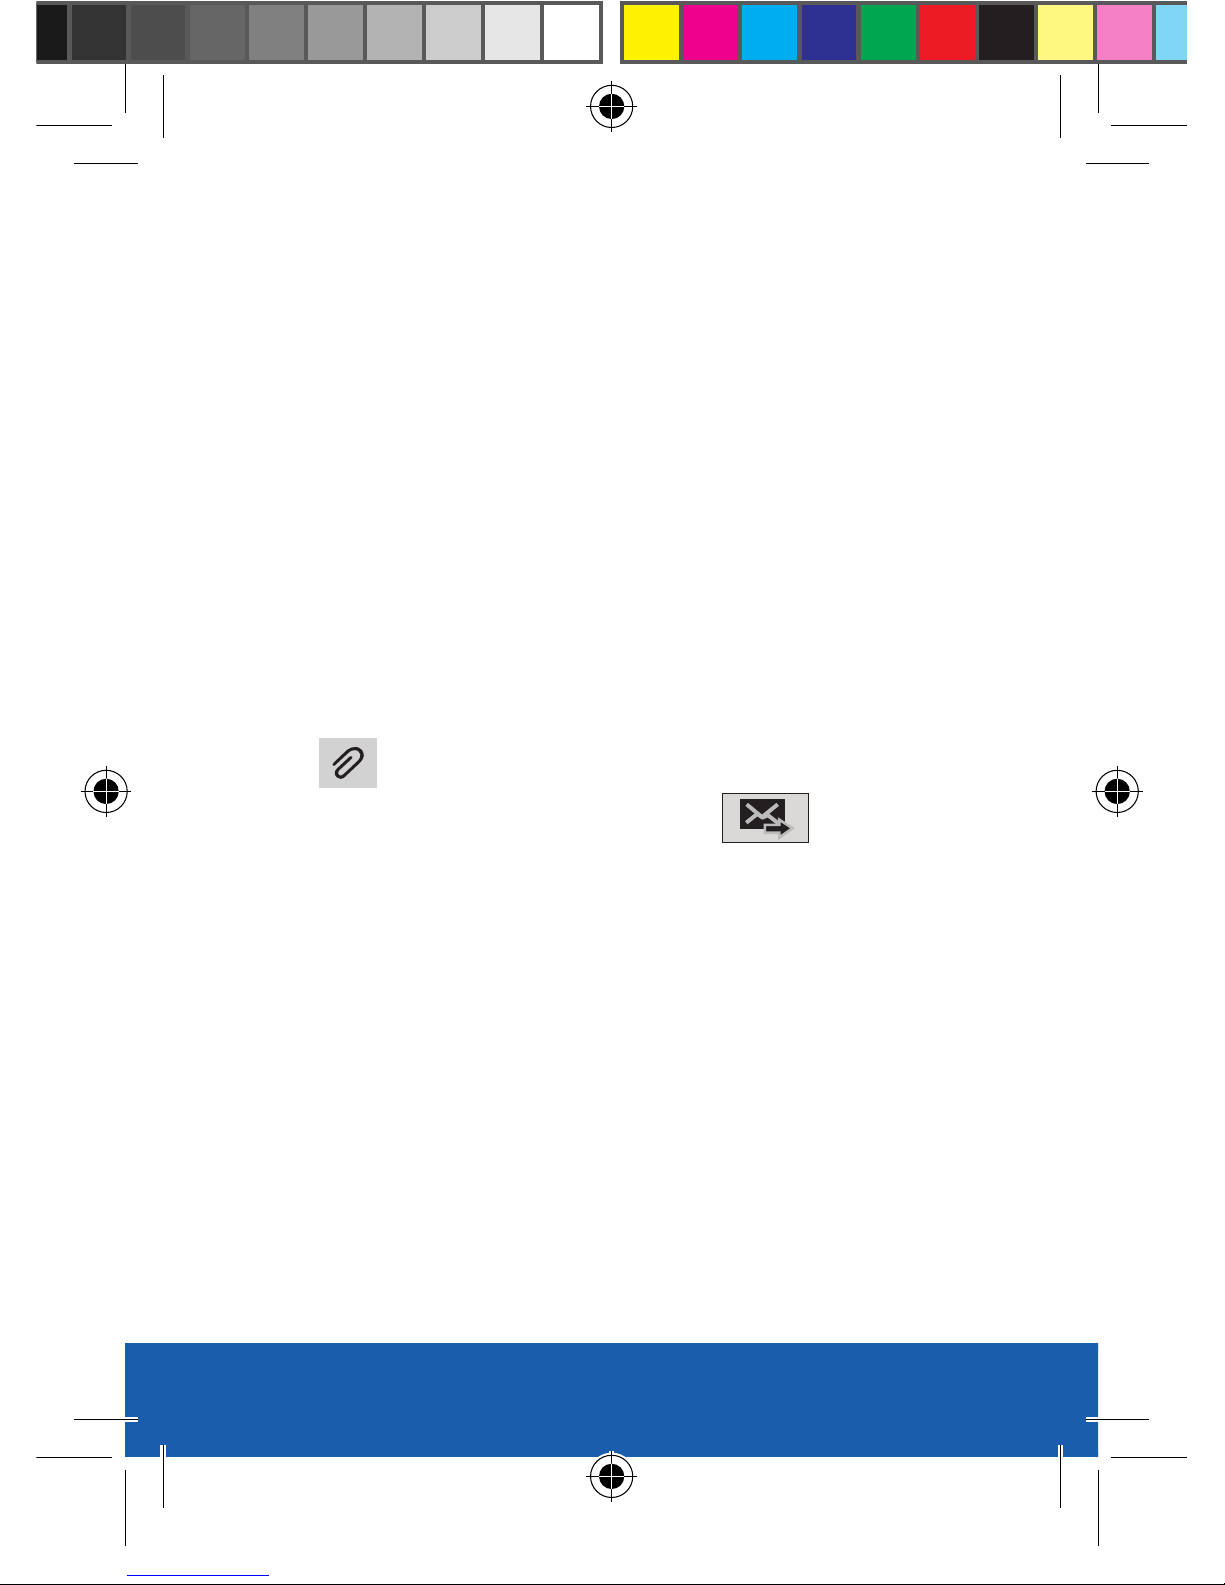
6. To add an attachment to your message, tap
(Attach).
7. Review your message and tap (Send).
8. If you have more than one recipient, the same
text message is sent to all recipients in the
Enter Recipients field.
NOTE: If you exit a message before you send it, it will be automatically
saved as a draft.
cricket_GSIII_QRM.indd 16
10/26/2012 2:45:56 PM

17
YOUR PHONE
HOME SCREEN
Swipe your fingers left or right to view the entire
Home screen. You can customize the screen with
widgets and shortcuts to your favorite applications.
Status bar
The Status bar appears at the top of your Home
screen. Icons indicating your phone’s status and new
notification alerts appear on the Status bar.
Status Bar
cricket_GSIII_QRM.indd 17
10/26/2012 2:45:57 PM

YOUR PHONE
18
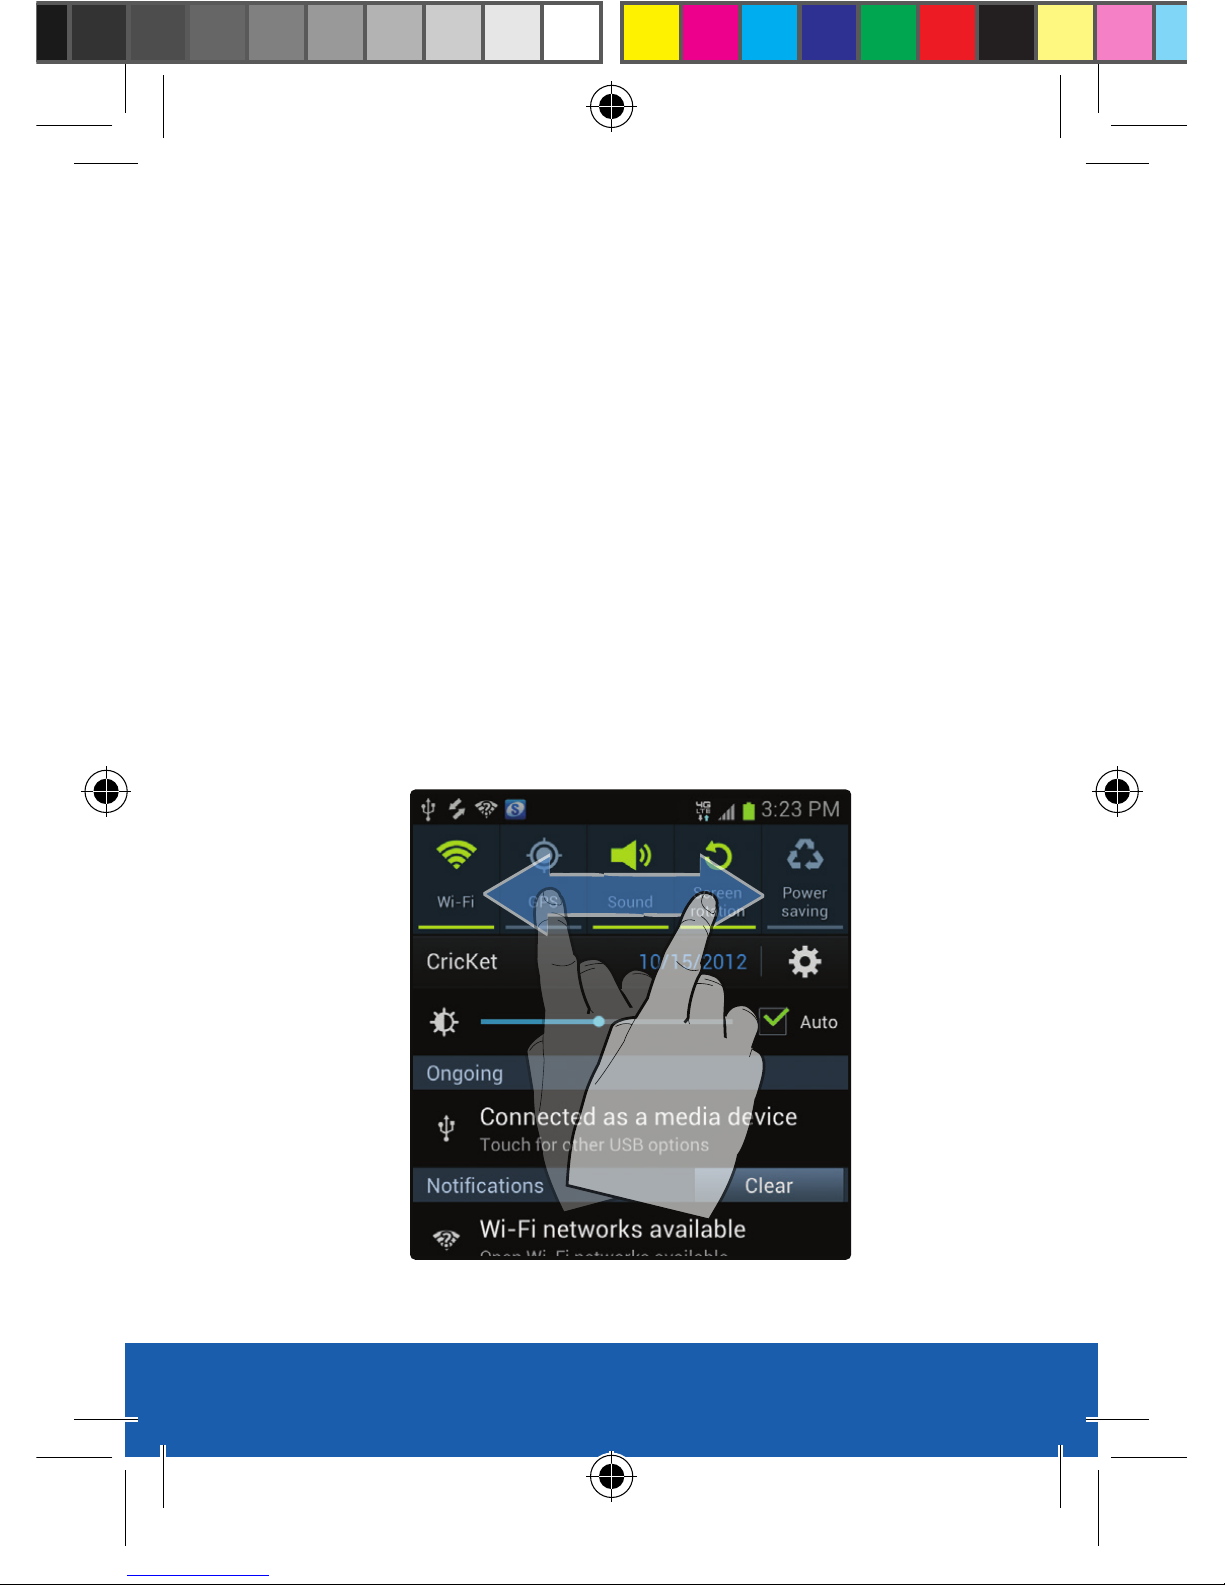
Notification Screen
The Notification area indicates new message events
(data sync status, new messages, calendar events,
call status, etc). You can expand this area to reveal
the Notifications screen that provides more detailed
information about the current on-screen notification
icons.
To open the Notifications screen
1. In a single motion, touch and drag the Status
bar down to the bottom of the screen to open
the Notifications screen (1).
2. Tap a notification entry to open the associated
application (2).
cricket_GSIII_QRM.indd 18
10/26/2012 2:45:57 PM
19
YOUR PHONE
To access additional notification
options
In addition to notifications, this screen also provides
quick and ready access to separate phone functions.
These can be quickly activated or deactivated by
toggling them on or off.
1. In a single motion, touch and drag the Status
bar down to the bottom of the screen.
2. In a single motion touch and scroll left or right
across the top row of buttons to access
additional functions.
cricket_GSIII_QRM.indd 19
10/26/2012 2:45:57 PM
YOUR PHONE
20
Applications screen
To access the Applications screens, from any Home
screen, tap the Apps icon .
Swipe left or right through the screens. As you
download new applications, they will appear on the
Applications screens in alphabetical order.
As you transition from screen to screen, a dot
(located at the bottom) displays which panel you are
currently on.
Add an app to the Home screen
1. Swipe left or right to select a screen location
for your new shortcut.
2. Tap (Apps) to reveal all your current
available applications. By default, applications
are displayed as an alphabetical grid.
3. Scroll across the screens and locate your
desired application.
4. Touch and hold the on-screen icon. The new
shortcut then appears to hover over the current
screen.
cricket_GSIII_QRM.indd 20
10/26/2012 2:45:58 PM

21
YOUR PHONE
5. While still holding the on-screen icon, position
it on the current screen. Once complete,
release the screen to lock the shortcut into its
new position.
Move and delete items
Touch and hold the item you want to move or delete
and drag it to another location or to the Trash Can
icon at the bottom of the screen.
Assigning a new Default Home screen
1. Press (Home) g (Menu) g Edit
page.
2. Tap (Home screen). The new Home screen
will now include this highlighted icon.
cricket_GSIII_QRM.indd 21
10/26/2012 2:45:58 PM

YOUR PHONE
22
Change Home screen wallpaper
1. Navigate to any screen.
– or–
Press (Home) to go to the Home screen.
2. Touch and hold an empty area of the screen.
3. Tap Home screen.
4. Select a wallpaper type: Gallery, Live
wallpapers, or Wallpapers.
5. Tap the desired image.
6. Tap Set wallpaper or Done.
cricket_GSIII_QRM.indd 22
10/26/2012 2:45:58 PM

23
YOUR PHONE
RINGTONE
Set call and notification ringtone
1. From the Home screen, press (Menu) g
Settings g Sound.
2. Tap either Device ringtone or Default
notifications.
3. Tap the desired sound.
4. Tap OK.
Set other sounds
1. From the Home screen, press (Menu) g
Settings g Sound.
2. Scroll down to the System section and tap
those items you want to turn on or off. Choose
from: Keytones, Touch sounds, Screen lock
sound, or Haptic feedback.
cricket_GSIII_QRM.indd 23
10/26/2012 2:45:59 PM

YOUR PHONE
24
VOLUME
Set call volume
While on a call, press the Volume key up or down.
Set other volume
1. From the Home screen, press (Menu) g
Settings g Sound.
2. Tap Volume.
3. Touch and drag the Music, video, games, and
other media, or Ringtone, Notifications, and
System sliders to the desired levels.
4. Tap OK.
Silence ringer
From the Home screen, press the Volume key down
until you see the Silent mode icon .
To turn off silent mode, press the Volume key up.
cricket_GSIII_QRM.indd 24
10/26/2012 2:45:59 PM
25
YOUR PHONE
VOICEMAIL
Use voicemail
To call and set up voicemail:
1. From the Home screen, tap (Phone).
2. Touch and hold until the device dials
voicemail.
3. Follow the instructions to set up your voicemail
account.
cricket_GSIII_QRM.indd 25
10/26/2012 2:45:59 PM
YOUR PHONE
26
CONTACTS
Add new contact
1. From the Home screen, tap (Phone).
2. Enter the contact’s phone number.
3. Tap Add to Contacts.
4. Tap Create contact.
5. Tap a contact destination.
6. Enter the contact’s information.
7. Tap Save.
Call contact from the contacts list
1. From the Home screen, tap (Contacts).
2. Scroll to and tap the contact you want to call.
3. Tap .
cricket_GSIII_QRM.indd 26
10/26/2012 2:46:00 PM

27
YOUR PHONE
EMAIL
Set up Gmail
1. From the Home screen, tap (Apps) g
(Gmail).
2. Tap Existing or New.
3. Follow the on-screen instructions.
Set up Internet email
1. From the Home screen, tap (Apps) g
(Email).
NOTE: If you have already set up an email account, tap the name of the open
account, tap the Menu key, and then tap Add account.
2. Tap the Email field and enter your emaill
account information.
3. Tap the Password field and enter your
password.
4. Tap Next.
5. Set your account options and tap Next.
6. At the Set up email screen, name the account
and enter a screen name to identify yourself on
this account. and tap Done.
cricket_GSIII_QRM.indd 27
10/26/2012 2:46:00 PM

YOUR PHONE
28
Set up Corporate Exchange email
1. From the Home screen, tap (Apps) g
(Email).
NOTE: If you have already set up an email account, tap the name of the open
account, tap
(
Menu
) g
Settings g
(
Add account.)
2. Enter your email address and password
information and tap Next.
3. Tap Microsoft Exchange ActiveSync.
4. Enter an updated Domain, confirm your User
name and Password information.
5. Re-enter your Exchange server information
and tap Next.
6. Modify the account options as desired and tap
Next.
7. Read the on-screen Activation disclaimer and,
when prompted, tap OK.
8. If prompted, read the Remote security
administration information and tap OK to
accept the service and continue.
9. Adjust the various on-screen configuration
fields and tap Next.
cricket_GSIII_QRM.indd 28
10/26/2012 2:46:01 PM
29
YOUR PHONE
10. If prompted, read the Activate device
administrator? screen and tap Activate to
complete the email setup process.
11. Identify your new work email account with a
unique name (Ex: Work), then tap Done.
Contact your company’s IT department if you need
more help.
cricket_GSIII_QRM.indd 29
10/26/2012 2:46:01 PM

YOUR PHONE
30
BLUETOOTH
Your phone comes with Bluetooth connectivity,
a wireless technology that enables a connection
between your phone and a Bluetooth headset or
other Bluetooth device (sold separately).
Prepare Bluetooth headset
Make sure that your headset is fully charged and in
pairing mode. Refer to the headset’s user manual for
more information.
Turn on Bluetooth and pair with headset
1. In a single motion, touch and drag the Status
bar down to the bottom of the screen.
2. Tap Bluetooth g Bluetooth available.
Your phone will scan for and display a list of
available Bluetooth devices.
NOTE: Tap scan if the phone does not automatically begin to scan for
available devices.
3. From the list, tap the headset/device you want
to pair with your phone.
4. If necessary, enter the PIN or passcode.
cricket_GSIII_QRM.indd 30
10/26/2012 2:46:01 PM
 Loading...