

Samsung Cell Phone User Manual

Samsung Omnia™
PORTABLE Dual-Mode
SMARTPHONE
Windows Mobile 6.1 Professional
User Manual
Please read this manual before operating your
phone, and keep it for future reference.

Intellectual Property
All Intellectual Property, as defined below, owned by or which is otherwise the property of Samsung or its respective suppliers relating to
the SAMSUNG Phone, including but not limited to, accessories, parts, or software relating there to (the “Phone System”), is proprietary to
Samsung and protected under federal laws, state laws, and international treaty provisions. Intellectual Property includes, but is not limited
to, inventions (patentable or unpatentable), patents, trade secrets, copyrights, software, computer programs, and related documentation
and other works of authorship. You may not infringe or otherwise violate the rights secured by the Intellectual Property. Moreover, you
agree that you will not (and will not attempt to) modify, prepare derivative works of, reverse engineer, decompile, disassemble, or
otherwise attempt to create source code from the software. No title to or ownership in the Intellectual Property is transferred to you. All
applicable rights of the Intellectual Property shall remain with SAMSUNG and its suppliers.
Samsung Telecommunications America (STA), LLC
Headquarters: Customer Care Center:
1301 E. Lookout Drive 1000 Klein Rd.
Richardson, TX 75082 Plano, TX 75074
Toll Free Tel: 1.888.987.HELP (4357)
Internet Address: http://www.samsungusa.com
©
2008 Samsung Telecommunications America, LLC is a registered trademark of Samsung Electronics America, Inc. and its related
entities.
Do you have questions about your Samsung Mobile Phone?
For 24 hour information and assistance, we offer a new FAQ/ARS System (Automated Response System) at:
www.samsungwireless.com/support
Omnia_BJ18_PM_102808_F3

Licensed by Qualcomm Incorporated under one or more of the following patents: U.S.
Patent No. 4, 901, 307; 5, 056, 109; 5, 099, 204; 5, 101, 501; 5, 103, 459; 5, 107, 225; 5, 109, 390.
Disclaimer of Warranties; Exclusion of Liability
EXCEPT AS SET FORTH IN THE EXPRESS WARRANTY CONTAINED ON THE WARRANTY PAGE ENCLOSED WITH THE PRODUCT, THE
PURCHASER TAKES THE PRODUCT "AS IS", AND SAMSUNG MAKES NO EXPRESS OR IMPLIED WARRANTY OF ANY KIND WHATSOEVER
WITH RESPECT TO THE PRODUCT, INCLUDING BUT NOT LIMITED TO THE MERCHANTABILITY OF THE PRODUCT OR ITS FITNESS FOR ANY
PARTICULAR PURPOSE OR USE; THE DESIGN, CONDITION OR QUALITY OF THE PRODUCT; THE PERFORMANCE OF THE PRODUCT; THE
WORKMANSHIP OF THE PRODUCT OR THE COMPONENTS CONTAINED THEREIN; OR COMPLIANCE OF THE PRODUCT WITH THE
REQUIREMENTS OF ANY LAW, RULE, SPECIFICATION OR CONTRACT PERTAINING THERETO. NOTHING CONTAINED IN THE INSTRUCTION
MANUAL SHALL BE CONSTRUED TO CREATE AN EXPRESS OR IMPLIED WARRANTY OF ANY KIND WHATSOEVER WITH RESPECT TO THE
PRODUCT. IN ADDITION, SAMSUNG SHALL NOT BE LIABLE FOR ANY DAMAGES OF ANY KIND RESULTING FROM THE PURCHASE OR USE OF
THE PRODUCT OR ARISING FROM THE BREACH OF THE EXPRESS WARRANTY, INCLUDING INCIDENTAL, SPECIAL OR CONSEQUENTIAL
DAMAGES, OR LOSS OF ANTICIPATED PROFITS OR BENEFITS.

Table of Contents
Section 1: Getting Started ..............................................5
Understanding this User Manual . . . . . . . . . . . . . . . . . . . . . . . .5
Activating Your Phone . . . . . . . . . . . . . . . . . . . . . . . . . . . . . . . . 5
Powering the Phone On and Off . . . . . . . . . . . . . . . . . . . . . . . . 5
Turning the Phone Feature On and Off . . . . . . . . . . . . . . . . . . . 6
Rebooting your Phone after Lockup . . . . . . . . . . . . . . . . . . . . . 6
Resetting your Phone to Factory Defaults . . . . . . . . . . . . . . . . . 7
Battery . . . . . . . . . . . . . . . . . . . . . . . . . . . . . . . . . . . . . . . . . . . 8
Using a microSD Memory Card (sold separately) . . . . . . . . . . . 14
Reformatting the microSD Memory Card . . . . . . . . . . . . . . . . . 16
Voicemail . . . . . . . . . . . . . . . . . . . . . . . . . . . . . . . . . . . . . . . . 17
Visual Voice Mail . . . . . . . . . . . . . . . . . . . . . . . . . . . . . . . . . . . 18
Section 2: Menu Icons .................................................. 19
Display Icons . . . . . . . . . . . . . . . . . . . . . . . . . . . . . . . . . . . . . 19
Main Menu Icons . . . . . . . . . . . . . . . . . . . . . . . . . . . . . . . . . . 20
Start Icons . . . . . . . . . . . . . . . . . . . . . . . . . . . . . . . . . . . . . . . 22
Program Icons . . . . . . . . . . . . . . . . . . . . . . . . . . . . . . . . . . . . 23
Settings Icons . . . . . . . . . . . . . . . . . . . . . . . . . . . . . . . . . . . . . 27
Section 3: Understanding Your Phone ......................... 32
Features of Your Phone . . . . . . . . . . . . . . . . . . . . . . . . . . . . . . 32
Front View of Your Phone . . . . . . . . . . . . . . . . . . . . . . . . . . . . 33
Side View . . . . . . . . . . . . . . . . . . . . . . . . . . . . . . . . . . . . . . .34
Top View . . . . . . . . . . . . . . . . . . . . . . . . . . . . . . . . . . . . . . . .35
Rear View . . . . . . . . . . . . . . . . . . . . . . . . . . . . . . . . . . . . . . . . 36
1
Today Screen . . . . . . . . . . . . . . . . . . . . . . . . . . . . . . . . . . . . . 37
Command keys . . . . . . . . . . . . . . . . . . . . . . . . . . . . . . . . . . . 38
Motions Sensor . . . . . . . . . . . . . . . . . . . . . . . . . . . . . . . . . . . 39
Section 4: Customization and Navigation ................... 42
Menu Navigation . . . . . . . . . . . . . . . . . . . . . . . . . . . . . . . . . . 42
Opening an Application . . . . . . . . . . . . . . . . . . . . . . . . . . . . . 43
Accessing a Menu Function . . . . . . . . . . . . . . . . . . . . . . . . . . 43
Widgets . . . . . . . . . . . . . . . . . . . . . . . . . . . . . . . . . . . . . . . . . 46
Widget Bar Navigation . . . . . . . . . . . . . . . . . . . . . . . . . . . . . . 49
Customizing your Start Menu List . . . . . . . . . . . . . . . . . . . . . . 50
Customizing the Shortcut Menu . . . . . . . . . . . . . . . . . . . . . . . 50
Today Screen . . . . . . . . . . . . . . . . . . . . . . . . . . . . . . . . . . . . . 51
Customizing your Today Screen Theme . . . . . . . . . . . . . . . . . 51
Customizing your Today Screen Item List . . . . . . . . . . . . . . . . 51
Customizing your display theme . . . . . . . . . . . . . . . . . . . . . . . 52
Customizing Buttons . . . . . . . . . . . . . . . . . . . . . . . . . . . . . . . 53
Section 5: Security ....................................................... 54
Locking Your Phone . . . . . . . . . . . . . . . . . . . . . . . . . . . . . . . . 54
Section 6: Call Functions ............................................. 58
Making a Call . . . . . . . . . . . . . . . . . . . . . . . . . . . . . . . . . . . . . 58
Answering a Call . . . . . . . . . . . . . . . . . . . . . . . . . . . . . . . . . . 59
Using the Speakerphone . . . . . . . . . . . . . . . . . . . . . . . . . . . . 59
Displaying Your Phone Number . . . . . . . . . . . . . . . . . . . . . . . 60
Call Log . . . . . . . . . . . . . . . . . . . . . . . . . . . . . . . . . . . . . . . . . 60

Roaming-Networks . . . . . . . . . . . . . . . . . . . . . . . . . . . . . . . . 63
TTY . . . . . . . . . . . . . . . . . . . . . . . . . . . . . . . . . . . . . . . . . . . . 64
Voice Command . . . . . . . . . . . . . . . . . . . . . . . . . . . . . . . . . . . 64
Section 7: Network Services ........................................ 66
Call Forwarding . . . . . . . . . . . . . . . . . . . . . . . . . . . . . . . . . . . 66
Three-way Calling . . . . . . . . . . . . . . . . . . . . . . . . . . . . . . . . . 66
Call Waiting . . . . . . . . . . . . . . . . . . . . . . . . . . . . . . . . . . . . . . 67
Caller ID . . . . . . . . . . . . . . . . . . . . . . . . . . . . . . . . . . . . . . . . . 67
Section 8: Entering Text ............................................... 68
Virtual QWERTY keyboard . . . . . . . . . . . . . . . . . . . . . . . . . . . . 68
Text Entry - Input Mode . . . . . . . . . . . . . . . . . . . . . . . . . . . . . 68
Text Entry - Word Completion . . . . . . . . . . . . . . . . . . . . . . . . 69
Text Entry - Options . . . . . . . . . . . . . . . . . . . . . . . . . . . . . . . . 70
Section 9: Messaging ................................................... 72
Types of Messages . . . . . . . . . . . . . . . . . . . . . . . . . . . . . . . . 72
Retrieving a Message . . . . . . . . . . . . . . . . . . . . . . . . . . . . . . . 72
Accessing Message Folders . . . . . . . . . . . . . . . . . . . . . . . . . . 72
Configuration of Messaging Parameters . . . . . . . . . . . . . . . . . 73
Sending Messages . . . . . . . . . . . . . . . . . . . . . . . . . . . . . . . . . 75
Message Option . . . . . . . . . . . . . . . . . . . . . . . . . . . . . . . . . . . 77
Spell Checking a Text Message . . . . . . . . . . . . . . . . . . . . . . . 80
Checking Names with an SMS Message . . . . . . . . . . . . . . . . . 81
Using My Text Messages . . . . . . . . . . . . . . . . . . . . . . . . . . . . 81
E-mail Account Setup . . . . . . . . . . . . . . . . . . . . . . . . . . . . . . . 82
Message Folders . . . . . . . . . . . . . . . . . . . . . . . . . . . . . . . . . . 84
Section 10: Contacts .................................................... 85
Phone Book . . . . . . . . . . . . . . . . . . . . . . . . . . . . . . . . . . . . . . 85
Understanding Your Contacts . . . . . . . . . . . . . . . . . . . . . . . . . 87
Working with your Contacts . . . . . . . . . . . . . . . . . . . . . . . . . . 87
Adding Notes to Contacts . . . . . . . . . . . . . . . . . . . . . . . . . . . 91
Speed Dial Contacts . . . . . . . . . . . . . . . . . . . . . . . . . . . . . . . 92
Section 11: Microsoft Mobile Applications ................. 93
Mobile Applications . . . . . . . . . . . . . . . . . . . . . . . . . . . . . . . . 93
Office Mobile . . . . . . . . . . . . . . . . . . . . . . . . . . . . . . . . . . . . . 93
Section 12: Multimedia ................................................ 98
Camera . . . . . . . . . . . . . . . . . . . . . . . . . . . . . . . . . . . . . . . . . 98
Media Album . . . . . . . . . . . . . . . . . . . . . . . . . . . . . . . . . . . . 101
Photo Slides . . . . . . . . . . . . . . . . . . . . . . . . . . . . . . . . . . . . 102
Digital Frame . . . . . . . . . . . . . . . . . . . . . . . . . . . . . . . . . . . . 103
Podcasts . . . . . . . . . . . . . . . . . . . . . . . . . . . . . . . . . . . . . . . 105
RSS Reader . . . . . . . . . . . . . . . . . . . . . . . . . . . . . . . . . . . . . 106
ShoZu . . . . . . . . . . . . . . . . . . . . . . . . . . . . . . . . . . . . . . . . . 106
Smart Reader . . . . . . . . . . . . . . . . . . . . . . . . . . . . . . . . . . . 108
TV Out Viewer . . . . . . . . . . . . . . . . . . . . . . . . . . . . . . . . . . . 109
Video Editor . . . . . . . . . . . . . . . . . . . . . . . . . . . . . . . . . . . . . 109
Windows Media Player . . . . . . . . . . . . . . . . . . . . . . . . . . . . 111
Touch Player . . . . . . . . . . . . . . . . . . . . . . . . . . . . . . . . . . . . 113
Connected Home . . . . . . . . . . . . . . . . . . . . . . . . . . . . . . . . . 114
2

Section 13: Web .......................................................... 116
Opera™ Browser . . . . . . . . . . . . . . . . . . . . . . . . . . . . . . . . . 116
Internet Explorer . . . . . . . . . . . . . . . . . . . . . . . . . . . . . . . . . . 117
Mobile IM . . . . . . . . . . . . . . . . . . . . . . . . . . . . . . . . . . . . . . .118
Dormant Mode . . . . . . . . . . . . . . . . . . . . . . . . . . . . . . . . . . . 118
Application Management . . . . . . . . . . . . . . . . . . . . . . . . . . . 119
Managing Certificates . . . . . . . . . . . . . . . . . . . . . . . . . . . . . . 120
Broadband Access Connect . . . . . . . . . . . . . . . . . . . . . . . . .120
Section 14: Personal Organizer .................................122
Calendar . . . . . . . . . . . . . . . . . . . . . . . . . . . . . . . . . . . . . . . . 125
Tasks . . . . . . . . . . . . . . . . . . . . . . . . . . . . . . . . . . . . . . . . . . 127
Task Manager . . . . . . . . . . . . . . . . . . . . . . . . . . . . . . . . . . . 130
Task Switcher . . . . . . . . . . . . . . . . . . . . . . . . . . . . . . . . . . . . 131
Notes . . . . . . . . . . . . . . . . . . . . . . . . . . . . . . . . . . . . . . . . . . 131
Remote Desktop Mobile . . . . . . . . . . . . . . . . . . . . . . . . . . . . 132
Section 15: Bluetooth and Wi-Fi Services .................133
About Bluetooth Wireless Technology . . . . . . . . . . . . . . . . . .133
Bluetooth Modes . . . . . . . . . . . . . . . . . . . . . . . . . . . . . . . . . . 137
Bluetooth Bonds . . . . . . . . . . . . . . . . . . . . . . . . . . . . . . . . . .138
Bluetooth Hands-Free Device . . . . . . . . . . . . . . . . . . . . . . . . 140
Bluetooth OBEX FTP . . . . . . . . . . . . . . . . . . . . . . . . . . . . . . . 141
Bluetooth Virtual Serial Port . . . . . . . . . . . . . . . . . . . . . . . . . 141
ActiveSync via Bluetooth Wireless Technology . . . . . . . . . . . 142
About Wi-Fi . . . . . . . . . . . . . . . . . . . . . . . . . . . . . . . . . . . . . 142
Enabling Wi-Fi . . . . . . . . . . . . . . . . . . . . . . . . . . . . . . . . . . . 142
Automatically Connecting to a Network . . . . . . . . . . . . . . . . . 142
3
Manually Entering Network Settings . . . . . . . . . . . . . . . . . . . 143
Changing Connection Information . . . . . . . . . . . . . . . . . . . . . 143
Section 16: Synchronization ...................................... 145
Active Sync . . . . . . . . . . . . . . . . . . . . . . . . . . . . . . . . . . . . . 145
Changing the Synchronization Schedule . . . . . . . . . . . . . . . . 150
Windows Mobile Device Center 6 for Windows Vista . . . . . . . 152
Wireless Sync . . . . . . . . . . . . . . . . . . . . . . . . . . . . . . . . . . . 153
Section 17: Tools ........................................................ 155
Search . . . . . . . . . . . . . . . . . . . . . . . . . . . . . . . . . . . . . . . . . 155
File Explorer . . . . . . . . . . . . . . . . . . . . . . . . . . . . . . . . . . . . . 155
VZ Navigator . . . . . . . . . . . . . . . . . . . . . . . . . . . . . . . . . . . . 155
VZAppZone . . . . . . . . . . . . . . . . . . . . . . . . . . . . . . . . . . . . . . 156
Calculator . . . . . . . . . . . . . . . . . . . . . . . . . . . . . . . . . . . . . . 156
Smart Converter . . . . . . . . . . . . . . . . . . . . . . . . . . . . . . . . . . 156
Clock . . . . . . . . . . . . . . . . . . . . . . . . . . . . . . . . . . . . . . . . . . 156
Games . . . . . . . . . . . . . . . . . . . . . . . . . . . . . . . . . . . . . . . . . 158
Section 18: Changing Your Settings .......................... 160
Omnia Settings . . . . . . . . . . . . . . . . . . . . . . . . . . . . . . . . . . 160
Personal Settings . . . . . . . . . . . . . . . . . . . . . . . . . . . . . . . . . 160
System Settings . . . . . . . . . . . . . . . . . . . . . . . . . . . . . . . . . . 170
Connections Settings . . . . . . . . . . . . . . . . . . . . . . . . . . . . . 175
Sound Settings . . . . . . . . . . . . . . . . . . . . . . . . . . . . . . . . . . . 178
Section 19: Health and Safety Information ............... 179
Health and Safety Information . . . . . . . . . . . . . . . . . . . . . . . 179
Samsung Mobile Products and Recycling . . . . . . . . . . . . . . . 180
UL Certified Travel Adapter . . . . . . . . . . . . . . . . . . . . . . . . . . 180

Consumer Information on Wireless Phones . . . . . . . . . . . . . . 181
Road Safety . . . . . . . . . . . . . . . . . . . . . . . . . . . . . . . . . . . . . 186
Responsible Listening . . . . . . . . . . . . . . . . . . . . . . . . . . . . . 188
Operating Environment . . . . . . . . . . . . . . . . . . . . . . . . . . . . . 189
Using Your Phone Near Other Electronic Devices . . . . . . . . . 190
FCC Hearing-Aid Compatibility (HAC) Regulations for Wireless
Devices . . . . . . . . . . . . . . . . . . . . . . . . . . . . . . . . . . . . . 190
Potentially Explosive Environments . . . . . . . . . . . . . . . . . . . . 192
Emergency Calls . . . . . . . . . . . . . . . . . . . . . . . . . . . . . . . . . 192
FCC Notice and Cautions . . . . . . . . . . . . . . . . . . . . . . . . . . . 193
Other Important Safety Information . . . . . . . . . . . . . . . . . . . 194
Product Performance . . . . . . . . . . . . . . . . . . . . . . . . . . . . . . 194
Availability of Various Features/Ring Tones . . . . . . . . . . . . . 195
Battery Standby and Talk Time . . . . . . . . . . . . . . . . . . . . . . 195
Battery Precautions . . . . . . . . . . . . . . . . . . . . . . . . . . . . . . . 195
Care and Maintenance . . . . . . . . . . . . . . . . . . . . . . . . . . . . . 197
Section 20: Warranty Information .............................198
Standard Limited Warranty . . . . . . . . . . . . . . . . . . . . . . . . . . 198
Index ............................................................................202
4

Section 1: Getting Started
This section allows you to start using your phone by activating
your service, setting up your voicemail, inserting your battery,
and navigating from the
Tod ay
screen.
Understanding this User Manual
The chapters of this guide generally follow the same order as the
menus and sub menus in your phone. A robust index for quick
reference to most features begins on page 202.
Also included in this manual is important safety information that
you should know before using your phone.
Activating Your Phone
If you purchased your phone at a Verizon Wireless store, it is
probably activated and ready to use. If you have upgraded your
phone or received a new phone by mail, it probably needs to be
activated before you can use it.
To activate your phone, follow these steps:
1. Visit a Verizon Wireless store to activate your phone, or
visit
www.verizonwireless.com
password in the
available on the home page.
5
My Verizon
enter your login and
➔
Manage Your Account
option
2. When you have accessed the My Account Overview page,
select
Activate a new phone
to activate your phone online.
After gathering the required materials, follow the instructions to
complete the activation process.
to display instructions needed
Powering the Phone On and Off
1. Press and hold
(for 5 seconds)
the Power On/Off
key
located at the top
of the phone.
2. The phone
receives a signal
from your home
network and then logs in. At this point, the phone displays
the
Tod ay
screen (page 6) and only functions as a PDA
(allowing you to run applications) until you activate the
phone features.

Powering Off the Phone
1. Press and hold the Power On/Off key located at
the top of the phone.
Turning the Phone Feature On and Off
Before you can use your Omnia™ phone features, the onboard
phone must first be activated.
1. From the
2. Tap
Tod ay
the
Wireless Manager
Phone on
screen, tap
the Widget Bar and drag and drop
widget
onto the desktop.
. The Phone feature is now turned on and you
are now able to make and receive phone calls.
Turning On the Phone Feature
1. From the
2. Tap
Tod ay
the
Wireless Manager
Phone off
screen, tap
the Widget Bar and drag and drop
widget
onto the desktop.
. The Phone feature is now turned off and you
are now unable to make and receive phone calls.
Rebooting your Phone after Lockup
The
Reset
button allows
you to quickly turn off
the phone in the event of
a program or application
error. In this case your
Omnia would appear to
“freeze” and become
unresponsive.
1. Locate the
Reset
button located at
the top of the phone, adjacent to the power key.
2. Carefully insert the stylus into the reset button hole. After
depressing the reset button, the phone will reboot.
Note:
This reset action retains all of your phone’s default parameters and
settings. This action is similar to that of a reboot action on your
computer which only restarts the machine while maintaining all data
intact.
Getting Started 6

Resetting your Phone to Factory Defaults
Note:
To completely remove any personal information stored on your device,
see “Precautions for Transfer and Disposal” on page 201.
Hard Reset
allows you to reset your phone’s settings and
clear all data/applications from the phone’s internal memory. This
action resets your phone to its factory default settings, ends all
applications currently running, and wipes all data (pics/video/
contacts) from your phone.
Note:
Although this action wipes all information and settings from your
Omnia, you can circumvent the deletion of important data by storing it
on your removable microSD memory card.
1. From the
Menu
7
Tod ay
screen, tap the right soft key function
➔
Settings
➔
System
.
tab ➔
Hard Reset
Main
2. The Hard Reset screen displays with the Memory tab
open. To reset your phone, tap the Clear all data button.
3. At the Clear all data prompt, tap
4. Tap the QWERTY keyboard icon at the bottom bar on
Yes
.
the main LCD screen to open the virtual QWERTY keyboard
and enter the Device Lock Code (last 4-digits of your phone
number) and tap “yes” in the box.

Tap the Yes box to proceed. Your phone will reboot to the
5.
factory settings. After the phone reboots, you will need to
align the screen and set your local time. Follow the on-
screen prompts when directed.
Note:
Press the Reset button (on the top of the phone) while holding the
SEND and END simultaneously. Continue to hold SEND and END until
the prompt to re-format device arrives on screen. Press Send again to
re-format or END to cancel.
Battery
Your Omnia comes with a standard rechargeable battery, power
adapter, and headset accessory.
Note:
This phone comes packaged with a partially charged rechargeable
standard Li-Ion battery and travel charger.
You must fully charge the battery before using your phone for the first
time. A fully discharged battery requires up to 4 hours of charge time.
Using A Non-Supported Battery
Samsung handsets do not support the use of a non-supported
battery.
When using a non-supported battery, you will hear a series of
beeps and you will see a warning message that indicates “
SUPPORTED BATTERY. SEE USER MANUAL.
” If you receive this
warning, battery charging has been disabled.
Samsung charging accessories (i.e. wall charger, and cigarette
lighter adapter) will only charge a Samsung approved battery.
To continue use of your handset, press down on the
Mouse
.
Note:
When using a non-supported battery the handset can only be used for
the duration of the life of the battery and cannot be recharged.
Important!:
Using a non-supported battery may cause damage to your
phone. Use a Samsung supported battery only.
Optical
Getting Started 8
NON-

Installing the Battery
1. Press down at the top of the battery cover and push in the
direction of the arrow to remove.
9
2. Insert the top end of the battery into the phone housing
using the directional arrow printed on the battery. The gold
contacts at the battery end must align with contacts on the
phone. Push bottom end of the battery down until it snaps
into place.

Slide the battery cover up until it snaps into place.
3.
2. Lift the battery up at each end and remove from the phone.
Removing the Battery
1. Power off the phone. Press down at the top of the battery
cover and push in the direction of the arrow to remove.
3. Slide the battery cover up until it snaps into place.
Getting Started 10
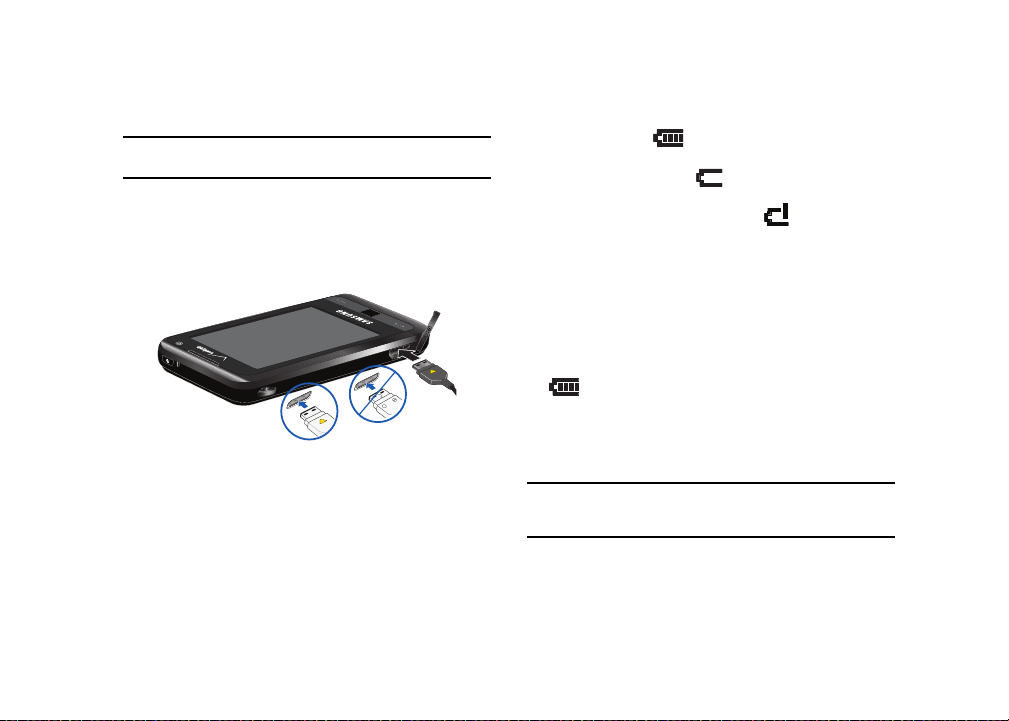
Charging the Battery
Correct
Incorrect
+
Note:
Your Omnia comes with a rechargeable battery. Fully charge this
battery before using your phone.
Your phone is powered by a rechargeable standard Li-ion battery.
Only use Samsung-approved charging devices and batteries.
Samsung accessories are designed to maximize battery life.
Using other accessories may invalidate your warranty and may
cause damage.
1. Plug the terminal end of the wall charger into the phone’s
power/accessory interface connector and the other end
into an electrical outlet.
11
Battery Indicator
The battery indicator in the upper-right corner of the
display indicates battery power level. Four bars indicate a full
charge, while an empty icon indicates an almost empty
battery. Two to three minutes before the battery becomes too low
to operate, a blinking empty battery icon appears and a
tone sounds. If you continue to operate the phone without
charging, it shuts down.
Checking Battery Charge
Keeping track of the battery’s charge is important. If the battery
level becomes too low, your phone automatically shuts down and
you could lose important data.
䊳
For a quick check of your battery level, tap the battery icon
to display the main battery’s remaining battery power.
Battery Capacity
When the battery is low, a warning window displays and the
backlight turns off.
Note:
Long backlight settings, simultaneous use of Wi-Fi and Bluetooth,
searching for service, vibrate mode and browser use affect the
battery’s talk and standby times.

Battery power remaining:
Main Battery:
LiIon
There is also an internal backup battery that saves all phone
settings if the regular battery is discharged. The internal battery
maintains data for approximately four hours. This internal backup
battery needs an initial charge of 24 hours.
Perform ActiveSync operations or use a backup utility frequently
to avoid losing any information in case the battery is fully
discharged. For more information see “Synchronization” on
page 145.
Battery tab - Charge state
The Battery tab allows you to view the current power state of
the Li-Ion battery. To perform a battery check using the Start
menu:
1. From the
Menu
Tod ay
screen, tap the right soft key function
➔
Settings
➔ System tab ➔ Power .
Main
Battery Power tab - Power parameters
The Battery Power tab allows you to set the following battery
power parameters for your device.
1. The On Battery Power screen displays. If you wish to have
the device turn off when not in use, select: Turn off device
in the first drop-down box.
Getting Started 12

2.
Select a time interval (from 1 to 5 minutes) for the phone
to turn off.
3. Tap the box for: “Turn off backlight if device is not used
for” if desired. Select a time interval (from 10 seconds to
5 minutes) for the backlight to turn off.
4. Tap the box for: “Turn on backlight when a button is
pressed or the screen is tapped” if desired.
13
5. Tap to save your changes and return to the previous
ok
Settings screen.
6. Tap to return to the
External Power tab
Tod ay
screen.
The External Power tab allows you to set the following external
power parameters for your device.
1. The On Battery Power screen displays. If you wish to have
the device turn off when not in use, select: Turn off device

in the first drop-down box.
2. Select a time interval (from 1 to 30 minutes) for the phone
to turn off.
3. Tap the box for: “Turn off backlight if device is not used
for” if desired. Select a time interval (from 1 to 10
minutes) for the backlight to turn off.
4. Tap the box for: “Turn on backlight when a button is
pressed or the screen is tapped” if desired.
5. Tap to save your changes and return to the previous
ok
Settings screen.
6. Tap to return to the
Tod ay
screen.
Using a microSD Memory Card (sold separately)
Your phone has an expansion slot compatible with microSDTM
memory cards which are primarily used to back up or transfer
files and data. This type of card is specifically designed for use
with ultra-small mobile phones and other devices. It’s ideal for
storing media-rich files such as music, programs, videos, and
photographs for your phone.
Note:
Use only compatible memory cards with your phone. Using
incompatible memory cards, such as Secure Digital (SD) cards, may
damage the card, as well as the phone, and data stored on the card.
Installing the microSD Memor y Card
1. Press down at the top of the battery cover and push in the
direction of the arrow to remove.
Getting Started 14

Remove the battery, locate the memory slot and orient the
2.
microSD card so the contact pins are facing up (see
illustration below).
3. Carefully insert the compatible microSD card into the
opening and firmly push it in until you hear a click that
indicates the card is securely installed. The card is secure
when it is not protruding from the slot within the phone.
15
4. Re-insert the battery and slide the battery cover up until it
snaps into place.
Note:
Memory cards with a storage capacity of over 16GB will not work with
this phone.

Removing the microSD Memory Card
ok
1. Power off the phone. Remove the battery cover (see
“Installing the microSD Memory Card” on page 14. Firmly
push in the microSD card and release so that it becomes
disengaged from the slot. The card should pop out from
the slot.
2. Carefully grab the card and pull it out of the slot.
Reformatting the microSD Memory Card
You can reformat your MicroSD memory card at the
tab
in
Hard Reset
menu.
Note:
Reformatting your microSD memory card will delete all data stored on
the card.
Storage Card
2. The Hard Reset screen displays with the Memory tab open.
Tap t he Storage Card tab.
1. From the
Menu
➔
.
Tod ay
screen, tap the right soft key function
Settings
➔
System
tab ➔
Hard Reset
Main
3. To format your microSD card, tap the Format button. At
the Reset prompt, tap Yes . The format will complete and
the Format Success prompt will display. Tap at the
ok
prompt.
4. Tap to save your changes and return to the previous
screen.
5. Tap to return to the
Tod ay
screen.
Getting Started 16

Transferring data to the microSD card from a PC
1. Insert the microSD card into the microSD slot lot of your
Omnia. For information on inserting the microSD card, see
“Installing the microSD Memory Card” on page 14.
2. Synchronize your Omnia with your PC via ActiveSync.
3. Open Windows Explorer on your PC, then highlight the
application or folder that you wish to transfer to the
microSD card.
4. Highlight and copy the file(s) or folder(s) to your computer’s
clipboard.
5. Using the ActiveSync menu, click the Explore icon to open
the Mobile Device folder.
6. Double-click on the My Windows Mobile-Based Device
folder.
7. Double-click the Storage Card folder to open. Any contents
of the microSD card appear in the display.
8. Locate the folder or sub folder where you wish to paste the
files that you’ve copied.
9. Press Ctrl-V on your computer to paste the files or folders
on your computer’s clipboard onto the microSD card.
17
Use the microSD/microSDHC card
Once you’ve transferred files from your computer to the microSD
card using ActiveSync, you can access games or applications
that have been transferred to your microSD card.
For example, if you’ve transferred any multimedia files onto your
microSD card that are compatible with Windows Media Player,
simply open Windows Media Player and select the media file that
you wish to play. There is no need to look or browse your phone
for the microSD card. The microSD card is recognized when it is
installed.
Voicemail
Setting Up Your Voicemail
All unanswered calls to your phone are sent to voicemail, even if
your device is turned off. Therefore, you’ll want to set up your
voicemail and personal greeting as soon as you activate your
phone.
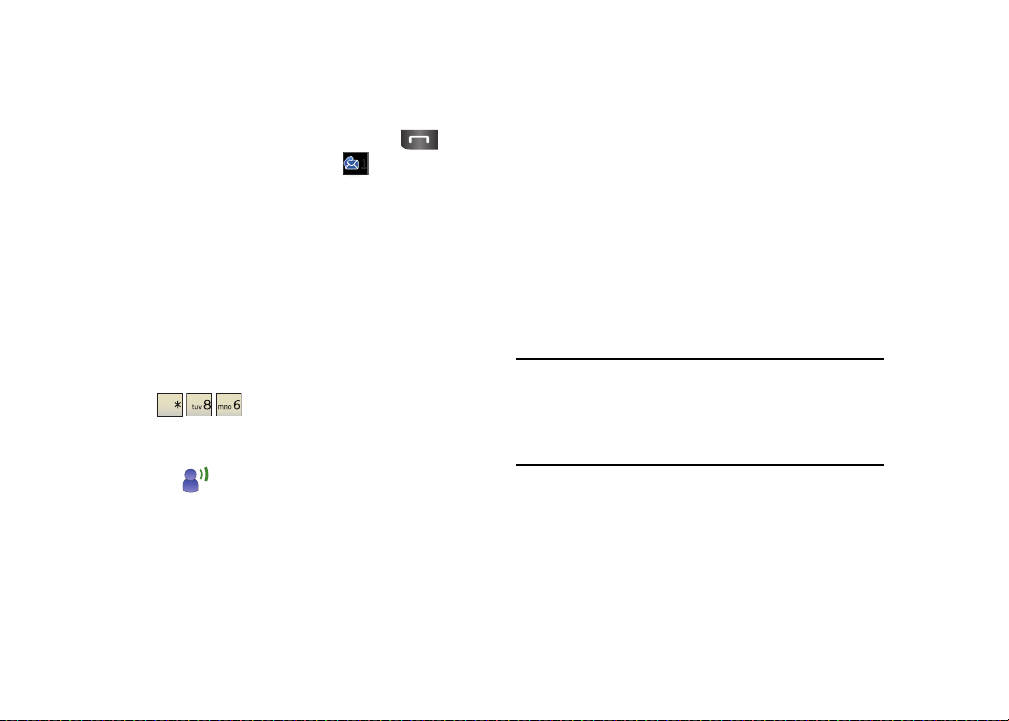
1. From the
2. Press and hold the
Tod ay
screen, press the
Voicemail
Send
key (
key
( ) to call Voicemail.
)
.
Follow the automated instructions to set up your voicemail.
Check Voicemail
1. From the
2. Press and hold the
Tod ay
screen, press the
Voicemail
Send
key (
key
( ) to call Voicemail.
)
Follow the automated instructions to set up your voicemail.
Visual Voice Mail
Visual Voice Mail
allows the management of voice mail directly
from the device rather than accessing voice mail via traditional
method(s). Visual Voice Mail displays a list of messages and
allows the user to choose which message to listen to or delete,
without having to dial into their mailbox, listen to voice
instructions, or prior messages.
1. If you are an existing Verizon Wireless subscriber, skip to
step 3. If you are new Verizon Wireless subscriber, first dial
to set-up your voice mail service.
2. Once your voicemail box is set-up, from the
tap the right soft key function
Mail
.
3. A prompt will be displayed to download the Visual Voice
Main Menu
Tod ay
➔
Visual Voice
screen,
Mail application.
4. Click
Download
to download the application.
5. When prompted, enter your basic voice mail password that
.
was previously established.
6. Continue to follow the prompts and instructions to
complete the activation of Visual Voice Mail.
7. Once the activation steps are completed, exit the
application and return after 5 minutes to begin using Visual
Voice Mail.
8. Please note that storing a voice mail password is required
to use Visual Voice Mail. This application may store voice
mail messages in electronic format on this device.
Note:
Storing a voice mail password is required to use Visual Voice Mail. This
application may store voice mail messages in electronic format on this
device.
Anyone in possession of this device can access the voice mail. To limit
unauthorized access to the voice mail, consider locking the phone
when not in use.
Getting Started 18

Section 2: Menu Icons
Ev
Display Icons
Various icons appear in your Omnia’s display or Title Bar during
operation. The following table lists these icons as well as their
descriptions.
Indicates signal strength. More bars mean better signal.
Indicates GPS is on for location.
Indicates GPS for 911 is active.
Indicates your device is in Flight mode and your cellular
radio is turned off (i.e. the phone is turned Off but the PDA
is On).
Indicates the ringer for the selected profile is set to On.
Indicates the ringer for the selected profile is set to Off.
Indicates the ringer for the selected profile is set to Vibrate.
Indicates your Omnia is charging.
Indicates the 1xRTT high speed data transfer protocol is
supported.
Indicates your phone has high speed dat a services (Ev-Do
Ev
protocol), which is required for video streaming and
downloads.
Indicates important information. Indicates a programming
error. The phone can not connect until it is properly
programmed.
Indicates your Omnia is in Roaming mode. Indicates your
phone is outside of the home service area.
Indicates ActiveSync or a Data Session is currently in use.
Indicates there are no data sessions active.
Indicates two or more message icons are being displayed,
your battery charge is low, or you have missed a call.
Indicates a reminder of an upcoming calendar event.
Indicates you have a new text message or email. If you tap
this icon, a window is displayed that allows you to access
the Inbox.
19

Indicates you have a new multimedia message. If you tap
this icon, a window is displayed that allows you to access the
Inbox.
Indicates you have a new voicemail message. If you tap this
icon a window is displayed that allows you to listen to new
voicemail messages.
Indicates you have a missed call. If you tap the icon a
window is displayed indicating the number of calls missed.
It also gives you the ability to view the missed call
information.
Indicates the current battery charge strength. (Icon shown
fully discharged and will power down.)
Indicates the current battery charge strength. (Icon shown
fully discharged and will power down.)
Main Menu Icons
From the Today screen tap the right soft key function
The following icons appear in the display.
Main Menu
.
Indicates your Omnia is in Speakerphone mode.
Indicates Voice Privacy is available.
Indicates a Wi-Fi connection is inactive.
Indicates a Wi-Fi connection is available and active.
Indicates the Voice Command feature is active and awaiting
a verbal command.
Indicates the current battery charge strength. Icon shown
fully charged.
Phone Book
: Directory listing of contacts stored
on the device.
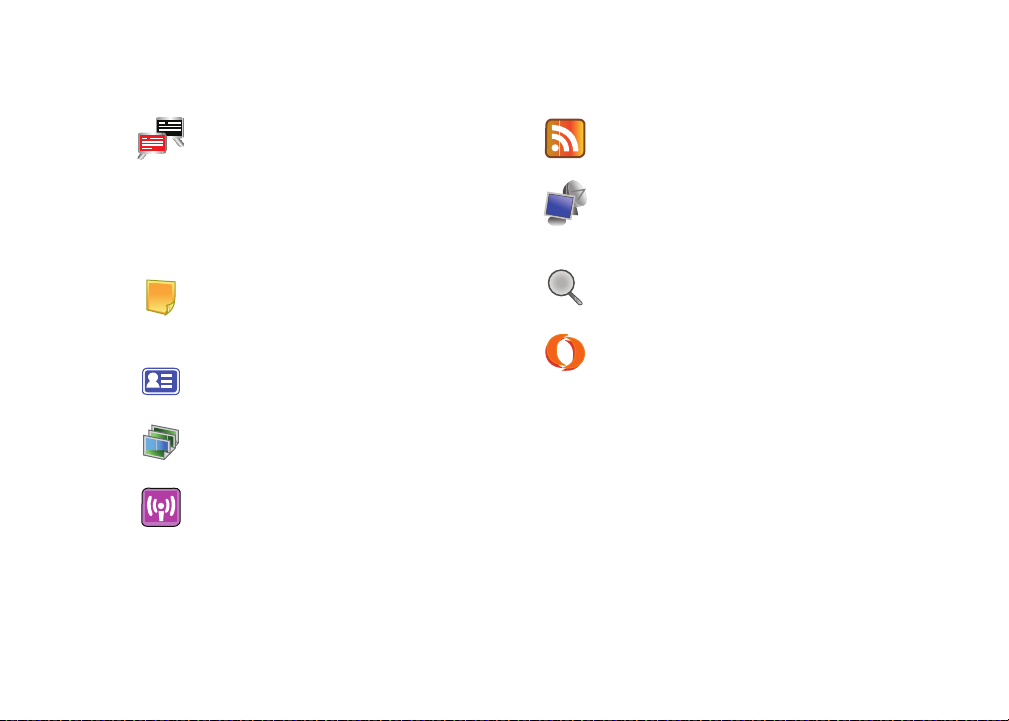
Message
: Direct entry to messaging.
Internet
: Launches Opera Mobile web browser.
Touch Player
: Activate native Music/video player.
Menu Icons 20
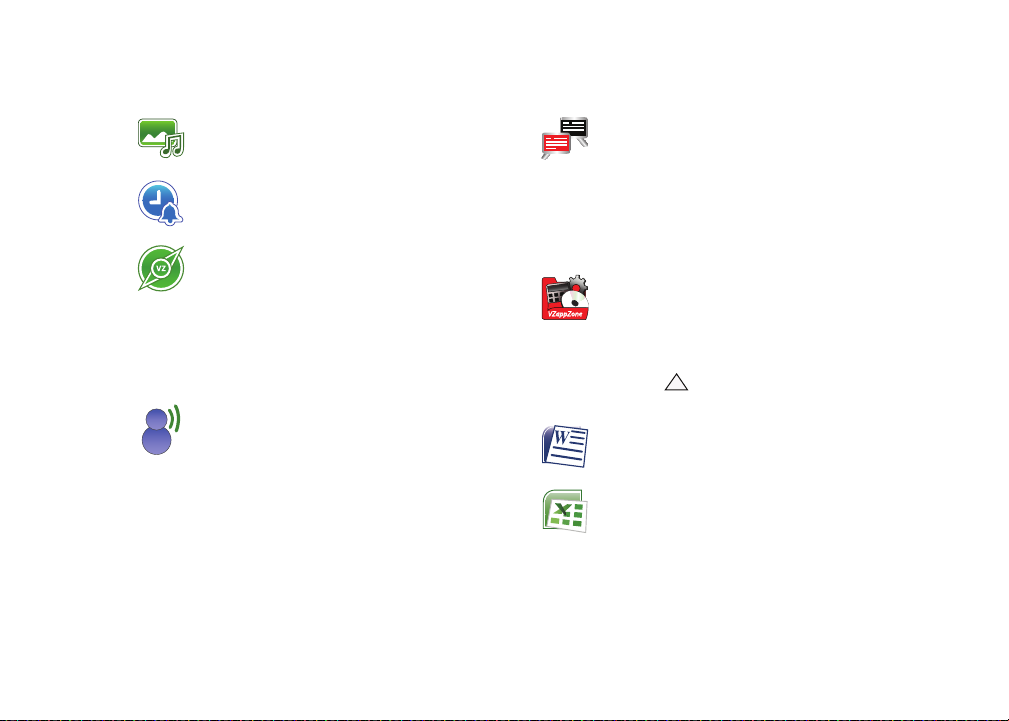
Media Album: Folder listing of all media (music,
video, photos, or docs) on device.
Clock
: Clock has integrated Alarms, Anniversary
Day, Stopwatch, and World Clock.
VZ Navigator
: Tap to launch VZ Navigator. With
audible turn-by-turn directions, you can locate
nearly fourteen million points of interest in the U.S.,
including landmarks, restaurants and even ATMs.
VZ Navigator uses GPS positioning to tell you where
you are, what's nearby, and to give you directions
- quickly and easily.
Visual Voice Mail
: Allows you to view a list of your
voicemail’s and who they are from so you can listen
to them in any order you’d like.
Mobile IM
: Allows you to send and receive instant
messages using one of the following Instant
Messaging communities.
• AIM™
• WL Messenger
• Ya hoo !®
VZAppZone
: Allows you to discover applications
and services available for your device, and
download applications to your device, all from one
convenient location.
Tap the white triangle at the bottom of the display to
view additional applications:
Word Mobile
: Allows you to create, open, and save
Word documents on your mobile device.
Excel Mobile
: Allows you to create, open, and save
Excel documents on your mobile device.
21

PowerPoint Mobile
: Allows you to open, and save
PowerPoint documents on your mobile device.
RSS Reader
: Provides news updates from a website
in a simple form for your phone.
OneNote Mobile
: Allows you to create, open, and
save Notes on your mobile device.
Note:
This will not synchronize with Outlook Notes.
Smart Reader
: Smart Reader allows you to take a
photo of a business card, extract the information
from the card, and save it as a new contact in
Contacts. You can also take a photo of a document
and convert it to an editable text file.
Digital Frame
FM Radio
: Tap to open Digital Frame menu.
: Activates the FM Radio. (Antenna
cable / 3.5mm headset adapter must be
attached for FM radio to function.)
Podca st
which are distributed over the internet for playback
on phone.
Internet Explorer
Programs
Settings
Start Icons
Tod ay :
: Provides a series of digital-media files,
: Tap to launch Internet Explorer.
: Displays the Programs menu.
: Displays the Settings menu
Tap to return to the Today screen.
Menu Icons 22

Office Mobile:
Calendar
Contacts
Messaging
Tap to open the Office Mobile menu.
: Tap to open the Calendar menu.
: Tap to open your Contacts list.
: Tap to open Messaging accounts
selection menu.
Programs
Settings
Help
: Tap to open the Help menu.
Program Icons
: Tap to open the Programs menu.
: Tap to open the Settings menu.
Opera Browser
Opera enables you to take your full Web experience
: Tap to launch the Opera Browser.
Games
: Tap to open the Games menu.
to your phone. Stay in touch with your friends on
Facebook, Twitter, get your e-mail on the go, do your
online banking. There are no limits — Opera is the
Office Mobile
: Tap to open the Office Mobile menu.
quick, easy and secure way to get any Web page you
want.
Phone
: Tap to open the phone keypad.
23
ActiveSync
: Tap to configure ActiveSync
connection settings
Calculator
: Tap to launch the calculator.

Call Log
: Displays call history of incoming,
outgoing, and missed calls.
FM Radio
: Allows you to listen to your favorite FM
radio station.
Camera
: Tap to launch the Camera.
Clock
: Tap to lauch Clock menu. The Clock menu
allows you to set Alarms, Anniversary Dates, World
clock and use the Stop Watch feature.
Connected Home
: Allow your phone to serve as a
Mobile Digital Media Server (M-DMS), sending
photos, music and videos from its memory to other
DLNA Certified devices.
Or, it could function as a Mobile Digital Media Player
(M-DMP) to play digital content received from other
DLNA Certified devices.
Digital Frame
: Tap to open Digital Frame menu.
File Explorer
: Allows you to browse all the files and
folders on your device.
Internet Explorer
Main Menu
: Tap to launch Internet Explorer.
:Tap to lauch the Main Menu. You can
also access the Main Menu via the right soft key
fucntion from the Today screen.
Media Album
: Folder listing of all media (music,
video, photos, or docs) on device.
Menu Icons 24
Mobile IM
: Allows you to send and receive instant
messages using one of the following Instant
RSS Reader
: Provides news updates from a website
in a simple form for your phone.
Messaging communities.
• AOL Instant Messenger
• Windows Live Messenger
• Yahoo! Messenger
Notes
: Allows you to quickly capture thoughts,
reminders, ideas, drawings, and phone numbers.
Remote Desktop
: Remote desktop technology
makes it possible to view another computer's
desktop on your phone.
Search
: Allows you to search for files and/or folders
by a specific name or type.
Notes can be either recorded or written.
ShoZu
: Allows you to upload your photos to your
Phonebook
:Tap to open phonebook menu.
Flickr photostream, get your friends' photostreams
downloaded to your phone, and read and reply to
comments to your posts.
Photo Slides
: Allows you to display a series of
chosen images in a slide show.
Podcast
: Provides a series of digital-media files,
which are distributed over the internet for playback
on phone.
25

Smart Converter
: Allows you to convert numbers to
one of the following conversion types:
•
Length
•
Weight
•
Area
•
Volume
•
Tem p er at u re
Smart Reader
: Allows you to take a photo of a
business card and extract the information from the
card, and save it as a new contact in Contacts. You
can also take a photo of a document and convert it
to an editable text file.
Task Switcher
: Allows you to switch between
applications currently running on your device.
Tas ks
: Allows you to create and track task.
A task is an item that you create in Outlook or via
your Omnia to track until its completion. A to-do
item is any Outlook item — such as a task, an email message, or a contact — that has been
flagged for follow-up. By default, all tasks are
flagged for follow-up when they are crea ted, even
if they have no start date or due date. Therefore,
whenever you create a task, or flag an e-mail
message or a contact, a to-do item is created
automatically.
TV Out Viewer
: Allows you to view your device’s
display on a TV screen. This is done by using an
optional cable to connect your device to your
monitor’s TV input jacks. Cable sold seperately.
Task Manager
: Displays all applications that are
currently running on your device.
Tou ch Player
: Allows you to play music and video.
Menu Icons 26
VZ Navigator
DIV
audible turn-by-turn directions, you can locate
: Tap to launch VZ Navigator. With
Windows Media
player.
: Tap to launch Windows Media
nearly fourteen million points of interest in the U.S.,
including landmarks, restaurants and even ATMs.
VZ Navigator uses GPS positioning to tell you where
you are, what's nearby, traffic information and
Settings Icons
Personal Tab
directions - quickly and easily.
Buttons
VZAppZone
: Allows you to discover applications
and services available for your device, and
download applications to your device, all from one
: Allows you to customize the Main Menu
button and Camera button located on the right side
of your device.
convenient location.
DivX VOD Registration
Video Editor
: Tap to launch Video Editor. Video Editor
allows you to edit videos recorded with the
camcorder feature on your device.
Visual Voice Mail
: Allows you to view a list of your
voicemails and who they are from so you can listen
to them in any order you’d like.
27
(VOD) is a digital video delive ry service that allows
you to download and enjoy high-quality video
content from a diverse group of DivX content
partners.
Input
: Allows you to set the default text entry
method.
Lock
: Allows you to set up your device security.
: DivX Video-on-Demand
 Loading...