How it Works
Log In / Sign Up
Buy Points
How it Works
FAQ
Contact Us
Questions and Suggestions
Users
Samsung
Loading...
C
CE2913T
2
CE2913VXEF
8
CE2914
11
CE2914N
2
CE2914NR
CE2914NT
2
CE2914NTR
CE2914R
2
CE2914R-BWT
8
CE2914T
3
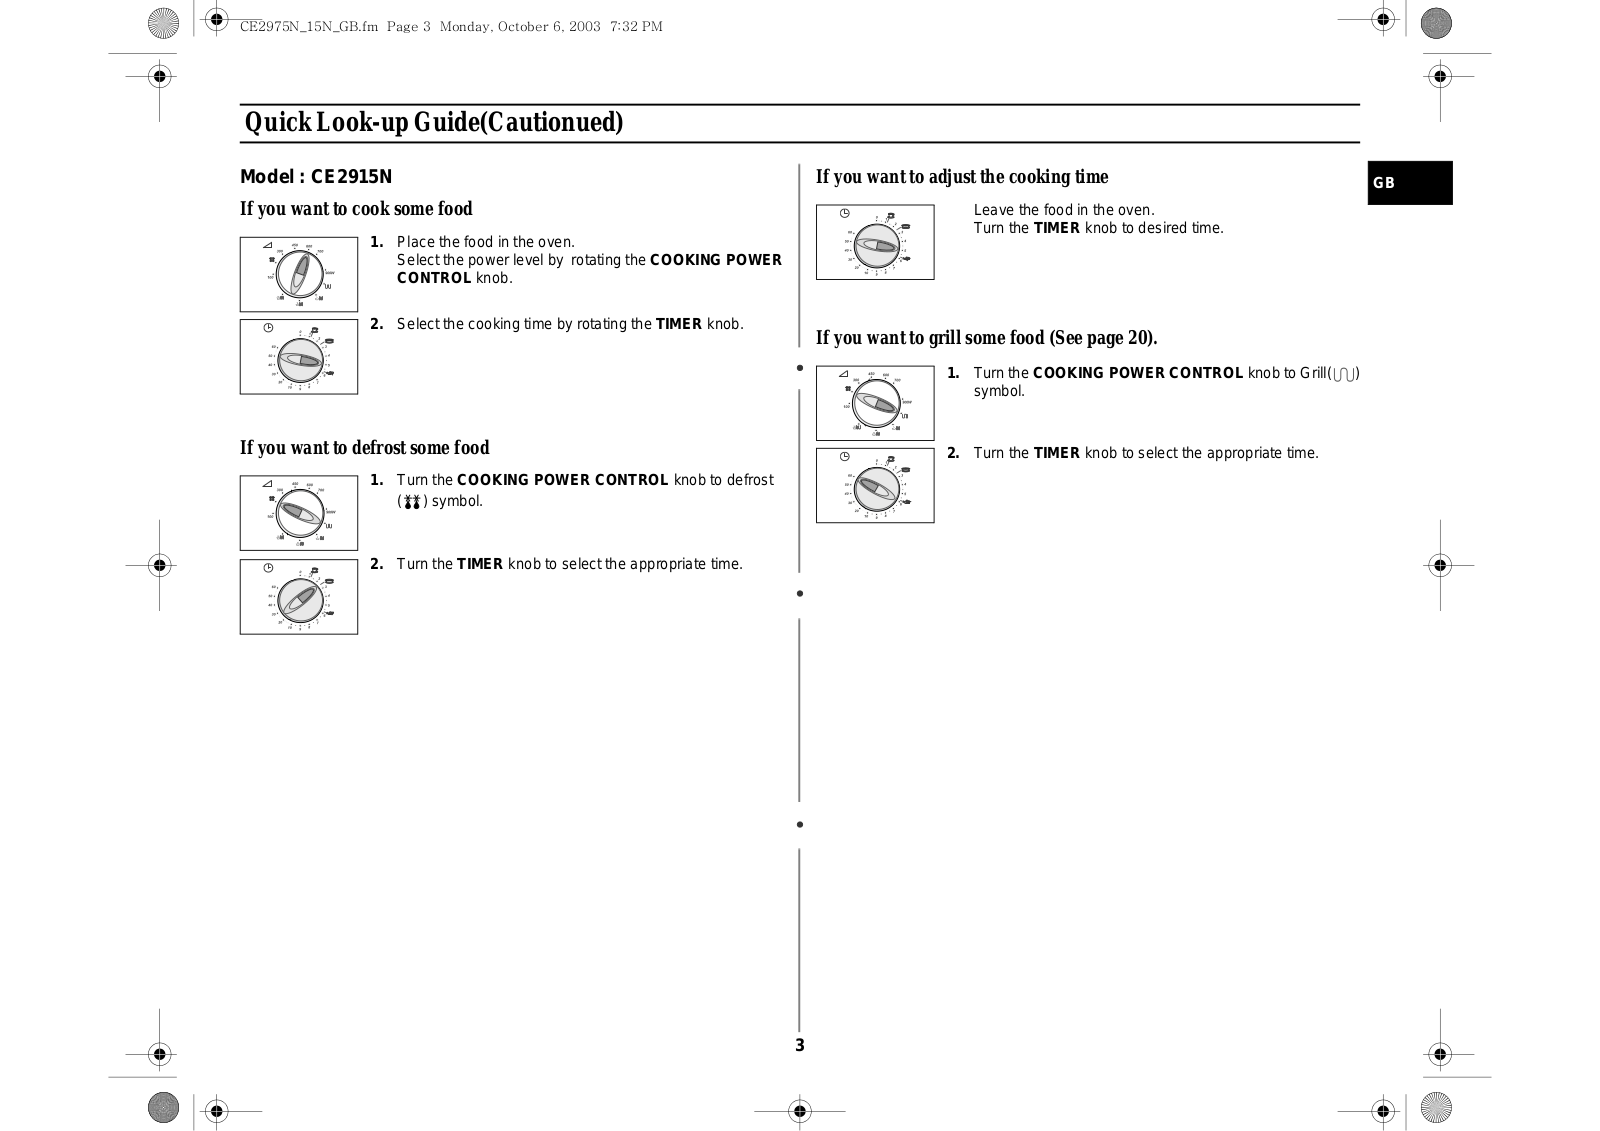
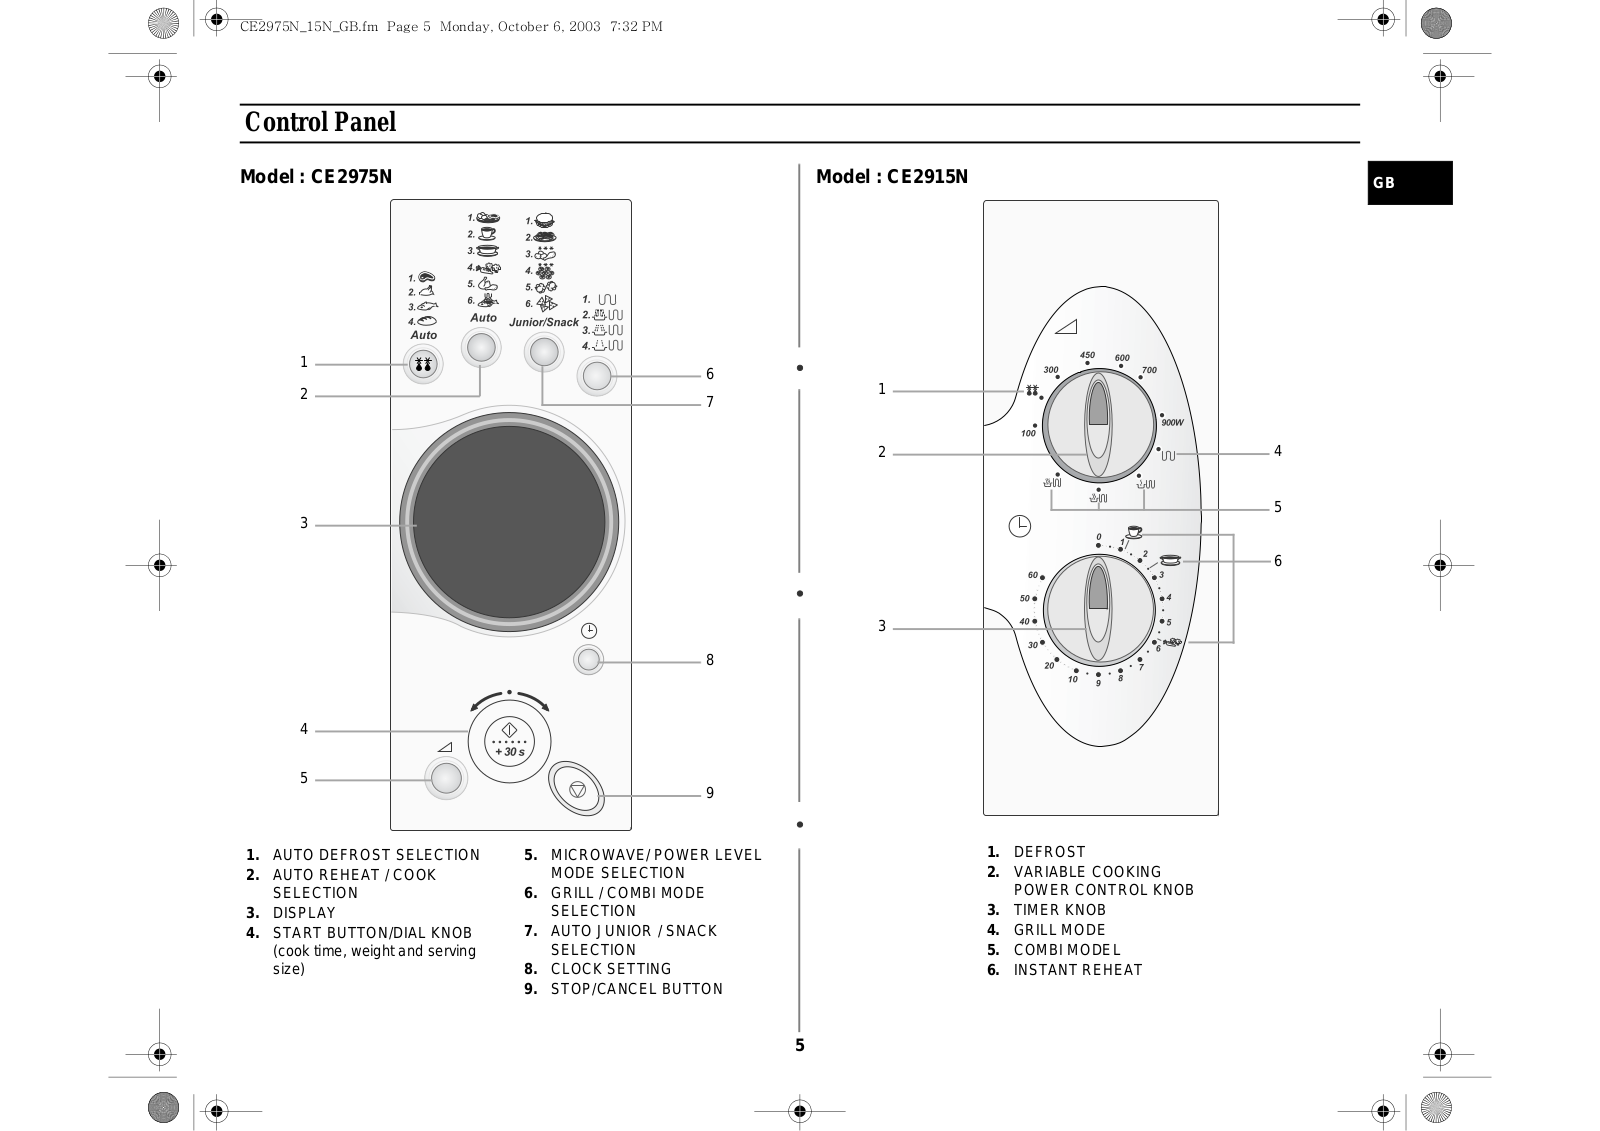
CE2915N
CE2915NR
CE2917N
2
CE2917NR
CE2917NT
3
CE2917NTR
CE291DN
2
CE291DNT
3
CE2927
3
CE2927N
3
CE2927NR
2
CE2927NT
4
CE2927NTR
CE2927R
CE2927T
CE292DN
4
CE292DN-5S
CE292DNR
CE292DNS
CE292DNT
4
CE292DNTR
CE2933
3
CE2933N
5
CE2933NT
2
CE2933T
2
CE2944N
4
CE2944N-5
CE2944N-5S
CE2944NT
3
CE2974
13
CE2974-1
CE2974C
CE2974N
2
CE2974NR
CE2974NT
CE2974R
2
CE2974RBWT
7
CE2974T
4
CE2974T-1
CE2974TR
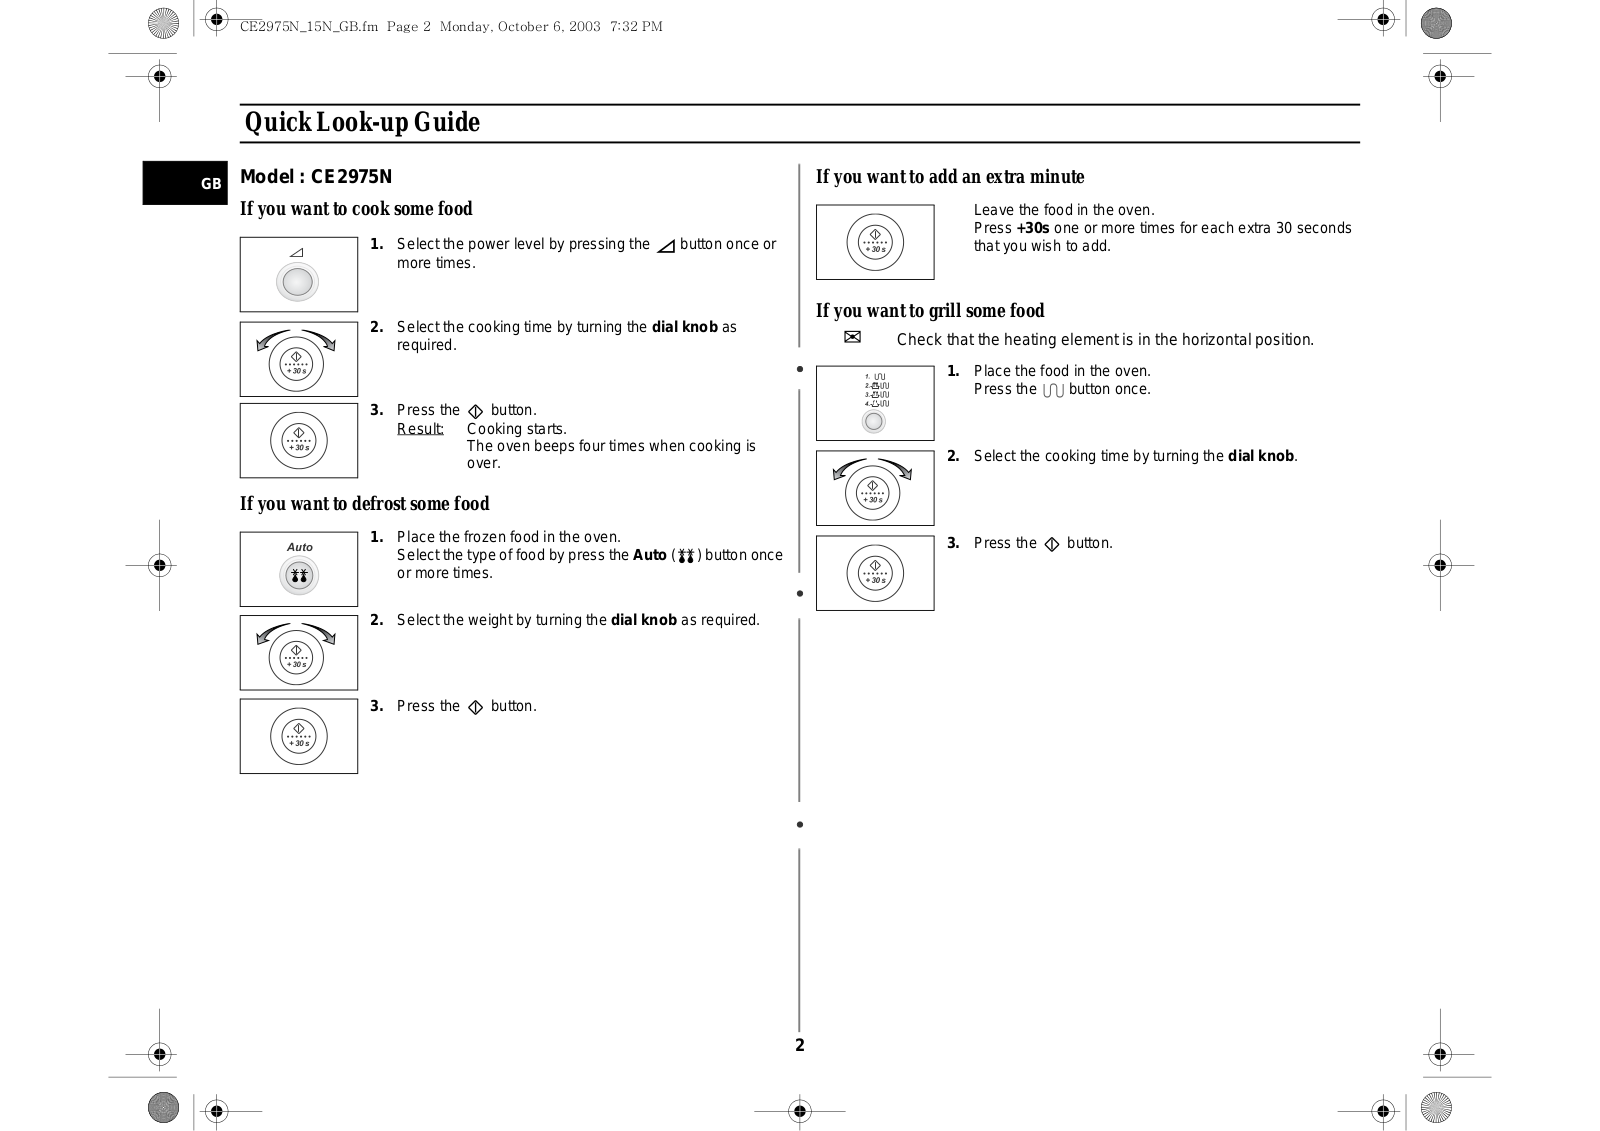
CE2975N
3
CE2975NR
CE2975NT
CE2977
CE2977N
3
CE2977ND
CE2977NR
CE2977NR5
CE2977NR-E
CE2977NR-G
CE2977NR-R
CE2977NR-T
CE2977NT
6
CE2977NTR
CE2977NT-S
CE2977R
CE2977R-G
CE2977R-R
CE2977R-T
CE2977T
2
CE297BNR
CE297DL
CE297DN
9
CE297DNR
CE297DNS
CE297DNT
CE2D33
3
CE2D33-1
CE2D33/CE2D33T
CE2D33T
3
CE3010N
CE305
10
CE305CF
2
CE305CFHAC
9
CE3110N
CE3120N
CE31351T
CE325
10
CE325KF
2
CE325KF-HAC
7
CE3280
2
CE3280E
2
CE3280EB
3
CE3280F
2
CE3280T
2
CE3760F
2
CE3760FS
3
CE3780AT
CE735
CE735GR
Loading...
Loading...
Nothing found
CE2975N
User Manual
36 pgs
2.07 Mb
0
Owner's Instructions Manual
36 pgs
2.15 Mb
0
Manual De Instrucciones [es]
36 pgs
1.54 Mb
0
Table of contents
Loading...
Samsung CE2975N User Manual
...
Samsung User Manual
Download
Specifications and Main Features
Frequently Asked Questions
User Manual
Download
Loading...
+
25
hidden pages
Unhide
You need points to download manuals.
1 point = 1 manual.
You can buy points or you can get point for every manual you upload.
Buy points
Upload your manuals
 Loading...