

Samsung C3560 Disassembly and assembly Instructions 6
Level
7.
Disassembly and Assembly Instructions
7-1.
Repair
2
7-1-1.
※
1)
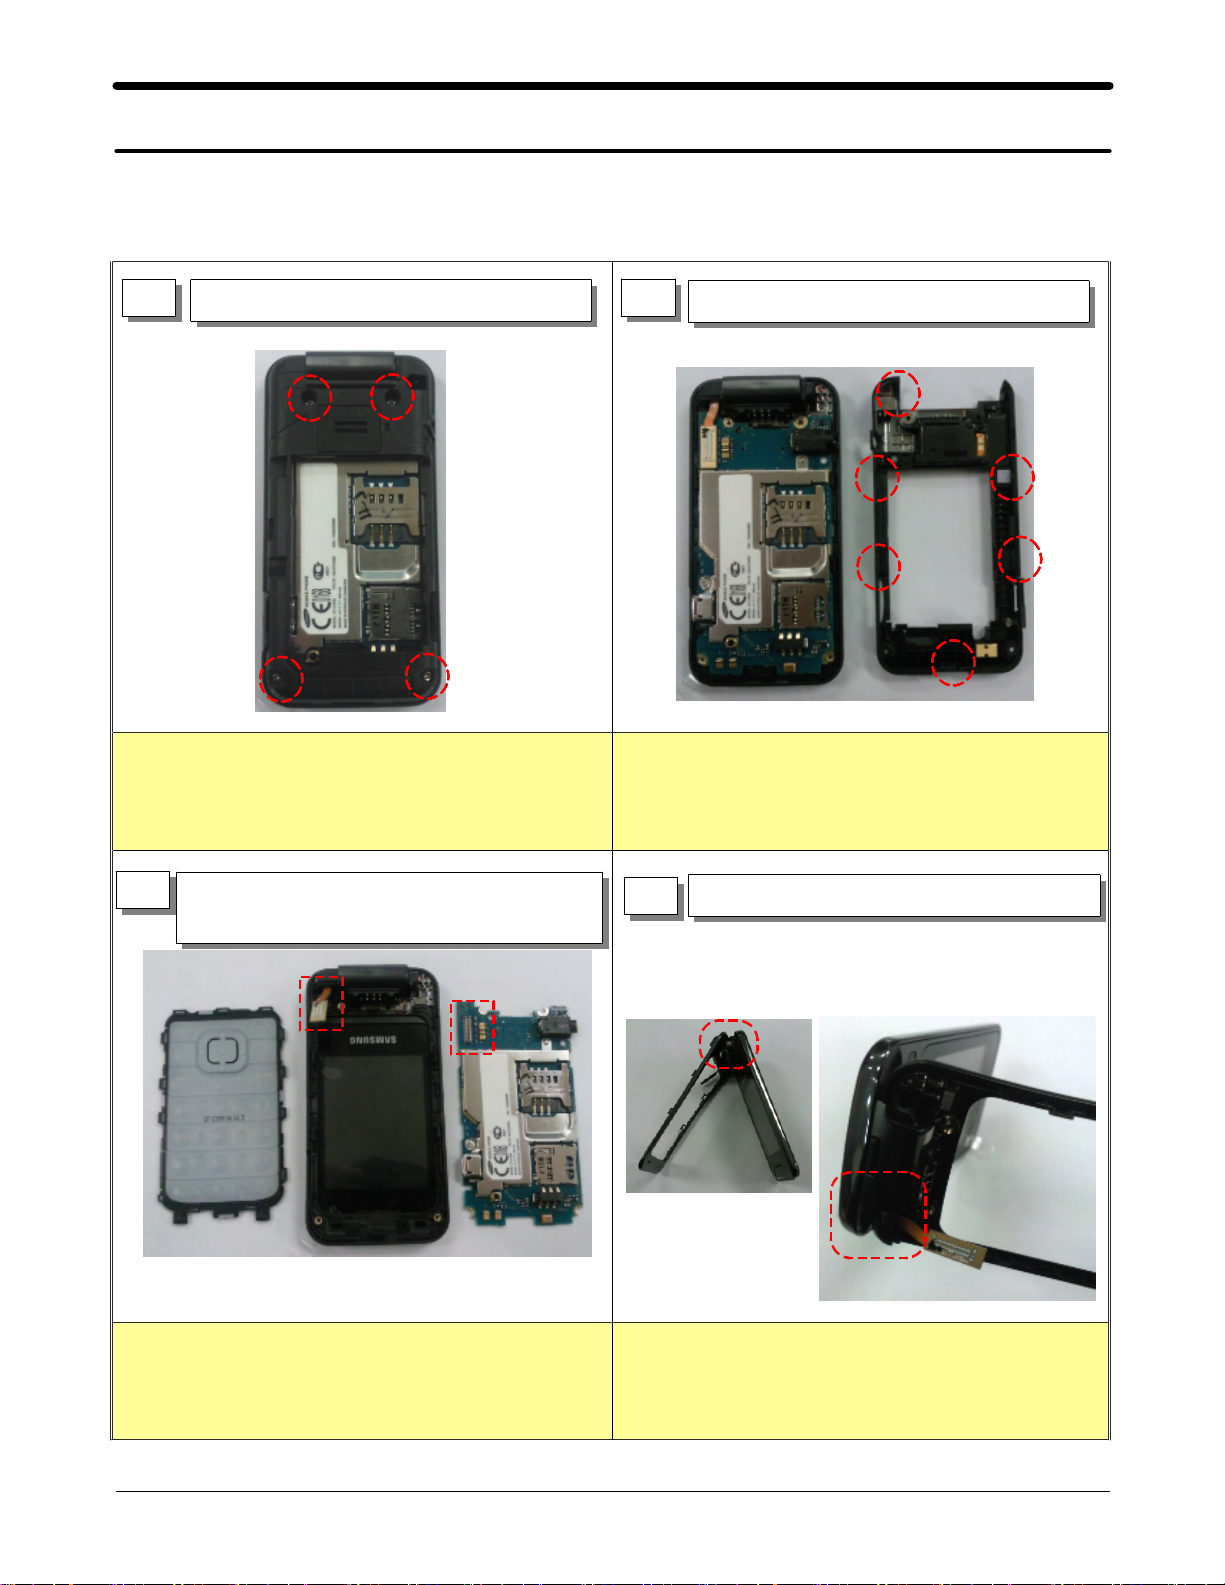
Disassembly
1 2
Be care of scratch and molding damage.
Unscrew4points
Caution
Separate Rear case6hooks
Caution
※
Be care of scratch and molding damage.
1)
3
Separate LCD connector, and keypad, PBA
ass'y
Caution
※
Be care of scratch and molding damage.
1)
Be care of damage to LCD FPCB.
)
2
Separate front using disassemble jig
4
Caution
※
Be care of scratch and molding damage.
1)
Be care of damage to LCD FPCB.
)
2
7-1
SAMSUNG Proprietary-Contents may change without notice
This Document can not be used without Samsung's authorization

Level2Repair
7.
5
Separate screw cap and unscrew2points
Caution
※
Be care of scratch and molding damage.
1)
Separate upper front bottom to top
6
3
Caution
※
Be care of scratch and molding damage.
1)
Be care of damage to LCD FPCB.
)
2
2
1
7
Separate LCD connector and Camera
Caution
※
Be care of damage to LCD FPCB, Camera
1)
8
Separate LCD ass'y
Caution
※
Be care of scratch and molding damage.
1)
Be care of damage to LCD FPCB.
)
2
7-2
SAMSUNG Proprietary-Contents may change without notice
This Document can not be used without Samsung's authorization
 Loading...