

Page 1
Level
7.
Disassembly and Assembly Instructions
7-1.
Repair
2
7-1-1.
※
1) Torque : 1.1±0.1 kgf.cm
Disassembly
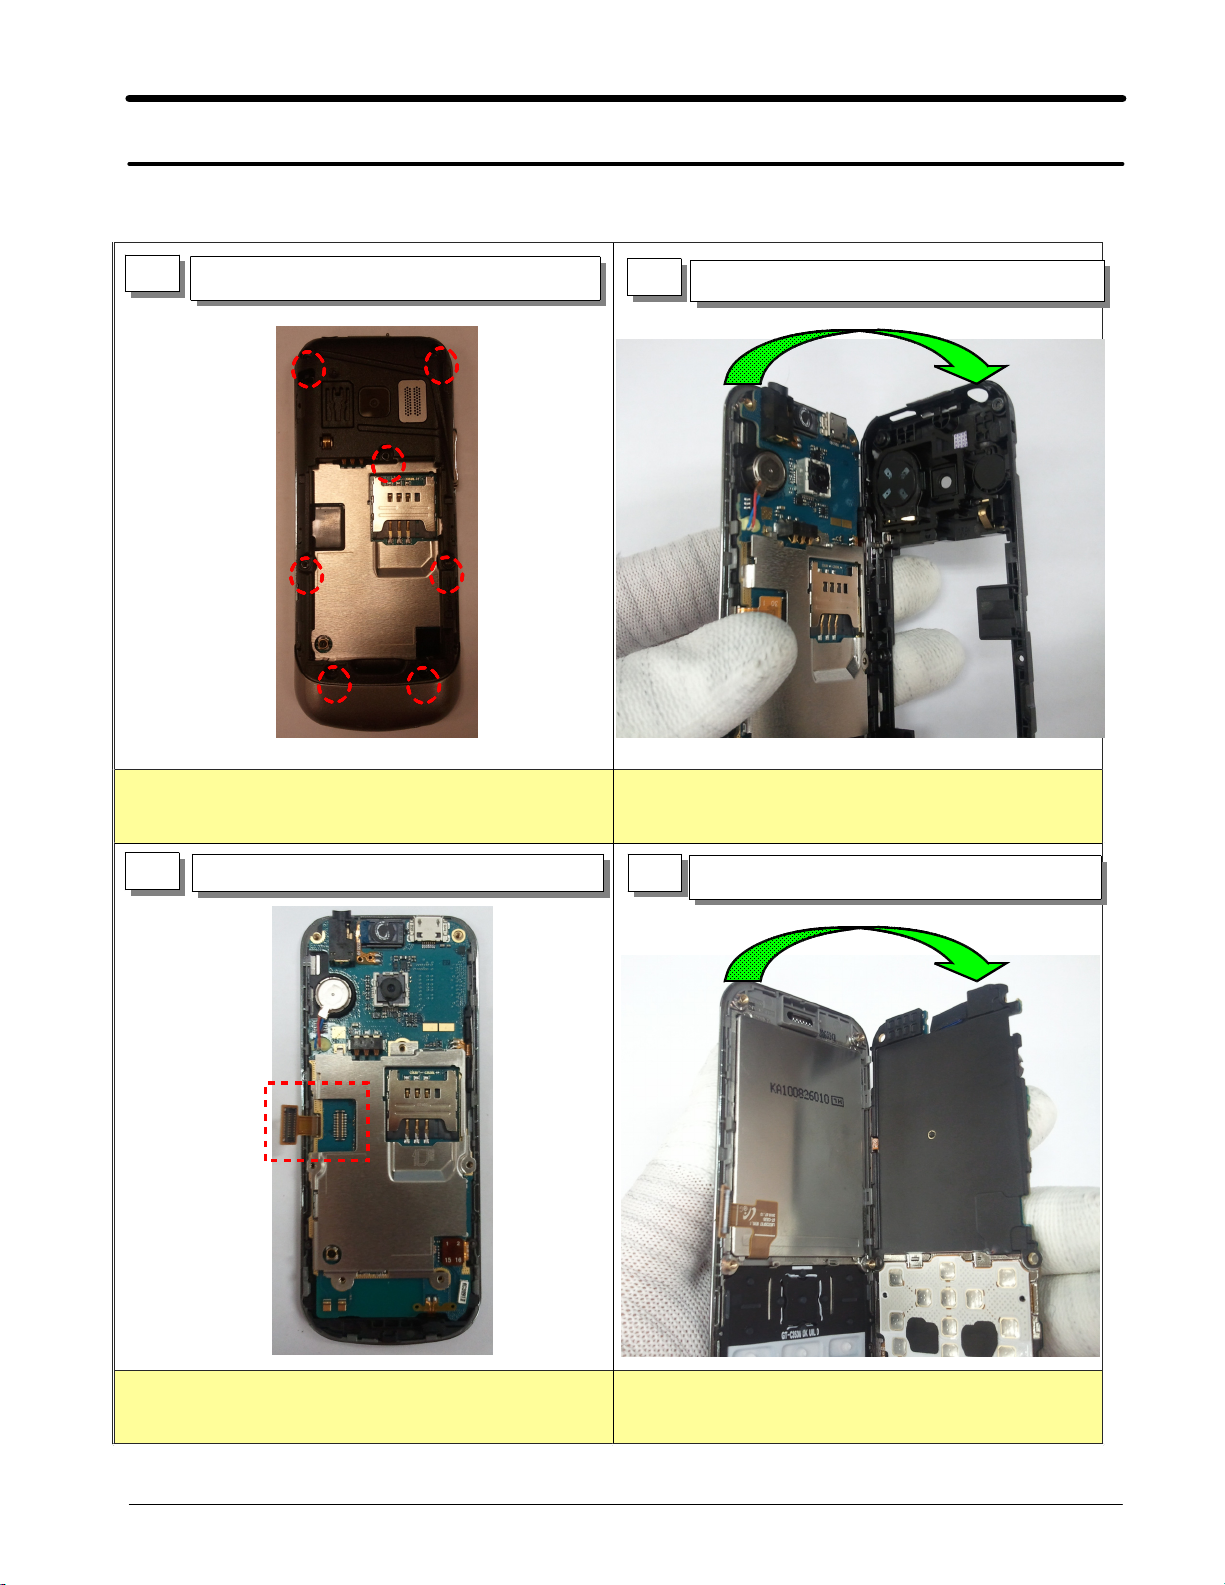
1
1)
Caution
Unscrew7Points.
2
※
1)
Caution
Disassemble the Rear.
1)
Becareful Hook on Mech. not to be broken.
3
Disassemble LCD FPCB connector.
1)
4
Caution
※
Becareful Hook on Mech. not to be broken.
1)
1) 1)
Disassemble
PBA and Front Ass'y
7-1
SAMSUNG Proprietary-Contents may change without notice
This Document can not be used without Samsung's authorization
Page 2
Level2Repair
7.
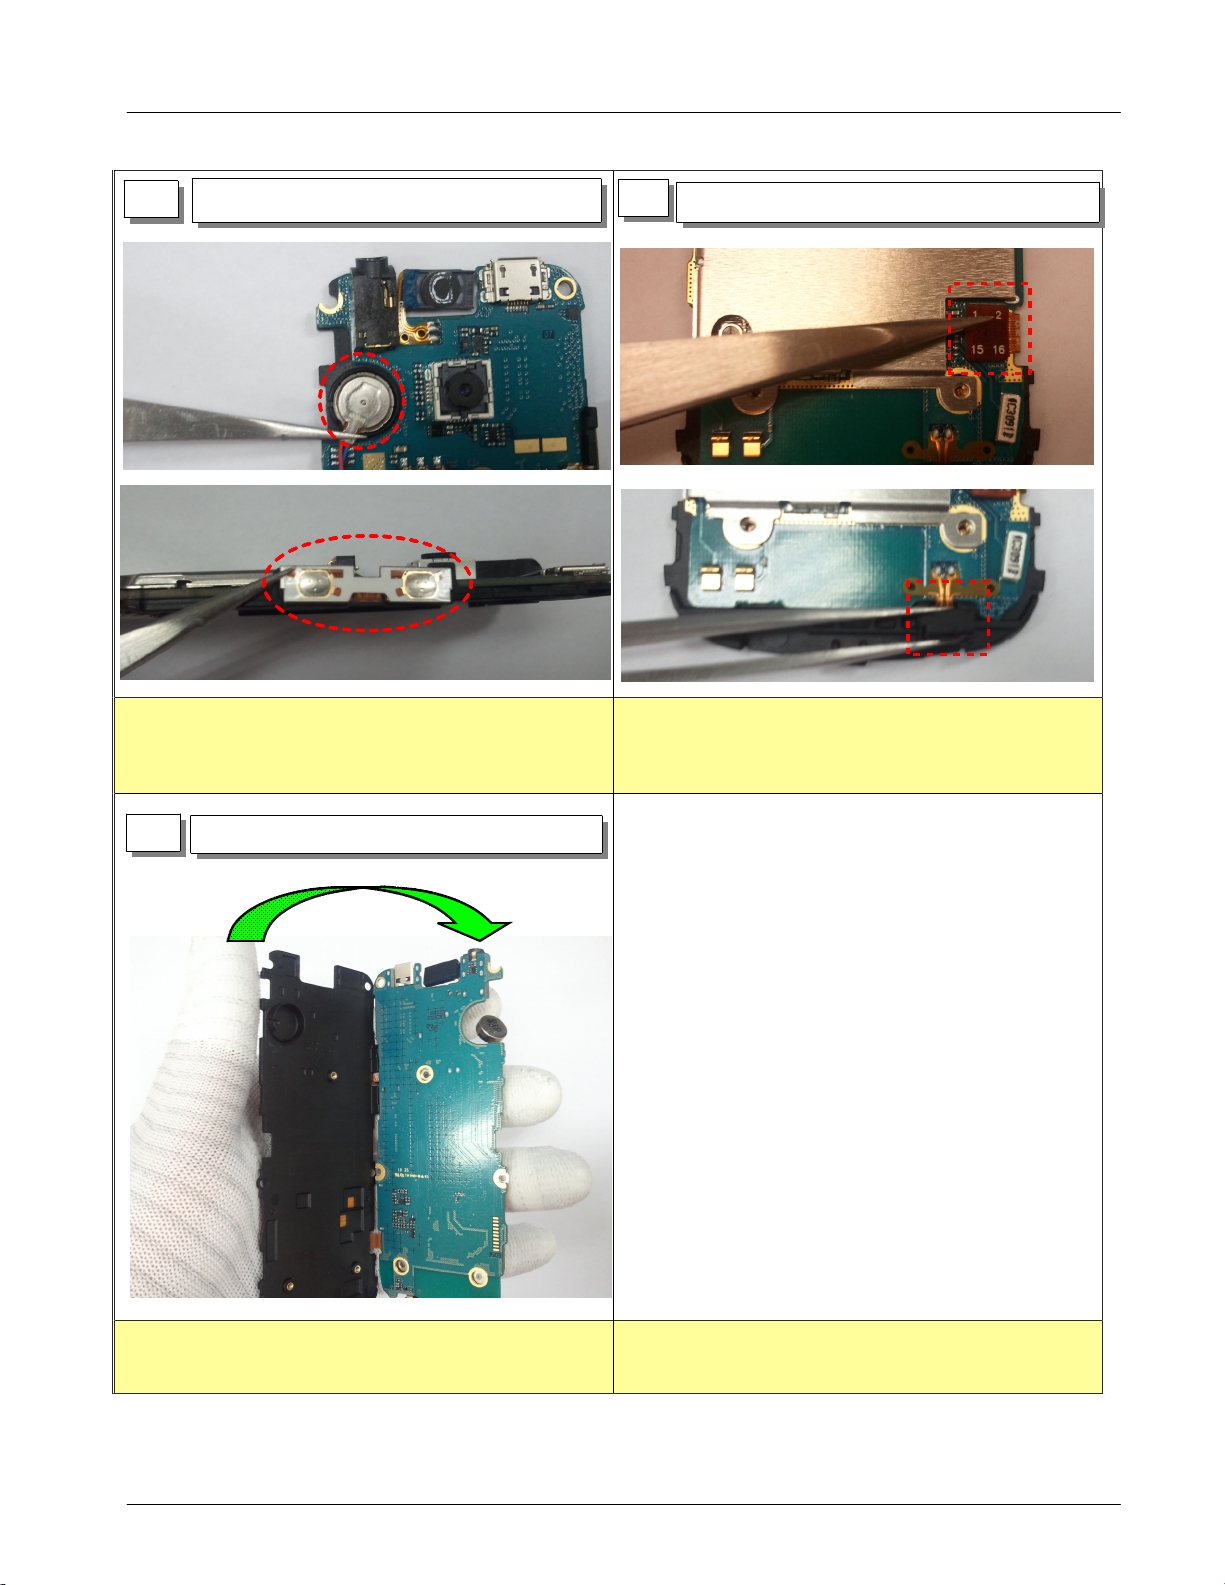
5
1) Detach Motor, Volume Key FPCB.
Caution
※
Be careful Motor&FPCB not to be damaged.
1)
6
1) Disassemble 3*4 Key FPCB connector, MIC.
Caution
※
Be careful
1)
3*4 Key FPCB connector &
module not to be damaged.
MIC
7
Disassemble PBA with Bracket.
1)
7-2
SAMSUNG Proprietary-Contents may change without notice
This Document can not be used without Samsung's authorization
Page 3

Level2Repair
7.
7-1-2.
※
Assembly
1
1) Assemble the PBA with the Bracket.
Caution
1) Assemble following boss hole & guide on the
bracket.
2
1) Attach Motor, Volume Key FPCB, 3*4
Key FPCB, MIC on the Bracket & PBA
3
1) Attach Motor, Volume Key FPCB.
Caution
※
Check Motor fully settled down in the Bracket.
1)
Assemble FPCB following guide on the Bracket.
2)
1) Assemble 3*4 Key FPCB connector, MIC.
4
Caution
※
Check MIC fully settled down in the Bracket.
1)
7-3
SAMSUNG Proprietary-Contents may change without notice
This Document can not be used without Samsung's authorization
Page 4

Level2Repair
7.
5 6
1) Assemble PBA and Front Ass'y
Caution
※
1) Assemble following boss hole on the bracket.
2) Check 3*4 Keypad assembled at the right place.
Assemble LCD FPCB connector.
1)
Caution
※
Check Receiver fully settled down in the
1)
Bracket.
7 8
Caution
※
1)
Assemble Rear.
1)
Becareful Volume Key&SPK module
assembled at the right place.
Screw7points.
1)
Caution
※
1) Torque : 1.1±0.1 kgf.cm
7-4
SAMSUNG Proprietary-Contents may change without notice
This Document can not be used without Samsung's authorization
 Loading...