

Page 1

Page 2

Connections
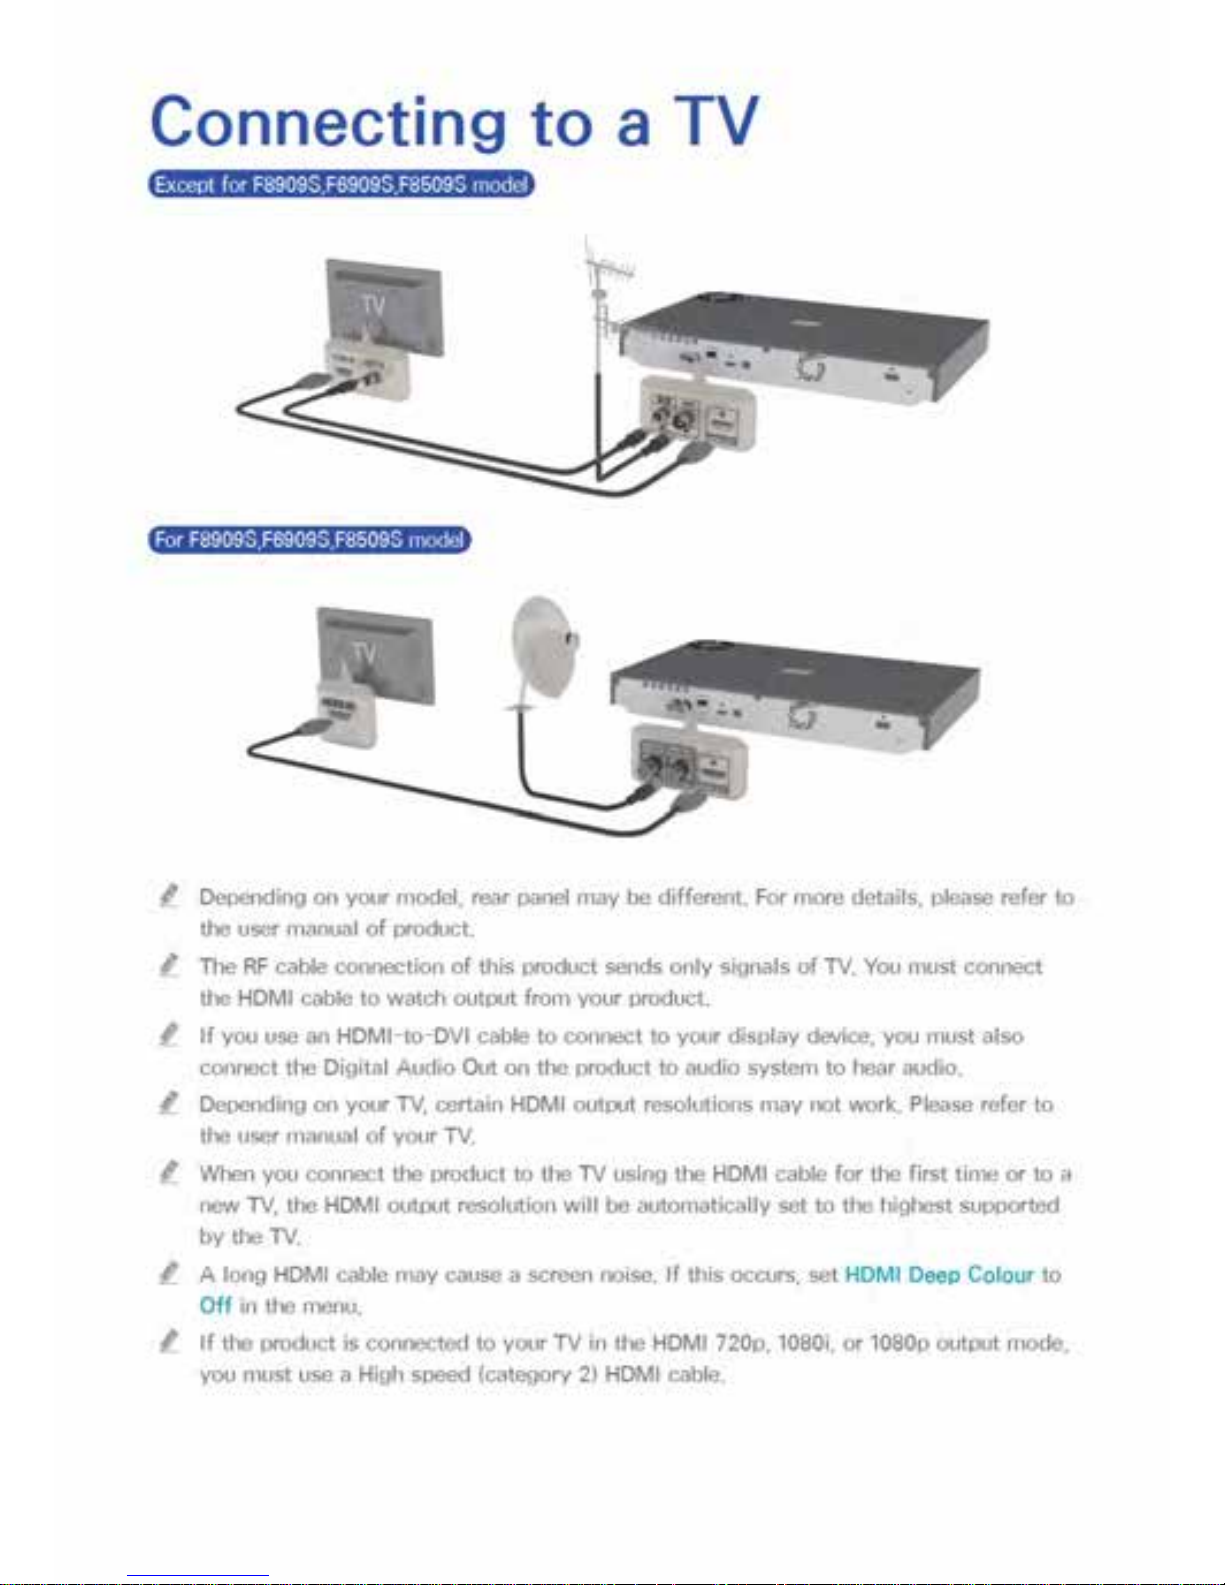
Connecting to a TV
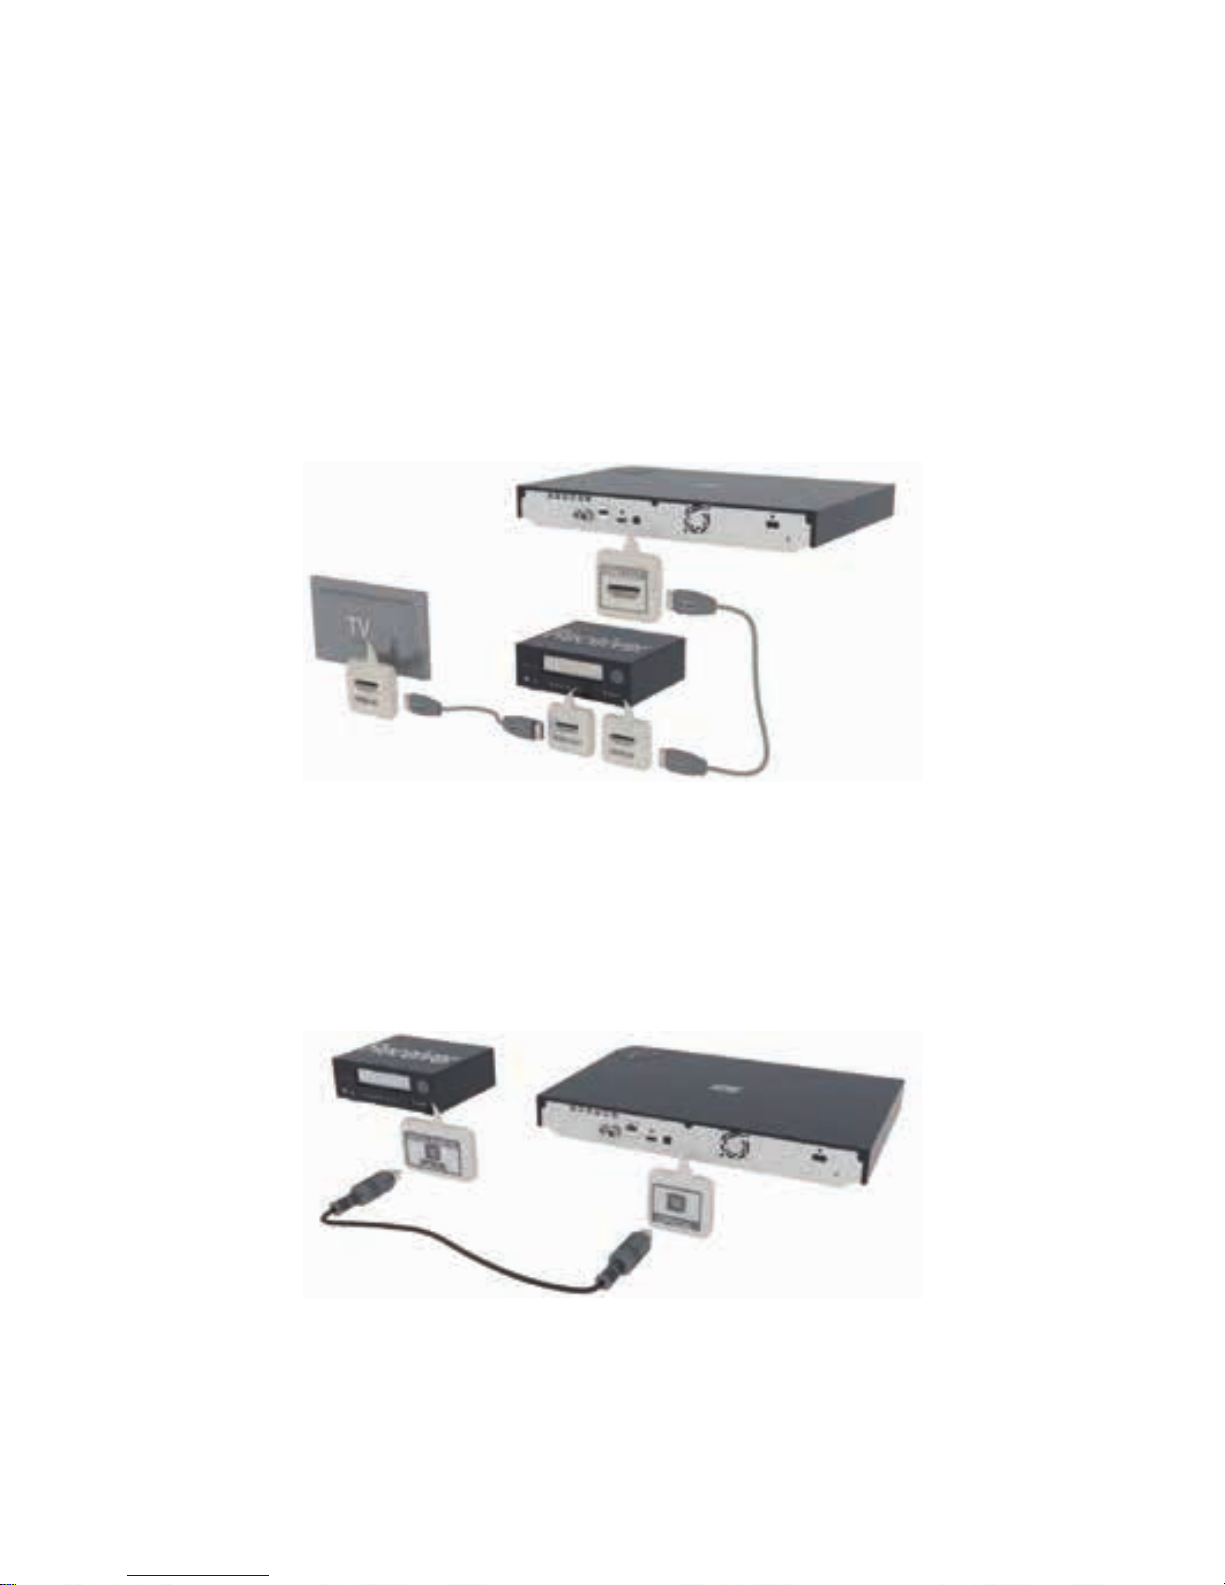
Connecting to an Audio System
8 Method 1: Connecting to an HDMI supported AV
receiver
8 Method 2: Connecting to an AV receiver with
Optical input
Connecting to a Network Router
9 Wired Network
10 Wireless Network
Settings
Display
11 3D Settings
11 3D Blu-ray Playback Mode
12 Screen Size
13 TV Aspect Ratio
13 BD Wise (Samsung Products only)
14 Resolution
15 Resolution according to the output mode
16 DTV Smart Resolution
16 Movie Frame (24fps)
17 Smart Hub Screen Size
17 HDMI Colour Format
18 HDMI Deep Colour
18 Progressive Mode
Audio
18 Digital Output
20 Digital Output Selection
22 PCM Downsampling
22 Dynamic Range Control
23 Downmixing Mode
23 DTS Neo:6 Mode
23 Audio Sync
24 Connected Device
Broadcasting
25 Auto Tuning
25 Auto Tuning
25 Cable Search
25 Aerial
25 Channel List
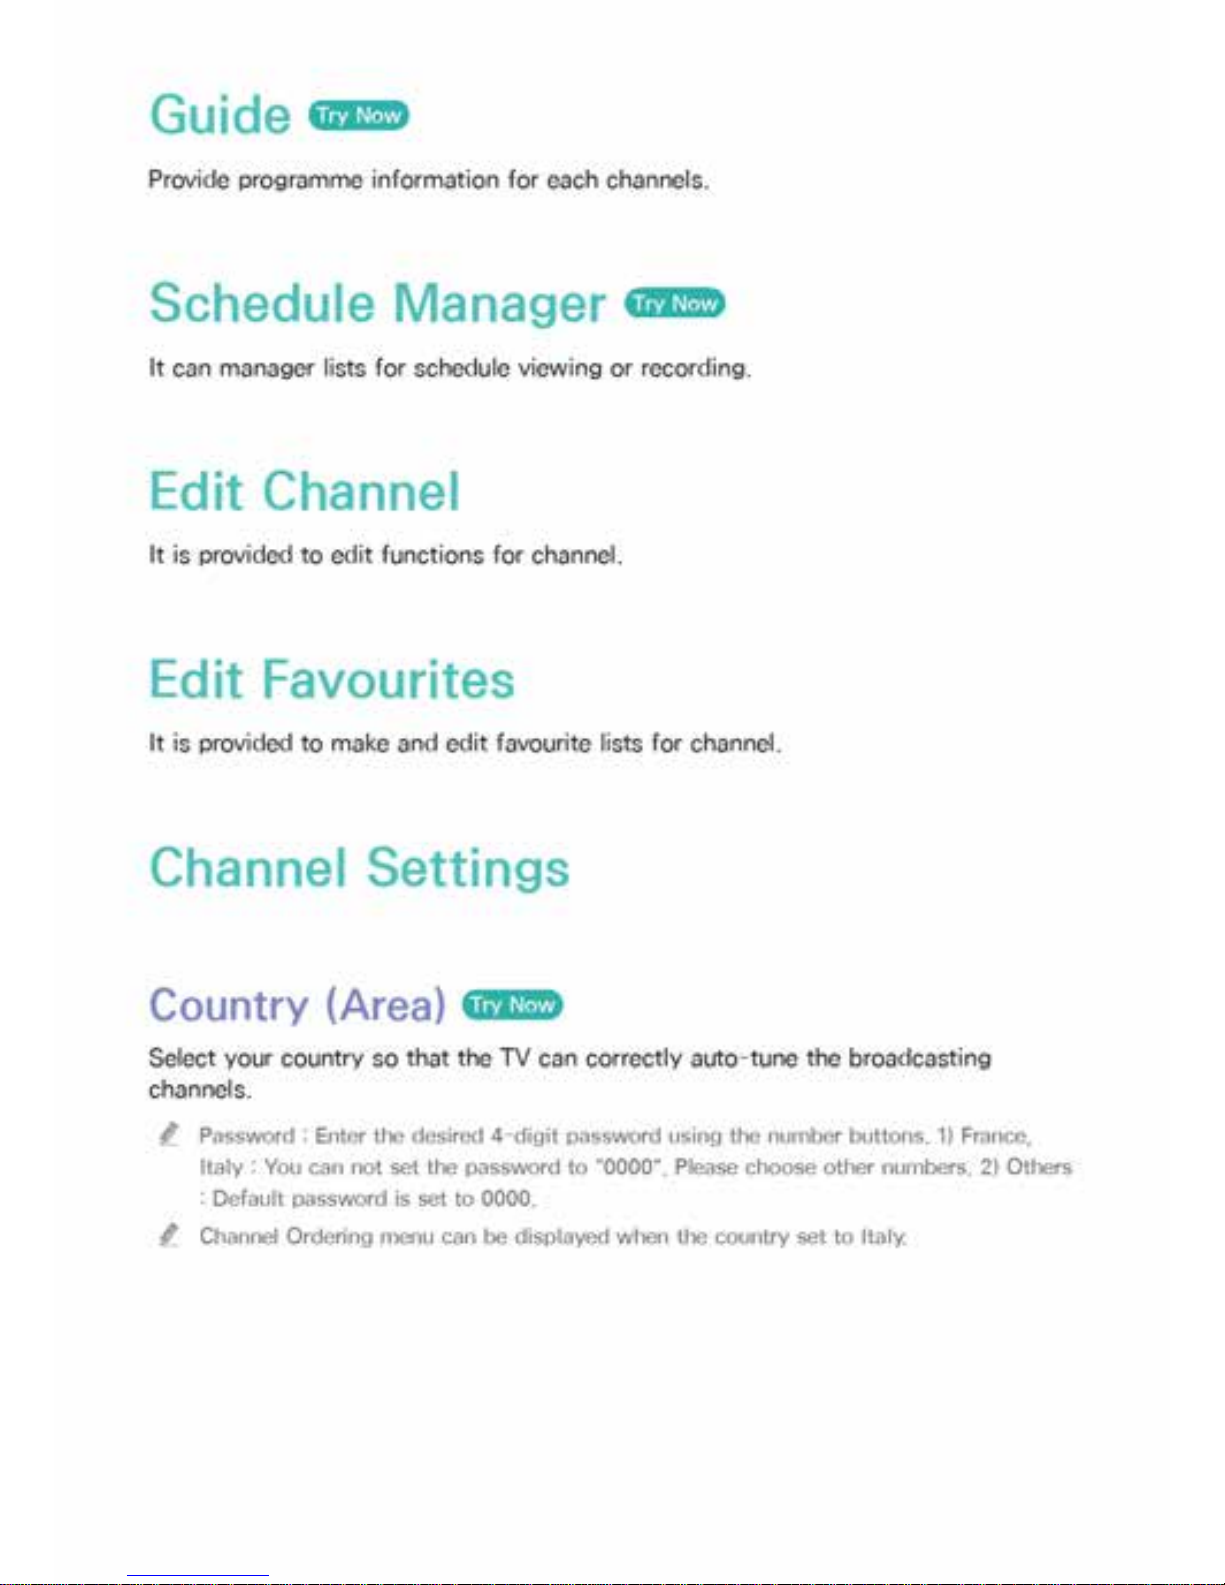
26 Guide
26 Schedule Manager
26 Edit Channel
26 Edit Favourites
26 Channel Settings
26 Country (Area)
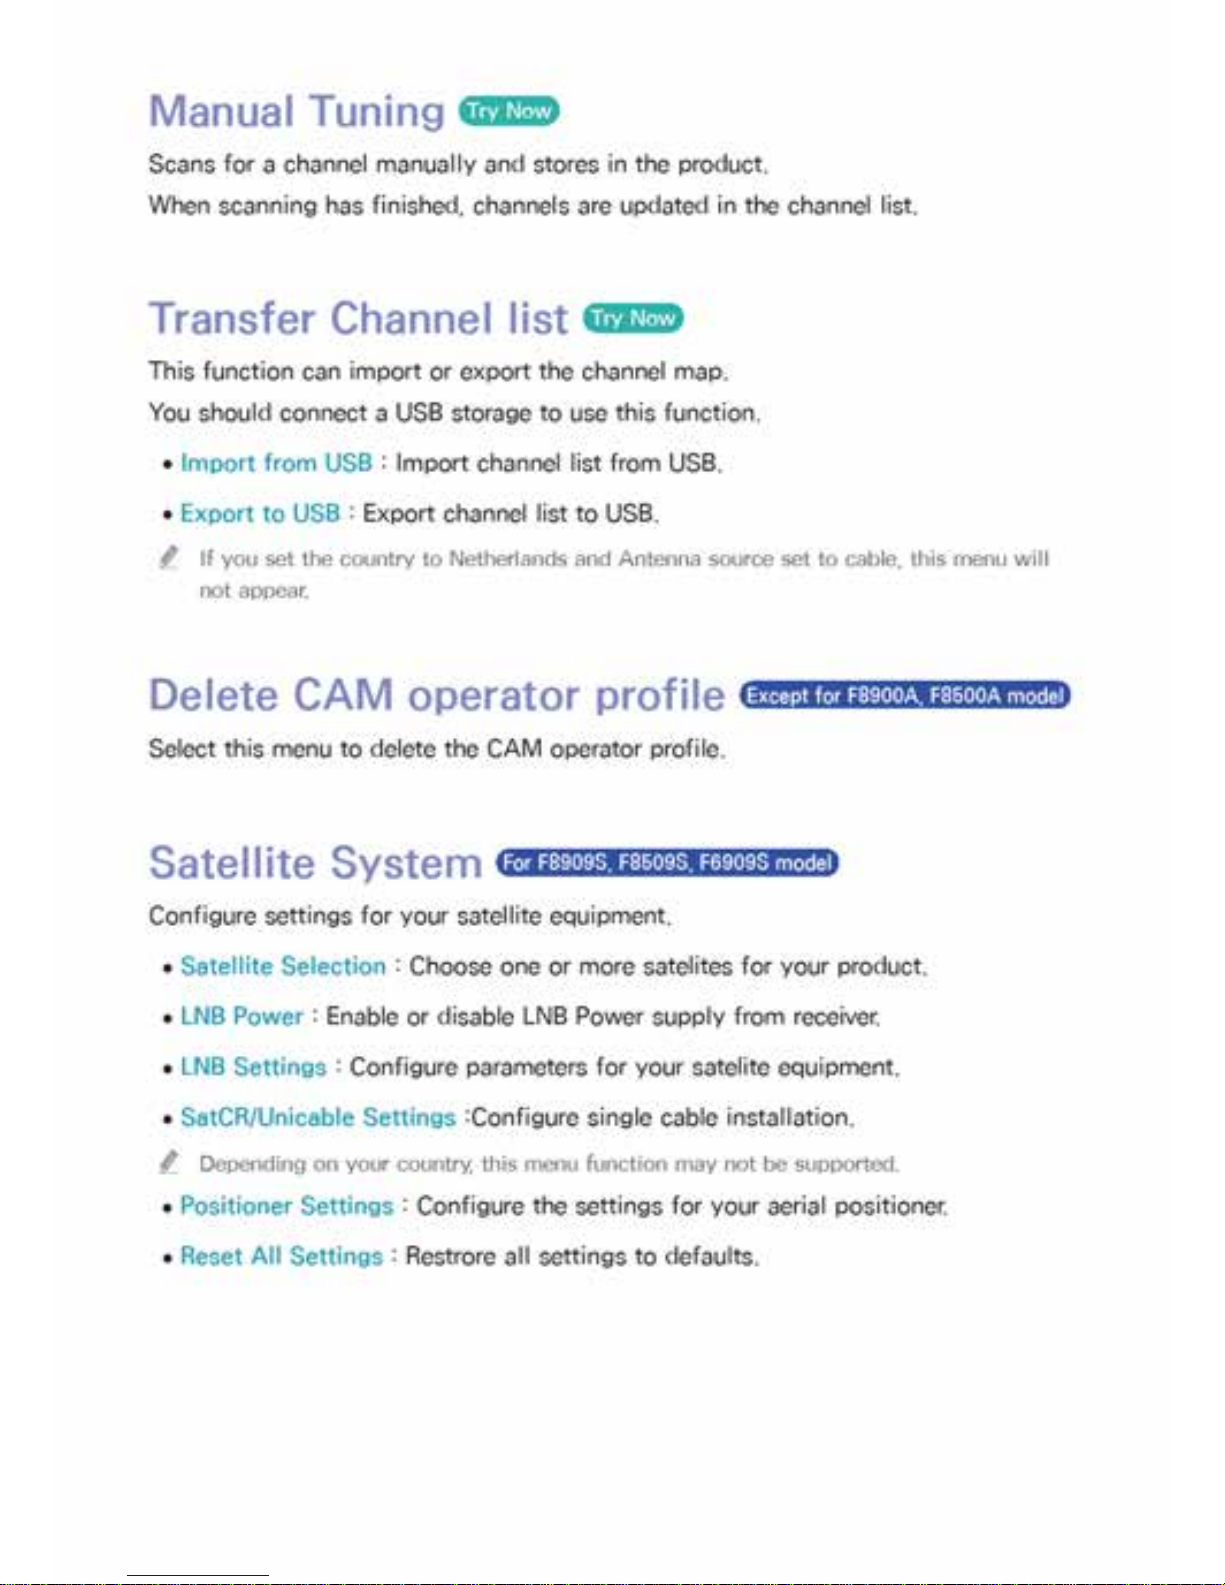
27 Manual Tuning
27 Transfer Channel list
27 Delete CAM operator profile
27 Satellite System
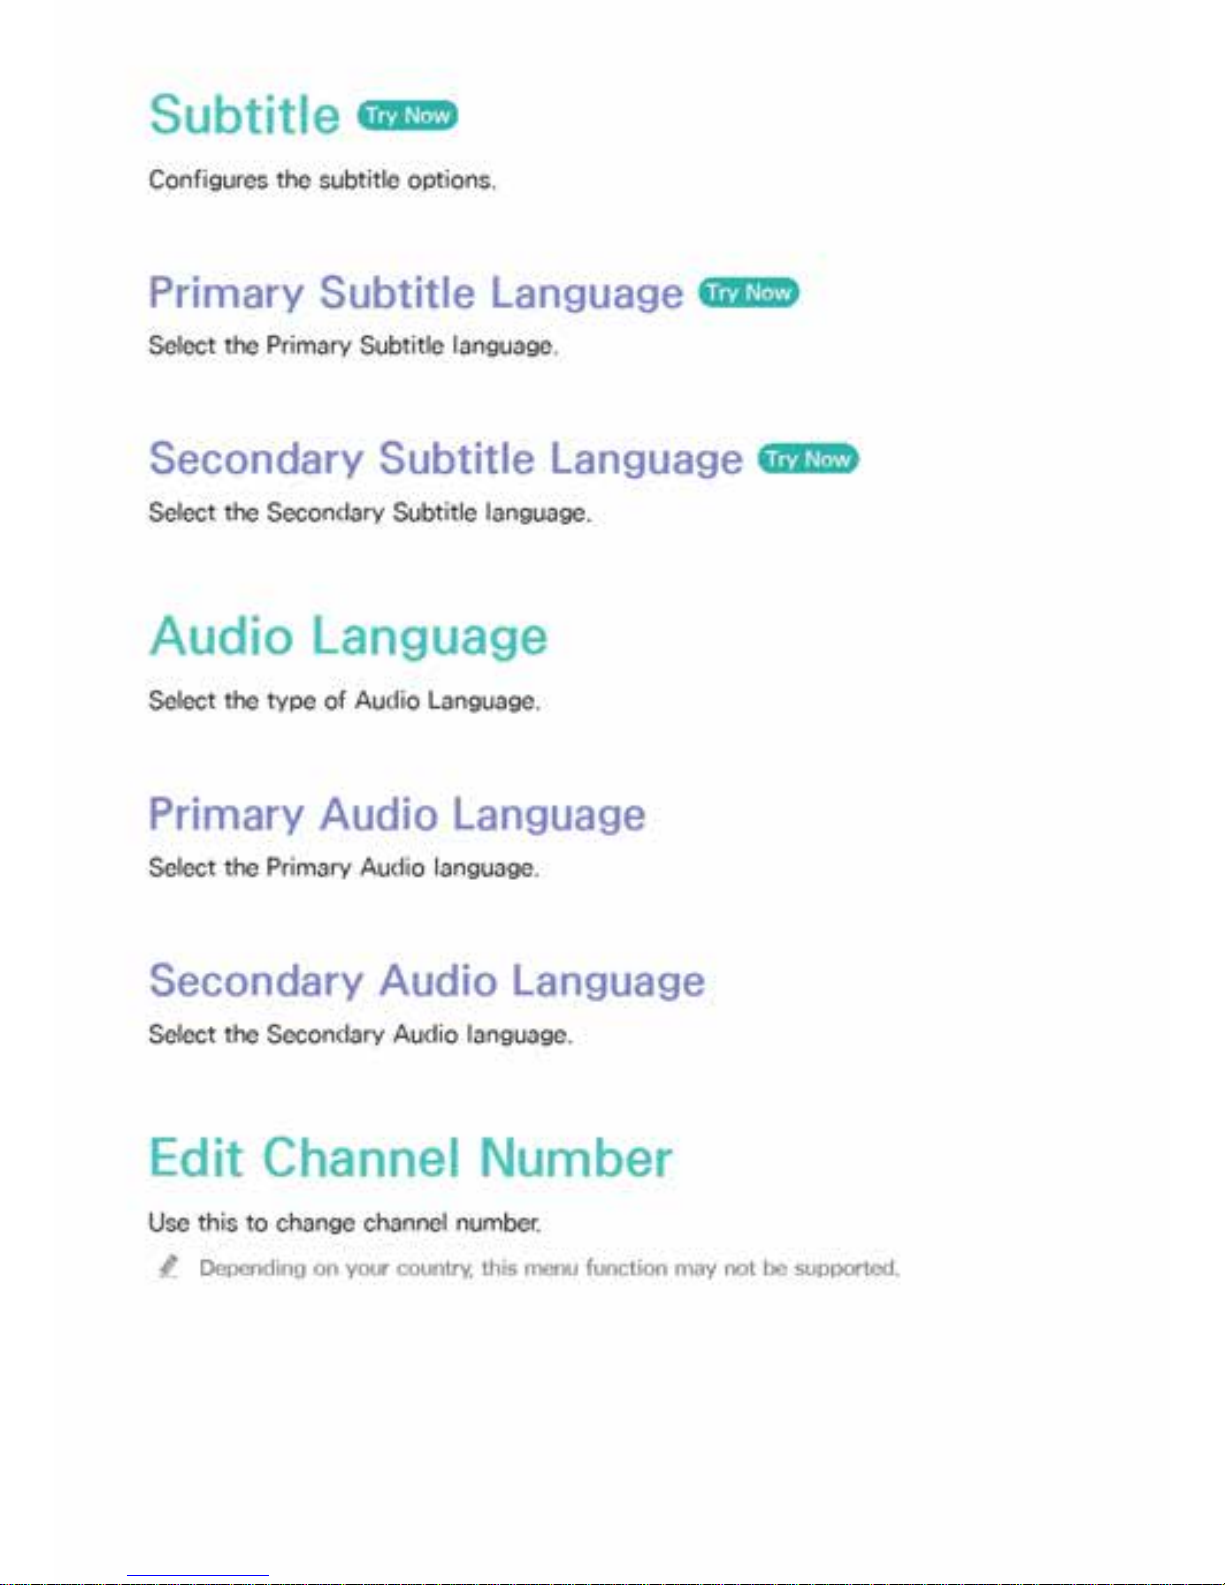
28 Subtitle
28 Primary Subtitle Language
28 Secondary Subtitle Language
28 Audio Language
28 Primary Audio Language
28 Secondary Audio Language
28 Edit Channel Number
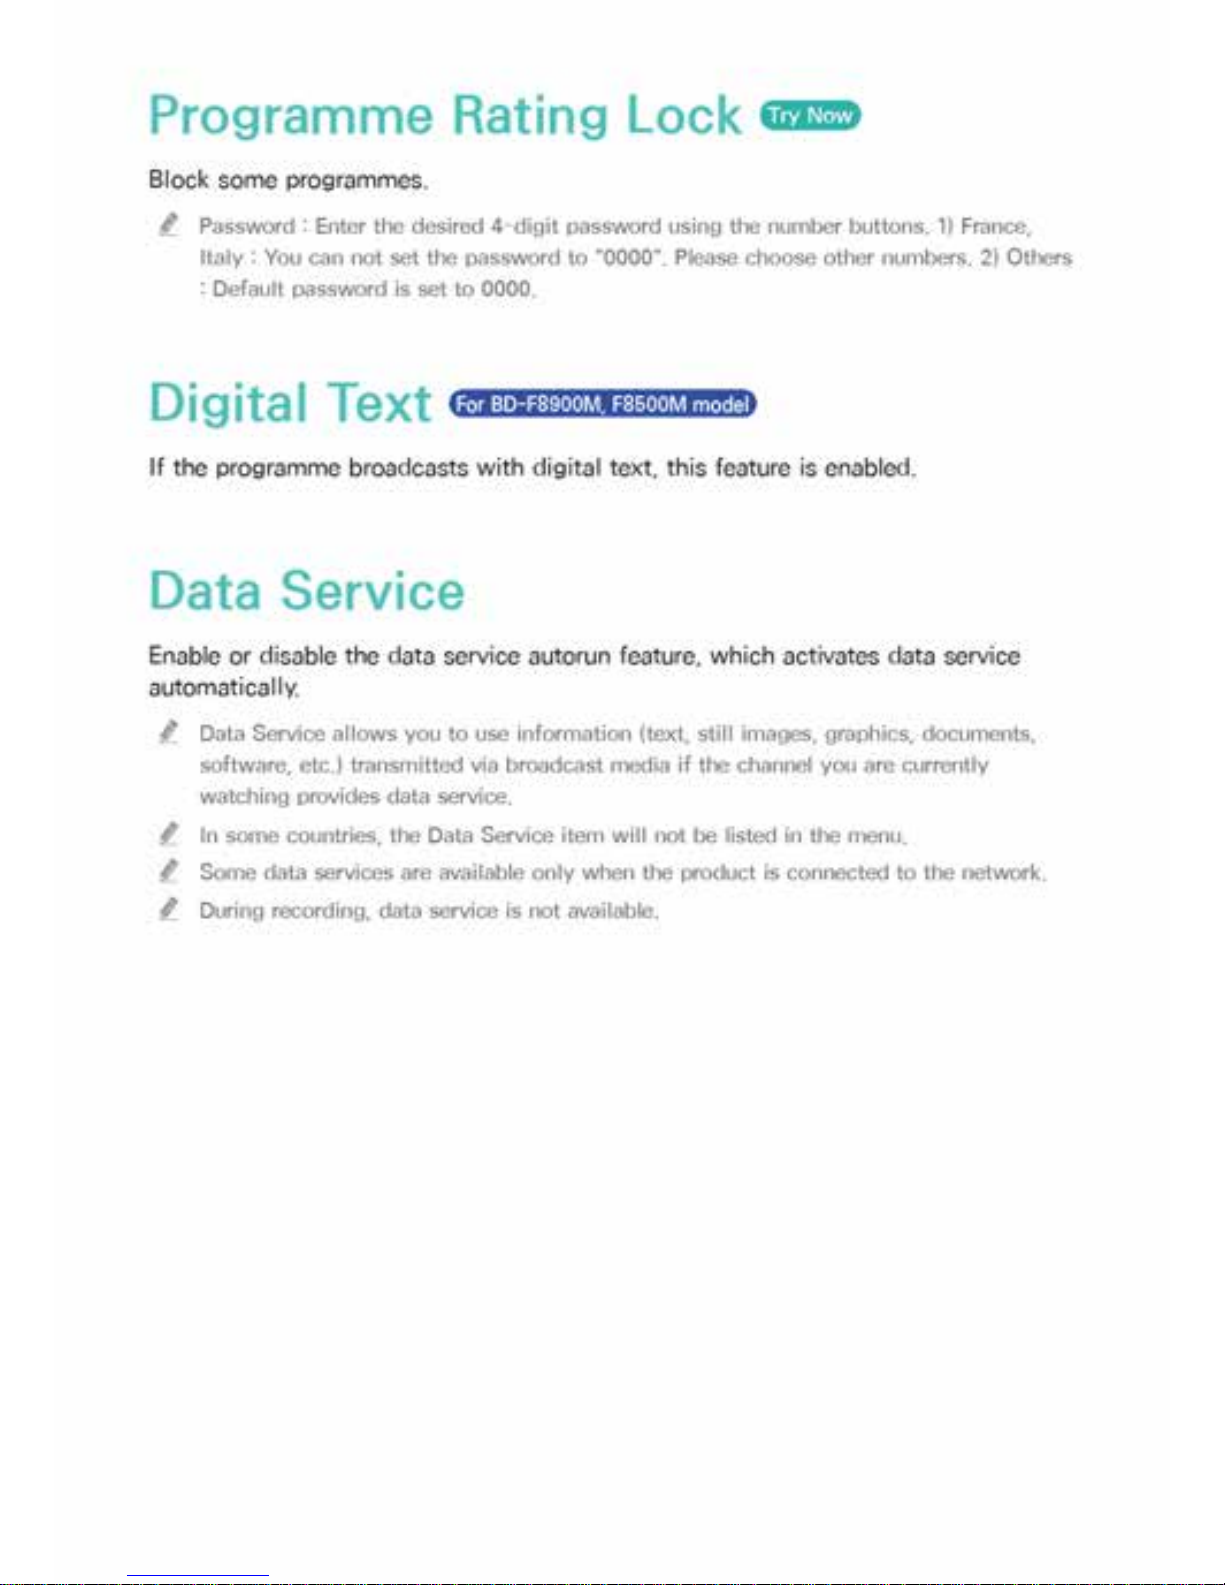
29 Programme Rating Lock
29 Digital Text
29 Data Service
30 Teletext Language
30 Primary Teletext Language
30 Secondary Teletext Language
30 RF Bypass Gain
30 Aerial Connection Type
31 Common Interface
Network
32 Network Status
32 Network Settings
33 Wired Network
34 Wireless Network
Contents
Page 3

37 Wi-Fi Direct
39 AllShare Settings
39 Content Sharing
39 Share Hard Drive
39 Set Remote Access
39 Remote Scheduler
39 Register to AllShare Play
40 Device Name
40 BD-Live Settings
40 BD-Live Internet Connection
40 Delete BD Data
40 BD Data Management
Smart Features
41 Apps Settings
41 Auto Ticker
41 Push Notification Settings
41 Channel-Bound Apps
41 Properties
41 VOD Rating Lock
42 Terms & Conditions, Privacy Policy
42 Reset Smart Hub
System
42 Setup
42 Language
42 Device Manager
43 Keyboard Settings
43 Mouse Settings
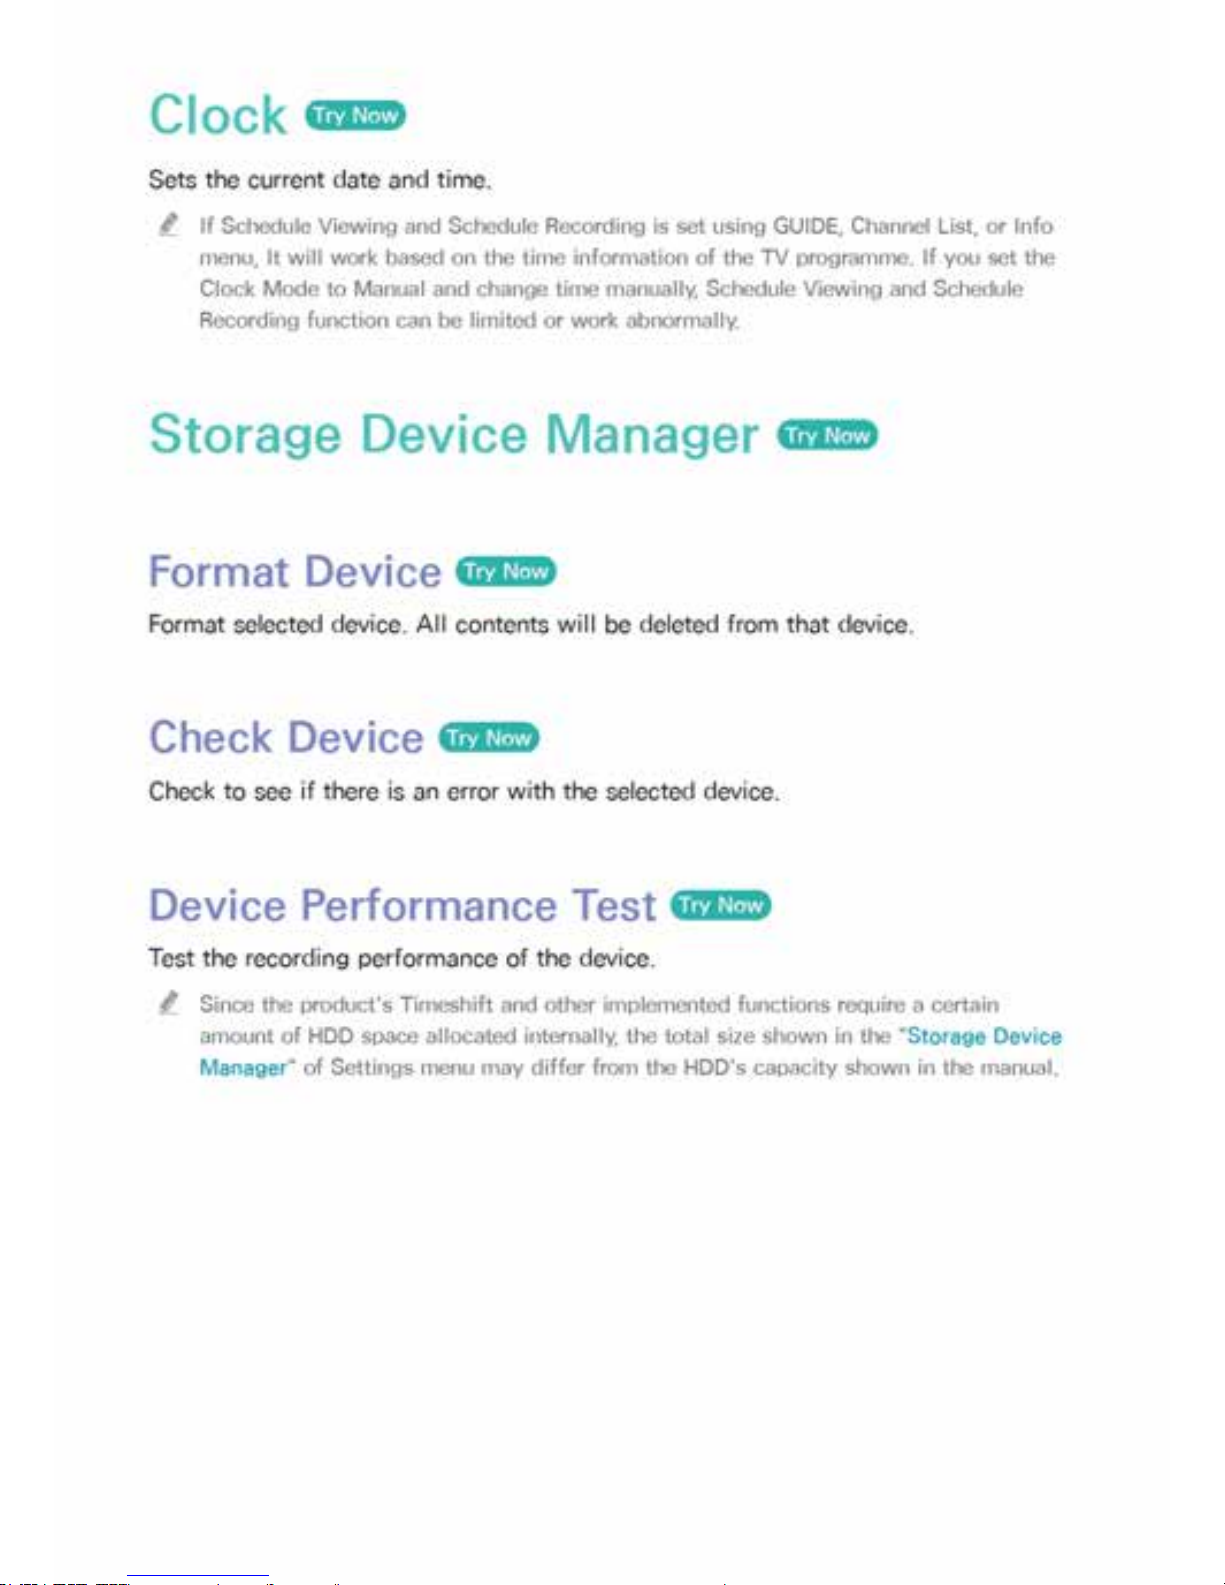
44 Clock
44 Storage Device Manager
44 Format Device
44 Check Device
44 Device Performance Test
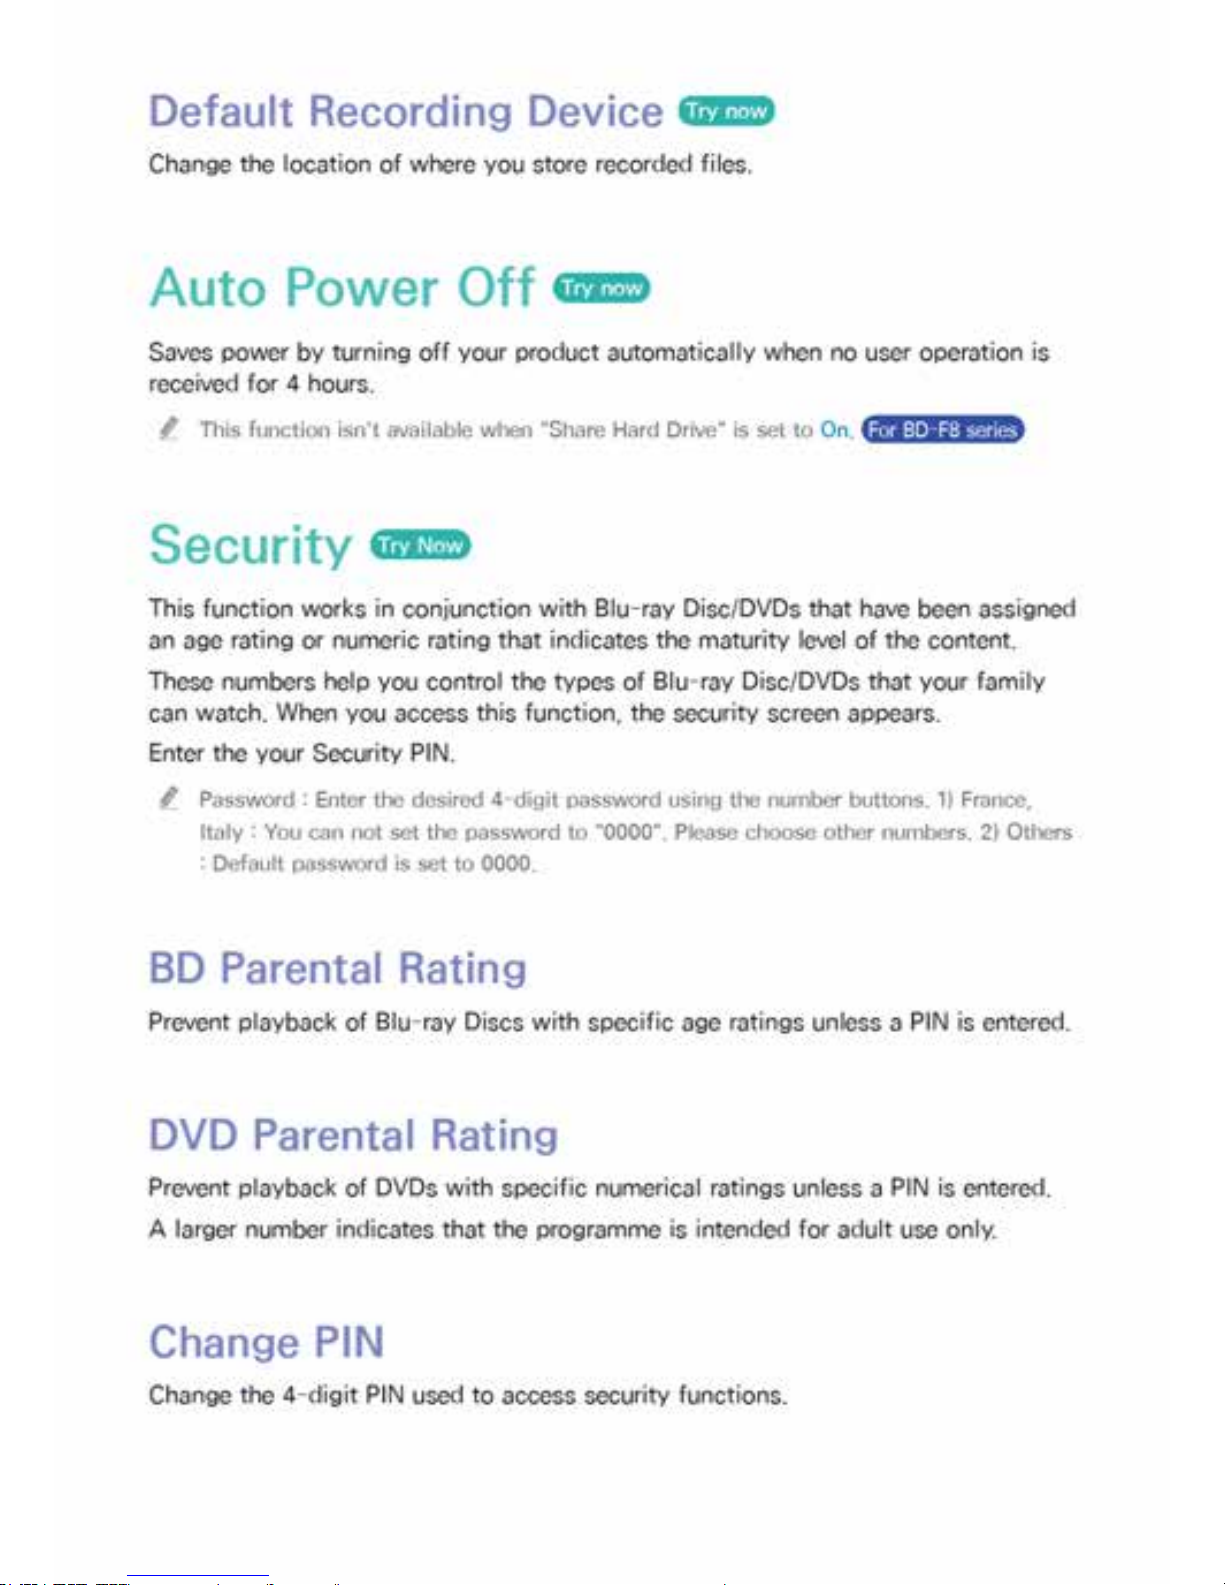
45 Default Recording Device
45 Auto Power Off
45 Security
45 BD Parental Rating
45 DVD Parental Rating
45 Change PIN
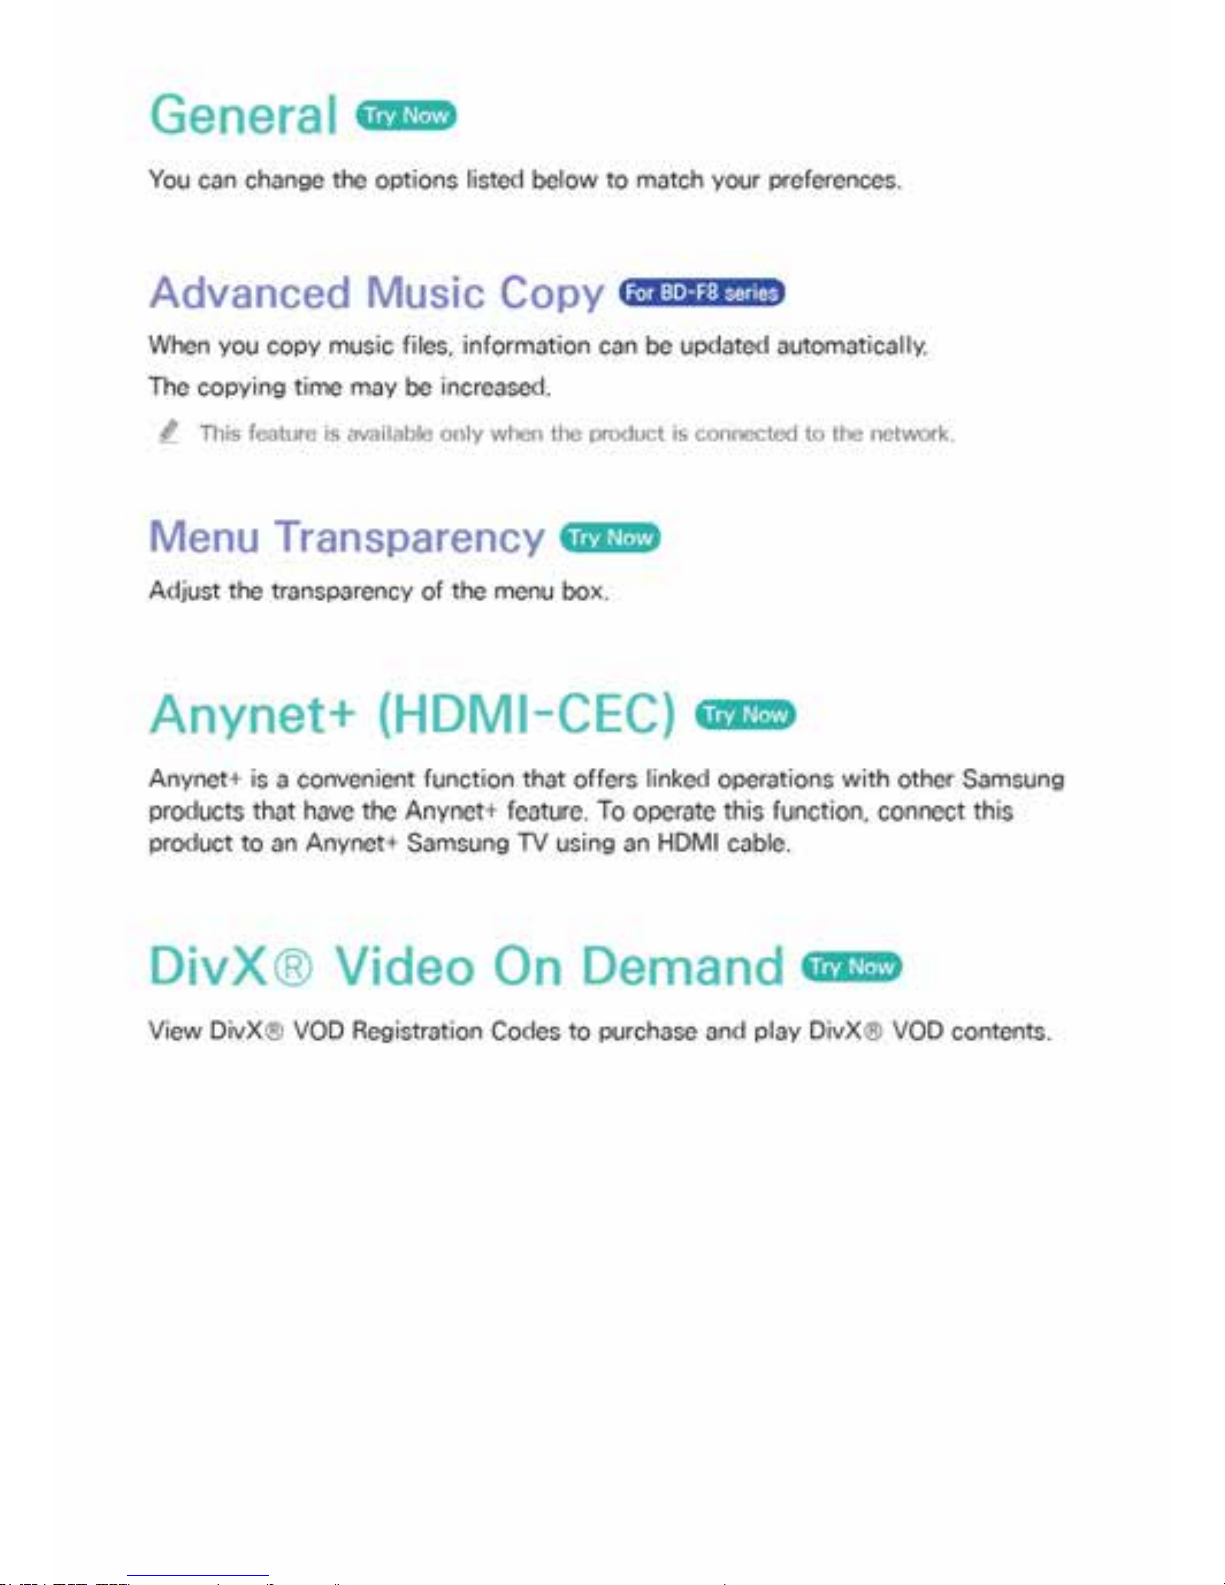
46 General
46 Advanced Music Copy
46 Menu Transparency
46 Anynet+ (HDMI-CEC)
46 DivX® Video On Demand
Support
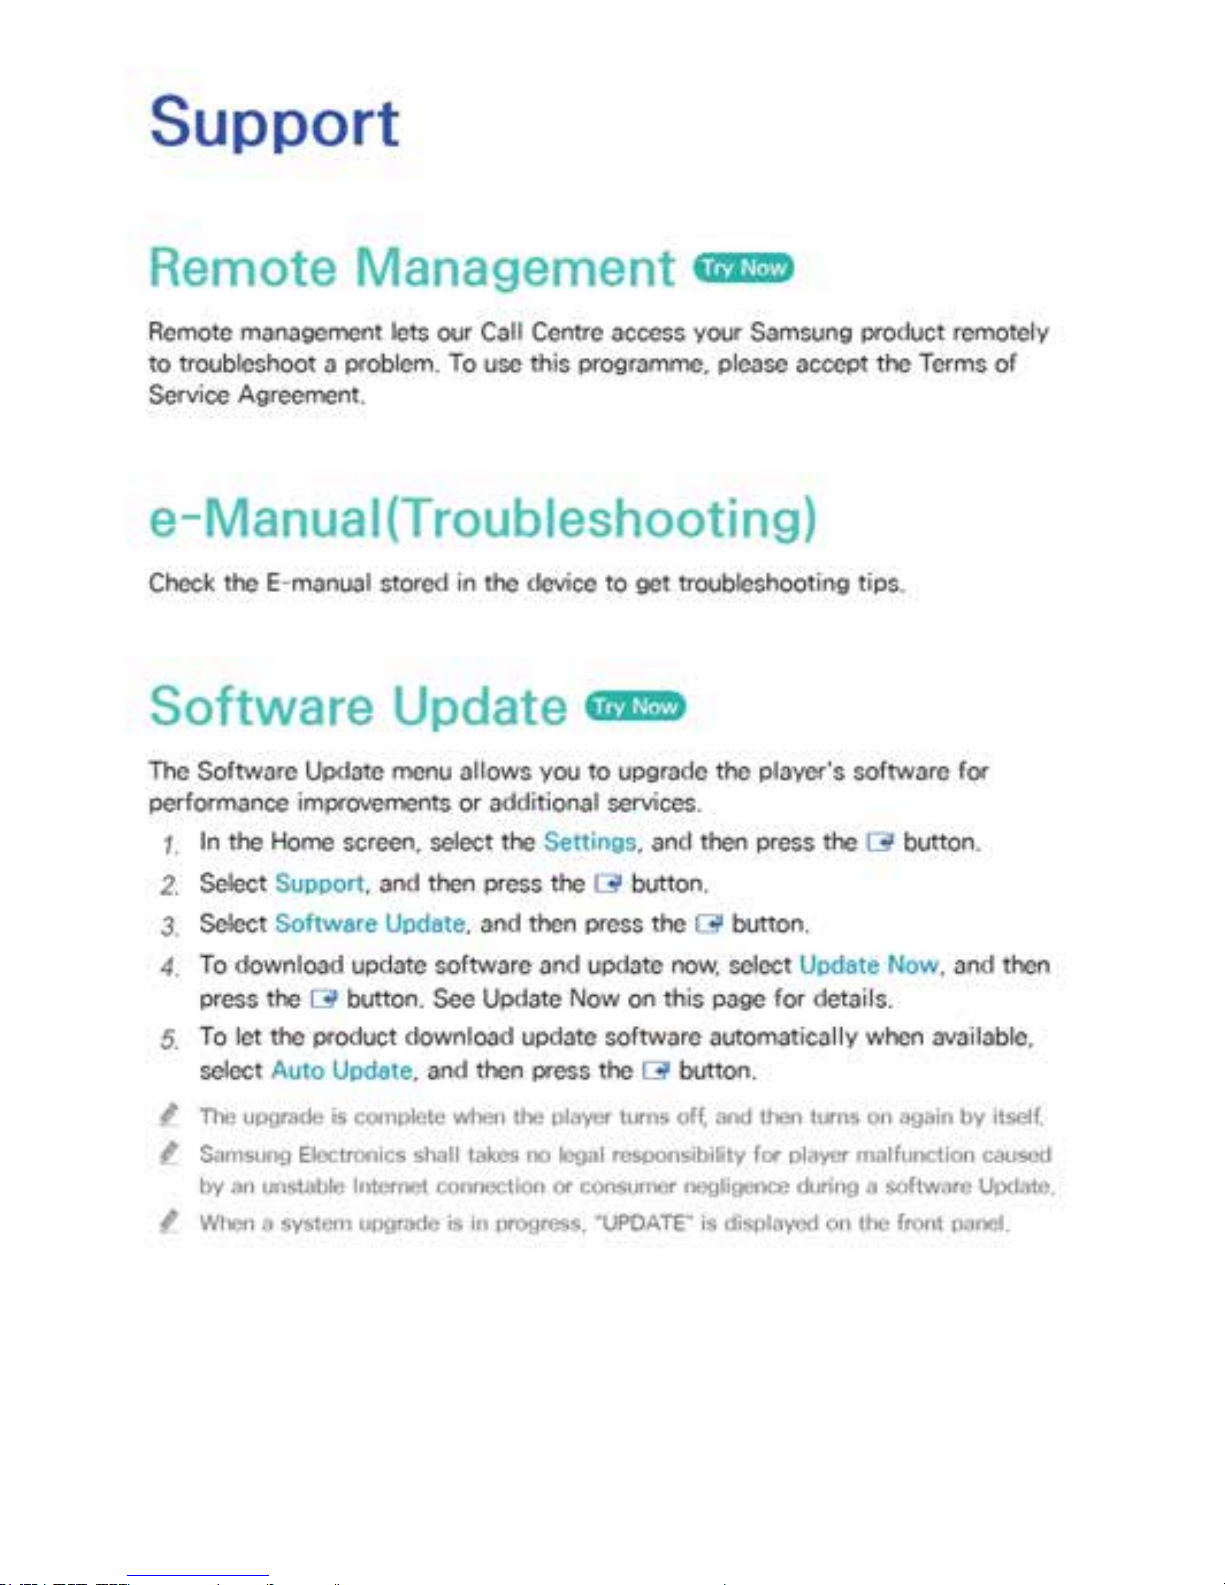
47 Remote Management
47 e-Manual(Troubleshooting)
47 Software Update
48 Update Now
48 Auto Update
50 Manage Satellite
50 Contact Samsung
50 Reset
Media Play
The AllShare Play Screen
51 Accessing the AllShare Play Screen
51 Playing Commercial Discs
Playing Files on a USB Device
52 Method 1
52 Method 2
Using the AllShare Network Function
54 To Download the AllShare Software
54 Playing Content Located on Your PC or AllShare
Device (DMS) through this product (DMP).
55 Playing Content located on internal HDD of
this device(DMS) through the the PC or your
SmartPone(DMP)
Controlling Video Playback
55 Buttons on the Remote Control used for Video
Playback
57 Using the Tools Menu
59 Using the View & Options Menus
59 Using the View Menu
60 Using the Options Menu
Controlling Music Playback
60 Buttons on the Remote Control used for Music
Playback
61 Using the View & Options Menus
61 Using the View Menu
61 Using the Options Menu
62 Repeating Tracks on an Audio CD
62 Shuffling Tracks on an Audio CD
63 Creating a Playlist from an Audio CD
64 Ripping
Page 4

Playing Photo Contents
65 Using the Tools Menu
66 Using the View & Options Menus
66 Using the View Menu
66 Using the Options Menu
DTV Functions
Watching TV Channels
67 Using the channel option
67 Using the remote control buttons
68 Using the Tools Button
Editing Channels
69 Channel List
69 Edit Channel
70 Using the remote control buttons
Viewing the Guide Screen
71 Using the Guide Screen option
71 Using the remote control buttons
71 Setting the Schedule Manager
Using the Teletext Service
73 Typical Teletext page
Advanced Function
Recording
74 Checking Available Storage Size
74 Notes on HDD capacity
75 Recording the current TV channel you are
watching
75 To pause recording
75 To stop recording
75 Playback control during recording
76 Watching other channels during Recording a TV
channel
76 Simultaneous Recording
76 Simultaneous Recording of Two TV Channels
77 Watching different TV channels that is not under
recording
77 To stop recording
77 Simultaneous Operation
78 Timeshift function
78 Start Timeshift with PLAY button
78 Start Timeshift with PAUSE button
78 Timeshift information
79 Playback control button during Timeshift function is
enabled
79 To stop Timeshift
Playing the Recorded Title
80 Using the View, Filter and Options Menus
80 Using the View Menu
80 Using the Filter Menu
81 Using the Options Menu
Editing the Recorded Title
82 Splitting a Section of a Title (Divide into two)
82 Splitting a Section of a Title (Partial Delete)
Copy
83 Copying Videos, Music or Photos
3D Functions
84 Viewing DTV with the 3D effect
Logging In to Your Samsung Account
Before Using Movies & TV Shows or Apps
Using Movies & TV Shows
Using Apps
88 The Apps Screen at a Glance
89 Downloading Applications
90 Starting an Application
91 Using the More Apps Screen
91 Sorting the Apps
92 Using the Options Menu
92 Lock/Unlock
93 Edit My Apps
94 Create Folder
95 Move to Folder
95 Rename Folder
96 Delete
97 Update Apps
Page 5

Screen Mirroring
Using the Web Browser
99 Link Browsing and Pointer Browsing
100 The Control Panel at a Glance
101 Using the Keyboard Pop-up
102 Options on the Keyboard Pop-Up
102 Using the Setting Menu
Linking Your Internet Service Accounts to
the Player
BD-Live Settings
105 BD-LIVE™
106 BD-LIVE™
Appendix
Supported Formats
107 Video File Support
109 Supported Subtitle File Formats
109 Music File Support
110 Picture File Support
110 AVCHD (Advanced Video Codec High Definition)
Troubleshooting
Page 6
Page 7
Page 8
Connecting to an Audio System
Method 1: Connecting to an HDMI
supported AV receiver
Method 2: Connecting to an AV
receiver with Optical input
" After finishing the connections, press the input selector of the connected audio system
and TV until the video signal from the product appears on your TV and you hear the
audio signal through your audio system.
" Do not connect the power cord until you have made all the other connections. When
you change the connections, turn off all devices before you start.
Page 9
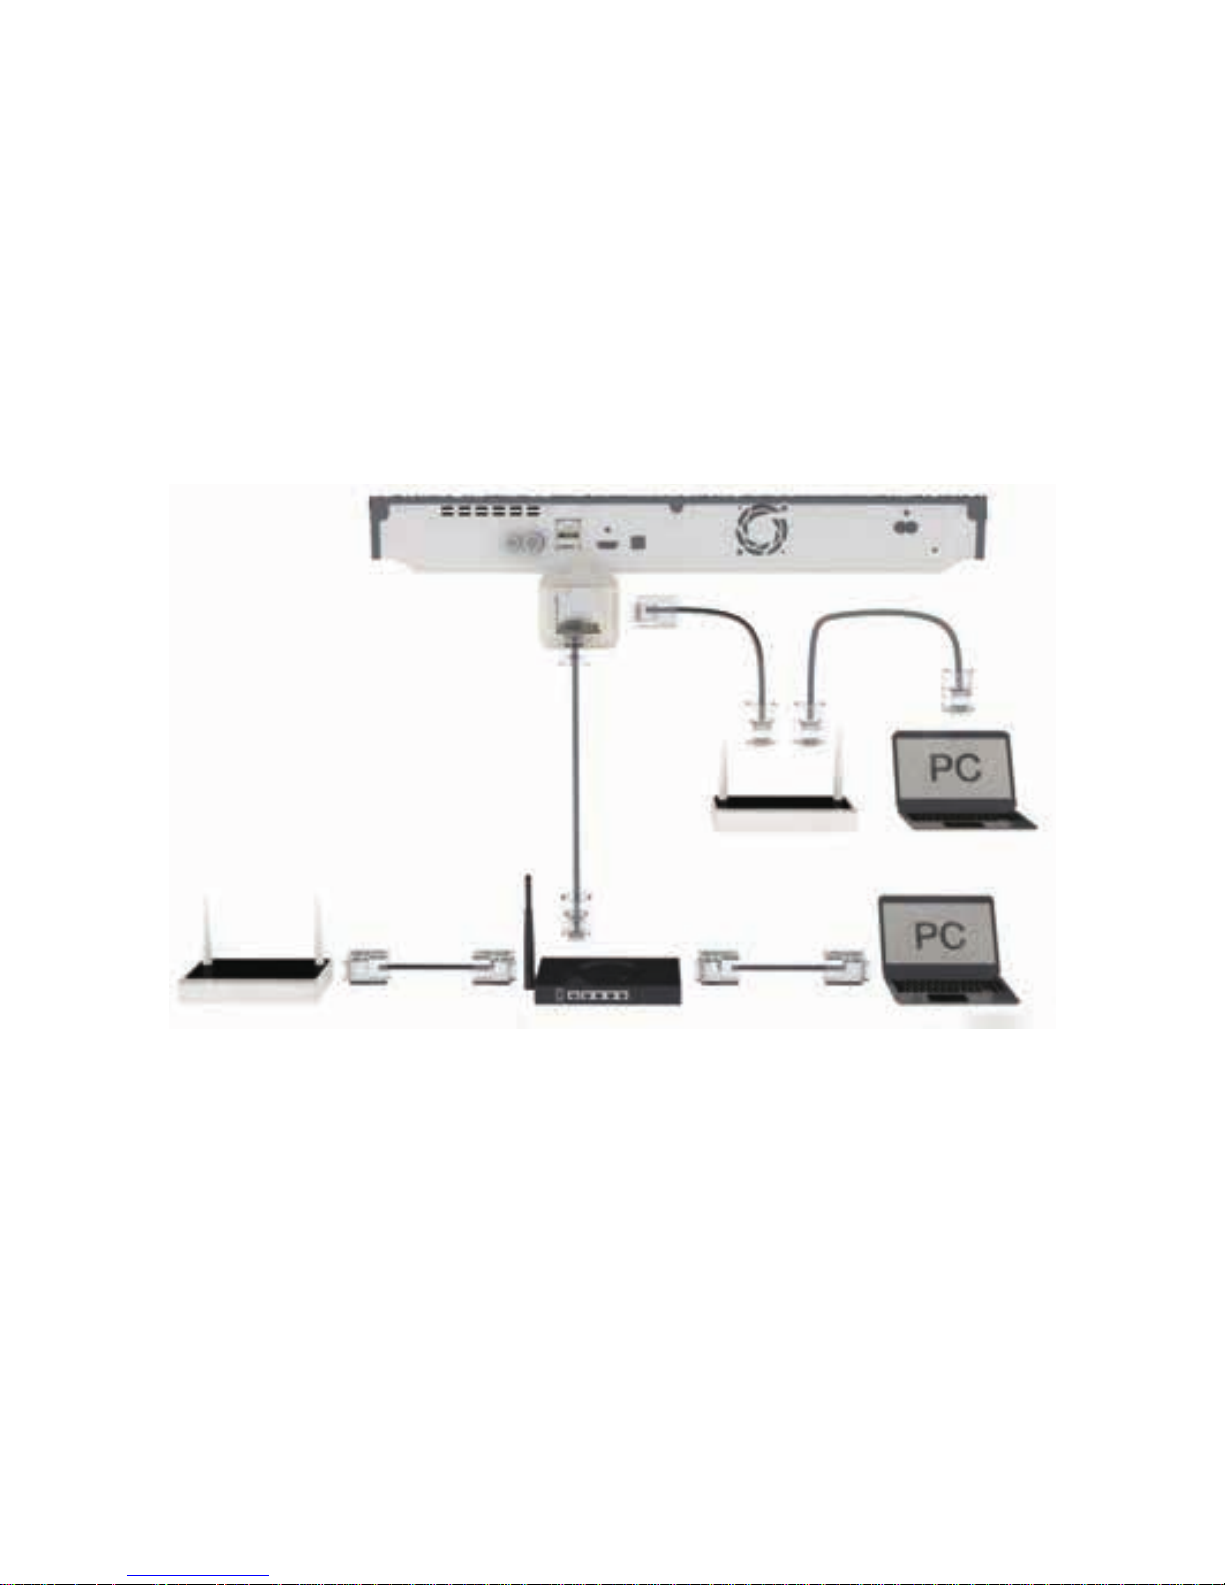
Connecting to a Network
Router
You can connect your product to your network router using one of the methods
illustrated below.
Wired Network
" Internet access to Samsung’s software update server may not be allowed, depending
on the router you use or your ISP’s policy. For more information, contact your ISP
(Internet Service Provider).
" For DSL users, please use a router to make a network connection.
" To use the AllShare function with your PC, your PC should be connected to the same
network as your product.
Page 10
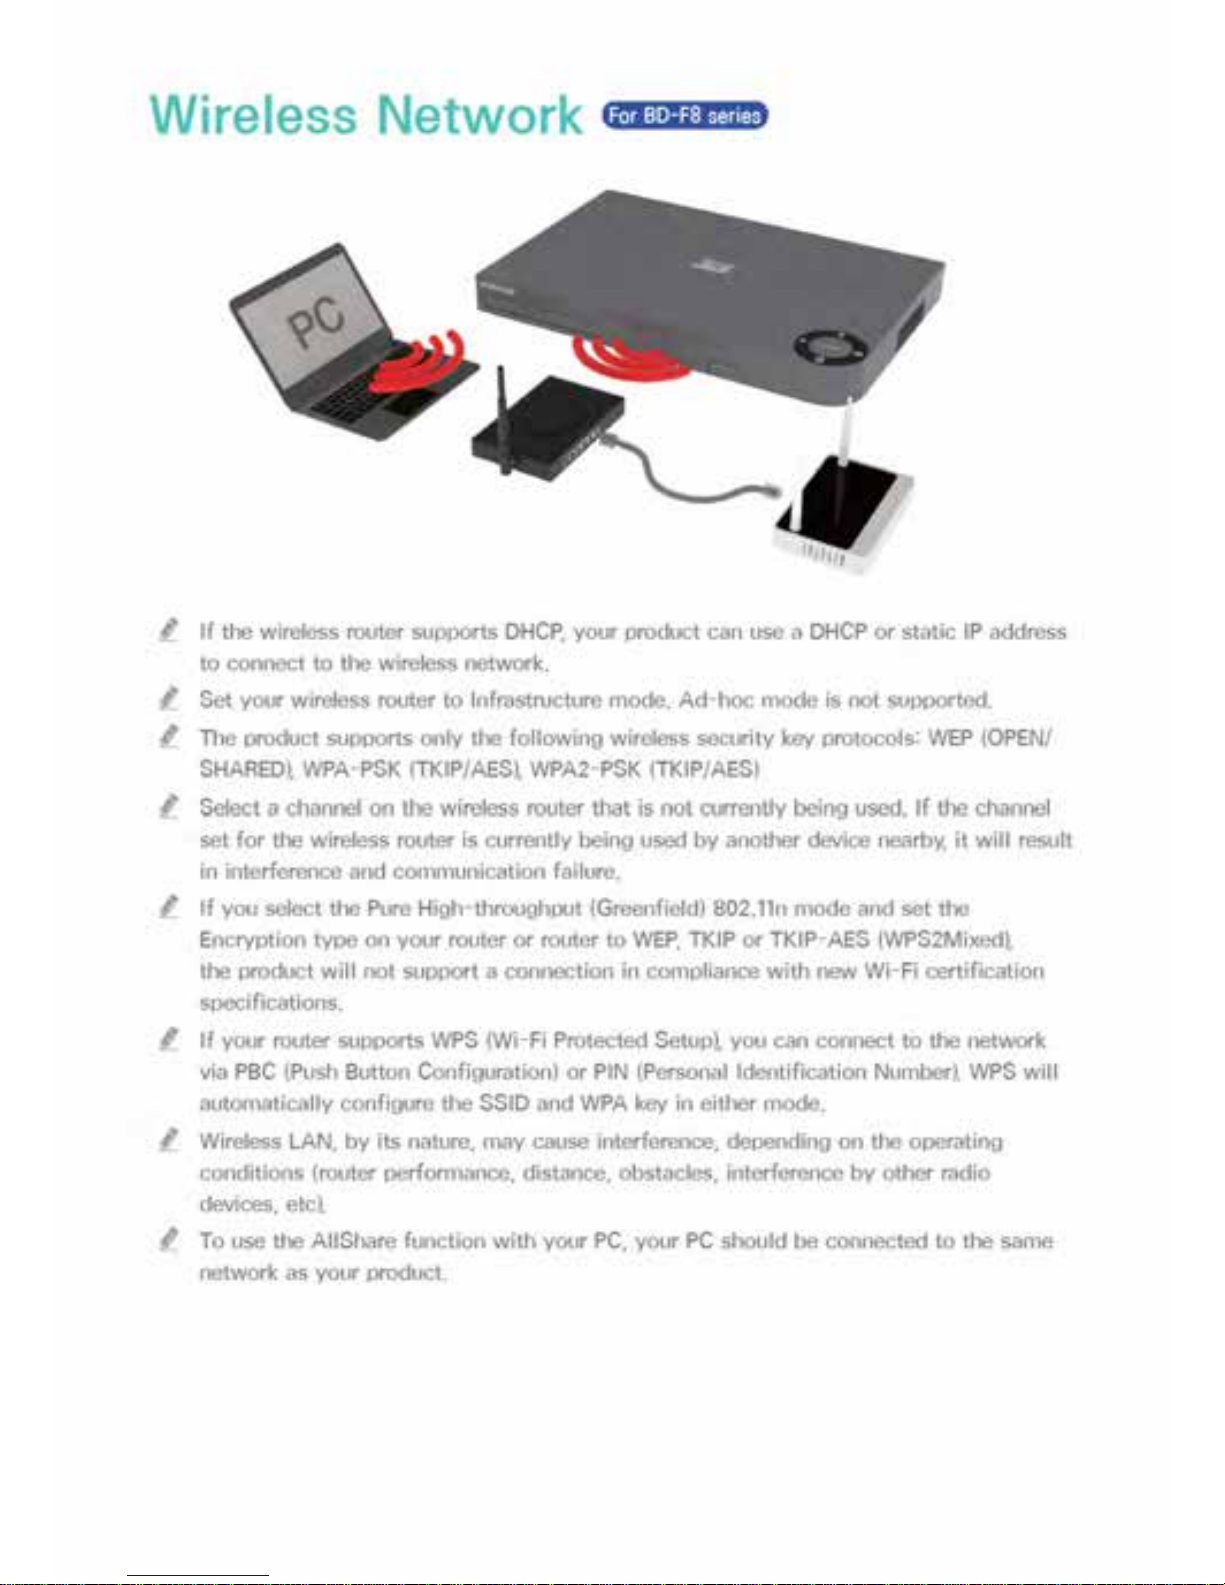
Page 11
Page 12
Page 13
Page 14
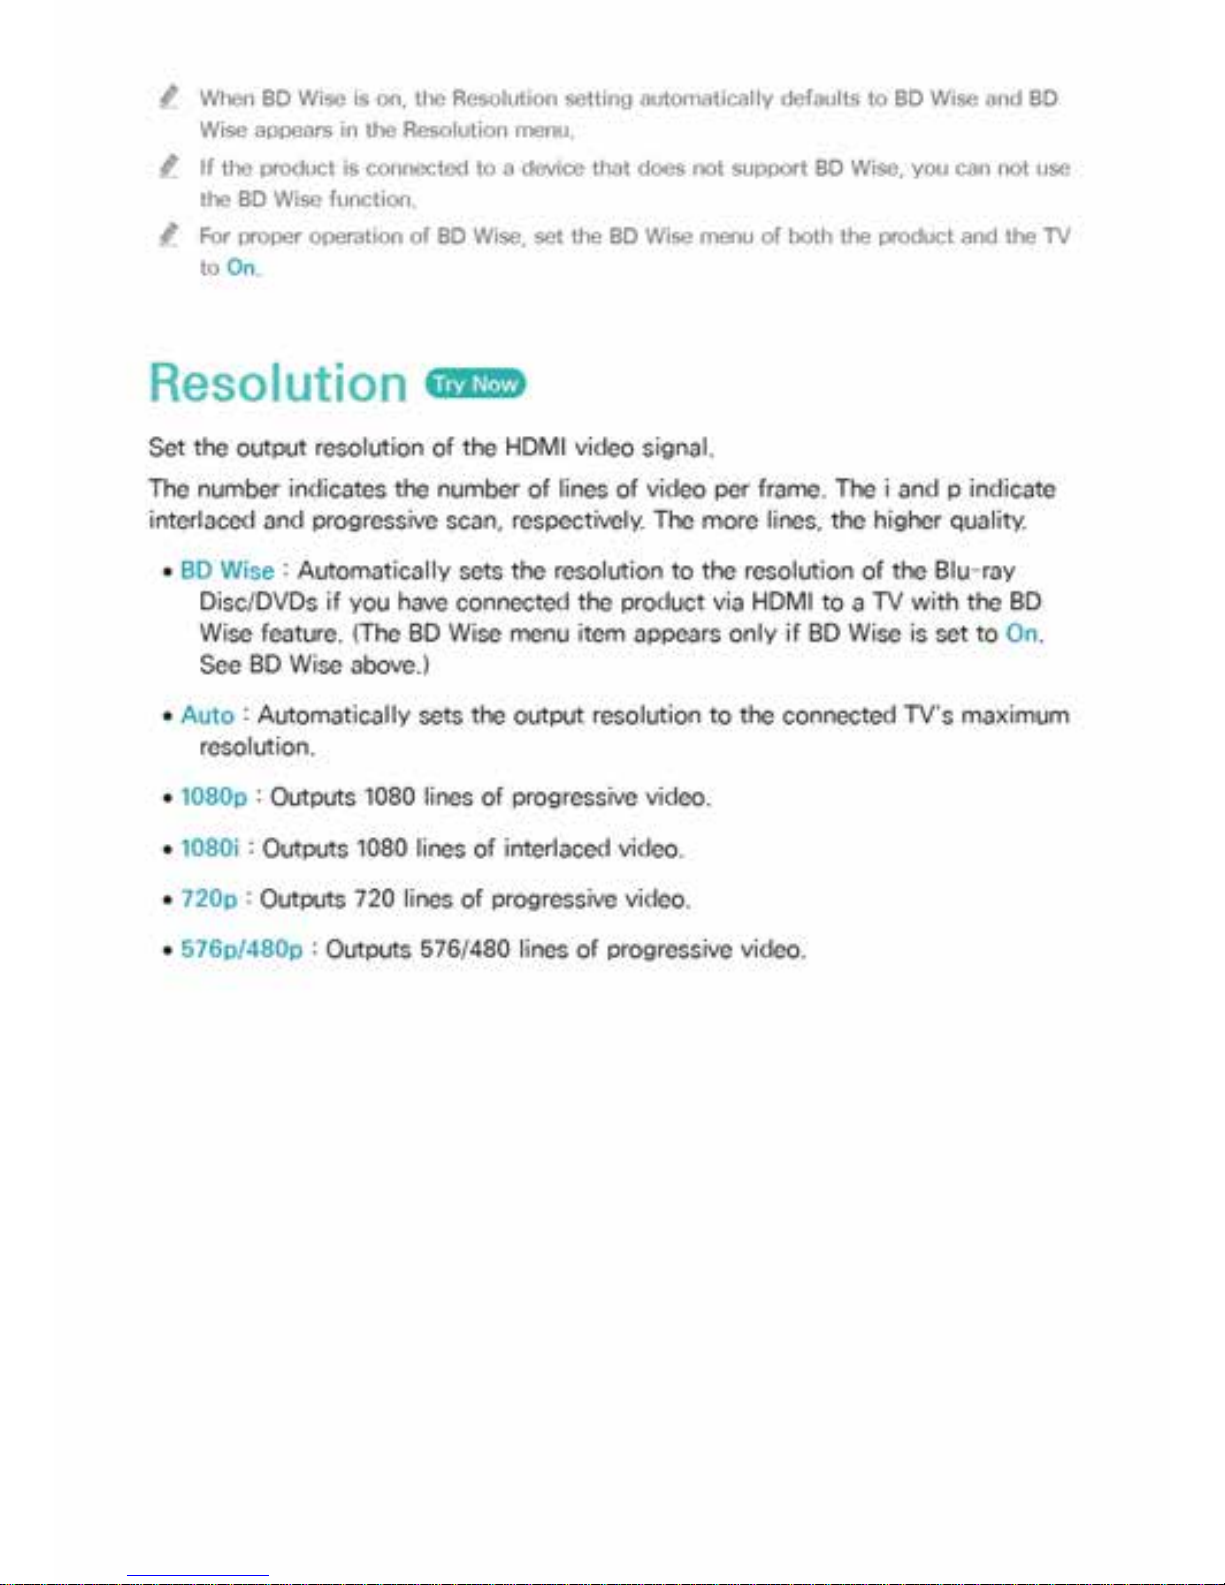
Page 15
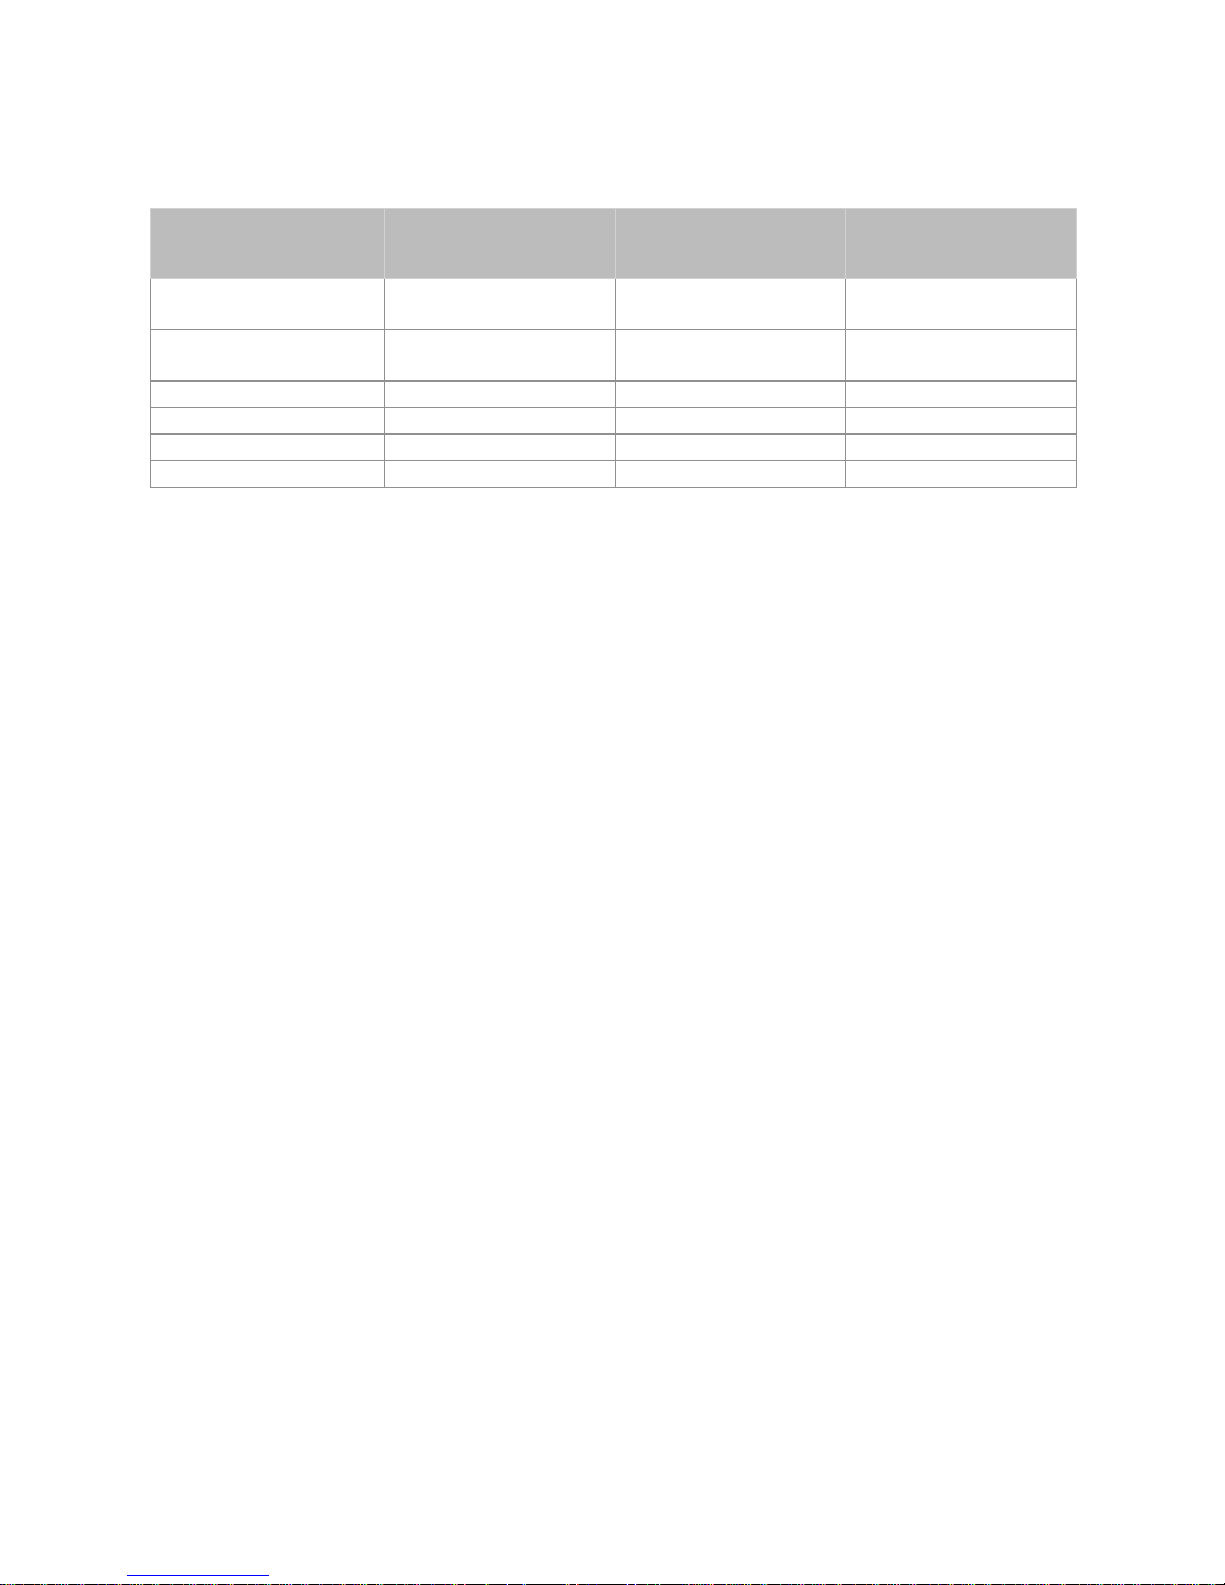
Resolution according to the output mode
●
Blu-ray Disc/E-contents/Digital Contents/DTV/DVD playback
Resolution Blu-ray Disc
E-contents/Digital
contents/DTV
DVD
BD Wise
Resolution of Blu-ray
Disc
1080p 576i/480i
Auto
Max. Resolution of TV
input
Max. Resolution of TV
input
Max. Resolution of TV
input
1080p 1080p 1080p 1080p
1080i 1080i 1080i 1080i
720p 720p 720p 720p
576p/480p 576p/480p 576p/480p 576p/480p
" If the screen stays blank after you have changed the resolution, remove all discs, and
then press and hold the ' button on the top of the product for more than 5 seconds on
the home screen. All settings are restored to the factory default.
" When the factory default settings are restored, all stored user BD data is deleted.
" The Blu-ray Disc must have the 24 frame feature for the product to use the Movie
Frame (24fps) mode.
Page 16
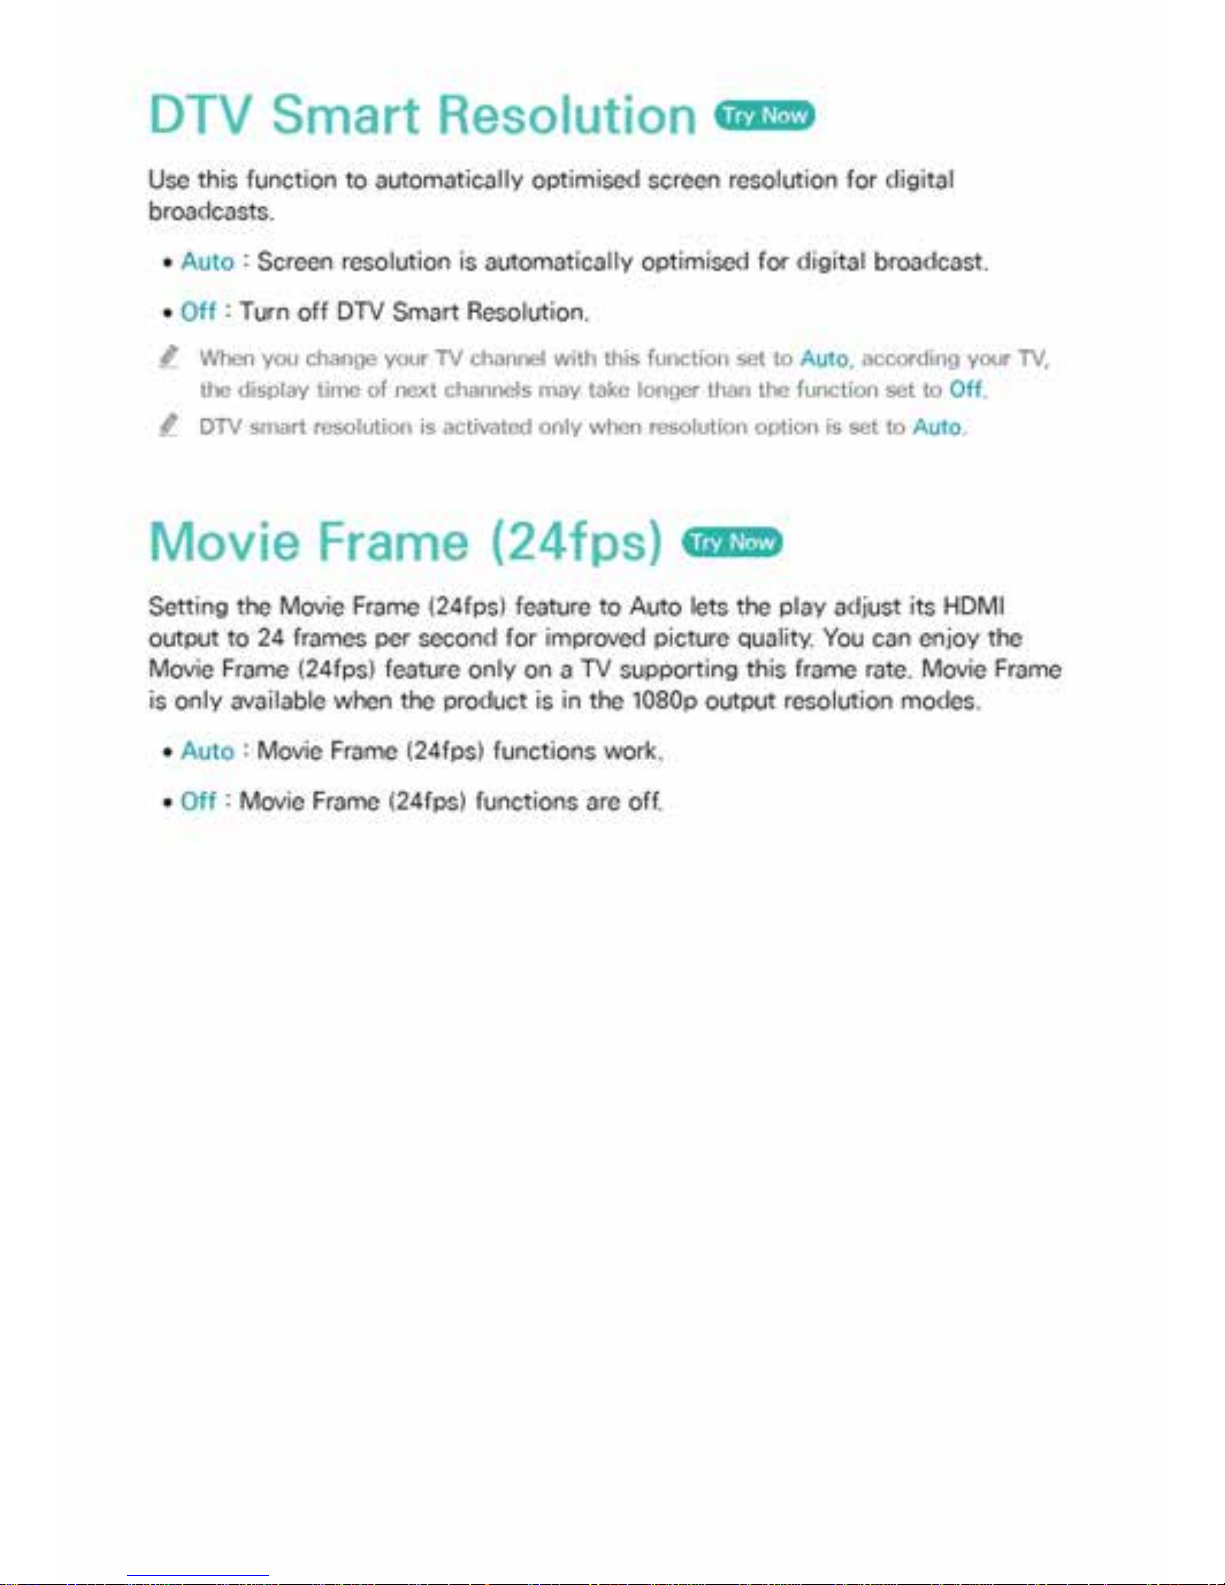
Page 17
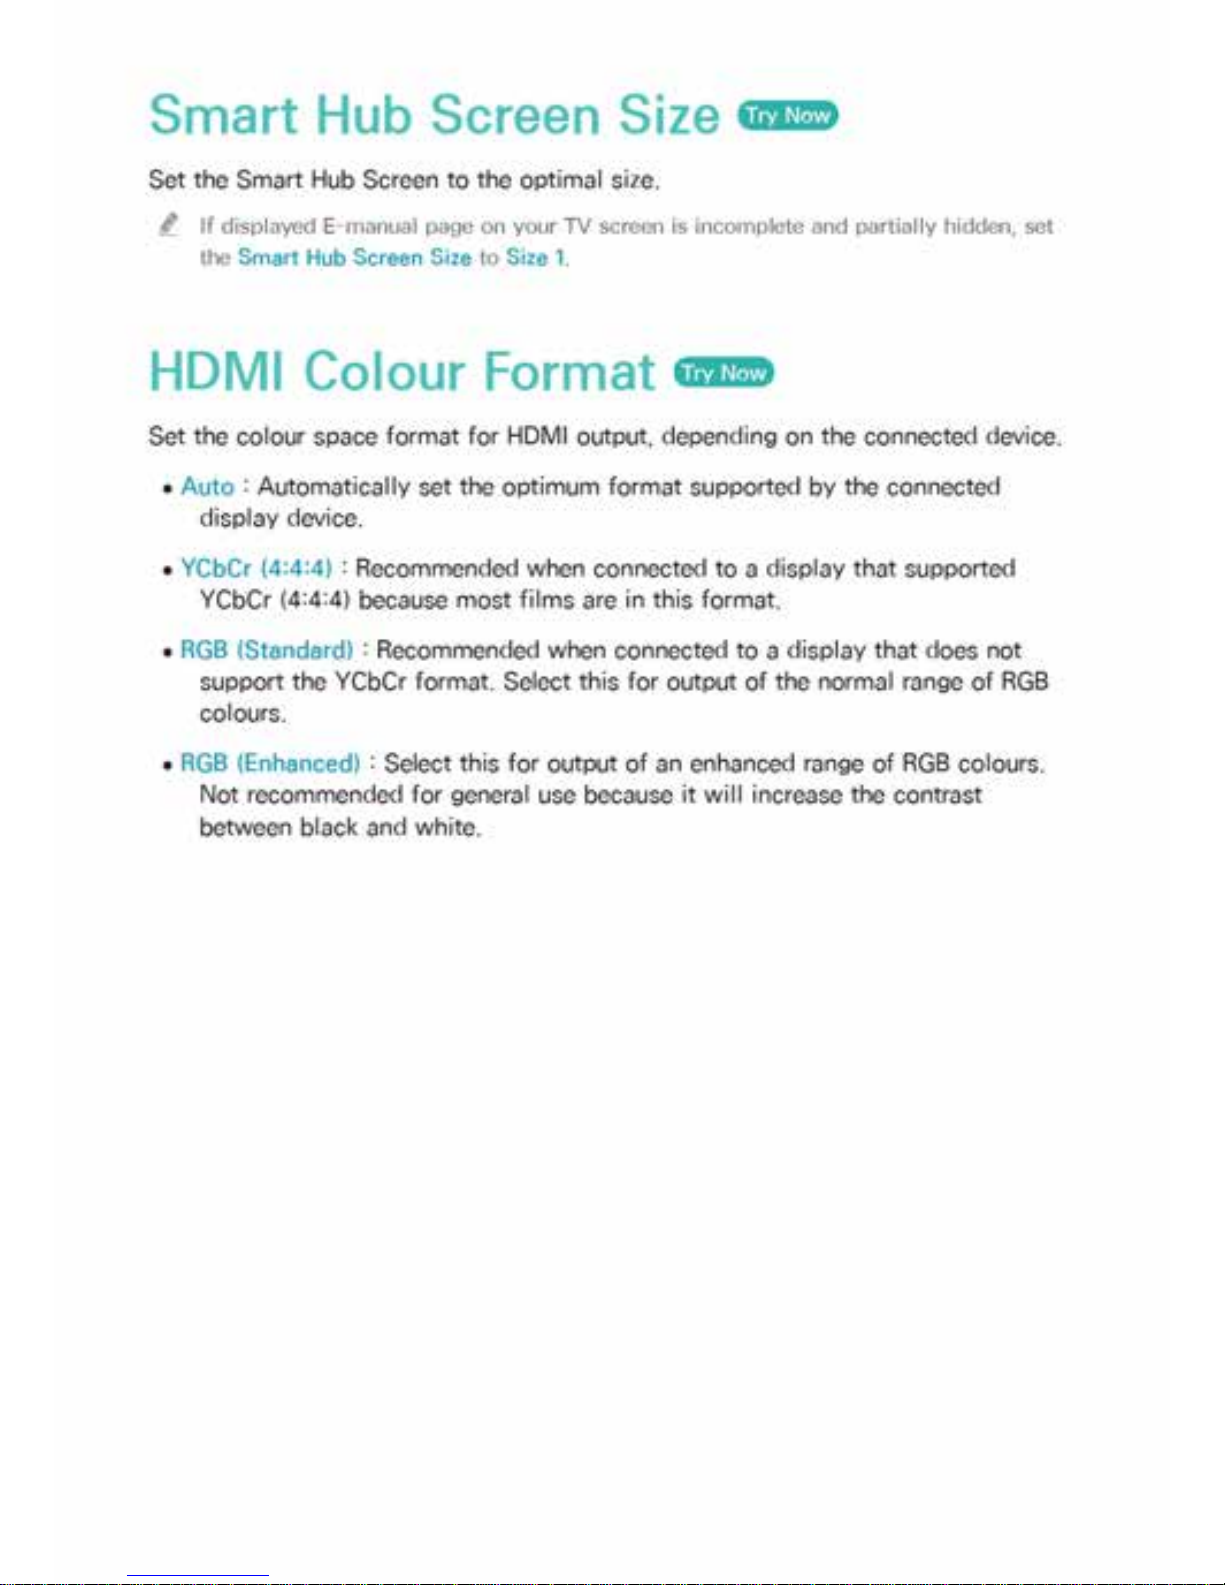
Page 18
Page 19

●
Bitstream (Re-encoded DTS) : Choose if you have connected an AV receiver
using a Digital Optical input that can decode DTS.
●
Bitstream (Re-encoded Dolby D) : Select if you don’t have an HDMI supported
AV receiver, but have an AV receiver with Dolby Digital decoding capabilities.
"
Be sure to select the correct Digital Output or you will hear no sound or a loud noise.
" If the HDMI device (AV receiver, TV) is not compatible with compressed formats (Dolby
digital, DTS), the audio signal outputs as PCM.
" Regular DVDs do not have BONUSVIEW audio and Navigation Sound Effects.
Page 20

Digital Output Selection
Setup PCM
Bitstream
(Unprocessed)
Bitstream
(Re-
encoded
DTS)
Bitstream
(Re-
encoded
Dolby D)
Connection
HDMI
supported
AV
receiver
Optical
HDMI
supported
AV
receiver
Optical
HDMI
supported
AV
receiver
or Optical
HDMI
supported
AV
receiver
or Optical
PCM
Up to PCM
7.1ch
PCM 2ch PCM PCM 2ch
Re-
encoded
DTS
Re-
encoded
Dolby
Digital *
Dolby
Digital
Up to PCM
7.1ch
PCM 2ch
Dolby
Digital
Dolby
Digital
Re-
encoded
DTS
Re-
encoded
Dolby
Digital *
Dolby
Digital
Plus
Up to PCM
7.1ch
PCM 2ch
Dolby
Digital
Plus
Dolby
Digital
Re-
encoded
DTS
Re-
encoded
Dolby
Digital *
Audio
Stream on
Blu-ray
Disc
Dolby
TrueHD
Up to PCM
7.1ch
PCM 2ch
Dolby
TrueHD
Dolby
Digital
Re-
encoded
DTS
Re-
encoded
Dolby
Digital *
DTS
Up to PCM
6.1ch
PCM 2ch DTS DTS
Re-
encoded
DTS
Re-
encoded
Dolby
Digital *
DTS-
HD High
Resolution
Audio
Up to PCM
7.1ch
PCM 2ch
DTS-
HD High
Resolution
Audio
DTS
Re-
encoded
DTS
Re-
encoded
Dolby
Digital *
DTS-HD
Master
Audio
Up to PCM
7.1ch
PCM 2ch
DTS-HD
Master
Audio
DTS
Re-
encoded
DTS
Re-
encoded
Dolby
Digital *
PCM PCM 2ch PCM 2ch PCM 2ch PCM 2ch PCM 2ch PCM 2ch
Audio
Stream on
DVD
Dolby
Digital
Up to PCM
5.1ch
PCM 2ch
Dolby
Digital
Dolby
Digital
Dolby
Digital
Dolby
Digital
DTS
Up to PCM
6.1ch
PCM 2ch DTS DTS DTS DTS
Page 21

Setup PCM
Bitstream
(Unprocessed)
Bitstream
(Re-
encoded
DTS)
Bitstream
(Re-
encoded
Dolby D)
Connection
HDMI
supported
AV
receiver
Optical
HDMI
supported
AV
receiver
Optical
HDMI
supported
AV
receiver
or Optical
HDMI
supported
AV
receiver
or Optical
Dolby
Digital
Up to PCM
5.1ch
PCM 2ch
Dolby
Digital
Dolby
Digital
Re-
encoded
DTS
Re-
encoded
Dolby
Digital
Audio
Stream of
Broadcast
Dolby
Digital
Plus
Up to PCM
5.1ch
PCM 2ch
Dolby
Digital
Plus**
Dolby
Digital
Re-
encoded
DTS
Re-
encoded
Dolby
Digital
MPEG1
Layer 2
PCM 2ch PCM 2ch PCM 2ch PCM 2ch PCM 2ch PCM 2ch
HE-AAC
Up to PCM
5.1ch
PCM 2ch
Re-
encoded
Dolby
Digital***
Re-
encoded
Dolby
Digital***
Re-
encoded
DTS***
Re-
encoded
Dolby
Digital***
Definition
for Blu-ray
Disc
Any
Decodes the main
feature audio and
BONUSVIEW audio
stream together into
PCM audio and adds
Navigation Sound
Effects.
Outputs only the main
feature audio stream
so that your AV
receiver can decode
the audio bitstream.
You will not hear
BONUSVIEW audio
or Navigation Sound
Effects.
Decodes the
main feature
audio and
BONUSVIEW
audio stream
together into
PCM audio
and adds
Navigation
Sound
Effects,
then re-
encodes the
PCM audio
into DTS
bitstream.
Decodes the
main feature
audio and
BONUSVIEW
audio stream
together into
PCM audio
and adds
Navigation
Sound
Effects,
then re-
encodes the
PCM audio
into Dolby
Digital
bitstream.
* If the Source Stream is 2ch or mono, "Re-encoded Dolby D" setting is not
applied. Output will be PCM 2ch.
** If the Audio Description is set to On, audio output will be changed Dolby
Digital even if the original broadcast stream is Dolby Digital Plus.
*** If the Audio Description is set to On and sampling rate of less 48kHz, audio
output will be changed PCM even if the Bitstream is selected.
Page 22
Page 23

Page 24
Page 25
Page 26
Page 27
Page 28
Page 29
Page 30
Page 31
Page 32
Page 33

Wired Network
Wired - Automatic
1.
In the Home screen, select Settings, and then press the E button.
2.
Select Network, and then press the E button.
3.
Select Network Settings, and then press the E button.
4.
Select Wired in the Network Settings screen, and then press the E button.
5.
Select Connect, and then press the E button. The product detects the wired
connection, verifies the network connection and then connects to the network.
Wired - Manual
If you have a static IP address or the Automatic procedure does not work, you'll
need to set the Network Settings values manually.
Follow Steps 1 and 2 in Wired Network, and then follow these steps:
1.
Select Network Status. The player searches for a network, and then displays
the connection failed message.
2.
On the bottom of the screen, select IP Settings, and then press the E button.
The IP Settings screen appears.
3.
Select the IP Setting field, and then press the E button.
4.
Select Enter manually in the IP Setting field, and then press the E button.
5.
Select a value to enter (IP Address, for example), and then press the E
button. Use the number keypad on your remote control to enter the numbers
for the value. You can also enter numbers using the ▲▼ buttons. Use the ◀▶
buttons on the remote control to move from entry field to entry field within a
value. When done with one value, press the E button.
6.
Press the ▲ or ▼ button to move to another value, and then enter the numbers
for that value following the instructions in Step 5.
7.
Repeat Steps 5 and 6 until you have filled in all values.
"
You can get the Network values from your Internet provider.
8.
When finished entering all the values, select OK, and then press the E button.
The player verifies the network connection and then connects to the network.
Page 34

Wireless Network
You can setup a wireless network connection in four ways:
–
Wireless Automatic
–
Wireless Manual
–
WPS(PBC)
–
WPS(PIN)
When you configure the wireless network connection, any wireless network devices
currently connected through the player or, if applicable, the player's current wired
connection, will be disconnected.
Wireless - Automatic
1.
In the Home screen, select Settings, and then press the E button.
2.
Select Network, and then press the E button.
3.
Select Network Settings, and then press the E button.
4.
Select Wireless in the Network Settings screen, and then press the E button.
The player searches for and then displays a list of the available networks.
5.
Select the desired network, and then press the E button.
6.
On the Security screen, enter your network's Security Code or Pass Phrase.
Enter numbers directly using the number buttons on your remote control. Enter
letters by selecting a letter with an arrow button, and then pressing E button.
"
To view the password as you enter it, use the arrow buttons to select Show Password
on the right side, and then press E button.
7.
When done, select Done and then press the E button. The player verifies the
network connection and then connects to the network.
8.
When verification is complete, select OK, and then press the E button.
"
You should be able to find the Security Code or Pass Phrase on one of the set up
screens you used to set up your router or modem.
Page 35

Wireless - Manual
If you have a static IP address or the Automatic procedure does not work, you'll
need to set the Network Settings values manually.
1.
Follow the directions in Wireless - Automatic through Step 5.
2.
The player searches for a network, and then displays the connection failed
message.
3.
On the bottom of the screen, select IP Settings, and then press the E button.
The IP Settings screen appears.
4.
Select the IP Setting field, and then press the E button.
5.
Select Enter manually in the IP Setting field, and then press the E button.
6.
Select a value to enter (IP Address, for example), and then press E button.
Use the number keypad on your remote control to enter the numbers for the
value. You can also enter numbers using the ▲▼ buttons. Use the ◀▶ buttons
on the remote control to move from entry field to entry field within a value.
When done with one value, press the E button.
7.
Press the ▲ or ▼ button to move to another value, and then enter the numbers
for that value following the instructions in Step 6.
8.
Repeat Steps 6 and 7 until you have filled in all values.
"
You can get the Network values from your Internet provider.
9.
When finished, select OK, and then press the E button. The Security Screen
appears.
10.
On the Security screen, enter your network's Security Code or Pass Phrase.
Enter numbers directly using the number buttons on your remote control. Enter
letters by selecting a letter with the ▲▼◀▶ buttons, and then pressing the E
button.
11.
When finished, select Done at the right of the screen, and then press the E
button. The player verifies the network connection and then connects to the
network.
12.
After the player verifies the network, select OK, and then press the E button.
Page 36

WPS(PBC)
1.
In the Home screen, select Settings, and then press the E button.
2.
Select Network, and then press the E button.
3.
Select Network Settings, and then press the E button.
4.
Select Wireless in the Network Settings screen, and then press the E button.
5.
Press the ▲ button on your remote, and then press the ▶ button to select the
WPS(PBC).
6.
Press the E button on your remote. The "Press the PBC button" message
appears.
7.
Press the WPS(PBC) button on your router within two minutes. Your player
automatically acquires all the network settings values it needs and connects to
your network. The Network Status screen appears. The player connects to the
network after the network connection is verified.
WPS(PIN)
Before you begin, open the router's setup menu on your PC and access the screen
with the WPS PIN entry field.
1.
In the Home screen, select Settings, and then press the E button.
2.
Select Network, and then press the E button.
3.
Select Network Settings, and then press the E button.
4.
Select Wireless in the Network Settings screen, and then press the E button.
The player searches for and then displays a list of the available networks.
5.
Select the desired network, and then press the E button.
6.
Select the WPS(PIN), and then press the E button. The PIN pop-up appears.
7.
Enter the PIN into the WPS PIN entry field in the router's Set Up screen and
then save the the screen.
"
Contact the manufacturer of the router for instructions explaining how to access the
route's Set Up screens or refer to the router's user's manual.
" For WPS connection, set your wireless router’s security encryption to AES. Setting to
WEP security encryption does not support WPS connection.
Page 37
Page 38

Through the Product Using PBC
1.
Select the Wi-Fi Direct device you want to connect to this product, and then
press the E button. The PBC/PIN pop up appears.
2.
Select PBC, and then press the E button. The PBC pop-up appears.
3.
Press the PBC button on the Wi-Fi Direct device within 2 minutes.
4.
The Connecting pop-up appears, followed by the Connected pop-up. When
it closes, you should see the device listed on the Wi-Fi Direct screen as
connected.
Through the Product Using a PIN
1.
Select the Wi-Fi Direct device you want to connect to this product, and then
press the E button. The PBC/PIN pop up appears.
2.
Select PIN, and then press the E button. The PIN pop-up appears.
3.
Note the PIN code in the pop-up, and then enter it into the appropriate field in
the Wi-Fi Direct device you want to connect.
4.
The Connecting pop-up appears, followed by the Connected pop-up. When
it closes, you should see the device listed on the Wi-Fi Direct screen as
connected.
"
The wired or wireless network connection will be disconnected when you use the Wi-Fi
Direct function.
" Some Wi-Fi Direct devices may not support the AllShare function if connected via Wi-
Fi Direct. If this is the case, it is advisable to change the network connection method
between devices.
Page 39
Page 40
Page 41

Smart Features
Set your preferences for using Apps.
Apps Settings
Lets you configure App notification settings and view basic info about your Apps.
Auto Ticker
This automatically turns on the selected ticker service.
Push Notification Settings
Receive notifications from selected services.
Channel-Bound Apps
Enable or disable Channel-Bound Apps.
There are available on certain channels that provide additional information or
services.
Properties
See basic info about Apps.
VOD Rating Lock
You can lock access to Video on Demand (VOD) content based on its rating.
"
Depending on your country, this menu function may not be supported.
Page 42
Page 43
Page 44
Page 45
Page 46
Page 47
Page 48

Update Now
You can use Update Now to update the software through your network connection
or by using a USB flash drive. The network instructions are below. The USB flash
drive instructions are on the next page.
1.
Select Update Now, and then press the E button. The Update now pop-up
appears.
2.
The product searches on line for the latest software version.
3.
If it does not find an update, the "No new updates" pop-up appears. Press the
E
button to exit.
4.
If it finds a new version, the Update Request pop-up appears.
5.
Select OK. The product upgrades the software, turns off, and then turns on
automatically.
6.
If you do not select OK or Cancel in one minute, the product stores the new
upgrade software. You can upgrade the software later using Auto Update.
7.
If you select Cancel, the product cancels the upgrade.
"
When the system upgrade is done, check the software details in the Product
Information section of the Contact Samsung screen.
" Do not turn off the player during the Software Update. It may cause the player to
malfunction.
Auto Update
You can set the Auto Update function so that the player downloads new upgrade
software when it is in Auto Update mode. In Auto Update mode, the player is off,
but its Internet connection is active. This allows the player to download upgrade
software automatically, when you are not using it.
1.
Press the ▲▼ buttons to select Auto Update, and then press the E button.
2.
Select the desired time. The product will be updated automatically at the time
you have set or after power off. If it downloads new upgrade software, the
player will ask you if you want to install it when you turn the player on.
"
To use the Auto Update Mode Upgrade function, your player must be connected to the
Internet.
Page 49

By USB
1.
Visit www.samsung.com.
2.
Click SUPPORT on the top right of the page.
3.
Enter the product's model number into the search field. As you enter the model
number, a drop down will display products that match the model number.
4.
Left click your product's model number in the drop down list.
5.
On the page that appears, scroll down to and then click Firmware Manuals &
Downloads.
6.
Click Firmware in the centre of the page.
7.
Click the ZIP button in the File column on the right side of the page.
8.
Click Send in the first pop-up that appears. Click OK in the second pop-up to
download and save the firmware file to your PC.
9.
Unzip the zip archive to your computer. You should have a single folder with
the same name as the zip file.
10.
Copy the folder to a USB flash drive.
11.
Make sure no disc is inserted in the product, and then insert the USB flash
drive into the USB port of the product.
12.
In the product’s menu, go to Settings > Support >Software Update.
13.
Select Update Now.
14.
The product searches for the software on the USB drive. When it finds the
software,the Update Request pop-up appears.
15.
Select OK. The product upgrades the software, turns off, and then turns on
automatically.
"
There should be no disc in the player when you upgrade the software using the USB
jack.
" When the system upgrade is done, check the software details in the Product
Information section of the Contact Samsung screen.
" Do not turn off the player during the Software Update. It may cause the player to
malfunction.
" Software Updates using the USB jack must be performed with a USB flash memory
stick only.
Page 50
Page 51

Your product can play content located on Blu-ray/DVD/CD discs, USB devices,
and PCs. To play content located on your PC, you must connect your PC and the
product to your network and download and install the AllShare network software
on your PC.
The AllShare Play Screen
For all media, the AllShare Play Main screen or one of its sub screens are your
primary means of accessing and playing contents saved on a variety of devices,
either connected directly or using your network.
Accessing the AllShare Play Screen
To access the AllShare Play Main screen, select Photos, Videos & Music on the
Home screen, and then press the E button.
Playing Commercial Discs
1.
Press the button to open the disc tray.
2.
Place a disc gently into the disc tray with the disc’s label facing up.
3.
Press the button to close the disc tray. Playback starts automatically.
"
In TV view mode, the ∂ button will function as Timeshift rather than its original
function, playback even if there is a disc inserted.
" In Home screen, the ∂ button will function as playback of multimedia content in the
disc.
Page 52

Playing Files on a USB Device
There are two methods you can use to play or view multimedia files located on a
USB device through your product.
Method 1
1.
Turn the product on.
2.
Connect the USB device to the USB port on the front panel of the player. The
New Device Connected pop-up appears.
"
If the pop-up does not appear, go to Method 2.
3.
Use the ▲▼ buttons to select Photos, Videos, Music or All Content, and then
press the E button. The AllShare Play screen appears listing the content of
the device. Depending on how the contents is arranged, you will see either
folders, individual files, or both.
4.
If necessary, use the the ▲▼◀▶ buttons to select a folder, and then press the
E
button.
5.
Select a file to view or play, and then press the E button.
6.
Press the RETURN button to exit a folder or the EXIT button to return to the
TV view mode.
Method 2
1.
Turn the product on.
2.
Connect the USB device to the USB port on the front panel of the product.
3.
Press the MENU button to go to home screen.
4.
Select Photos, Videos & Music on the Home screen, and then press the E
button.
5.
Select the desired Photos, Videos, Music or All Content, and then press the
E
button.
Page 53

6.
Use the ▲▼◀▶ buttons to select the desired device and then press the E
button. Depending on how the contents are arranged, you will see either
folders, individual files, or both.
7.
If necessary, use the the ▲▼◀▶ buttons to select a folder, and then press the
E
button.
8.
Use the ▲▼◀▶ buttons to select a file to view or play, and then press the E
button.
9.
Press the RETURN button to exit a folder or the EXIT button to return to Home
screen.
"
If you insert a disc when playing a USB device or phone, the device mode changes to
"Disc" automatically.
Using the AllShare Network
Function
AllShare lets you play Videos, Photos, or Music located on your PC or your
AllShare compatible device through the product using a wireless or wired network
connection. Note that Recorded TV contents stored in the built-in HDD will not be
shared with other devices.
"
Only within the same network, a Samsung smartphone device installed with the
AllShare app can be connected.
" A Samsung smartphone or a PC installed with the AllShare Play app can be connected
to the Blu-ray product through a remote network.
" To connect devices through a remote network, the same Samsung Account should be
used to log in for both this Blue-ray product and the device running the AllShare Play
app.
" For further details on sharing contents with AllShare in remote access network, refer to
the “Register to AllShare Play” guide to enable the function.
Page 54

To Download the AllShare Software
AllShare Play makes it easy to retrieve and enjoy media files from computers and
DLNA-enabled devices. However, computers need to be installed with AllShare PC
and mobile devices need to support AllShare Play. For more information, visit the
AllShare website (http://www.allshareplay.com). You may experience compatibility
issues when attempting to play media files via a third-party DLNA server.
Playing Content Located on Your PC
or AllShare Device (DMS) through
this product (DMP).
1.
Connect the product, your PC, and/or your Allshare compatible device to the
same wireless or wired network.
2.
Follow the directions in the Allshare software Installation/Instruction manual
to set up devices and files for playing or viewing.
3.
Select Photos, Videos & Music on the player's Home screen, and then press
the E button. The AllShare Play screen appears.
4.
Select the type of content you want to play - Photos, Videos, Music, or All
Content - and then press the E button.
5.
In the list of Allshare connected devices that appears, select your PC or other
Allshare compatible device, and then press the E button. A screen listing the
available files appears.
6.
Select the file you want to play or view, and then press the E button.
Page 55
Page 56

Playback related buttons
The product does not play sound in Search, Slow or Step mode.
●
To return to normal speed playback, press the ∂ button.
●
∂
button : Starts playback.
●
'
button : Stops playback.
●
∑
button : Pauses playback.
●
Fast Motion Play : During playback, press the † or … button. Each time you
press the † or … button, the playback speed will change.
●
Slow Motion Play : In pause mode, press the … button. Each time you press the
…
button, the playback speed will change.
●
Step Motion Play : In pause mode, press the ∑ button. Each time you press the ∑
button, a new frame appears.
●
Skip Motion Play : During playback, press the € or ‚ button. Each time you
press € or ‚ button, the disc moves to the previous or next chapter or file.
Using the disc menu, title menu, popup menu, and title list
●
DISC MENU button : During playback, press this button to display the Disc
menu.
●
TITLE MENU button : During playback, press this button to display the Title
menu.
–
If your disc has a playlist, press the View button to go to the playlist.
●
POPUP MENU button : During playback, press this button to display the Popup
menu.
Page 57

Using the Tools Menu
During playback or in pause mode, press the TOOLS button.
●
Play from the Beginning : Select to return to the beginning of the movie, and
then press the E button.
●
Movie Note : Movie Note provides information such as director, cast, synopsis,
etc.
"
Movie Note is available if the disc includes Movie Note information and connected to a
network.
●
Search Scene : You can use the Search Scene function during playback to view
or start a movie from the scene of your choice.
"
If the index information in the file is damaged or the file does not support indexing,
you will not be able to use the Search Scene function.
" If you play the AllShare Play after connect to a computer with the network, the Search
Scene may not be supported.
●
Search Titles : If there is more than one movie on the disc or device, select to
start a different title.
1.
Select Search Titles, and then press the E button.
2.
Use the ▲▼ buttons to select a title, and then press the E button.
●
Chapter Search : Select to play the chapter of your choice.
1.
Select Chapter Search, and then press the E button.
2.
Use the ▲▼ buttons to select a chapter, and then press the E button.
Page 58

●
Search Time Bar : Select to play the movie from a selected time point.
1.
Select Search Time Bar, and then press the E button.
2.
Using the number buttons, enter the time point you want to go to, and then
press the E button.
"
You can also use the ◀▶ buttons to advance or rewind the movie. The movie advances
or rewinds one minute each tme you press the ◀▶ buttons.
●
Repeat Mode : Select to repeat a title, chapter, or specific section.
–
Off : Select to return to normal playback.
–
Title : Choose to repeat a selected title.
–
Chapter : Choose to repeat a specific chapter.
–
Repeat A-B : Choose to repeat a specific section.
1.
Press the ▲▼ buttons to select Repeat A-B, and then press the E button.
2.
Press the E button at the point where you want repeat play to start (A). Let
the movie play.
3.
Press the E button at the point where you want repeat play to stop (B).
"
You must set point (B) at least 5 seconds of playing time after point (A).
●
Full Screen : Select to set the size of the video image.
●
Audio Sync : Select to set the audio sync.
●
Rotate : Select to rotate the picture.
●
Picture Mode : Select to set the picture mode.
–
Dynamic : Increases sharpness and brightness.
–
Standard : Choose this setting for most viewing applications.
–
Movie : The best setting for watching movies.
–
User : Lets you adjust the sharpness and noise reduction function respectively.
"
When you use the BD wise function, this menu will not appear.
●
Audio : Select to set the desired audio language.
●
Subtitle : Select to set the desired subtitle language.
Page 59

●
Subtitle Settings : Select to set the desired subtitle options.
●
Angle : Select to view a scene from another angle. The Angle option displays
the number of angles available to view. When a Blu-ray Disc/DVD contains
multiple angles of a particular scene, you can change angle.
●
BONUSVIEW Video, BONUSVIEW Audio : Select to set the desired bonusview
option.
●
Information : Select to view video file information.
"
Depending on the disc or storage device, the Tools menu may differ.
" Video files with high bitrates of 20Mbps or more strain the product's capabilities and
may stop playing during playback.
Using the View & Options Menus
Using the View Menu
On a file screen containing video files, select the View and press the E button.
●
Date : Appears on the View function screen. Sort to Date.
●
Title : Appears on the View function screen. Sort to Title.
●
Folder : Appears on the View function screen. Sort to Folder.
●
Playlist : Appears on the View function screen. Sort to Playlist.
●
Title List : Appears on the View function screen. Sort to Title List.
"
Depending on the disc or storage device, the View menu may differ or not be shown.
Page 60

Using the Options Menu
On a file screen containing video files, select the Options and press the E button.
●
Play Selected : Play Selected lets you select specific file to play. It works
essentially the same for all media.
●
Send : Select Send to upload selected files to app (Picasa, Facebook etc) or
device. To use Send, you need to establish an account with the on-line site,
and then log in using the Log In function.
●
Delete : Select to delete a file from the device.
Controlling Music Playback
You can control the playback of music content located on a Disc, USB, mobile
device or PC.
Depending on the disc or contents, some of the functions described in this manual
may not be available.
Buttons on the Remote Control used
for Music Playback
●
NUMBER buttons : Press the number of a track. The selected track is played.
●
€ ‚
button : Move to the next/forward track.
●
'
button : Stops a track.
●
Fast Play (Audio CD (CD-DA) only) : During playback, press the † or … button.
Each time you press the † … button, the playback speed will change.
●
∑
button : Pauses a track.
●
∂
button : Plays the currently selected track.
Page 61

Using the View & Options Menus
Using the View Menu
On playback screen, select the View and press the E button.
●
Track : Appears on the View function screen. Sort to Track.
●
Album : Appears on the View function screen. Sort to Album.
●
Artist : Appears on the View function screen. Sort to Artist.
●
Genre : Appears on the View function screen. Sort to Genre.
●
Folder : Appears in the View function screen. Sort to Folder.
"
Depending on the disc or storage device, the View menu may differ or not be shown.
Using the Options Menu
On playback screen or a file screen containing music files, select the Options and
press the E button.
●
Play Selected : Play Selected lets you select specific tract to play. It works
essentially the same for all media. See the Repeating tracks on an Audio CD.
●
Send : Select to send the selected file to other devices.
●
Ripping : The Ripping function converts CD audio to the mp3 format and saves
the converted files on a USB device or the mobile device connected to the
product.
●
Information : Select to see the (Contents) information.
●
Encoding : Select to manage the text encoding options.
●
Delete : Select to delete the file from the device.
"
Depending on the disc or storage device, the Options menu may differ or not be
shown.
Page 62

Repeating Tracks on an Audio CD
You can set the product to repeat tracks on an audio CD (CD-DA/MP3).
1.
On the Playback screen, use the ▲▼◀▶ buttons to select in the lower left
corner of the screen, and then press the E button.
2.
Use the ▲▼ to select the repeat mode you want - Off, One Song, or All - and
then press the E button.
Shuffling Tracks on an Audio CD
You can set the product to play tracks on an audio CD (CD-DA/MP3) at random.
1.
On the Playback screen, use the ▲▼◀▶ buttons to select in the lower left
corner of the screen, and then press the E button.
2.
Use the ▲▼ to set the Shuffle mode On or Off, and then press the E button.
Page 63

Creating a Playlist from an Audio CD
1.
With the Playback screen displayed, select the Options button and then press
the E button. The Options menu appears.
2.
Use the ▲▼ buttons to select Play Selected, and then press the E button.
The Selection Play screen appears.
3.
Use the ▲▼ buttons to select a track, and then press the E button. A check
appears to the left of the track.
4.
Repeat Step 3 to select and check additional tracks.
5.
To remove a track from the list, move to the track, and then press the E
button again. The check on the track is removed.
6.
When done, press the ▲▼ button to select Play, and then press the E button.
The Music Playback screen reappears listing only the tracks you checked. The
selected tracks play automatically.
"
You can create a playlist with up to 99 tracks on Audio CDs (CD-DA).
" If you have created a playlist, Play Selected is replaced by Edit Playlist on the Options
menu.
" On the Selection Play screen, you can also choose Select All, Clear All, and Cancel.
1) Use Select All to select all tracks. This cancels your individual track selections.
When you press the RETURN button on your remote control or select Play button, and
then press the E button, all tracks will appear on the Music Playback screen, and the
product will begin to play all tracks from Track 001. 2) Use Clear All to deselect all
selected tracks at once. Then, select individual tracks or use Select All to select all the
tracks, and then press the RETURN button on your remote control. If you do not use
Select All or select individual tracks, the Playlist will not change. 3) Cancel cancels any
changes you made on the Play Select screen. When you return to the Playback screen,
the Playlist will be unchanged.
Page 64

Ripping
1.
Insert a USB device into the USB jack on the front of the product.
2.
With the Playback screen displayed, select the Options button and then press
the E button. The Options menu appears.
3.
Use the ▲▼ buttons to select Ripping, and then press the E button. The
Ripping screen appears.
4.
Use the ▲▼ buttons to select a track, and then press the E button. A check
appears to the left of the track.
5.
Repeat Step 3 to select and check additional tracks.
6.
To remove a track from the list, move to the track, and then press the E
button again. The check on the track is removed.
7.
When done, select the Rip button using the ▲▼ button, and then press the E
button. The Rip pop-up appears.
8.
Use the ▲▼ buttons to select the device to store the ripping file and then
press the E button.
"
Do not disconnect the device while rip is in progress.
9.
If you want to cancel ripping the track, press the E button and then select
Yes . Select No to continue ripping.
10.
When ripping is complete, the "Successfully ripped." message appears. Press
the E button.
11.
Press the RETURN or select the Cancel button and then press the E button to
go back to the Playback screen.
"
This function is not available with DTS Audio CD.
" This function may not be supported by some discs.
" This function will be encoded to the .mp3 format at 192kbps.
" On the Ripping screen, you can also choose Select All and Deselect All.
" Use Select All to select all tracks and press the E button. This cancels your individual
track selections.
" Use Deselect All to deselect all selected tracks at once.
Page 65

Playing Photo Contents
You can play photo contents located on a DVD, USB, mobile device or PC.
Using the Tools Menu
During playback, press the TOOLS button.
●
Previous : Select to move the previous picture.
●
Next : Select to move the next picture.
●
Start Slide Show / Stop Slide Show : Select to play/pause the slide show.
●
Slideshow Settings : Select the Slide Show settings.
–
Speed : Select to set the slide speed.
–
Effect : Select to set the slide effect.
●
Zoom : Select to enlarge the current picture. (Enlarge up to 4 times)
●
Rotate : Select to rotate the picture. (This will rotate the picture either clockwise
or counter clockwise.)
●
Background Music : Select to listen to music while viewing a slide show.
●
Settings : Select the picture mode and information.
"
Depending on the disc or storage device, the Tools menu may differ. All options may
not be displayed.
" To enable the background music function, the photo file must be in the same storage
media as the music file. However, the sound quality can be affected by the bitrate of
the MP3 file, the size of the photo, and the encoding method.
" You can't enlarge the subtitle and PG graphic in the full screen mode.
Page 66

Using the View & Options Menus
Using the View Menu
On a file screen containing photo files, select the View and press the E button.
●
Date : Appears on the View function screen. Sort to Date.
●
Title : Appears on the View function screen. Sort to Title.
●
Folder : Appears on the View function screen. Sort to Folder.
"
Depending on the disc or storage device, the View menu may differ or not be shown.
Using the Options Menu
On a file screen containing photo files, select the Options and press the E button.
●
Slide show : Lets the slide show containing the all files in the current folder
without selections.
●
Play Selected : Play Selected lets you select specific photo to see. It works
essentially the same for all media.
●
Send : Select Send to upload selected files to app (Picasa, Facebook etc) or
device. To use Send, you need to establish an account with the on-line site,
and then log in using the Log In function.
●
Delete : Select to delete the file from the device.
Page 67

Watching TV Channels
After Tuning is completed, you can watch TV channel.
Using the channel option
Using the remote control buttons
Press the below buttons while you are viewing a channel.
●
NUMBER buttons : To move TV channel directly, press the channel numbers of
desired TV channel.
●
PROG button : Press this button to change TV channels.
●
INFO button : Press this button to display detailed information of selected
channel.
●
Channel List button : Press this button to display the Channel List.
Page 68

Using the Tools Button
Press the TOOLS button while you are viewing a channel.
●
Picture Mode : Select this to set the picture mode.
–
Dynamic : Choose this setting to increase Sharpness.
–
Standard : Choose this setting for most viewing applications.
–
Movie : This is the best setting for watching movies.
–
User : Lets you adjust the sharpness and noise reduction function
respectively.
"
This menu can not be displayed when you use the BD Wise function.
●
Audio Language : Select to set the desired audio language.
●
Dual I II : Select to set the desired audio.
●
Lock Current Channel : You can lock a TV channel by setting PIN.
"
This menu can be displayed when the country set to Netherlands and brodcast signal is
cable.
●
Aerial : Select to change a signal.
●
Edit Favourites : Select to edit Favourites.
●
Signal Information : Select to check the signal information.
●
Audio Description : Select to add a verbal description to the main audio to help
the visually impaired.
●
Subtitle : Select to set the desired subtitle.
Page 69

Editing Channels
Channel List
1.
Press the CH LIST button on the remote control to see all channels searched.
The Channel List will be displayed.
2.
Press the ◀ button to sort channels. You can Change the list ordered by name
or number.
3.
Press the ▶ button to display the channel list according to channel mode. (Edit
Favourites, All, TV, Radio, Date/Other)
4.
Select desired channel, then press the E button. The selected channel will be
displayed.
Edit Channel
You can manage the stored channels.
1.
In the Home screen, select Settings, and then press the E button.
2.
Select Broadcasting, and then press the E button.
3.
Select Edit Channel, and then press the E button. The Edit Channel Screen
will be displayed.
Page 70

Using the remote control buttons
When the Edit Channel Screen is displayed, you can manage the stored channels.
●
a
: Select this to change the channel number.
●
b
: Select this to lock or unlock channels.
●
{
: Select this to deletes selected channel.
●
}
: Select this to check all channels.
●
Go to : Select this to move to a TV channel directly.
●
k
: Moves to next or previous page.
●
E
: Selects desired channel.
●
T
button : Displays the Tools menu.
Page 71

Viewing the Guide Screen
The EPG (Electronic Programme Guide) information is provided by broadcasters.
Using channel schedules provided by broadcasters, you can specify channels
you want to watch in advance so that the channel automatically changes to the
selected channel at the specified time. Channel entries may appear blank or out of
date depending on a channel status.
Using the Guide Screen option
Press the GUIDE button on the remote control.
Using the remote control buttons
When the Guide Screen is displayed, you can manage the stored channels.
●
a
: Select this to search the desired channel and time quickly.
●
b
: Select this to change category. (Show All, TV, Radio)
●
{
: Select this to reserve the desired TV programmes. (Schedule Recording,
Schedule Viewing)
Setting the Schedule Manager
You can reserve the desired TV programmes using this menu. Make sure that clock
must be set before operating this function.
1.
Select Schedule Manager on the Home screen, and then press the E button.
2.
Press the E button.
3.
Select Schedule Viewing or Schedule Recording, and then press the E
button.
4.
Fill the input items, and then press the E button.
"
In the guide view, Schedule Viewing and Schedule Recording schedules are not
displayed.
Page 72

Using the Teletext Service
If DTV programme supports teletext signal, you can use teletext service. For
Teletext information is displayed correctly, channel reception must be stable.
Otherwise, information may be missing or some pages may not be displayed.
1.
Press TTX/MIX button while you are viewing a TV channel.
2.
By pressing the TTX/MIX button repeatedly, you can change or exit the
teletext mode.
●
8
: Stores the Teletext pages.
●
4
: Displays the teletext on the upper half of the screen in double-size. To
move the text to the lower half of the screen, press it again. For normal
display, press it once again.
●
9
: Holds the display at the current page, in the case that there are several
secondary pages that follow automaticially. To undo, press it again.
●
Colour buttons (red, green, yellow, blue) : If the FASTEXT system is used by
the broadcasting company, the different topics on a Teletext page are colourcoded and can be selected by pressing the coloured buttons. Press the colour
corresponding to the topic of your choice. A new colour-coded page is
displayed. Items can be selected in the same way. To display the previous or
next page, press the corresponding coloured button.
●
1
: Displays the available sub-page.
●
2
: Displays the next Teletext page.
●
3
: Displays the previous Teletext page.
●
6
: Displays the index (contents) page at any time while you are viewing
Teletext.
●
0
: Selects the Teletext mode (LIST/ FLOF). If pressed during LIST mode,
switches the mode to List savemode. In List save mode, you can save a
Teletext page into a list using the 8(store) button.
●
5
: Displays the hidden text (answers to quiz games, for example). To display
the normal screen, press it again.
●
7
: Shrinks the Teletext display to overlap with the current broadcast.
Page 73
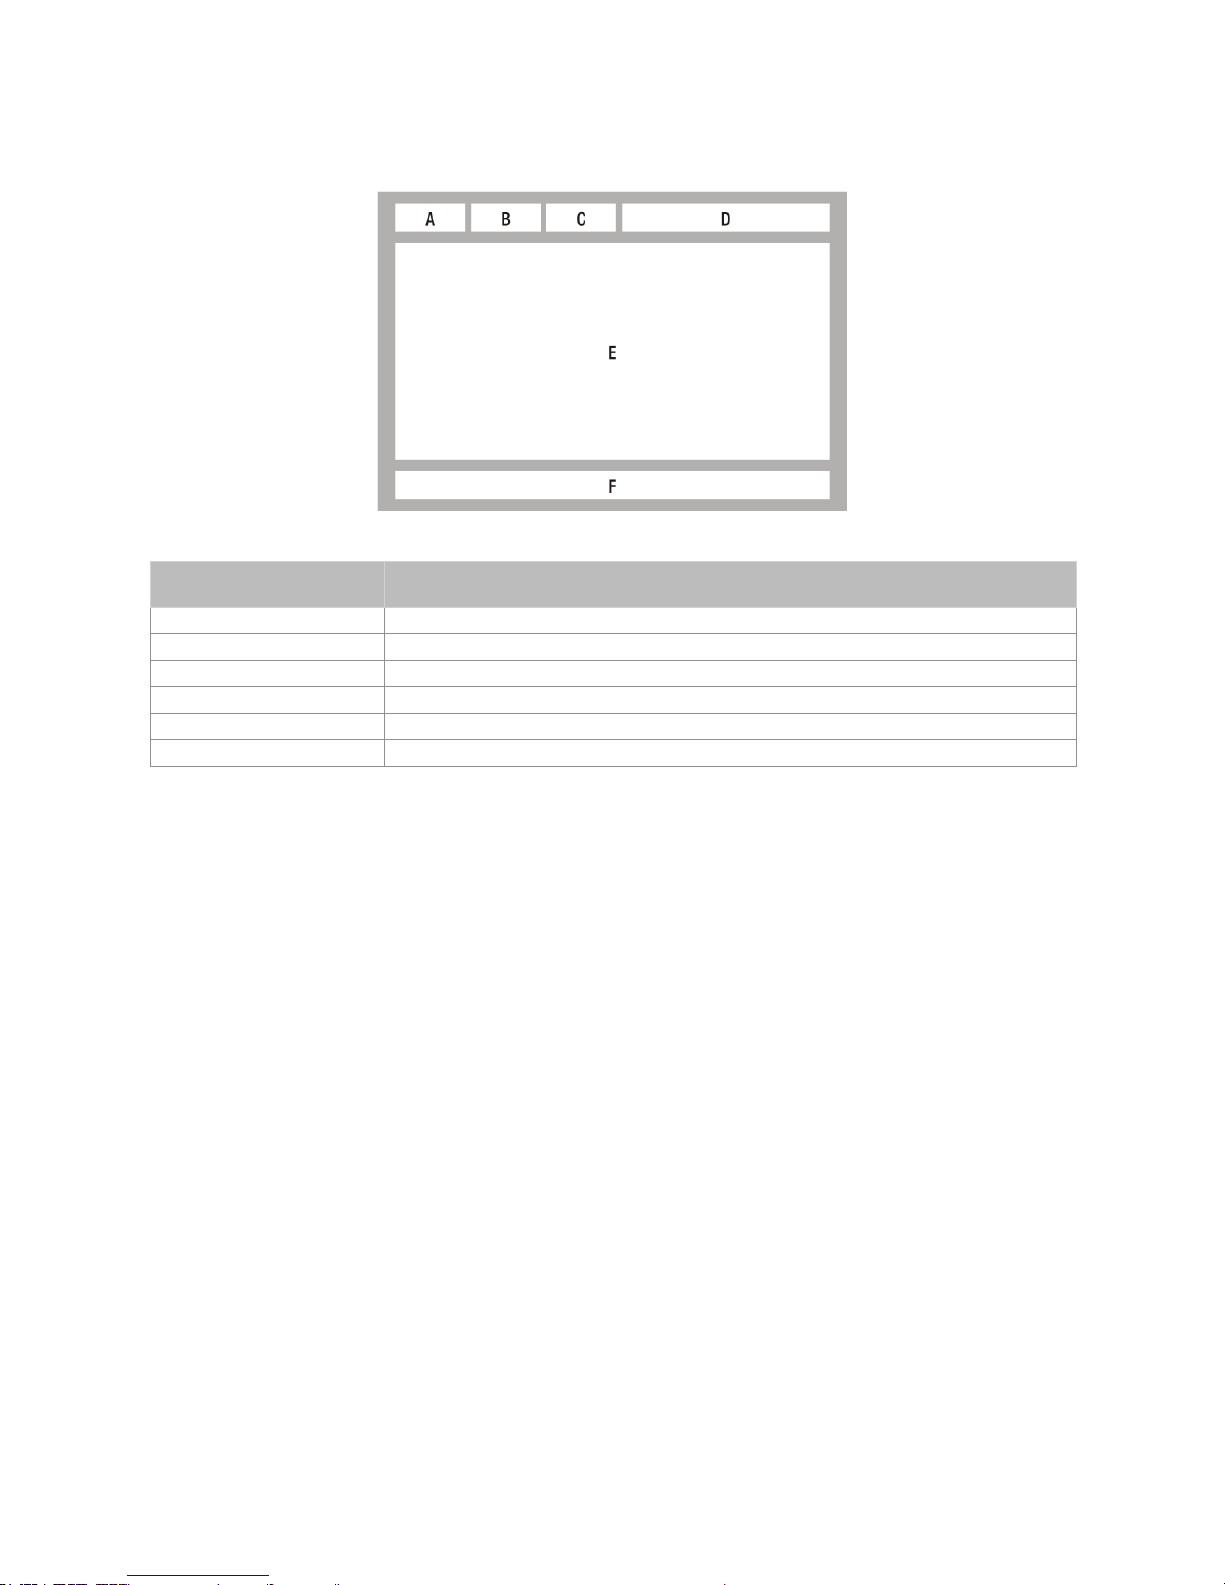
Typical Teletext page
Part Contents
A Selected page number.
B Broadcasting channel identity.
C Current page number or search indications.
D Date and time.
E Text.
F Status information. FASTEXT information.
" Teletext TTX/MIX control is available only when the DTV programme support teletext
signal.
Page 74
Page 75

Recording the current TV channel
you are watching
1.
Press the PROG or number buttons to select a TV Channel you want to record.
2.
Press the REC button.
3.
If you want to adjust length of the recording, press the E button.
4.
Select the desired length of the recording, then press the E button.
To pause recording
1.
Press the REC PAUSE button to pause a recording in progress.
2.
Press the REC button to resume recording.
To stop recording
Press the ' button to stop a recording in progress.
Playback control during recording
During recording a TV channel, you can search scene or move to the beginning
point of recording without influence on the recording through Timeshift function.
1.
† …
buttons : Search the desired scene. Each time this button is pressed,
playback speed will change.
…
1 → … 2 → … 3 → … 4 → … 5
†
1 → † 2 → † 3 → † 4 → † 5
2.
€
button : Return to the beginning point of recording.
3.
‚
button : Jump to the same scene with Live TV.
4.
l
button : Jump to - 10 sec from current position.
5.
r
button : Jump to + 10 sec from current position.
Page 76
Page 77
Page 78

Timeshift function
You can pause a live TV or start watching the TV programme from the beginning
point you started Timeshift function.
Start Timeshift with PLAY button
1.
When you are watching a TV channel, press the ∂ button.
2.
The Timeshift function starts and the Timeshift bar will appear. Live TV is
displayed on the left side of Timeshift bar.
Start Timeshift with PAUSE button
1.
When you are watching a TV channel, press the ∑ button.
2.
The image of TV programme will be paused, and then Timeshift bar will
appear. ∑ (Pause) is displayed on the left side of Timeshift bar.
Timeshift information
You can see current information about Timeshift function.
1.
Press the E button on your remote control while Timeshift function is
enabled.
2.
Timeshift bar appears as below.
"
The Timeshift settings are sustained even when you switch to another channel in
Timeshift operation. In this case, Timeshift of former channel is supported as history
function. (The Timeshift of former channel is still available)
" If Timeshift is started with Play or Pause key, the Timeshift is sustained until the Stop
button is pressed. In case when the Timeshift operation becomes not available (such
as switching to another application, an analogue channel or changing the input source),
Timeshift stops without a notification and will resume automatically as soon as the
source is switched to Digital TV. 1) The history function supports only for records of
switching within channels of Digital TV source. 2) If switched to an analogue channel,
history and Timeshift will stop functioning automatically. 3) Timeshift automatically
stops when selected another menu in the Home menu. (Stops Timeshift and history
functions that were operating.) 4) Returning to a Digital TV channel will automatically
resumes Timeshift, if not accessed any other menu item of the Home menu.
" For Timeshift function, 22 GB of the internal HDD is reserved.
Page 79

Playback control button during Timeshift
function is enabled
1.
† …
buttons : Search the desired scene. Each time this button is pressed,
playback speed will change.
…
1 → … 2 → … 3 → … 4 → … 5
†
1 → † 2 → † 3 → † 4 → † 5
2.
€
button : Return to the beginning of Timeshift.
3.
‚
button : Shows same scene with Live TV.
4.
l
button : Jump to - 10 sec from current position.
5.
r
button : Jump to + 10 sec from current position.
6.
∑
button : Pause the scene while keeping Timeshift operation.
7.
'
button : If you are watching the past scene, playback point will jump to the
same scene with Live TV. If you are watching the same scene with Live TV, the
Timeshift function will be stopped.
To stop Timeshift
1.
If Timeshift bar is not in pause or past mode, press ' button. The message
"Do you want to stop Timeshift?" will appear.
2.
Select OK button and press E button to stop Timeshift.
3.
If the Timeshift bar is in pause or past mode, Timeshift mode will be changed
into Live TV when you press ' button first time.
4.
Press ' button again, then same message with above image appears.
5.
Select Yes, and then press the E button.
Page 80

Playing the Recorded Title
1.
Select Photos, Videos & Music on the Home screen, then press the E button.
2.
Select the Recorded TV, then press the E button. The Recorded TV List will
be displayed.
3.
Select the desired device, then press the E button.
4.
Select the title you want to play, then press the E button. The selected title
will be played back.
Using the View, Filter and Options
Menus
Using the View Menu
On playback screen, select the View and press the E button.
●
Title : Appears on the View function screen. Sort to Title.
●
Date : Appears on the View function screen. Sort to Date.
●
Channel : Appears on the View function screen. Sort to Channel.
"
Depending on the disc or storage device, the View menu may differ or not be shown.
Using the Filter Menu
On playback screen, select the Filter and press the E button.
●
All : Appears all the recorded TV list.
●
Unwatched : Appears unwatched TV list.
Page 81

Using the Options Menu
On playback screen or a file screen containing Recorded TV files, select the
Options and press the E button.
●
Play Selected : Play Selected lets you select specific tract to play. It works
essentially the same for all media. See the Repeating tracks on an Audio CD.
●
Lock : You can lock the list.
●
Unlock : You can unlock the list.
●
Delete : You can delete the file from the list.
●
Partial Delete : You can delete a title partially.
●
Split : You can split a title.
●
Rename : You can rename a title.
●
Manage Devices : Select this menu to manage device.
"
Depending on the disc or storage device, the Options menu may differ or not be
shown.
Page 82

Editing the Recorded Title
Splitting a Section of a Title (Divide
into two)
1.
In the Recorded TV screen, select the Options, then press the E button.
2.
Select the Split, then press the E button.
3.
Select the title you want to edit.
4.
Using the playback-related buttons, move to a point for splitting and then
press the E button.
5.
Press the E button to select Split.
6.
Press the E button. The split title is divided into two, and the following titles
will be shifted down by one.
Splitting a Section of a Title (Partial
Delete)
1.
In the Recorded TV screen, select the Options, then press the E button.
2.
Select the Partial Delete, then press the E button.
3.
Select the title you want to edit.
4.
Press the E button at the starting point. The image and starting point time is
displayed in the section deletion starting point window.
●
Select the start and end points of the section you want to delete using the
playback related buttons.
5.
Press the E button at the end point. The image and end point time is
displayed in the Section deletion ending point window.
6.
Press the E button to select Delete.
7.
Press the E button.
"
The minimum length of delete section should be longer than 5 seconds.
Page 83
Copy
Copying Videos, Music or Photos
●
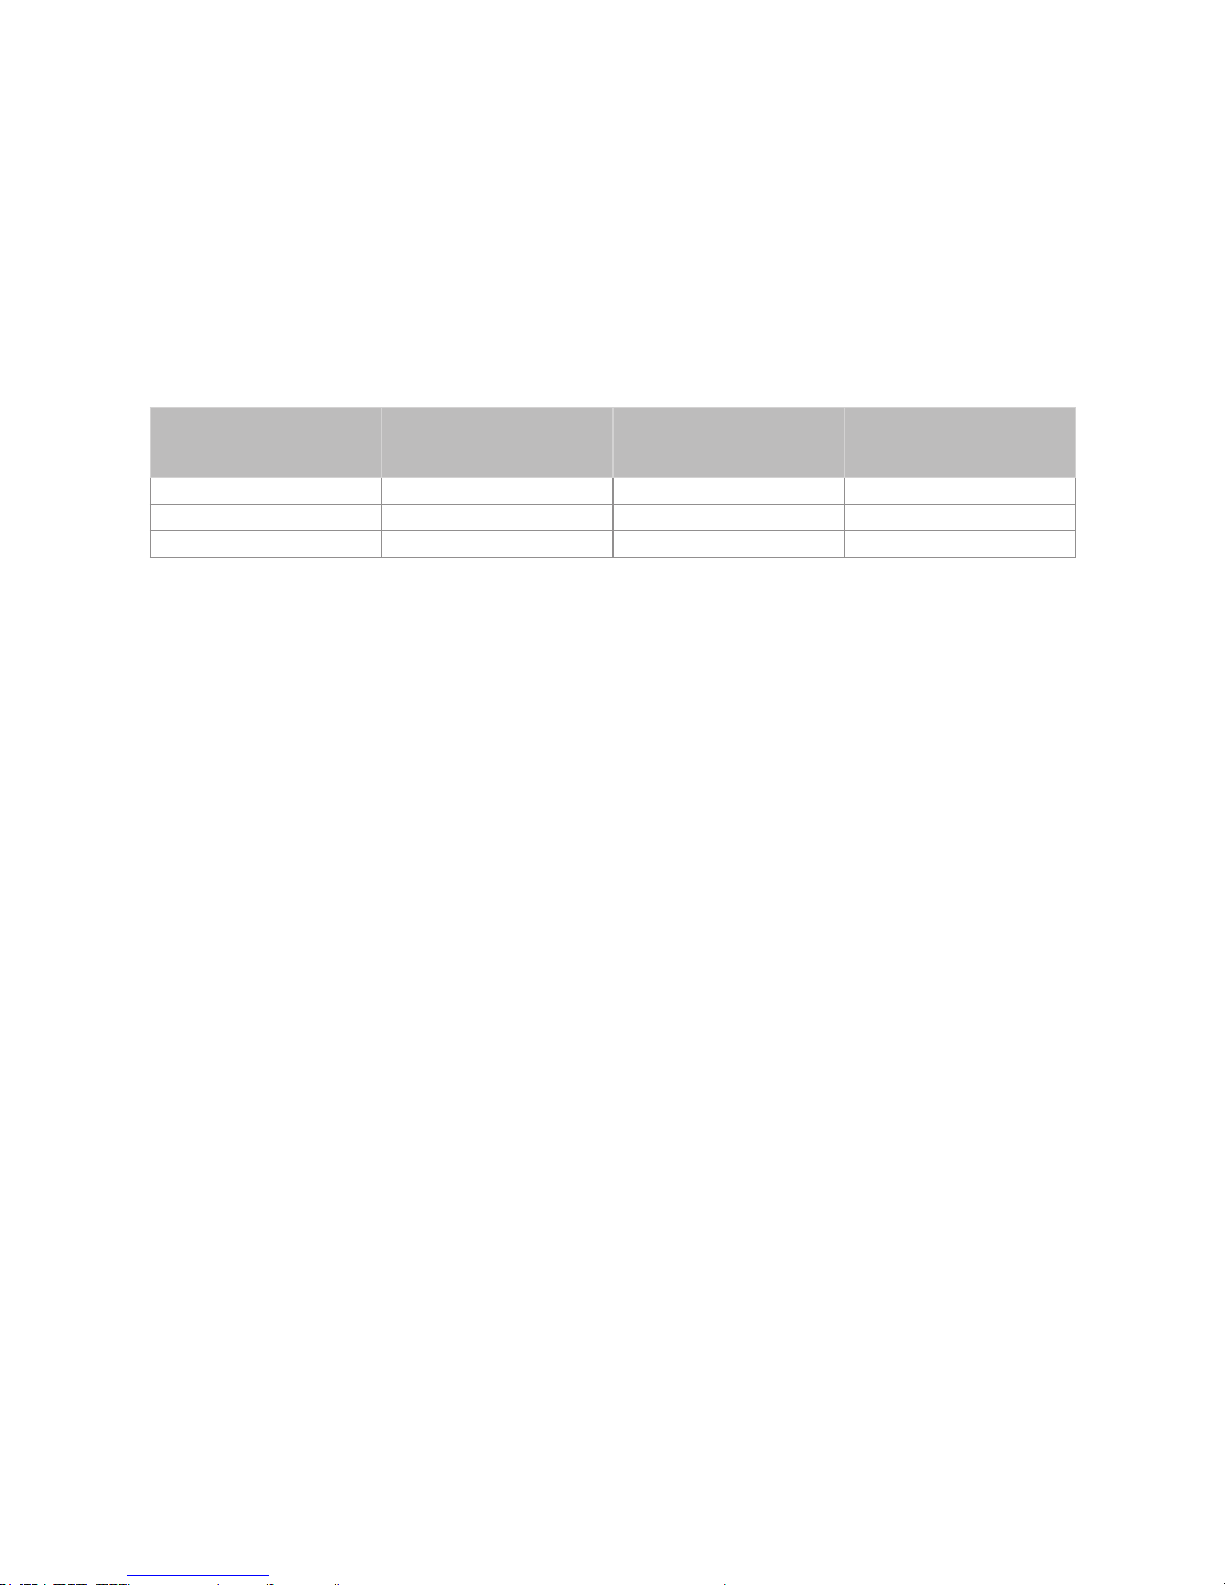
Only models of F8 series support copying files from the HDD to another storage
device and vice versa.
Contents
HDD/DISC/AllShare
→ USB
DISC/USB/AllShare
→ HDD
HDD/DISC/USB →
AllShare
Music Supported Supported Supported
Photos Supported Supported Supported
Videos Supported Supported Supported
●
Disc (CD-DA/CD-R/CD-RW, DVD±R(Finalise)/ DVD+RW/DVD-RW(Finalise)) →
HDD or USB
●
PTP USB is not available when you copy to USB.
●
The broadcast signal can be recorded on external or internal HDD but copy
feature is not supported.
1.
Press the HOME button. The home screen will be displayed.
2.
In Stop mode, connect the USB storage device to the USB port on the front
panel of the product.
3.
Select the desired contents type, then press the E button.
4.
Select the desired contents.
5.
Select the Options, then press the E button.
6.
Select the Send, then press the E button. To cancel the copying in progress,
press the E button.
Page 84

3D Functions
Viewing DTV with the 3D effect
You can experience 3D effect with live TV and recorded TV programme with 3D
contents.
1.
During watching the TV programme or playing recorded TV programme, press
the 3D button on your remote control. The 3D menu will appear.
●
Side by Side : Displays two images next to each other.
●
Top and Bottom : Displays one image above another.
2.
Press the ◀▶ buttons to select the desired 3D mode, then press the E
button.
3.
If you press the 3D button once more during 3D viewing, displayed image will
be changed into 2D mode.
"
If you change TV channel during watching DTV in 3D mode of Side by Side mode,
displayed image will be changed into 2D mode automatically.
" When 3D effect of Side by Side mode is enabled, you can not adjust 3D mode.
" If TV programme is not support Side by Side, Top and Bottom mode or Auto Detection
function, 3D menu selection OSD is not appear.
Page 85

Logging In to Your Samsung
Account
Before you access Movies & TV Shows or Apps, we suggest you log in to your
Samsung account.
To log in to your Samsung account, follow these steps:
1.
With the Home screen displayed, press the a button. The Log In screen
appears.
2.
Select the Email field, and then press the E button. The keyboard pop-up
appears.
3.
Using the keyboard, enter your e-mail address. When finished, select the Done
button, and then press the E button. The Log In screen re-appears.
4.
Select the Password field, and then press the E button. The keyboard pop-up
appears.
5.
Using the keyboard, enter your password. When finished, select the Done
button, and then press the E button. The Log In screen re-appears.
6.
To make the log in process easier next time, select Sign me in automatically,
and then press the E button.
7.
Select Log In, and then press the E button. The player logs you in to your
account. Your account e-mail is displayed on the bottom left of the screen.
"
If you selected Sign me in automatically, the next time you log in, the player will
automatically enter your e-mail and password. All you need to do is select Log In.
" If your e-mail address and password are not displayed when the Log In screen
appears, select the button with the down pointing arrow head next to the Email field,
and then press the E button. A drop down list of all your registered accounts will
appear. Select your account, and then press the E button. The player will fill in the
e-mail and password fields.
" If you press the a button after you have logged in, the My Account pop-up appears.
On the pop-up, you can select Logout, Change Account Information, Link Service
Accounts, Remove Accounts from the Device, and Deactivate Account.
" To rent Films and purchase for-pay apps, you must have a credit card registered in
your account. If you haven’t registered a card, select Change Account Information. On
the Change Account information page, select Register Card, press the E button, and
then follow the directions on the screen.
Page 86

Before Using Movies & TV
Shows or Apps
If you haven’t set up Smart Hub, when you use Movies & TV Shows or Apps for
the first time, the player will ask you to perform the Smart Hub set up procedure.
1.
On the Home screen, select either Movies & TV Shows or Apps, and then
press the E button. If you have selected Apps, go to Step 4.
2.
If you selected Movies & TV Shows, the Smart Hub pop-up appears asking if
you want to set up Smart Hub. Select Yes , and then press the E button. The
Welcome screen appears.
3.
Select Start, and then press the E button. The Smart Hub Terms &
Conditions, Privacy Policy screen appears.
4.
On the Smart Hub Terms & Conditions, Privacy Policy screen, you must review
and agree to both the Smart Hub Terms and Conditions and the Privacy Policy
to use Smart Hub.
5.
Scroll down, and then click the View Details buttons to review the full
documents.
6.
When done reading, scroll up to the first entry field, and press the E button
to agree to the Terms and Conditions and consent to the Privacy Policy.
7.
Press the ▶ button to go to the Supplemental Privacy Notices screen.
8.
Click the View Details button to view the entire notice.
9.
When done reading, scroll up to the top entry field, and then press the E
button.
"
You do not need to consent to the Supplemental Privacy Notice, but one or more Smart
TV features or functionalities may not be available if you do not.
10.
Press the ▶ button twice. The Setup Complete screen appears. Press the E
button.
Page 87
Using Movies & TV Shows
You can download or stream for pay and free-of-charge Films and TV shows and
view them on your TV.
1.
On the Home screen, select Movies & TV Shows, and then press the E
button.
2.
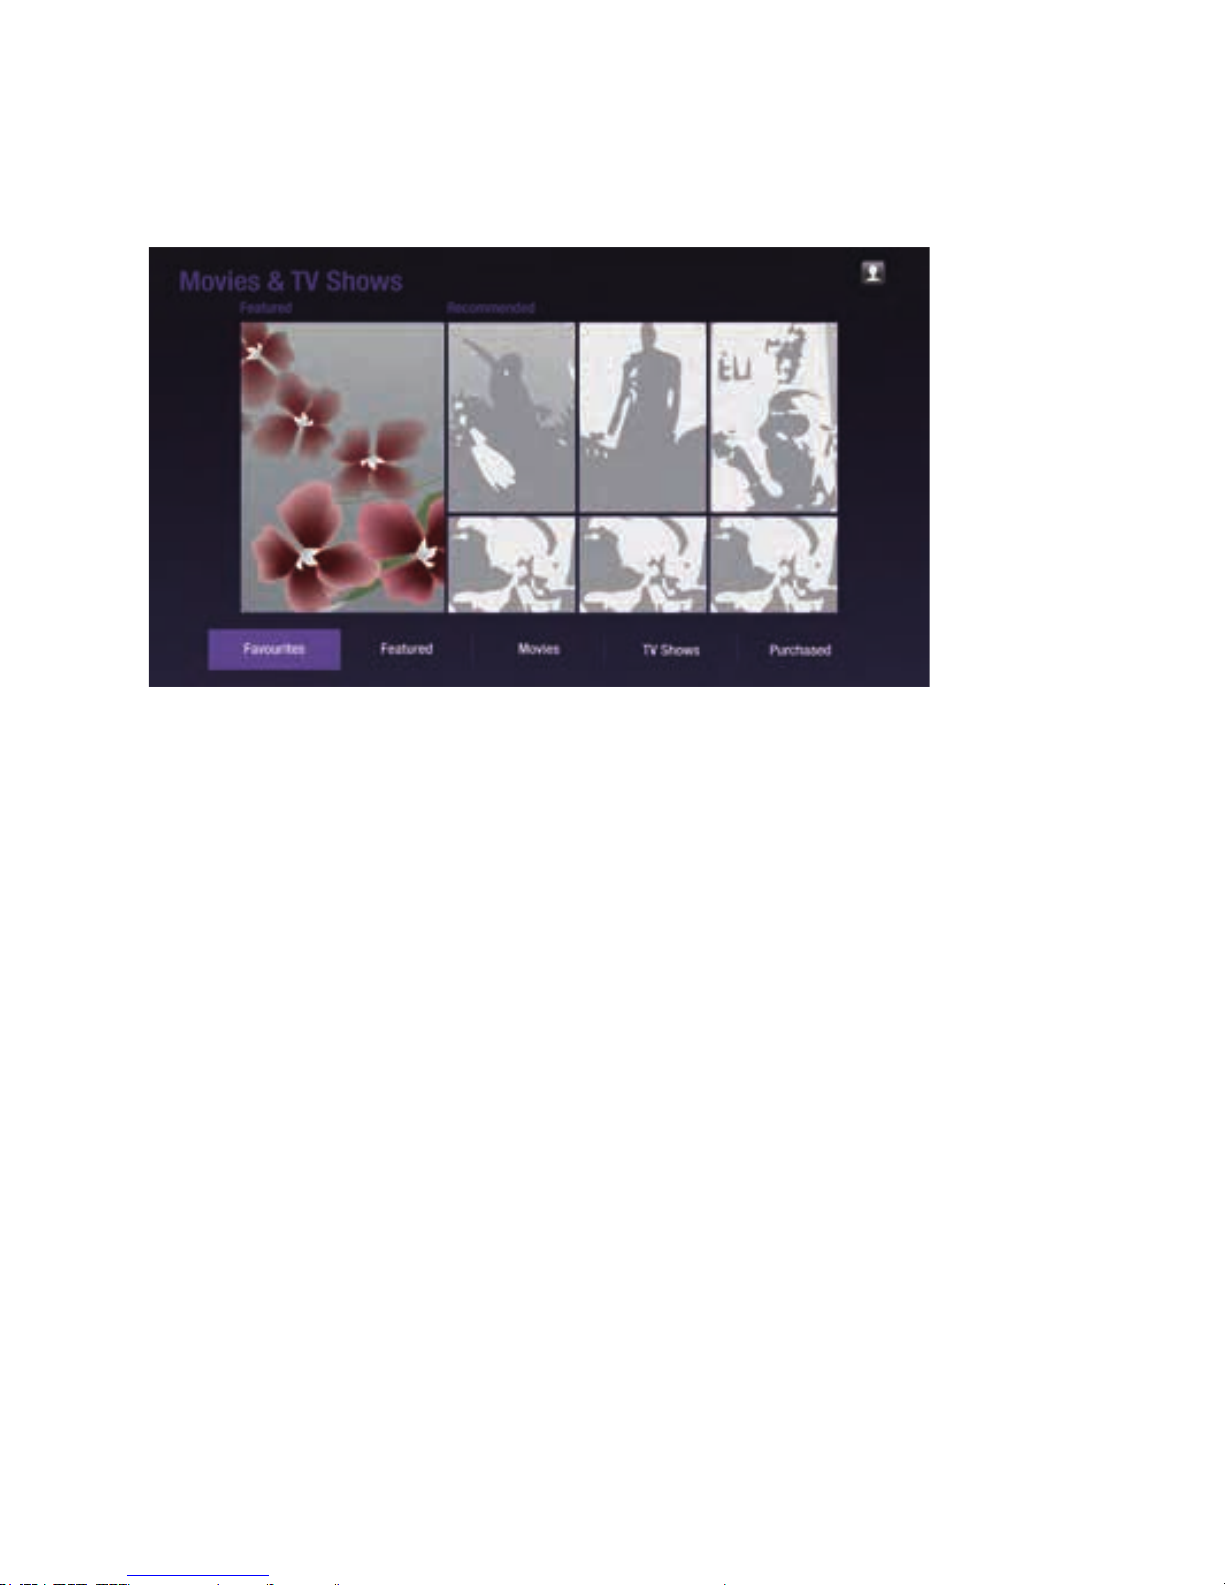
Select one of the Featured or Recommended Films, and then press the E
button. The page for that movie appears. Use the ▼ button to go to the
bottom of the screen. Select Favourites, Featured, Movies, TV Shows or
Purchased, and then press the E button. On the page that appears, use the
▲▼◀▶ buttons to select a show or movie, and then press the E button.
On the Movies and TV Show screen, you can also select What’s New, Most
Popular, or Genres to see more available shows or Films. On the Genre screen,
use the ▲▼◀▶ buttons to select a Genre, and then press the E button. To
make a selection on a page displaying Movies and TV Show, use the ▲▼◀▶
buttons to make a selection, and then press the E button.
Page 88
3.
To watch a selection, select Watch now, and then press the E button. A
selection screen appears listing various locations from which you can rent the
film along with prices.
4.
Select a location, and then press the E button. Follow the directions on the
screen to start the movie.
"
If you haven't logged into your Samsung account, the Log In screen will appear after
Step 3 and you will need to log in.
" If you don't have a credit card associated with your Samsung account, after you log
in, the Register Card screen will appear. Follow the directions on the screen. You must
have a credit card registered to your account to rent Films and to purchase for-pay
apps.
Using Apps
You can download applications from the Internet, and access various for pay or
free-of-charge application and view them on your TV. To access some applications,
you need to have a Samsung account.
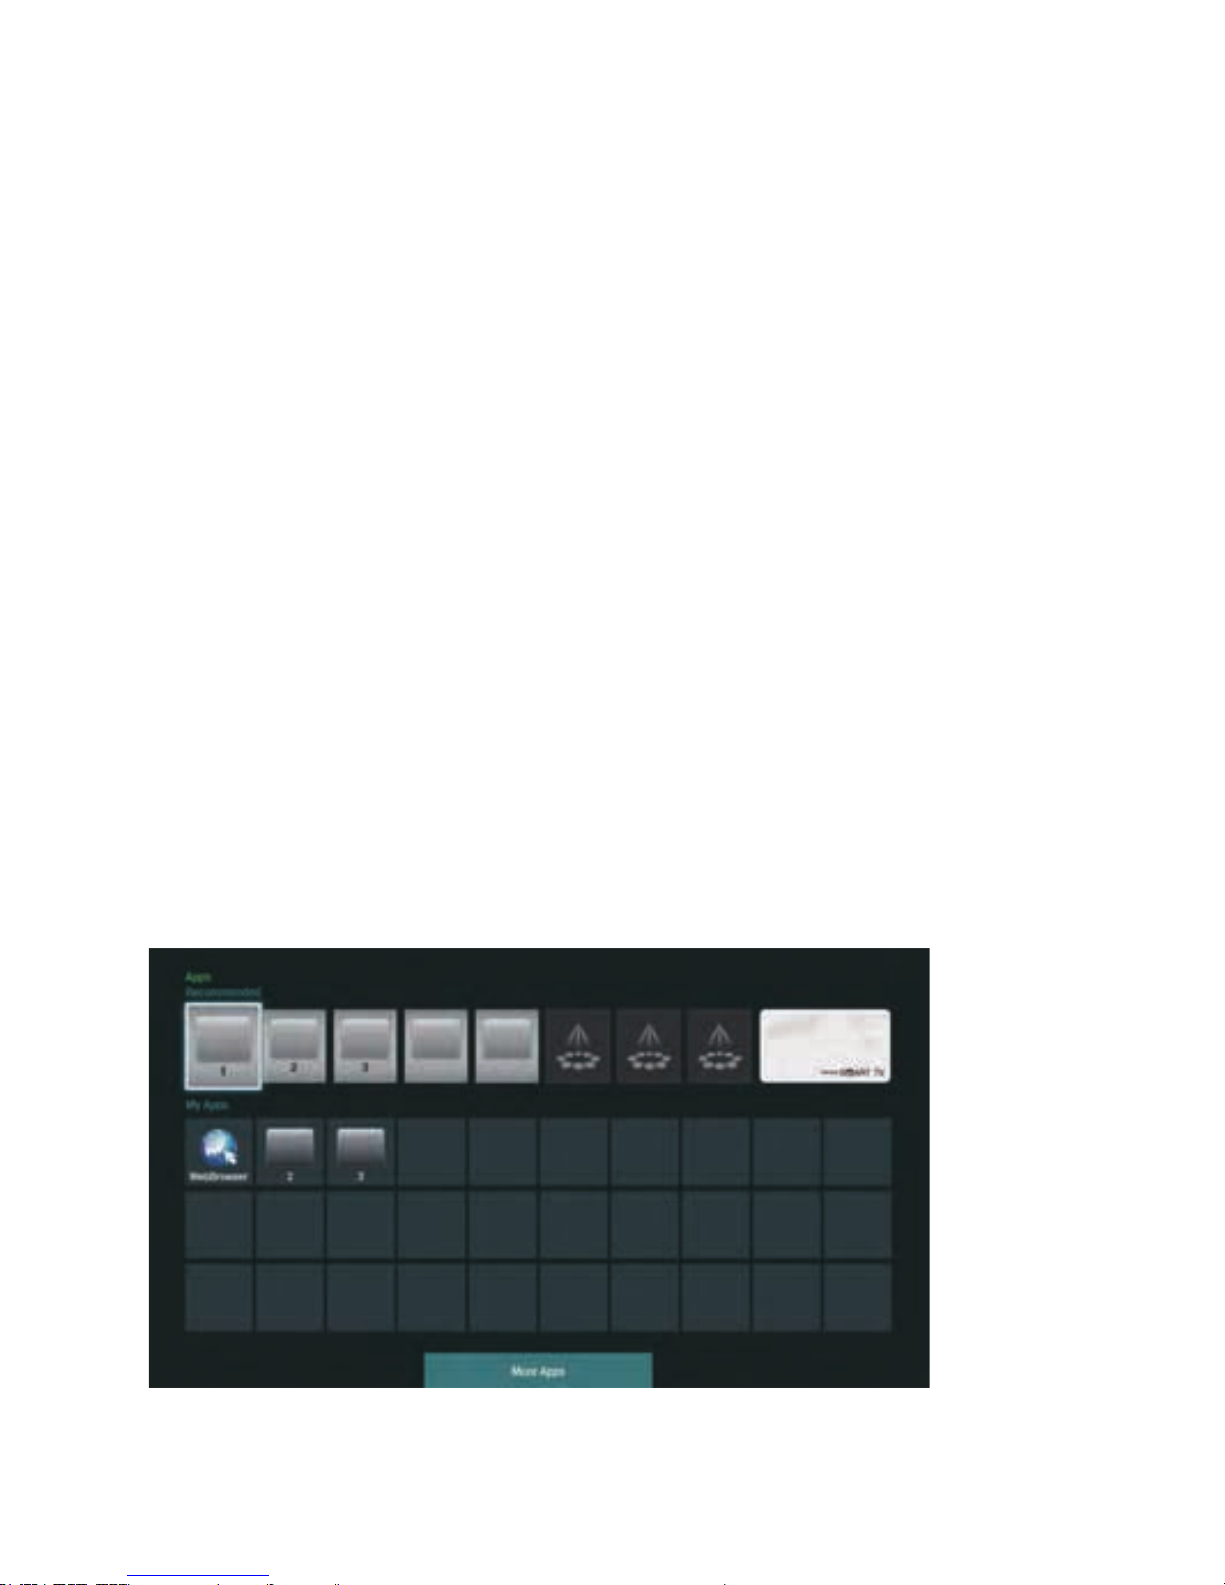
The Apps Screen at a Glance
Page 89

●
Recommended : Displays recommended contents managed by Samsung.
●
My Apps : Displays your personal gallery of applications modifiable on the
More Apps screen.
●
More Apps : Select to access the More Apps screen where you can add,modify,
and delete applications and see all downloaded applications.
●
Featured Applications : Use the ▲▼◀▶ buttons to highlight the displayed
Feature Application, and then press the E button. Information about the
featured application appears.
Downloading Applications
You can download for pay or free-of-charge applications through Samsung Apps.
1.
On the Apps screen, select Samsung Apps, and then press the E button. The
Samsung Apps screen appears.
2.
Across the top of the screen, under What’s New, you'll see a series of new
apps. Use the ◀▶ buttons to scroll the list right or left, and then select an
app. Press the E button to see more information about the app. If the app
is free, select Download, and then press the E button to download the app.
If it is a for pay app, select Buy, press the E button, and then follow the
instructions on the screen.
"
To buy an app, you must be logged into your Samsung account and have a credit card
registered to the account. Press the a button on your remote to log in.
" If you haven’t registered a card, after you log in, press the a button again, and then
select Change Account Information in the pop-up that appears. On the Change
Account information page, select Register Card, press the E button, and then follow
the directions on the screen.
" You can also access and download apps from the categories listed on the left of the
screen. For instructions, see Step 4.
Page 90

3.
After the app has downloaded, select Run, and then press the E button to run
the app now. To run the app later, press the RETURN button. In either case, the
icon for the app will appear on the Apps screen.
4.
To see additional apps, use the ▲▼◀▶ buttons to move to the category list
on the left side of the screen.
5.
Use the ▲▼ buttons to select a category. Each time you move the highlight to
another category, a different set of applications appears on the right.
6.
Use the ▶ button to move to the applications and the ▲▼◀▶ buttons to
move from app to app.
7.
To see more information about an app, select it, and then press the E button.
8.
To download the app, follow the directions in Steps 2 and 3.
Starting an Application
1.
Select Apps on the Home screen, and then press the E button.
2.
On the Apps screen, use the ▲▼◀▶ buttons to select an app, and then press
the E button. The app starts.
Page 91
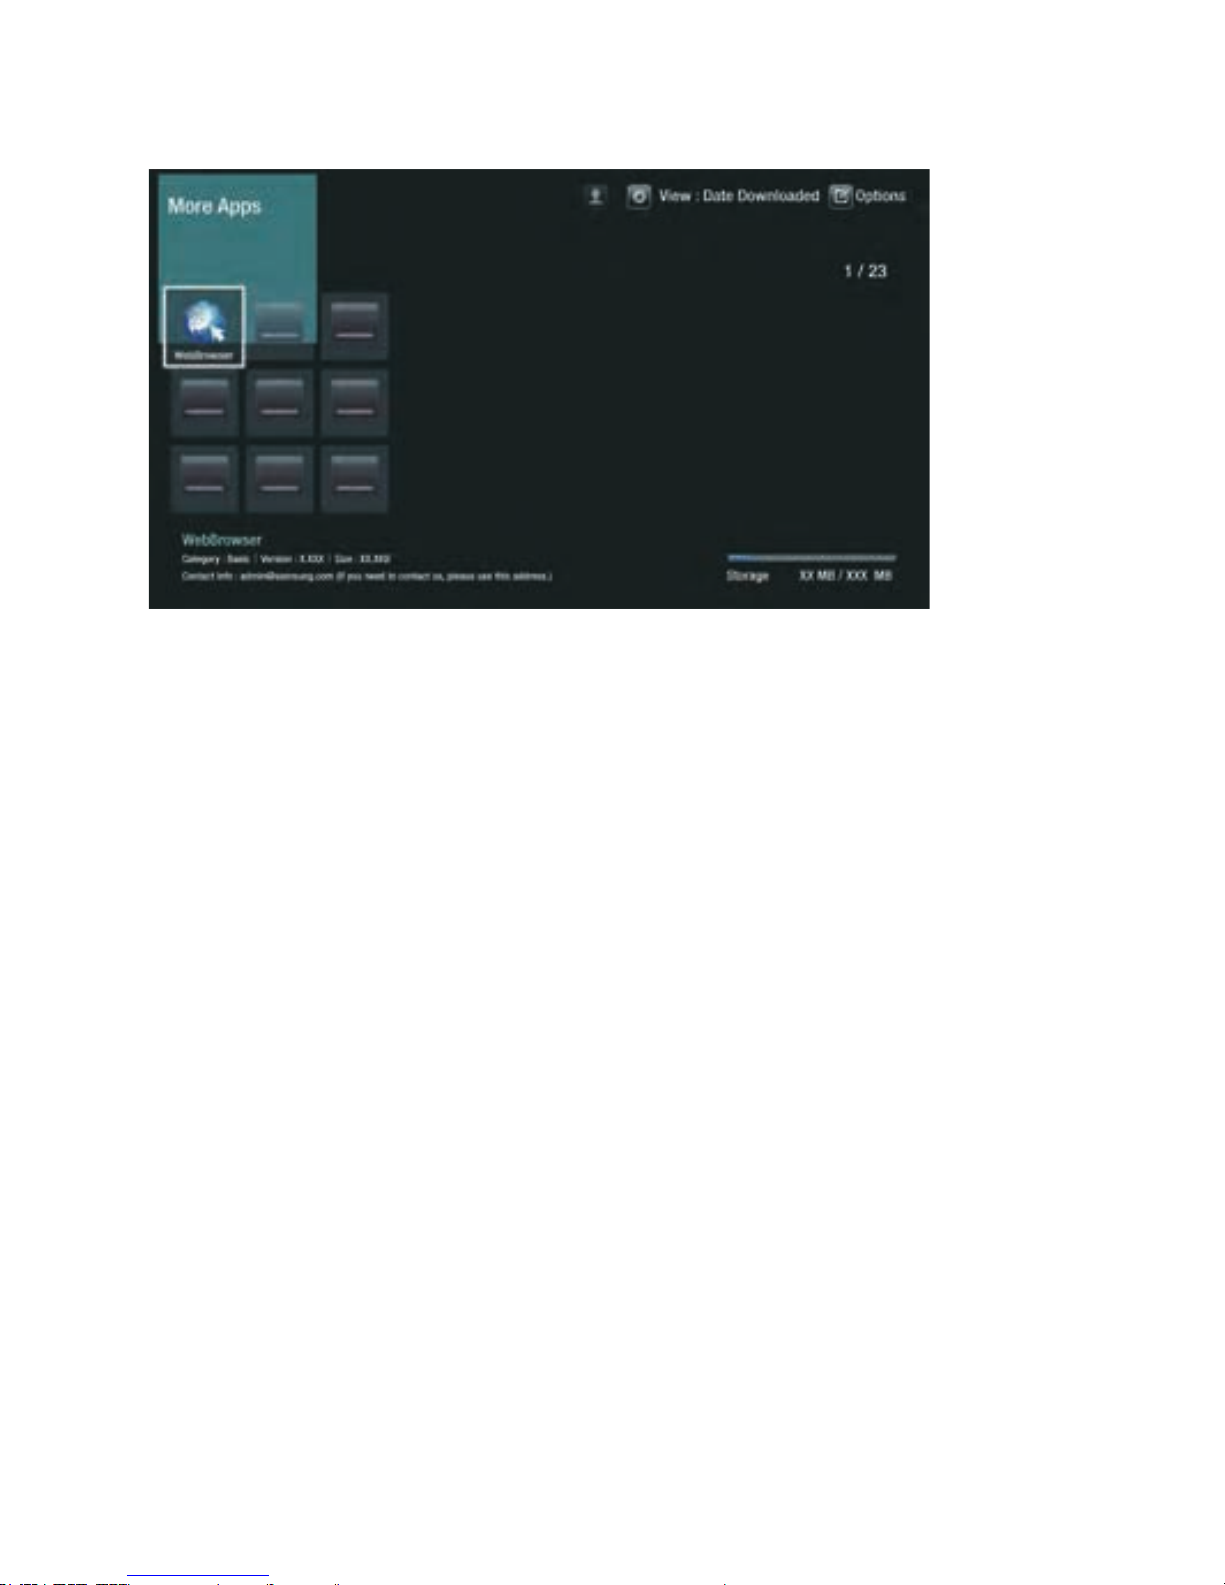
Using the More Apps Screen
The More Apps Screen lists all the apps you have downloaded and lets you:
●
Sort the apps on the More Apps screen by Date downloaded, Recently opened,
and Title.
●
Apply a number of Options Menu functions to the apps listed in the My Apps
section of the Apps screen including updating apps, moving apps into a folder,
deleting the apps from My Apps, and locking the apps.
●
Start apps.
Sorting the Apps
To sort the apps on the More Apps screen, follow these steps:
1.
On the Home screen, select Apps, and then press the E button.
2.
On the Apps screen, use the ▼ button to move to the More Apps hotspot at
the bottom of the page, and then press the E button.
3.
On the More Apps screen, use the ▲▶ buttons to move to View at the top of
the screen, and then press the E button.
4.
In the drop down that appears, select Date Downloaded, Recently Opened,
or Title, and then press the E button. The apps on the More Apps screen are
sorted by the criteria you have chosen.
Page 92

Using the Options Menu
Lock/Unlock
Using the Lock/Unlock function and the Security PIN, you can lock applications so
they cannot be started on either the Apps screen or the More Apps screen. The
default PIN is 0000.
1.
On the More Apps screen, use the ▲▶ buttons to go to Options at the top of
the screen, and then press the E button.
2.
Select Lock/Unlock, and then press the E button.
3.
When the Lock Service appears, enter the PIN using the number buttons on
your remote control.
4.
To lock an application, select the application, and then press the E button. A
lock appears on the app. Repeat to lock other, individual apps.
5.
To unlock a locked app, select the application, and then press the E button.
6.
To lock all the apps at once, use the ▲▶ buttons to select the Lock All button,
and then press the E button.
7.
To unlock all the locked apps at once, use the ▲▶ buttons to select the
Unlock All button and then press the E button.
8.
Press the RETURN button twice to return to the Apps screen. Locked apps will
display a lock on the upper right side.
Page 93

Edit My Apps
Edit My Apps lets you add apps to and delete apps from My Apps. It also lets you
change the position of an app in My Apps.
Add an App to My Apps
1.
On the More Apps screen, use the ▲▶ buttons to go to Options at the top of
the screen, and then press the E button.
2.
Select Edit My Apps, and then press the E button. The Edit My Apps screen
appears.
3.
Select a full colour app from the top row of apps, and then press the E
button. The full colour app icon appears in the My Apps area below and the
app icon in the top row is grayed out.
"
Grayed out apps are already in My Apps.
4.
When you return to the Apps screen, the app will appear in the My Apps area.
Delete an App from My Apps
1.
On the More Apps screen, use the ▲▶ buttons to go to Options at the top of
the screen, and then press the E button.
2.
Select Edit My Apps, and then press the E button. The Edit My Apps screen
appears.
3.
Select the app you want to delete from My Apps, press the E button, and
then press the ▲▼◀▶ button in the direction of the X. The Remove from My
Apps pop-up appears.
4.
Select Yes, and then press the E button.
5.
When you return to the Apps screen, the app will have been removed from the
My Apps area.
Page 94

Move an App in My Apps
1.
On the More Apps screen, use the ▲▶ buttons to go to Options at the top of
the screen, and then press the E button.
2.
Select Edit My Apps, and then press the E button. The Edit My Apps screen
appears.
3.
Select the app you want to move in My Apps, press the E button, and then
press the ▲▼◀▶ button to move the app icon in the direction of one of the
arrows (<, >, ^, etc.) that appears around the app icon. The app icon moves in
the direction you have chosen.
4.
After you have placed the app icon where you want, press the E button.
5.
When you return to the Apps screen, the app will be positioned in the location
you had selected.
Create Folder
Create Folder lets you create a folder on the More Apps screen into which you can
put apps.
1.
On the More Apps screen, use the ▲▶ buttons to go to Options at the top of
the screen, and then press the E button.
2.
Select Create Folder, and then press the E button. The Set Folder Name popup appears.
3.
Press the E button. The keyboard appears.
4.
Select the Clear button on the right side, and then press the E button to
remove Folder 1 from the entry field. Then, using the keyboard, enter the name
you want to apply to the folder.
5.
When finished, select the Done button on the right side, and then press the E
button. The pop-up reappears.
6.
Select OK, and then press the E button. The new folder appears in the list of
apps on the left side of the screen.
Page 95

Move to Folder
Move to Folder lets you move apps to the folder of your choice.
1.
On the More Apps screen, use the ▲▶ buttons to go to Options at the top of
the screen, and then press the E button.
2.
Select Move to Folder, and then press the E button. The Move to Folder
screen appears.
3.
Use the ▲▼◀▶ buttons to move to an app, and then press the E button to
select the app. A check appears in the upper left corner of the app.
4.
To deselect an app, press the E button. The check disappears.
5.
Repeat Step 3 to select additional apps.
"
To select all the downloaded apps, select Select All at the top right of the screen, and
then press the E button. To deselect all the apps, select Deselect All at the top right
of the screen, and then press the E button.
6.
When done, select Select folder at the top of the screen, and then press the
E
button. The Select folder pop-up appears.
7.
In the Select folder pop-up, use the ▲▼ buttons to select the folder you want
to move the apps you selected to and then press the E button.
8.
The Apps Moved pop up appears. Press the E button.
9.
To open a folder, use the ▲▼◀▶ buttons to highlight the folder, and then
press the E button.
Rename Folder
Rename Folder lets you rename an existing folder.
1.
On the More Apps screen, use the ▲▶ buttons to go to Options at the top of
the screen, and then press the E button.
2.
Select Rename Folder, and then press the E button. The Rename Folder
screen appears, and a folder is highlighted.
3.
User the ▲▼◀▶ buttons to highlight a folder of your choice, and then press
the E button. The Rename pop-up appears.
4.
Press the E button. The keyboard appears.
Page 96

5.
Enter the new name for the folder. When finished, select Done on the right
side, and then press the E button. The Rename pop-up reappears displaying
the new name.
6.
Select OK, and then press the E button. The folder is renamed.
7.
Select Close on the right side of the screen, and then press the E button.
Delete
Delete lets you delete apps and folders from the My Apps screen. If there are apps
in a folder, both the folder and the apps are deleted together. Delete removes apps
permanently. If you decide you want to use an app you deleted, you will need to
download it again.
1.
On the More Apps screen, use the ▲▶ buttons to go to Options at the top of
the screen, and then press the E button.
2.
Select Delete, and then press the E button. The Delete screen appears.
3.
Use the ▲▼◀▶ buttons to move to an app, or folder and then press the E
button to select. A check appears in the upper left corner of the app or folder
you selected.
4.
To deselect an app, press the E button. The check disappears.
5.
Repeat Step 3 to select additional apps or folders.
"
To select all the downloaded apps, select Select All at the top right of the screen, and
then press the E button. To deselect all the apps, select Deselect All at the top right
of the screen, and then press the E button.
6.
After you have made all your selections, select Delete at the top of the screen,
and then press the E button. The Delete pop-up appears.
7.
Select Yes, and then press the E button. All the apps you selected are
deleted.
"
You cannot immediately delete a locked app or folder. If you select a locked app or
folder to delete, when you perform Step 7, the Lock Service pop-up appears. Enter the
Security PIN into the pop-up, and then press the E button. The lock will be released
and the app or folder will be deleted.
Page 97
Page 98

5.
The TV displays a connecting message (for example, Connecting to
Android_92gb...) and then displays the connected message.
6.
In a few moments, the screen of your device appears on the TV screen.
7.
To stop Screen Mirroring, press the EXIT or RETURN button on the remote
control, or disable Screen Mirroring function of your smart phone.
"
You can connect to a device that supports AllShare Cast. Note that connecting to
such a device may not be fully supported depending on the manufacturer. For further
information on mobile connection support, refer to the manufacturer’s web site.
" When you are using the Screen Mirroring function, video stuttering or audio dropouts
may occur, depending on your environment.
" Bluetooth transmissions can interfere with the Screen Mirroring signal. Before using
the Screen Mirroring function, we strongly recommend that you turn off the Bluetooth
function on your smart phone or smart device (tablet, etc.).
" Screen Mirroring is only available with mobile devices that support AllShare Cast
or Wireless Mirroring. For more information, visit the mobile device manufacturer's
website.
Using the Web Browser
You can access the Internet using the Web Browser application.
Select Web Browser on the Home screen, and then press the E button.
"
When you run the Web Browser with the player connected by HDMI to a BD Wise
compatible TV - and BD Wise is on - the browser is maximized to fill the screen and
the TV's resolution is set to the optimal resolution automatically.
" The Web Browser is not compatible with Java applications.
" If you attempt to download a file, and the file cannot be saved, an error message will
appear.
" E-commerce (purchasing products online) is not supported.
" ActiveX is not supported.
" Access may be blocked to some websites or to web browsers operated by certain
businesses.
Page 99

Link Browsing and Pointer Browsing
The Web Browser provides two types of browsing, Pointer Browsing and Link
Browsing. When you launch the browser for the first time, Pointer Browsing is
active. If you are using a mouse to navigate in the Web Browser, we recommend
leaving Pointer Browsing active. If you are using your remote to navigate in
the Web Browser, we recommend that you replace Pointer Browsing with Link
Browsing. Link Browsing moves a highlight from one link to the next in the Web
Browser and is much faster than Pointer Browsing if you are using your remote.
To activate Link Browsing, follow these steps:
1.
Use the ▲▼◀▶ buttons on your remote to move the pointer to the Link
Browser icon on the top right of the screen. The Link Browser icon is the third
icon from the right. The pointer will be in the correct position if the icon turns
blue and the words “Link Browsing” appear on the screen.
2.
Press the E button. Link Browsing is activated and will remain active
whenever you bring up the Web Browser.
Page 100
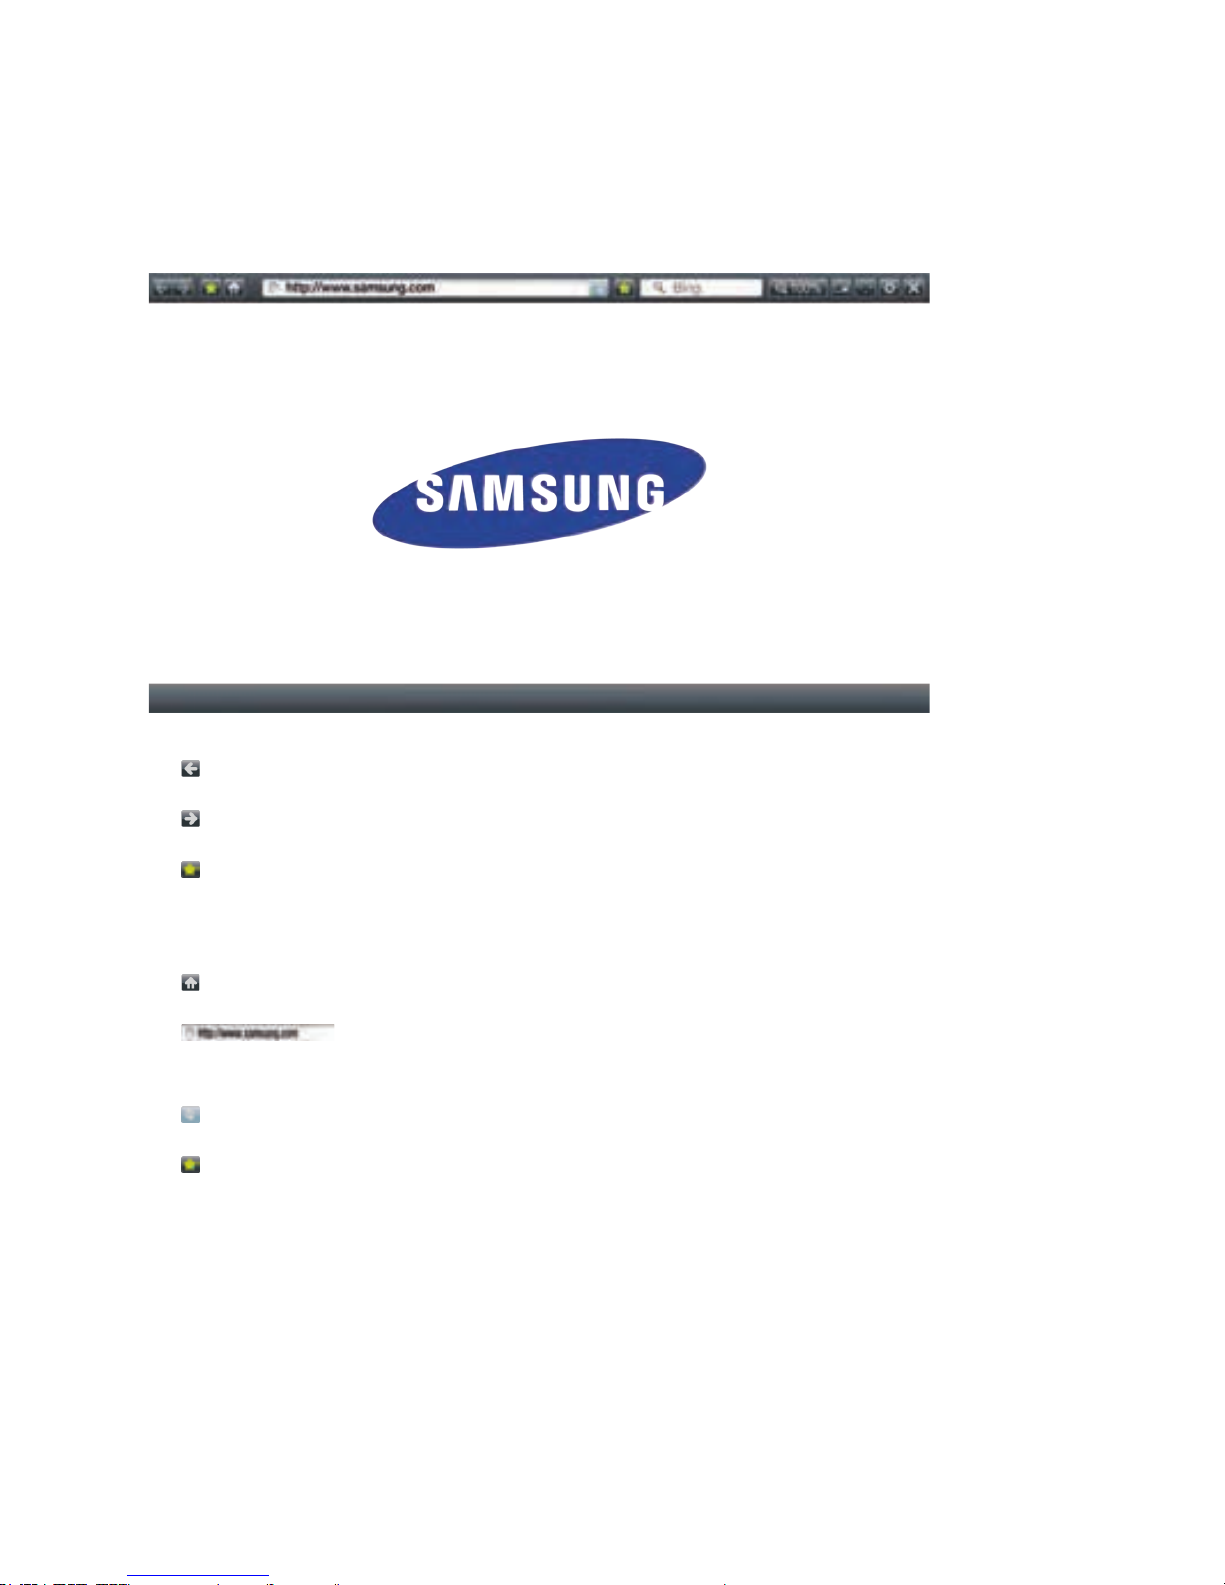
The Control Panel at a Glance
The Control Panel, which runs across the top of the screen, has a series of icons
which start a number of useful functions. The icons are described below, starting
with the icon on the far left of the screen.
●
: Moves to the previous page.
●
: Moves to the next web page.
●
: Displays the Bookmarks and History screen. You can bookmark the current
page, select an existing bookmark, and edit and delete bookmarks. You can
also view your browsing history and select a page to revisit.
●
: Moves to the Home screen of the Web Browser.
●
: Lets you enter a page address manually using the keyboard
pop-up.
●
: Reloads the current page so that it is refreshed on the screen.
●
: Adds the current page to your bookmarks.
 Loading...