

Page 1
Disassembly and Assembly Instructions
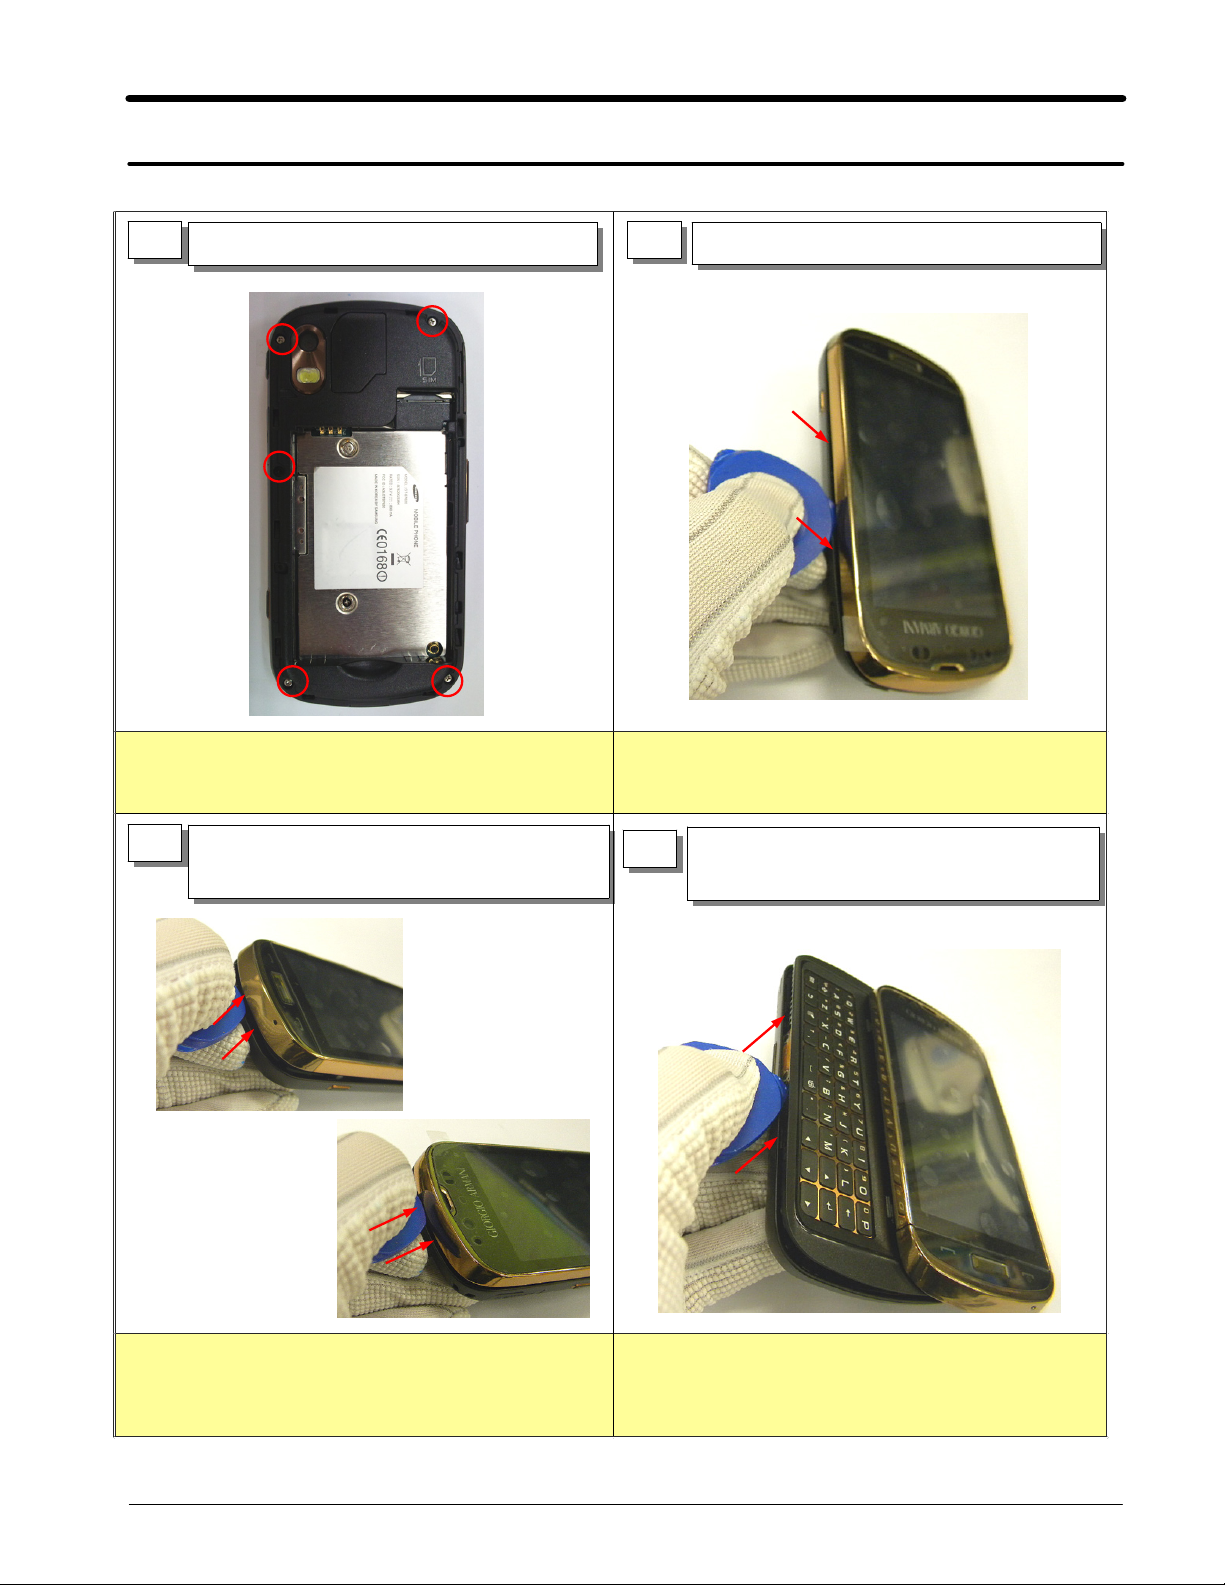
11.
11-1.
Disassembly
1 2
1
Release screw5point at rear
)
Be careful not to make scratch and molding damage!
1)
Disjoint the right of rear from the set
1)
Be careful not to make scratch and molding damage!
1)
3
1
Disjoint the top&bottom of rear from
)
the set
Be careful not to make scratch and molding damage!
1)
4
1
After slide open, disjoint the left of rear
)
from the set
Be careful not to make scratch and molding damage!
1)
11-1
SAMSUNG Proprietary-Contents may change without notice
This Document can not be used without Samsung's authorization
Page 2
Disassembly and Assembly Instructions
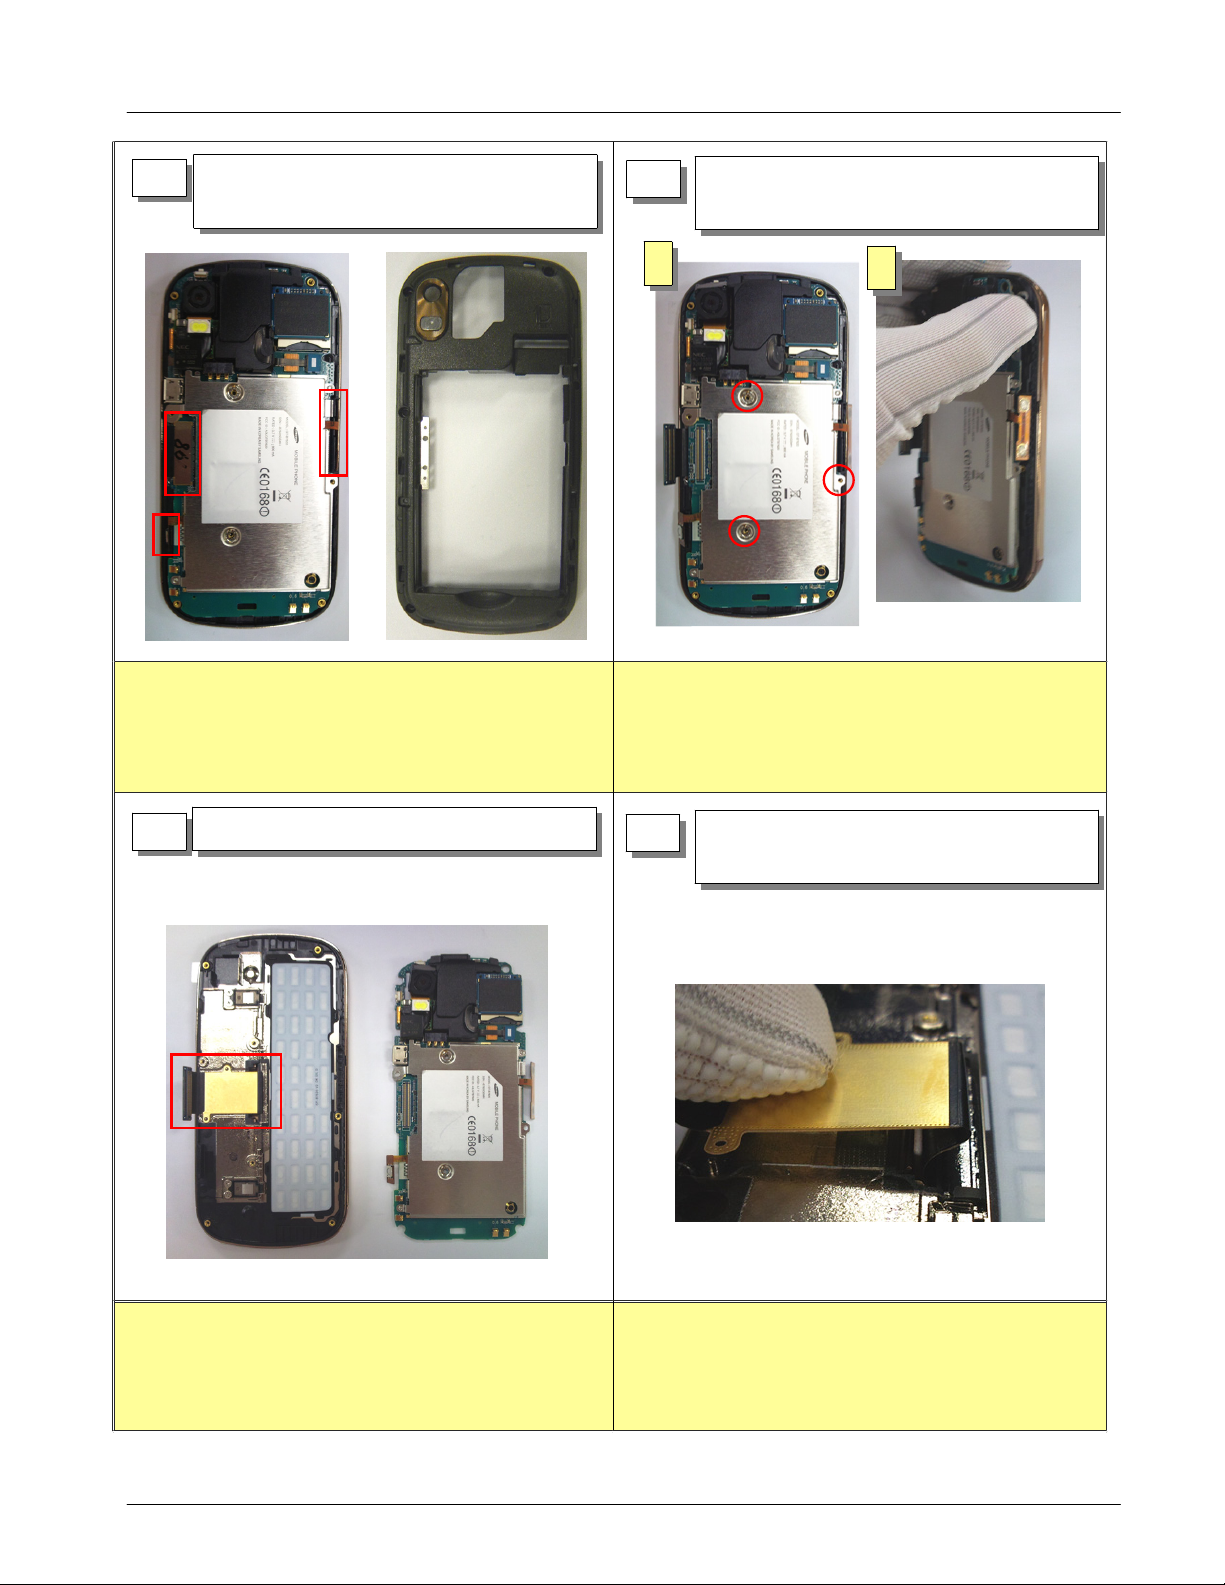
1
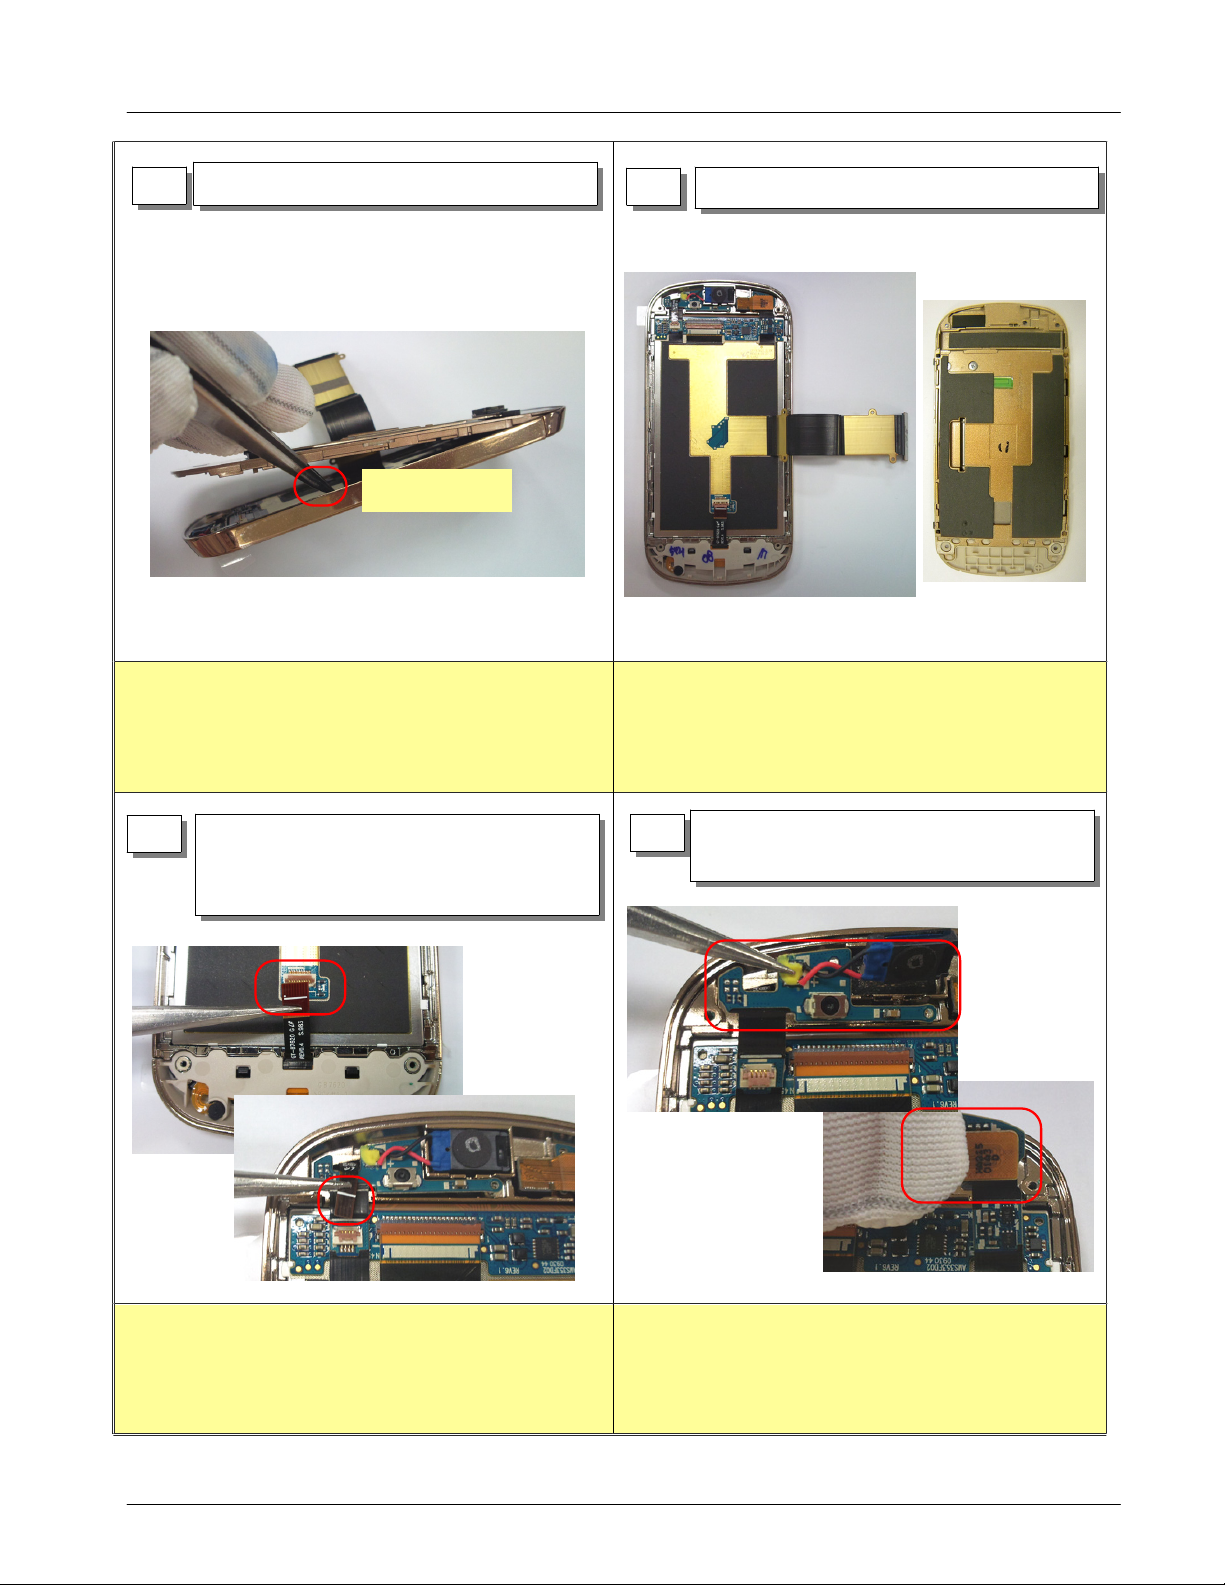
Detach the slide FPCB connector, volume
)
5
key/camera key FPCB from the front ass'y
1
Release screw3point at shield can
6
)
Disassembled PBA and front ass'y
1)
1
1) Beware that you do not damage PBA. 1) Beware that you do not damage PBA.
1
Detach the slide FPCB from the front
)
7
1
Slowly and cautiously, detach the slide
8
)
FPCB
2
1) Beware that you do not damage Slide FPCB 1) Beware that you do not damage Slide FPCB
11-2
SAMSUNG Proprietary-Contents may change without notice
This Document can not be used without Samsung's authorization
Page 3
Disassembly and Assembly Instructions
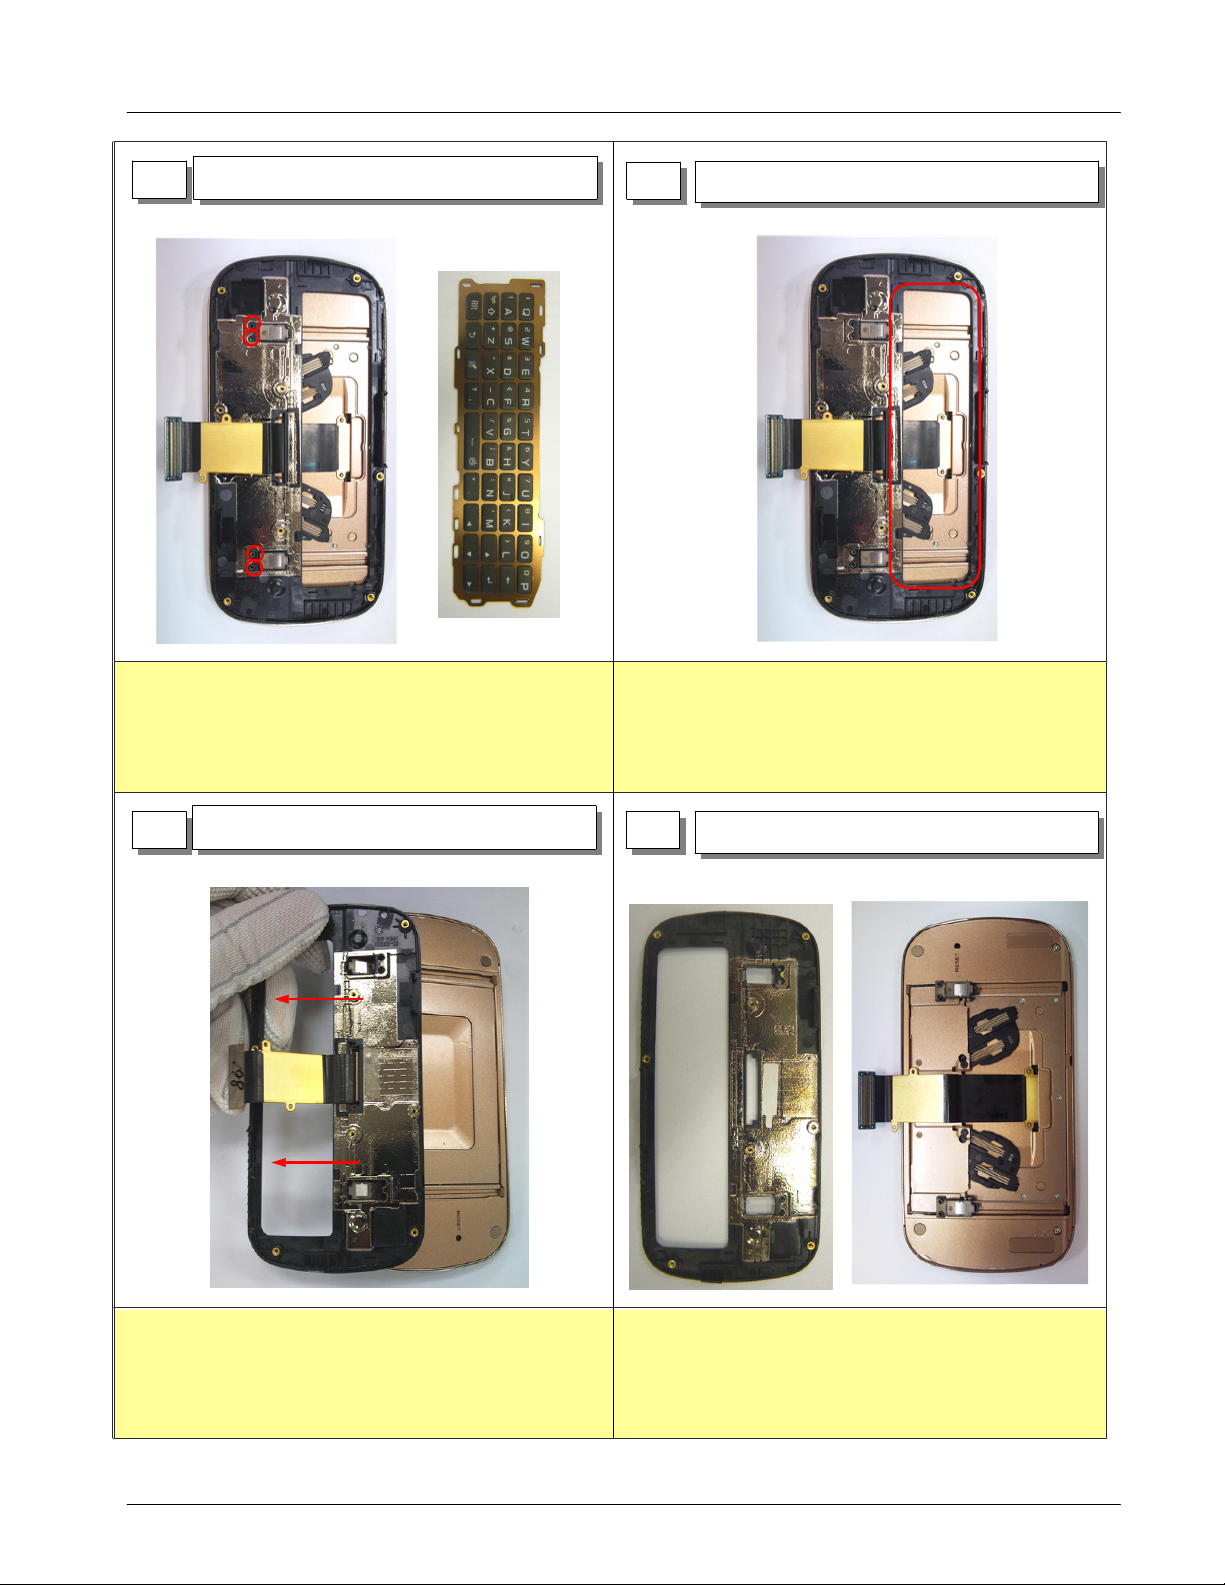
1
Release screw4point at front hinge
)
9
10
Disassemble the qwerty keypad and front
1)
1) Be careful not to make scratch and molding damage! 1) Be careful not to make scratch and molding damage!
1
Separate the front and slide ass'y
11
)
12
Disassembled the front and slide ass'y
1)
1) Be careful not to make scratch and molding damage! 1) Be careful not to make scratch and molding damage!
11-3
SAMSUNG Proprietary-Contents may change without notice
This Document can not be used without Samsung's authorization
Page 4
Disassembly and Assembly Instructions
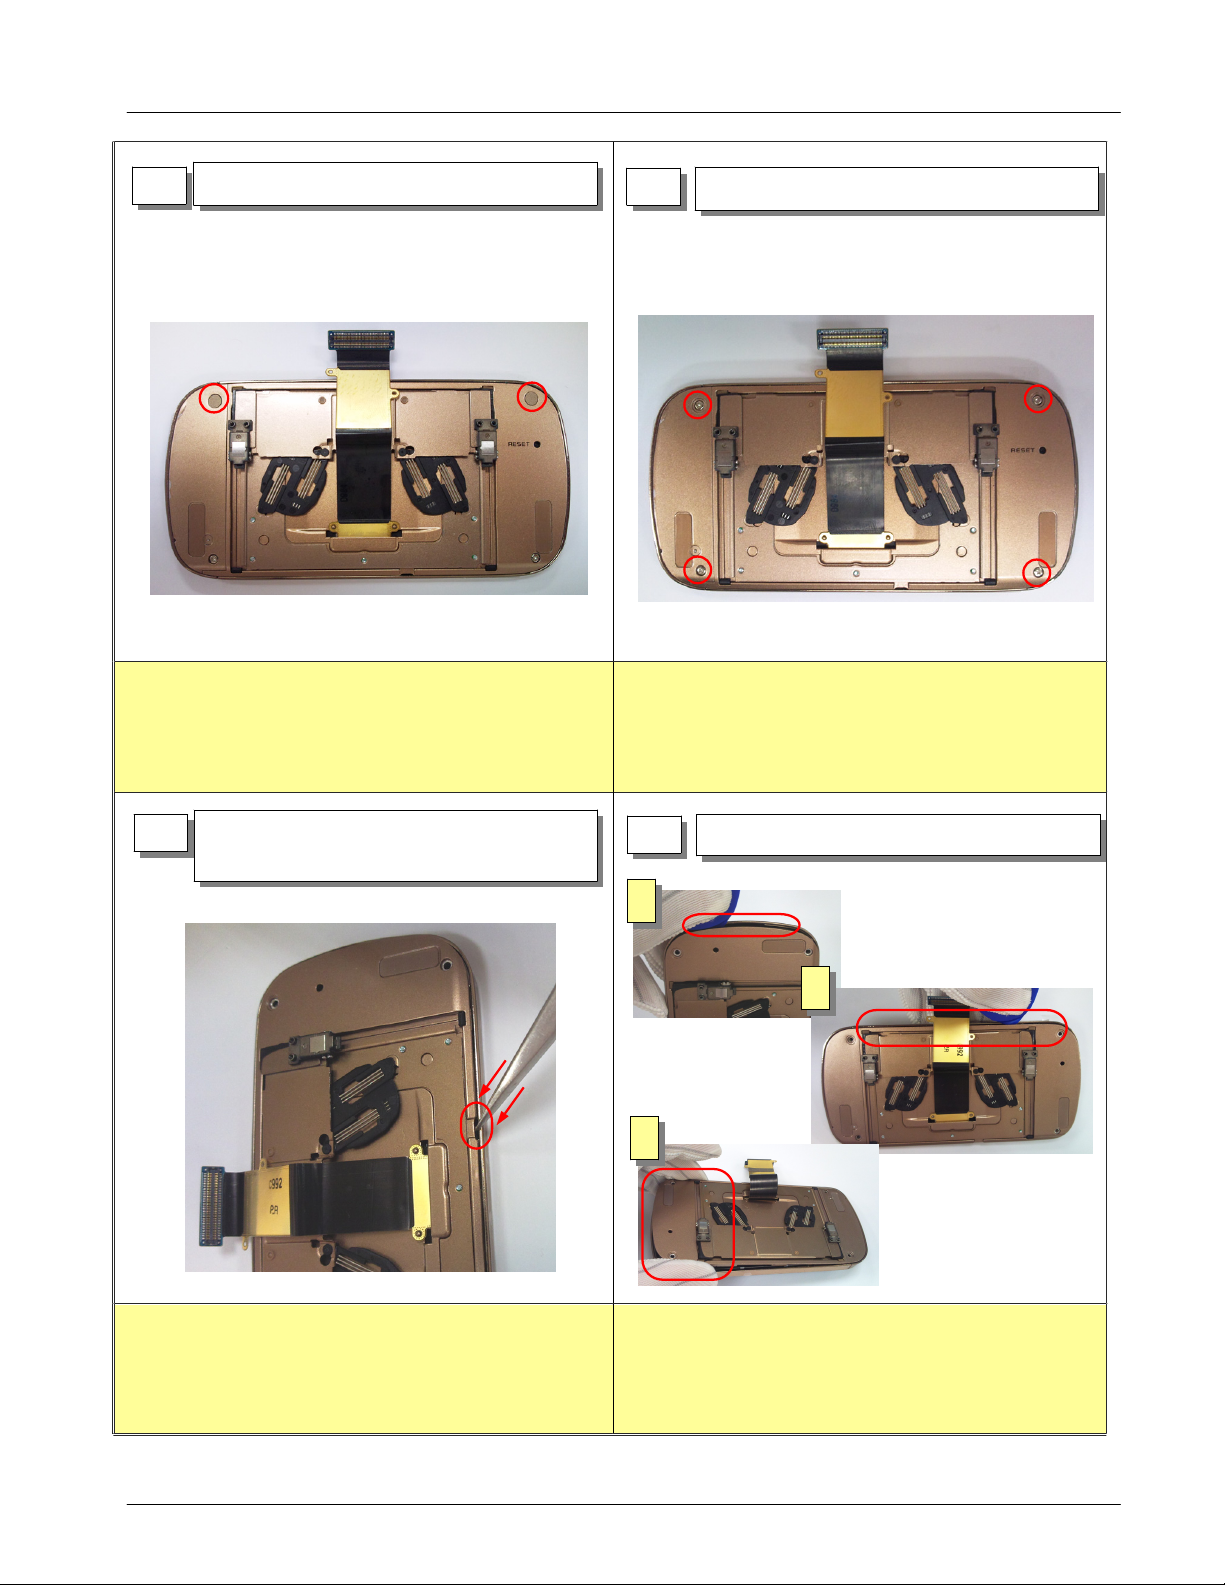
1
Detach the screw cap2point
13
)
14
1
Release screw4point at lower
)
1) Be careful not to make scratch and molding damage! 1) Be careful not to make scratch and molding damage!
Detach the lower from upper take
1)
15
advantage of disjoint point
16
Disjoint the rear from the upper ass'y
1)
1
2
3
1) Be careful not to make scratch and molding damage! 1) Be careful not to make scratch and molding damage!
11-4
SAMSUNG Proprietary-Contents may change without notice
This Document can not be used without Samsung's authorization
Page 5
17
1
Detach the LCD pannel from inner lower
)
Softly press
18
Disassembly and Assembly Instructions
Disassembled the upper ass'y and lower
1)
1) Beware that you do not damage LCD pannel !
19
Draw out the sub key/TSPFPCBfrom
1)
the
slide FPCB connector
20
Detach the top of the slide FPCB2areas
1)
from the upper
1) Beware that you do not damage FPCB 1) Beware that you do not damage FPCB
11-5
SAMSUNG Proprietary-Contents may change without notice
This Document can not be used without Samsung's authorization
Page 6

Disassembly and Assembly Instructions
21
1) Beware that you do not damage FPCB 1) Beware that you do not damage FPCB
Draw out the slide FPCB from the LCD
1)
connector
1
Slowly and cautiously, detach the slide
22
)
FPCB from the LCD plate
23
Disassembled upper ass'y and slide FPCB
1)
24
1) Be careful not to make scratch and molding damage!
cautiously, detach the LCD from the
1)
upper's TSP pannel
11-6
SAMSUNG Proprietary-Contents may change without notice
This Document can not be used without Samsung's authorization
Page 7

25
Separated LCD and Upper ass'y
1)
26
Disassembly and Assembly Instructions
Push the bottom of TSP for detach TSP
1)
and upper
PUSH
1)
27
2)
upper cautiously
1
2
Push the side of the TSP
Detach ahead of the top of TSP from
1) Be careful not to make scratch and molding damage!
28
Disassembled upper ass'y and TSP
1)
1) Be careful not to make scratch and molding damage!
SAMSUNG Proprietary-Contents may change without notice
This Document can not be used without Samsung's authorization
11-7
Page 8

Disassembly and Assembly Instructions
1
Separate the sub key from the upper
29
)
Push the hook
30
Disassembled sub keypad and upper
1)
1) Be careful not to make scratch and molding damage!
11-8
SAMSUNG Proprietary-Contents may change without notice
This Document can not be used without Samsung's authorization
Page 9

Disassembly and Assembly Instructions
11-2.
Assembly
1 2
Setasub keypad and upper
1)
Assemble the sub keypad to upper guide
1)
1)
3 4
Setaupper ass'y and TSP
1)
Be careful not to make scratch and molding damage!
Attach the TSP to the upper
1)
Attach Guide:Top of upper
Be careful not to make scratch and molding damage!
1)
11-9
SAMSUNG Proprietary-Contents may change without notice
This Document can not be used without Samsung's authorization
Page 10

Disassembly and Assembly Instructions
5
Setaupper ass'y and LCD
1)
6
Attach the LCD to the upper ass'y
1)
Notice interference about FPCB
Beware that you do not damage LCD
2)
7
Setaupper ass'y and slide FPCB
1)
8
Beware that you do not damage slide FPCB
2)
Insert slide FPCB into LCD connector
1)
After insert it, Close the connecter cover
2)
11-10
SAMSUNG Proprietary-Contents may change without notice
This Document can not be used without Samsung's authorization
Page 11

Disassembly and Assembly Instructions
9 1)
1
3
Beware that you do not damage FPCB and this items
2)
Attach the slide FPCB to the upper ass'y
Insert the TSP FPCB
2
Attach the PCB
Attach the CIF camera
10
Attach the Slide FPCB to the back of LCD
1)
Attach Guide line
Beware that you do not damage slide FPCB
2)
Insert sub key FPCB into the connector
1)
11
After insert it, Close the connector cover
2)
Beware that you do not damage FPCB
2)
Insert guide line
12
Setaupper ass'y and lower
1)
11-11
SAMSUNG Proprietary-Contents may change without notice
This Document can not be used without Samsung's authorization
Page 12

Disassembly and Assembly Instructions
Go through the slide FPCB to the lower's
1)
13
hole
14
1
Assemble the upper ass'y and lower
1)
Attach the slide FPCB to the lower
2)
2
Attach guide rib
Beware that you do not damage slide FPCB
2)
Drivers4screws on the lower
1)
15
Beware that you do not damage slide FPCB
2)
16
Attach the screw cap2point
1)
Be careful not to make scratch and molding damage!
1)
SAMSUNG Proprietary-Contents may change without notice
This Document can not be used without Samsung's authorization
Be careful not to make scratch and molding damage!
1)
11-12
Page 13

17
Setaupper ass'y and front
1)
18
Disassembly and Assembly Instructions
Go through the slide FPCB to the front's
1)
hole
19
Assemble the upper ass'y and front
1)
Fit the hinge
Beware that you do not damage slide FPCB
2)
20
Setafront ass'y and qwerty keypad
1)
Be careful not to make scratch and molding damage!
1)
SAMSUNG Proprietary-Contents may change without notice
This Document can not be used without Samsung's authorization
11-13
Page 14

Disassembly and Assembly Instructions
Attach the qwerty keypad to front
1)
21
22
Attach the slide FPCB to the front
1)
After attached, press the FPCB
2)
Standard
guide rib
Be careful not to make scratch and molding damage!
1)
Setafront ass'y and PBA
1)
23
1
slide FPCB
bending point
3
2
Attach guide
rib2point
Beware that you do not damage slide FPCB
2)
24
Assemble the PBA and front ass'y
1)
11-14
SAMSUNG Proprietary-Contents may change without notice
This Document can not be used without Samsung's authorization
Page 15

25
Attach the slide FPCB to connector
1)
Insert the
2)
Camera into the guide hole
5M
26
Disassembly and Assembly Instructions
Insert the volume key/camera key into
1)
the guide hole
Beware that you do not damage connector and items
2)
Setafront ass'y and rear
1)
27
Beware that you do not damage FPCB
2)
28
Assemble the front ass'y and rear
1)
First assemble
point(right)
Be careful not to make scratch and molding damage!
1)
11-15
SAMSUNG Proprietary-Contents may change without notice
This Document can not be used without Samsung's authorization
Page 16

Disassembly and Assembly Instructions
29
1) Assemble
press the sim socket area
the front ass'y and rear surely
Pressing point
Be careful not to make scratch and molding damage!
1)
30
Be careful not to make scratch and molding damage!
1)
After assembling, Check the status of the
1)
slide open point
Drivers5screws on the rear
1)
31
Be careful not to make scratch and molding damage!
1)
11-16
SAMSUNG Proprietary-Contents may change without notice
This Document can not be used without Samsung's authorization
 Loading...