

Page 1

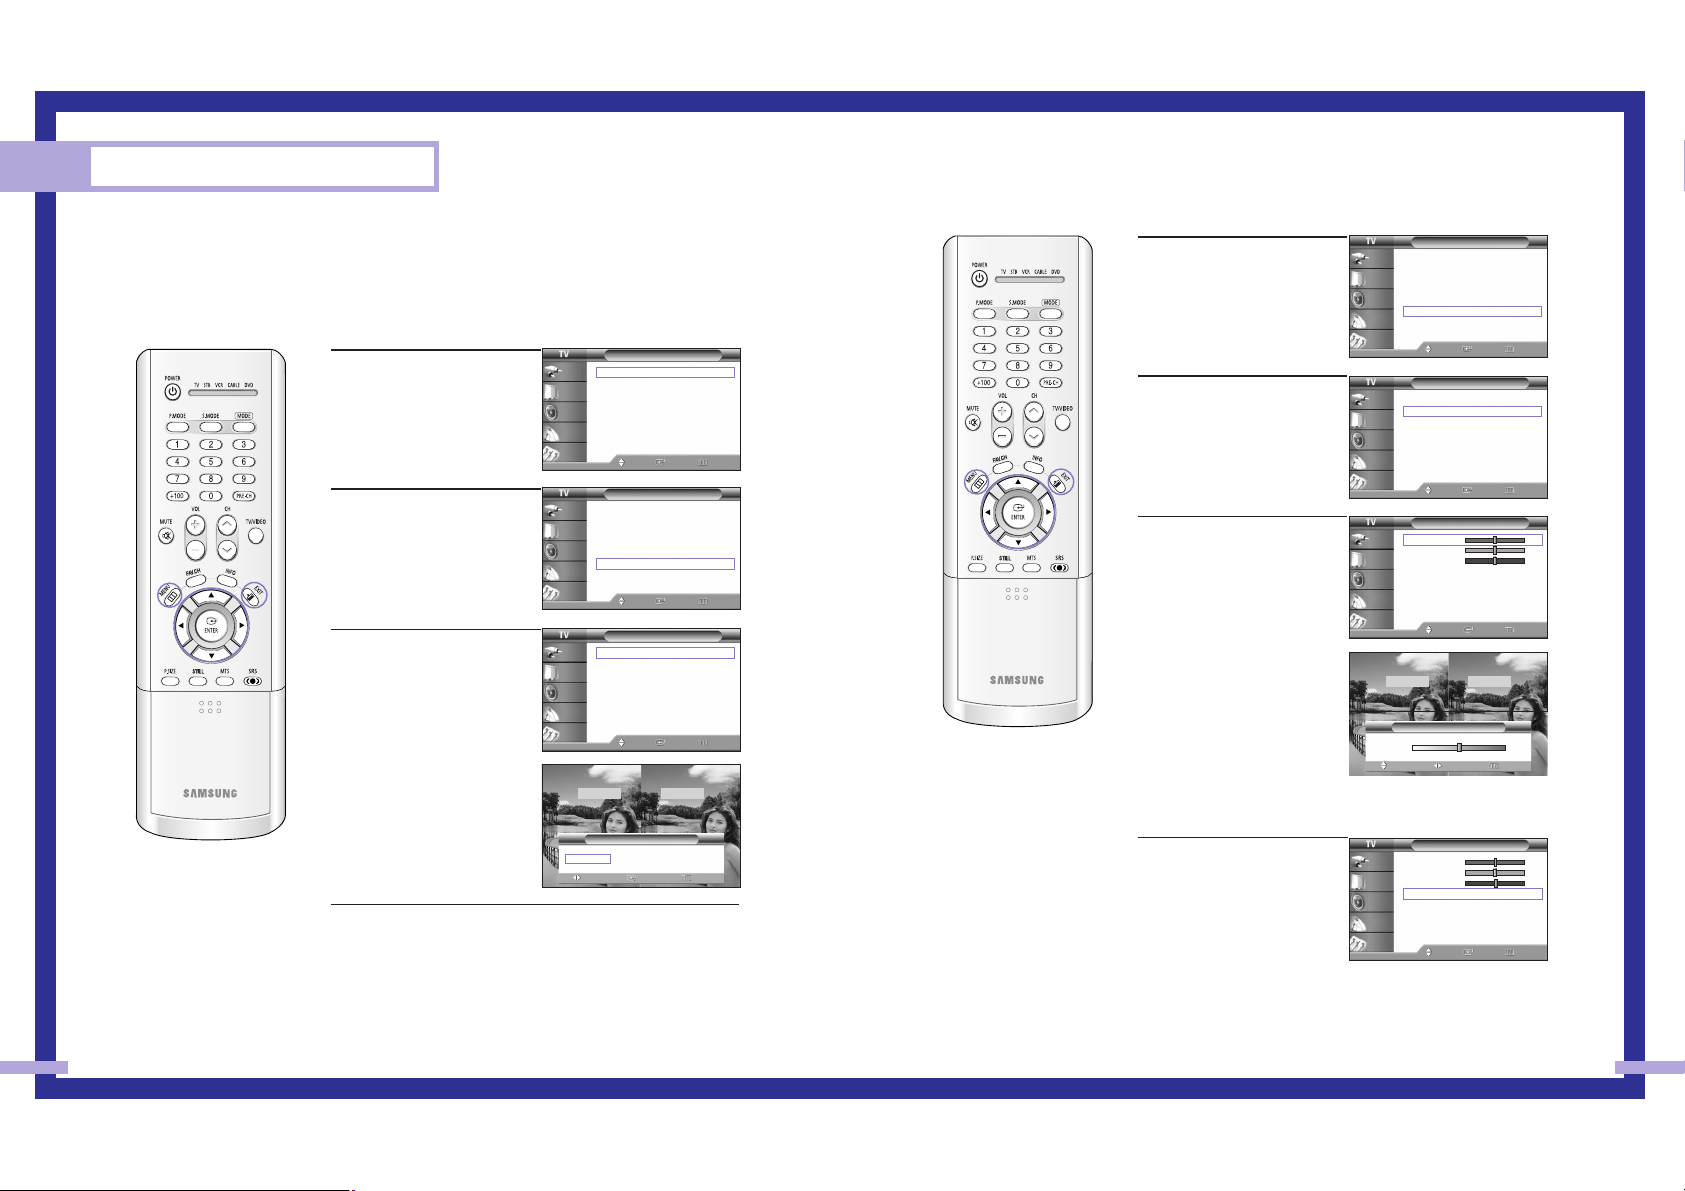
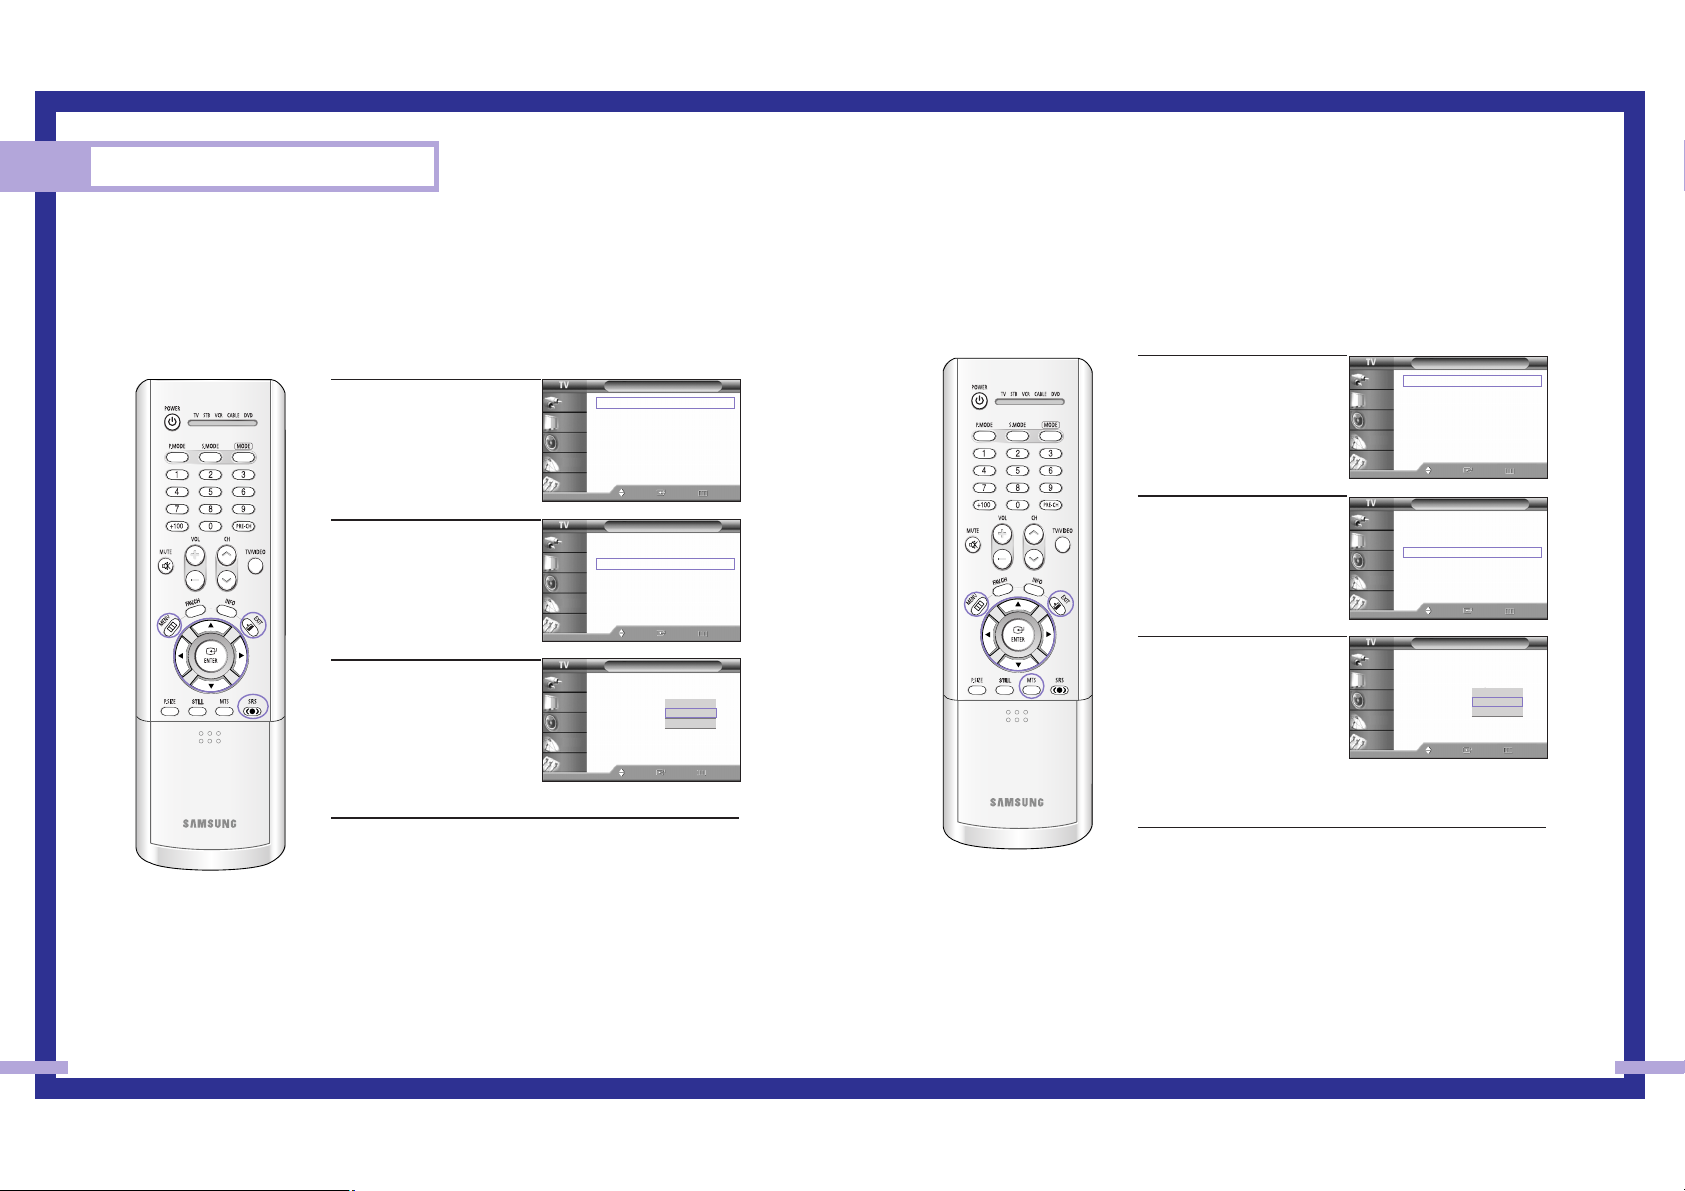
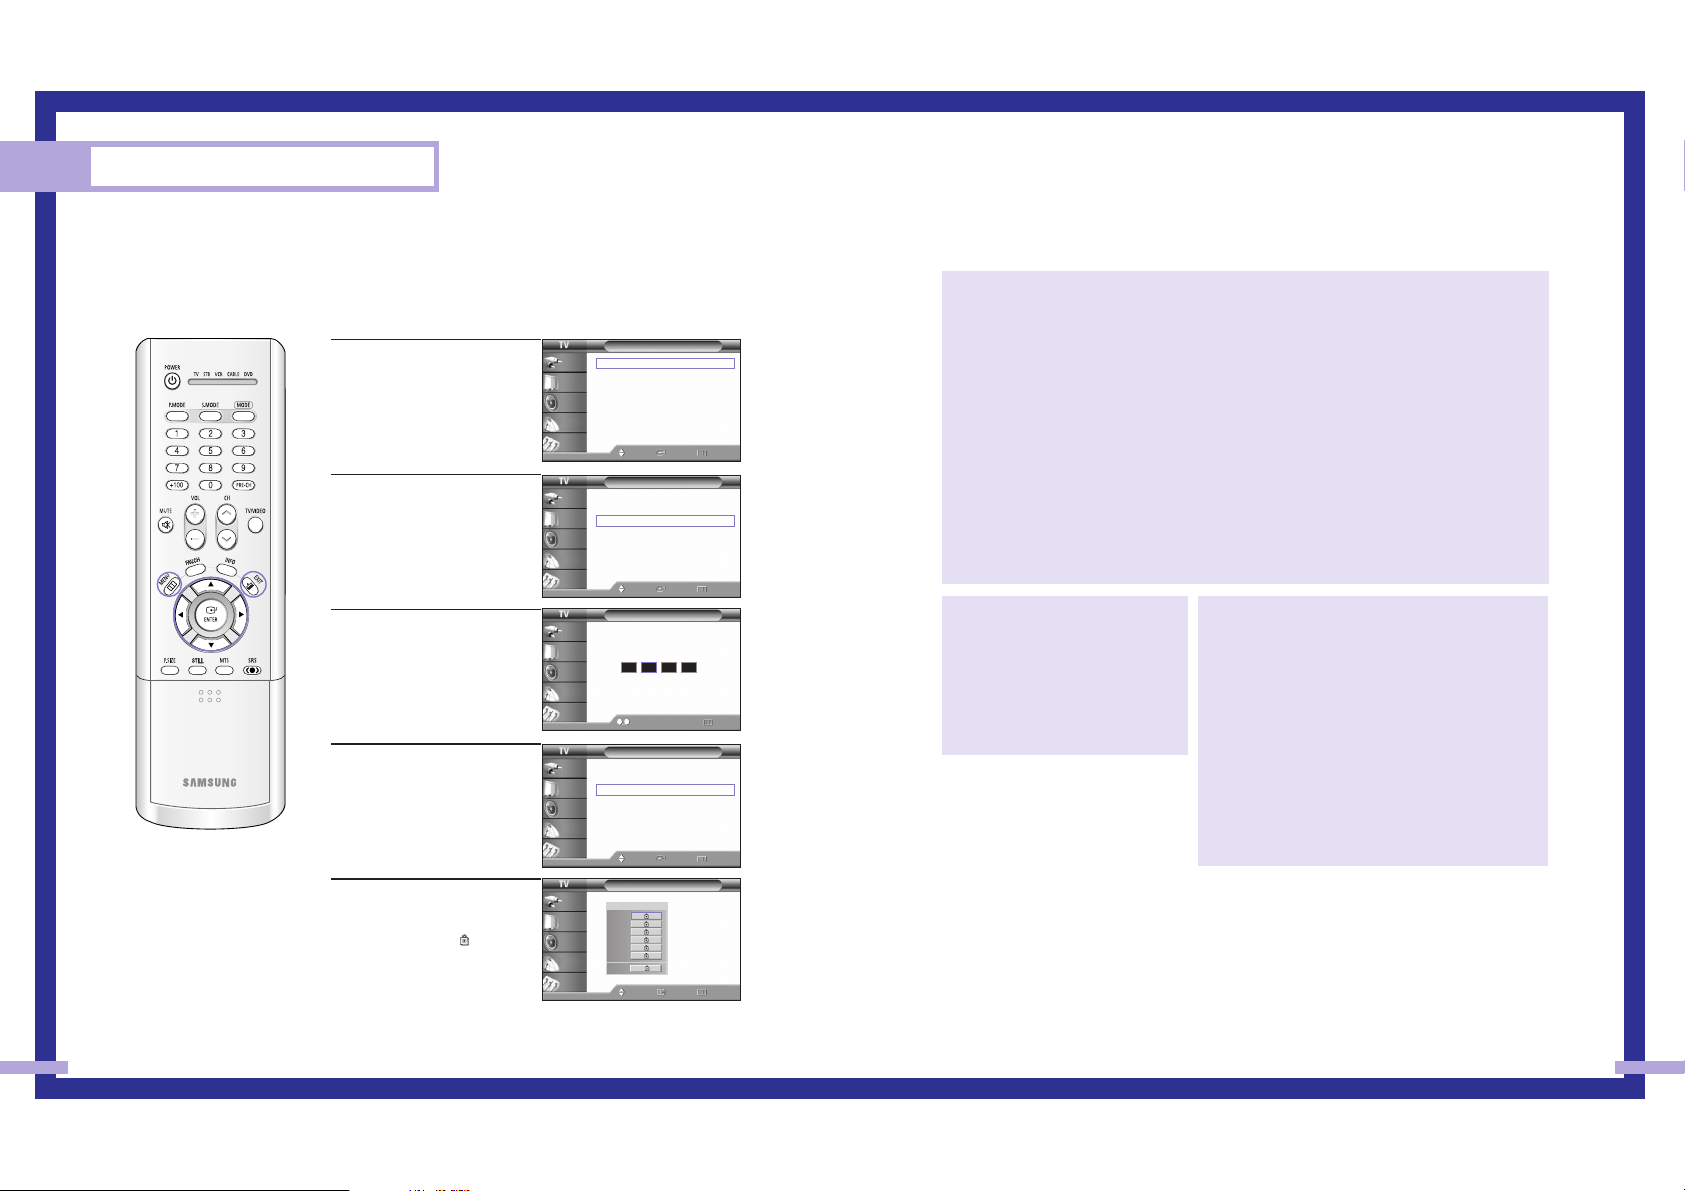
Digital Noise Reduction
If the broadcast signal received by your TV is weak, you can activate the Digital Noise Reduction
feature to help reduce any static and ghosting that may appear on the screen.
52
Special Features
53
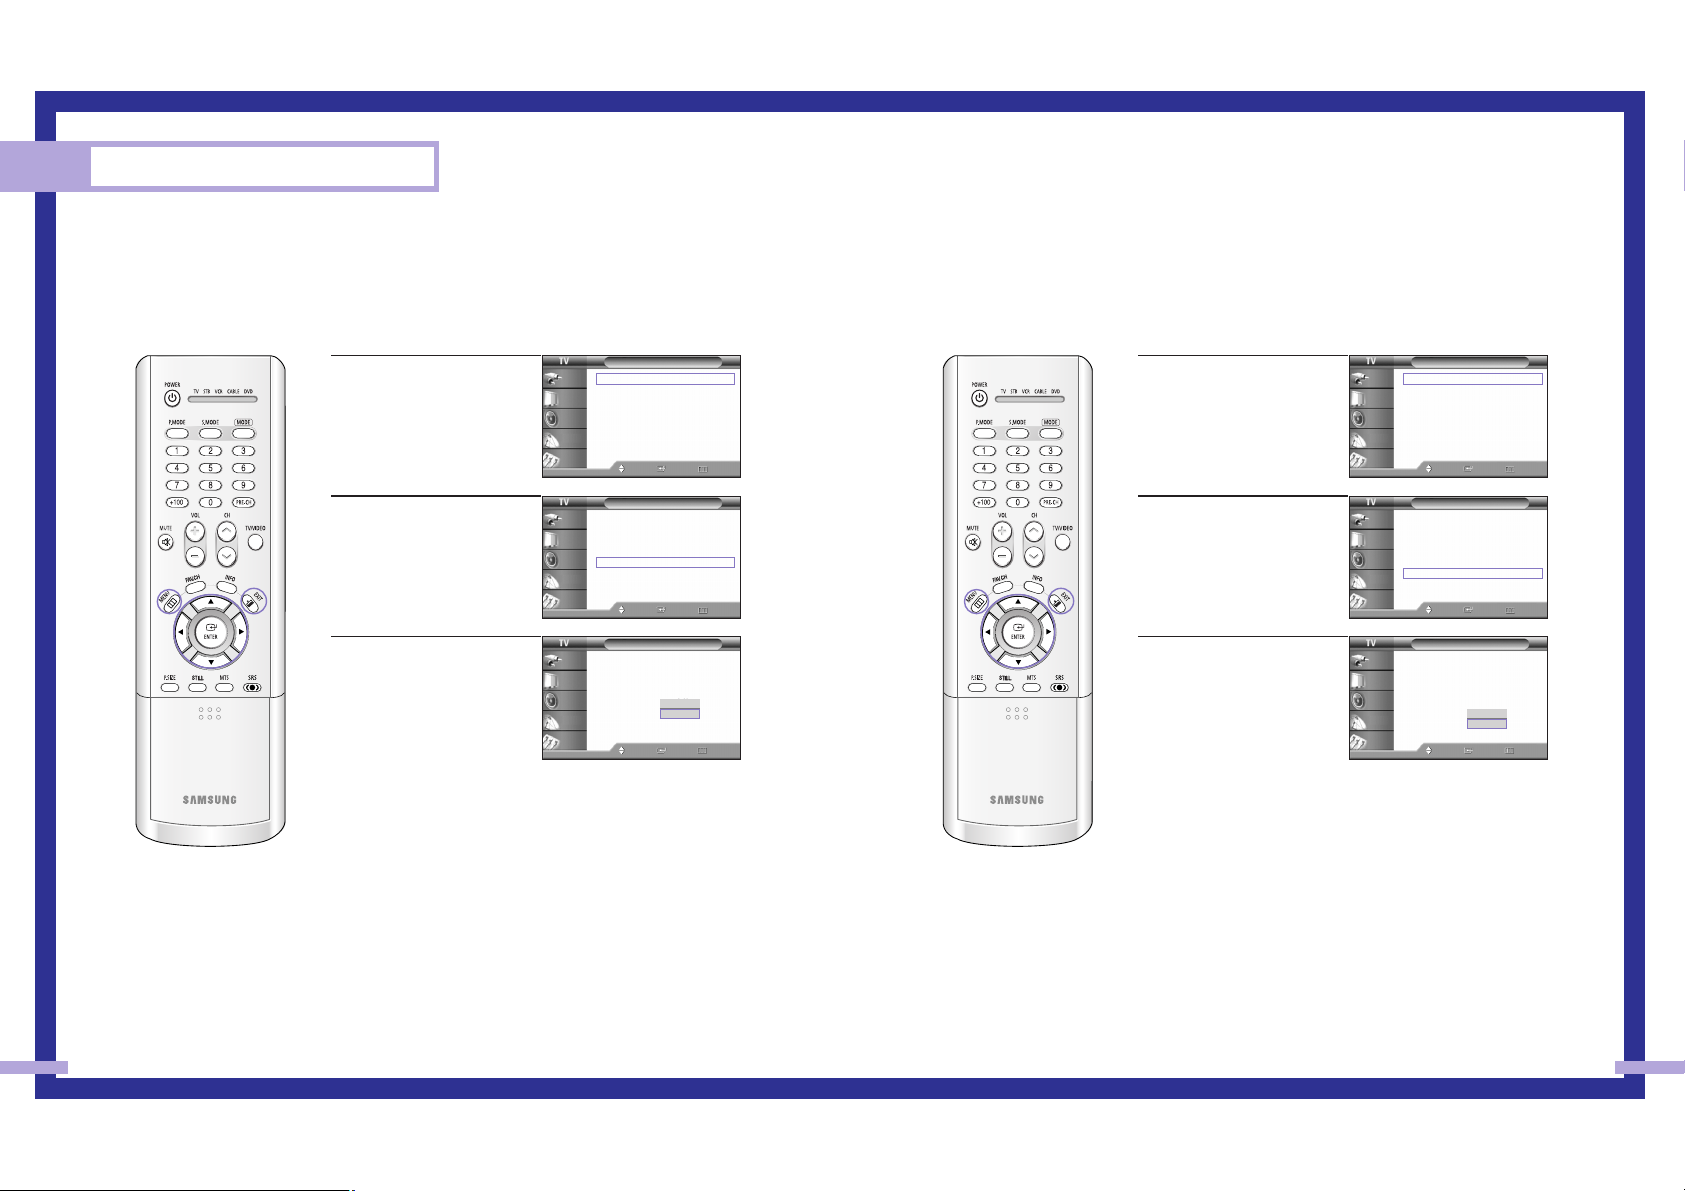
DNIe
TM
(Digital Natural Image engine)
This feature brings you more detailed image with 3D noise reduction, detail enhancement,
contrast enhancement and white enhancement. New image compensation Algorithm presents
brighter, clearer, much detailed image. DNIeTMtechnology will fit every signals into your eyes.
1
Press the MENU button.
Press the … or † button to
select “Picture”, then press
the ENTER button.
2
Press the … or † button to
select “Digital NR”, then
press the ENTER button.
3
Press the … or † button to
select “Off” or “On”, then
press the ENTER button.
Press the EXIT button to exit.
Picture
Mode : Standard
√
Color Tone : Warm1
√
Size
√
Digital NR : Off
√
DNIe : On
√
MCC
√
Film Mode : Off
√
PIP
√
Move Enter Return
Input
Picture
Sound
Channel
Setup
Picture
Mode : Standard
√
Color Tone : Warm1
√
Size
√
Digital NR : Off
√
DNIe : On
√
MCC
√
Film Mode : Off
√
PIP
√
Move Enter Return
Input
Picture
Sound
Channel
Setup
1
Press the MENU button.
Press the … or † button to
select “Picture”, then press
the ENTER button.
2
Press the … or † button to
select “DNIe”, then press the
ENTER button.
3
Press the … or † button to
select “Off”, “Demo” or
“On”, then press the ENTER
button.
Press the EXIT button to exit.
Alternate method
Press the DNIe button on the remote control repeatedly to select
one of the settings.
• On: Switches on the DNIe mode.
• Off: Switches off the DNIe mode.
• Demo: The screen before applying DNIe
appears on the right and the screen after
applying DNIe appears on the left.
Picture
Mode : Standard
Color Tone : Warm1
Size
Digital NR : Off
DNIe : On
MCC
Film Mode : Off
PIP
Move Enter Return
Input
Picture
Sound
Channel
Setup
Off
Demo
On
Picture
Mode : Standard
√
Color Tone : Warm1
√
Size
√
Digital NR : Off
√
DNIe : On
√
MCC
√
Film Mode : Off
√
PIP
√
Move Enter Return
Input
Picture
Sound
Channel
Setup
Picture
Mode : Standard
√
Color Tone : Warm1
√
Size
√
Digital NR : Off
√
DNIe : On
√
MCC
√
Film Mode : Off
√
PIP
√
Move Enter Return
Input
Picture
Sound
Channel
Setup
DNIe Demo
DNIe On DNIe Off
Picture
Mode : Standard
Color Tone : Warm1
Size
Digital NR : Off
DNIe : On
MCC
Film Mode : Off
PIP
Move Enter Return
Input
Picture
Sound
Channel
Setup
Off
On
Page 2
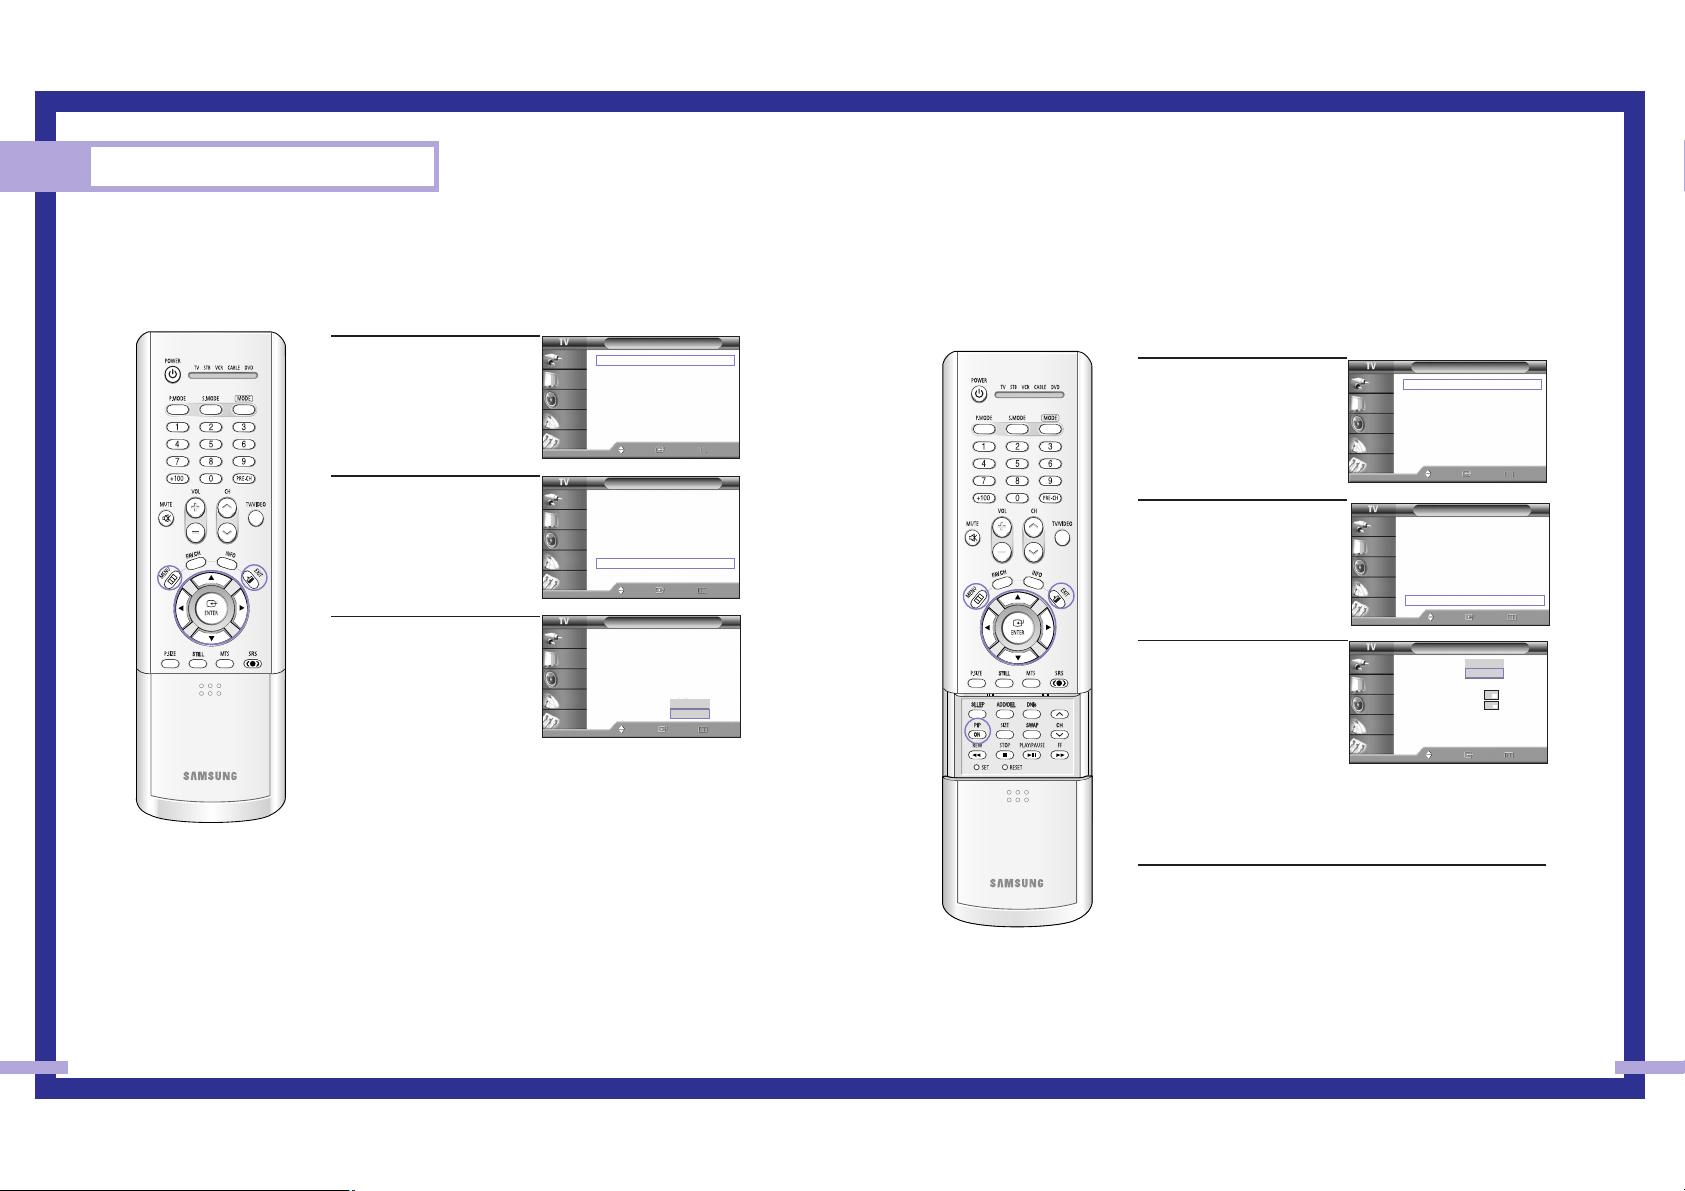
Special Features
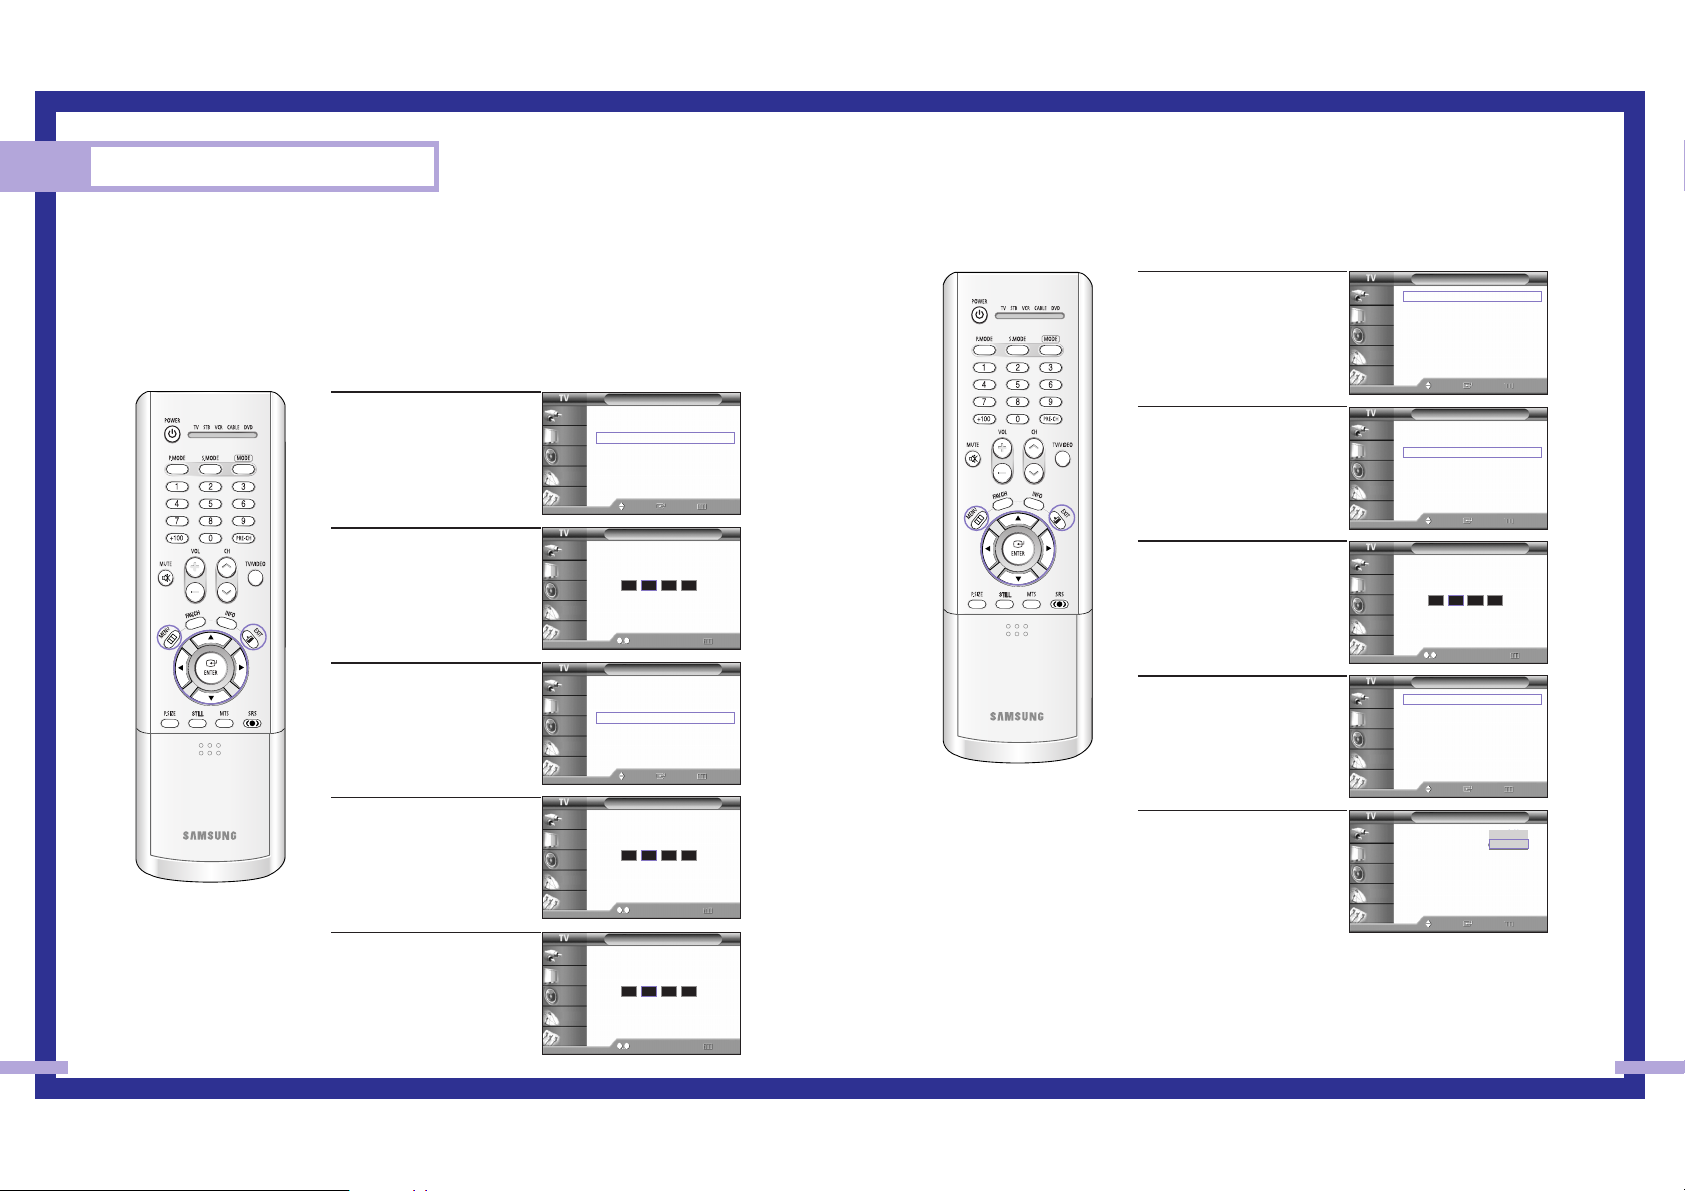
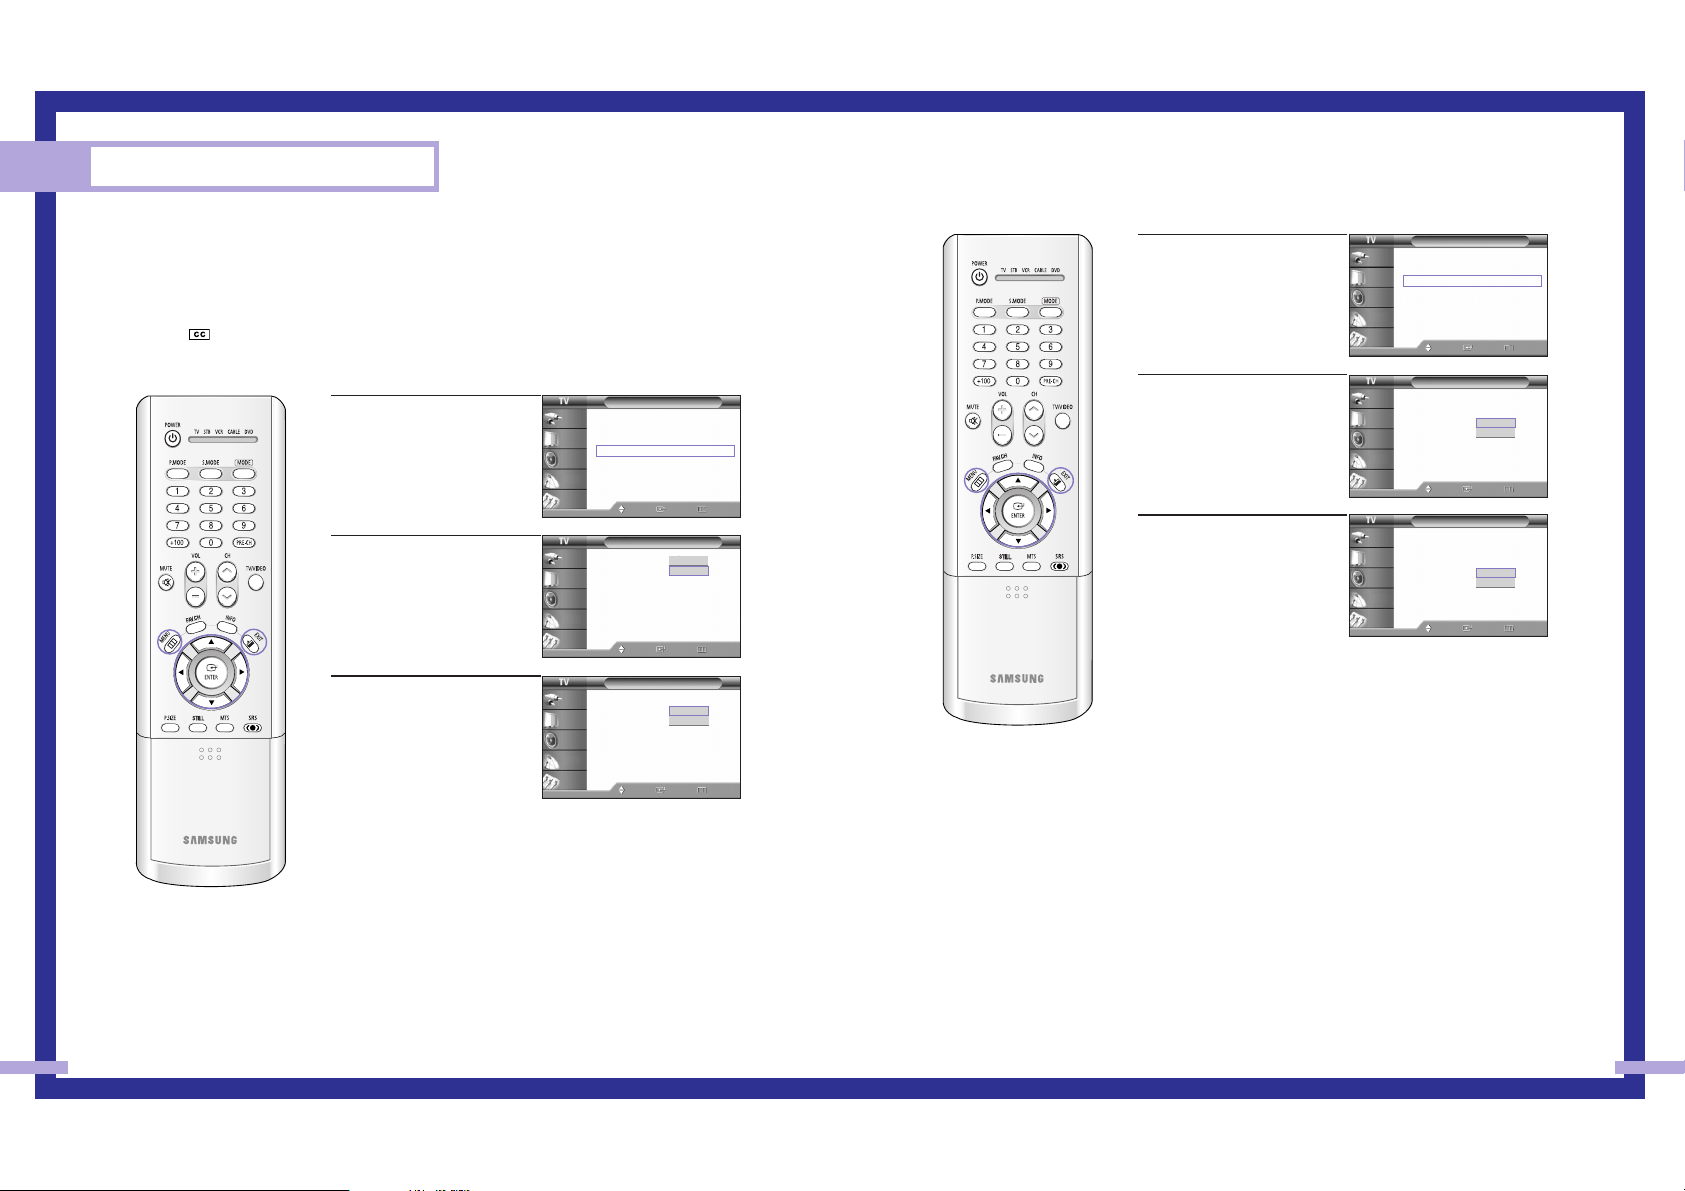
Setting the MCC (My Color Control) Mode
MCC allows users to adjust colors to according to their preferences, by adjusting skin, sky, and
grass tones using the predefined settings (“Turkish Blue”, “Emerald Green”, “Indian Pink”,
“Standard”, “Custom”) without affecting other colors on the screen.
Using the Easy Control Menu
1
Press the MENU button.
Press the … or † button to
select “Picture”, then press
the ENTER button.
2
Press the … or † button to
select “MCC”, then press the
ENTER button.
3
Press the ENTER button to
select “Easy Control”.
Press the œ or √ button to
select one of the picture
settings you want.
The original picture (before
adjustment) is shown
on the left side, while the
selected mode is shown
on the right side.
Press the ENTER button to
accept the selected mode.
Press the EXIT button to exit.
•“Turkish Blue”: Emphasizing Clear Blues. Feel the clear sun
shine on the blue Mediterranean sea.
•“Emerald Green”: Emphasizing Mild Greens. Feel the
translucent, romantic turquoise sea.
•“Indian Pink”: Emphasizing Warm Skin Colors.
•“Standard”: Standard Picture
Picture
Mode : Standard
√
Color Tone : Warm1
√
Size
√
Digital NR : Off
√
DNIe : On
√
MCC
√
Film Mode : Off
√
PIP
√
Move Enter Return
Input
Picture
Sound
Channel
Setup
Picture
Mode : Standard
√
Color Tone : Warm1
√
Size
√
Digital NR : Off
√
DNIe : On
√
MCC
√
Film Mode : Off
√
PIP
√
Move Enter Return
Input
Picture
Sound
Channel
Setup
MCC
Easy Control : Turkish Blue
√
Detail Control
√
Move Enter Return
Input
Picture
Sound
Channel
Setup
5554
Custom Settings
1
Press the MENU button.
Press the … or † button to
select “Picture”, then press
the ENTER button.
Press the … or † button to
select “MCC”, then press the
ENTER button.
2
Press the … or † button to
select “Detail Control”, then
press the ENTER button.
3
Press the … or † button to
select one of the MCC color
you want, then press the
ENTER button.
There are three MCC colors:
“Skin Tone”, “Green Grass”
and “Blue Sky”.
Press the
œ or √ button to
adjust the value of a color
selected.
Changing the adjustment
value will refresh the
adjusted screen.
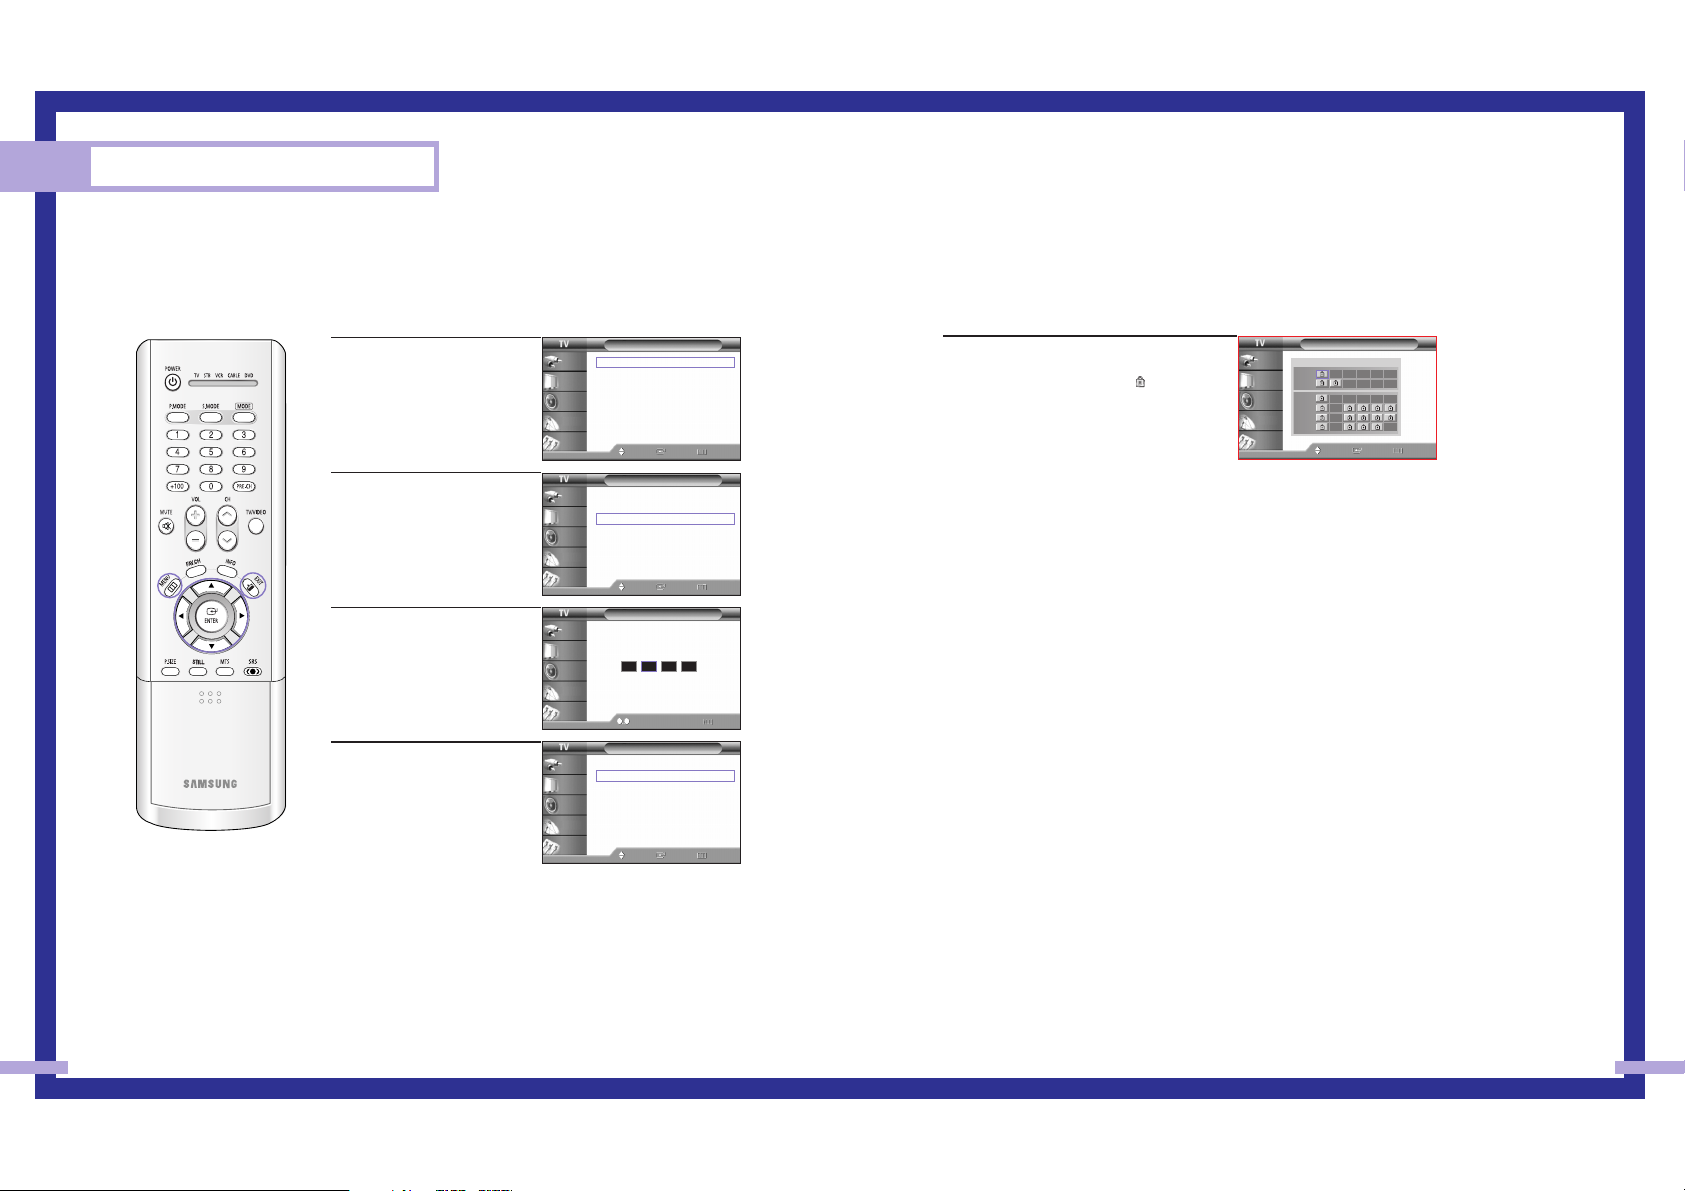
Resetting the MCC Colors to the Factory Defaults
You can return to the factory default settings for MCC colors.
4
Press the MENU button to
display the “Detail Control”
menu.
Press the … or † button to
select “Reset”, then press the
ENTER button.
The previously adjusted
MCC Colors will be reset to
the factory defaults.
Picture
Mode : Standard
√
Color Tone : Warm1
√
Size
√
Digital NR : Off
√
DNIe : On
√
MCC
√
Film Mode : Off
√
PIP
√
Move Enter Return
Input
Picture
Sound
Channel
Setup
MCC
Easy Control : Turkish Blue
√
Detail Control
√
Move Enter Return
Input
Picture
Sound
Channel
Setup
NOTE
• Changing the settings
in the “Detail Control”
menu (see next page)
will automatically set
the MCC mode to
“Custom”.
Detail Control
Skin Tone 50
Green Grass 50
Blue Sky 50
Reset
Move Enter Return
Input
Picture
Sound
Channel
Setup
Detail Control
Skin Tone 50
Green Grass 50
Blue Sky 50
Reset
Move Enter Return
Input
Picture
Sound
Channel
Setup
Turkish Blue Emerald Green Indian Pink √
Easy Control
Move Return
Enter
Original Turkish Blue
▲
Skin Tone
▼
Detail Control
Move Return
Adjust
Original Adjusted
50
Page 3
Viewing Picture-In-Picture
One of the most best features of your TV is the Picture-In-Picture (PIP) feature. The advanced PIP
system allows you to watch two different pictures at once, even if you don’t have a VCR
connected to your TV.
57
Setting the Film Mode
You can automatically sense and process film signals from all sources and adjust the picture for
optimum quality.
56
Special Features
1
Press the MENU button.
Press the … or † button to
select “Picture”, then press
the ENTER button.
2
Press the … or † button to
select “Film Mode”, then
press the ENTER button.
3
Press the … or † button to
select “Off” or “On”, then
press the ENTER button.
Press the EXIT button to exit.
NOTE
• Film mode is supported in 480i only.
Picture
Mode : Standard
√
Color Tone : Warm1
√
Size
√
Digital NR : Off
√
DNIe : On
√
MCC
√
Film Mode : Off
√
PIP
√
Move Enter Return
Input
Picture
Sound
Channel
Setup
Picture
Mode : Standard
Color Tone : Warm1
Size
Digital NR : Off
DNIe : On
MCC
Film Mode : Off
PIP
Move Enter Return
Input
Picture
Sound
Channel
Setup
Off
On
Picture
Mode : Standard
√
Color Tone : Warm1
√
Size
√
Digital NR : Off
√
DNIe : On
√
MCC
√
Film Mode : Off
√
PIP
√
Move Enter Return
Input
Picture
Sound
Channel
Setup
Activating the PIP
1
Press the MENU button.
Press the … or † button to
select “Picture”, then press
the ENTER button.
2
Press the … or † button to
select “PIP”, then press the
ENTER button.
3
Press the ENTER button to
select “PIP”.
Press the … or † button to
select “On”, then press the
ENTER button.
The sub picture appears in
the corner of the screen.
Press the EXIT button to exit.
Alternate method
Press the PIP button on the remote control repeatedly to activate or
deactivate the PIP.
Picture
Mode : Standard
√
Color Tone : Warm1
√
Size
√
Digital NR : Off
√
DNIe : On
√
MCC
√
Film Mode : Off
√
PIP
√
Move Enter Return
Input
Picture
Sound
Channel
Setup
Picture
Mode : Standard
√
Color Tone : Warm1
√
Size
√
Digital NR : Off
√
DNIe : On
√
MCC
√
Film Mode : Off
√
PIP
√
Move Enter Return
Input
Picture
Sound
Channel
Setup
PIP
PIP : On
Source : TV
Swap
Size
Position
Channel : Air 11
Select Sound : Main
Move Enter Return
Input
Picture
Sound
Channel
Setup
Off
On
NOTES
• This feature doesn’t function when the “V-Chip” or “Caption” is active.
• This feature doesn’t operate in the HDMI mode.
• If you turn the TV off while watching and turn it on again, then the mode will return to normal
video.
Page 4
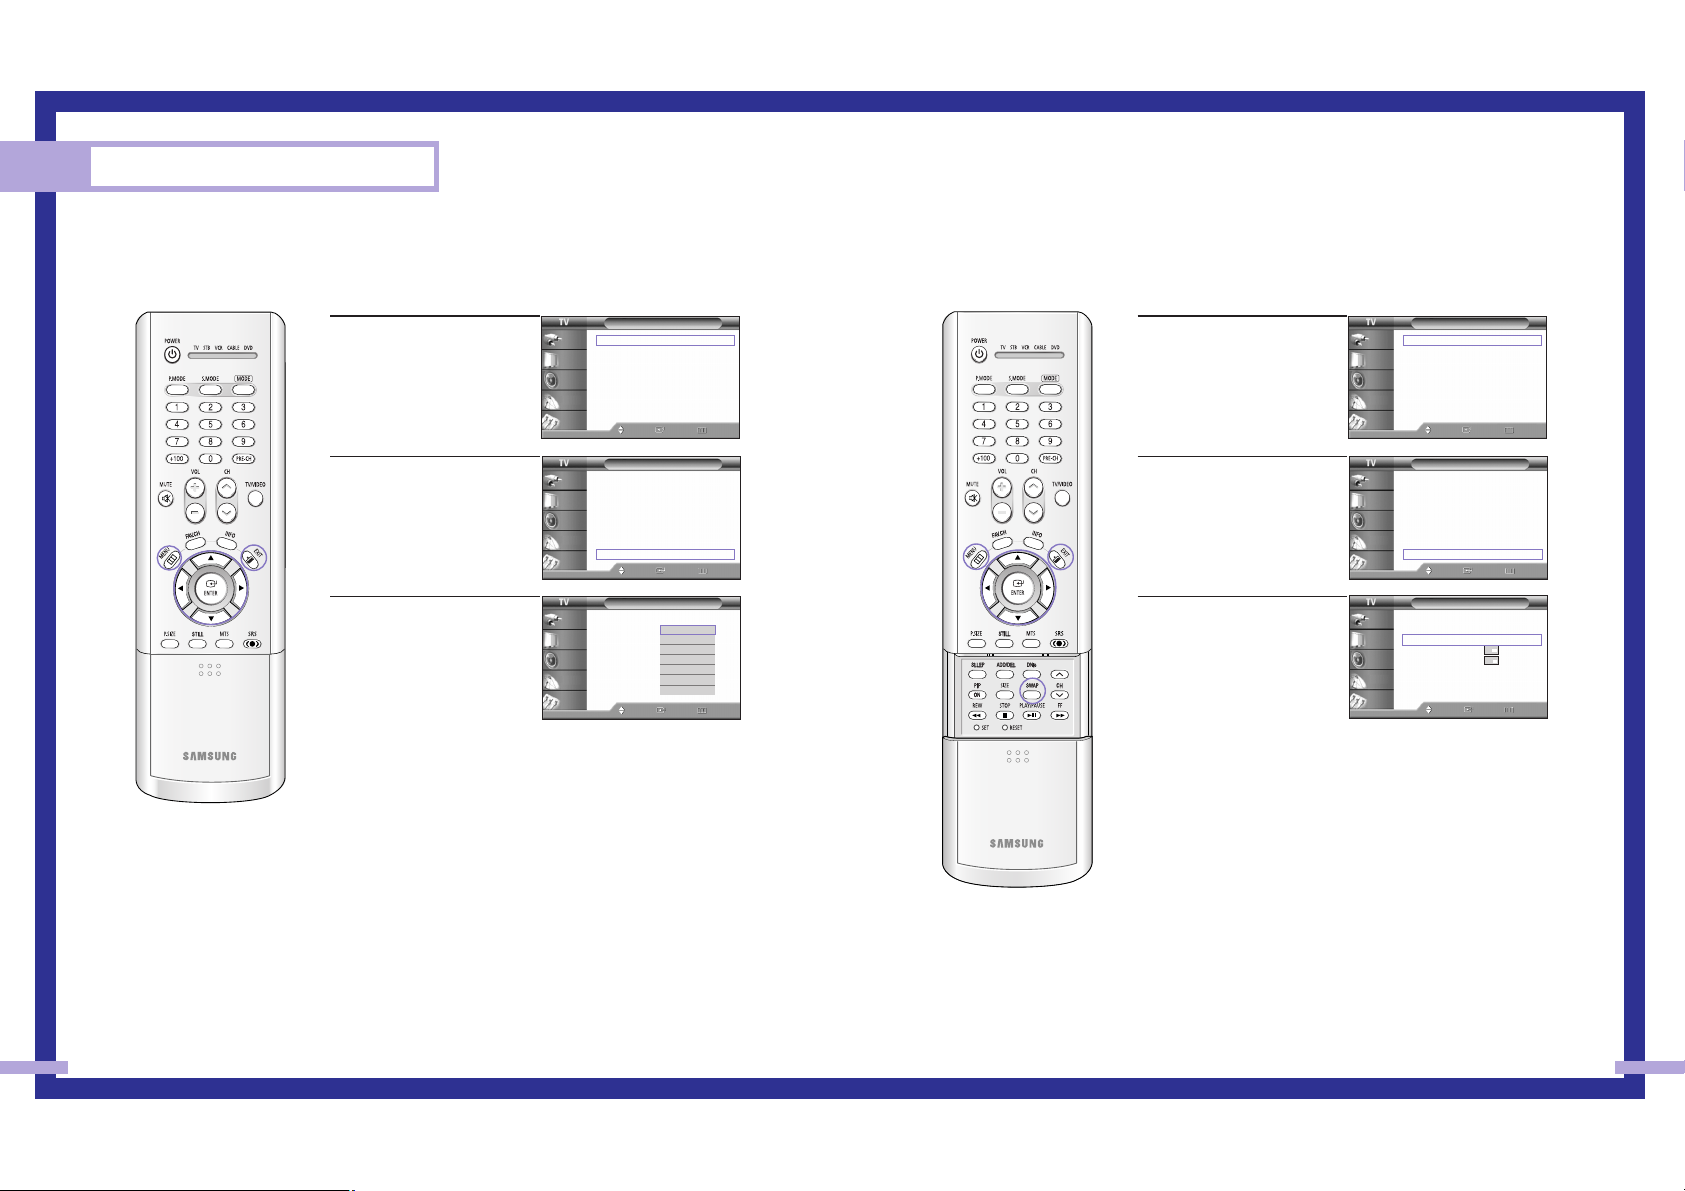
Swapping the Sub Picture and Main Picture
59
Selecting an External Source
You can use PIP to view a signal from an external source, such as a VCR.
58
Special Features
1
Press the MENU button.
Press the … or † button to
select “Picture”, then press
the ENTER button.
2
Press the … or † button to
select “PIP”, then press the
ENTER button.
3
Press the … or † button to
select “Source”, then press
the ENTER button.
If you have not connected
any equipment to the TV’s
input jacks, the signal from
these inputs will not appear.
Press the … or † button to
select an external signal,
then press the ENTER button.
Press the EXIT button to exit.
Picture
Mode : Standard
√
Color Tone : Warm1
√
Size
√
Digital NR : Off
√
DNIe : On
√
MCC
√
Film Mode : Off
√
PIP
√
Move Enter Return
Input
Picture
Sound
Channel
Setup
NOTES
• The sub picture doesn’t support “ANT 2 IN”, “Component1”, “Component2”, “PC”, “DVI” and
HDMI.
• For more information about external signals, see “Viewing an External Signal Source” (See
page 41). If you select “TV”, the sub picture is the same as the main picture.
PIP
PIP : On
Source : TV
Swap
Size
Position
Channel : Air 11
Select Sound : Main
Move Enter Return
Input
Picture
Sound
Channel
Setup
TV
AV1
AV2
AV3
S-Video1
S-Video2
S-Video3
1
Press the MENU button.
Press the … or † button to
select “Picture”, then press
the ENTER button.
2
Press the … or † button to
select “PIP”, then press the
ENTER button.
3
Press the … or † button to
select “Swap”, then press
the ENTER button.
The sub picture appears in
the main picture, and vice
versa.
Press the EXIT button to exit.
Picture
Mode : Standard
√
Color Tone : Warm1
√
Size
√
Digital NR : Off
√
DNIe : On
√
MCC
√
Film Mode : Off
√
PIP
√
Move Enter Return
Input
Picture
Sound
Channel
Setup
NOTE
• The swapping doesn’t support “ANT 2 IN”, “Component1”, “Component2”, “PC”, “DVI” and
HDMI.
PIP
PIP : On
√
Source : TV
√
Swap
Size
√
Position
√
Channel : Air 11
√
Select Sound : Main
√
Move Enter Return
Input
Picture
Sound
Channel
Setup
Picture
Mode : Standard
√
Color Tone : Warm1
√
Size
√
Digital NR : Off
√
DNIe : On
√
MCC
√
Film Mode : Off
√
PIP
√
Move Enter Return
Input
Picture
Sound
Channel
Setup
Picture
Mode : Standard
√
Color Tone : Warm1
√
Size
√
Digital NR : Off
√
DNIe : On
√
MCC
√
Film Mode : Off
√
PIP
√
Move Enter Return
Input
Picture
Sound
Channel
Setup
Page 5

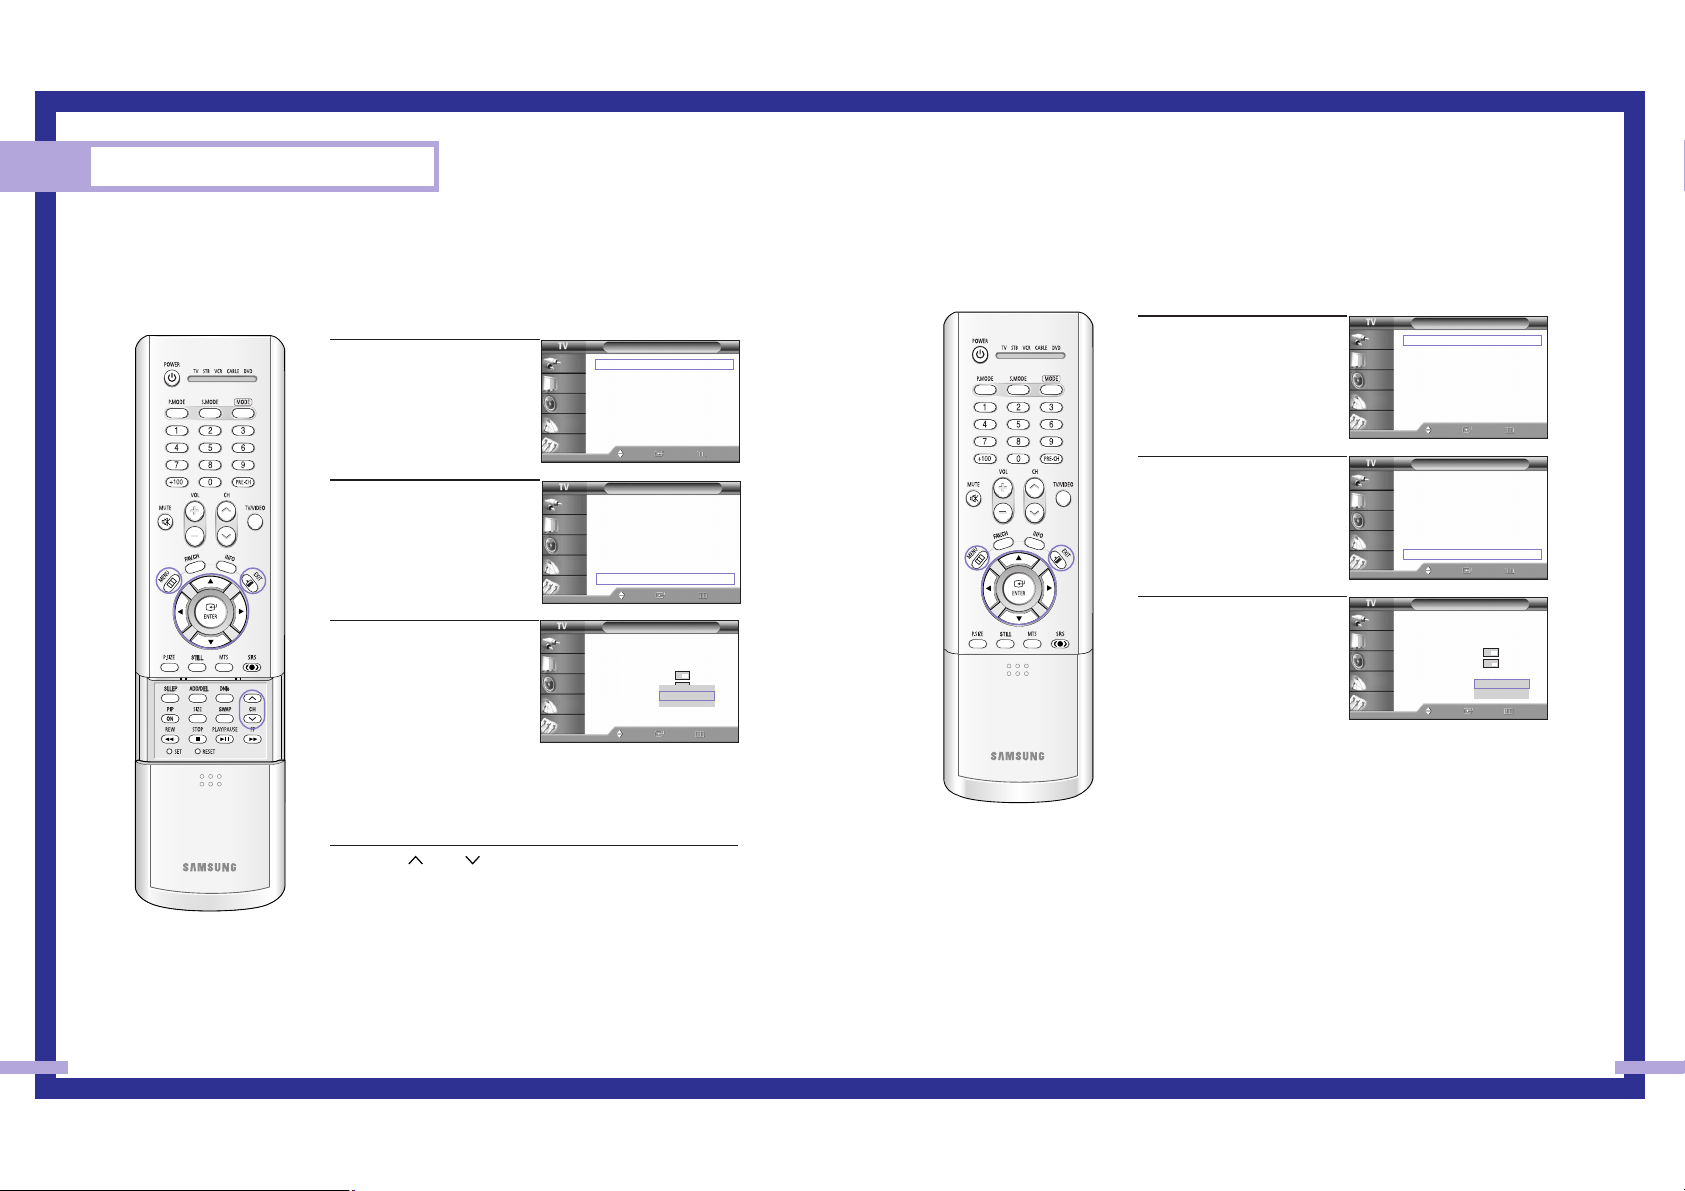
Changing the Location of the Sub Picture
61
Changing the Size of the Sub Picture
60
Special Features
1
Press the MENU button.
Press the
… or † button to
select “Picture”, then press
the ENTER button.
2
Press the … or † button to
select “PIP”, then press the
ENTER button.
3
Press the … or † button to
select “Size”, then press the
ENTER button.
Press the … or † button to
select a size you want, then
press the ENTER button.
Press the EXIT button to exit.
Alternate method
Press the SIZE button on the remote control repeatedly to select
one of the settings.
Picture
Mode : Standard
√
Color Tone : Warm1
√
Size
√
Digital NR : Off
√
DNIe : On
√
MCC
√
Film Mode : Off
√
PIP
√
Move Enter Return
Input
Picture
Sound
Channel
Setup
1
Press the MENU button.
Press the
… or † button to
select “Picture”, then press
the ENTER button.
2
Press the … or † button to
select “PIP”, then press the
ENTER button.
3
Press the … or † button to
select “Position”, then press
the ENTER button.
Press the … or † button to
select a position you want,
then press the ENTER button.
Press the EXIT button to exit.
Picture
Mode : Standard
√
Color Tone : Warm1
√
Size
√
Digital NR : Off
√
DNIe : On
√
MCC
√
Film Mode : Off
√
PIP
√
Move Enter Return
Input
Picture
Sound
Channel
Setup
PIP
PIP : On
Source : TV
Swap
Size
Position
Channel : Air 11
Select Sound : Main
Move Enter Return
Input
Picture
Sound
Channel
Setup
Picture
Mode : Standard
√
Color Tone : Warm1
√
Size
√
Digital NR : Off
√
DNIe : On
√
MCC
√
Film Mode : Off
√
PIP
√
Move Enter Return
Input
Picture
Sound
Channel
Setup
Picture
Mode : Standard
√
Color Tone : Warm1
√
Size
√
Digital NR : Off
√
DNIe : On
√
MCC
√
Film Mode : Off
√
PIP
√
Move Enter Return
Input
Picture
Sound
Channel
Setup
PIP
PIP : On
Source : TV
Swap
Size
Position
Channel : Air 11
Select Sound : Main
Move Enter Return
Input
Picture
Sound
Channel
Setup
Page 6
Changing the Channel of the Sub Picture
After you set the signal source (antenna or cable) of sub picture, it is easy to change channels.
6362
Special Features
1
Press the MENU button.
Press the … or † button to
select “Picture”, then press
the ENTER button.
2
Press the … or † button to
select “PIP”, then press the
ENTER button.
3
Press the … or † button to
select “Channel”, then press
the ENTER button.
Press the … or † button to
select a channel you want,
then press the ENTER button.
Press the EXIT button to exit.
Alternate method
Press the CH or CH button on the remote control to change
channels of sub picture during PIP on.
Picture
Mode : Standard
√
Color Tone : Warm1
√
Size
√
Digital NR : Off
√
DNIe : On
√
MCC
√
Film Mode : Off
√
PIP
√
Move Enter Return
Input
Picture
Sound
Channel
Setup
PIP
PIP : On
Source : TV
Swap
Size
Position
Channel : Air 11
Select Sound : Main
Move Enter Return
Input
Picture
Sound
Channel
Setup
▲
▼
Air 11
NOTE
• The channels of sub picture are not available when antenna is set to “ANT 2 IN”. It links to
“ANT 1 IN”.
Picture
Mode : Standard
√
Color Tone : Warm1
√
Size
√
Digital NR : Off
√
DNIe : On
√
MCC
√
Film Mode : Off
√
PIP
√
Move Enter Return
Input
Picture
Sound
Channel
Setup
Selecting the Sound Source
You can use this feature to hear sound from the main or sub picture.
1
Press the MENU button.
Press the … or † button to
select “Picture”, then press
the ENTER button.
2
Press the … or † button to
select “PIP”, then press the
ENTER button.
3
Press the … or † button to
select “Select Sound”, then
press the ENTER button.
Press the … or † button to
select “Main” or “Sub”,
then press the ENTER button.
“Main” is for the main TV
picture audio, and “Sub” is
for the sub picture (PIP)
audio.
Press the EXIT button to exit.
Picture
Mode : Standard
√
Color Tone : Warm1
√
Size
√
Digital NR : Off
√
DNIe : On
√
MCC
√
Film Mode : Off
√
PIP
√
Move Enter Return
Input
Picture
Sound
Channel
Setup
PIP
PIP : On
Source : TV
Swap
Size
Position
Channel : Air 11
Select Sound : Main
Move Enter Return
Input
Picture
Sound
Channel
Setup
Main
Sub
Picture
Mode : Standard
√
Color Tone : Warm1
√
Size
√
Digital NR : Off
√
DNIe : On
√
MCC
√
Film Mode : Off
√
PIP
√
Move Enter Return
Input
Picture
Sound
Channel
Setup
Page 7
6564
Special Features
Setting the SRS TSXT
TruSurround XT is a patented SRS technology that solves the problem of playing 5.1 multichannel
content over two speakers. Trusurround delivers a compelling, virtual surround sound experience
through any two-speaker playback system, including internal television speakers. It is fully
compatible with all multichannel formats.
1
Press the MENU button.
Press the … or † button to
select “Sound”, then press
the ENTER button.
2
Press the … or † button to
select “SRS TSXT”, then
press the ENTER button.
3
Press the … or † button to
select “Off”, “3D Mono” or
“Stereo”, then press the
ENTER button.
Press the EXIT button to exit.
Alternate method
Press the SRS TSXT button on the remote control repeatedly to
select one of the settings.
Sound
Mode : Standard
Equalizer
SRS TSXT : Off
MTS : Stereo
Auto Volume : Off
Internal Mute : Off
Move Enter Return
Input
Picture
Sound
Channel
Setup
Off
3D Mono
Stereo
Sound
Mode : Standard
√
Equalizer
√
SRS TSXT : Off
√
MTS : Stereo
√
Auto Volume : Off
√
Internal Mute : Off
√
Move Enter Return
Input
Picture
Sound
Channel
Setup
Sound
Mode : Standard
√
Equalizer
√
SRS TSXT : Off
√
MTS : Stereo
√
Auto Volume : Off
√
Internal Mute : Off
√
Move Enter Return
Input
Picture
Sound
Channel
Setup
Choosing a Multi-Channel Sound (MTS) track
Depending on the particular program being broadcast, you can listen to “Mono”, “Stereo” or
“SAP (Separate Audio Program)”. “SAP” audio is usually a foreign-language translation.
Sometimes “SAP” has unrelated information like news or weather.
1
Press the MENU button.
Press the … or † button to
select “Sound”, then press
the ENTER button.
2
Press the … or † button to
select “MTS”, then press the
ENTER button.
3
Press the … or † button to
select “Mono”, “Stereo” or
“SAP”, then press the ENTER
button.
Press the EXIT button to exit.
Alternate method
Press the MTS button on the remote control repeatedly to select
one of the settings.
• Choose “Mono” for channels that are broadcasting in mono, or
if you are having difficulty receiving a stereo signal.
• Choose “Stereo” for channels that are broadcasting in stereo.
• Choose “SAP” to listen to the Separate Audio Program, which
is usually a foreign-language translation.
Sound
Mode : Standard
Equalizer
SRS TSXT : Off
MTS : Stereo
Auto Volume : Off
Internal Mute : Off
Move Enter Return
Input
Picture
Sound
Channel
Setup
Mono
Stereo
SAP
Sound
Mode : Standard
√
Equalizer
√
SRS TSXT : Off
√
MTS : Stereo
√
Auto Volume : Off
√
Internal Mute : Off
√
Move Enter Return
Input
Picture
Sound
Channel
Setup
Sound
Mode : Standard
√
Equalizer
√
SRS TSXT : Off
√
MTS : Stereo
√
Auto Volume : Off
√
Internal Mute : Off
√
Move Enter Return
Input
Picture
Sound
Channel
Setup
Page 8
67
Special Features
66
Auto Volume
Each broadcasting station has its own signal conditions, and it is inconvenient to adjust the
volume every time the channel is changed. “Auto Volume” automatically adjusts the volume of the
desired channel by lowering the sound output when the modulation signal is high or by raising
the sound output when the modulation signal is low.
1
Press the MENU button.
Press the … or † button to
select “Sound”, then press
the ENTER button.
2
Press the … or † button to
select “Auto Volume”, then
press the ENTER button.
3
Press the … or † button to
select “Off” or “On”, then
press the ENTER button.
Press the EXIT button to exit.
Sound
Mode : Standard
Equalizer
SRS TSXT : Off
MTS : Stereo
Auto Volume : Off
Internal Mute : Off
Move Enter Return
Input
Picture
Sound
Channel
Setup
Off
On
Sound
Mode : Standard
√
Equalizer
√
SRS TSXT : Off
√
MTS : Stereo
√
Auto Volume : Off
√
Internal Mute : Off
√
Move Enter Return
Input
Picture
Sound
Channel
Setup
Sound
Mode : Standard
√
Equalizer
√
SRS TSXT : Off
√
MTS : Stereo
√
Auto Volume : Off
√
Internal Mute : Off
√
Move Enter Return
Input
Picture
Sound
Channel
Setup
Enjoying the Sound of External Speakers
When using external device such as Home Theater Systems, external speaker, or external Audio
Amplifier set “Internal Mute” to “On” to produce sound which is consistent with what the picture
shows.
1
Press the MENU button.
Press the … or † button to
select “Sound”, then press
the ENTER button.
2
Press the … or † button to
select “Internal Mute”, then
press the ENTER button.
3
Press the … or † button to
select “Off” or “On”, then
press the ENTER button.
Press the EXIT button to exit.
Sound
Mode : Standard
Equalizer
SRS TSXT : Off
MTS : Stereo
Auto Volume : Off
Internal Mute : Off
Move Enter Return
Input
Picture
Sound
Channel
Setup
Off
On
Sound
Mode : Standard
√
Equalizer
√
SRS TSXT : Off
√
MTS : Stereo
√
Auto Volume : Off
√
Internal Mute : Off
√
Move Enter Return
Input
Picture
Sound
Channel
Setup
Sound
Mode : Standard
√
Equalizer
√
SRS TSXT : Off
√
MTS : Stereo
√
Auto Volume : Off
√
Internal Mute : Off
√
Move Enter Return
Input
Picture
Sound
Channel
Setup
Page 9
6968
Special Features
Using the V-Chip (USA)
Access to channels and programs is controlled by a password (i.e., a 4-digit secret code that is
defined by the user). The on-screen menu will instruct you to assign a password (and you can
change it later, if necessary).
NOTE
• The V-Chip doesn’t function when the PIP is active.
How to Change Your Password
1
Press the MENU button.
Press the … or † button to
select “Setup”, then press the
ENTER button.
Press the … or † button to
select “V-Chip”, then press
the ENTER button.
2
Press the number buttons to
enter your current 4-digit pin
number.
(The default pin number for
a new TV set is “0000”.)
The “V-Chip” menu is
displayed.
3
Press the … or † button to
select “Change PIN”, then
press the ENTER button.
4
Press the number buttons to
enter your new 4-digit pin
number.
5
Re-enter your new pin
number to confirm.
Press the EXIT button to exit.
NOTE
• If you forget the pin
number, press the
remote control buttons
in the following
sequence, which resets
the pin to 0-0-0-0:
POWER (Off), MUTE,
8, 2, 4, POWER (On).
Setup
Language : English
√
Time
√
V-Chip
√
Caption
√
Blue Screen : Off
√
Melody : On
√
Color Weakness
√
PC
√
Move Enter Return
Input
Picture
Sound
Channel
Setup
V-Chip
0 9
Enter PIN Return
Input
Picture
Sound
Channel
Setup
Enter PIN
*
V-Chip
V-Chip Lock : Off
√
TV Parental Guidelines
√
MPAA Rating
√
Change PIN
√
Move Enter Return
Input
Picture
Sound
Channel
Setup
Change PIN
0 9
Enter PIN Return
Input
Picture
Sound
Channel
Setup
Enter New PIN
*
Change PIN
0 9
Enter PIN Return
Input
Picture
Sound
Channel
Setup
Confirm New PIN
*
How to Enable/Disable the Rating Controls
1
Press the MENU button.
Press the … or † button to
select “Setup”, then press the
ENTER button.
2
Press the … or † button to
select “V-Chip”, then press
the ENTER button.
3
Press the number buttons to
enter your current 4-digit pin
number.
(The default pin number for
a new TV set is “0000”.)
The “V-Chip” menu is
displayed.
4
Press the ENTER button to
select “V-Chip Lock”.
5
Press the … or † button to
select “On”, then press the
ENTER button.
Press the EXIT button to exit.
Setup
Language : English
√
Time
√
V-Chip
√
Caption
√
Blue Screen : Off
√
Melody : On
√
Color Weakness
√
PC
√
Move Enter Return
Input
Picture
Sound
Channel
Setup
V-Chip
0 9
Enter PIN Return
Input
Picture
Sound
Channel
Setup
Enter PIN
*
V-Chip
V-Chip Lock : Off
√
TV Parental Guidelines
√
MPAA Rating
√
Change PIN
√
Move Enter Return
Input
Picture
Sound
Channel
Setup
V-Chip
V-Chip Lock : Off
TV Parental Guidelines
MPAA Rating
Change PIN
Move Enter Return
Input
Picture
Sound
Channel
Setup
Off
On
Setup
Language : English
√
Time
√
V-Chip
√
Caption
√
Blue Screen : Off
√
Melody : On
√
Color Weakness
√
PC
√
Move Enter Return
Input
Picture
Sound
Channel
Setup
Page 10
7170
Special Features
How to Set up Restrictions Using the “TV Parental Guidelines”
The parental restrictions can be set up using either of two methods: The “TV Parental Guidelines”
or “MPAA Rating”.
1
Press the MENU button.
Press the … or † button to
select “Setup”, then press the
ENTER button.
2
Press the … or † button to
select “V-Chip”, then press
the ENTER button.
3
Press the number buttons to
enter your current 4-digit pin
number.
(The default pin number for
a new TV set is “0000”.)
The “V-Chip” menu is
displayed.
4
Press the … or † button to
select “TV Parental
Guidelines”, then press the
ENTER button.
Setup
Language : English
√
Time
√
V-Chip
√
Caption
√
Blue Screen : Off
√
Melody : On
√
Color Weakness
√
PC
√
Move Enter Return
Input
Picture
Sound
Channel
Setup
V-Chip
0 9
Enter PIN Return
Input
Picture
Sound
Channel
Setup
Enter PIN
*
V-Chip
V-Chip Lock : On
√
TV Parental Guidelines
√
MPAA Rating
√
Change PIN
√
Move Enter Return
Input
Picture
Sound
Channel
Setup
Setup
Language : English
√
Time
√
V-Chip
√
Caption
√
Blue Screen : Off
√
Melody : On
√
Color Weakness
√
PC
√
Move Enter Return
Input
Picture
Sound
Channel
Setup
5
You can independently lock the TV
ratings. The locked TV (FCC) ratings are
indicated by the symbol “”.
Press the
…/†/œ/√ buttons and the
ENTER button to activate the appropriate
restrictions for TV (FCC) rating system.
TV-Y : Young children
TV-Y7 : Children 7 and over
TV-G : General audience
TV-PG : Parent Guidance
TV-14 : Viewers 14 and over
TV-MA : Mature Audience
Press the EXIT button to exit.
NOTES
• These categories consist of two separate groups: “TV-Y” and “TV-Y7” (young
children through age 7), and “TV-G” through “TV-MA” (everybody else).
• The restrictions for these two groups work independently: If a household
includes very young children as well as young adults, the TV parental
guidelines must be set up separately for each age group. (See page 73.)
TV Parental Guidelines
Move Enter Return
Input
Picture
Sound
Channel
Setup
ALL FV V S L D
TV-Y
TV-Y7
TV-G
TV-PG
TV-14
TV-MA
Page 11
7372
Special Features
How to Set up Restrictions Using the “MPAA Rating”
The Movie rating system uses the “MPAA” (Motion Picture Association of America) system, and its
main application is for movies.
When the rating controls is on, the TV will automatically block any programs that are coded with
objectionable ratings (either “MPAA Rating” or “TV Parental Guidelines”).
1
Press the MENU button.
Press the … or † button to
select “Setup”, then press the
ENTER button.
2
Press the … or † button to
select “V-Chip”, then press
the ENTER button.
3
Press the number buttons to
enter your current 4-digit pin
number.
(The default pin number for
a new TV set is “0000”.)
The “V-Chip” menu is
displayed.
4
Press the … or † button to
select “MPAA Rating”, then
press the ENTER button.
5
You can independently lock
the movie ratings. The locked
movie ratings are indicated
by the symbol “”.
Press the …/†/ENTER
buttons to activate the
appropriate restrictions for
movie rating system.
Press the EXIT button.
Setup
Language : English
√
Time
√
V-Chip
√
Caption
√
Blue Screen : Off
√
Melody : On
√
Color Weakness
√
PC
√
Move Enter Return
Input
Picture
Sound
Channel
Setup
V-Chip
0 9
Enter PIN Return
Input
Picture
Sound
Channel
Setup
Enter PIN
*
V-Chip
V-Chip Lock : On
√
TV Parental Guidelines
√
MPAA Rating
√
Change PIN
√
Move Enter Return
Input
Picture
Sound
Channel
Setup
Setup
Language : English
√
Time
√
V-Chip
√
Caption
√
Blue Screen : Off
√
Melody : On
√
Color Weakness
√
PC
√
Move Enter Return
Input
Picture
Sound
Channel
Setup
Important Notes About Parental Locks
Explanation of the MPAA and TV (FCC) Rating Systems:
TV (FCC) Age-Based Ratings
TV-MA
Mature audiences only. This program may
contain mature themes, profane language,
graphic violence and explicit sexual content.
TV-14
Parents strongly cautioned. This program may
contain sophisticated themes, sexual content,
strong language and more intense violence.
TV-PG
Parental guidance suggested. The program
may contain infrequent coarse language,
limited violence, some suggestive sexual
dialogue and situations.
TV-G
General audience. It contains little or no
violence, no strong language, and little or no
sexual dialogue or situations.
TV-Y7
Directed to older children. Themes and
elements in this program may include mild
physical or comedic violence, or may frighten
children under the age of seven.
TV-Y
All children. The themes and elements in this
program are specifically designed for a very
young audience, including children from ages
two – six.
TV (FCC) Content Category
V Violence.
S Sexual content.
L Offensive language.
D Dialogue sexual innuendo.
FV Fantasy or cartoon violence.
MPAA Rating System (Movies)
G General audience. No restriction.
PG Children under 13 should be
accompanied by an adult.
PG-13 Parental guidance suggested. Children
under 13 should be accompanied by an
adult.
R Restricted. Viewers should be 17 or older.
NC-17 Not classified. Viewers should be 17 or
older.
X Adults only.
NR Not rated.
• TV (FCC) ratings : The particular rating that you have selected will be locked (and indicated as
a red “L” on a blue background). Also, all of the age-based ratings will be locked within the
particular group (i.e., “group 1” or “group 2”). Suppose that the TV-G rating and all of its
contents (V, S, L, and D) are locked. In that case, more restrictive ratings (TV-PG, TV-14, and
TV-MA) and all of their contents (V, S, L, and D) are automatically locked as well.
• MPAA ratings : The particular rating that you have selected will be locked. In addition, more
restrictive ratings will be locked as well.
• Neither TV (FCC) ratings nor MPAA ratings apply to news programs.
MPAA Rating
Move Enter Return
Input
Picture
Sound
Channel
Setup
Block
G
PG
PG-13
R
NC-17
X
NR
Page 12
75
Special Features
74
Viewing Closed Caption Information
Your TV decodes and displays the closed captions information that is broadcast along with some
television shows. These captions are usually subtitles for the hearing impaired or translations into
other languages. All VCRs record the closed caption signal from television programs, so prerecorded video tapes can also deliver closed-caption information. Check for the closed caption
symbol ( ) on the tape’s package or your TV program-schedule.
1
Press the MENU button.
Press the … or † button to
select “Setup”, then press the
ENTER button.
Press the … or † button to
select “Caption”, then press
the ENTER button.
2
Press the ENTER button to
select “Caption”.
Press the … or † button to
select “On”, then press the
ENTER button.
3
Press the … or † button to
select “Mode”, then press
the ENTER button.
Press the … or † button to
select “Caption” or “Text”,
then press the ENTER button.
• In “Caption” mode, caption appears at the bottom of the
screen, and they usually cover only a small portion of the
picture.
• In “Text” mode, information unrelated to the program, such as
news or weather, is displayed. Text often covers a large portion
of the screen.
Caption
Caption : On
Mode : Caption
Channel : 1
Field : 1
Move Enter Return
Input
Picture
Sound
Channel
Setup
Caption
Caption : On
Mode : Caption
Channel : 1
Field : 1
Move Enter Return
Input
Picture
Sound
Channel
Setup
Off
On
Setup
Language : English
√
Time
√
V-Chip
√
Caption
√
Blue Screen : Off
√
Melody : On
√
Color Weakness
√
PC
√
Move Enter Return
Input
Picture
Sound
Channel
Setup
Text
Caption
4
Depending on the particular
broadcast, it might be
necessary to make changes
to “Channel” and “Field”.
Press the … or † button to
select “Channel”, then press
the ENTER button.
5
Press the … or † button to
select “1” or “2”, then press
the ENTER button.
6
Press the … or † button to
select “Field”, then press the
ENTER button.
Press the
… or † button to
select “1” or “2”, then press
the ENTER button.
• Different channels and fields display different information:
“Field 2” carries additional information that supplements the
information in “Field 1”. (For example, “Channel 1” may have
subtitles in English, while “Channel 2” has subtitles in Spanish.)
Caption
Caption : On
Mode : Caption
Channel : 1
Field : 1
Move Enter Return
Input
Picture
Sound
Channel
Setup
2
1
Caption
Caption : On
√
Mode : Caption
√
Channel : 1
√
Field : 1
√
Move Enter Return
Input
Picture
Sound
Channel
Setup
Caption
Caption : On
Mode : Caption
Channel : 1
Field : 1
Move Enter Return
Input
Picture
Sound
Channel
Setup
2
1
NOTES
• The Caption function doesn’t operate when the PIP is active.
• Misspellings and unusual characters sometimes occur during closed caption transmissions,
especially those of live events. There may be a small delay before captions appear when you
change channels. These are not malfunctions of the TV.
Page 13

Setting the Blue Screen Mode
If no signal is being received or the signal is very weak, a blue screen automatically replaces the
noisy picture background. If you wish to continue viewing the poor picture, you must set the “Blue
Screen” mode to “Off”.
77
Special Features
76
1
Press the MENU button.
Press the … or † button to
select “Setup”, then press
the ENTER button.
2
Press the … or † button to
select “Blue Screen”, then
press the ENTER button.
3
Press the … or † button to
select “On” or “Off”, then
press the ENTER button.
Press the EXIT button to exit.
Setup
Language : English
√
Time
√
V-Chip
√
Caption
√
Blue Screen : Off
√
Melody : On
√
Color Weakness
√
PC
√
Move Enter Return
Input
Picture
Sound
Channel
Setup
Setup
Language : English
√
Time
√
V-Chip
√
Caption
√
Blue Screen : Off
√
Melody : On
√
Color Weakness
√
PC
√
Move Enter Return
Input
Picture
Sound
Channel
Setup
Setup
Language : English
Time
V-Chip
Caption
Blue Screen : Off
Melody : On
Color Weakness
PC
Move Enter Return
Input
Picture
Sound
Channel
Setup
Off
On
Setting The On/Off Melody
A melody sound can be set to come on when the TV is powered On or Off.
1
Press the MENU button.
Press the … or † button to
select “Setup”, then press the
ENTER button.
2
Press the … or † button to
select “Melody”, then press
the ENTER button.
3
Press the … or † button to
select “On”, then press the
ENTER button.
Press the EXIT button to exit
the menu.
Setup
Language : English
Time
V-Chip
Caption
Blue Screen : Off
Melody : On
Color Weakness
PC
Move Enter Return
Input
Picture
Sound
Channel
Setup
Off
On
Setup
Language : English
√
Time
√
V-Chip
√
Caption
√
Blue Screen : Off
√
Melody : On
√
Color Weakness
√
PC
√
Move Enter Return
Input
Picture
Sound
Channel
Setup
Setup
Language : English
√
Time
√
V-Chip
√
Caption
√
Blue Screen : Off
√
Melody : On
√
Color Weakness
√
PC
√
Move Enter Return
Input
Picture
Sound
Channel
Setup
Page 14

PC Display
Using the Color Weakness Enhancement Feature
This feature adjusts the Red, Blue or Green color to enhance the picture according to the user's
particular color weakness.
78
Special Features
1
Press the MENU button.
Press the … or † button to
select “Setup”, then press
the ENTER button.
2
Press the … or † button to
select “Color Weakness”,
then press the ENTER button.
3
Press the ENTER button to
select “Color Weakness”.
Press the … or † button to
select “On”, then press the
ENTER button.
4
Press the … or † button to
select a color to be adjusted,
then press the ENTER button.
Press the œ or √ button to
adjust the value of a color
selected.
Press the EXIT button to exit.
Setup
Language : English
√
Time
√
V-Chip
√
Caption
√
Blue Screen : Off
√
Melody : On
√
Color Weakness
√
PC
√
Move Enter Return
Input
Picture
Sound
Channel
Setup
Setup
Language : English
√
Time
√
V-Chip
√
Caption
√
Blue Screen : Off
√
Melody : On
√
Color Weakness
√
PC
√
Move Enter Return
Input
Picture
Sound
Channel
Setup
0
Color Weakness
AdjustMove Return
▲
Red
▼
Setup
Color Weakness : On
√
Red 0
Green 0
Blue 0
Move Enter Return
Input
Picture
Sound
Channel
Setup
Setup
Color Weakness : On
Red 0
Green 0
Blue 0
Move Enter Return
Input
Picture
Sound
Channel
Setup
Off
On
Page 15

PC Display
80 81
Using Your TV as a Computer (PC) Display
How to Connect Your PC to the TV
This figure shows the Standard Connector-jack panel. The actual configuration on your TV may be
different, depending on the model.
Setting up Your PC Software (Based on Widows 98)
The Windows display-settings for a typical computer are shown below. The actual screens on your
PC will probably be different, depending upon your particular version of Windows and your
particular video card. However, even if your actual screens look different, the same basic setup
information will apply in almost all cases. (If not, contact your computer manufacturer or Samsung
Dealer.)
15Pin(D-Sub) Cable
TV Rear Panel
PC
Audio Cable
First, click on “Settings” on the Windows start menu.
While “Settings” is highlighted, move the cursor so
that “control panel” is highlighted.
Navigate to the “Settings” tab on the display dialog
box.
The two key variables that apply to the TV-PC interface
are “resolution” and “colors”. The correct settings for
these two variables are:
* Screen area (sometimes called “resolution”): 1024 x
768 pixels
* Colors: “24-bit” color (might also be expressed as
“16 million colors”).
If a vertical-frequency option exists on your display
settings dialog box, the correct value is “60” or “60
Hz”. Otherwise, just click “OK” and exit the dialog
box.
continued...
When the control panel screen appears,
click on “Display” and a display dialog-box
will appear.
Page 16

Adjusting the Picture Quality
The purpose of picture quality adjustment is to remove or reduce picture noise. If the noise is not
removed by fine tuning alone, then do the frequency adjustments to the utmost and fine tune
again. After the noise has been reduced, re-adjust the picture so that it is aligned on the center of
screen.
83
PC Display
82
NOTE
• Both screen position and size will vary, depending on the type of PC monitor and its resolution.
The table above shows all of the display modes that are supported:
* The interlace mode is not supported.
* The TV will operate abnormally if a non-standard video format is selected.
NOTES
• When this TV is used as a PC display, 32-bit color is supported (over 16 million colors).
• Your PC display screen might appear different, depending on the manufacturer (and depending
on your particular version of Windows). Check your PC instruction book for information about
connecting your PC to a TV display-monitor.
• Same modes as PC are supported for the signal input to the DVI jack. Only a separate sync
signal is supported.
Resolution
640 x 350
720 x 400
640 x 480
800 x 600
832 x 624
1024 x 768
1920 x 1080i
1280 x 720p
720 x 483p
Horizontal Frequency [KHz]
31.47
31.47
37.93
31.47
35.00
37.86
37.50
43.27
35.16
37.88
48.08
46.87
53.67
49.73
48.36
56.40
60.02
33.75
45.00
31.47
Vertical Frequency [Hz]
70.00
70.00
85.00
60.00
66.70
72.80
75.00
85.00
56.30
60.30
72.20
75.00
85.10
74.60
60.00
70.10
75.00
60
60
60
Pixel Clock [MHz]
25.175
28.322
35.5
25.175
30.24
31.50
31.50
36.00
36.00
40.00
50.00
49.50
56.25
57.284
65.00
75.00
78.75
74.25
74.25
27
Sync Polarity (H/V)
+/
-
-
/
-
-
/+
-
/+
-/-
-/-
-/-
-/-
-+/-
+/+
+/+
+/+
+/+
-
/+
-/-
-
/
-
+/
X
X
X
Mode
VGA
SVGA
XGA
DTV
Display Modes
1
Press the TV/VIDEO button to select “PC”.
2
Press the MENU button.
Press the … or † button to
select “Setup”, then press the
ENTER button.
3
Press the … or † button to
select “PC”, then press the
ENTER button.
4
Press the … or † button to
select “Coarse” or “Fine”,
then press the ENTER button.
5
Pressing the œ or √ button
to remove the picture noise.
Press the EXIT button to exit.
NOTE
• This feature may change the width of the image. If necessary,
adjust the position to center.
Setup
Language : English
√
Time
√
V-Chip
√
Caption
√
Blue Screen : Off
√
Melody : On
√
Color Weakness
√
PC
√
Move Enter Return
Input
Picture
Sound
Channel
Setup
Setup
Language : English
√
Time
√
V-Chip
√
Caption
√
Blue Screen : Off
√
Melody : On
√
Color Weakness
√
PC
√
Move Enter Return
Input
Picture
Sound
Channel
Setup
▲
Coarse
▼
1344
PC
Coarse
√
Fine
√
Position
√
Auto Adjustment
Recall
Move Enter Return
Input
Picture
Sound
Channel
Setup
▲
Fine
▼
0
Page 17

Changing the Picture Position
After connecting the TV to your PC, adjust the position of picture if it is not well-aligned.
84
PC Display
85
Adjusting the Picture Quality and Position Automatically
This feature allows the TV to self-adjust to the incoming video signal. The values of fine, coarse
and position are adjusted automatically.
1
Press the TV/VIDEO button to select “PC”.
2
Press the MENU button.
Press the … or † button to
select “Setup”, then press the
ENTER button.
3
Press the … or † button to
select “PC”, then press the
ENTER button.
4
Press the … or † button to
select “Auto Adjustment”,
then press the ENTER button.
The picture quality and
position are automatically
adjusted, and the picture
returns to original view
about a few seconds later.
Press the EXIT button to exit.
Auto in Progress
Please Wait
PC
Coarse
√
Fine
√
Position
√
Auto Adjustment
Recall
Move Enter Return
Input
Picture
Sound
Channel
Setup
Setup
Language : English
√
Time
√
V-Chip
√
Caption
√
Blue Screen : Off
√
Melody : On
√
Color Weakness
√
PC
√
Move Enter Return
Input
Picture
Sound
Channel
Setup
Setup
Language : English
√
Time
√
V-Chip
√
Caption
√
Blue Screen : Off
√
Melody : On
√
Color Weakness
√
PC
√
Move Enter Return
Input
Picture
Sound
Channel
Setup
1
Press the TV/VIDEO button to select “PC”.
2
Press the MENU button.
Press the … or † button to
select “Setup”, then press the
ENTER button.
3
Press the … or † button to
select “PC”, then press the
ENTER button.
4
Press the … or † button to
select “Position”, then press
the ENTER button.
5
Adjust the position of picture
by pressing the …/†/œ/√
button.
Press the EXIT button to exit.
NOTE
• If a PC signal is input to “DVI” or “HDMI”, you can’t adjust the
quality and position of picture.
PC
Coarse
√
Fine
√
Position
√
Auto Adjustment
Recall
Move Enter Return
Input
Picture
Sound
Channel
Setup
Setup
Language : English
√
Time
√
V-Chip
√
Caption
√
Blue Screen : Off
√
Melody : On
√
Color Weakness
√
PC
√
Move Enter Return
Input
Picture
Sound
Channel
Setup
Setup
Language : English
√
Time
√
V-Chip
√
Caption
√
Blue Screen : Off
√
Melody : On
√
Color Weakness
√
PC
√
Move Enter Return
Input
Picture
Sound
Channel
Setup
Position
Move Enter Return
Input
Picture
Sound
Channel
Setup
▲
▼
▼
▼
Page 18

Initializing the Picture Settings
You can replace all picture settings with the factory default values.
86 87
PC Display
1
Press the TV/VIDEO button to select “PC”.
2
Press the MENU button.
Press the … or † button to
select “Setup”, then press the
ENTER button.
3
Press the … or † button to
select “PC”, then press the
ENTER button.
4
Press the … or † button to
select “Recall”, then press
the ENTER button.
The picture settings are
replaced with the factory
default values.
Press the EXIT button to exit.
Setup
Language : English
√
Time
√
V-Chip
√
Caption
√
Blue Screen : Off
√
Melody : On
√
Color Weakness
√
PC
√
Move Enter Return
Input
Picture
Sound
Channel
Setup
Setup
Language : English
√
Time
√
V-Chip
√
Caption
√
Blue Screen : Off
√
Melody : On
√
Color Weakness
√
PC
√
Move Enter Return
Input
Picture
Sound
Channel
Setup
PC
Coarse
√
Fine
√
Position
√
Auto Adjustment
Recall
Move Enter Return
Input
Picture
Sound
Channel
Setup
Changing the Picture Size (PC Mode)
You can select the picture size which best corresponds to your viewing requirements.
1
Press the TV/VIDEO button to select “PC”.
2
Press the MENU button.
Press the … or † button to
select “Picture”, then press
the ENTER button.
Press the … or † button to
select “Size”, then press the
ENTER button.
3
Press the œ or √ button to
select the screen format you
want, then press the ENTER
button.
Press the EXIT button to exit.
Alternate method
Press the P.SIZE button on the remote control repeatedly to select
one of the picture size settings.
•“Wide TV”: Scales the picture to the size of the TV screen
regardless of the aspect ratio of the input source.
•“Wide PC”: Scales the picture to 92% of the screen regardless
of the aspect ratio of the input source.
•“Expand”: Scales the picture to the aspect ratio of the input
source.
•“4:3”: Displays the picture as it is without changing the aspect
ratio of input source.
NOTES
• The “Wide PC” and
“Expand” modes are
recommended for the PC
mode.
• In VGA (640x480) and
SVGA (800x600) modes,
the “Wide” and “4:3”
modes are available.
• In XGA (1024x768)
mode, the “Wide” mode
is available.
Picture
Mode : Dynamic
√
Custom
√
Color Tone : Normal
√
Size
√
Digital NR : On
√
DNIe : On
√
MCC
√
▼ More
Move Enter Return
Input
Picture
Sound
Channel
Setup
Picture Size
Wide TV ➝ 4:3
Wide TV
➝ Wide PC ➝ Expand ➝ 4:3
Wide TV
➝ Wide PC ➝ Expand
Wide TV ➝ 4:3
Wide TV
➝ Wide PC ➝ Expand ➝ 4:3
Source (PC/DVI)
1920 x 1080i
1280 x 720
1024 x 768
720 x 483 (480p)
Others
Size
Move Enter Return
Input
Picture
Sound
Channel
Setup
Wide TV Wide PC Expend 4:3
Page 19

Appendix
SAMSUNG
Page 20

Cleaning and Maintaining Your TV
With proper care, your TV will give you many years of service. Please follow these guidelines to
get the maximum performance from your TV.
Placement
• Do not put the TV near extremely hot, cold, humid or dusty places.
• Do not place the TV near appliances with electric motors that create magnetic fields, such as
vacuum cleaners.
• Keep the ventilation openings clear; do not place the TV on a soft surface, such as cloth or
paper.
• Place the TV in a vertical position only.
Liquids
• Do not handle liquids near or on the TV. Liquids that spill into it can cause serious damage.
Cabinet
• Never open the cabinet or touch the parts inside.
• Wipe your TV with a clean, dry cloth. Never use water, cleaning fluids, wax, or chemicals.
• Do not put heavy objects on top of the cabinet.
• This DLP Projection TV projects the image onto a large screen by applying an optical system.
If you place the TV set face down, it might cause a problem because dirt, or some other
contaminant may become attached to the inside of the TV set.
Temperature
• If your TV is suddenly moved from a cold to a warm place, unplug the power cord, and allow
at least two hours for moisture that may have formed inside the unit to dry completely.
Using Your TV in Another Country
If you plan to take your TV with you to a foreign country, please be aware of the different
television systems that are in use around the world. A TV designed for one system may not work
properly with another system due to differences in the TV channel frequencies.
Specifications
91
Troubleshooting
If the TV seems to have a problem, first try this list of possible problems and solutions. If none of
these troubleshooting tips apply, then call your nearest service center.
90
Appendix
Possible Solution
Try another channel.
Adjust the antenna.
Check all wire connections.
Try another channel.
Adjust the antenna.
Make sure the MUTE button is off.
Try another channel.
Press the TV/VIDEO button.
Make sure the TV is plugged in.
Check the antenna connections.
Make sure the program is broadcasted in color.
Adjust the picture settings.
Adjust the antenna.
Check all wire connections.
If you are using a VCR, check the tracking.
Unplug the TV for 30 seconds, then try operating it
again.
Press the MODE button to put your remote control
into TV mode.
Make sure the remote has batteries.
Make sure the wall outlet is working.
Make sure the remote has batteries.
• The display panel used for the DLP Projection TV is composed of many tiny pixels.
These, pixels may occasionally appear on the screen.
Problem
Poor picture quality.
Poor sound quality.
No picture or sound.
No color, wrong colors or tints.
Picture rolls vertically.
The TV operates erratically.
Your remote control does not
operate your TV.
The TV won’t switch on.
Model
Voltage
Frequency of Operation
Power Consumption
Dimension (W x D x H)
Weight
HL-P5085W
AC 120V
60Hz
200 watts
???? x ??? x ??? mm /
?? x ?? x ?? inches
?? Kg / ?? lbs
HL-P5085W
AC 120V
60Hz
200 watts
???? x ??? x ??? mm /
?? x ?? x ?? inches
?? Kg / ?? lbs
Page 21

• The slots and openings in the cabinet and in the back or bottom are provided for necessary ventilation.
To ensure reliable operation of this apparatus, and to protect it from overheating, these slots and openings must never
be blocked or covered.
- Do not cover the slots and openings with a cloth or other materials.
- Do not block the slots and openings by placing this apparatus on a bed, sofa, rug or other similar surface.
- Do not place this apparatus in a confined space, such as a bookcase, or built-in cabinet, unless proper ventilations is
provided.
• Do not place this apparatus near or over a radiator or heat register, or where it is exposed to direct sunlight.
• Do not place the sources of heat on this apparatus, such as a candle, ash tray, incense or other similar material.
• Do not place a water containing vessel on this apparatus, as this can result in a risk of fire or electric shock.
• Do not expose this apparatus to rain or place it near water(near a bathtub, washbowl, kitchen sink, or laundry tub,
in a wet basement, or near a swimming pool etc.). If this appratus accidentally gets wet, unplug it and contact an
authorized dealer immediately.
You can clean this apparatus with damp cloth when necessary, but be sure to unplug the apparatus first.
• Do not expose this apparatus set to extreme temperature conditions or to extreme humidity conditions.
• This appratus use batteries. In your community there might be regulations that require you to dispose these batteries
properly under environmental considerations. Please contact your local authorities for disposal or recycling
information.
• To cut off the power source, unplug this apparatus from the wall outlet.
• Do not overload wall outlets, extension cords or convenience receptacles beyond their capacity, since this can result in
fire or electric shock.
• Power-supply cords should be routed so that they are not likely to be walked on or pinched by items placed upon or
against them, paying particular attention to cords at plugs, convenience receptacles, and the point where they exit from
the appliance.
• To protect this apparatus from a lightning storm, or when it is left unattended and unused for long periods of time,
unplug it from the wall outlet and disconnect the antenna or cable system. This will prevent damage to the set due to
lightning and power line surges.
• Before connecting the AC power cord to the DC adapter outlet, make sure the voltage designation of the DC adapter
corrsponds to the local electrical supply.
• Never insert anything metallic into this appratus openings. Doing so many create the danger of electric shock.
• To avoid electric shock, never touch the inside of this apparatus. Only a qualified technician should open this
apparatus's case.
• Be sure to hold the plug, not the cord, when disconnecting this apparatus from an electric socket.
• Locate this apparatus near an easily acessible AC outlet.
• If this appratus does not operate normally - in particular, if there are any unusual sounds or smells coming from
it - unplug it immediately and contact an authorized dealer or service center.
• Unplug this apparatus from the AC outlet before any service.
• Be sure to pull the power plug out of the outlet if the TV is to remain unused or you are to leave the house for an
extended period of time (especially when children, elderly or disabled people will be left alone in the house).
- Accumulated dust can cause an electric shock, an electric leakage or a fire by causing the power cord to generate
sparks and heat or deteriorating the insulation.
Warning! Important Safety Instructions
(Please read the appropriate section that corresponds to the marking on your Samsung product
before attempting to install the product.)
CAUTION
CAUTION: TO REDUCE THE RISK OF ELECTRIC SHOCK,
DO NOT REMOVE COVER (OR BACK). THERE ARE NO USER
SERVICEABLE PARTS INSIDE. REFER ALL SERVICING TO
QUALIFIED PERSONNEL.
RISK OF ELECTRIC SHOCK DO NOT OPEN
This sysmbol indicated high voltage is present inside.
It is dangerous to make any kind of contact with any
inside part of this product.
This symbol alerts you that important literature
concerning operation and maintenance has been
included with this product.
- 1 -
safety 2003.12.3 4:51 AM 페이지2
Page 22

• Les fentes et les ouvertures ménagées dans le boîtier ainsi qu'à l’arrière et au-dessous de l'appareil assurent la
ventilation de ce dernier.
Afin de garantir le bon fonctionnement de l'appareil et éviter les risques de surchauffe, ces fentes et ouvertures
ne doivent être ni obstruées ni couvertes.
- Ne couvrez pas les fentes et les ouvertures avec un morceau de tissu ou tout autre objet.
- Ne les obstruez pas non plus en plaçant l’appareil sur un lit, un canapé, un tapis ou toute autre surface
apparentée.
- Ne placez pas l’appareil dans un environnement clos tel qu’une bibliothèque ou une armoire encastrée, sauf si
une ventilation adéquate est prévue.
• Ne placez pas l’appareil à proximité ou au-dessus d’un radiateur ou d’une bouche d'air chaud, de même que
dans un endroit exposé à la lumière directe du soleil.
• Ne placez pas de sources de chaleur sur l’appareil, telles qu’une bougie, un cendrier, de l'encens.
• Ne placez aucun récipient d’eau sur l’appareil car cela représente un risque d’incendie ou de décharge
électrique.
• N’exposez pas l’appareil à la pluie et ne le placez pas à proximité d'une source d'eau, par exemple une
baignoire, un lavabo, un évier, un bac de lavage, un sous-sol humide, une piscine, etc. Si l’app areil vient à être
mouillé par accident, débranchez-le et contactez immédiatement un revendeur agréé.
Si nécessaire, après vous être assuré de l'avoir débranché, vous pouvez nettoyer l’appareil à l’aide d’un chiffon
humide.
• N’exposez pas l’appareil à des conditions de température ou d’humidité extrêmes.
• Cet appareil peut fonctionner sur piles. Dans un souci de préservation de l’environnement, la réglementation
locale prévoit peut-être des mesures spécifiques de récupération des piles usagées.Veuillez donc contacter les
autorités compétentes afin d’obtenir des informations sur la mise au rebut ou le recyclage des piles.
• Pour couper l’alimentation, déb ranchez l’appareil de la prise murale.
• Evitez de surcharger les prises murales, les rallonges et les prises mult iples car cela entraîne un risque
d'incendie ou de décharge électrique.
• Les cordons d'alimentation doivent être déroulés de sorte qu'aucun objet placé sur ou contre eux ne les
chevauche ou les pince. Accordez une attention particulière aux cordons au niveau des fiches, des prises et de
la sortie de l’appareil.
• En cas d'orage, ou bien lorsque vous vous absentez ou n'utilisez pas votre appareil pendant une longue période,
débranchez celui-ci de la prise murale et débranchez également le câble d’antenne ou le cordon de connexion
au réseau câblé. Ces précautions éviteront que l’appareil ne soit endommagé par la foudre ou par des
surtensions.
• Avant de raccorder le cordon d’alimentation CA à la prise de l’adaptateur CC, vérifiez que la tension indiquée
sur ce dernier correspond bien à la tension délivrée par le réseau électrique local.
• N’insérez aucun objet métallique dans les ouvertures de l’appareil. vous risqueriez de recevoir une décharge
électrique.
• Afin d’éviter tout risque d'électrocution, ne mettez jamais les doigts à l’intérieur de l’appareil. Seul un
technicien qualifié est habilité à ouvrir le boîtier de l’appareil.
• Assurez-vous de tirer sur la fiche et non sur le cordon lorsque vous débranchez l’appareil d'une prise
électrique.
• Placez l’appareil à proximité d’une prise CA facile d’accès.
• Si l’appareil ne fonction ne pas normalement, en particulier s’il émet des odeurs oudes sons anormaux,
débranchez-le immédiatement et contactez un revendeur ou un centre de dépannage agréé.
• Débranchez l’appareil de la prise CA avant toute réparation.
• Veillez à bien débrancher le cordon d'alimentation si la télévision doit restée inutilisée, ou lorsque vous quittez
votre domicile, pendant une période assez longue (et plus spécialement si des enfants, des personnes âgées ou
des majeurs incapables doivent rester seul à votre domicile).
- L'accumulation de poussières peut provoquer une électrocution, une perte d'énergie, ou un incendie induit par
le cordon d'alimentation, dû à des variations de tension, une surchauffe ou une détérioration de l'isolation.
Avertissement!
Consignes de sécurité importantes
(Avant toute installation de votre prod uit Samsung,
veuillez lire les sections correspondant aux inscriptions qui figurent sur ce de rnier.)
ATTENTION
ATTENTION : POUR REDUIRE LES RISQUES D'ELECTROCUTION, NE
RETIREZ PAS LE CAPOT(NI LE PANNEAU ARRIERE). A L'INTERIEUR
DE L'APPAREIL, AUCUNE PIECE NE PEUT ETRE REPAREE PAR
L’UTILISATEUR. POUR TOUT DEPANNAGE, ADRESSEZ-VOUS AUN
SPECIALISTE.
RISQUE D'ELECTROCUTION NE PAS OUVRIR
Ce symbole indique qu'une tension élevée est
présente à l'intérieur de l'appareil. Tout contact
avec une pièce située à l'intérieur de cet appareil
est dangereux.
Ce symbole vous prévient qu'une documentation
importante relative au fonctionnement et à
l’entretien est fournie avec le produit.
- 2 -
safety 2003.12.3 4:51 AM 페이지3
Page 23

• Las ranuras y aberturas existentes en la unidad y en la parte trasera o inferior se facilitan para proporcionar la
ventilación necesaria.
Para garantizar el funcionamiento fiable de este aparato, y para protegerlo frente a sobrecalentamiento, estas
ranuras y aberturas nunca deben bloquearse ni cubrirse.
- No cubra las ranuras y aberturas con un paño o con cualquier otro material.
- No bloquee las ranuras ni aberturas colocando este aparato sobre la cama, sofá, alfombra o superficie similar.
- No coloque este aparato en un espacio cerrado, como una librería, o un armario empotrado, a menos que se
proporcione una ventilación correcta.
• No coloque este aparato cerca o sobre un radiador o una rejilla de aire caliente, o en lugares expuestos a luz
solar directa.
• No coloque fuentes de calor en este aparato, como una vela, un cenicero, incienso o material similar.
• No coloque recipientes con agua sobre este aparato, ya que podría representar riesgo de incendio o descarga
eléctrica.
• No exponga este aparato a la lluvia ni lo coloque cerca de agua (cerca de una bañera, lavabo, fregadero o
lavadero, en un sótano húmedo ni cerca de una piscina o similar).
Si este aparato accidentalmente se moja, desenchúfelo y póngase en contacto inmediatamente con un
autorizado.
Puede limpiar este aparato con un paño húmedo cuando sea necesario, pero asegúrese de desenchufar primero
el aparato.
• exponga este aparato a condiciones de temperatura o humedad extremas.
• Este aparato utiliza baterías. En su comunidad puede que existan normativas que requieran la disposición de
estas baterías de forma adecuada bajo consideraciones ambientales.
Póngase en contacto con las autoridades locales para obtener información sobre desecho y reciclaje.
• Para cortar la fuente de alimentación, desenchufe este aparato de la toma mural.
• No sobrecargue las tomas murales, los alargadores ni los receptáculos correspondientes por encima de su
capacidad, ya que esto puede generar incendios o descargas eléctricas.
• Los cables de alimentación y protección deben colocarse de forma que no puedan pisarse ni quedar atrapados
por objetos encima o contra ellos, poniendo especial atención en los cables cerca del enchufe, los receptáculos
de los electrodomésticos y el punto en el que salen del aparato.
• Para proteger este aparato durante una tormenta eléctrica o cuando no lo utilice durante largos periodos de
tiempo, desenchúfelo de la toma de la pared y desconecte la antena o el cable del sistema. Esto evitará que el
equipo se dañe por rayos o picos de tensión de la línea eléctrica.
• Antes de conectar el cable de alimentación de CA a la toma del adaptador de CC, asegúrese de que la
designación del voltaje del adaptador de CC corresponde a la fuente eléctrica local.
• Nunca inserte nada metálico en las aberturas del aparato. Hacerlo así puede crear peligros de descarga eléctrica.
• Para evitar descarga eléctrica, no toque nunca el interior de este aparato. Sólo un técnico cualificado debe abrir
el alojamiento del aparato.
• Asegúrese de sujetar el enchufe, no el cable, al desconectar este aparato de la toma eléctrica.
• Sitúe este aparato cerca de una toma de CA de fácil acceso.
• Si este aparato no funciona normalmente, en concreto, si emite sonidos extraños o desprende olores desde el
interior, desenchúfelo inmediatamente y póngase en contacto con el distribuidor autorizado o el centro de
servicio técnico.
• Desenchufe este aparato de la toma de CA antes de realizar cualquier operación de servicio.
• Asegúrese de desconectar el enchufe de alimentación de la toma de corriente si la TV ha dejado de utilizarse,
o desea salir de casa, durante un largo período de tiempo (especialmente cuando sea necesario dejar solos en
casa a niños, ancianos o personas incapacitadas).
- El polvo acumulado puede provocar una descarga eléctrica, un cortocircuito o un fuego, haciendo que el cable
eléctrico genere chispas y calor, o deteriorando la funda protectora.
Advertencia!
Instrucciones importantes de seguridad
(Lea la sección apropiada que corresponde a la
marca del producto Samsung antes de intentar instalar el producto.)
PRECAUCIÓN
PRECAUCIÓN:PARAREDUCIR EL PELIGRO DE DESCARGA
ELÉCTRICA, NO RETIRE LA CUBIERTA. NO HAY PIEZAS EN
EL INTERIOR QUE PUEDA REPARAR ELUSUARIO.
CONSULTE AL PERSONAL CUALIFICADO DE SERVICIO TÉCNICO.
PELIGRO DE DESCARGA ELÉCTRICA NO ABRIR
Este símbolo indica la presencia de alto voltaje en
el interior. Es peligroso entrar en contacto con
cualquier pieza interior de este producto.
Este símbolo le alerta de que con este producto se
incluye documentación importante correspondiente
al funcionamiento y mantenimiento.
- 3 -
safety 2003.12.3 4:51 AM 페이지4
Page 24

• Die Schlitze und Öffnungen im Gehäuse und in der Rückwand oder im Boden sind für die Belüftung
erforderlich.
Um den zuverlässigen Betrieb des Geräts zu gewährleisten und es vor Überhitzung zu schützen, dürfen diese
Öffnungen keinesfalls blockiert oder bedeckt werden.
- Bedecken Sie die Schlitze und Öffnungen nicht mit einem Tuch oder anderen Materialien.
- Schlitze und Öffnungen dürfen keinesfalls blockiert werden, indem das Gerät auf ein Bett, Sofa, einen Teppich oder
eine ähnliche Oberfläche gestellt wird.
- Stellen Sie das Gerät nicht in abgeschlossene Räume wie z. B. in ein Bücherregal oder einen Einbauschrank.
Dieser Einbau ist nur dann zulässig, wenn für ausreichende Belüftung gesorgt wird.
• Außerdem darf das Gerät keinesfalls in der Nähe oder über einem Radiator oder Heizkörper aufgestellt werden,
oder an Orten, an denen es direkter Sonneneinstrahlung ausgesetzt ist.
• Stellen Sie keine Wärmequelle auf das Gerät wie z. B. Kerzen, Aschenbecher, Räucherstäbchen oder vergleichbare
Materialien.
• Stellen Sie keine mit Flüssigkeit gefüllte Behälter auf das Gerät, da dies zu einem Brand oder Stromschlag führen
kann.
• Setzen Sie das Gerät keinesfalls Regen aus und stellen Sie es nicht in der Nähe von Wasser auf (Badewanne,
Küchenspüle, feuchter Keller, Schwimmbecken usw). Falls das Gerät dennoch Nässe ausgesetzt wurde, trennen Sie es
von der Stromversorgung und wenden Sie sich umgehend an Ihren örtlichen Vertreter.
Sie können das Gerät, falls erforderlich, mit einem feuchten Tuch reinigen. Trennen Sie es davor unbedingt von der
Stromversorgung.
• Setzen Sie das Gerät nicht extremen Temperaturbedingungen oder extremen Feuchtigkeitsbedingungen aus.
• Für dieses Gerät benötigen Sie Batterien.
Entsorgen Sie die Batterien gemäß den regionalen Umweltschutzbestimmungen.
• Um das Gerät von der Stromversorgung zu trennen ziehen Sie den Stecker aus der Steckdose.
• Überlasten Sie Steckdosen, Verlängerungskabel und Mehrfachstecker keinesfalls, da dies zu einem Brand oder
Stromschlag führen kann.
• Netzkabel müssen so verlegt werden, dass niemand auf das Kabel treten kann oder es durch Gegenstände gequetscht
wird, die auf dem Kabel stehen oder gegen das Kabel drücken. Besondere Aufmerksamkeit muss den Bereichen um
Stecker, Steckdosen und dem Punkt zukommen, an dem das Netzkabel aus dem Gerät herausgeführt wird.
• Zum Schutz des Geräts bei einem Gewitter oder längerem Nichtbetrieb trennen Sie das Gerät vom Netz.
Trennen Sie darüber hinaus das Antennenkabel vom Gerät. Auf diese Weise werden Schäden durch Blitzschlag oder
Spannungsstöße vermieden.
• Stellen Sie sicher, dass die Nennspannung des Netzteils für die örtliche Stromversorgung geeignet ist, bevor Sie das
Netzkabel an die Stromversorgung anschließen.
• Stecken Sie keinesfalls metallische Gegenstände in die Öffnungen des Geräts.
Dies kann zu Stromschlägen führen.
• Berühren Sie keinesfalls Bauteile im Geräteinneren, um Stromschläge zu vermeiden.
Das Gerät darf nur von einem qualifizierten Techniker geöffnet werden.
• Ziehen Sie beim Trennen des Gerätes von der Stromversorgung nicht am Netzkabel sondern am Stecker.
• Stellen Sie das Gerät der Nähe einer leicht zugänglichen Steckdose auf.
• Wenn das Gerät nicht einwandfrei funktioniert, insbesondere beim Auftreten ungewöhnlicher Geräusche oder
Gerüche aus dem Inneren, trennen Sie es unverzüglich von der Stromversorgung und wenden Sie sich umgehend an
Ihren örtlichen Vertreter.
• Trennen Sie das Gerät vor jeder Wartung oder Reinigung von der Stromversorgung.
• Achten Sie darauf, dass der Netzstecker gezogen wird, wenn das Fernsehgerät nicht benutzt werden soll oder Sie
längere Zeit abwesend sind (besonders wenn Kinder, ältere oder behinderte Menschen allein im Haus gelassen
werden).
- Angesammelter Staub kann bei Funkenund Hitzebildung oder Beschädigung der Isolation einen Stromschlag,
elektrischen Kriechstrom oder einen Brand verursachen.
Achtung! Wichtige Sicherheitshinweise
(Bitte lesen Sie den Ihrem Samsung Gerät
entsprechenden Abschnitt, bevor Sie dieses installieren.)
ACHTUNG
ACHTUNG: ABDECKUNG ODER RÜCKWAND NICHT ÖFFNEN!
STROMSCHLAGGEFAHR! IM GERÄTEINNEREN BEFINDEN SICH KEINE
VOM BENUTZER ZU WARTENDEN TEILE. LASSEN SIE REPARATUREN NUR
VON QUALIFIZIERTEM KUNDENDIENSTPERSONALDURCHFÜHREN.
STROMSCHLAGGEFAHR NICHT ÖFFNEN
Dieses Symbol weist auf eine hohe Spannung im
Inneren des Geräts hin. Das Berühren von Teilen im
Geräteinneren ist gefährlich.
Dieses Symbol weist darauf hin, dass diesem Gerät
wichtige Anweisungen zu Betrieb und Wartung
beigefügt sind.
- 4 -
safety 2003.12.3 4:51 AM 페이지5
Page 25

• As ranhuras e aberturas na caixa e na parte posterior ou inferior permitem a ventilação necessária.
Para garantir o funcionamento correcto do aparelho e para o proteger do sobreaquecimento, nunca deve
bloquear ou tapar estas ranhuras e aberturas.
- Não tape as ranhuras e aberturas com panos ou outros materiais.
- Não bloqueie as ranhuras e aberturas colocando o aparelho numa cama, sofá, tapete ou outra superfície
semelhante.
- Não coloque este aparelho num espaço fechado, como uma estante ou um armário embutido, a menos que
tenha ventilação adequada.
• Não coloque este aparelho perto ou por cima de um radiador, sistema de aquecimento ou num local em que
esteja exposto à incidência directa dos raios solares.
• Não coloque fontes de calor em cima do aparelho, como velas, cinzeiros, incensos ou outros materiais
semelhantes.
• Não coloque recipientes com água em cima do aparelho, porque pode provocar um incêndio ou choque
eléctrico.
• Não exponha o aparelho à chuva nem coloque em locais perto de água (perto de uma banheira, lavatório,
lava-loiça, tubo da máquina de lavar a loiça, piscina ou numa cave com humidade).
Se molhar acidentalmente o aparelho, desligue-o da ficha e contacte de imediato o revendedor autorizado.
Quando for necessário, pode limpar o aparelho com um pano húmido, mas certifique-se de que primeiro
desliga o aparelho da ficha.
• Não exponha o aparelho a condições de temperatura ou humidade extremas.
• Este aparelho tem pilhas. Deite fora as pilhas adequadamente de acordo com as considerações ambientais
existentes no seu país. Contacte as autoridades locais para obter informações sobre a destruição ou reciclagem
de pilhas.
• Para desligar a fonte de alimentação, retire a ficha do aparelho da tomada de parede.
• Não sobrecarregue tomadas de parede, extensões nem receptáculos, porque pode provocar um incêndio ou
choque eléctrico.
• Deve colocar os cabos de alimentação de forma a não serem pisados nem entalados por objectos, tendo em
especial atenção os cabos ligados a fichas, a receptáculos e ao ponto de onde os cabos saem do aparelho.
• Para proteger o aparelho de trovoadas, ou quando não for utilizá-lo durante longos períodos de tempo, desligue
o aparelho da tomada de parede e desligue a antena ou o sistema de televisão por cabo.
Deste modo, o aparelho não sofre eventuais danos provocados por raios e descargas em cabos de alta tensão.
• Antes de ligar o cabo de alimentação de CA à tomada do transformador de CC, certifique-se de que a
designação de tensão do transformador de CC corresponde à alimentação eléctrica local.
• Nunca introduza objectos metálicos nas aberturas do aparelho. Se o fizer, pode provocar choques eléctricos.
• Para evitar choques eléctricos, nunca toque no interior do aparelho.
A caixa do aparelho só deve ser aberta por técnicos qualificados.
• Quando desligar o aparelho da tomada, puxe pela ficha e não pelo cabo.
• Coloque o aparelho perto de uma tomada de CA de fácil acesso.
• Se o aparelho não funcionar normalmente - em particular, se o aparelho emitir ruídos ou cheiros invulgares –
desligue o aparelho de imediato e contacte o revendedor autorizado ou centro de assistência técnica.
• Desligue o aparelho da tomada de CA antes de serem efectuados quaisquer serviços de assistência.
• Certifique-se de que retira a ficha de alimentação da tomada se o aparelho de televisão não for utilizado ou se o
utilizador não estiver em casa durante um período de tempo longo (especialmente quando crianças, idosos ou
pessoas com deficiências forem deixadas sozinhas em casa).
- Poeira acumulada pode provocar um choque eléctrico, uma fuga eléctrica ou um incêndio, fazendo com que o
fio de alimentação produza faíscas e aqueça ou deteriore o isolamento.
Aviso! Instruções de segurança importantes
(Leia a secção adequada que corresponde
à marca no produto Samsung antes de tentar instalar o produto.)
CUIDADO
CUIDADO:PARA REDUZIR O RISCO DE CHOQUE ELÉCTRICO, NÃO
RETIRE A TAMPA(NEM A PARTE TRASEIRA).
NO INTERIOR DO TELEVISOR NÃO EXISTEM PEÇAS QUE POSSAM SER
REPARADAS PELOUTILIZADOR.
AASSISTÊNCIA SÓ PODE SER EFECTUADA POR TÉCNICOS QUALIFICADOS.
RISCO DE CHOQUE ELÉCTRICO NÃO ABRIR
Este símbolo indica a existência de alta
tensão no interior do televisor. É perigoso tocar em
qualquer parte no interior do produto.
Este símbolo informa-o de que este produto
inclui literaturaimportante sobre o respectivo
funcionamento e manutenção.
- 5 -
safety 2003.12.3 4:51 AM 페이지6
Page 26

• Le fessure e le aperture presenti sul telaio o nelle parti posteriore e inferiore garantiscono una ventilazione
adeguata.
Per assicurare il funzionamento corretto del prodotto e proteggerlo dal surriscaldamento, le fessure e le
aperture non devono mai essere bloccate o coperte.
- Non coprire le fessure e le aperture con un panno o altri materiali.
- Non bloccare le fessure e le aperture posizionando il dispositivo sul letto, sul divano, su una coperta o su
superfici analoghe.
- Non posizionare il dispositivo in uno spazio ristretto, quale ad esempio una libreria o un telaio incorporato,
senza una ventilazione adeguata.
• Non posizionare il dispositivo vicino o sopra un radiatore o una valvola di regolazione del calore, né esporlo
alla luce diretta del sole.
• Non posizionare sul dispositivo alcuna fonte di calore quali candele, portacenere, incenso o altri materiali
simili.
• Non posizionare sul dispositivo recipienti pieni d'acqua per evitare il rischio di incendio o scosse elettriche.
• Non esporre il dispositivo alla pioggia né posizionarlo in luoghi con presenza di acqua (vasca da bagno,
bacinella, lavello o lavatoio, pavimento bagnato, nei pressi di una piscina o in presenza di altre situazioni
analoghe.).
Se il dispositivo entra accidentalmente in contatto con l’acqua, scollegarlo e contattare immediatamente un
rivenditore autorizzato.
Se necessario, è possibile pulire il dispositivo con un panno umido, ma solo dopo averlo scollegato.
• Non esporre l’unità a temperature o umidità eccessive.
• Questo dispositivo utilizza delle batterie. Il paese in cui si utilizza questo dispositivo potrebbe avere delle
normative in materia di smaltimento delle batterie per la salvaguardia dell’ambiente.
Contattare le autorità locali per ottenere informazioni in merito a smaltimento e riciclaggio.
• Per disattivare l’alimentazione, scollegare il dispositivo dalla presa a parete.
• Non sovraccaricare la presa a parete, i cavi di prolunga o le altre prese utilizzate per non incorrere nel pericolo
di incendio o scosse elettriche.
• I cavi di alimentazione devono essere posizionati in modo da non essere calpestati o schiacciati da oggetti
collocati sopra o contro di essi, prestando particolare attenzione ai cavi in prossimità delle spine, delle prese
utilizzate e del punto in cui escono dall'unità.
• Per proteggere il dispositivo durante un temporale, o quando viene lasciato incustodito e inutilizzato per lunghi
periodi di tempo, staccarlo dalla presa a parete e scollegare l’antenna o il sistema via cavo.
Si evitano in questo modo danni all'unità provocati da fulmini o da picchi di corrente.
• Prima di collegare il cavo di alimentazione CA all’uscita dell’adattatore CC, accertarsi che l’indicazione di
voltaggio presente sull’adattatore corrisponda al tipo di alimentazione elettrica locale.
• Non inserire alcuna parte metallica nelle aperture del dispositivo.
Ciò può generare pericolo di scosse elettriche.
• Per evitare la formazione di scosse elettriche, non toccare mai le parti interne del dispositivo.
Il telaio del dispositivo deve essere aperto solo da un tecnico qualificato.
• Quando il dispositivo viene scollegato dalla presa di corrente, accertarsi di afferrare la spina e nonil cavo.
• Posizionare il dispositivo nei pressi di una presa CA facilmente accessibile.
• Se il dispositivo non funziona correttamente, in particolare se si avverte la presenza di rumori o odori insoliti,
scollegarlo immediatamente e contattare un rivenditore autorizzato o il centro di assistenza tecnica.
• Scollegare il dispositivo dalla presa CA prima di eseguire qualsiasi intervento di manutenzione.
• Accertarsi di scollegare dalla presa di alimentazione la spina nel caso in cui la TV debba rimanere inutilizzata
oppure si debba lasciare la casa per un periodo di tempo prolungato (in particolar modo quando ci sono
bambini, anziani o persone disabili sole in casa).
- L'accumulo di polvere può causare scosse elettriche, una dispersione elettrica o un incendio, provocando la
generazione di calore e scintille dal cavo di alimentazione e il deteriorasi dell'isolamento.
Avvertenza!
Importanti istruzioni per la sicurezza
(Prima di installare il prodotto,
leggere la sezione che si riferisce al marchio presente sul vostro dispositivo Samsung.)
ATTENZIONE
ATTENZIONE:PER EVITARE ILRISCHIO DI SCOSSE ELETTRICHE,
NON RIMUOVERE IL COPERCHIO (O IL PANNELLO
POSTERIORE). ALL'INTERNO NON È PRESENTE ALCUNA PARTE
RIPARABILE DALL'UTENTE.IN CASO DI RIPARAZIONI
RIVOLGERSI A PERSONALE QUALIFICATO.
RISCHIO DI SCARICHE ELETTRICHE NON APRIRE
Questo simbolo indica la presenza di alta tensione
all'interno. È pericoloso toccare qualunque parte
interna del prodotto.
Questo simbolo informa che al prodotto è allegata
della documentazione importante relativa al
funzionamento e alla manutenzione.
- 6 -
safety 2003.12.3 4:51 AM 페이지7
Page 27

• иУВБЛ Л УЪ‚ВТЪЛfl ‚ НУФЫТВ Л М‡ Б‡‰МВИ ЛОЛ МЛКМВИ Ф‡МВОЛ ФВ‰М‡БМ‡˜ВМ˚ ‰Оfl ‚ВМЪЛОflˆЛЛ.
СОfl У·ВТФВ˜ВМЛfl М‡‰ВКМУИ ‡·УЪ˚ ЫТЪУИТЪ‚‡ Л ФВ‰УЪ‚‡˘ВМЛfl В„У ФВ„‚‡ ˝ЪЛ УЪ‚ВТЪЛfl МВО¸Бfl
Б‡Н˚‚‡Ъ¸ ЛОЛ ФВФflЪТЪ‚У‚‡Ъ¸ ЪУНЫ ‚УБ‰Ыı‡.
- ç Á‡Í˚‚‡ÈÚ ÔÓÂÁË Ë ÓÚ‚ÂÒÚËfl Ú̸͇˛ ËÎË ‰Û„ËÏË Ï‡Ú¡·ÏË.
- б‡ФВ˘‡ВЪТfl Б‡Н˚‚‡Ъ¸ ˝ЪЛ УЪ‚ВТЪЛfl, ФУПВ˘‡fl ЛБ‰ВОЛВ М‡ НУ‚‡Ъ¸, ‰Л‚‡М, ФУ‰ТЪЛОНЫ ЛОЛ ‡М‡ОУ„Л˜МЫ˛
ÔÓ‚ÂıÌÓÒÚ¸.
- зВ ЫТЪ‡М‡‚ОЛ‚‡ИЪВ ЫТЪУИТЪ‚У ‚МЫЪЛ Б‡ПНМЫЪУ„У У·˙ВП‡, М‡ФЛПВ, ‚ НМЛКМУП ¯Н‡ЩЫ ЛОЛ ‚У ‚ТЪУВММУП
¯Н‡ЩЫ, ВТОЛ УЪТЫЪТЪ‚ЫВЪ М‡‰ОВК‡˘‡fl ‚ВМЪЛОflˆЛfl.
• зВ ‡БПВ˘‡ИЪВ ЫТЪУИТЪ‚У УНУОУ ·‡Ъ‡ВЛ ЛОЛ У·У„В‚‡ЪВОfl ЛОЛ М‡‰ МЛПЛ, ‡ Ъ‡НКВ ‚ ПВТЪ‡ı, ФУ‰‚ВКВММ˚ı
ФflПУПЫ ТУОМВ˜МУПЫ Т‚ВЪЫ.
• ç ÒÚ‡‚¸Ú ̇ ÛÒÚÓÈÒÚ‚Ó ËÒÚÓ˜ÌËÍË ÚÂÔ·, ̇ÔËÏÂ, ҂˜Ë, ÁÓθÌËÍË, ·ÏÔ‡‰˚ Ë ‰Û„Ë ÒıÓ‰Ì˚Â Ò ÌËÏË
Ô‰ÏÂÚ˚.
• зВ ТЪ‡‚¸ЪВ М‡ ЫТЪУИТЪ‚У ТУТЫ‰˚ Т КЛ‰НУТЪflПЛ, ˝ЪУ ПУКВЪ ФЛ‚ВТЪЛ Н ‚УБ„У‡МЛ˛ ЛОЛ ФУ‡КВМЛ˛
˝ОВНЪЛ˜ВТНЛП ЪУНУП.
• зВ ФУ‰‚В„‡ИЪВ ЫТЪУИТЪ‚У ‚УБ‰ВИТЪ‚Л˛ ‰УК‰fl Л МВ ТЪ‡‚¸ЪВ В„У УНУОУ ‚У‰˚ (УНУОУ ‚‡ММ˚, ЫП˚‚‡О¸МЛН‡,
НЫıУММУИ ПУИНЛ, ·‡Н‡ ‰Оfl ПУИНЛ, М‡ ‚О‡КМУВ УТМУ‚‡МЛВ ЛОЛ fl‰УП Т ·‡ТТВИМУП).
ЦТОЛ ЫТЪУИТЪ‚У ТОЫ˜‡ИМУ ТЪ‡МУ‚ЛЪТfl ‚О‡КМ˚П, УЪТУВ‰ЛМЛЪВ В„У УЪ ТВЪЛ Л МВПВ‰ОВММУ У·‡ЪЛЪВТ¸ Н
‡‚ЪУЛБУ‚‡ММУПЫ ‰ЛОВЫ.
иЛ МВУ·ıУ‰ЛПУТЪЛ ЫТЪУИТЪ‚У ПУКМУ ФУЪЛ‡Ъ¸ ‚О‡КМУИ ЪН‡М¸˛, МУ ФВВ‰ ˝ЪЛП В„У МВУ·ıУ‰ЛПУ УЪТУВ‰ЛМЛЪ¸
УЪ ТВЪЛ.
• зВ ФУ‰‚В„‡ИЪВ ЫТЪУИТЪ‚У ‚УБ‰ВИТЪ‚Л˛ У˜ВМ¸ ‚˚ТУНЛı ЪВПФВ‡ЪЫ Л У˜ВМ¸ ‚˚ТУНУИ ‚О‡КМУТЪЛ.
• иЛЪ‡МЛВ ‰‡ММУ„У ЫТЪУИТЪ‚‡ УТЫ˘ВТЪ‚ОflВЪТfl УЪ ·‡Ъ‡ВИ. еУ„ЫЪ ТЫ˘ВТЪ‚У‚‡Ъ¸ ПВТЪМ˚В Ф‡‚ЛО‡ ЫЪЛОЛБ‡ˆЛЛ
·‡Ъ‡ВИ ‚ ТУУЪ‚ВЪТЪ‚ЛЛ Т ЪВ·У‚‡МЛflПЛ ФУ Уı‡МВ УНЫК‡˛˘ВИ ТВ‰˚.
б‡ Т‚В‰ВМЛflПЛ У· ЫЪЛОЛБ‡ˆЛЛ У·‡˘‡ИЪВТ¸ ‚ ЫФУОМУПУ˜ВММ˚В У„‡М˚.
• СОfl УЪНО˛˜ВМЛfl ЛТЪУ˜МЛН‡ ФЛЪ‡МЛfl УЪТУВ‰ЛМЛЪВ ЫТЪУИТЪ‚У УЪ УБВЪНЛ.
• ЗУ ЛБ·ВК‡МЛВ ФУ‡КВМЛfl ˝ОВНЪЛ˜ВТНЛП ЪУНУП Л ‚УБМЛНМУ‚ВМЛfl ФУК‡‡ Б‡ФВ˘‡ВЪТfl ФУ‰НО˛˜‡Ъ¸ ˜ВБПВМЫ˛
М‡„ЫБНЫ Н УБВЪН‡П ТВЪЛ ФЛЪ‡МЛfl Л Ы‰ОЛМЛЪВО¸М˚П Н‡·ВОflП.
• д‡·ВОЛ ФЛЪ‡МЛfl ТОВ‰ЫВЪ ФУНО‡‰˚‚‡Ъ¸ ‚ ПВТЪ‡ı, „‰В М‡ МЛı МВ‚УБПУКМУ ·Ы‰ВЪ М‡ТЪЫФЛЪ¸ ЛОЛ ФВВ‰‡‚ЛЪ¸
ЪflКВО˚ПЛ ФВ‰ПВЪ‡ПЛ. йТУ·ВММУВ ‚МЛП‡МЛВ МЫКМУ Ы‰ВОЛЪ¸ ‚ЛОН‡П, УБВЪН‡П Л ПВТЪ‡П ТУВ‰ЛМВМЛfl Н‡·ВОfl
ФЛЪ‡МЛfl Т ЫТЪУИТЪ‚УП.
• СОfl Б‡˘ЛЪ˚ ЫТЪУИТЪ‚‡ ‚У ‚ВПfl „УБ˚, ЛОЛ ВТОЛ УМУ ‰ОЛЪВО¸МУВ ‚ВПfl МВ ЛТФУО¸БЫВЪТfl ЛОЛ УТЪ‡‚ОflВЪТfl ·ВБ
ФЛТПУЪ‡, УЪТУВ‰ЛМЛЪВ ЫТЪУИТЪ‚У УЪ УБВЪНЛ Л УЪТУВ‰ЛМЛЪВ ‡МЪВММЫ ЛОЛ Н‡·ВО¸МЫ˛ ТЛТЪВПЫ. н‡Н‡fl ПВ‡
ФВ‰УТЪУУКМУТЪЛ ФВ‰УЪ‚‡ЪЛЪ ФУ‚ВК‰ВМЛВ ЛБ‰ВОЛfl ‚ ВБЫО¸Ъ‡ЪВ ФУФ‡‰‡МЛfl ПУОМЛЛ ЛОЛ ЛБ-Б‡ ТН‡˜НУ‚
М‡ФflКВМЛfl ‚ ТВЪЛ ФЛЪ‡МЛfl.
• иВВ‰ ФУ‰ТУВ‰ЛМВМЛВП Н‡·ВОfl ФЛЪ‡МЛfl ФВВПВММУ„У ЪУН‡ Н ‡‰‡ФЪВЫ ФУТЪУflММУ„У ЪУН‡ Ы·В‰ЛЪВТ¸, ˜ЪУ
‰УФЫТЪЛПУВ М‡ФflКВМЛВ ‡‰‡ФЪВ‡ ТУУЪ‚ВЪТЪ‚ЫВЪ М‡ФflКВМЛ˛ ˝ОВНЪЛ˜ВТНУИ ТВЪЛ.
• зВ ‚ТЪ‡‚ОflИЪВ ПВЪ‡ООЛ˜ВТНЛВ ФВ‰ПВЪ˚ ‚ УЪ‚ВТЪЛfl ЫТЪУИТЪ‚‡. щЪУ ПУКВЪ ФЛ‚ВТЪЛ Н ФУ‡КВМЛ˛
˝ОВНЪЛ˜ВТНЛП ЪУНУП.
• уЪУ·˚ ЛБ·ВК‡Ъ¸ ФУ‡КВМЛfl ˝ОВНЪЛ˜ВТНЛП ЪУНУП, МВ ‰УЪ‡„Л‚‡ИЪВТ¸ ‰У ‚МЫЪВММЛı ‰ВЪ‡ОВИ ЫТЪУИТЪ‚‡.
дУФЫТ ЫТЪУИТЪ‚‡ ‰УОКВМ УЪН˚‚‡Ъ¸ ЪУО¸НУ Н‚‡ОЛЩЛˆЛУ‚‡ММ˚И ТФВˆЛ‡ОЛТЪ.
• иЛ УЪТУВ‰ЛМВМЛЛ ЫТЪУИТЪ‚‡ УЪ ТВЪЛ МВУ·ıУ‰ЛПУ ‰ВК‡Ъ¸Тfl Б‡ ‚ЛОНЫ, МУ МВ Б‡ Н‡·ВО¸.
• мТЪУИТЪ‚У ТОВ‰ЫВЪ ‡БПВ˘‡Ъ¸ ФУ·ОЛБУТЪЛ УЪ ОВ„НУ ‰УТЪЫФМУИ УБВЪНЛ ТВЪЛ ФВВПВММУ„У ЪУН‡.
• ЦТОЛ ЫТЪУИТЪ‚У ‡·УЪ‡ВЪ МВФ‡‚ЛО¸МУ, ‚ УТУ·ВММУТЪЛ ВТОЛ ЛБ‰‡ВЪТfl МВУ·˚˜М˚И ¯ЫП ЛОЛ Б‡Ф‡ı, МВПВ‰ОВММУ
УЪТУВ‰ЛМЛЪВ В„У УЪ ТВЪЛ Л У·‡ЪЛЪВТ¸ Н ‡‚ЪУЛБУ‚‡ММУПЫ ‰ЛОВЫ ЛОЛ ‚ ТВ‚ЛТМ˚И ˆВМЪ.
• иВВ‰ ФУ‚В‰ВМЛВП У·ТОЫКЛ‚‡МЛfl ЫТЪУИТЪ‚‡ УЪТУВ‰ЛМflИЪВ В„У УЪ ТВЪЛ ФВВПВММУ„У ЪУН‡.
• й·flБ‡ЪВО¸МУ УЪТУВ‰ЛМflИЪВ ¯МЫ ФЛЪ‡МЛfl У УБВЪНЛ, ВТОЛ З˚ МВ ТУ·Л‡ВЪВТ¸ ‚ ·ОЛК‡И¯ВВ ‚ВПfl ЛТФУО¸БУ‚‡Ъ¸
ЪВОВ‚ЛБУ ЛОЛ ЫıУ‰ЛЪВ М‡‰УО„У (‚ УТУ·ВММУТЪЛ, ВТОЛ З˚ УТЪ‡‚ОflВЪВ ·ВБ ФЛТПУЪ‡ ‰ВЪВИ, ФВТЪ‡ВО˚ı ЛОЛ
ЛМ‚‡ОЛ‰У‚).
- з‡НУФОВМЛВ Ф˚ОЛ ПУКВЪ ФЛ‚У‰ЛЪ¸ Н ФУ‡КВМЛ˛ ˝ОВНЪЛ˜ВТНЛП ЪУНУП, ЫЪВ˜НВ ˝ОВНЪЛ˜ВТЪ‚‡ ЛОЛ ФУК‡Ы,
Ъ‡Н Н‡Н ФЛ ˝ЪУП ПУКВЪ ФУЛТıУ‰ЛЪ¸ ЛТНВМЛВ, М‡„В‚‡МЛВ ЛОЛ М‡Ы¯ВМЛВ ЛБУОflˆЛЛ ¯МЫ‡ ФЛЪ‡МЛfl.
ééÒÒÚÚÓÓÓÓÊÊÌÌÓÓ!!
ÇLJ‡ÊÊÌÌ˚˚ ÔÔ‡‡‚‚ËËη‡ ÚÚÂÂııÌÌËËÍÍËË ··ÂÂÁÁÓÓÔÔ‡‡ÒÒÌÌÓÓÒÒÚÚËË
(è‰ ÛÒÚ‡ÌÓ‚ÍÓÈ ËÁ‰ÂÎËfl ÔÓ˜ËÚ‡ÈÚÂ
ÒÓÓÚ‚ÂÚÒÚ‚Û˛˘ËÈ ‡Á‰ÂÎ Ò Ó·ÓÁ̇˜ÂÌËflÏË Ì‡ ‰‡ÌÌÓÏ ËÁ‰ÂÎËË Samsung.)
ååÖÖêêõõ èèêêÖÖÑÑééëëííééêêééÜÜççééëëííàà
ЗзаеДзаЦ: унйЕх абЕЦЬДнъ ийкДЬЦзаь щгЦднкауЦлдае
нйдйе, зЦ йндкхЗДвнЦ дкхтдм (бДСзыы дкхтдм).
Ззмнка млнкйвлнЗД зЦн уДлнЦв, йЕлгмЬаЗДзаЦ дйнйкхп
ейЬЦн икйабЗйСанъль ийгъбйЗДнЦгЦе.
ЗлЦ йиЦкДсаа ий йЕлгмЬаЗДзаы СйгЬзх Зхийгзьнъль
нйгъдй дЗДгаоасакйЗДззхеа лиЦсаДгалнДеа.
ééèèÄÄëëççééëëííúú èèééêêÄÄÜÜÖÖççààüü ùùããÖÖääííêêààóóÖÖëëääààåå ííééääééåå ççÖÖ ééííääêêõõÇÇÄÄííúú!!
С‡ММ˚И ТЛП‚УО УБМ‡˜‡ВЪ, ˜ЪУ ‚МЫЪЛ
ФЛТЫЪТЪ‚ЫВЪ ‚˚ТУНУВ М‡ФflКВМЛВ.
éÔ‡ÒÌÓ ‰ÓÚ‡„Ë‚‡Ú¸Òfl ‰Ó β·˚ı
‚ÌÛÚÂÌÌËı ‰ÂÚ‡ÎÂÈ ËÁ‰ÂÎËfl.
С‡ММ˚И ТЛП‚УО УБМ‡˜‡ВЪ, ˜ЪУ Н ЛБ‰ВОЛ˛
ФЛО‡„‡ВЪТfl ‚Тfl МВУ·ıУ‰ЛП‡fl ОЛЪВ‡ЪЫ‡
ФУ ‡·УЪВ Л У·ТОЫКЛ‚‡МЛ˛.
- 7 -
safety 2003.12.3 4:51 AM 페이지8
Page 28

•
•
•
•
•
•
•
•
•
•
•
•
•
•
•
•
•
•
•
- 8 -
Page 29

•
•
•
•
•
•
•
•
•
•
•
•
•
•
•
•
•
•
•
- 9 -
?
?
?
?
?
?
?
?
?
?
?
?
W2@6T&f?
7<?I'@f?
@LeN@f?
3)K??@f?
V'@6X?f?
?V4@)Xf?
?I')X?e?
V'1?e?
)Xf@?e?
@)K?O&5?e?
(R4@@0Y?e?
?
?
?
?
?
?
?
?
?W2@@6X?f
?7@??B)Xf
?@@?e@1f
@@f
?O2@@@f
?W20M?@@f
W&<?e@@f
7@f@@f
@@e?J@@f
3@eO&@@W.e
V4@@0MI40Ye
?W2@@@
W&<??@
7@e?@
@@f
@@f
@@f
@@@@@@@?
@@f
@@f
@@f
@@f
@@f
@@f
@@f
@@f
@@f
@@@@@@e
W2@6X?f
?W.M?I/Xf
W&H?eN)X?e
7@f?@1?e
@@@@@@@@@?e
@@he
@@he
3@L?f@?e
V'1?e?J5?e
?V'=eO.Y?e
V4@@0Yf
?
?
?
?
?
?
?
?
?@@?f?
?@@?f?
?@@?f?
?@@?f?
?@@@@@@@e?
?@@?f?
?@@?f?
?@@?f?
?@@?f?
?@@?f?
?@@?f?
?@@?f?
?@@?f?
?3@?O.e?
?V4@0Ye?
?
?
?
?
?
?
?
?
?
?
?
?
?
?
?
?
?
?
?
?
@@@@@@e@@@@@?e?
@@g@?f?
3@L?e?J5?f?
N@1?e?7H?f?
?3@LeJ5g?
?N@1e7Hg?
3@?C5?g?
N@@@H?g?
?3@5h?
?N@Hh?
?J5?h?
?7H?h?
C5he?
@@(Yhe?
@0Y?he?
?
?
?
?
?'6Xhf
?V')X?he
N@)?fW-X?e
?@Y?e?O&@)Xe
?@@@@@@@@@@@@@@@@@@@@)e
I'X?gW@@(M?f
?V/Xf?W&@0Yg
V/K?eW&(Mh
?V46KO&(Y?h
?S@@@Yhe
O&@@@@6Kh
O2@0M?I4@@@@6Kf
O2@@(Mg?W@@@@@@e
@@0M?@Y?gO&@W@0M?e
?@@@@@@@@@@@@(M?f
?@@?g?@@Hg
?@@?g?@@?g
?@@?g?@@?g
?@@?g?@@?g
?@@?g?@@?g
?@@?g?@@?g
?@@@@@@@@@@@@?g
?@(Mg?@5?g
?(Y?g?(Y?g
@K
@@@?hg
?J@@Y?fO26Xg
W&@@@@@@@@@@@,g
7(?4@Xf@@0Yg
?J(YeI/KO2@0Mh
W.Y?e?V@@@?he
.Ye?O2@0?4@@@6Kg
O2@0M?fI4@@@@@@e
?O2@@Yhe?@@(M?e
@0M?@@@@@@@@@@@@@@(Yf
@@f@@f@@H?f
@@f@@f@@g
@@@@@@@@@@@@@@g
@@f@@f@@g
@@f@@f@@g
@@@@@@@@@@@@@5g
@Mh?I(Yg
@Ke@6X?he
W&e@@@?N@,??@?@@6K?e
?W&5e@@H??(Y??@L?I'@@e
W&@He@@g?@1??N@5e
7@@?e3@@@@@@@@@5?e(Ye
@MfV4@@@@@@@0Y?g
?
?
?
?
?
?
?
W2@@6Xg?
?W&@@@@)X?f?
?7(M?I'@1?f?
?@H?eN@@?f?
?@f?@@?f?
?@@?f?
?@5?f?
J@H?f?
75g?
?J(Yg?
W.Y?g?
?W.Yh?
W.Y?e@?f?
?W&Yf@?f?
W&@@@@@@@?f?
&@@@@@@@@?f?
?
?
?
?
?
?
?
?
?
?
?
?
?
?
?
W2@@6Xg?
?W&@@@@)X?f?
?7(M?I'@1?f?
?@H?eN@@?f?
?@f?@@?f?
?@@?f?
?@5?f?
J@H?f?
75g?
?J(Yg?
W.Y?g?
?W.Yh?
W.Y?e@?f?
?W&Yf@?f?
W&@@@@@@@?f?
&@@@@@@@@?f?
?
?
?
?
?
?
?
?
?
?
?
?
?
?
?
W2@@6Xg?
?W.MeI/X?f?
?7H?e?N1?f?
J@g@Lf?
7@g@1f?
@@g@@f?
@@g@@f?
@@g@@f?
@@g@@f?
@@g@@f?
@@g@@f?
3@g@5f?
N@g@Hf?
?3L?e?J5?f?
?V/KeO.Y?f?
V4@@0Yg?
?
?
?
?
?
?
?
?
?
?
?
?
?
?
?
W2@@6Xg?
?W.MeI/X?f?
?7H?e?N1?f?
J@g@Lf?
7@g@1f?
@@g@@f?
@@g@@f?
@@g@@f?
@@g@@f?
@@g@@f?
@@g@@f?
3@g@5f?
N@g@Hf?
?3L?e?J5?f?
?V/KeO.Y?f?
V4@@0Yg?
?
?
?
?
?
?
?
?
?
?
?
?
?
?
?
W2@6X?g?
?W&@@@)Xg?
?.M??I'1g?
N@g?
?@g?
J5g?
?O&Ug?
?@@@@)X?f?
?I'@1?f?
V'@?f?
?N@?f?
@?f?
?J5?f?
W.Y?f?
?'6K?O.Yg?
?V4@@0Y?g?
?
?
?
?
?
?
?
?
?
?
?
?
?
?
?
?
?
?
?
?
?
?
?
?
?
?
?
?
?
?@@??
?@@??
?
?
?
?
?
?
?
?
?
?
?
?
?
?
?
?O2@h?
?@@@@@h?
@@h?
@@h?
@@h?
@@h?
@@h?
@@h?
@@h?
@@h?
@@h?
@@h?
@@h?
@@h?
@@h?
?@@@@@@@@?f?
?
?
?
?
?
?
?
?
?
?
?
?
?
?
?
?O2@h?
?@@@@@h?
@@h?
@@h?
@@h?
@@h?
@@h?
@@h?
@@h?
@@h?
@@h?
@@h?
@@h?
@@h?
@@h?
?@@@@@@@@?f?
?
?
?
?
?
?
?
?
?
?
?
?
?
?
?
?
?
?
?
?
?
?
?
?
?
?
?
?
?
?@@??
?@@??
?
?
?
?
?
?
?
?
?
?
?
?
?
?
?
W2@@6Xg?
?W&@@@@)X?f?
?7(M?I'@1?f?
?@H?eN@@?f?
?@f?@@?f?
?@@?f?
?@5?f?
J@H?f?
75g?
?J(Yg?
W.Y?g?
?W.Yh?
W.Y?e@?f?
?W&Yf@?f?
W&@@@@@@@?f?
&@@@@@@@@?f?
?
?
?
?
?
?
?
?
?
?
?
?
?
?
?
?@@@@@@@f?
?@@@@@@@f?
J(M?h?
7Yhe?
@@6Kh?
@@@@6Xg?
?I4@@)X?f?
?I'@1?f?
V'@?f?
?N@?f?
@?f?
@?f?
?J5?f?
W.Y?f?
?'6K?O.Yg?
?V4@@0Y?g?
?
?
?
?
?
?
?
?
?
?
?
?
?
?
?
W2@6X?g?
?W&@@@)Xg?
?.M??I'1g?
N@g?
?@g?
J5g?
?O&Ug?
?@@@@)X?f?
?I'@1?f?
V'@?f?
?N@?f?
@?f?
?J5?f?
W.Y?f?
?'6K?O.Yg?
?V4@@0Y?g?
?
?
?
?
?
?
?
?
?
?
?
?
?
?
?
?
?
?
?
?
?
?@@?f?
?@@?f?
?
?
?
?
?
?
?
?@@?f?
?@@?f?
?
?
?
?
?
?
?
?
?
?
?
?
?
?
?@@@@@@@f?
?@@@@@@@f?
J(M?h?
7Yhe?
@@6Kh?
@@@@6Xg?
?I4@@)X?f?
?I'@1?f?
V'@?f?
?N@?f?
@?f?
@?f?
?J5?f?
W.Y?f?
?'6K?O.Yg?
?V4@@0Y?g?
?
?
?
?
?
?
?
?
?
?
?
?
?
?
?
W2@6X?g?
?W&@@@)Xg?
?.M??I'1g?
N@g?
?@g?
J5g?
?O&Ug?
?@@@@)X?f?
?I'@1?f?
V'@?f?
?N@?f?
@?f?
?J5?f?
W.Y?f?
?'6K?O.Yg?
?V4@@0Y?g?
?
?
?
?
?
?
?
?
@@he
@@he
?J@@L?h
?7Y@1?h
J5?3@Lh
7H?N@1h
@?e@@h
?J5?e3@L?g
?7H?eN@1?g
J@f?@@Lg
7@@@@@@@@1g
@?g@@g
?J5?g3@L?f
?7H?gN@1?f
?@h?@@?f
?@@@@@f?@@@@@@?e
@@@@hf@@
@@L?h?J@@
@@1?h?7@@
@@@LhJ@@@
@?@1h7Y@@
@?3@L?f?J5?@@
@?N@1?f?7H?@@
@??3@LfJ5e@@
@??N@1f7He@@
@?e3@L??J5?e@@
@?eN@1??7H?e@@
@?e?3@?C5f@@
@?e?N@@@Hf@@
@?f3@5?f@@
@?fN@H?f@@
@@@@@?e?@f@@@@
W-X?e
?O&@)Xe
@@@@@@@@@@@@@@@@@@@@@)e
@@(Mhf
@(Y?hf
?J(Yhg
?@K?O&Y?f?O26X?f
?@@@@@@@@@@@@@@@)?f
?@@?he@@H?f
?@@?f@Kf@@g
?@@?f@@@?e@@g
?@@?f@@H?e@@g
?@@?f@@f@@g
?@@?f@@f@@g
?@@?f@@f@@g
?@@?f@@f@@g
?@@?e?J@5f@5g
?@5?e?7@Hf(Yg
?(Y?eJ@5?/Khe
?W&(Y?V46Kh
O&0YfI'@6K?f
O20Mg?V4@@6X?e
O20Mhe?I'@,?e
?@0M V+Y?e
O26Xe
@@@@@@@@@@@@@@@@@@@@@)e
?@@(M?he
?@@Hhf
?@5?hf
@Kf?@Y?f?O26X?e
@@@@@@@@@@@@@@@@@@)?e
@@e?@@?e?@@?e@@H?e
@@e?@@?e?@@?e@@f
@@e?@@?e?@@?e@@f
@@e?@@@@@@@@?e@@f
@@e?@@?e?@@?e@@f
@@e?@@?e?@@?e@@f
@@e?@@?e?@@?e@@f
@@e?@@@@@@@@?e@@f
@@e?@@?e?@@?e@@f
@@e?@@?e?@@?e@@f
@@e?@@?e?@@?e@@f
@@e?@@?e?@@?e@@f
@@@@@@@@@@@@@@@@@@f
@(M?hf@5f
(Y (Yf
?
?
?
?
?
?
?
?O2@h?
?@@@@@h?
@@h?
@@h?
@@h?
@@h?
@@h?
@@h?
@@h?
@@h?
@@h?
@@h?
@@h?
@@h?
@@h?
?@@@@@@@@?f?
?
?
?
?
?
?
?
?
Page 30

•
•
•
•
•
•
•
•
•
•
•
•
•
•
•
•
•
•
•
- 10 -
Page 31

Regulatory Compliance Statements
This device complies with part 15 of the FCC Rules. Operation is subject to the following two conditions:
1. This device may not cause harmful interference, and
2. This device must accept any interference received, including interference that may cause undesired operation.
NOTE:
This equipment has been tested and found to comply with the limits for a Class A digital device, pursuant to Part 15 of the
FCC Rules. These limits are designed to provide reasonable protection against harmful interference when the equipment is
operated in a commercial environment. This equipment generates, uses, and can radiate radio frequency energy and, if not
installed and used in accordance with the instruction manual, may cause harmful interference to radio communications.
Operation of this equipment in a residential area is likely to cause harmful interference in which case the user will be
required to correct the interference at his own expense.
FCC Class ANotice
User must use shielded signal interface cables to maintain FCC compliance for the product.
Provided with this monitor is a detachable power supply cord with IEC320 style terminations.
It may be suitable for connection to any UL Listed personal computer with similar configuration.
Before making the connection, make sure the voltage rating of the computer convenience outlet is the same as the monitor
and that the ampere rating of the computer convenience outlet is equal or exceeds the monitor voltage rating.
For 120 Volt applications, use only UL Listed detachable power cord with NEMA configuration 5-15P type(parallel blades)
plug cap. For 240 Volt applications use only UL Listed detachable power supply cord with NEMA configuration 6015P
type(tandem blades) plug cap.
This television receiver provides display of television closed captioning in accordance with Section 15.119 of the FCC
rules.(TV broadcast receivers with picture screens 13 inches or larger in diameter models only)
Warning
SAMSUNG ELECTRONICS CO., LTD.
America QA Lab of Samsung
3351 Michelson Drive
Suite #290, Irvine, CA92612 USA
The party responsible for product compliance:
Changes or modifications not expressly approved by the party responsible for compliance could void the user's authority to
operate the equipment. If necessary, consult with your dealer or an experienced radio/television technician for additiona
suggestions. You may find the booklet called How to Identify and Resolve Radio/TV Interference Problems helpful.
This booklet was prepared by the Federal Communications Commission. It is available from the U.S. Government
Printing Office. Washington, DC 20402, Stock Number 004-000-00345-4.
User Information
This device complies with part 15 of the FCC Rules. Operation is subject to the following two conditions:
1. This device may not cause harmful interference, and
2. This device must accept any interference received, including interference that may cause undesired operation.
NOTE:
This equipment has been tested and found to comply with the limits for a Class B digital device, pursuant to Part 15 of the
FCC Rules. These limits are designed to provide reasonable protection against harmful interference in a residential
installation. This equipment generates, uses and can radiate radio frequency energy and, if not installed and used in
accordance with the instructions, may cause harmful interference to radio communications. However, there is no guarantee
that interference will not occur in a particular installation. If this equipment does cause harmful interference to radio or
television reception, which can be determined by turning the equipment off and on, the user is encouraged to try to correct
the interference by one or more of the following measures:
-- Reorient or relocate the receiving antenna.
-- Increase the separation between the equipment and receiver.
-- Connect the equipment into an outlet on a circuit different from that to which the receiver is connected.
-- Consult the dealer or an experienced radio/TV technician for help.
FCC Class B Notice
- 11 -
- Federal Communications Commission (FCC) - USA
- Industry Canada Equipment Standard for Digital Equipment (ICES-003) - Canada
- Voluntary Control Council for Interference (VCCI) - Japan
- Bureau of Standards Metrology and Inspection (BSMI) - Taiwan
- Ministry of Information and Communication (MIC) - Republic of Korea
- Italian Post Ministry (Homologation) - Italy
Your Samsung product is marked to indicate its compliance class
safety 2003.12.3 11:28 PM 페이지12
Page 32

ICES-003 Class A Notice - Avis NMB-003, Classe A
This Class A digital apparatus complies with Canadian ICES-003.
Cet appareil numérique de la classe A est conforme à la norme NMB-003 du Canada.
ICES-003 Class B Notice - Avis NMB-003, Classe B
This Class B digital apparatus complies with Canadian ICES-003.
Cet appareil numérique de la classe B est conforme à la norme NMB-003 du Canada.
VCCI Class A Notice
VCCI Class B Notice
BSMI Class A Notice
The following statement is applicable to products shipped to Taiwan and marked as Class A on
the product compliance label.
European Notice(Europe Only)
Products with the CE marking comply with the EMC Directive(89/336/EEC), (92/31/EEC),
(93/68/EEC) and the Low Voltage Directive(73/23/EEC) issued by the Commission of the European
Community.
Compliance with these directives implies conformity to the following European Norms:
- EN55022: Radio Frequency Interference
- EN55024: Electromagnetic Immunity of Information Technology Equipment
- EN61000-3-2: Power Line Harmonics
- EN61000-3-3: Voltage Fluctuations
- EN55013: Radio disturbance characteristics of broadcast receivers and associated equipments
- EN55020: Electromagnetic immunity of broadcast receivers and associated equipments
European Class A Warning
This is a class A product. In a domestic environment this product may cause radio interference in
which case the user may be required to take adequate measures.(Class A product only)
정정보보통통신신기기기기 AA급급기기기기
(MIC Class A Notice)
이 기기는 업무용으로 전자파적합등록을 한 기기이오니 판매자 또는 사용자는 이 점을 주의하시기 바라며
만약 잘못 판매 또는 구입하였을 때에는 가정용으로 교환하시기 바랍니다 .
정정보보통통신신기기기기 BB급급기기기기
(MIC Class B Notice)
이 기기는 가정용으로 전자파적합등록을 한 기기로서 주거지역에서는 물론 모든 지역에서 사용할 수 있습니다 .
Italian Homologation Notice
Questo apparecchio e fabbricato in conformita al D.M.28.08.95 n.548
ed in particolare a quanto specificato nell Art.2, comma 1.
Questo apparecchio e fabbricato nella U.E. in conformita al D.M.28.08.95 n.548
Art.2, comma 1 ed al D.M.26.03.92 Art.1
-. For products produced in countries except European Community
Questo apparecchio e fabbricato in conformita al D.M.28.08.95 n.548
ed in particolare a quanto specificato nell Art.2, comma 1.
-. For products produced in European Community
Questo apparecchio e fabbricato nella U.E. in conformita al D.M.28.08.95 n.548
Art.2, comma 1 ed al D.M.26.03.92 Art.1
- 12 -
safety 2003.12.3 4:51 AM 페이지13
Page 33

1) Read these instructions.
2) Keep these instructions.
3) Heed all warnings.
4) Follow all instructions.
5) Do not use this apparatus near water.
6) Clean only with dry cloth.
7) Do not block any ventilation openings, Install in accordance with the manufacturer’s
instructions.
8) Do not install near any heat sources such as radiators, heat registers, stoves, or other apparatus
(including amplifiers) that produce heat.
9) Do not defeat the safety purpose of the polarized or grounding-type plug. A polarized plug has
two blades with one wider than the other. A grounding type plug has two blades and a third
grounding prong. The wide blade or the third prong are provided for your safety.
If the provided plug does not fit into your outlet, consult an electrician for replacement
of the obsolete outlet.
10) Protect the power cord from being walked on or pinched particularly at plugs,
convenience receptacles, and the point where they exit from the apparatus.
11) Only use attachments/accessories specified by the manufacturer.
12) Use only with cart, stand, tripod, bracket, or table specified by the manufacturer, or sold with the
apparatus. When a cart is used, use caution when moving the cart/apparatus combination to avoid
injury from tip-over.
13) Unplug this apparatus during lightning storms or when unused for long periods of time.
14) Refer all servicing to qualified service personnel. Servicing is required when the apparatus
has been damaged in any way, such as power-supply cord or plug is damaged, liquid has
been spilled or objects have fallen into the apparatus, the apparatus has been exposed to rain or
moisture, does not operate normally, or has been dropped.
Important Safety Instructions(UL Only)
WARNING: To prevent damage which may result in fire or electric
shock hazard, do not expose this appliance to rain or moisture.
• Optional
1. Do not place the apparatus in a rack or bookcase. Ensure that there is adequate ventilation and that
you've followed that manufacturer's instructions for mounting.(For PDP or Projection TV apparatus)
2. If you place the apparatus in a rack or bookcase, ensure that there is adequate ventilation and that
you've followed the manufacturer's instructions.
- 13 -
safety 2003.12.3 4:51 AM 페이지14
Page 34

Wiring the Mains Power Supply Plug(UK Only)
Russia Only - PCT Notice
IMPORTANT NOTICE
The mains lead on this equipment is supplied with a moulded plug incorporating a fuse. The value of
the fuse is indicated on the pin face of the plug and, if it requires replacing, a fuse approved to
BSI1362 of the same rating must be used.
Never use the plug with the fuse cover omitted if the cover is detachable. If a replacement fuse coverx
is required, it must be of the same colour as the pin face of the plug. Replacement covers are
available from your dealer.
If the fitted plug is not suitable for the power points in your house or the cable is not long enough to
reach a power point, you should obtain a suitable safety approved extension lead or consult your
dealer for assistance. However, if there is no alternative to cut off the plug, remove the fuse and then
safely dispose of the plug. Do NOT connect the plug to a mains socket as there is a risk of shock ha
ard from the bared flexible cord.
IMPORTANT
The wires in the mains lead are coloured in accordance with the following code:
BLUE - NEUTRAL BROWN - LIVE
As these colours may not correspond to the coloured markings identifying the terminals in your plug,
proceed as follows :
The wire coloured BLUE must be connected to the terminal marked with the letter N or coloured BLUE
or BLACK.
The wire coloured BROWN must be connected to the terminal marked with the letter L or coloured
BROWN or RED.
WARNING:
DO NOT CONNECT EITHER WIRE TO THE EARTH TERMINAL, WHICH IS MARKED WITH THE
LETTER E OR BY THE EARTH SYMBOL , OR COLOURED GREEN OR GREEN AND YELLOW.
This monitor complies with SWEDAC(MPR II) recommendations for reduced electric and magnetic fields.
MPR II Compliance (MPR II applied model only)
- 14 -
• EPA applied model only
As an ENERGY STAR Partner, Samsung has determined that this product
or product models meets the ENERGY STAR guidelines for energy efficiency.
safety 2003.12.3 4:51 AM 페이지15
Page 35

TCO'95-Ecological requirements for personal computers
(TCO'95 applied model only)
AB general requirements
AB2 Written Eco-document acompanying the products
Congratulations! You have just purchased a TCO'95 approved and labelled product!
Your choice has provided you with a product developed for professional use.
Your purchase has also contributed to reducing the burden on the environment and to
the further development of environmentally-adapted electronic products.
Why do we have environmentally-labelled monitors?
In many countries, environmental labelling has become an established method for encouraging the adaptation of
goods and services to the environment.The main problem as far as monitors and other electronic equipment are
concerned is that environmentally harmful substances are used both in the products and during their manufacture.
Since it has not been possible so far for the majority of electronic equipment to be recycled in a satisfactory way,
most of these potentially damaging substances sooner or later enter Nature.
There are also other characteristics of a monitor, such as energy consumption levels, that are important from both
the working and natural environment viewpoints. Since all types of conventional electricity generation have a
negative effect on the environment (acidic and climate-influencing emissions, radioactive waste, etc.) it is vital to
conserve energy. Electronic equipment in offices consumes an enormous amount of energy, since it is often
routinely left running continuously.
What does labelling involve?
This product meets the requirements for the TCO'95 scheme, which provides for international environmental
labelling of monitors. The labelling scheme was developed as a joint effort by the TCO (The Swedish Confederation
of Professional Employees), Naturskyddsforeningen (The Swedish Society for Nature Conservation) and NUTEK
(The National Board for Industrial and Technical Development in Sweden).
The requirements cover a wide range of issues: environment, ergonomics, usability, emission of electrical and
magnetic fields, energy consumption and electrical and fire safety.
The environmental demands concern among other things restrictions on the presence and use of heavy metals,
brominated and chlorinated flame retardants, CFCs (freons), and chlorinated solvents. The product must be
prepared for recycling and the manufacturer is obliged to have an environmental plan, which must be adhered to in
each country where the company conducts its operations policy.
The energy requirements include a demand that the monitor after a certain period of inactivity shall reduce its power
consumption to a lower level, in one or more stages. The length of time to reactivate the monitor shall be
reasonable for the user. Labelled products must meet strict environmental demands, for example in respect of the
reduction of electric and magnetic fields, along with physical and visual ergonomics and good usability.
TCO Development Unit 1996-11-29
On the page this folder you will find a brief summary of the environmental requirements met by this product.
The complete environmental criteria document may be ordered from:
TCO Development Unit
S-11494 Stockholm
Sweden
Fax: +46 8 782 92 07
E-mail (Internet): development@ tco.se
Current information regarding TCO'95-approved and labelled products may also be obtained via the Internet, using
the address: http://www.tco-info.com/
TCO'95 is a co-operative project between(3 logos)
- 15 -
safety 2003.12.3 4:51 AM 페이지16
Page 36

Environmental Requirements
Brominated flame retardants are present in printed circuit boards, cables, wires, casings and housings. In turn, they
delay the spread of fire. Up to thirty percent of the plastic in a computer casing can consist of flame retardant
substances. These are related to another group of environmental toxins, PCBs, which are suspected to give rise to
similar harm, including reproductive damage in fish eating birds and mammals, due to the bioaccumulative
processes.
Flame retardants have been found in human blood and researchers fear that disturbances in foetus development
may occur.
TCO'95 demand requires that plastic components weighing more than 25 grams must not contain organically
bound chlorine and bromine.
Lead
Lead can be found in picture tubes, display screens, solders and capacitors. Lead damages the nervous system
and in higher doses, causes lead poisoning.
TCO'95 requirement Permits the inclusion of lead since no replacement has yet been developed.
Cadmium
Cadmium is present in rechargeable batteries and in the colour generating layers of certain computer displays.
Cadmium damages the nervous system and is toxic in high doses.
TCO'95 requirement states that batteries may not contain more than 25 ppm (parts per million)
of cadmium. The colour-generating layers of display screens must not contain any cadmium.
Mercury
Mercury is sometimes found in batteries, relays and switches. Mercury damages the nervous
system and is toxic in high doses.
TCO'95 requirement states that batteries may not contain more than 25 ppm (parts per million) of mercury.
It also demands that no mercury is present in any of the electrical or electronics components concerned with
the display unit.
CFCs (freons)
CFCs (freons) are sometimes used for washing printed circuit boards and in the manufacturing of expanded foam
for packaging. CFCs break down ozone and thereby damage the ozone layer in the stratosphere, causing
increased reception on Earth of ultraviolet light with consequent increased risks of skin cancer
(malignant melanoma). The relevant TCO'95 requirement: Neither CFCs nor HCFCs may be used during the
manufacturing of the product or its packaging.
The relevant TCO'95 requirement: Neither CFCs nor HCFCs may be used during the manufacturing of the
product or its packaging.
TCO'99-Ecological requirements for personal computers
(TCO'99 applied model only)
Congratulations!
You have just purchased a TCO'99 approved and labelled product! Your choice has provided you with a product
developed for professional use. Your purchase has also contributed to reducing the burden on the environment and
also to the further development of environmentally adapted electronics products.
This product meets the requirements for the TCO'99 scheme which provides for an international environmental and
quality labelling labelling of personal computers. The labelling scheme was developed as a joint effort by the
TCO(The Swedish Confederation of Professional Employees),
Svenska Naturskyddsforeningen(The Swedish Society for Nature Conservation), Statens Energimyndighet
(The Swedish National Energy Administration) and SEMKO AB.
The requirements cover a wide range of issuse: environment, ergonomics, usability, reduction of electric and
magnetic fields, energy consumption and electrical safety.
- 16 -
safety 2003.12.3 4:51 AM 페이지17
Page 37

Why do we have environmentally labelled computers?
In many countries, environmental labelling has become an established method for encouraging the adaptation of
goods and services to the environment. The main problem, as far as computers and other electronics equipment
are concerned, is that environmentally harmful substances are used both in the products and during their
manufacture. Since it is not so far possible to satisfactorily recycle the majority of electronics equipment, most of
these potentially damaging substances sooner or later enter nature.
There are also other characteristics of a computer, such as energy consumption levels, that are important from the
viewpoints of both the work (internal) and natural (external) environments.
Since all methods of electricity generation have a negative effect on the environment (e.g. acidic and climateinfluencing emissions, radioactive waste), it is vital to save energy. Electronics equipment in offices is often left
running continuously and thereby consumes a lot of energy.
What does labelling involve?
The environmental demands has been developed by Svenska Naturskyddsforeningen (The Swedish Society for
Nature Conservation). These demands impose restrictions on the presence and use of heavy metals, brominated
and chlorinated flame retardants, CFCs(freons)and chlorinated solvents, among other things. The product must be
prepared for recycling and the manufacturer is obliged to have an environmental policy which must be adhered to in
each country where the company implements its operational policy.
The energy requirements include a demand that the computer and/or display, after a certain period of inactivity,
shall reduce its power consumption to a lower level in one or more stages. The length of time to reactivate the
computer shall be reasonable for the user.
Below you will find a brief summary of the environmental requirements met by this product.
The complete environmental criteria document may be ordered from:
TCO Development
SE-114 94 Stockholm, Sweden
Fax: +46 8 782 92 07
Email (Internet): development@tco.se
Current information regarding TCO'99 approved and labelled products may also be obtained via
the Internet, using the address: http://www.tco-info.com/
Environmental requirements
Flame retardants
Flame retardants are present in printed circuit boards, cables, wires, casings and housings. Their purpose is to
prevent, or at least to delay the spread of fire. Up to 30% of the plastic in a computer casing can consist of flame
retardant substances. Most flame retardants contain bromine or chloride, and those flame retardants are chemically
related to another group of environmental toxins, PCBs. Both the flame retardants containing bromine or chloride
and the PCBs are suspected of giving rise to severe health effects, including reproductive damage in fish-eating
birds and mammals, due to the bio-accumulative* processes. Flame retardants have been found in human blood
and researchers fear that disturbances in foetus development may occur.
The relevant TCO'99 demand requires that plastic components weighing more than 25 grams must not contain
flame retardants with organically bound bromine or chlorine. Flame retardants are allowed in the printed circuit
boards since no substitutes are available.
Cadmium**
Cadmium is present in rechargeable batteries and in the colour-generating layers of certain computer displays.
Cadmium damages the nervous system and is toxic in high doses. The relevant TCO'99 requirement states that
batteries, the colour-generating layers of display screens and the electrical or electronics components must not
contain any cadmium.
Mercury**
Mercury is sometimes found in batteries, relays and switches. It damages the nervous system and is toxic in high
doses. The relevant TCO'99 requirement states that batteries may not contain any mercury. It also demands that
mercury is not present in any of the electrical or electronics components associated with the labelled unit. There is
however one exception. Mercury is, for the time being, permitted in the back light system of flat panel monitors as
today there is no commercially available alternative. TCO aims on removing this exception when a Mercury free
alternative is available.
CFCs (freons)
The relevant TCO'99 requirement states that neither CFCs nor HCFCs may be used during the manufacture and
assembly of the product. CFCs (freons) are sometimes used for washing printed circuit boards. CFCs break down
ozone and thereby damage the ozone layer in the stratosphere, causing increased reception on earth of ultraviolet
light with e.g. increased risks of skin cancer (malignant melanoma) as a consequence.
Lead**
Lead can be found in picture tubes, display screens, solders and capacitors. Lead damages the nervous system
and in higher doses, causes lead poisoning. The relevant TCO'99 requirement permits the inclusion of lead since no
replacement has yet been developed.
- 17 -
safety 2003.12.3 4:51 AM 페이지18
Page 38

TCO'03-Ecological requirements for personal computers
(TCO'03 applied model only)
Congratulations!
The display you have just purchased carries the TCO'03 Displays label.
This means that your display is designed, manufactured and tested
according to some of the strictest quality and environmental requirements
in the world. This makes for a high performance product, designed with the
user in focus that also minimizes the impact on our natural environment.
Some of the features of the TCO'03 Display requirements:
Ergonomics
Good visual ergonomics and image quality in order to improve the working environment for the user
and to reduce sight and strain problems. Important parameters are luminance, contrast, resolution,
reflectance, colour rendition and image stability.
Energy
Energy-saving mode after a certain time – beneficial both for the user and the environment
Electrical safety
Emissions
• Electromagnetic fields
• Noise emissions
Ecology
• The product must be prepared for recycling and the manufacturer must have a certified
environmental management system such as EMAS or ISO 14000
• Restrictions on
o chlorinated and brominated flame retardants and polymers
o heavy metals such as cadmium, mercury and lead.
The requirements included in this label have been developed by TCO Development in cooperation
with scientists, experts, users as well as manufacturers all over the world. Since the end of the
1980s TCO has been involved in influencing the development of IT equipment in a more user-friendly
direction. Our labelling system started with displays in 1992 and is now requested by
users and IT-manufacturers all over the world.
For more information, Please visit www.tcodevelopment.com
- 18 -
safety 2003.12.3 4:51 AM 페이지19
Page 39

TCO'03 Recycling Information
(TCO'03 applied model only)
Medical Requirement
(Medical applied model only)
[European Residents Only]
For recycling information for TCO'03 certified monitors, for the residents in the following countries,
please contact the company corresponding to your region of residence. For those who reside in other countries,
please contact a nearest local Samsung dealer for recycling information for the products to be treated in
environmentally acceptable way.
Classifications:
In accordance with UL 2601-1/IEC 60601-1, the product is classified as Continuous duty Class I
equipment, which is not protected against ingress of liquids. The product is not suitable for use in
the presence of a flammable anaesthetic mixture with air or with oxygen or nitrous oxide.
EMC
This equipment has been tested and found to comply with the limits for medical devices to the IEC 601-1-2:1994.
These limits are designed to provide reasonable protection against harmful interference in a typical medical
installation. This equipment generates, uses and can radiate radio frequency energy and, if not installed and used in
accordance with the instructions, may cause harmful interference to other devices in the vicinity. However, there is
no guarantee that interference will not occur in a particular installation. If this equipment does cause harmful
interference to other devices, which can be determined by turning the equipment off and on, the user is encouraged
to try to correct the interference by one or more of the following measures:
• Reorient or relocate the receiving device.
• Increase the separation between the equipment.
• Connect the equipment into an outlet on a circuit different from that to which the other device (s) are connected.
• Consult the manufacturer or field service technician for help.
Video In / RS 232 / Video Out
Accessories equipment connected to the analog and digital interfaces must be certified to the respective IEC
standards (i.e. IEC 950 for data processing equipment and IEC 601-1 for medical equipment.) Furthermore all
configurations shall comply with the system standard IEC 601-1-1.
Everybody who connects additional equipment to the signal input part or signal output part configures a medical
system, and is therefore, responsible that the system complies with the requirements of the system standard IEC
601-1-1. If in doubt, consult the technical services department or your local representative.
Transport and Storage Limitations:
Temperature Range of -40°C to +70°C
Relative Humidity of 10 -95%, non-condensing
* Bio-accumulative is defined as substances which accumulate within living organisms.
** Lead, Cadmium and Mercury are heavy metals which are Bio-accumulative.
COMPANY
U.S.A. Residents Only European Residents Only
U.S.A. SWEDEN NORWAY GERMANY
49 0 2234 9587 - 0
vfw.info@vfw-ag.de
vfw AG
Max Plank Strasse 42
50858 Collogne
Germany
Elektronikkretur AS
23 06 07 40
23 06 07 41
adm@elektronikkretur.no
http://www.elretur.no/
6454 Etterstad 0602
Oslo
Fyrstikkalln 3B
08-545 212 99
info@el-kretsen.se
http://www.elkretsen.se/
08-545 212 90
ELKRETSEN
ELKRETSEN Box
1357, 111 83
Stockholm
Barnhusgatan 3, 4 tr.
Solid Waste Transfer &
Recycling Inc
973-565-0181
Fax: 973-565-9485
none
http://www.bcua.org/Solid
Waste_Disposal.htm
442 Frelinghuysen Ave
Newark, NJ 07114
ADDRESS
TELEPHONE
FAX
E-MAIL
HOME
PAGE
N
- 19 -
safety 2003.12.3 4:51 AM 페이지20
Page 40

AA68-03242A-00
ELECTRONICS
safety 2003.12.29 9:44 PM 페이지21
 Loading...