

Samsung AS09CM1N, AS12CM2N, AS09CM1X, AS12CM2X, AS12CM1N User Manual
...
USER’S MANUAL
AS09CM1N
AS09CM2N
AS12CM1N
AS12CM2N
AS18CM1N
AS18CM2N
AS24CM1N
AS24CM2N
Indoor Unit
AS09CM1X
AS09CM2X
AS12CM1X
AS12CM2X
AS18CM1X
AS18CM2X
AS24CM1X
AS24CM2X
Outdoor Unit
Split-type Air Conditioner
(Cooling)
E
DB98-21718A(2)
E-2
Safety Precautions
You should take the following safety precautions when using your air conditioner.
◆ Do not repair the air conditioner at your discretion.
It is recommended to contact a service center directly.
◆ Never spill any kind of liquid on the air conditioner.
If this happens, turn off the air conditioner and contact an authorized
service center.
◆ Do not insert anything between the airflow blades to prevent damage of
the inner fan and consequent injury. Keep children away from the air
conditioner.
◆ Do not place any obstacles in front of the air conditioner.
◆ Do not spray any kind of liquid into the indoor unit. If this happens,
turn off the air conditioner and contact a service center.
◆ Make sure that the air conditioner is well ventilated at all times:
Do not place a cloth or other materials over it.
◆ Remove the batteries if you don’t use the remote control for a long
time. (If applicable)
◆ Use the remote control within 7 meters from the indoor unit. (If applicable)
WARNING
DURING OPERATION
◆ Never store or load the air conditioner upside down or sideways to
prevent the damage to the compressor.
◆ Young children or infirm persons should be always supervised when
they use the air conditioner.
◆ Max current is measured according to IEC standard for safety.
◆ Current is measured according to ISO standard for energy efficiency.
OTHERS
◆ Before throwing out the air conditioner, remove the batteries from the
remote control.
◆ When you dispose of the air conditioner, consult your dealer. If pipes
are removed incorrectly, refrigerant may blow out and cause air
pollution. When it contacts with your skin, it can cause skin injury.
◆ The package of the air conditioner should be recycled or disposed of
properly for environmental reasons.
D
ISPOSING OF THE UNIT
• If you don’t follow the safety precautions, you may get the risk of an electric
shock, injury or death.
•The manufacturer or qualified service personnel must install this air conditioner.
• Turn off the electric power before repairing, installing or cleaning.
Register your product at www.samsung.com/global/register

E-3
Contents
◆
P
REPARATION
■ Safety Precautions . . . . . . . . . . . . . . . . . . . . . . . . . . . . . . . . . . . . 2
■ Name of Each Part . . . . . . . . . . . . . . . . . . . . . . . . . . . . . . . . . . . . 4
■ Remote Control-Buttons and Display . . . . . . . . . . . . . . . . . . . . . . 6
■ Inserting the Remote Control Batteries . . . . . . . . . . . . . . . . . . . . . 7
■ Getting Start . . . . . . . . . . . . . . . . . . . . . . . . . . . . . . . . . . . . . . . . . 8
◆
O
PERATION
■ Selecting the Auto Mode . . . . . . . . . . . . . . . . . . . . . . . . . . . . . . . . 9
■ Selecting the Cool Mode . . . . . . . . . . . . . . . . . . . . . . . . . . . . . . . . 10
■ Selecting the Dry Mode . . . . . . . . . . . . . . . . . . . . . . . . . . . . . . . . . 11
■ Selecting the Fan Mode . . . . . . . . . . . . . . . . . . . . . . . . . . . . . . . . 12
■ Selecting the Turbo Function . . . . . . . . . . . . . . . . . . . . . . . . . . . . . 13
■ Selecting the Energy Saving Function . . . . . . . . . . . . . . . . . . . . . 14
■ Selecting the Auto Cleaning Function . . . . . . . . . . . . . . . . . . . . . . 15
■ Selecting the Sound On/Off Function . . . . . . . . . . . . . . . . . . . . . . 16
■ Selecting the Anions Function . . . . . . . . . . . . . . . . . . . . . . . . . . . . 17
■ Adjusting the Airflow Direction Vertically . . . . . . . . . . . . . . . . . . . . 18
■ Adjusting the Airflow Direction Horizontally . . . . . . . . . . . . . . . . . . 19
■ Setting the On Timer . . . . . . . . . . . . . . . . . . . . . . . . . . . . . . . . . . . 20
■ Setting the Off Timer . . . . . . . . . . . . . . . . . . . . . . . . . . . . . . . . . . . 21
■ Setting the Sleep Timer . . . . . . . . . . . . . . . . . . . . . . . . . . . . . . . . . 22
◆
R
ECOMMENDATIONS FOR USE
■ Operating Recommendations . . . . . . . . . . . . . . . . . . . . . . . . . . . . 23
■ Temperature and Humidity Ranges . . . . . . . . . . . . . . . . . . . . . . . . 24
■ Operating Your Air Conditioner Without the Remote Control . . . . . 25
■ Troubleshooting Guide . . . . . . . . . . . . . . . . . . . . . . . . . . . . . . . . . 26
■ Cleaning Your Air Conditioner . . . . . . . . . . . . . . . . . . . . . . . . . . . . 27
■ Cleaning Anti-Allergy and Deodorizing Filter (Option) . . . . . . . . . . 27
◆
T
ECHNICAL SPECIFICATIONS
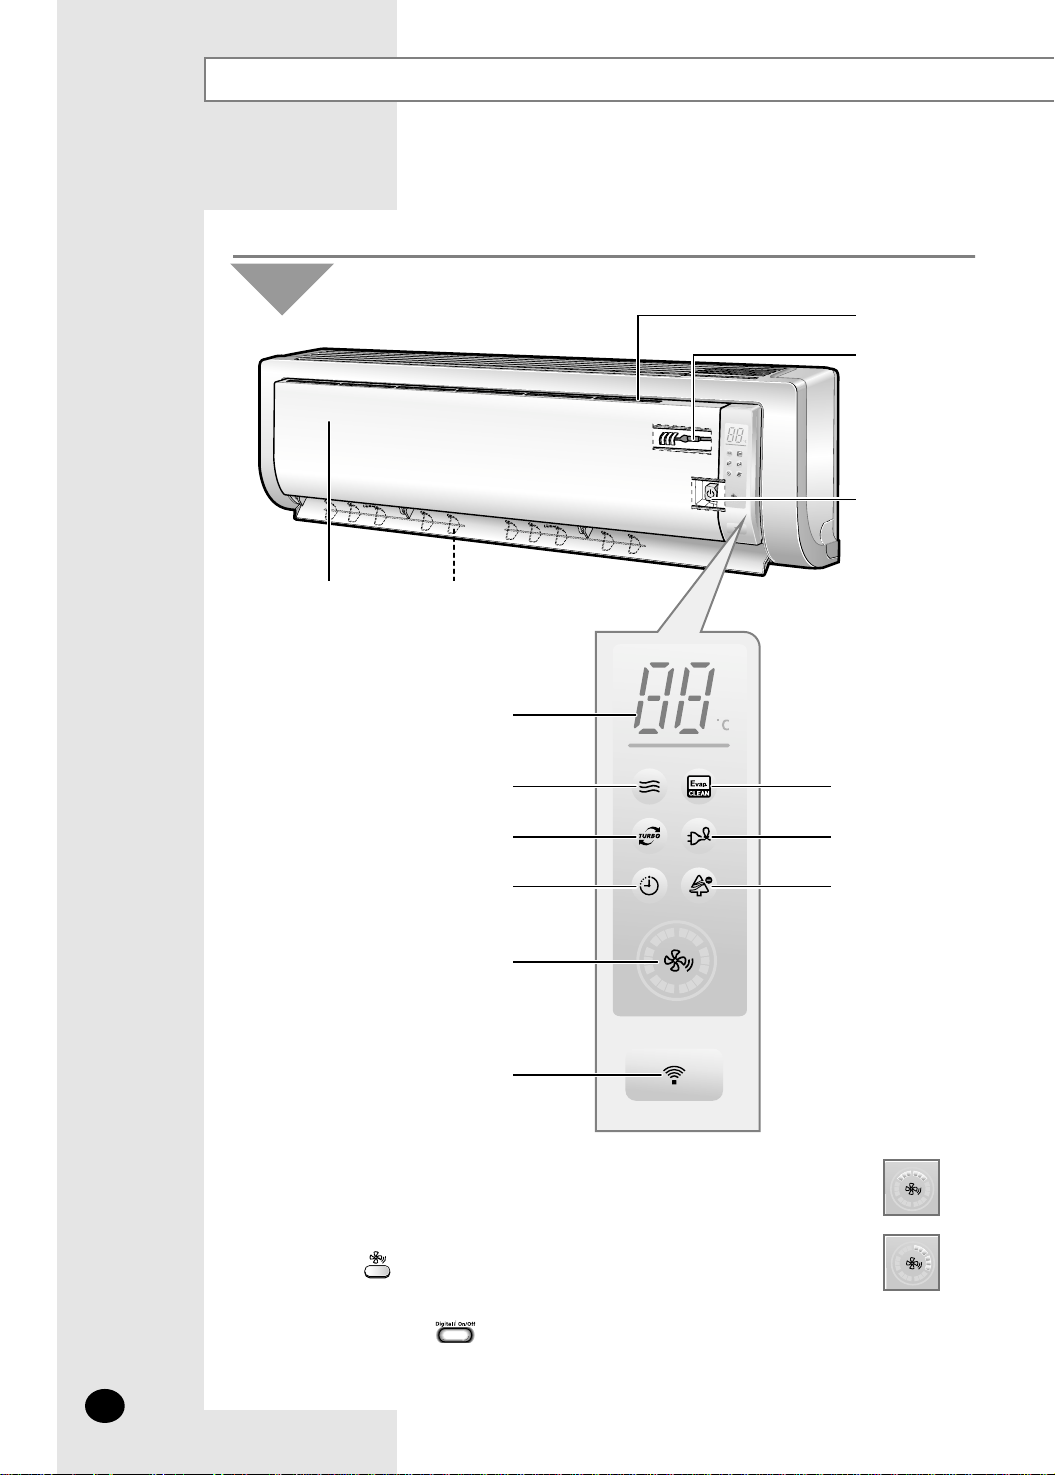
Name of Each Part
E-4
The design and shape can be changed according to the model.
Indoor Unit
Air filter
(under the grille)
Airflow blades
(outlet)
Power(On/Off) button
Set temperature &
room temperature
Operation indicator
(Auto-Cool, Cool, Dry, Fan : Blue)
Auto cleaning indicator
(Blue)
Energy saving indicator
(Blue)
Anions indicator
(Blue)
Turbo function indicator
(Blue)
Timer indicator
(Orange)
Fan speed indicator
(Blue)
Remote control sensor
Room Temperature sensor
Air Inlet
◆ In the Auto mode, 2 fan indicators increase and decrease continuously
and turn round.
◆ In the modes except the Auto mode, the fan speed indicator increases
and decreases continuously and turn round each time you press the
button. If you set the Turbo function, the fan speed indicator turns
round with the maximum setting and speed.
◆ If you want to turn on/off the Display during operation,
press the button on the remote control.
◆ The room temperature sensor senses air temperature around the
sensor, and shows the temperature on the display.
NNNNoooottttee
ee
E-5
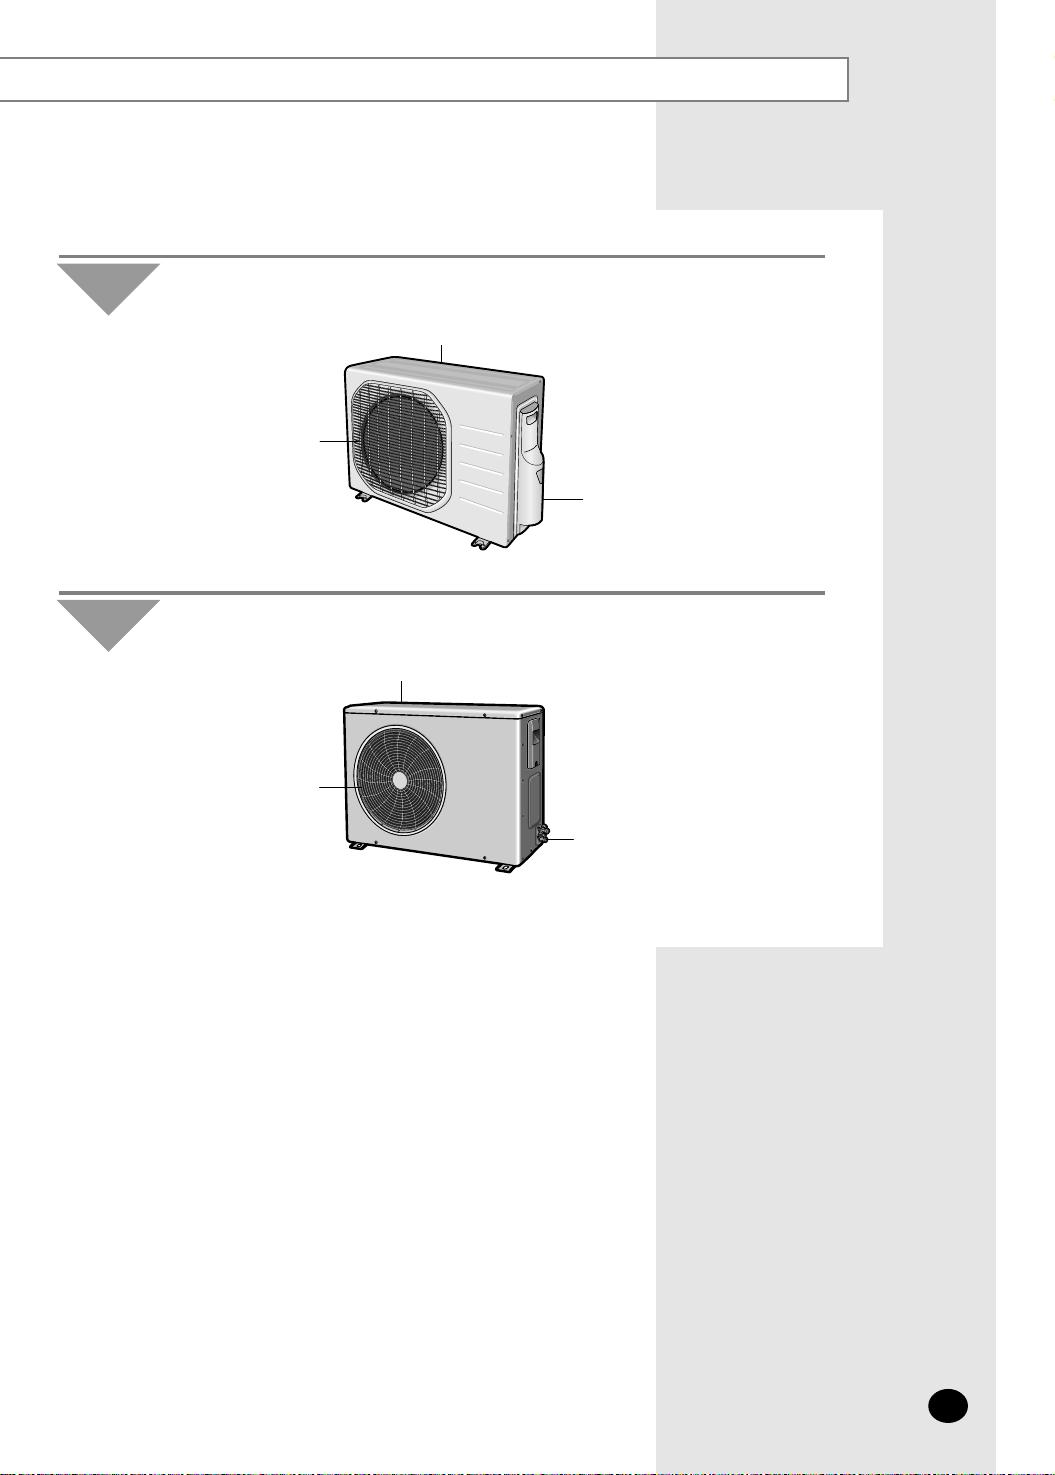
Air Inlet(Rear)
Air Outlet
Connection Valve
(inside)
Outdoor Unit
AS09CM1(2)X AS12CM1(2)X
Air Inlet(Rear)
Air Outlet
Connection Valve
Outdoor Unit
AS18CM1(2)X AS24CM1(2)X
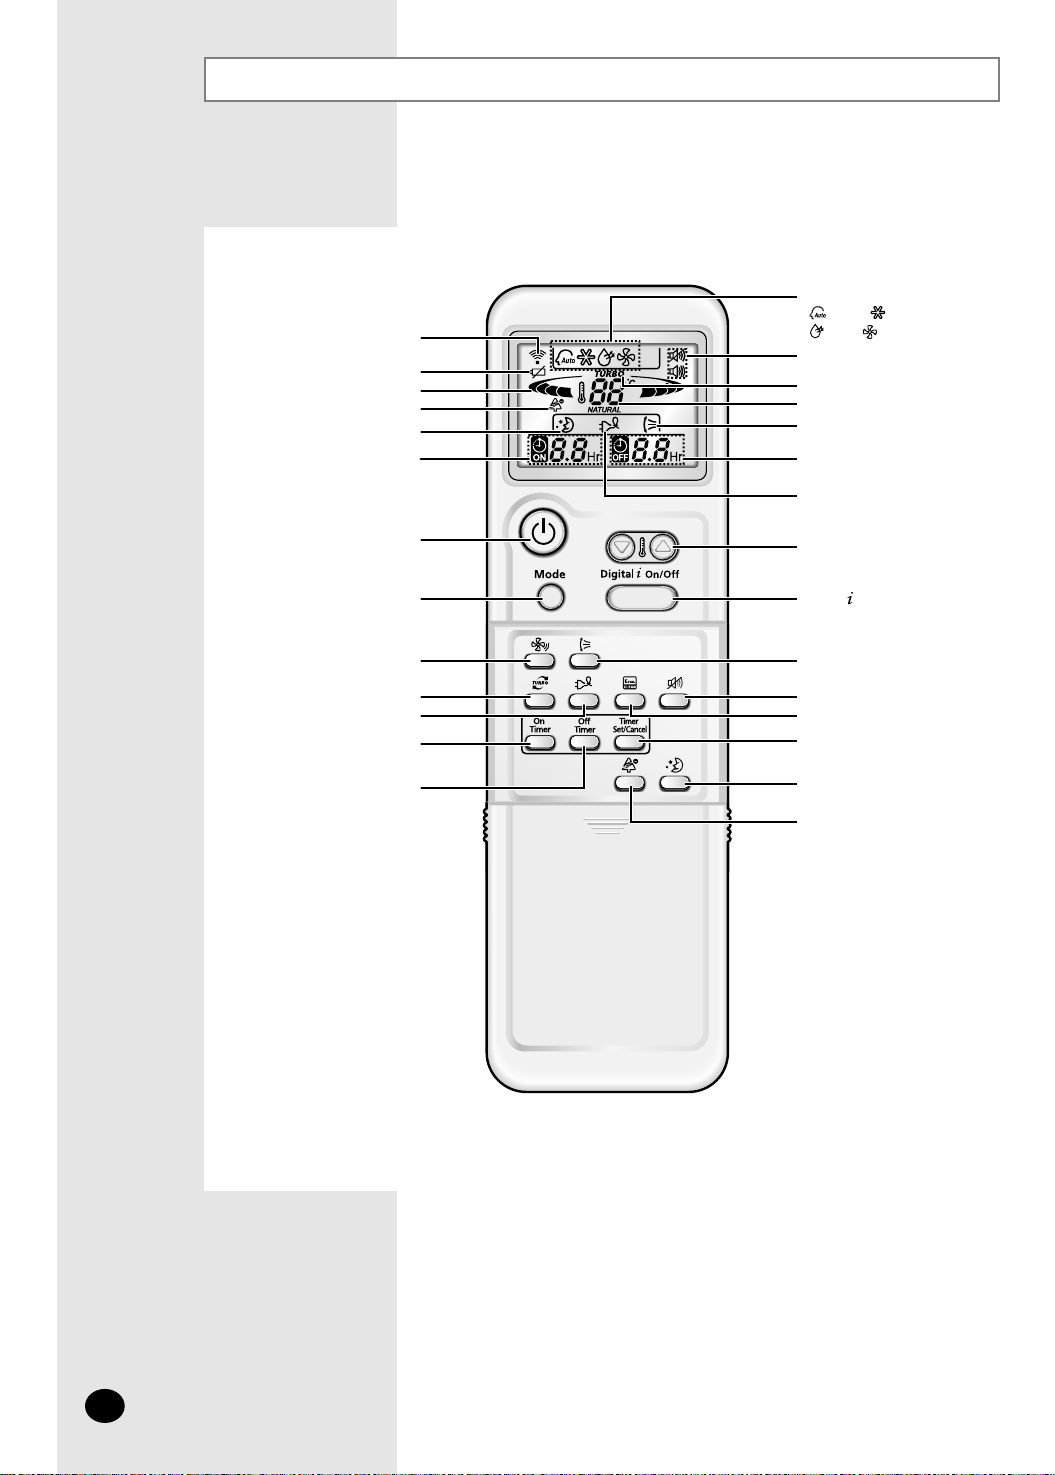
Remote Control-Buttons and Display
Remote control
transmission indicator
Timer Set/Cancel button
Sleep button
Digital On/Off button
Swing button
Anions button
Mode selection button
(AUTO, COOL, DRY, FAN)
Fan speed adjustment button
Sound On/Off indicator
Battery life indicator
Fan speed indicator
Anions indicator
Sleep mode indicator
Off Timer button
On Timer button
Power (On/Off) button
On Timer indicator
Turbo function indicator
Temperature setting
Air flow direction
Off Timer indicator
Energy saving indicator
Temperature adjustment
buttons
Sound On/Off button
Auto Cleaning button
Turbo button
Energy saving button
E-6
Operating mode
( AUTO, COOL,
DRY, FAN)
E-7
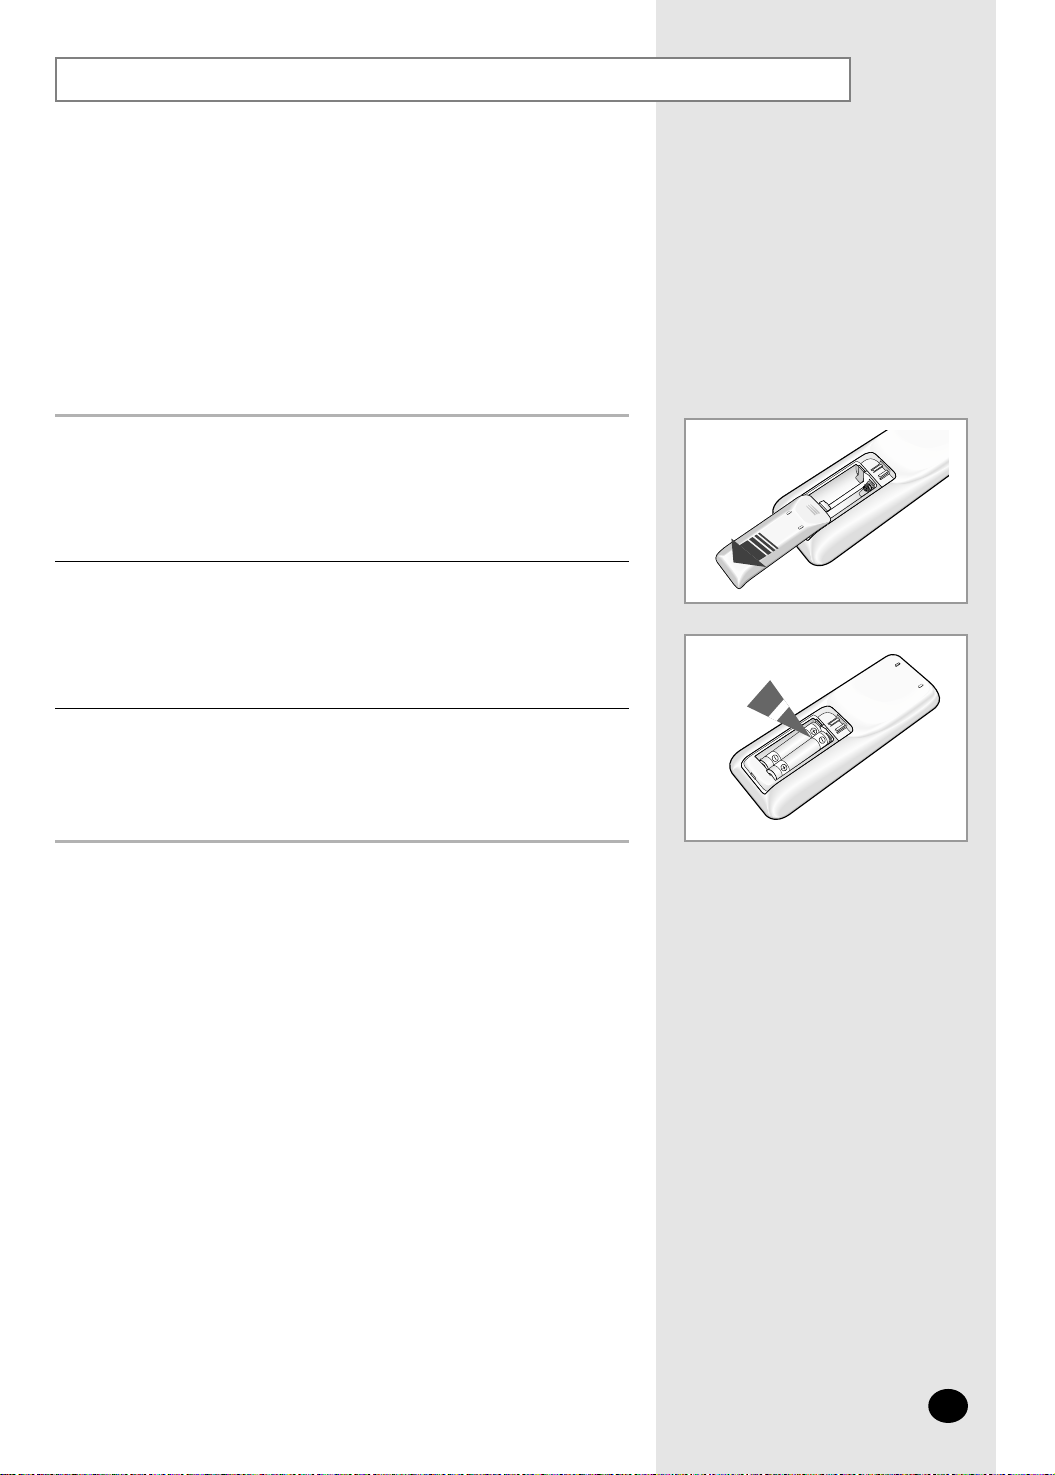
Inserting the Remote Control Batteries
Remove the battery cover in the rear of the remote control by pushing
it with your thumb.
Insert two batteries, respecting the polarities as indicated by
the + and - symbols.
1
2
Close the cover by sliding it back in its place.
3
◆ Use two AAA, LR03 1.5V batteries.
◆ Do not use old batteries or different kinds of batteries together.
◆ Batteries may be completely discharged after 12 months, even
◆ if they have not actually been used.
You must insert or replace the remote control batteries when:
◆ You purchase the air conditioner
◆ The remote control does not work correctly
NNNNoooottttee
ee
E-7
G
etting Start
The User’s Manual provides you with valuable information about your air conditioner.
Please read this manual carefully before using the air conditioner.
It will help you take full advantage of the unit's features.
You have already seen the basic description of the unit on pages from 4 to 6.
Starting with the next page, you will find a series of step- by-step procedures
for each function available.
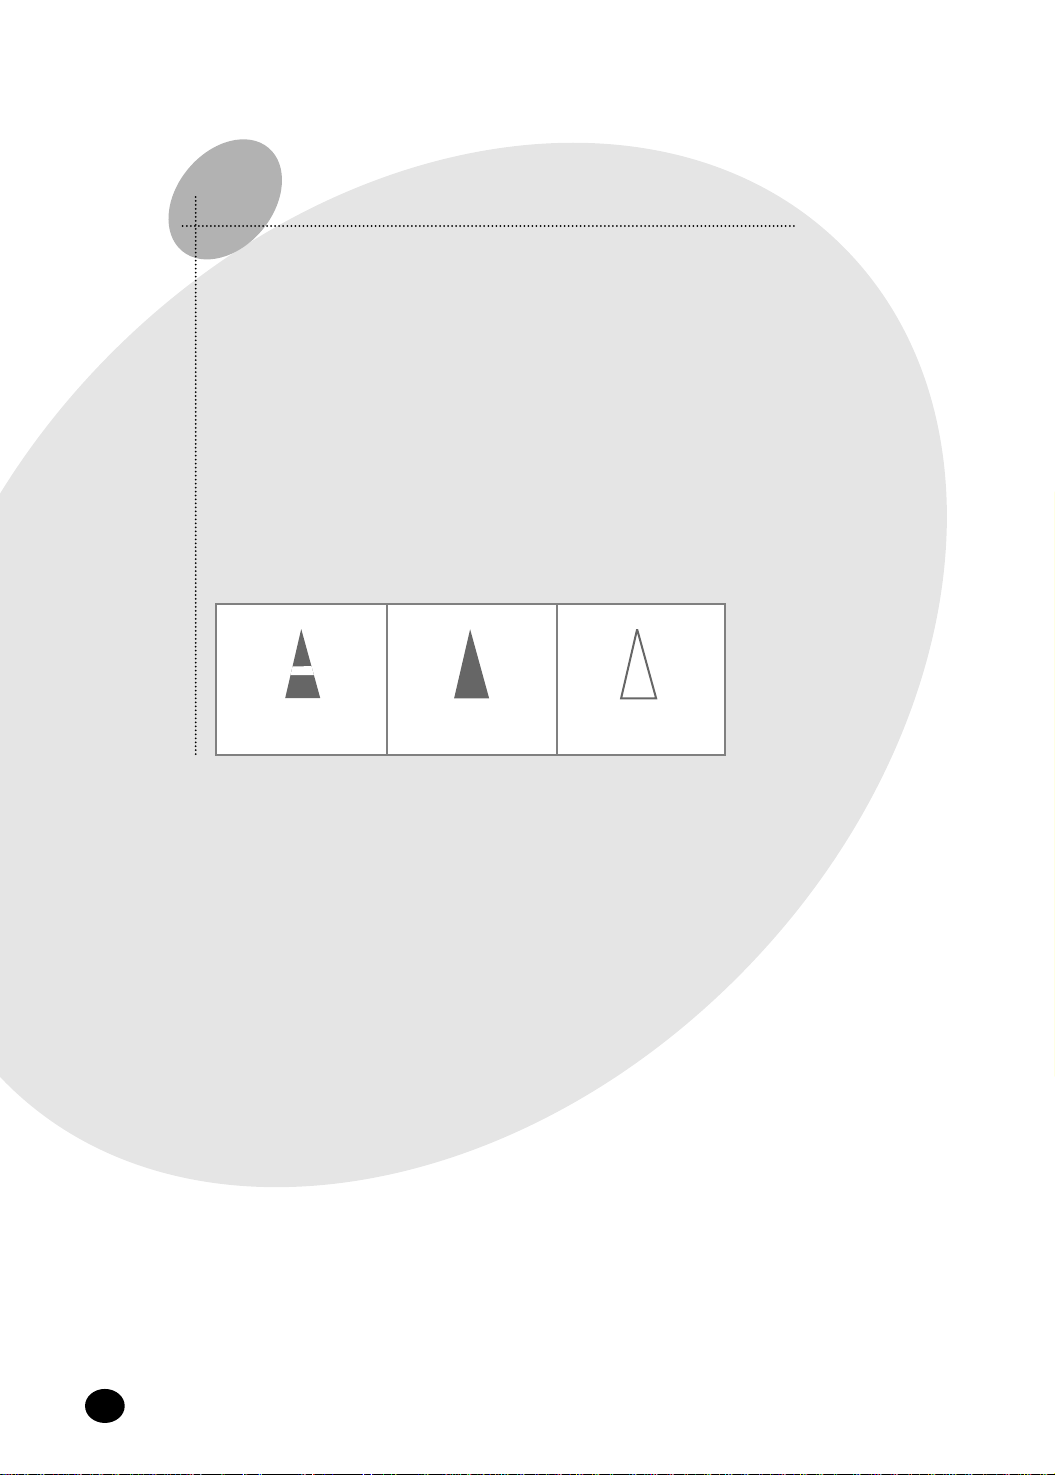
The illustrations in the step-by-step procedures use three different symbols:
PRESS PUSH HOLD DOWN
E-8
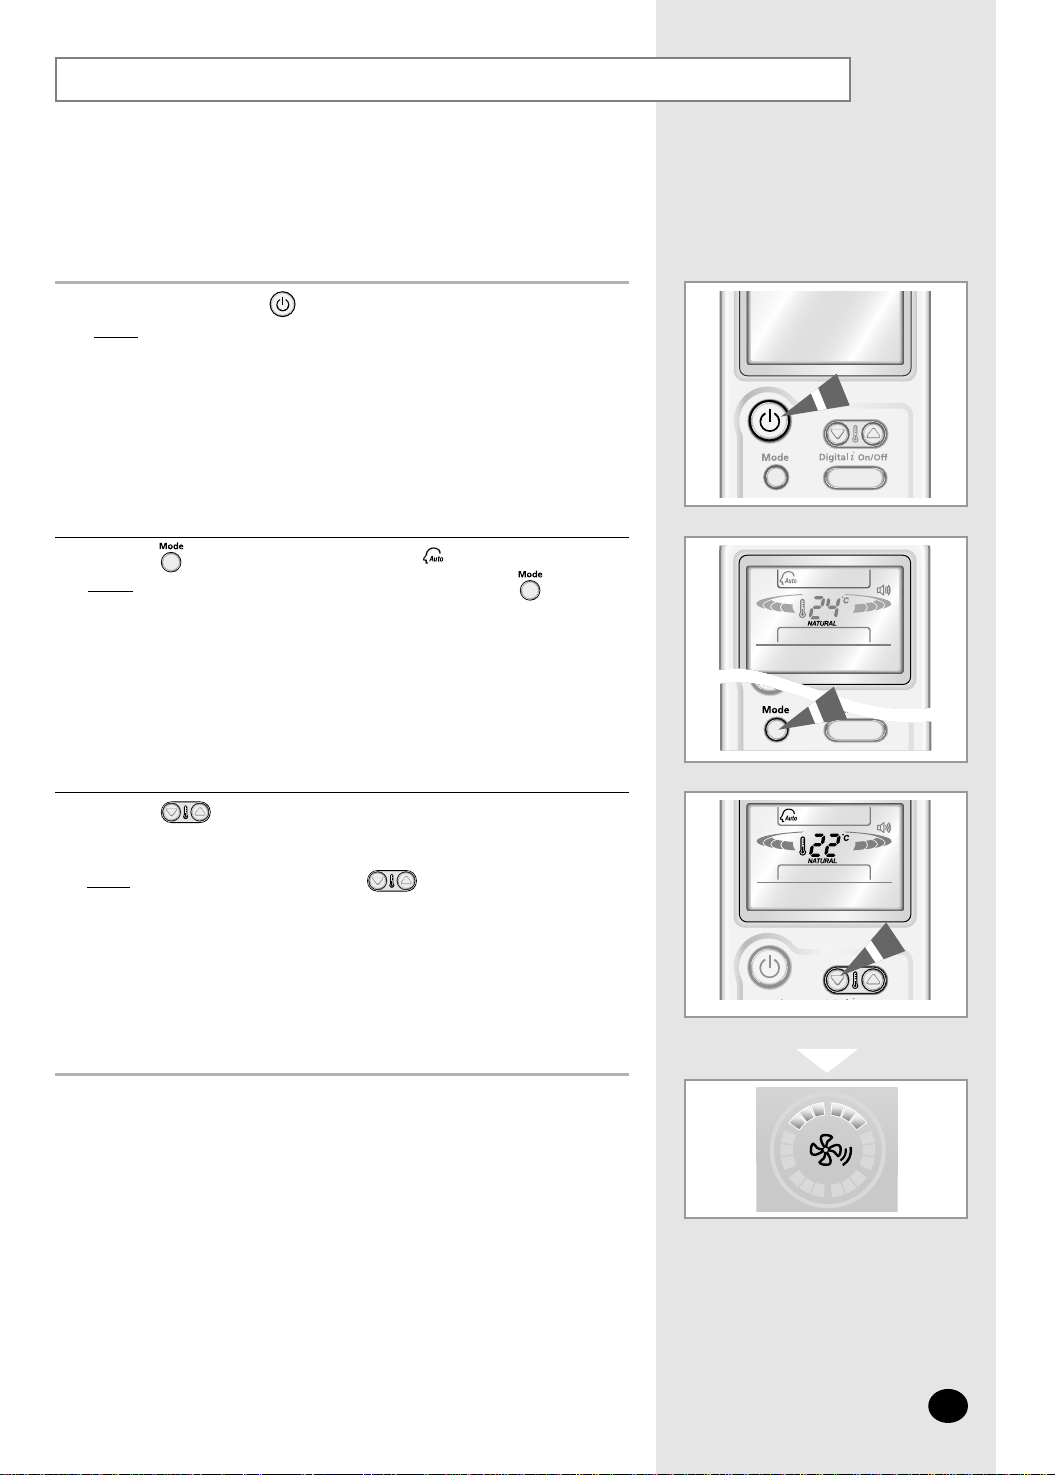
Selecting the Auto Mode
You can select the Auto mode if you want to cool your room automatically.
You can adjust the temperature in this mode.
1
Press the button on the remote control until is displayed.
Result
: ◆ The indoor unit beeps each time you press the button.
◆ The air conditioner runs in the Auto mode.
◆ The Auto mode cools the room depending on the set temperature.
2
You can change modes at any time.
If necessary, press the (On/ Off) button.
Result: ◆
The operation indicator on the indoor unit lights up.
◆
The air conditioner starts up in the mode you selected last.
◆ The indoor unit beeps.
NNNNoooottttee
ee
Press the button to adjust the temperature until the required
temperature is displayed.
You can set the temperature between 16°C and 30°C.
Result: ◆
Each time you press the button:
- The temperature is adjusted by 1°C
- The indoor unit beeps
◆ The fan speed is adjusted automatically.
◆ 2 fan speed indicators increase and decrease continuously and
turn round.
3
E-9
Control Panel
 Loading...