

Samsung AS12MWBX, AS12MWBN User Manual
E-2
Contents
PREPARATION
Safety Precautions ......................................................................................................... 3
Name of Each Part ......................................................................................................... 8
Remote Control – Buttons and Display ............................................................... 10
Inserting the Remote Control Batteries ............................................................... 10
Getting Started ............................................................................................................... 11
OPERATION
Selecting Auto Mode ................................................................................................... 12
Selecting Cool Mode .................................................................................................... 13
Selecting Dry Mode ...................................................................................................... 14
Selecting Fan Mode ...................................................................................................... 15
Selecting the Turbo Function ................................................................................... 16
Selecting the Energy Saving Function ................................................................. 17
Selecting Mode ...................................................................................... 18
Adjusting the Airflow Direction .............................................................................. 20
Selecting Auto Cleaning Function ......................................................................... 21
Setting the On Timer .................................................................................................... 22
Setting the Off Timer ................................................................................................... 23
Operating Your Air Conditioner Without the Remote Control .................. 24
RECOMMENDATIONS FOR USE
Cleaning the Air Filter on Your Air Conditioner ................................................ 25
Cleaning Deodorizing and Bio filter (Option) .................................................... 25
Temperature and Humidity Ranges ...................................................................... 26
Operating Recommendations ................................................................................. 26
Solving Common Problems ...................................................................................... 27
E-3
Register your product at www.samsung.com/global/register
Safety Precautions
The following safety precautions are provided to protect the users’ safety and prevent property damage.
Make sure to read the followings and use the air conditioner properly.
Keep this user’s manual together with the installation manual in a handy place so that you can find it whenever
you need to see it after reading this manual thoroughly.
WARNING
CAUTION
This indicates the possibility of serious injury or death.
This indicates the possibility of serious injury or damage to environments when
operated incorrectly
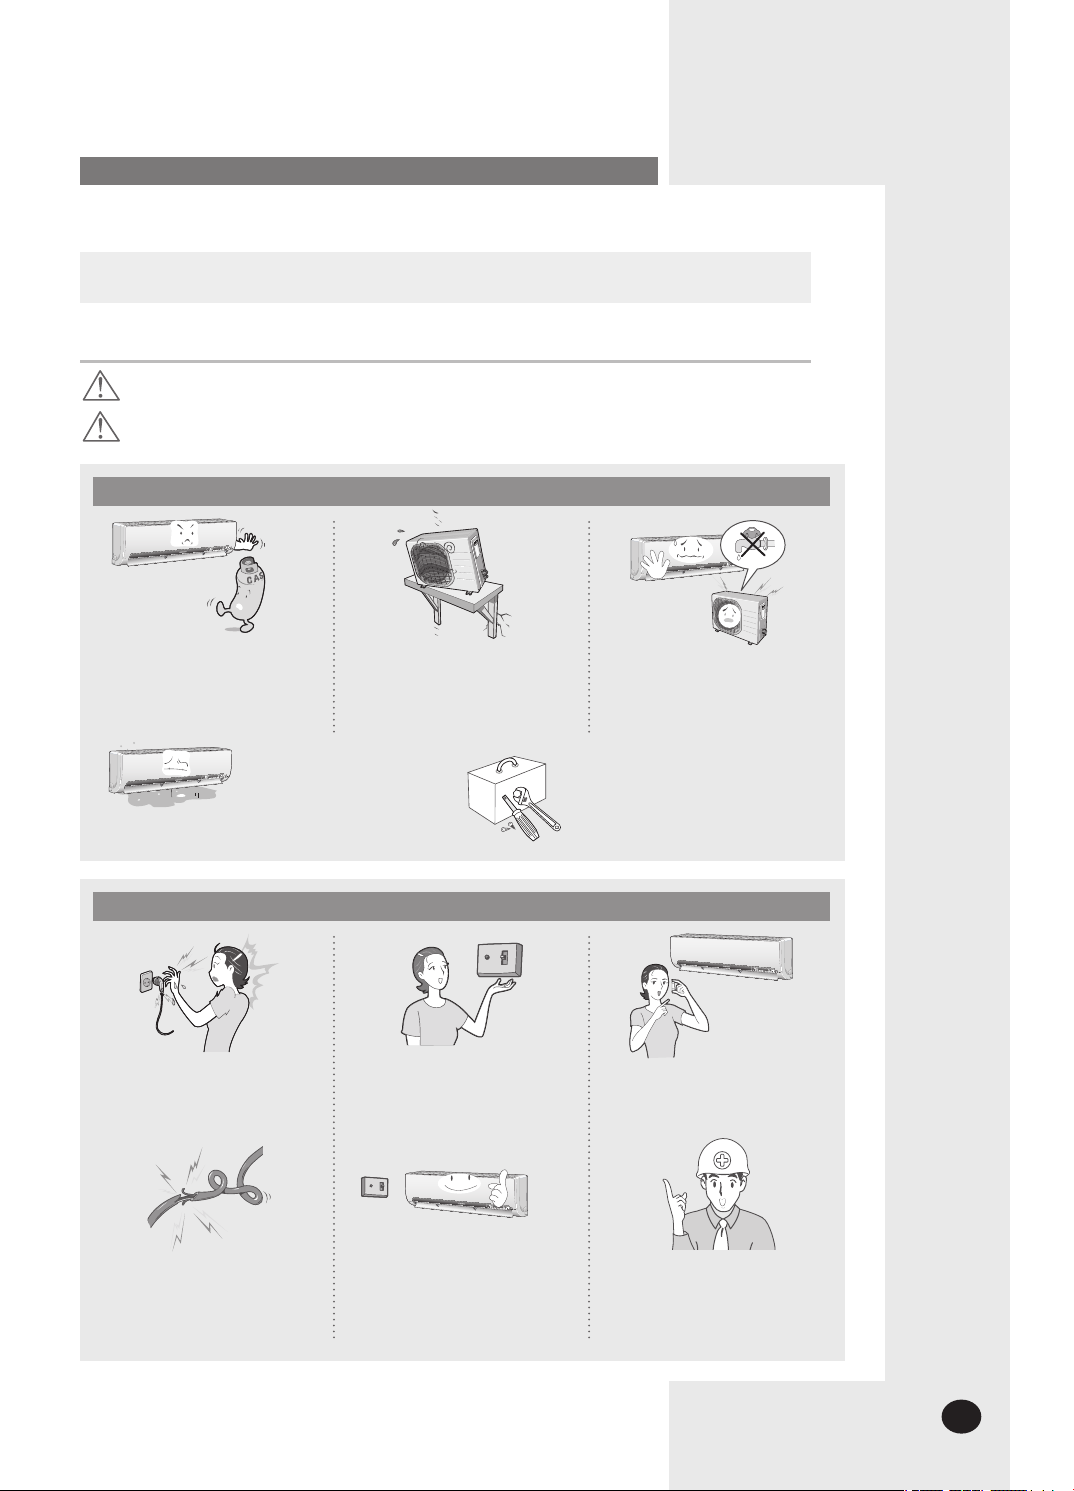
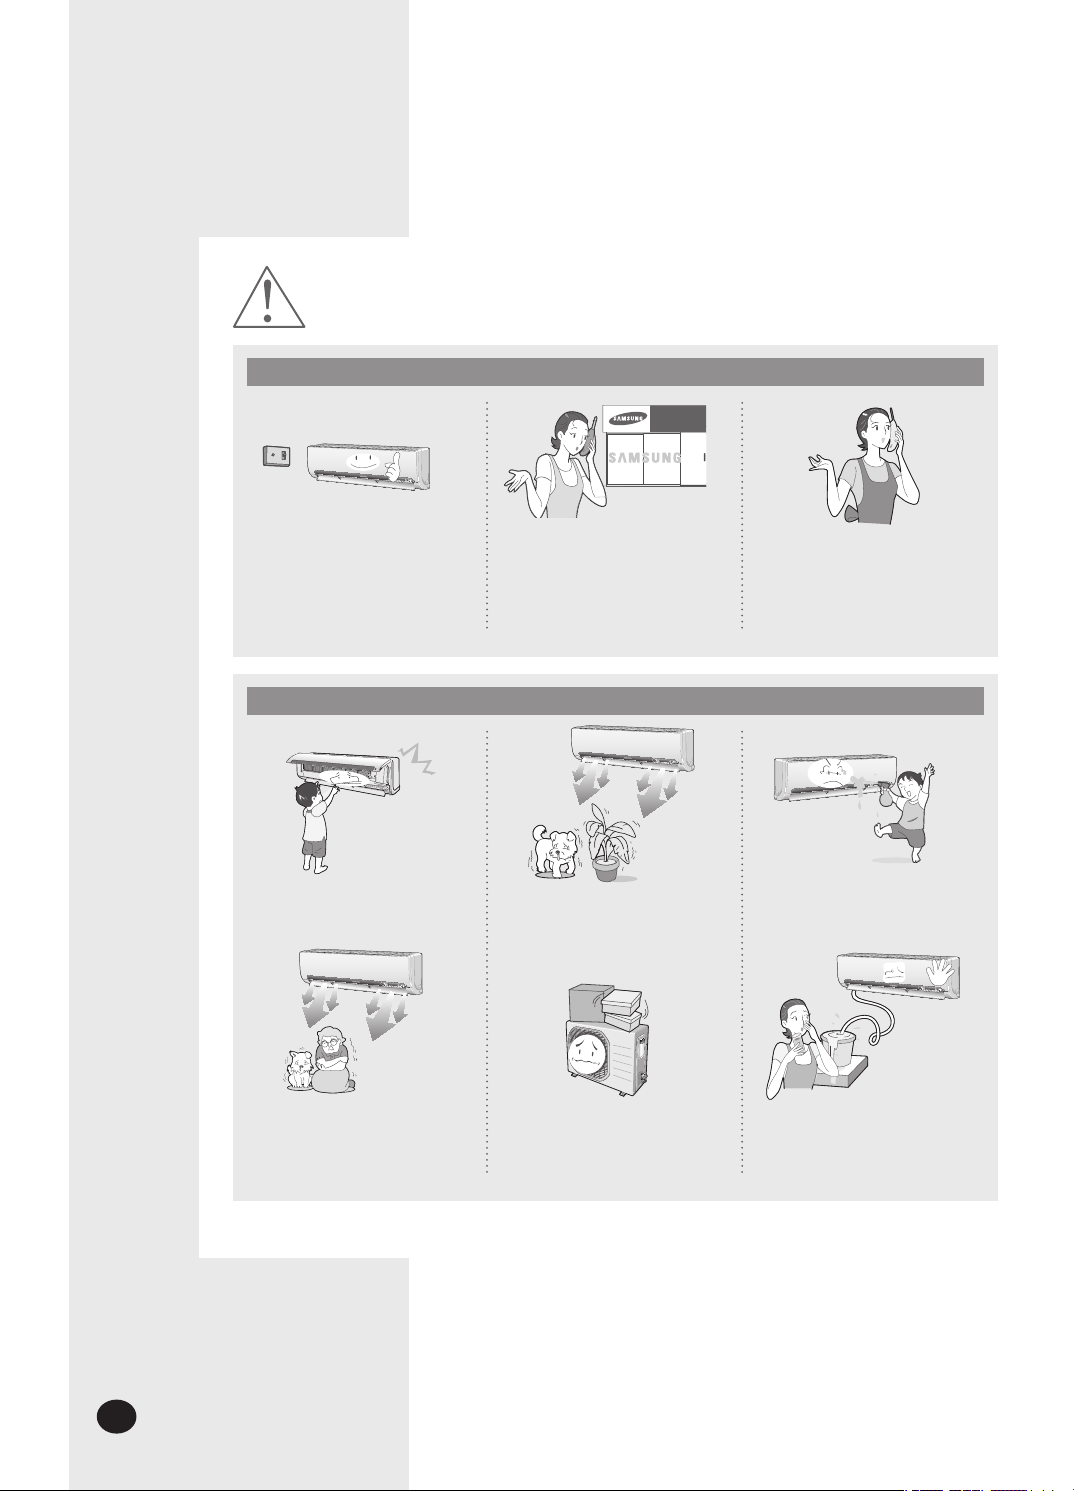
WHEN INSTALLING
Do not install the unit in a
place where it is exposed to
inflammable gas leakage.
Contact the service center
if the air conditioner is
under water.
REGARDING POWER SOURCE
.
Do not install the outdoor
unit where there’s the risk of
dropping such as on high
outer wall or outside of the
terrace.
Do not connect the ground
to a gas pipe, water pipe,
lightning rod or telephone
earth.
The installation must be carried out
by a licensed installer or qualified
personnel when installing the unit
for the first time or reinstalling it.
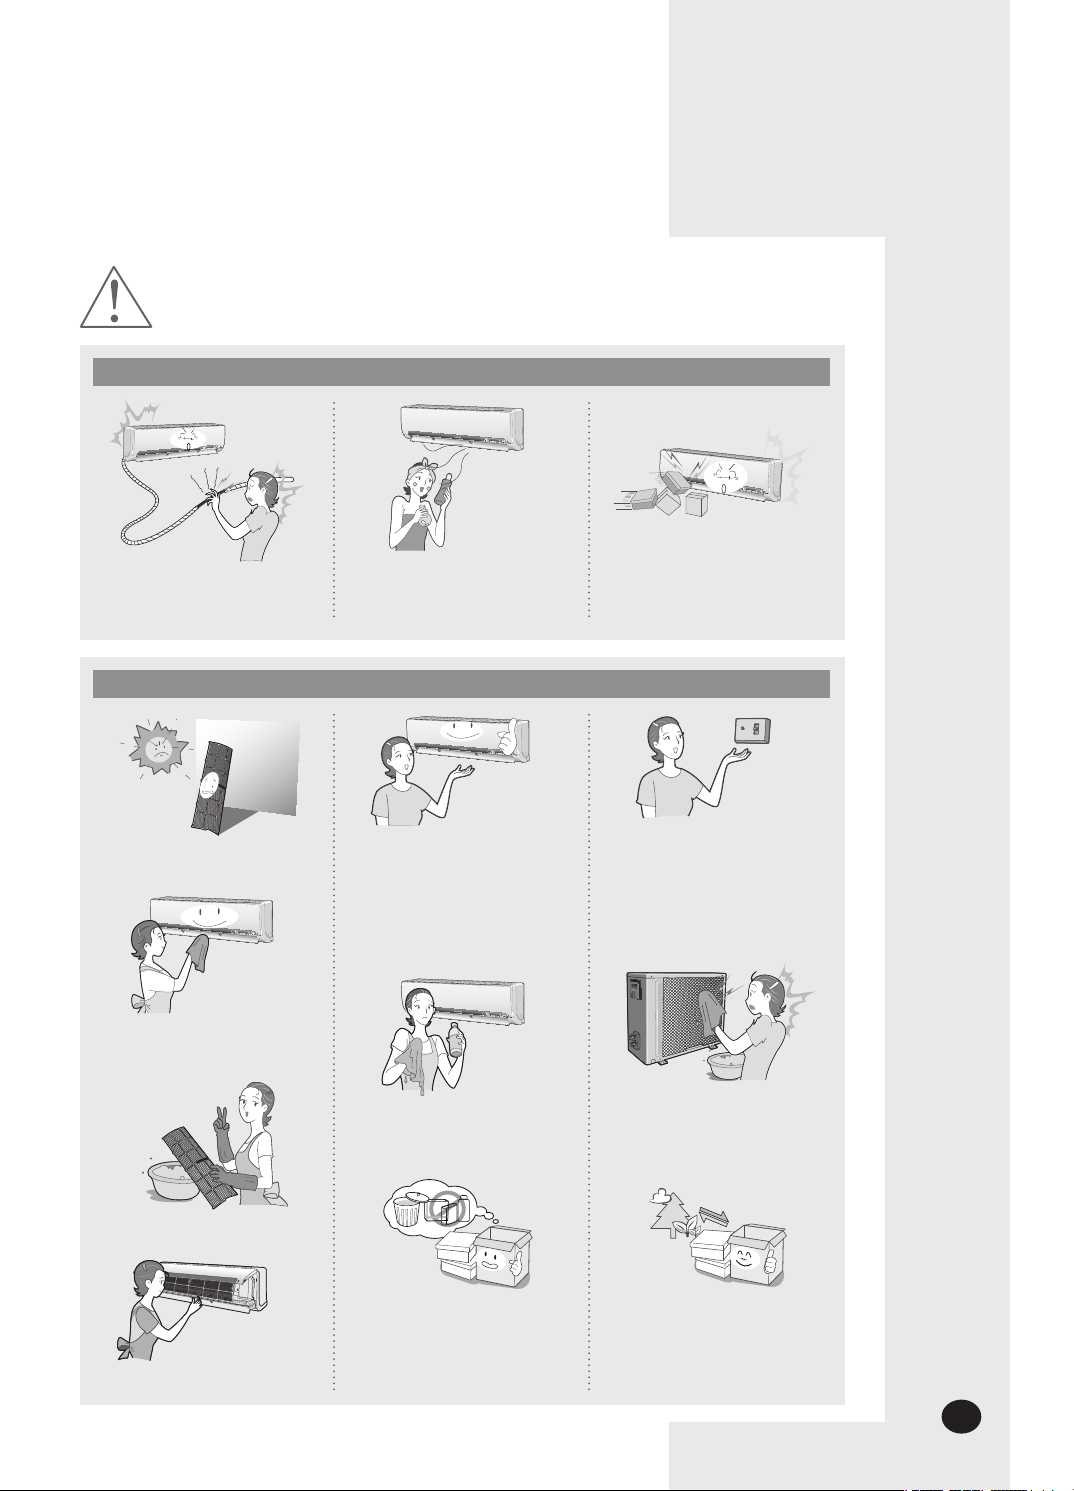
Do not pull the electric wire
or touch the power plug with
the wet hands.
Do not bend the electric wire
by force or weigh down the
air conditioner not to be out
of order.
Install the switch and circuit
breaker only for
air conditioner.
Use the power source with
separate wiring only for air
conditioner.
Use the rated current fuse.
If the power plug is
damaged, replace it by the
manufacturer or qualified
personnel to avoid the risk.
E-4
WARNING
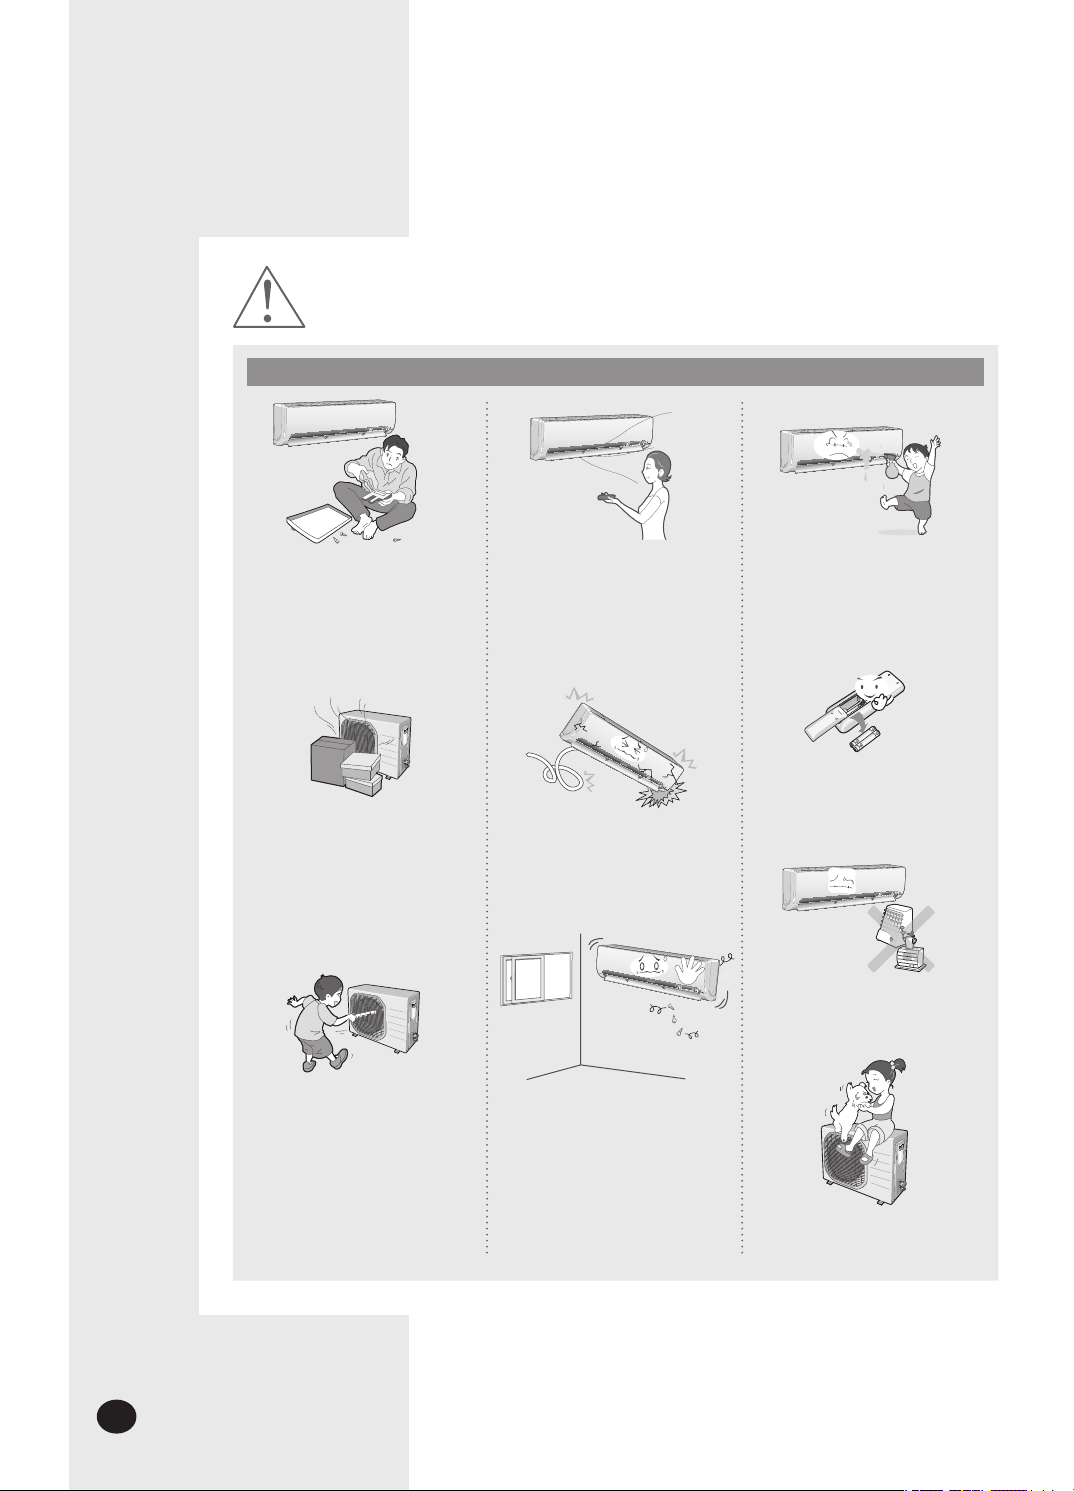
DURING OPERATION
Do not attempt to repair,
move, modify or reinstall
the unit on your own. Make
sure that these installations
are carried out by qualified
personnel to avoid electric
shock or fire.
Do not place any obstacles in
front of the unit.
Make sure that the unit is
correctly ventilated at all
times: Do not place clothing
or other materials over it.
Do not insert anything
between the air outlet
blades because the inner fan
may be damaged and could
cause injury. Keep children
away from the unit.
When using a wireless
remote control, the distance
should not be more than
7 meters from the air
conditioner. (If applicable)
The manufacturer declines
any liability for damage
resulting from modifications
or errors in the electrical or
hydraulic connections.
Failure to observe the
installation instruction, or use
of the unit under conditions
other than those indicated in
the table 'Operating limit' of
the unit installation manual,
will immediately invalidate
the unit warranty.
Never spill any kind of liquid
into the unit. Should this
happen, unplug or main
switch off the unit and
contact an authorized
service center.
If the wireless remote
control is not used for
a long time, remove the
batteries. (If applicable)
Do not connect the electric
heater to the air conditioner
or repair it with your
discretion.
Do not place any materials
so that children cannot step
on it.
E-5
WARNING
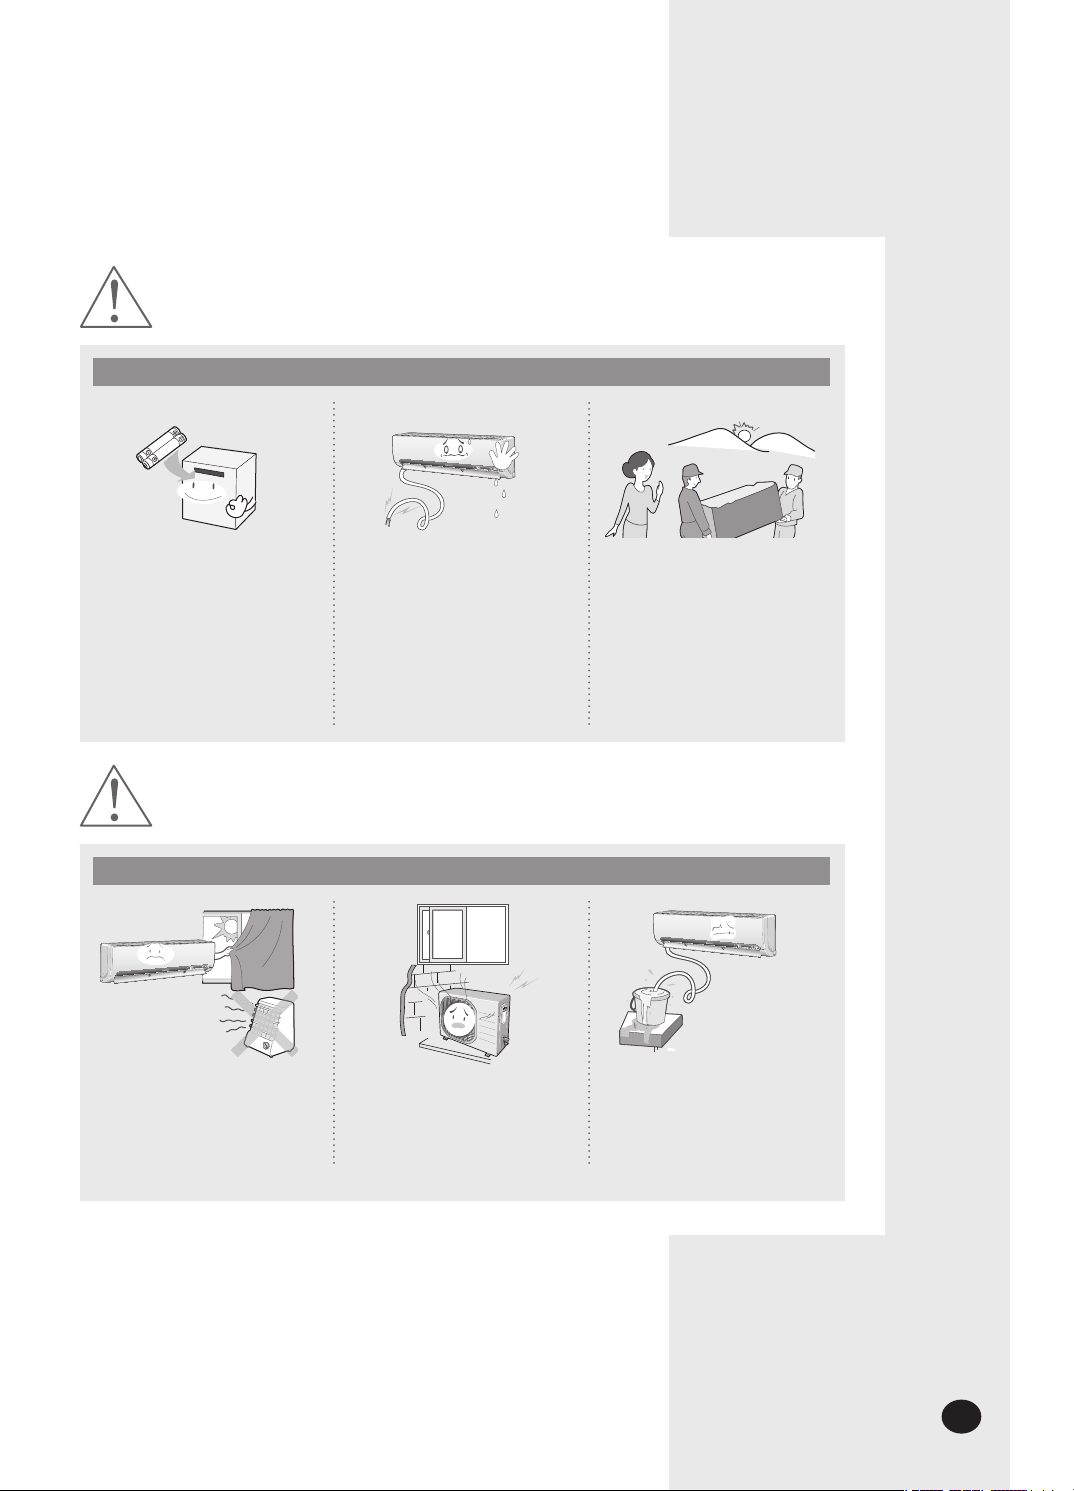
DISPOSING THE UNIT
Before throwing out the
device, it is necessary to pull
back the battery cells and get
rid of them safely for recycling
reasons.
CAUTION
When you need to dispose of
the unit, consult your dealer.
If pipes are removed
incorrectly, refrigerant may
blow out and come into
contact with your skin, causing
injury. Releasing refrigerant
into the atmosphere also
damages the environments.
Please recycle or dispose
of the packaging material for
this product in an
environmentally responsible
manner.
WHEN INSTALLING
Install the air conditioner
avoiding direct sunlight or
heater, especially water.
Install the outdoor unit so as
to let the discharged air out
properly. Avoid a place that
may disturb your neighbor by
noise.
Install the drain hose to let
the water run safely and
correctly.
E-6
CAUTION
REGARDING POWER SOURCE
Disconnect the circuit breaker
when you don’t use the
air conditioner for a long time
to save energy.
DURING OPERATION
Contact the service center or
manufacturer if you want to
repair the air conditioner.
Contact the service center
after turning off the air
conditioner if strange noise
is heard, burning smell or
smoke blow.
Do not open the front grille
during operation.
Do not use the air conditioner
for a long time in a closed room
or in a place where there’s a
baby or an old person.
Avoid cold and hot air
reaching to person, pet or a
plant directly for a long time.
Do not step on the air
conditioner or put heavy
object on it.
Avoid the water from
getting into the
air conditioner.
Do not drink the water from
the air conditioner.
E-7
CAUTION
DURING OPERATION
Do not touch the pipes
connected to the air
conditioner.
OTHERS
Be sure that the air filter not to
be exposed to direct sunlight.
Do not use the air conditioner
to maintain the machine, food,
pet, plant or cosmetics.
The appliance is not intended
for use by young children or
infirm persons without
supervision: Young children
should be supervised to
ensure that they do not play
with the appliance.
Do not give excessive shock
to the air conditioner.
The maximum input power &
current is measured
according to the IEC standard
and the input power & current
is measured according to the
ISO standard.
Turn off the air conditioner
and if the fan stops to operate,
clean the air conditioner.
Clean the air filter every 2 weeks.
Be sure to insert the air filter.
Do not clean the air
conditioner by spraying water
directly or with benzene,
thinner or alcohol.
Dispose of the packaging
material in accordance with
the local requirements.
The surface of the heat
exchanger is sharp, so be
careful of it when cleaning.
All of the manufacturing and
packaging materials used for your
new appliance are compatible
with the environment and can be
recycled.
E-8
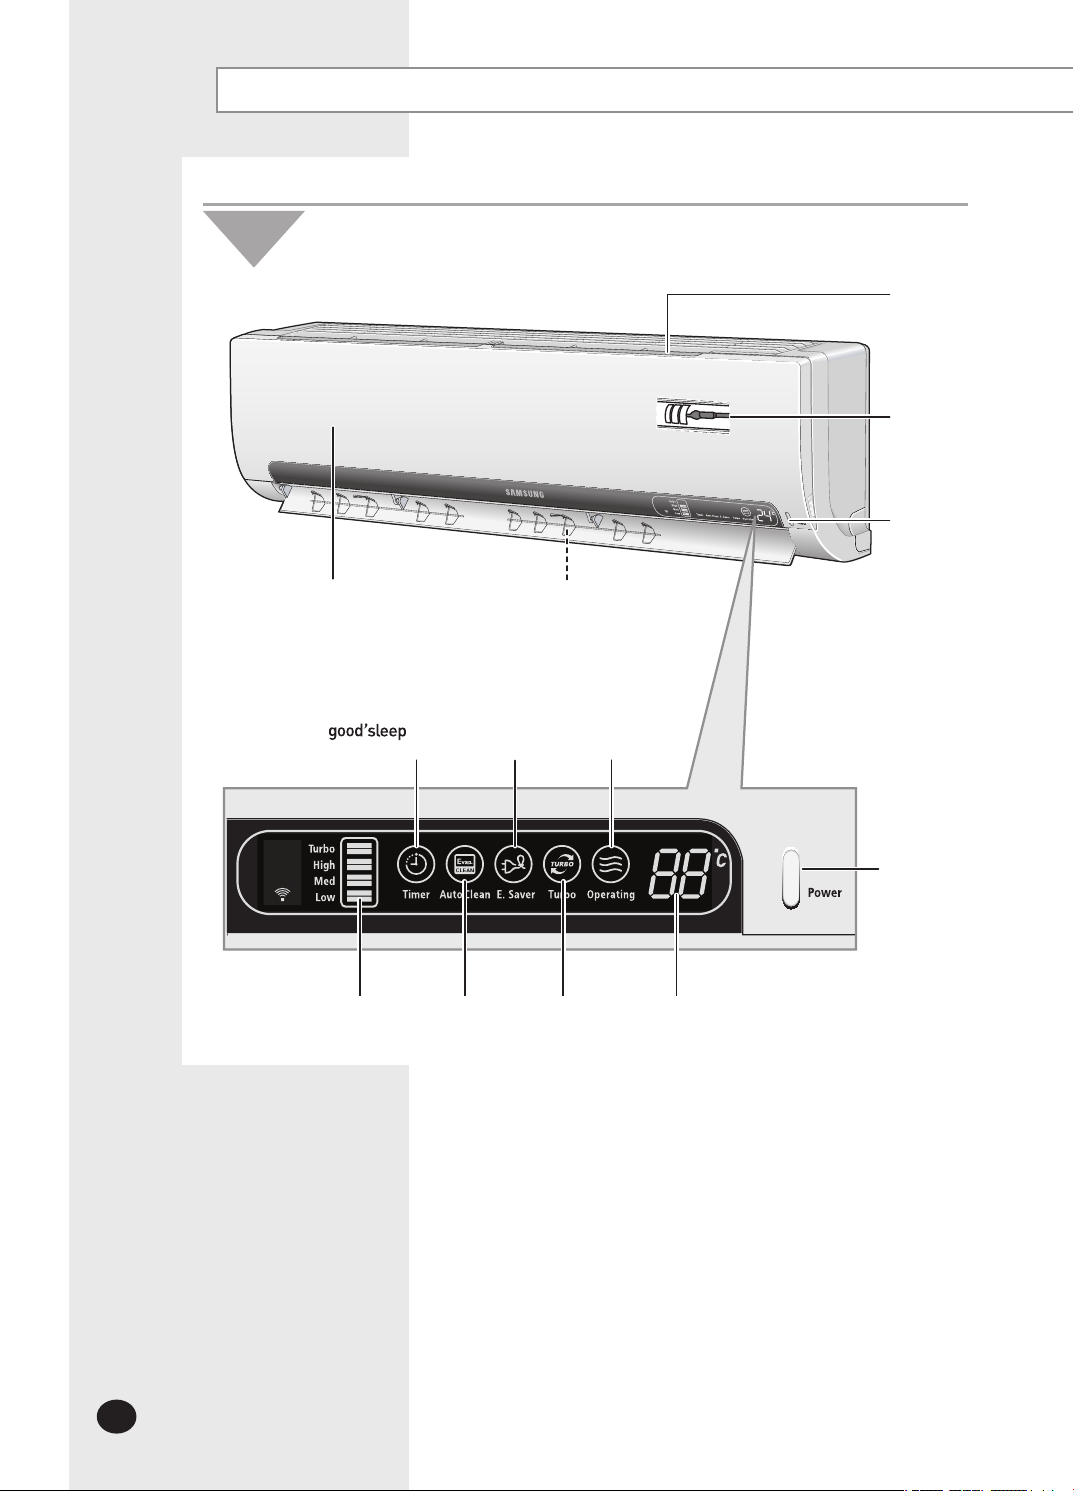
Name of Each Part
The design and shape can be changed according to the model.
Indoor Unit
Air Inlet
Room
Temperature sensor
Power(On/Off)
button
Air filter
(under the panel)
Timer/
Fan speed
indicator
mode
indicator
Auto cleaning
indicator
Airflow blades
Energy saving
indicator
indicator
(outlet)
Turbo
Operation
indicator
Power(On/Off)
button
Set temperature &
room temperature

E-9
Outdoor Unit
AS09M
Air Outlet
Series
Air Inlet (Rear)
Connection Valve
(Inside)
Outdoor Unit
Outdoor Unit
Air Outlet
Air Outlet
AS12M
AS18M
Series
Air Inlet (Rear)
Connection Valve
(Inside)
Series
Air Inlet (Rear)
Connection Valve
(Inside)
Outdoor Unit
AS24M
Air Outlet
Series
Air Inlet (Rear)
Connection Valve
(Inside)
E-10
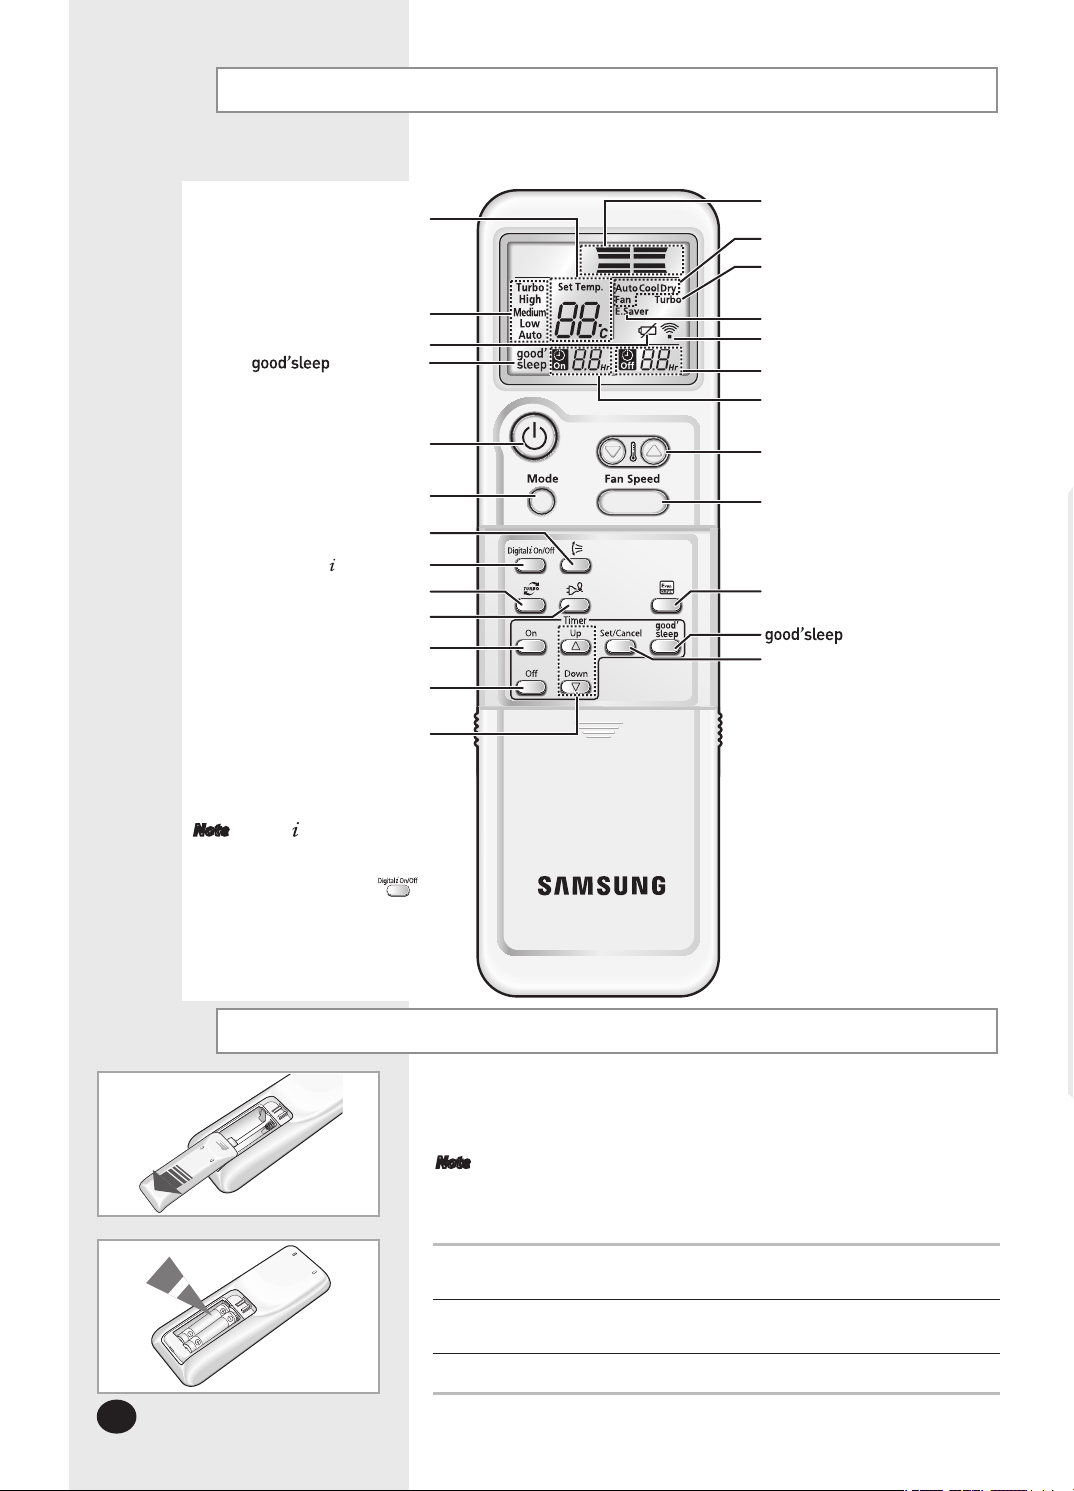
Remote Control-Buttons and Display
Temperature setting
Fan speed indicator
Battery life indicator
mode indicator
Power (On/Off) button
Mode selection button
(Auto, Cool, Dry, Fan)
Swing button
Digital
On/Off button
Turbo button
Energy saving button
On Timer button
Off Timer button
Time adjustment button
Airflow direction indicator
Operating mode indicator
(Auto, Cool, Dry, Fan)
Turbo function indicator
Energy saving indicator
Remote control
transmission indicator
Off Timer indicator
On Timer indicator
Temperature adjustment
buttons
Fan speed adjustment button
Auto Cleaning button
button
Timer Set/Cancel button
Note
Digital On/Off button
If you want to turn on or off the
Display of the indoor unit during
operation, press the
button
on the remote control.
Inserting the Remote Control Batteries
You must insert or replace the remote control batteries when:
Note
1
2
3
You purchase the air conditioner
The remote control does not work correctly
Use two AAA, LR03 1.5V batteries.
Do not use old and new batteries or different kinds of batteries
together.
Insert two batteries correctly as indicated by the + and – symbols.
Remove the battery cover in the rear of the remote control by pushing
it with your thumb.
Insert two batteries, respecting the polarities as indicated by
the + and - symbols.
Close the cover by sliding it back in place.
 Loading...