How it Works
Log In / Sign Up
Buy Points
How it Works
FAQ
Contact Us
Questions and Suggestions
Users
Samsung
Loading...
A
AR18JC2UFUQ
AR18JC2USUQ
AR18JC3ESLW
AR18JC3HATP
AR18JC3HBWK
AR18JC3JABV
AR18JC3JAMV
AR18JC3TFUR
AR18JC3UFUQ
AR18JC3USUQ
AR18JC5ECLZ
AR18JC5HATP
AR18JC5HBWK
AR18JC5HCTP
AR18JC5HCWK
AR18JC5JAMV
AR18JC5JCMV
AR18JC5SLZ
AR18JC5TCUR
AR18JC5TFUR
AR18JC5UCUQ
AR18JC5USUQ
AR18JCFS Series
AR18JPFS Series
AR18JSFLBWKNCV
AR18JSFLBWKXCV
AR18JSFNRWKNER
AR18JV5HATQ
AR18JV5HBTQ
AR18JV5HBWK
AR18JV5N Series
AR18JVFSBWKNME
AR18KPFN Series
AR18KSFPAWQNER
AR18KSFPDWQNCV
AR18KSFPDWQXCV
AR18KSFTAWQNSA
AR18KSFTAWQXSA
AR18KSWSJWKNCV
AR18NSWSPWKNCV
AR18NSWSPWKXCV
AR18RSFPAWQNER
AR18RXPXBWKNEU
AR18RXPXBWKXEU
AR18RXWXCWKNEU
AR18RXWXCWKXEU
AR18TQHQAURNER
AR18TSHZAWKNER
AR24FC2TAUR
AR24FSSSBWKN
AR24FSSSCURN
AR24FVSED Series
AR24HCF Series
AR24HPFN Series
AR24HPFS Series
AR24HQFNAWKN
AR24HQFSAWKN
AR24HSFNBWKNEU
AR24HSFNBWKXEU
AR24HSFNCWKN
AR24HSFNCWKXEU
AR24HSFNRWKN
AR24HSFNRWKNER
AR24HSFNRWKXER
AR24HSFSAWKN
AR24HSFSAWKNEU
AR24HSFSAWKXEU
AR24HSFSHWKNCV
2
AR24HSFSHWKXCV
2
AR24HSFSJWKN
AR24HSFSJWKNCV
AR24HSFSJWKX
AR24HSFSJWKXCV
AR24HSFSRWKN
AR24HSFSRWKNER
AR24HSFSRWKXER
AR24HSSDBWKN
AR24HSSDBWKNEU
AR24HSSDBWKXEU
AR24JC2JAMV
AR24JC2USUQ
AR24JC3HATP
AR24JC3TFUR
AR24JCFS Series
AR24JPFS Series
AR24JSFLBWKNCV
AR24JSFLBWKXCV
AR24JSFNRWKNER
AR24JV5HBWK
AR24JV5N Series
AR24KSFHBWKN
AR24KSFPAWQNER
2
AR24KSFPAWQXER
AR24KSFPDWQNCV
AR24KSFPDWQXCV
AR24KSWSAWKN
AR24KSWSJWKNCV
AR24MSFHBWKN
AR24MSFPAWQNER
AR24NSWSPWKNCV
Loading...
Loading...
Nothing found
AR24FSSSCURN
User Manual
61 pgs
17.48 Mb
0
Table of contents
Loading...
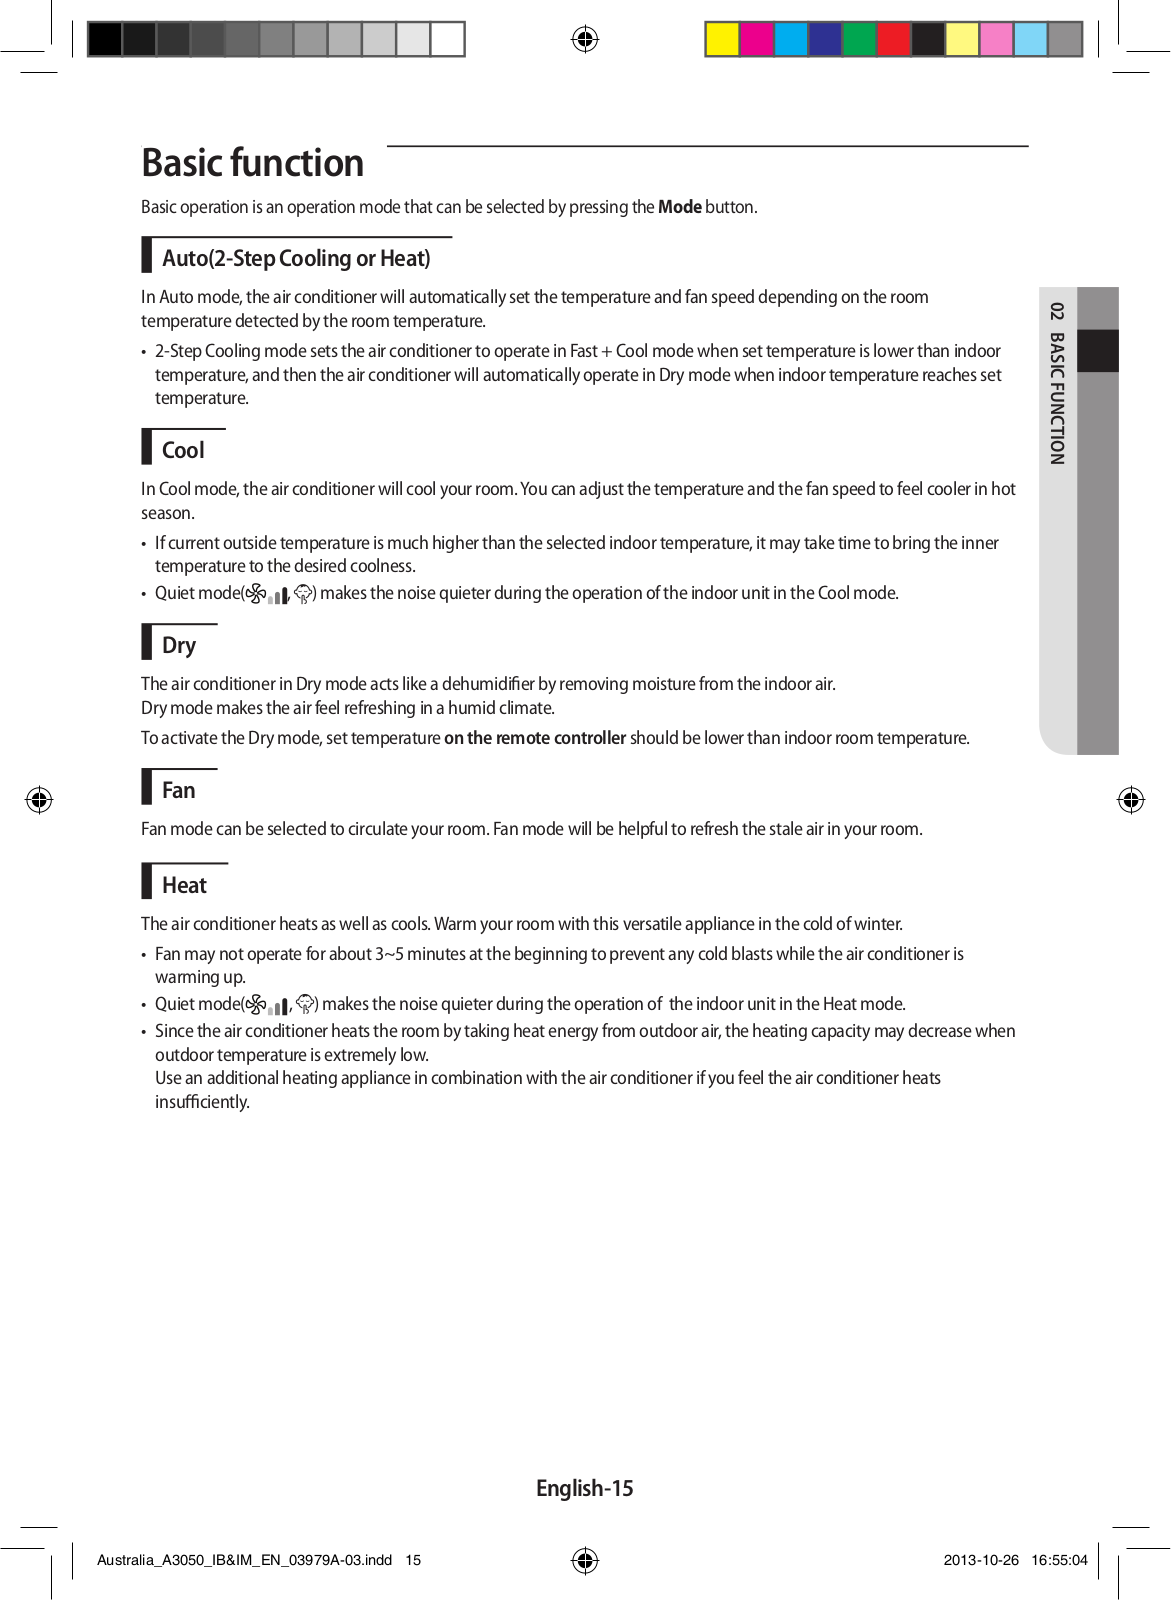
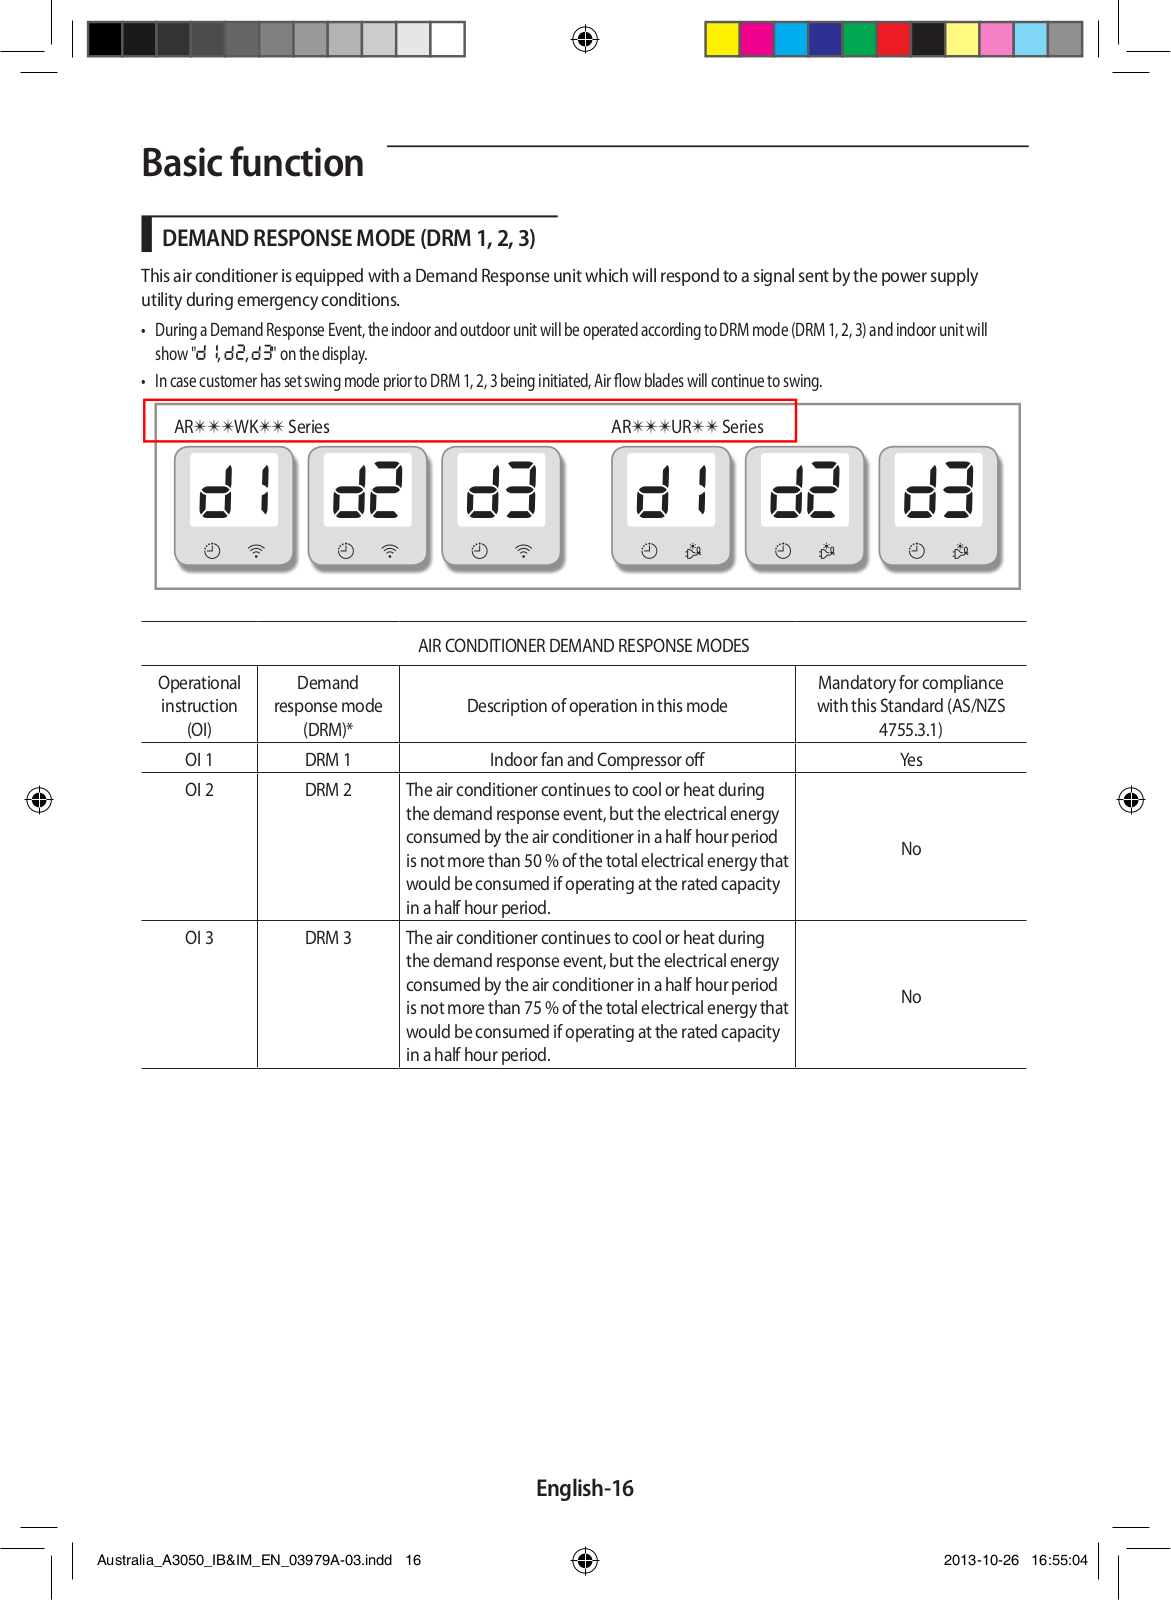
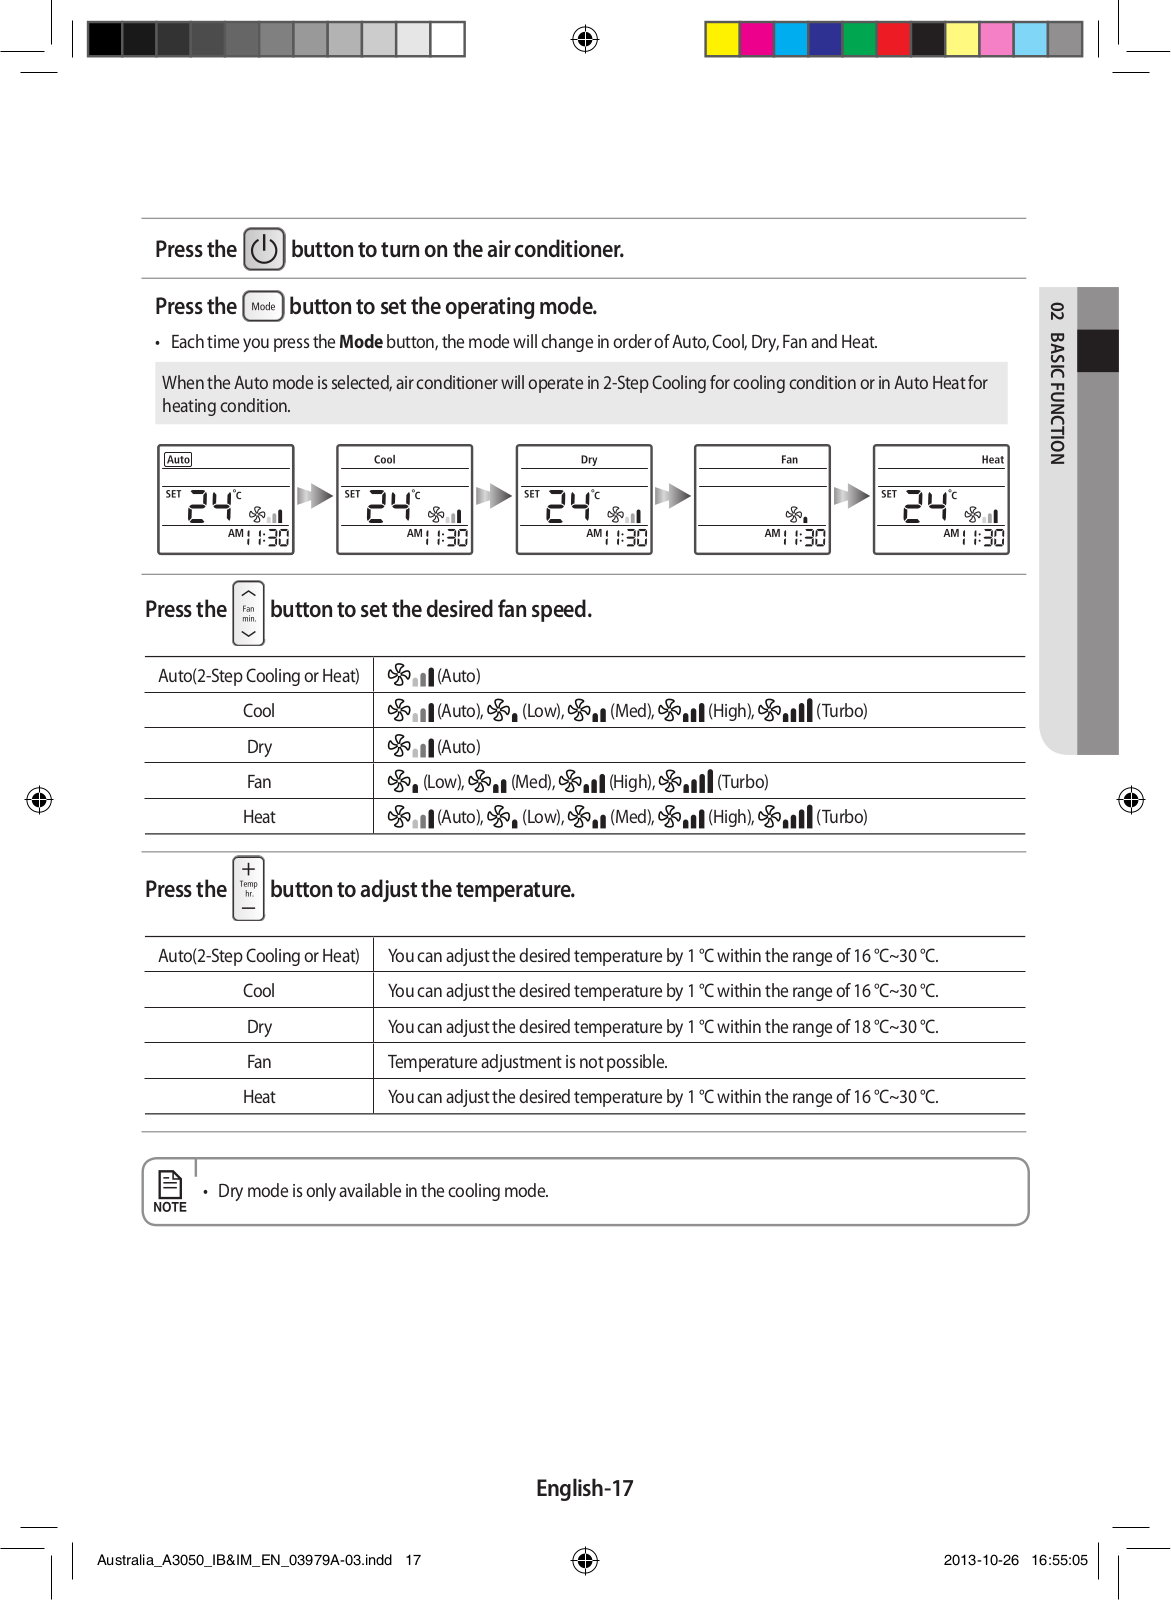
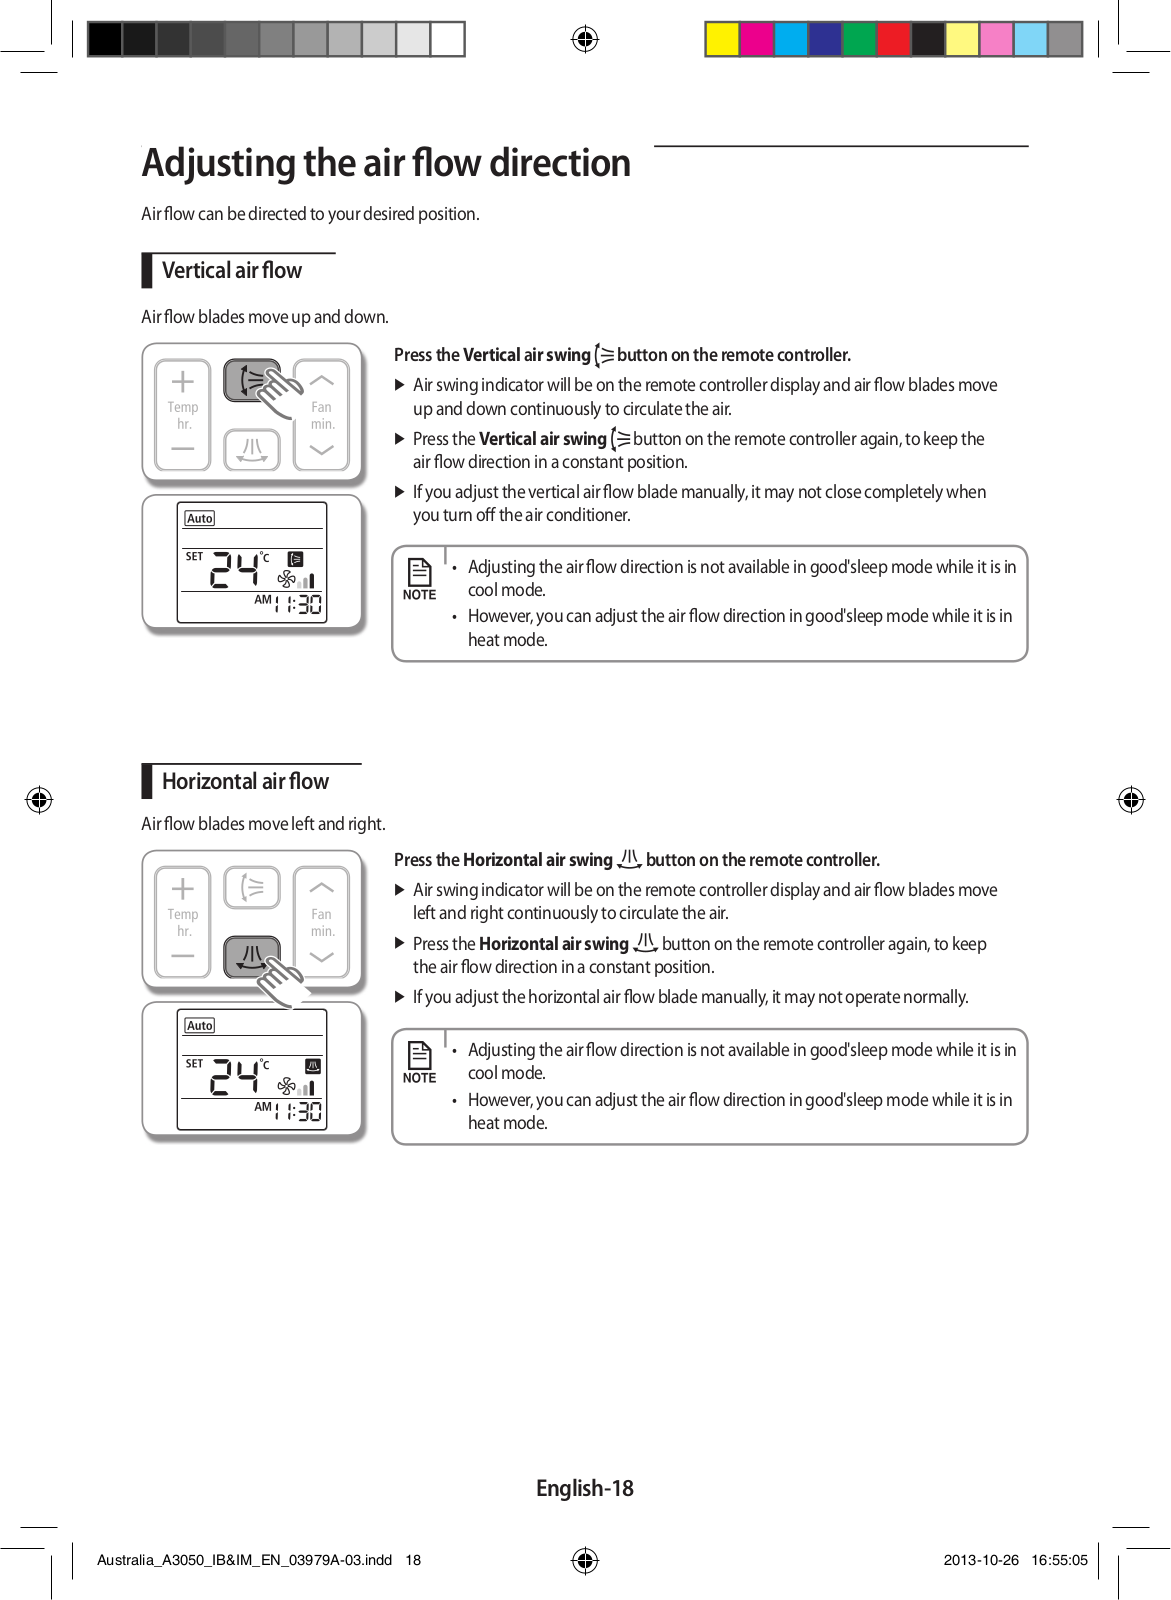
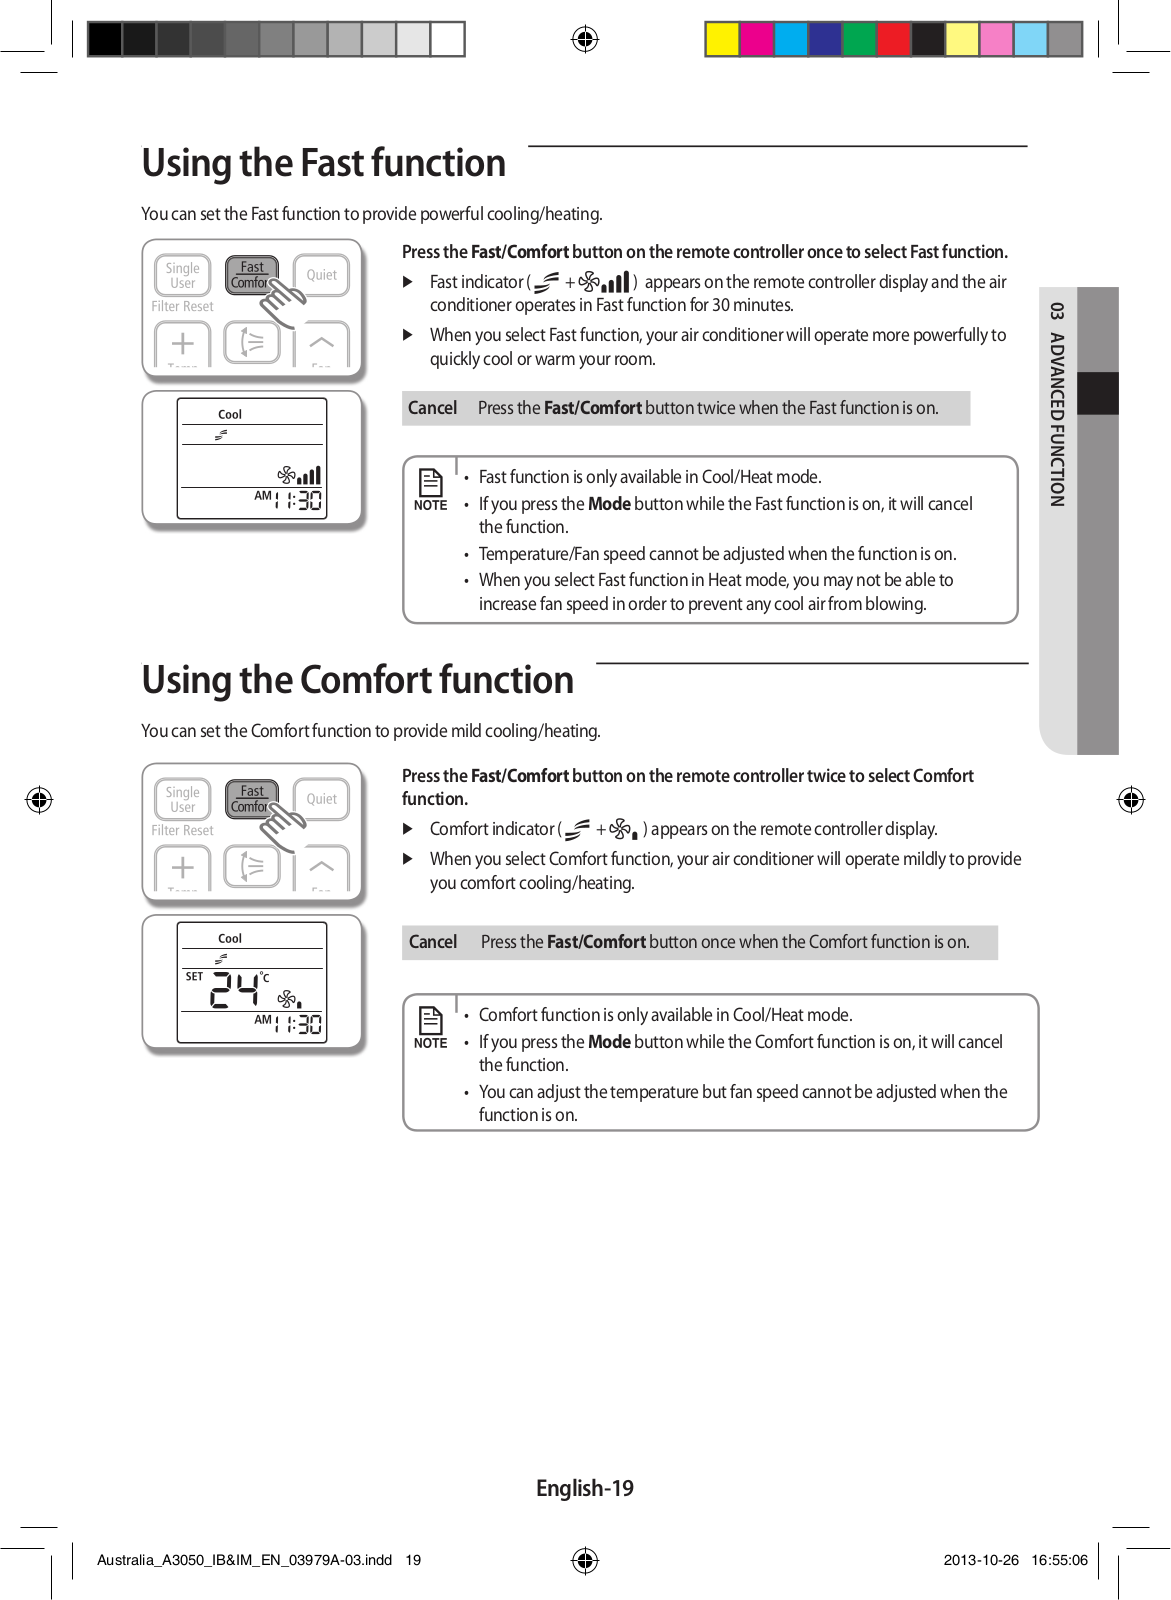
Samsung AR18FSSSCURN, AR24FSSSCURN User Manual
...
Samsung User Manual
Download
Specifications and Main Features
Frequently Asked Questions
User Manual
Download
Loading...
+
42
hidden pages
Unhide
You need points to download manuals.
1 point = 1 manual.
You can buy points or you can get point for every manual you upload.
Buy points
Upload your manuals
 Loading...