

Samsung AQ09SBGS, AQ18S0GB User Manual
SPLIT TYPE ROOM AIR CONDITIONER
( Cool and Heat )
E DB98-08237A(5)
AQ07S8GE
AQ07SBGE
SH07ZS8
AQ09S8GE
AQ09SBGE
SH09ZS8
AQ12SBGE
AQ12SGGB
AQ12SGGE
SH12ZSG
AQ18S0GB
AQ18S0GE
SH18ZS0
AQ24S6GB
AQT24S6GE
SH24TS6
Indoor unit
UQ07S8GE
UQ07SBGE
SH07ZS8X
UQ09S8GE
UQ09SBGE
SH09ZS8X
UQ12SBGE
UQ12SGGB
UQ12SGGE
SH12ZSGX
UQ18S0GB
UQ18S0GE
SH18ZS0X
UQ24S6GB
UQT24S6GE
SH24TS6X
Outdoor unit
OWNER’S
INSTRUCTIONS
E-2
Safety Precautions
◆ If the power supply cord of this air conditioner is damaged, it must
be replaced by the manufacturer or its authorized service personnel
only in order to avoid a safety hazard.
WARNING
◆ Do not attempt to install the air conditioner by yourself.
◆ This unit contains no user-serviceable parts. Always consult
authorized service personnel for repairs.
◆ When moving, consult authorized service personnel for disconnection
and installation of the unit.
◆ Do not become over-exposed to cold air by staying in the direct path
of the air flow of the air conditioner for extended periods of time.
◆ Do not insert fingers or objects into the outlet port or intake grilles.
◆ Do not start and stop air conditioner operation by disconnecting the
power supply cord and so on.
◆ Take care not damage the power supply cord.
◆ In the event of a malfunction(burning smell, etc.), immediately stop
operation, turn off the electrical breaker, and consult authorized
service personnel.
DANGER
◆ Provide occasional ventilation during use.
◆ Do not direct air flow at fireplaces or heating apparatus.
◆ Do not climb on, or place objects on, the air conditioner.
◆ Do not hang objects from the indoor unit.
◆ Do not set flower vases or water containers on top of air conditioner.
◆ Do not expose the air conditioner directly to water.
◆ Do not touch the power supply plug with wet hands.
◆ Do not turn off the air conditioner with pulling power cord.
◆ Turn off power source when not using the unit for extended periods.
◆ Do not place animals or plants in the direct path of the air flow.
◆ Do not drink the water drained from the air conditioner.
◆ Do not use in applications involving the storage of foods, plants or
animals, precision equipment, of art works.
◆ Do not block or cover the intake grille and outlet port in use.
◆ Do not use inflammable gases near the air conditioner.
◆ If the supply cord is damaged, it must be replaced by a special cord
or assembly available from the manufacturer or its service agent.
(For Europe)
◆ Before throwing out the device, it is necessary to pull back the battery
cells and get rid of them safely.
CAUTION

E-3
Contents
◆
P
REPARING YOUR AIR CONDITIONER
■ Safety Precautions . . . . . . . . . . . . . . . . . . . . . . . . . . . . . . . . . . . . 2
■ View of the Unit . . . . . . . . . . . . . . . . . . . . . . . . . . . . . . . . . . . . . . . 4
■ Remote Control-Buttons and Display . . . . . . . . . . . . . . . . . . . . . . 6
■ Getting Started . . . . . . . . . . . . . . . . . . . . . . . . . . . . . . . . . . . . . . . 7
■ Inserting the Remote Control Batteries . . . . . . . . . . . . . . . . . . . . . 8
◆
O
PERATING YOUR AIR CONDITIONER
■ Selecting the Automatic Operating Mode . . . . . . . . . . . . . . . . . . . 9
■ Cooling Your Room . . . . . . . . . . . . . . . . . . . . . . . . . . . . . . . . . . . . 10
■ Heating Your Room . . . . . . . . . . . . . . . . . . . . . . . . . . . . . . . . . . . . 11
■ Changing the Room Temperature Quickly . . . . . . . . . . . . . . . . . . 12
■ Removing Excess Humidity . . . . . . . . . . . . . . . . . . . . . . . . . . . . . 13
■ Airing Your Room . . . . . . . . . . . . . . . . . . . . . . . . . . . . . . . . . . . . . 14
■ Selecting Energy Saving Mode . . . . . . . . . . . . . . . . . . . . . . . . . . . 15
■ Adjusting the Air Flow Direction Vertically . . . . . . . . . . . . . . . . . . . 16
■ Adjusting the Air Flow Direction Horizontally . . . . . . . . . . . . . . . . 17
◆
P
ROGRAMMING YOUR AIR CONDITIONER
■ Setting the On Timer . . . . . . . . . . . . . . . . . . . . . . . . . . . . . . . . . . . 18
■ Setting the Off Timer . . . . . . . . . . . . . . . . . . . . . . . . . . . . . . . . . . . 19
■ Setting the Sleep Timer . . . . . . . . . . . . . . . . . . . . . . . . . . . . . . . . . 20
◆
R
ECOMMENDATIONS FOR USE
■ Operating Recommendations . . . . . . . . . . . . . . . . . . . . . . . . . . . . 21
■ Temperature and Humidity Ranges . . . . . . . . . . . . . . . . . . . . . . . . 22
■ Operating Your Air Conditioner Without the Remote Control . . . . . 22
■ Solving Common Problems . . . . . . . . . . . . . . . . . . . . . . . . . . . . . . 23
■ Cleaning Your Air Conditioner . . . . . . . . . . . . . . . . . . . . . . . . . . . . 24
■ Cleaning Deodorizing and Bio-Green filters (option) . . . . . . . . . . . 24
◆
T
ECHNICAL SPECIFICATIONS

View of the Unit
E-4
The design and shape are subject to change according to the model.
Indoor Unit
Air filter
(under the grille)
Air flow blades
(outlet)
Air Inlet
Remote Control Sensor
On/Off switch
TURBO indicator (RED)
Operation indicator
(Cooling-GREEN,
Heating-RED)
Energy Saving indicator
(GREEN)
Timer indicator
(YELLOW)
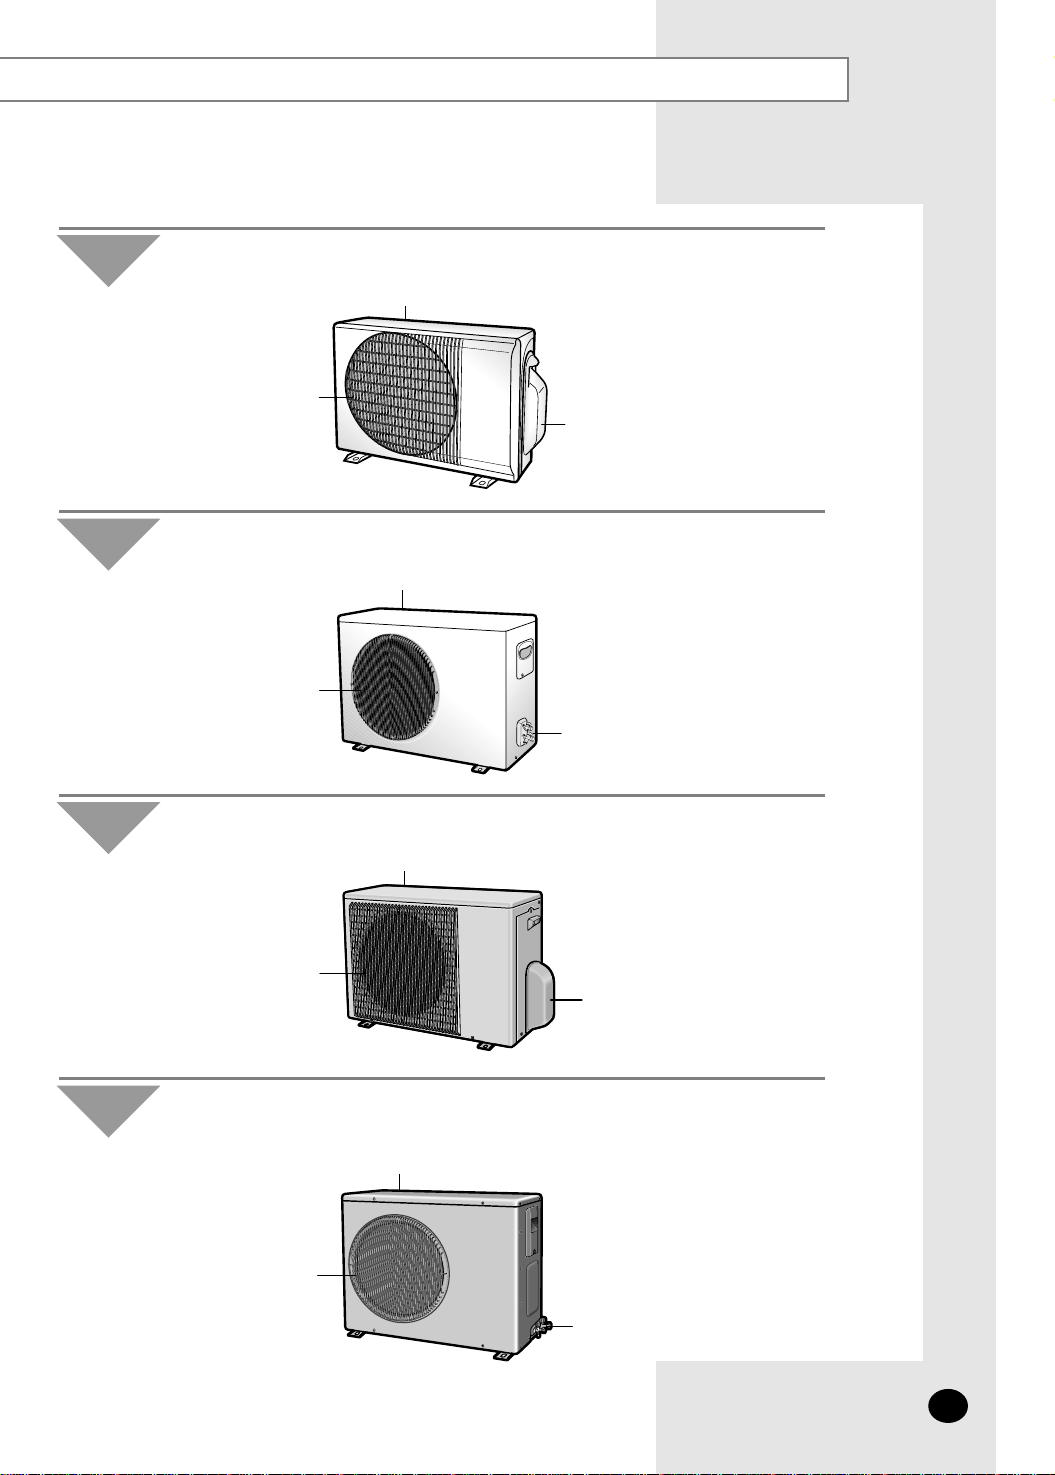
SH30ZC1(C2)X
E-5
Air Inlet(Rear)
Air Outlet
Connection Valve
(inside)
Outdoor Unit
UQ07S8GE SH07ZS8X UQ09S8GE SH09ZS8X
Air Inlet(Rear)
Air Outlet
Connection Valve
Outdoor Unit
UQ07SBGE UQ09SBGE UQ12SBGE
Air Inlet(Rear)
Air Outlet
Connection Valve
(inside)
Outdoor Unit
UQ12SGGB UQ12SGGE SH12ZSGX
Air Inlet(Rear)
Air Outlet
Connection Valve
Outdoor Unit
UQ18S0GB UQ18S0GE SH18ZS0X
UQ24S6GB UQT24S6GE SH24TS6X
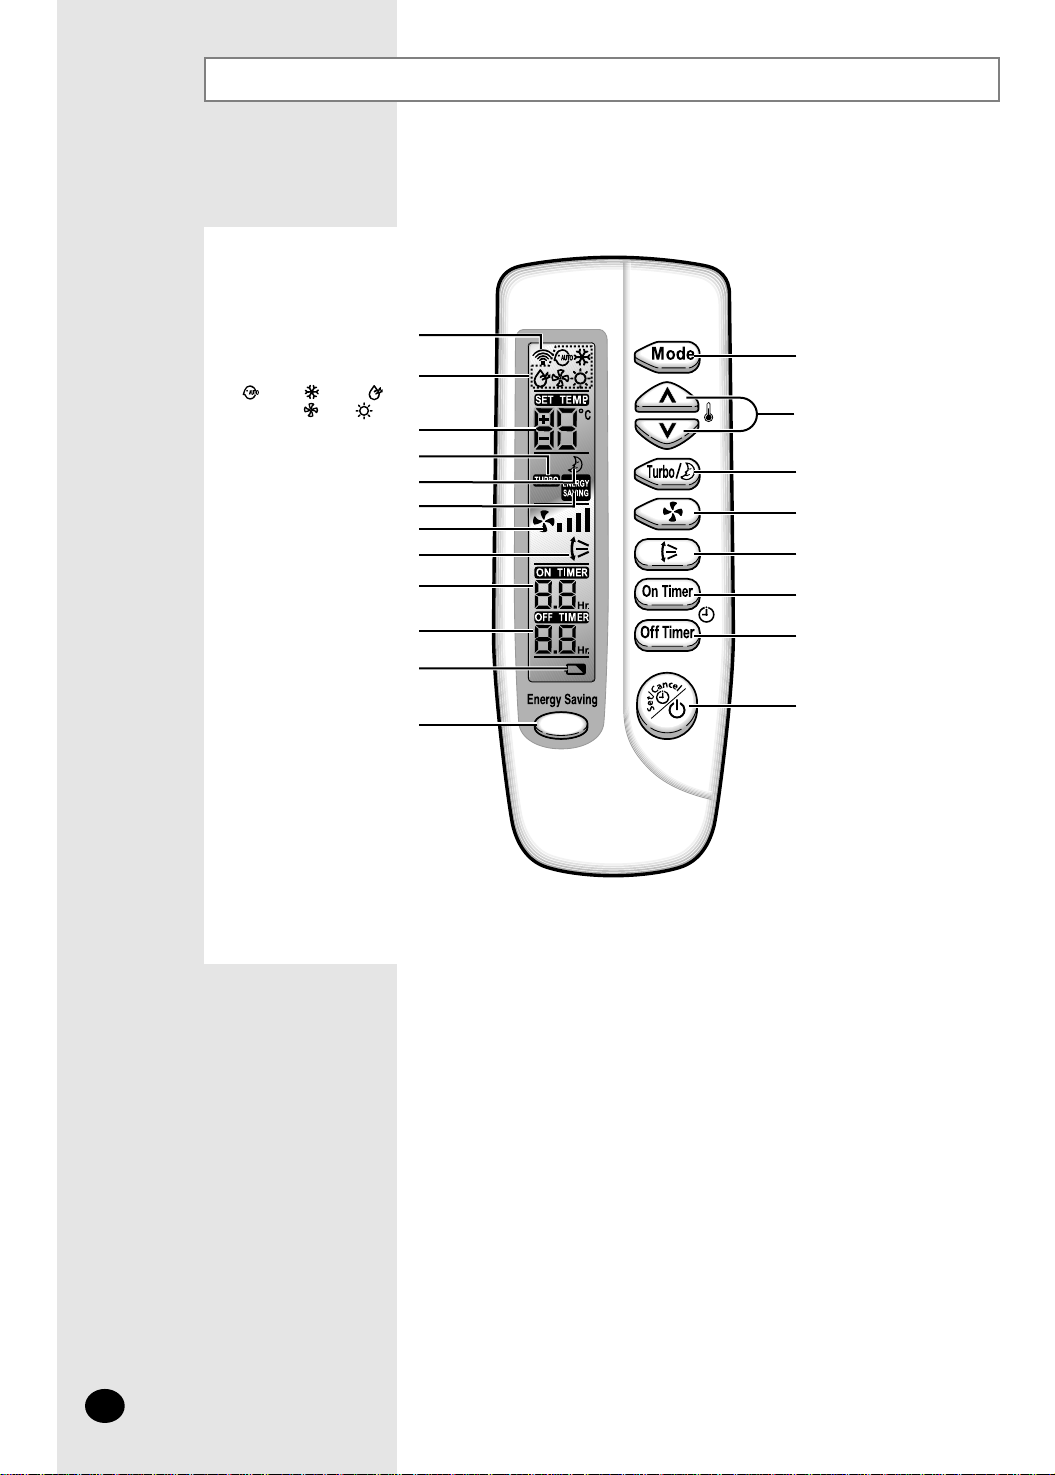
Remote Control - Buttons and Display
Operating mode
( AUTO, COOL, DRY,
FAN, HEAT)
Remote control
transmission indicator
Mode selection button
(AUTO, COOL, DRY, FAN, HEAT)
Turbo/Sleep mode
selection button
Swing button
On Timer button
Off Timer button
On/Off &
Timer Set/Cancel button
Fan speed adjustment button
Temperature adjustment
buttons
Temperature setting
Sleep mode
Turbo mode
Energy saving
Fan speed
Air flow direction
On Timer setting
Off Timer setting
Battery discharge indicator
Energy Saving button
E-6
G
etting Started
You have just purchased a split type air conditioner and it has been
installed by your installation specialist.
Your Owner’s Instructions contains valuable information on using your
air conditioner. Please take the time to read it as it will help you take full
advantage of the unit’s features.
The booklet is organized as follows.
◆ The following figures are shown on pages from 4 to 6 :
- Indoor and outdoor units
- Remote control(buttons and display)
They will help you find the buttons and understand the symbols displayed.
◆ In the main part of the installation book, you will find a series of
step-by-step procedures for each function available.
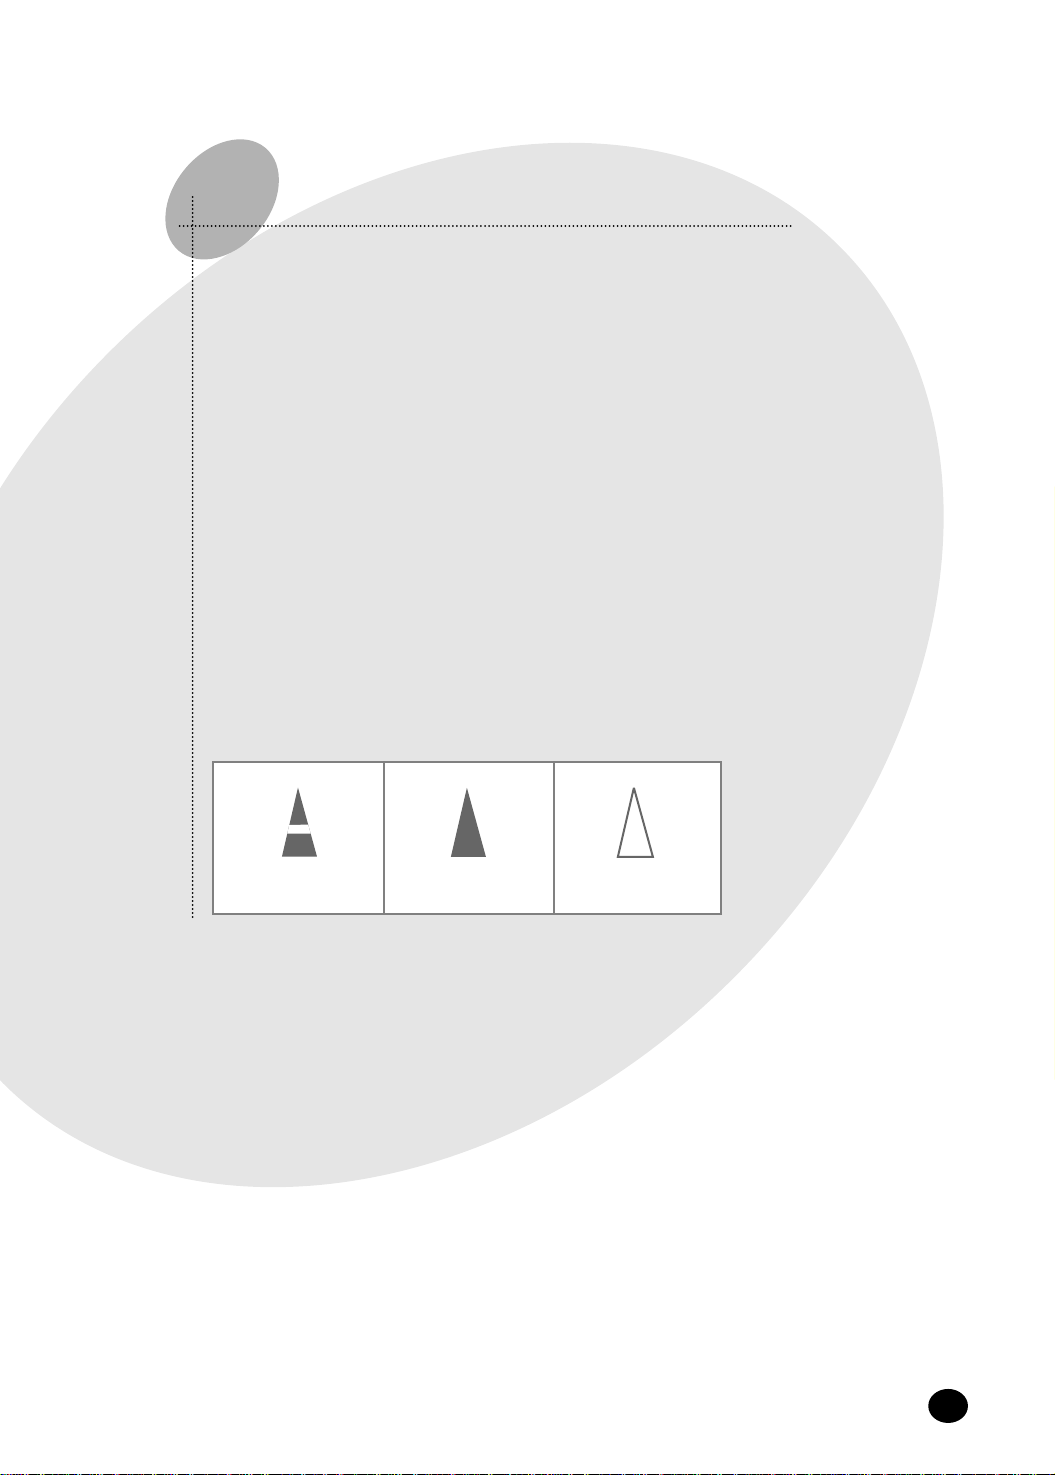
The illustrations in the step-by-step procedures use three different symbols:
PRESS PUSH HOLD DOWN
E-7
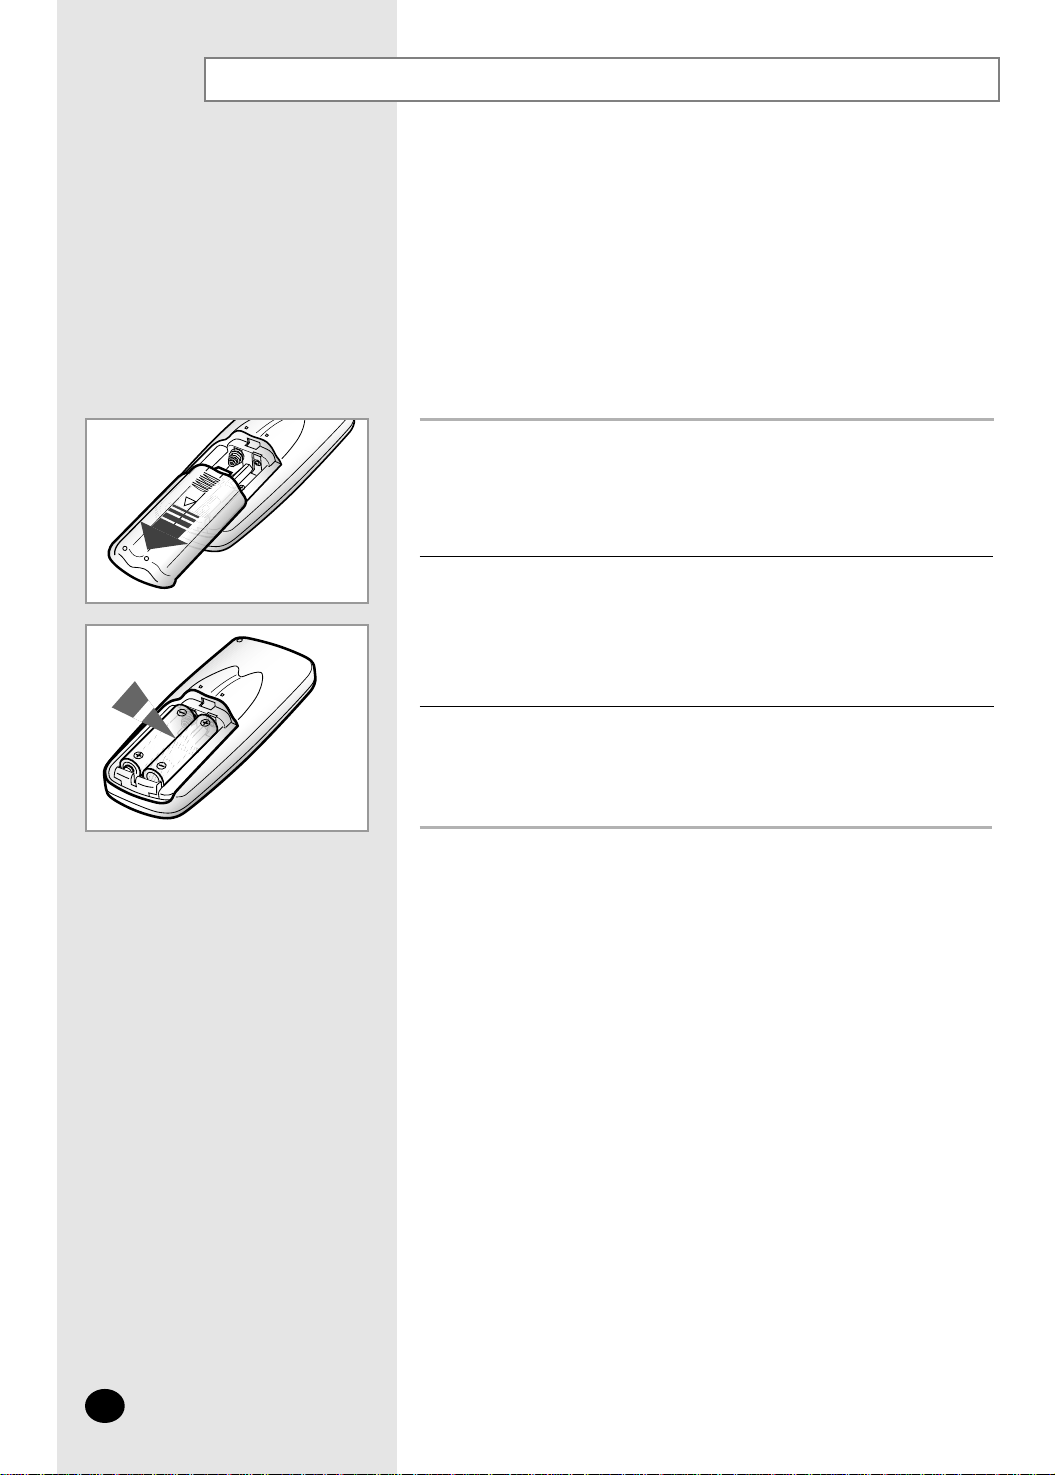
Inserting the Remote Control Batteries
Push the battery cover on the rear of the remote control with your thumb
in the direction of the arrow and remove it.
Insert the two batteries, taking care to respect the polarities :
◆ + on the battery with + on the remote control.
◆ - on the battery with - on the remote control.
1
2
Close the cover by sliding it back until it clicks into place.
3
◆ Use two AAA, LR03 1.5V batteries.
◆ Do not use old batteries or different kinds of batteries together.
◆ Batteries may be completely discharged after 12 months, even
◆ if they have not actually been used.
You must insert or replace the remote control batteries when :
◆ You purchase the air conditioner
◆ The remote control does not work correctly
NNNNoooottttee
ee
E-8
Selecting the Automatic Operating Mode
E-9
You can start the air conditioner in Automatic mode from your remote
control. In the Automatic mode, the standard temperature and the
optimum fan speed is selected automatically. You can adjust the
standard temperature but not the fan speed.
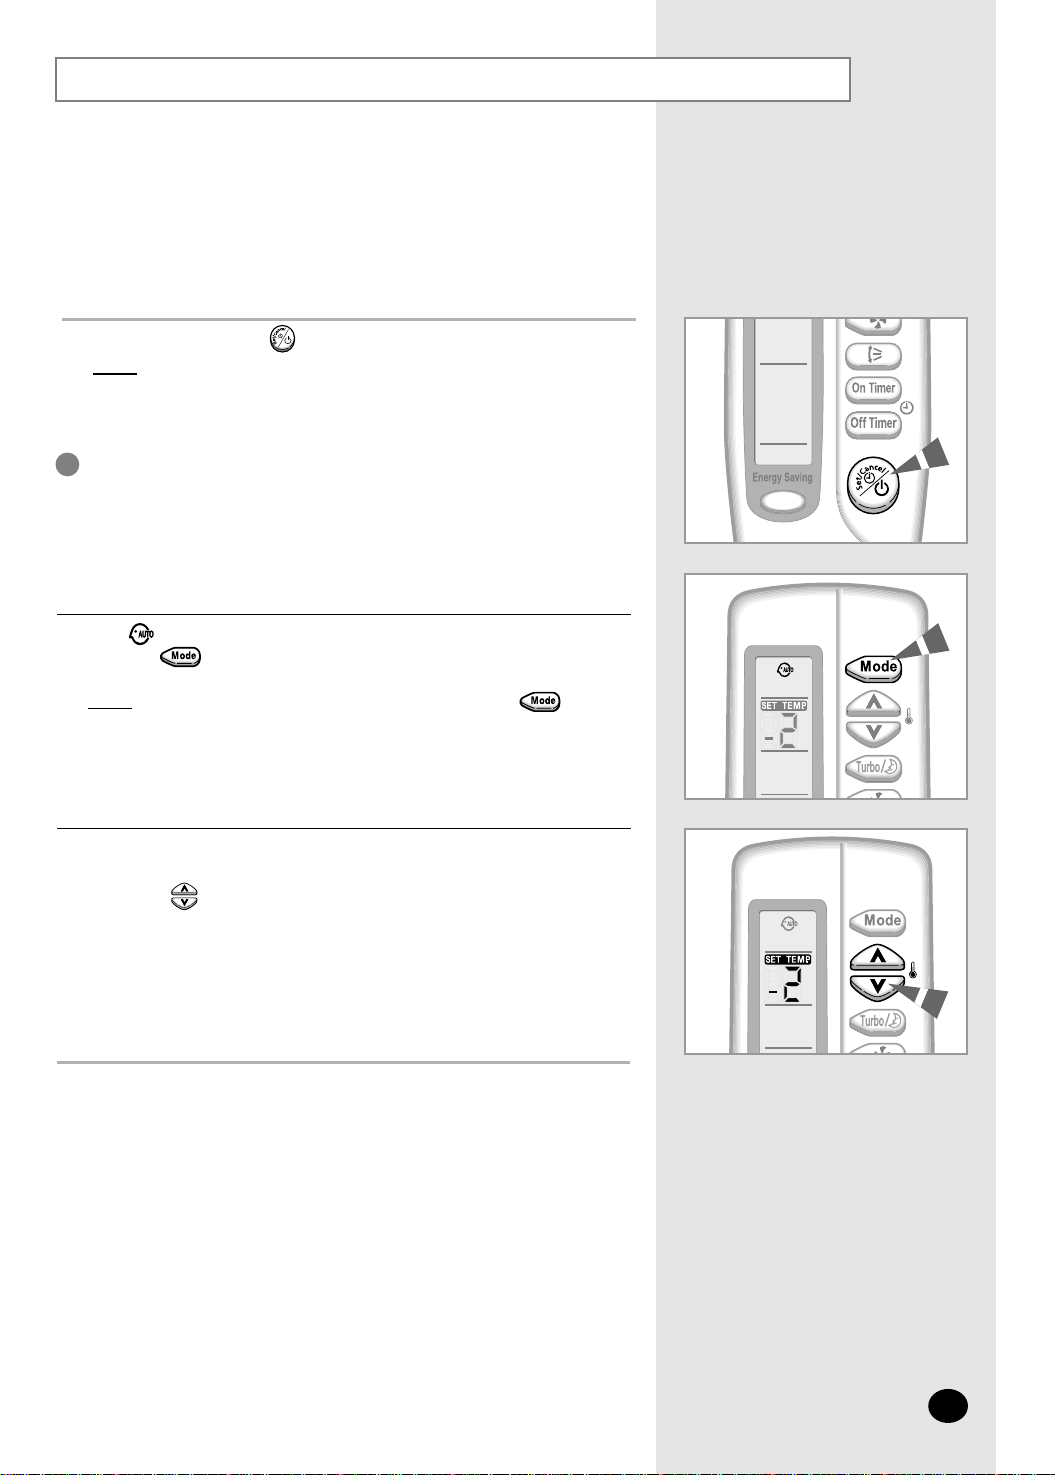
1
If the is not displayed at the top of the remote control,
press the button on the remote control one or more times until it
appears.
Result
: ◆ The indoor unit beeps each time you press the button.
◆ The air conditioner runs in AUTO mode.
2
You can change modes at any time.
If necessary, press the (On/Off) button.
Result: ◆ The operation indicator on the indoor unit lights up.
◆ The air conditioner starts up in the mode selected
when the unit was last used.
◆ The indoor unit beeps.
The air conditioner is fitted with a protection mechanism to
prevent the unit from being damaged when it is started
immediately after being:
◆ Plugged in
◆ Stopped
lt will start up normally after three minutes.
IMPORTANT
NNNNoooottttee
ee
To adjust the standard temperature (The air conditioner automatically
set the standard temperature by the current room temperature.),
press the button one or more times.
3
SET TEMP. SET TEMP. - SET TEMP. SET TEMP.
-2°C -1°C Standard temperature +1°C +2°C
< When you feel hot > < When you feel chilly >
 Loading...