

SAMSUNG AQ07A1VE Service Manual Disassembly & Reassembly
4. Disassembly and Reassembly
Stop operation of the air conditioner and remove the power cord before repairing the unit.
❊ The design and shape are subject to Change according to the model.
4-1 Indoor Unit
No Parts Procedure Remark
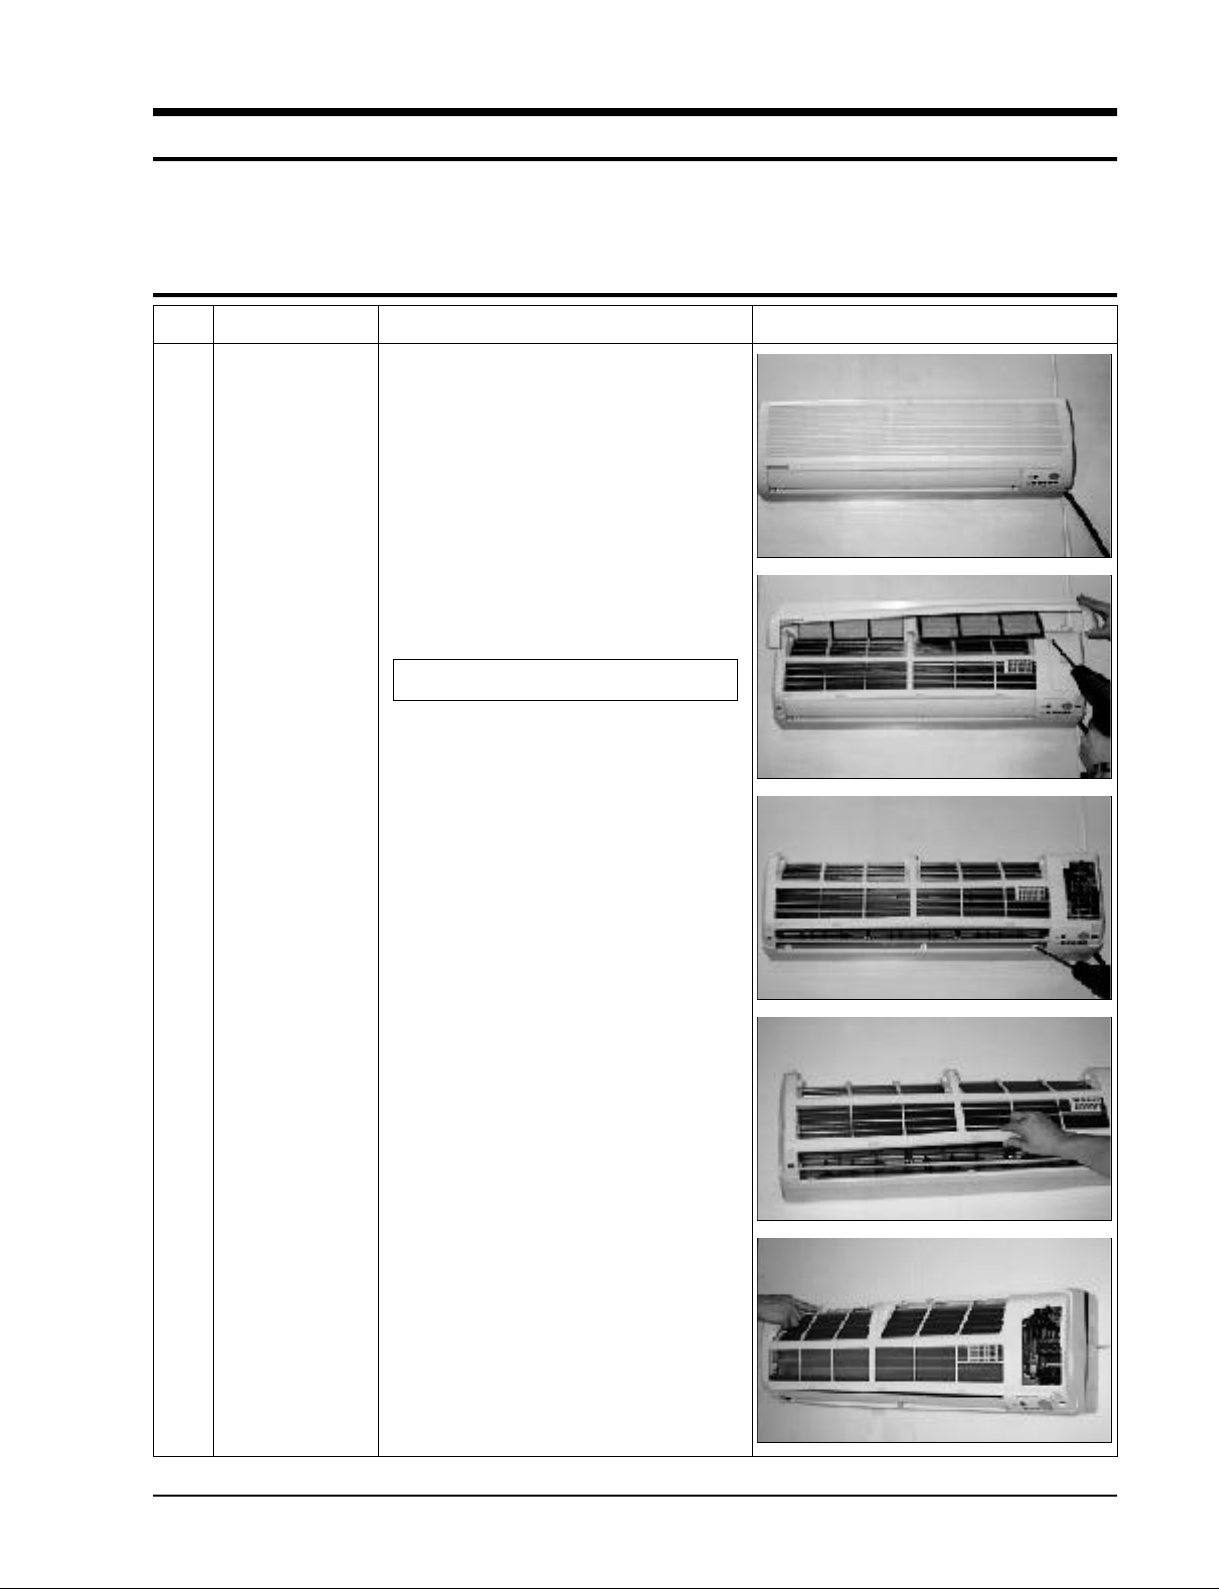
1 Front Grille 1) Stop the air conditioner operation and block
the main power.
2) Seperate tape of front panel upper.
3) Contract the second finger to the left, and
right handle and pull to open the inlet grille.
4) Take the left and right filter out.
*Taking off the deodorizing filter.
5) Loosen one of the right fixing screw and
seperate the terminal cover.
6) Loosen three fixing screws of front grille.
7) Pull the upper left and right of discharge
softly for the outside cover to be pulled out.
8) Pull softly the lower part of discharge and
push it up.
Caution;
Assemble the front panel and fix the
hooks of left and right.
Samsung Electronics
4-1
Disassembly and Reassembly
No Parts Procedure Remark
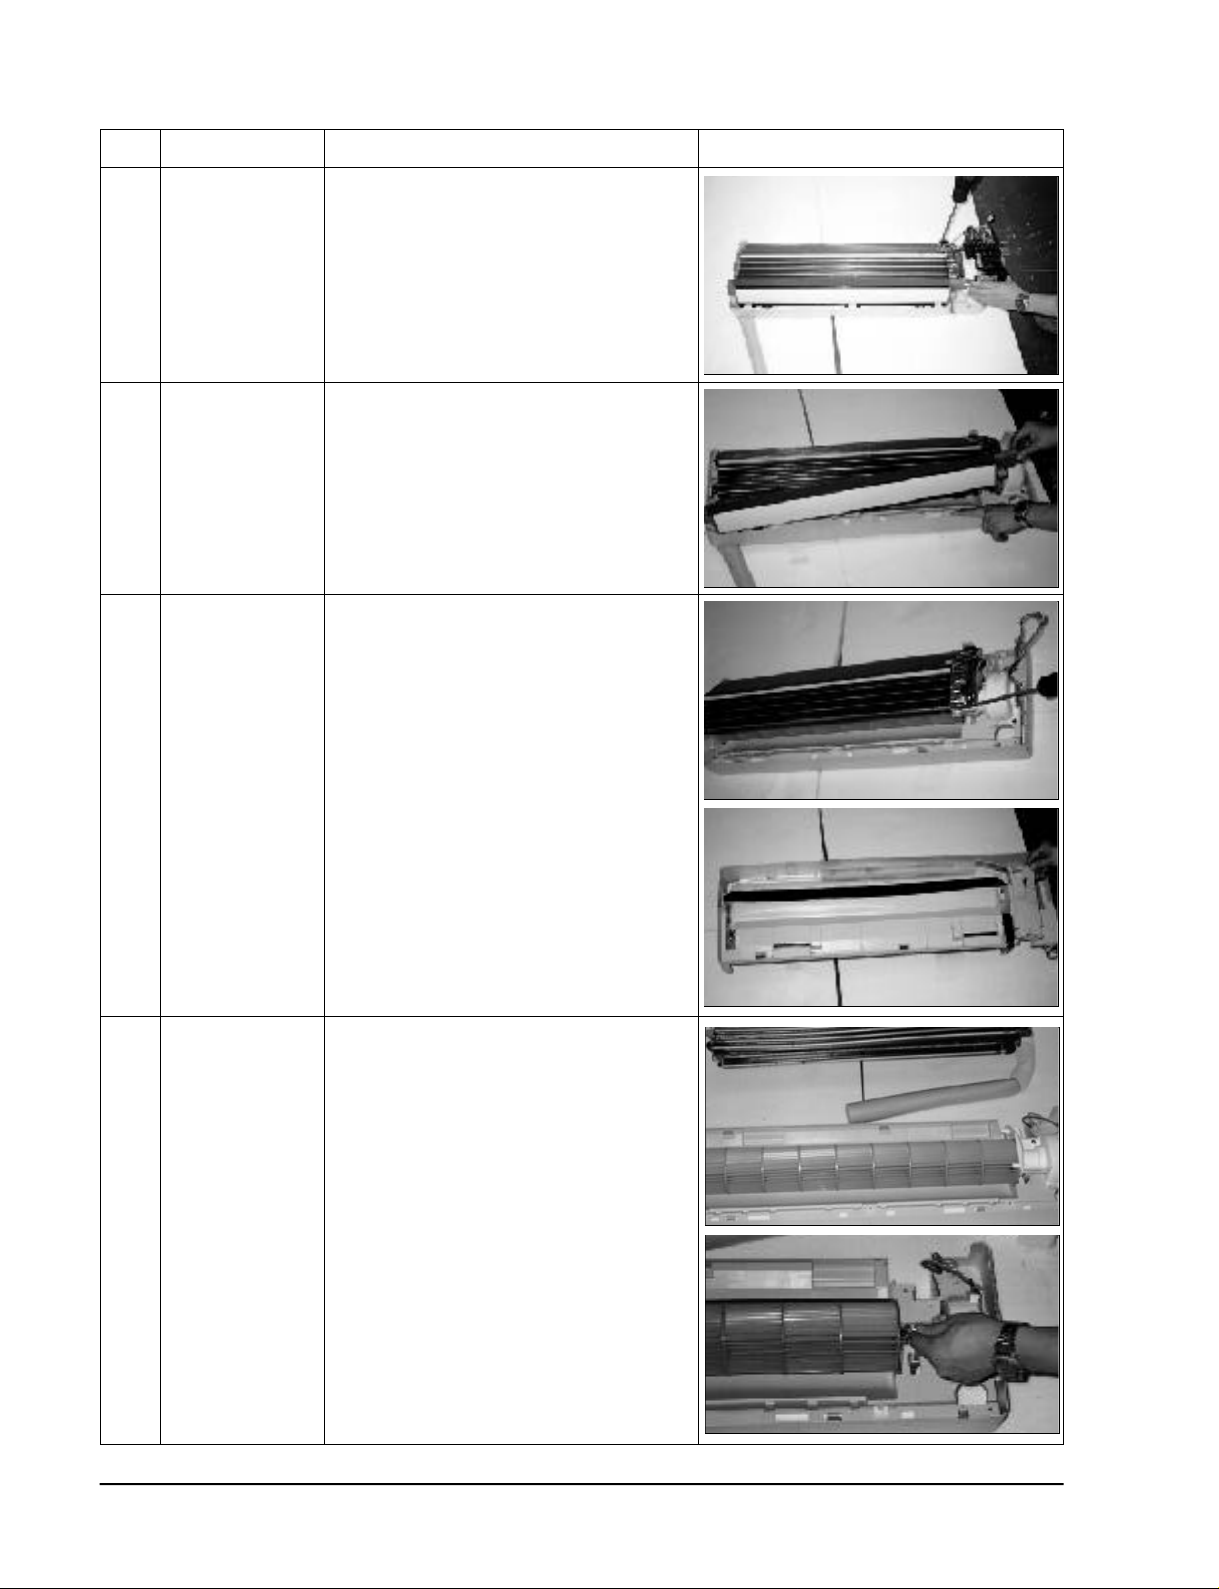
2
Ass’y Tray Drain.
1) Do “1”above
2) Take all the connector of PCB upper side out.
(Inclusion Power cord)
3) Separate the outdoor unit connection wire
from the terminal block.
4) If pulling the Main PCB up. it will be taken
out.
3
Electrical Parts
(Main PCB)
1) Do “1”, “2”, above
Separate the drain hose from the extension
drain hose.
2) Pull tray drain out from the back body.
4
Heat Exchanger
1) Do “1” and “2”, “3”, above
2) Loosen two fixing earth screws of right side.
3) Separate the connection pipe.
4) Separate the holder pipe at the rearside.
5) Loosen the three fixing screws of right and
left side.
6) Lifting the heat exchanger up a little to push
the up side for separation from the indoor
unit.
5
Fan Motor and
1) Do “1” “2” ”3” “4”, above.
Cross Fan
2) Loosen the fixing two screws and separate
the motor holder.
3) Loosen the fixing screw of fan motor.
(By use of M3 wrench)
4-2
4) Separate the fan motor from the fan.
5)Separate the fan from the left holder bearing.
Samsung Electronics
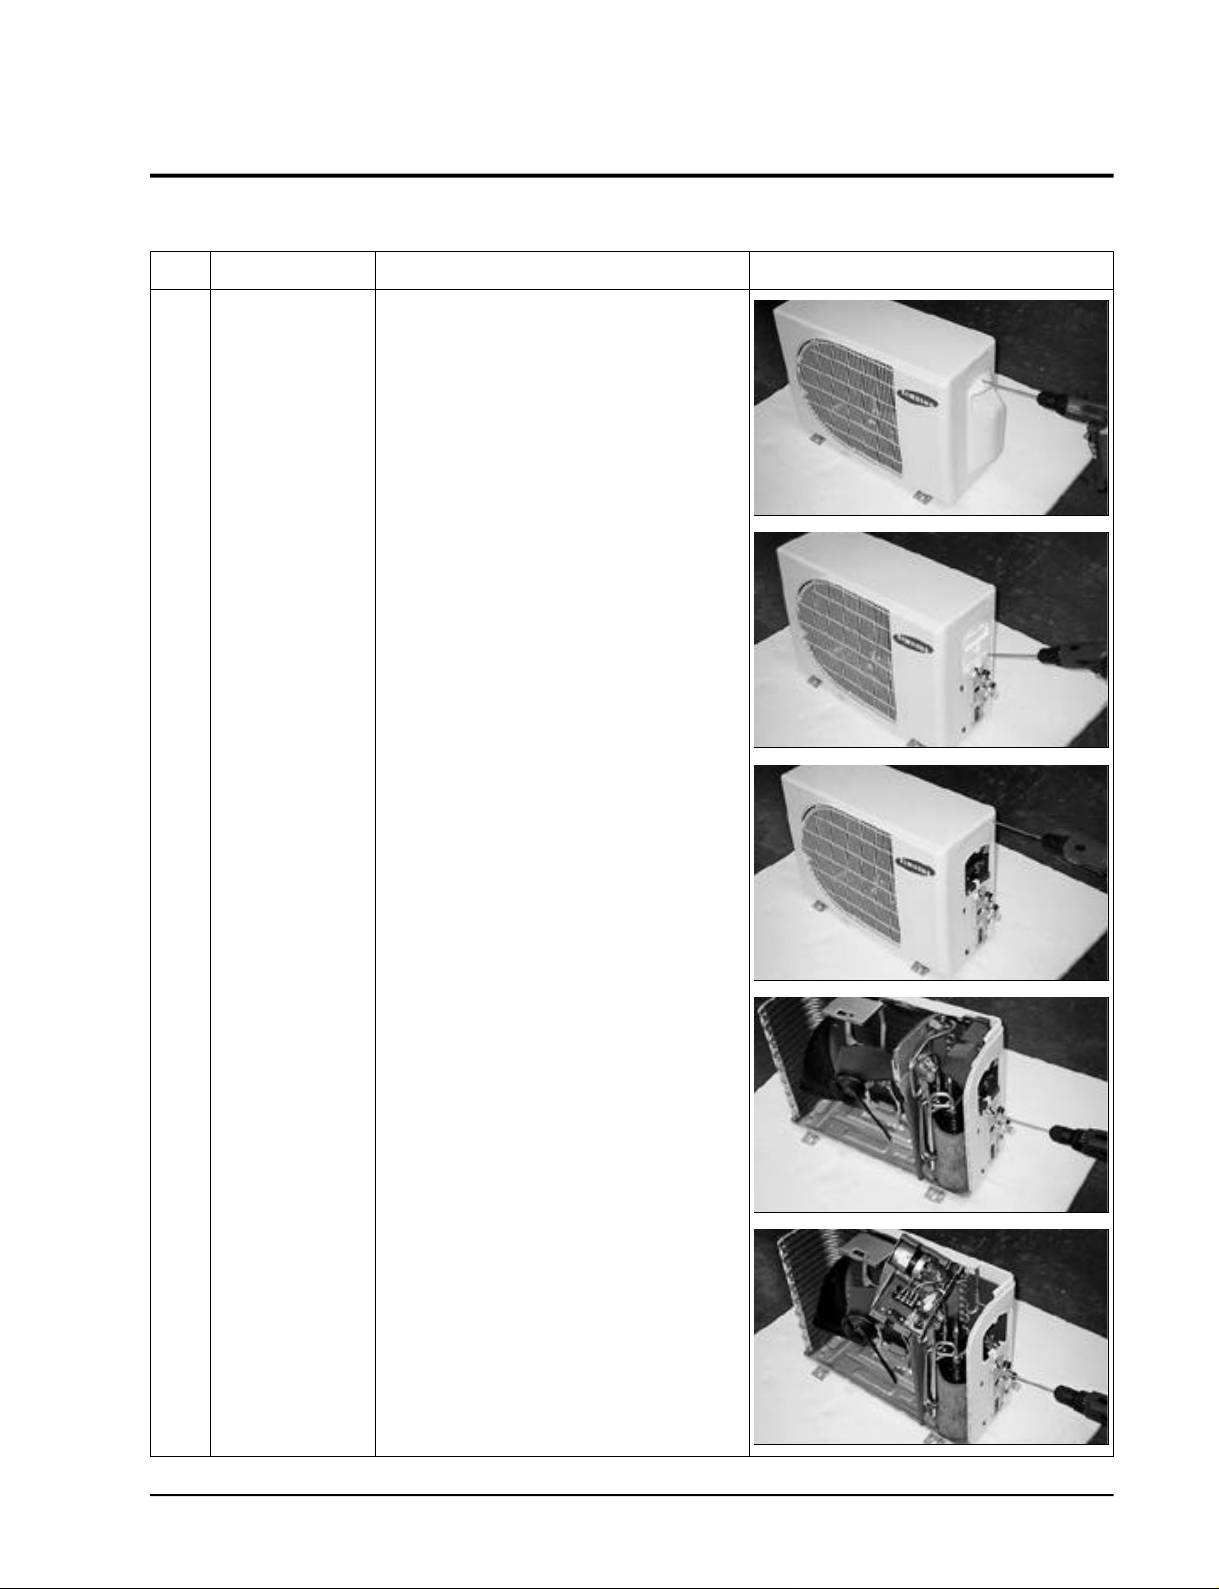
4-2 Outdoor Unit
• SH07ZA3(4)X/UQ07A3(4)ME
• SH09ZA3(4)X/UQ09 A3(4)ME
No Parts Procedure Remark
1 Common Work 1) Loosen the fixing tow screws and separate
the COVER TERMINAL
2) Loosen the fixing two screws and seperate
the cover control
3) Separate the connection wire from the terminal block.
4) Loosen six fixing screws and separate the
cabi front.
5) Loosen the one fixing screw of Ass'y E-part.
6) Loosen 12 fixing screws and separate the
cabi side.
Samsung Electronics
4-3
 Loading...