

Samsung AP-3607BR Owner's Instructions & Installation Manual
ⒺⓈ
DB68-00052A(2)
FLOOR STANDING TYPE AIR CONDITIONER
(Cool)
OWNER'S
INSTRUCTIONS &
INSTALLATION
MANUAL
AP-3607BR

E-2
◆ PREPARING YOUR AIR CONDITIONER
■ Getting Started
■ Remote Control - Buttons and Display
■ Inserting the Remote Control Batteries
■ Keeping the Remote Control
■ Indoor Unit
■ Outdoor Unit
■ Control panel
■ Setting the Time
◆ OPERATING YOUR AIR CONDITIONER
■ Operating Preparation
■ Using the Control Panel on the Indoor Unit
■ Using the Remote Control
■ Selecting the Auto Operating Mode
■ Starting to Cool
■ Selecting the Turbo Operating Mode
■ Selecting the Mild Operating Mode
■ Removing Excess Humidity
■ Ventilating Your Room
■ Adjusting the Air Flow Direction Horizontally
■ Adjusting the Air Flow Direction Vertically
◆ PROGRAMMING YOUR AIR CONDITIONER
■ Setting the Timer
■ Setting the Quick Timer
■ Cancelling the Timer
■ Cancelling the Quick Timer
◆ RECOMMENDATIONS FOR USE
■ Operating Recommendations
■ Safety Precautions
■ Temperature and Humidity Ranges
■ Cleaning Your Air Conditioner
■ Before Calling the After-Sales Service
■ Technical Specifications
3
4
5
5
6
7
7
8
9
9
9
10
11
12
12
13
14
15
15
16
17
18
18
19
19
20
20
21
22
Contents
E-3
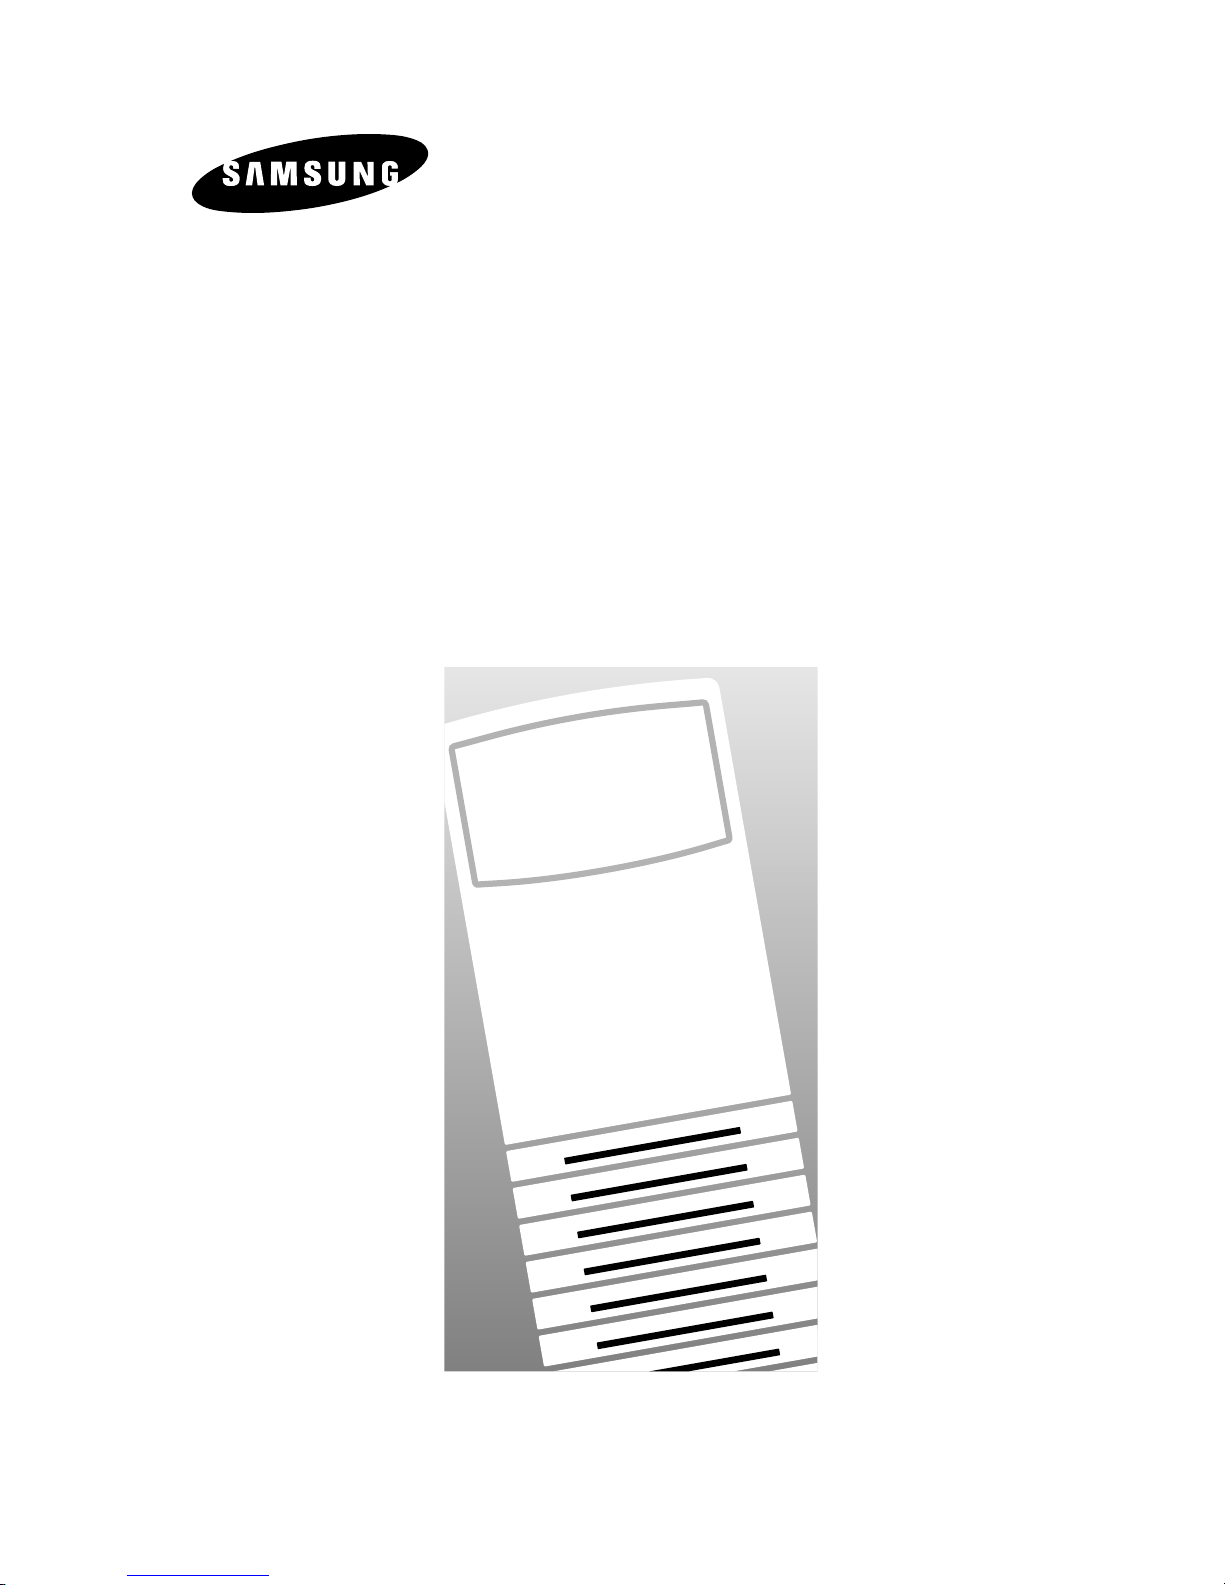
Getting Started
You have just purchased a packaged air conditioner and it has been installed by
your installation specialist.
Your Owner's Instructions contain much valuable information on using your
air conditioner.
Please take the time to read them as they will help you take full advantage
of the unit's features.
The booklet is organized as follows:
◆ The following figures are shown on page 4, page 6 and page 7.
- Remote control(buttons and display)
- Indoor unit
- Outdoor unit
They will help you find the buttons and switches
and understand the symbols displayed.
◆ In the main part of the document, you will find a series of step-by-step
procedures for each function available.
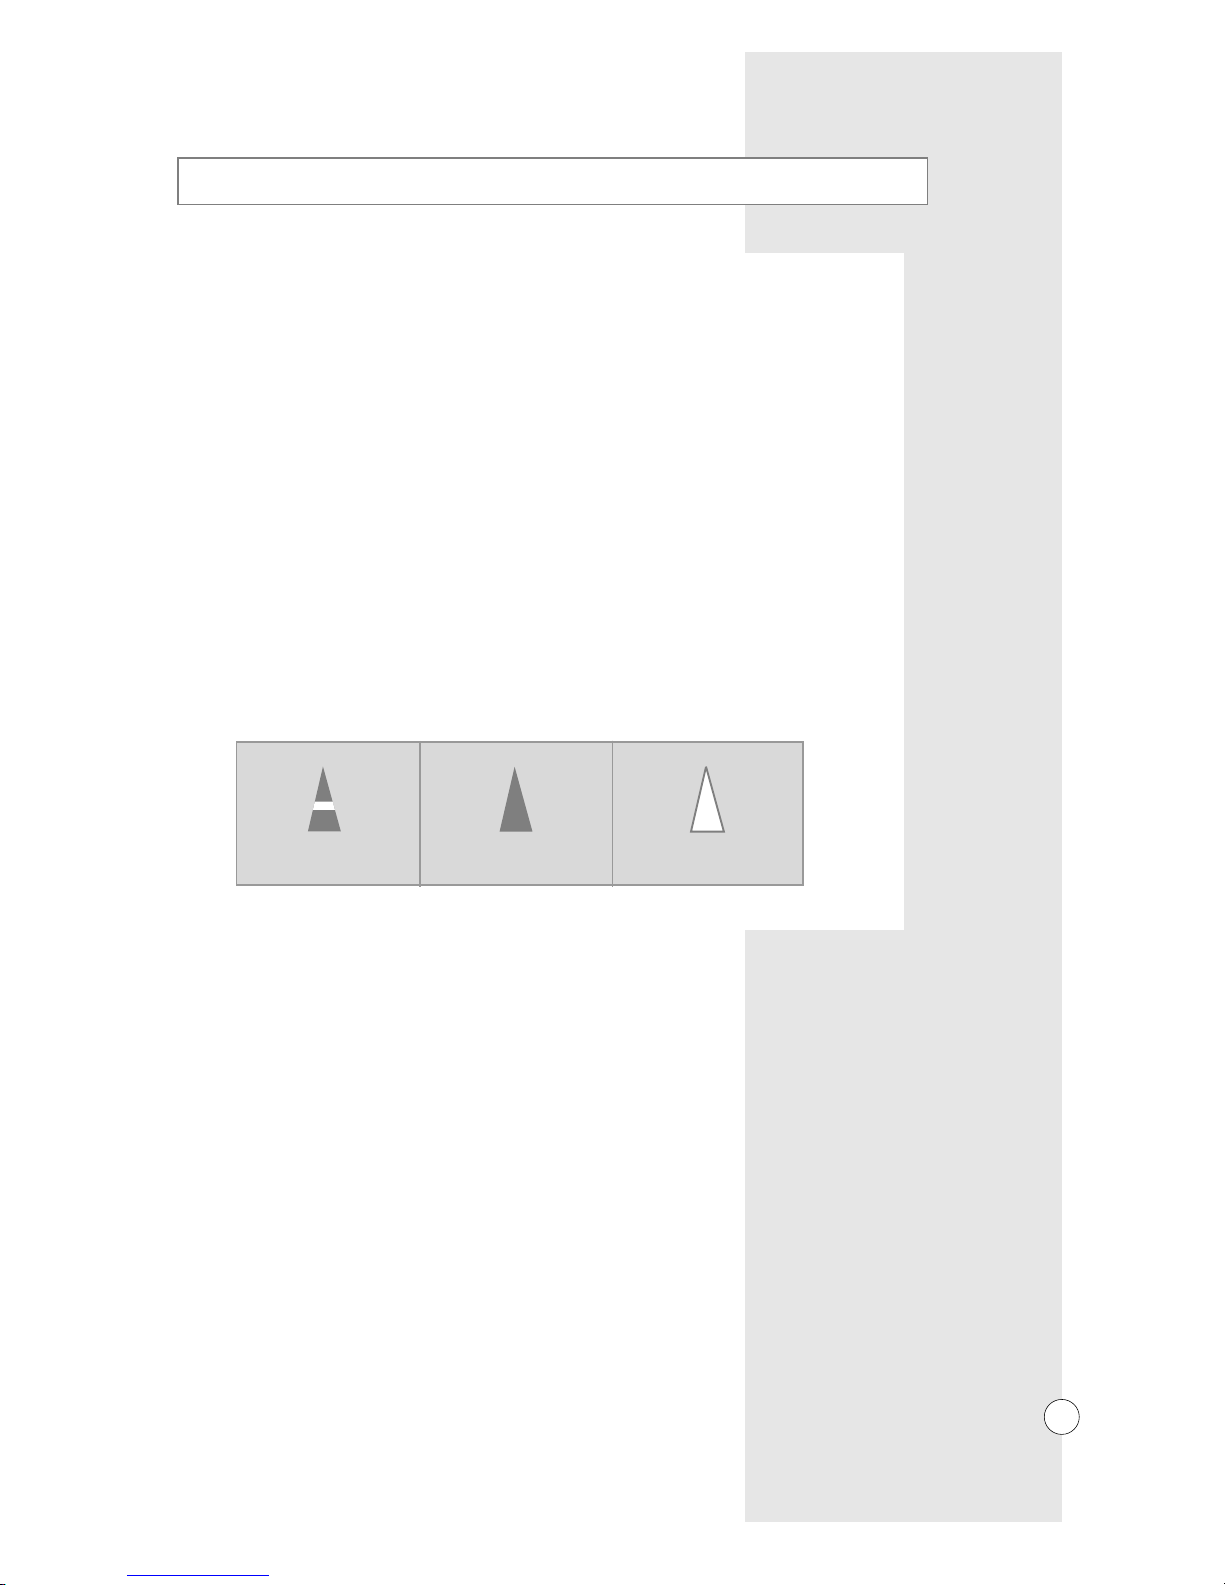
The illustrations in the step-by-step procedures use three different symbols:
PRESS PUSH HOLD DOWN
E-4
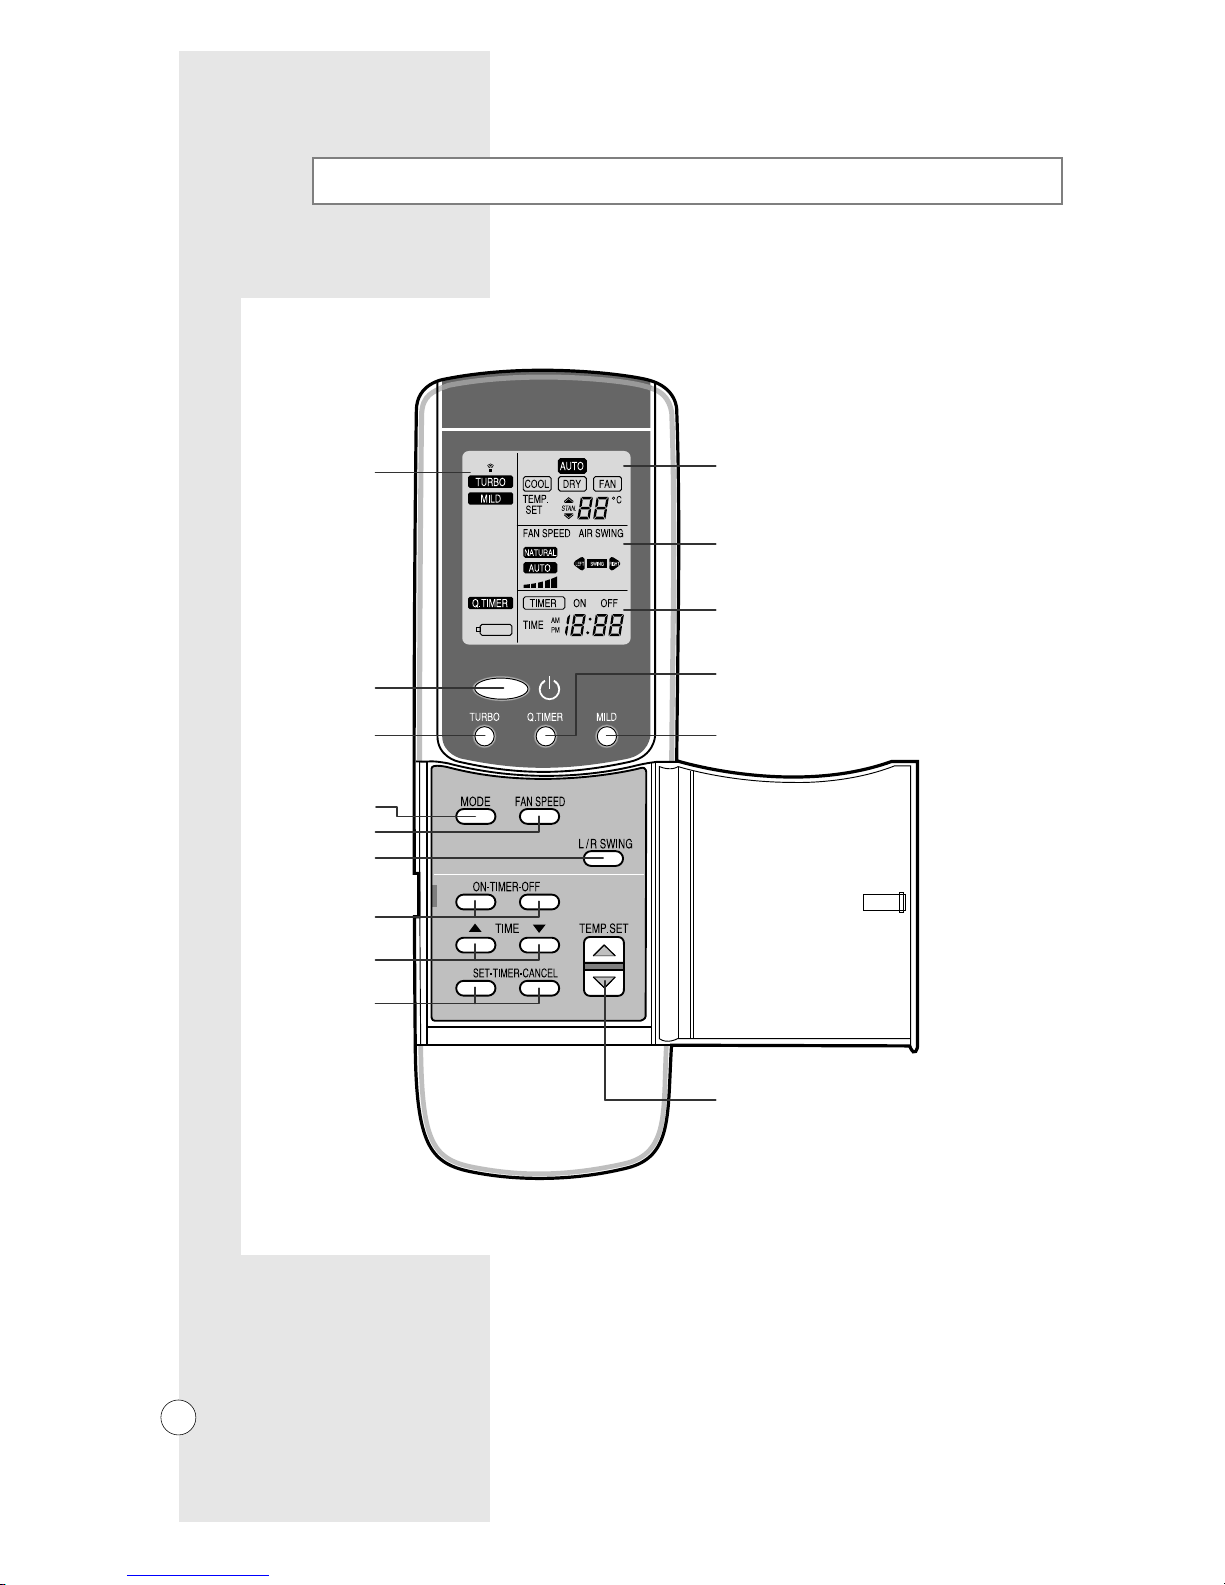
Remote Control - Buttons and Display
Setting display
-Indicator : TURBO, MILD,
Q.TIMER, Transmission,
Battery discharge.
Operating mode selection
Turbo setting
ON/OFF Button
Fan speed adjustment
Air flow adjustment
Timer setting/cancellation
Time adjustment
Timer adjustment
Operating mode/Temperature display :
-Mode indicators : AUTO, COOL, DRY,
FAN
Setting display :
-Fan speed
-Air flow direction
Mild setting(Automatic stop)
Q.Timer adjustment
Time/Timer display
-Current time
-Timer settings
Temperature adjustment

E-5
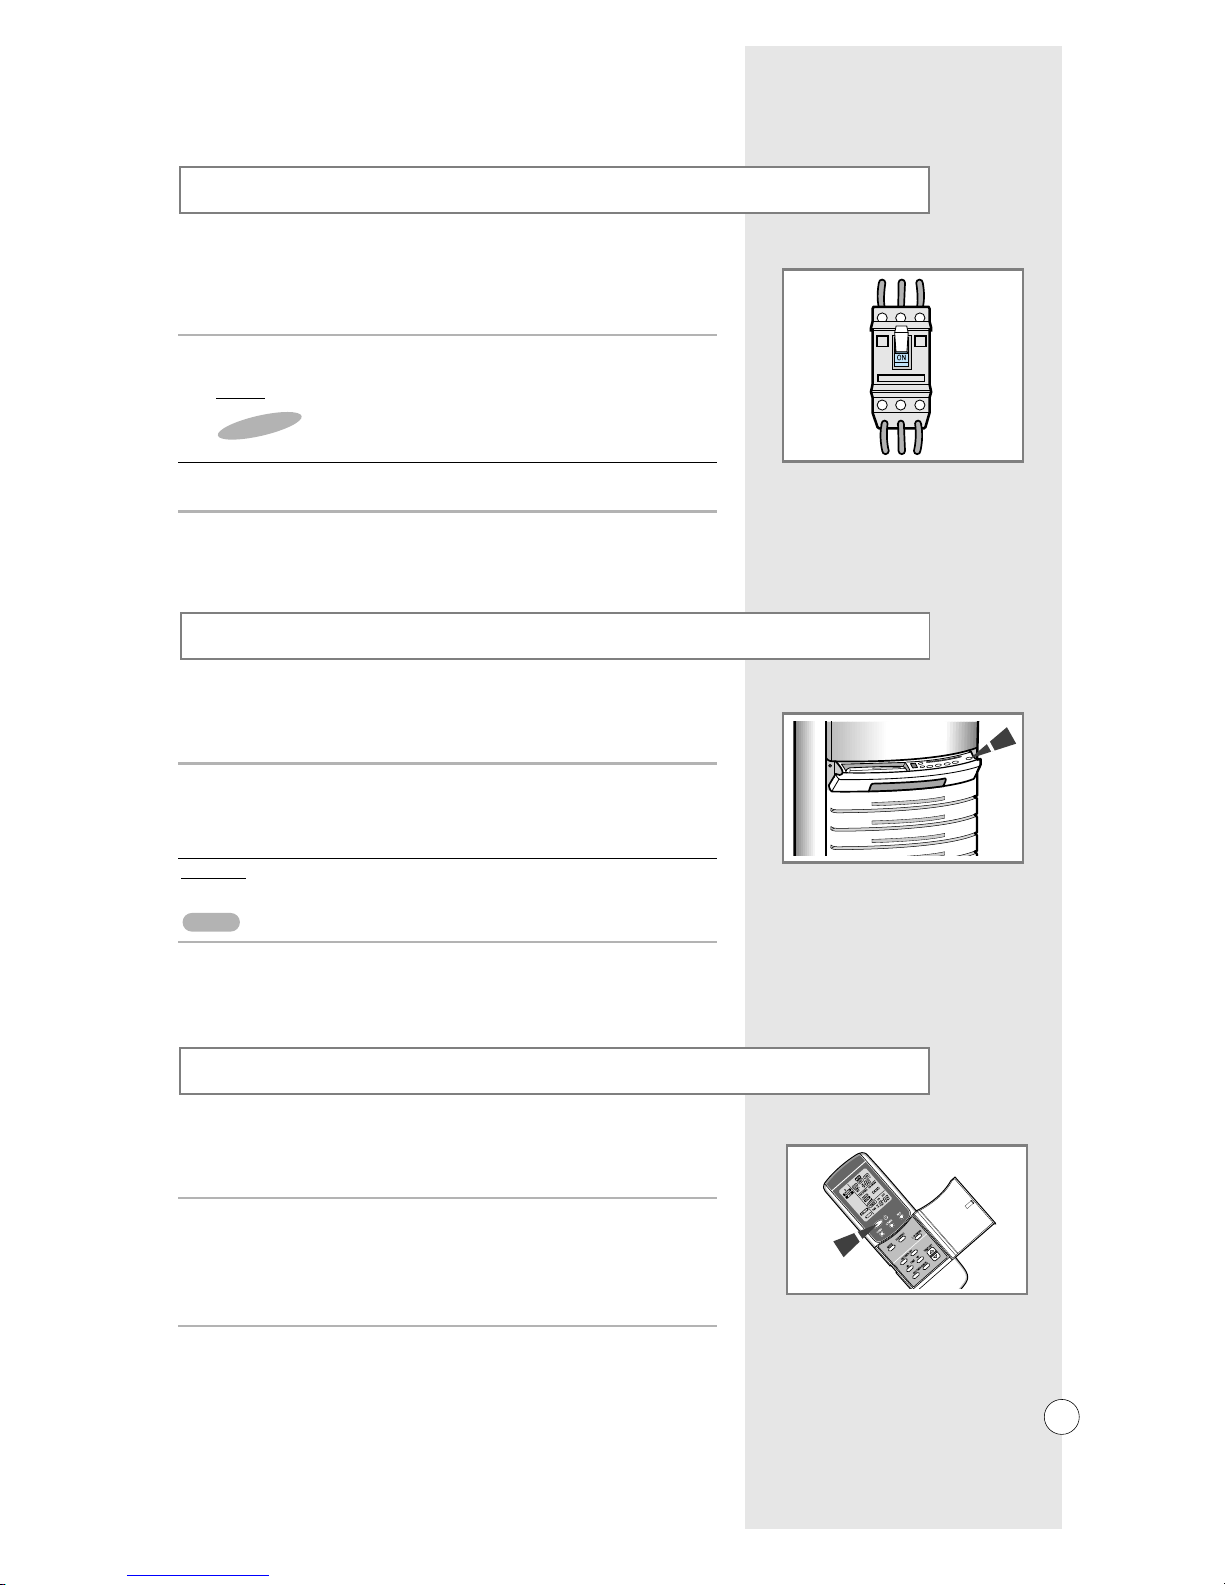
Open the control panel by pushing a part of it.
Put the remote control into the case.
Close the control panel by pushing a part of it in the direction
of the arrow until it clicks into place.
2
1
Keep the remote control in remote control case of the indoor unit
when it is not being used.
Inserting the Remote Control Batteries
Keeping the Remote Control
Push the battery cover on the rear of the remote control with your
thumb in the direction of the arrow.
1
2
3
You must insert or replace the remote control batteries when:
◆ You purchase the air conditioner
◆ The remote control does not work correctly
Use two LR03 1.5V batteries. Do not use old batteries, or
different kinds of batteries together. Batteries may not be
usable after 12 months though they have not been used.
IMPORTANT
Remote
control
case
When the following indication is displayed, replace the batteries
with a new set of it.
NOTE
Close the cover by sliding it back until it clicks into place.
Insert the two batteries, taking care to respect the polarities:
◆ + on the battery with + on the remote control
◆ - on the battery with - on the remote control
E-6
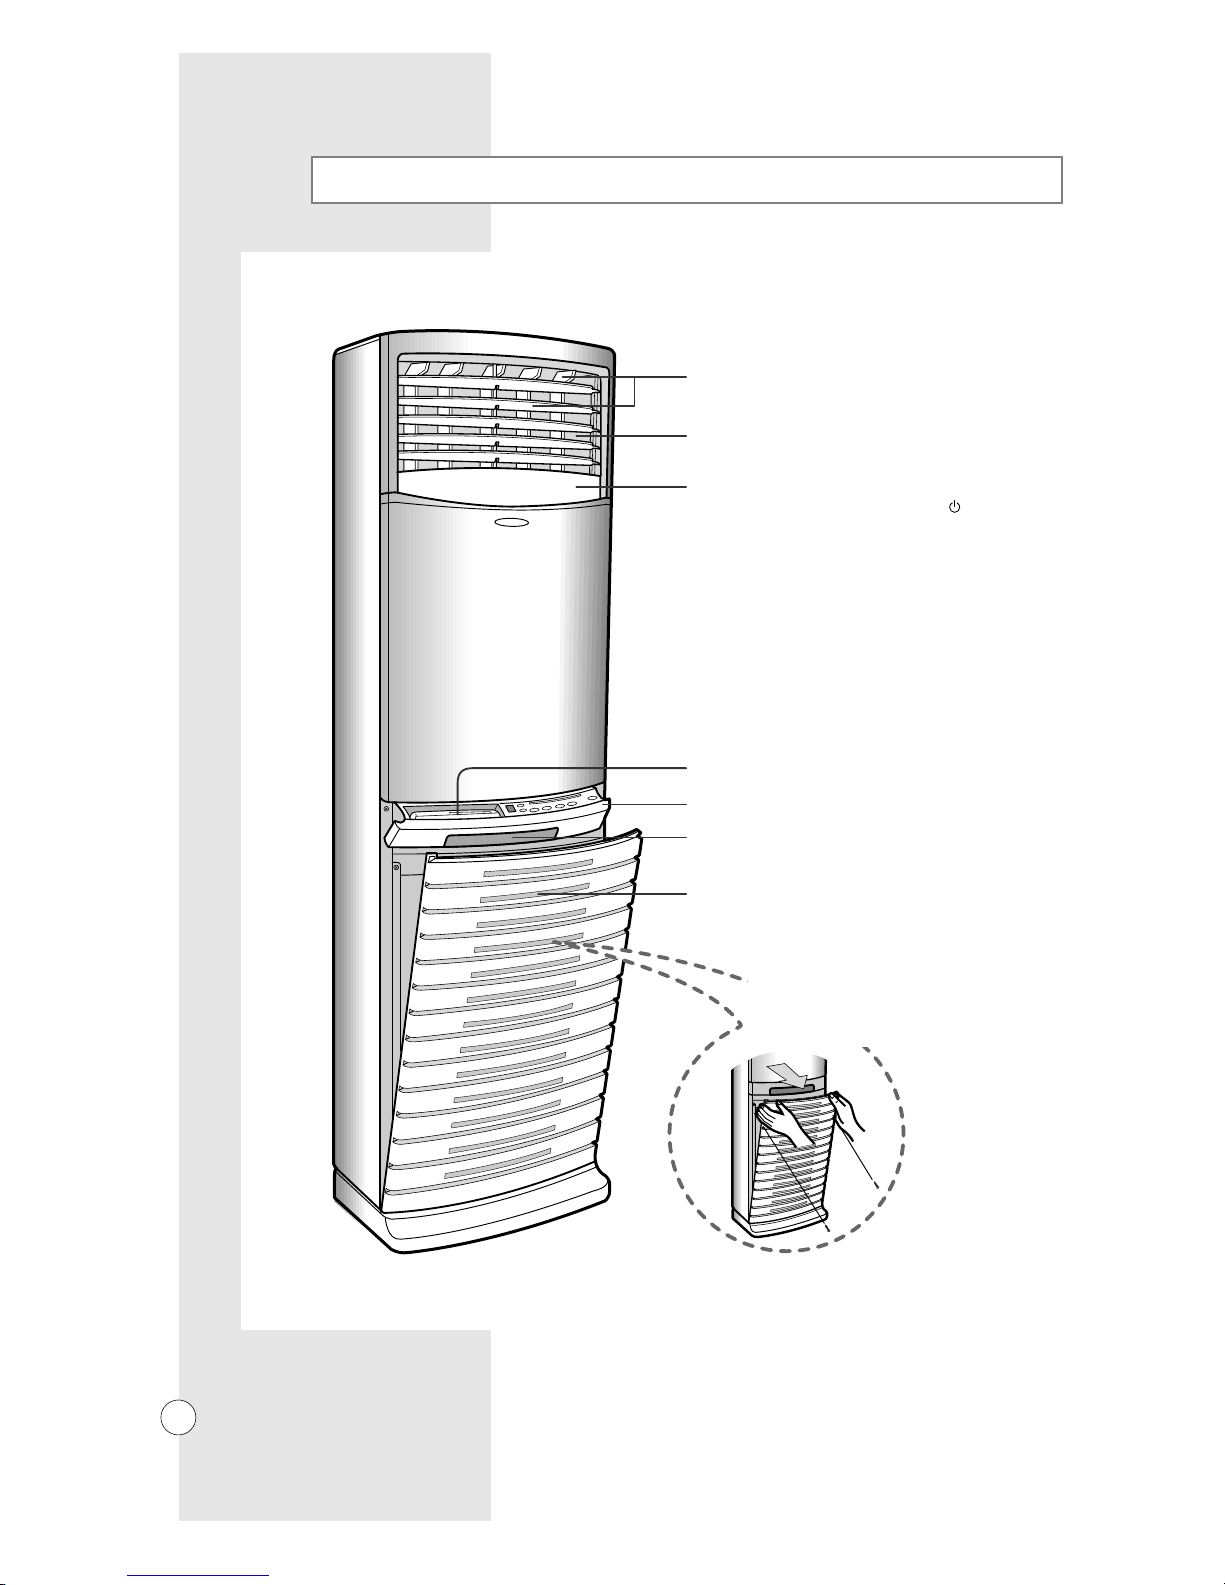
Indoor Unit
AIR FLOW(DIRECTION) ADJUSTING BLADE
AIR OUTLET
REMOTE CONTROL CASE
CONTROL PANEL
REMOTE CONTROL SENSOR
AIR INLET GRILLE
AUTO SHUTTER
Each time you can press the ON/OFF( )button,
it open or close automatically.
To disassemble the air inlet grille.
Loosen two fixing screws of left and right.
Hold the upper part of the air inlet grille,
and then pull it lightly forward.

E-7
Outdoor Unit
ELECTRIC PARTS BOX
AIR OUTLET
CONNECTION VALVE
Control Panel
Temperature adjustment
Operating Light
ON/OFF Button
Fan Light
Operating Light
Mild setting(Automatic stop)
Fan Speed adjustment
Turbo setting
Operating Mode Selection
Temperature display
Open the control panel by pushing a part of it.

E-8
After setting the time, press the (time set) button one more time.
Result: The Time indicator stops flashing and the clock is started.
Insert the batteries.
Result: The TIME indicator flashes.
Your air conditioner contains a clock used to start or stop the unit
automatically at a given time.
You must set the time when you:
◆ Purchase the air conditioner
◆ Replace the batteries
Be sure to change the time in an area where summertime
is applied.
To set the time during the operation.
Open the lid on the rear side of the remote control, and press the
(time set) button using a tool with a sharp end point.
Result:
The TIME indicator flashes.
Result: AM or PM are displayed to indicate whether the setting
corresponds to a time before or after midday.
3
2
◆ Each time the (▲) button is pressed, the time increases by
one minute.
When the (▲) button is continually pressed, the time increases
by ten minutes.
◆ Each time the (▼) button is pressed, the time decreases by
one minute.
When the (▼) button is continually pressed, the time decreases
by ten minutes.
Setting the Time
NOTE
NOTE
NOTE
Press the TIME ▲ or ▼ buttons, and set the current time.
1
E-9
Exemple: Remote control broken or lost.
Open the control panel by pushing a part of it.
Turn the power switch on.
Result: The POWER light on the indoor unit switches on.
1
Remove a protective cover of the outdoor unit.
2
You cannot operate the timer function with indoor unit.
NOTE
Look around the indoor and outdoor units.
Confirm if any obstacles that may prevent the air flow are present near
the air conditioner.
Operating Preparation
To operate the unit, the power switch is fitted to the wall
must be set to ON
IMPORTANT
You can operate with indoor unit when you do not wish to or cannot
operate the air conditioner with the remote control.
You can : Adapt the auto operating, cooling, turbo operating, mild
operating, drying and fan settings to your specific
requirements ;
All air conditioner features can be controlled from your seat, by using
the remote control.
Using the Remote Control
You can : Adapt the auto operating, cooling, turbo operating, mild
operating, drying and fan settings to your specific
requirements ;
See pages 10 to 18 for further details.
Using the Control Panel on the Indoor Unit

E-10
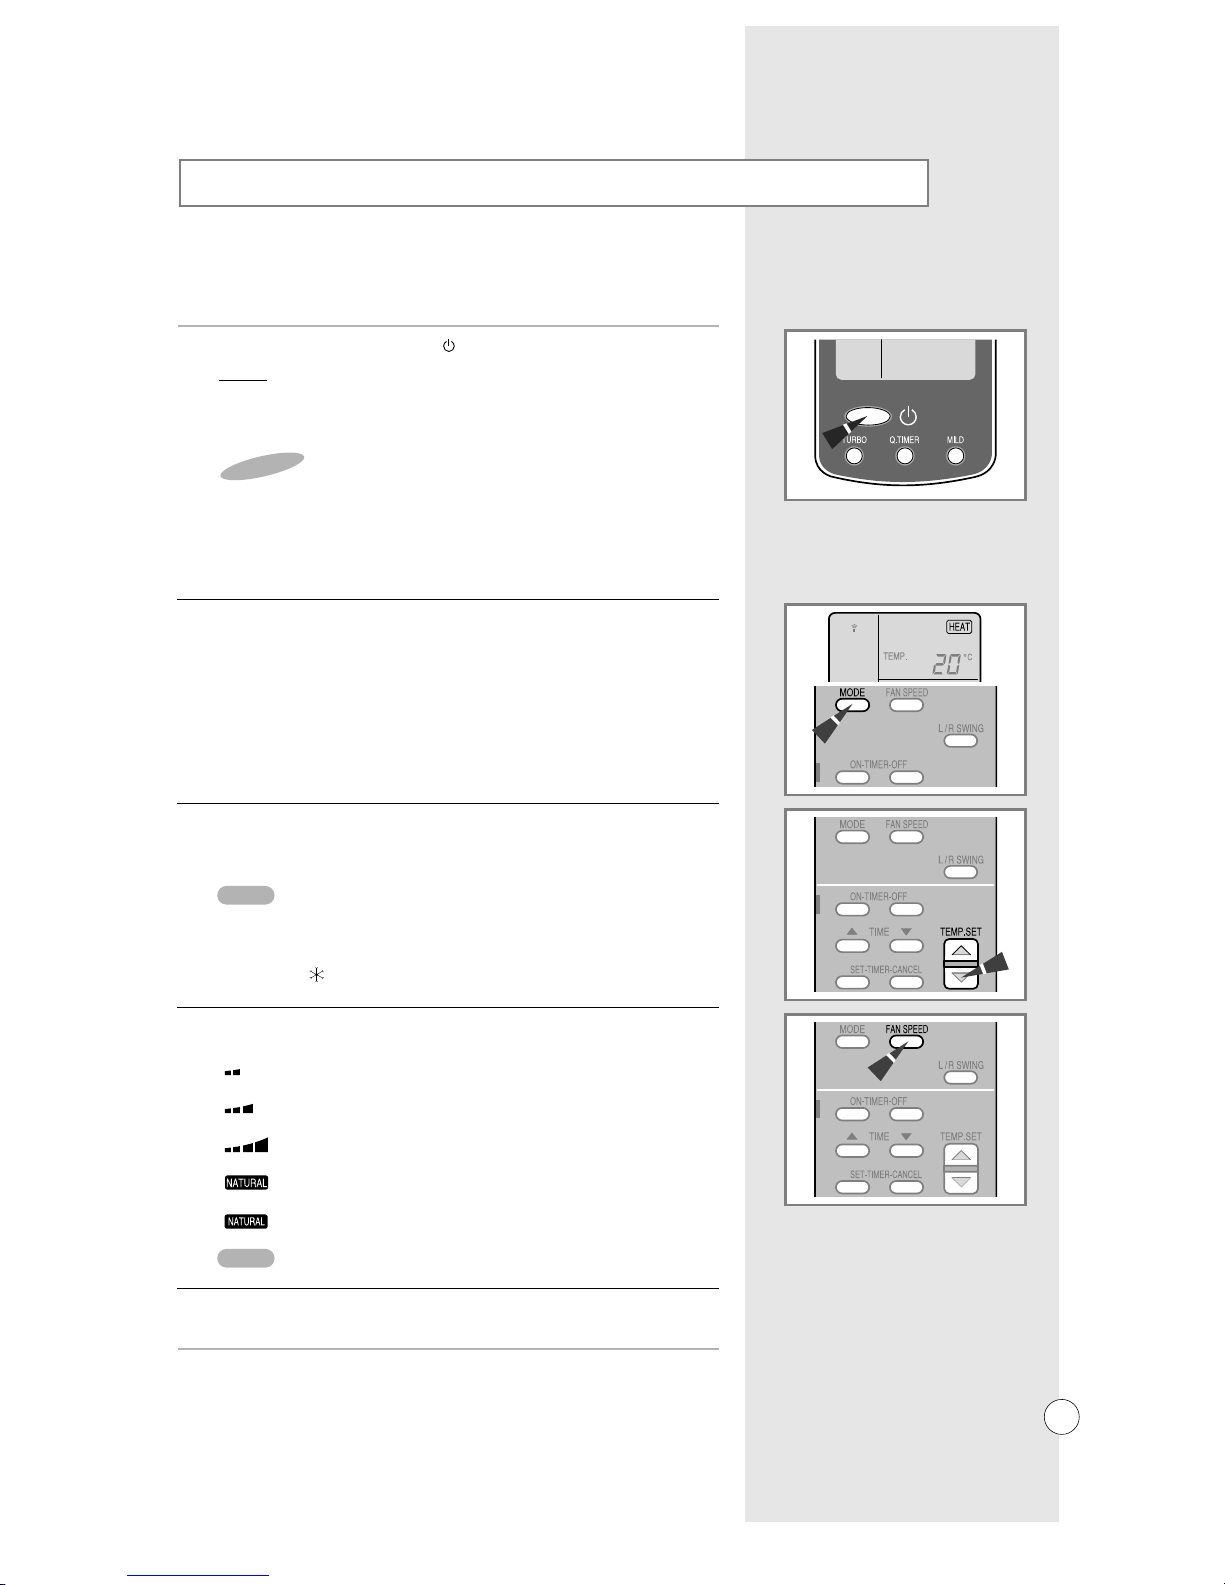
You can start the air conditioner in AUTO mode
If necessary, press the ON/OFF
( )
button.
Result: ◆ The OPER. light on indoor unit switches on.
◆ The operation mode previously set is displayed.
◆ The indoor unit beeps twice.
◆ The air conditioner starts up in the current.
1
The air conditioner is fitted with a protection feature
which prevents the unit from being damaged when
it is started immediately after being:
◆ Switched on
◆ Stopped
After a rest period of three minutes,
it will start up normally.
If the AUTO indicator is not displayed at the top of the remote control,
press MODE under the remote control flap one or more times until it
appears.
Result: ◆ The indoor unit beeps each time you press MODE.
◆ The air conditioner starts up in AUTO mode.
2
◆ You can, however, change modes at any time when the
air conditioner is operating.
◆ How to control the standard temperature.
When the unit is in automatic operation mode, the standard
temperature is automatically set.
However, the standard temperature can be adjusted up to
±2
˚C/
±4˚Fby pressing the TEMP.SET ▲ or ▼ buttons depending
upon the user.
In AUTO mode, the optimum fan speed is selected automatically
and cannot be changed.
Selecting the Auto Operating Mode
IMPORTANT
NOTE
·Upward control by +2˚C/+4˚F from the standard temperature
·Upward control by +1˚C/+2˚F from the standard temperature
·Standard temperature
·Downward control by -1˚C/-2˚F from the standard temperature
·Downward control by -2˚C/-4˚F from the standard temperature
( )
( )
( )
( )
( )
E-11
Each time you change the temperature by 1˚C,
the indoor unit beeps.
The air conditioner will only start cooling if the room temperature
is higher than the selected temperature.
The fan will, however, operate. During cooling,
the light switches on.
You must select the COOL mode if you wish to adjust the:
◆ Cooling temperature
◆ Fan speed when cooling
The air conditioner is fitted with a protection feature which
prevents the unit from being damaged when it is started
immediately after being:
◆ Swithced on
◆ Stopped
After a rest period of three minutes, it will start up normally.
If necessary, press the ON/OFF
( )
button.
Result: ◆ The OPER. light on the indoor unit switches on.
◆ The operation mode previously set is displayed.
◆ The indoor unit beeps twice.
◆ The air conditioner starts up in the current mode.
1
Press MODE under the remote control flap one or more times until the
COOL indicator is displayed.
2
Select the temperature by pressing the TEMP.SET ▲ or ▼ buttons one
or more times until the required temperature is displayed.
Possible temperatures are between 18
˚C(65˚F)
and 30
˚C(86˚F)
inclusive.
3
Each time you change the fan setting, the indoor unit beeps.
Select the fan speed by pressing the FAN SPEED button one or more
times until the required setting is displayed:
Low
Medium
High
Natural
Auto
4
Control the air flow direction when necessary.
Refer to page 15.
5
Starting to Cool
IMPORTANT
NOTE
NOTE
 Loading...