

Page 1
SAMTRON 73V/93V
Page 2
Select Model Name
SAMTRON 93V
Failure to follow directions noted by this symbol could result in bodily harm or damage to
equipment.
Prohibited
Important to read and understand at all
times
Do not disassemble Disconnect the plug from the outlet
Do not touch Grounding to prevent an electric shock
Power
When not used for extended periods of time, set your computer to DPMS.
If using a screen saver, set it to the active screen mode.
Page 3
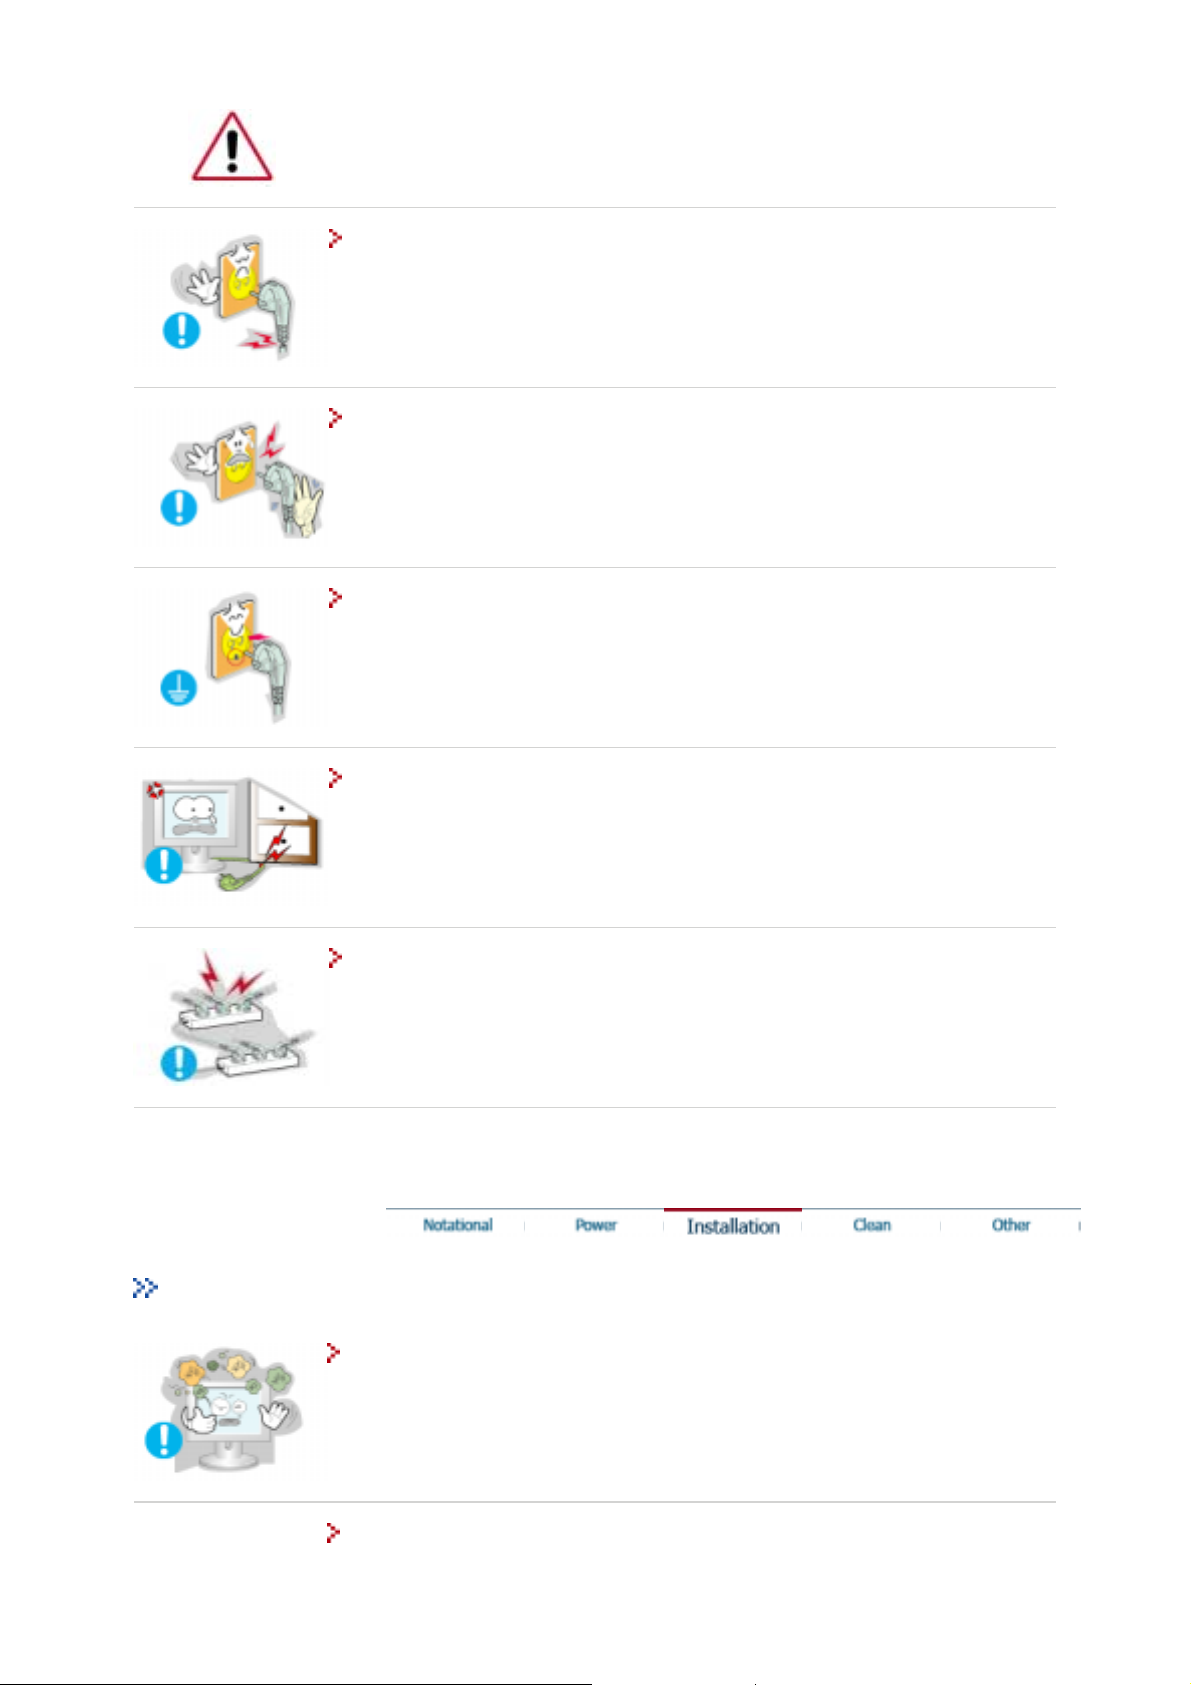
Do not use a damaged or loose plug.
This may cause an electric shock or fire.
z
Do not pull the plug out by the wire nor touch the plug with wet hands.
This may cause an electric shock or fire.
z
Use only a properly grounded plug and receptacle.
An improper ground may cause electric shock or equipment damage.
z
Do not excessively bend the plug and wire nor place heavy objects upon them,
which could cause damage.
Failure to do so may cause an electric shock or fire.
z
Do not connect too many extension cords or plugs to an outlet.
This may cause a fire.
z
Installation
Put your monitor in a location with low humidity and a minimum of dust.
An electric shock or fire could result inside the monitor.
z
Do not drop the monitor when moving it.
This may cause damage to the product or human body.
z
Page 4

Place the monitor on a flat and stable surface.
The monitor can cause injury by falling.
z
Set down the monitor carefully.
It could be damaged or broken.
z
Do not place the monitor face down.
The TFT-LCD surface may be damaged.
z
Installing a wall bracket must be done by a qualified professional.
Installation by unqualified personnel may result in injury.
z
Always use the mounting device specified in the owner's manual.
z
Leave a space for ventilation between the product and the wall.
Poor ventilation may cause the interior temperature to rise and lead to a fire.
z
Clean
When cleaning the monitor case or the surface of the TFT-LCD screen, wipe with a
slightly moistened, soft fabric.
Do not spray water or detergent directly on the monitor.
This may cause damage, electric shock or a fire.
z
Page 5
Use the recommended detergent with a smooth cloth.
If the connector between the plug and the pin is dusty or dirty, clean it properly
with a dry cloth.
A dirty connector can cause an electric shock or fire.
z
Contact a Service Center or Customer Center for interior cleaning once a year.
Keep the product's interior clean. Dust which has accumulated in the interior
z
over an extended period of time may cause malfunction or a fire.
Other
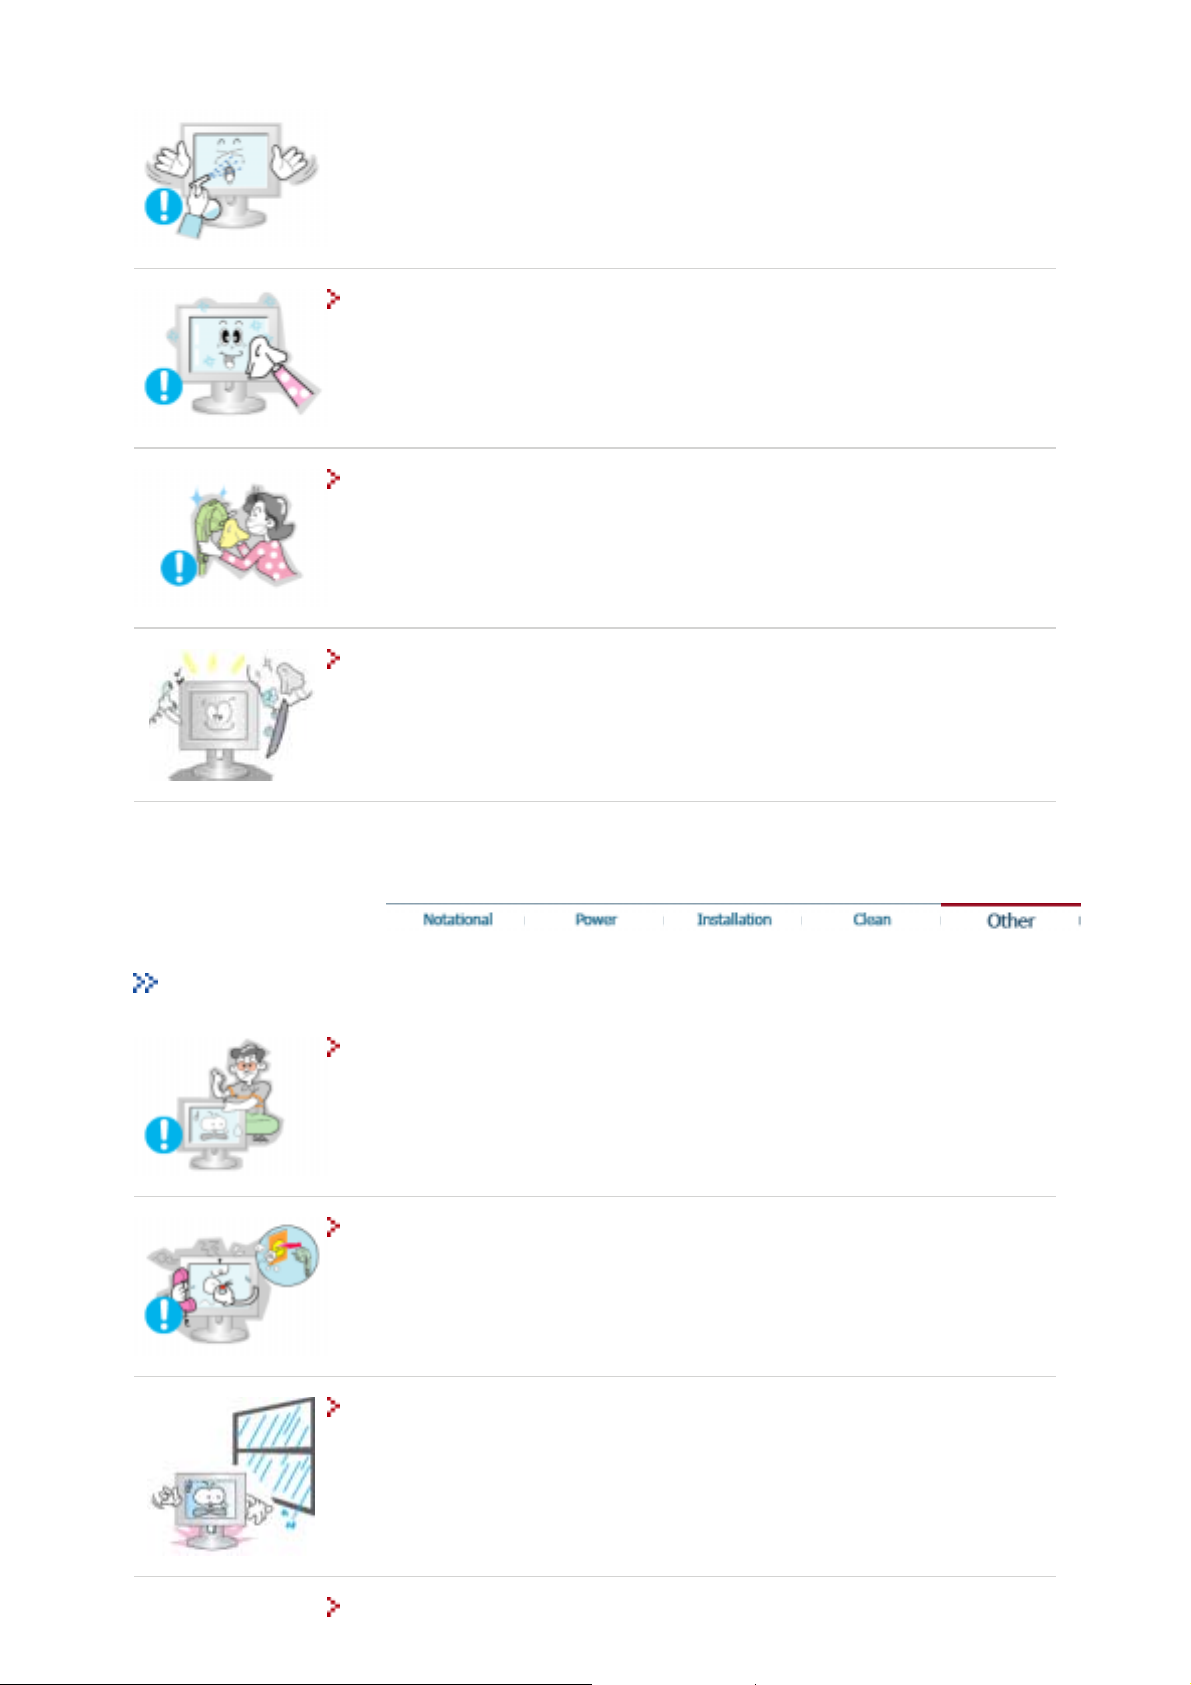
Do not remove cover (or back). No user serviceable parts inside.
This may cause an electric shock or a fire.
z
Refer servicing to qualified service personnel.
z
If your monitor does not operate normally - in particular, if there are any
unusual sounds or smells coming from it - unplug it immediately and contact
an authorized dealer or service.
This may cause an electric shock or fire.
z
Be careful not to let water drip into the monitor or expose the monitor to
moisture.
This may cause malfunction, an electric shock or a fire.
z
Especially avoid operating the monitor near water or outdoors where it could be
z
exposed to snow or rain.
Page 6

If the monitor is dropped or the casing is damaged, turn the monitor off and
unplug the power cord.
The monitor may malfunction, causing an electric shock or a fire.
z
Then contact the Service Center .
z
Keep the power off when there is thunder and lightening outside, or let the
monitor remain unused for an extended period of time.
The monitor may malfunction, causing an electric shock or a fire.
z
Do not try to move the monitor by pulling on the wire or the signal cable.
This may cause a breakdown, electric shock or a fire due to damage to the
z
cable.
Do not move the monitor right or left by pulling only the wire or the signal
cable.
This may cause a breakdown, electric shock or a fire due to damage to the
z
cable.
Do not cover the vents on the monitor cabinet.
Bad ventilation may cause a breakdown or fire.
z
Do not place water containers, chemical products or small metal objects on the
monitor.
This may cause malfunction, an electric shock or a fire.
z
If a foreign substance enters the monitor, unplug the power cord and contact
z
the Service Center .
Do not use or store inflammable substances near the monitor.
This may cause an explosion or fire.
z
Never insert anything metallic into the monitor openings.
This may cause an electric shock, fire or injury.
z
Do not insert metal objects such as utensils, wire or drill bits, or things that
Page 7
catch fire easily, such as pieces of paper or matches, into the vents or the
headphone or A/V ports on the monitor.
This may cause malfunction, an electric shock or a fire.
z
Always contact the Service Center if foreign substances/objects enter into the
z
monitor.
If you view a fixed screen for an extended period of time, residual image or
blurriness may appear.
Change the mode to energy save or set a screensaver to moving picture when
z
you need to be away from the monitor for an extended period of time.
Adjust the resolution and frequency to the levels appropriate for the model.
Inappropriate resolution may cause undesirable picture quality.
z
19 inch - 1280 X 1024
Keep a proper distance between your eyes and the monitor screen.
Sitting too close to the monitor on a continuous basis may damage eyesight.
z
To ease eye strain, take at least a five-minute break after every hour of using
the monitor
.
Do not use the monitor where it can be exposed to strong vibrations.
Exposure to strong vibrations can be a fire hazard and shorten the life of the
z
monitor.
When moving the monitor, turn the power switch off and unplug the power
cord.
Make sure that all cables, including the antenna cable and cables connecting to
other devices, are disconnected before moving the monitor.
Failure to disconnect a cable may damage it and lead to a fire or an electric
z
shock.
Page 8
y
g
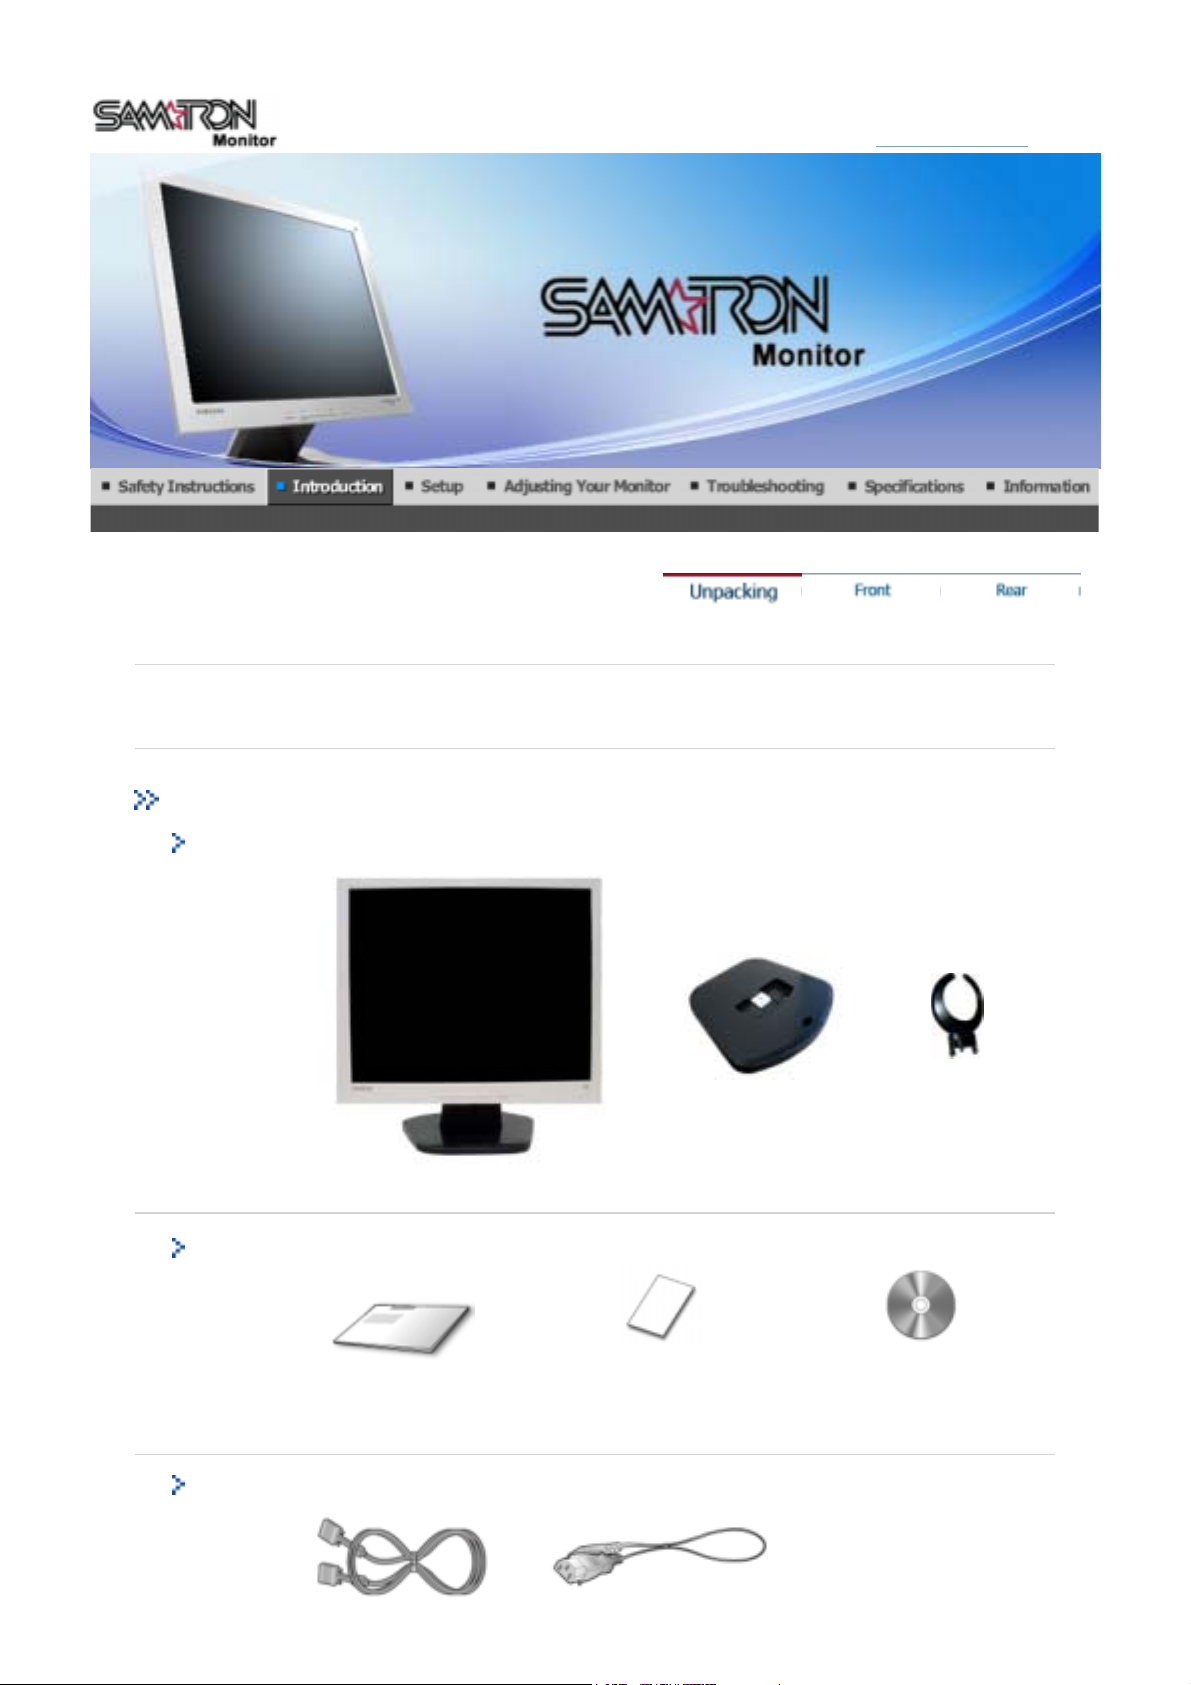
Unpacking
Monitor
Please make sure the following items are included with your monitor.
items are missing, contact your dealer.
If an
Manual
Cable
Quick Setup Guide Warranty Card
Monitor Bottom Han
User's Guide, Monitor Dirver
CD
er
Page 9

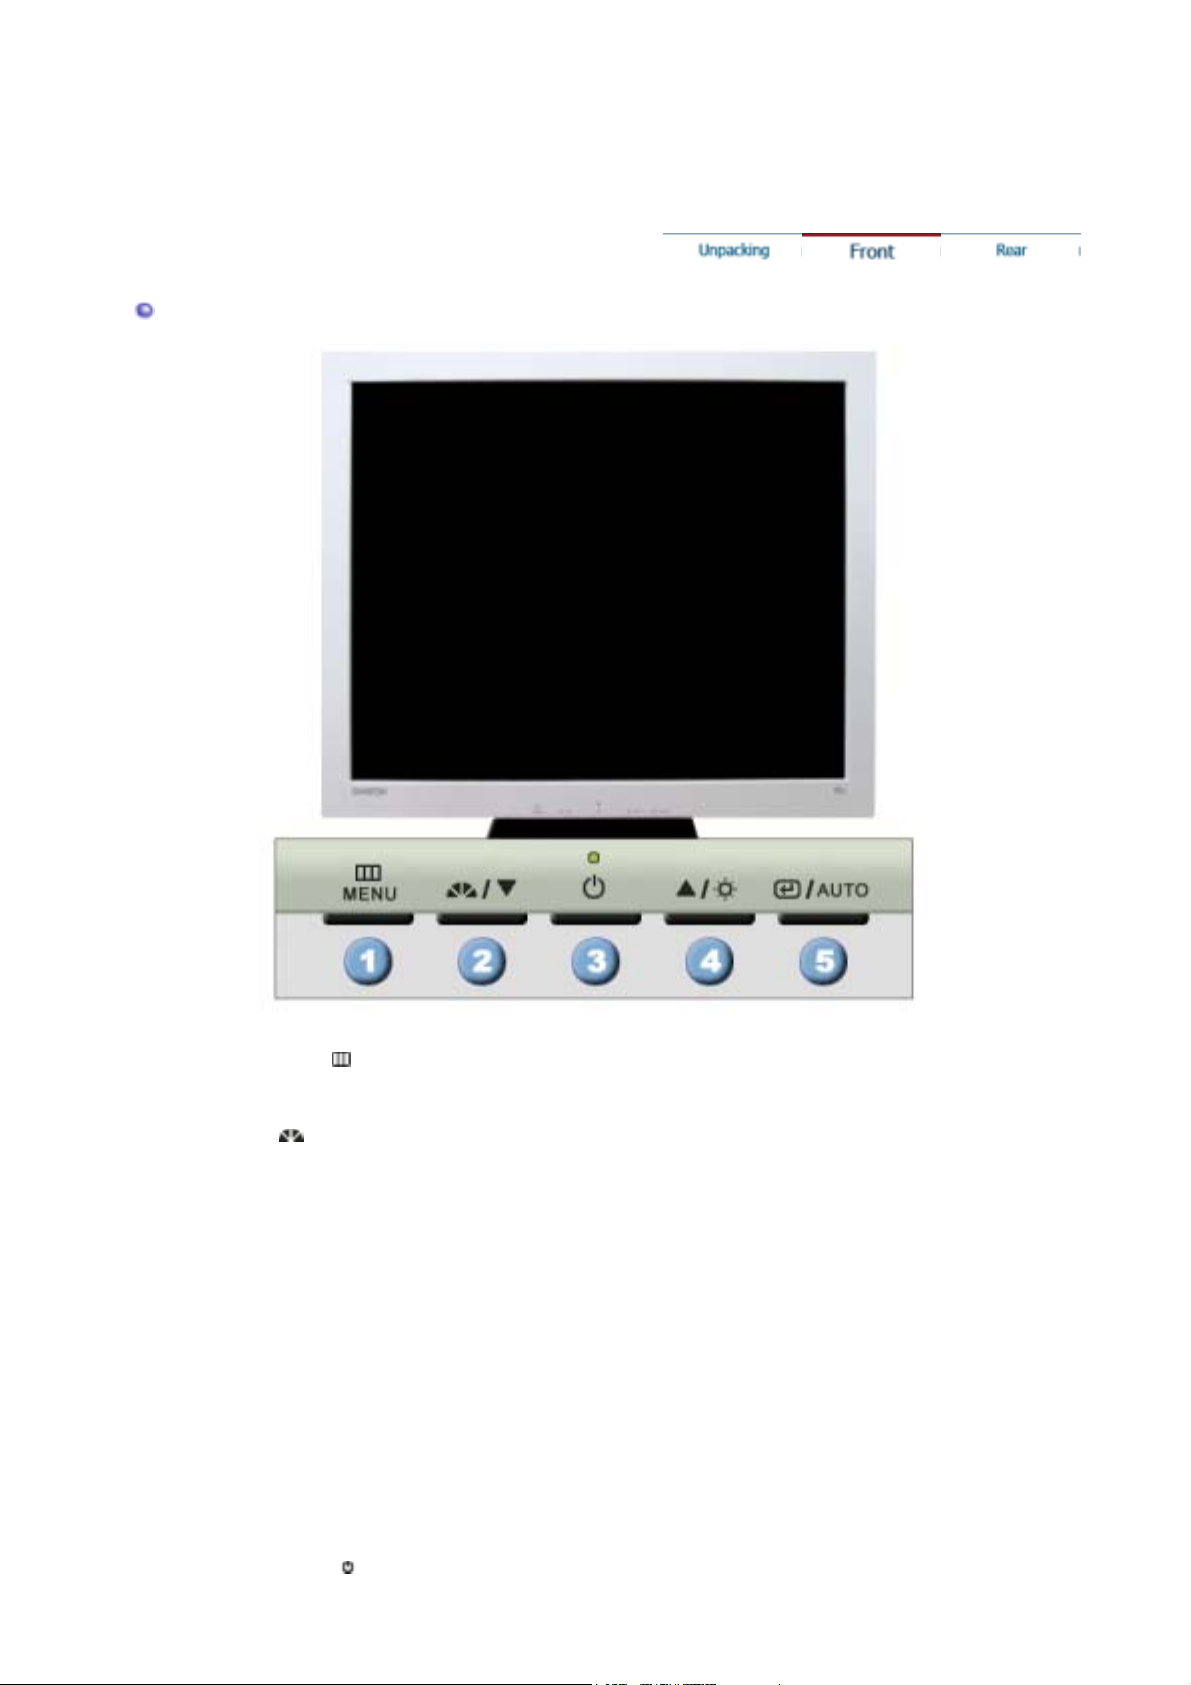
Front
D-Sub Cable Power Cord
1. Menu button [ ]
2. MagicBright™
button [ ]
Use this button for open the on-screen menu and exits from the menu
screen or closes screen adjustment menu.
MagicBright™ is a new feature providing optimum viewing environment
depending on the contents of the image you are watching.
Currently four different modes are available: Custom, Text, Internet, and
Entertain.
Each mode has its own pre-configured brightness value. You can easily
select one of four settings by simply pressing MagicBright control buttons.
: Normal Brightness
1) Text
For documentations or works involving heavy text.
2) Internet
For working with a mixture of images such as text and graphics.
3) Entertain
For watching motion pictures such as a DVD or VCD.
4) Custom
Although the values are carefully chosen by our engineers, the preconfigured values may not be comfortable to your eyes depending on
your taste.
If this is the case, adjust the Brightness and Contrast by using the
OSD menu.
: Medium Brightness
: High Brightness
3. Brightness button [ ]
2,3. Adjust buttons [ ]
4. Enter button [ ]/
Auto button
5. Power button [ ]
When OSD is not on the screen, Push the button to adjust brightness.
Use this button for navigate and select menus or adjust the menu items in
the menu screen.
Activate a highlighted menu item. /
Use this button for auto adjustment direct access.
Use this button for turn the monitor on and off.
Page 10

6. Power indicator
See PowerSaver described in the manual for further information regarding power saving functions.
For energy conservation, turn your monitor OFF when it is not needed, or when leaving it
unattended for long periods.
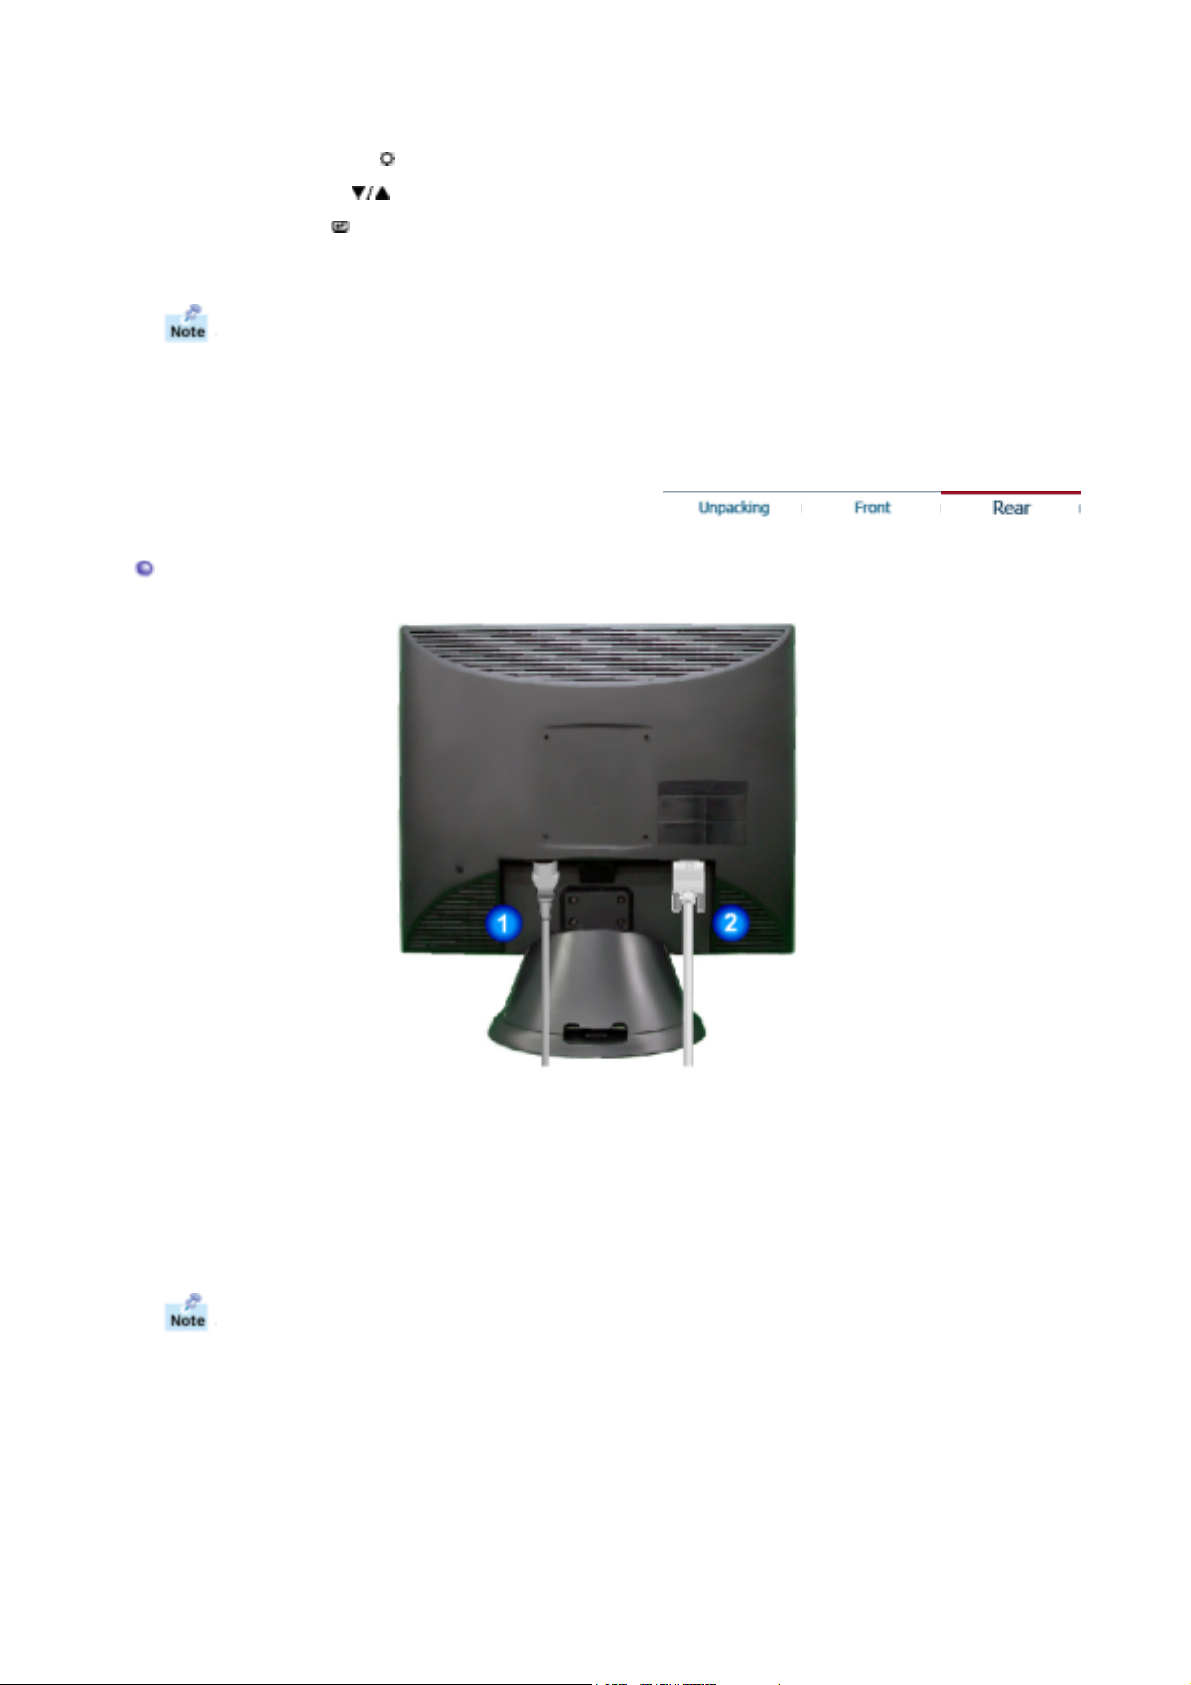
Rear
This light glows green during normal operation, and blinks green once as
the monitor saves your adjustments.
(The configuration at the back of the monitor may vary from product to product.)
1. Power port
2. D-sub 15-pin port
See Connecting Your Monitor for further information regarding cable connections.
Connect the power cord for your monitor to the power port on the back of the
monitor.
Connect the signal cable to the 15-pin, D-sub connector on the back of your
monitor.
Page 11
y
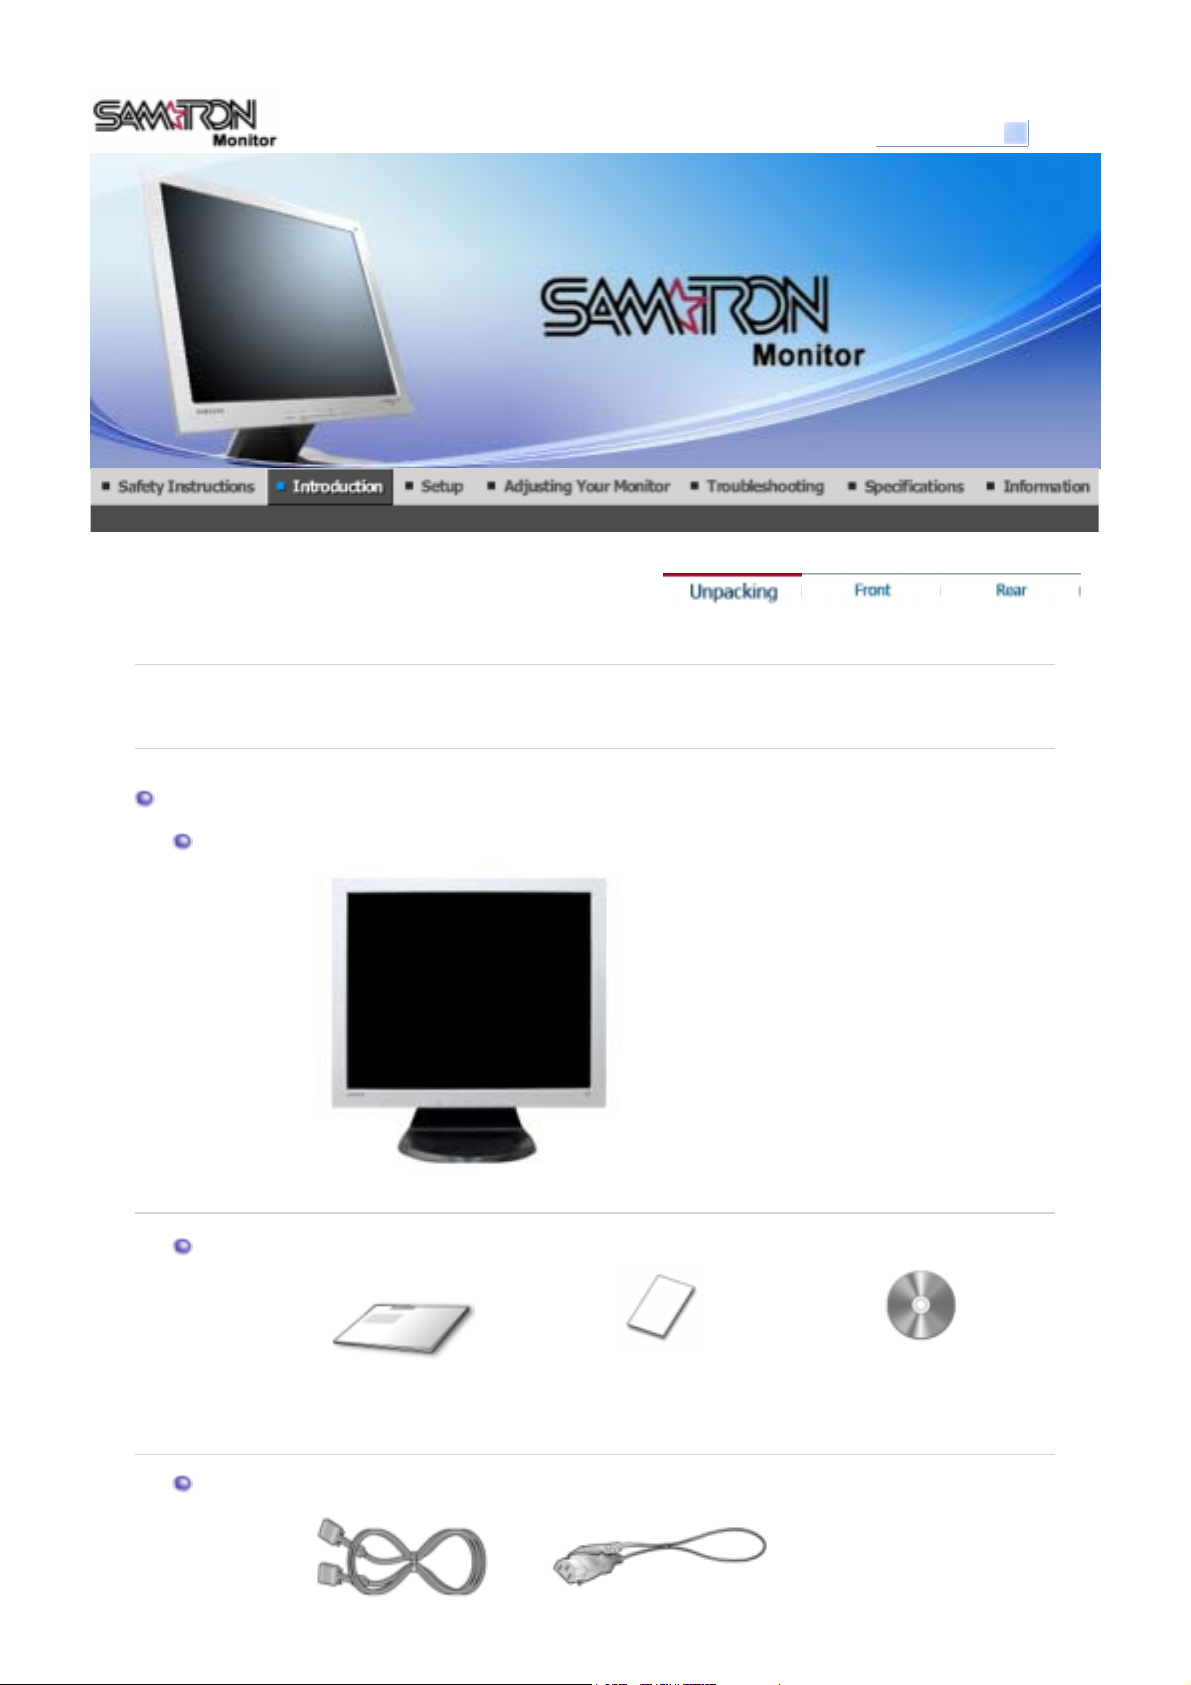
Unpacking
Monitor
Please make sure the following items are included with your monitor.
items are missing, contact your dealer.
If an
Select Model Name
SAMTRON 93V
Manual
Cable
Quick Setup Guide Warranty Card
Monitor
User's Guide, Monitor Dirver
CD
Page 12
Front
D-Sub Cable Power Cord
1. Menu button [ ]
2. MagicBright™
button [ ]
3. Power button [ ] /
Power indicator
Use this button for open the on-screen menu and exits from the menu
screen or closes screen adjustment menu.
MagicBright™ is a new feature providing optimum viewing environment
depending on the contents of the image you are watching.
Currently four different modes are available: Custom, Text, Internet, and
Entertain.
Each mode has its own pre-configured brightness value. You can easily
select one of four settings by simply pressing MagicBright control buttons.
: Normal Brightness
1) Text
For documentations or works involving heavy text.
2) Internet
For working with a mixture of images such as text and graphics.
3) Entertain
For watching motion pictures such as a DVD or VCD.
4) Custom
Although the values are carefully chosen by our engineers, the preconfigured values may not be comfortable to your eyes depending on
your taste.
If this is the case, adjust the Brightness and Contrast by using the
OSD menu.
>>Click here to see an animation clip
Use this button for turn the monitor on and off./
This light glows green during normal operation, and blinks green once as
: Medium Brightness
: High Brightness
Page 13
4. Brightness button [ ]
2,4. Adjust buttons [ ]
5. Enter button [ ]/
Auto button
See PowerSaver described in the manual for further information regarding power saving functions.
For energy conservation, turn your monitor OFF when it is not needed, or when leaving it
unattended for long periods.
Rear
the monitor saves your adjustments.
When OSD is not on the screen, Push the button to adjust brightness.
Adjust items in the menu.
Activate a highlighted menu item. /
Use this button for auto adjustment direct access.
(The configuration at the back of the monitor may vary from product to product.)
1. Power port
2. D-sub 15-pin port
See Connecting Your Monitor for further information regarding cable connections.
Connect the power cord for your monitor to the power port on the back of the
monitor.
Connect the signal cable to the 15-pin, D-sub connector on the back of your
monitor.
Page 14
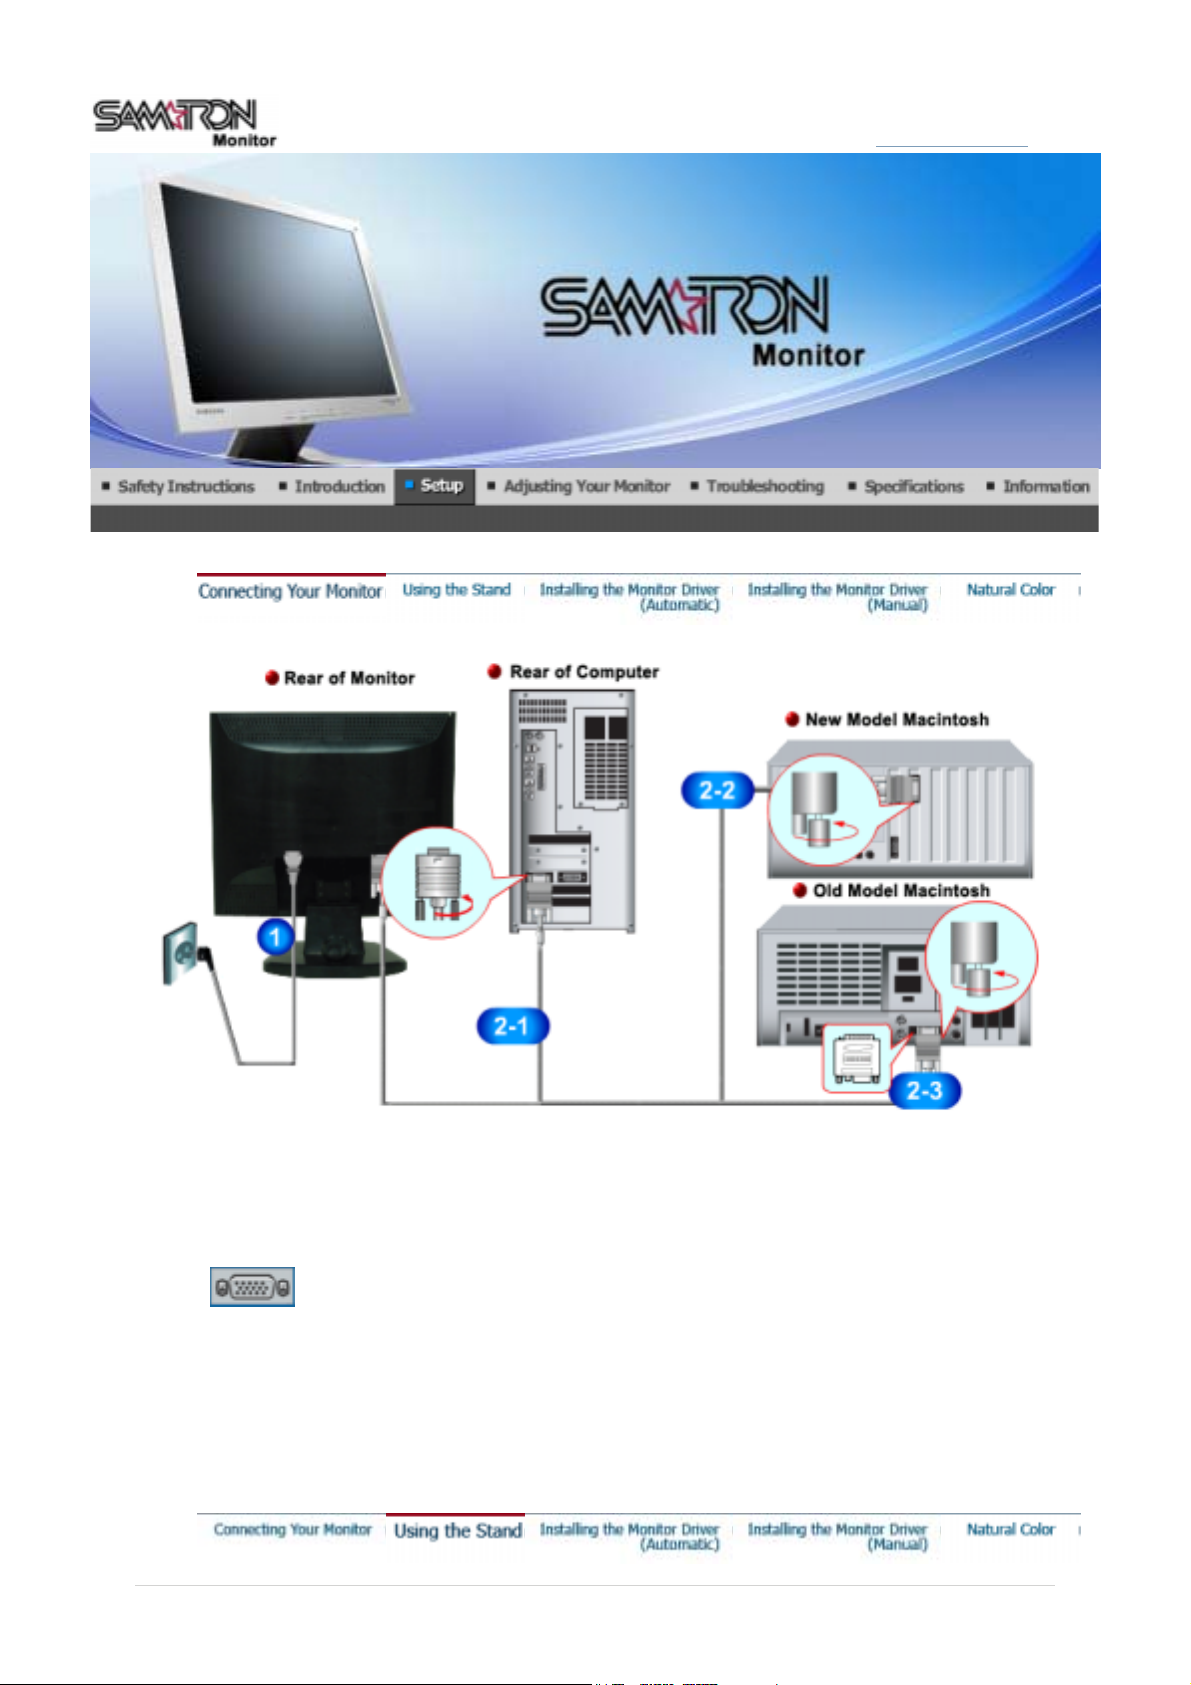
1.
2-1.
2-2.
2-3.
3.
Connect the power cord for your monitor to the power port on the back of the monitor.
Plug the power cord for the monitor into a nearby outlet.
Using the D-sub (Analog) connector on the video card.
Connect the signal cable to the 15-pin, D-sub connector on the back of your monitor.
Connected to a Macintosh.
Connect the monitor to the Macintosh computer using the D-SUB connection cable.
In the case of an old model Macintosh, you need to connect the monitor using a special Mac adaptor.
Turn on your computer and monitor. If your monitor displays an image, installation is complete.
Page 15
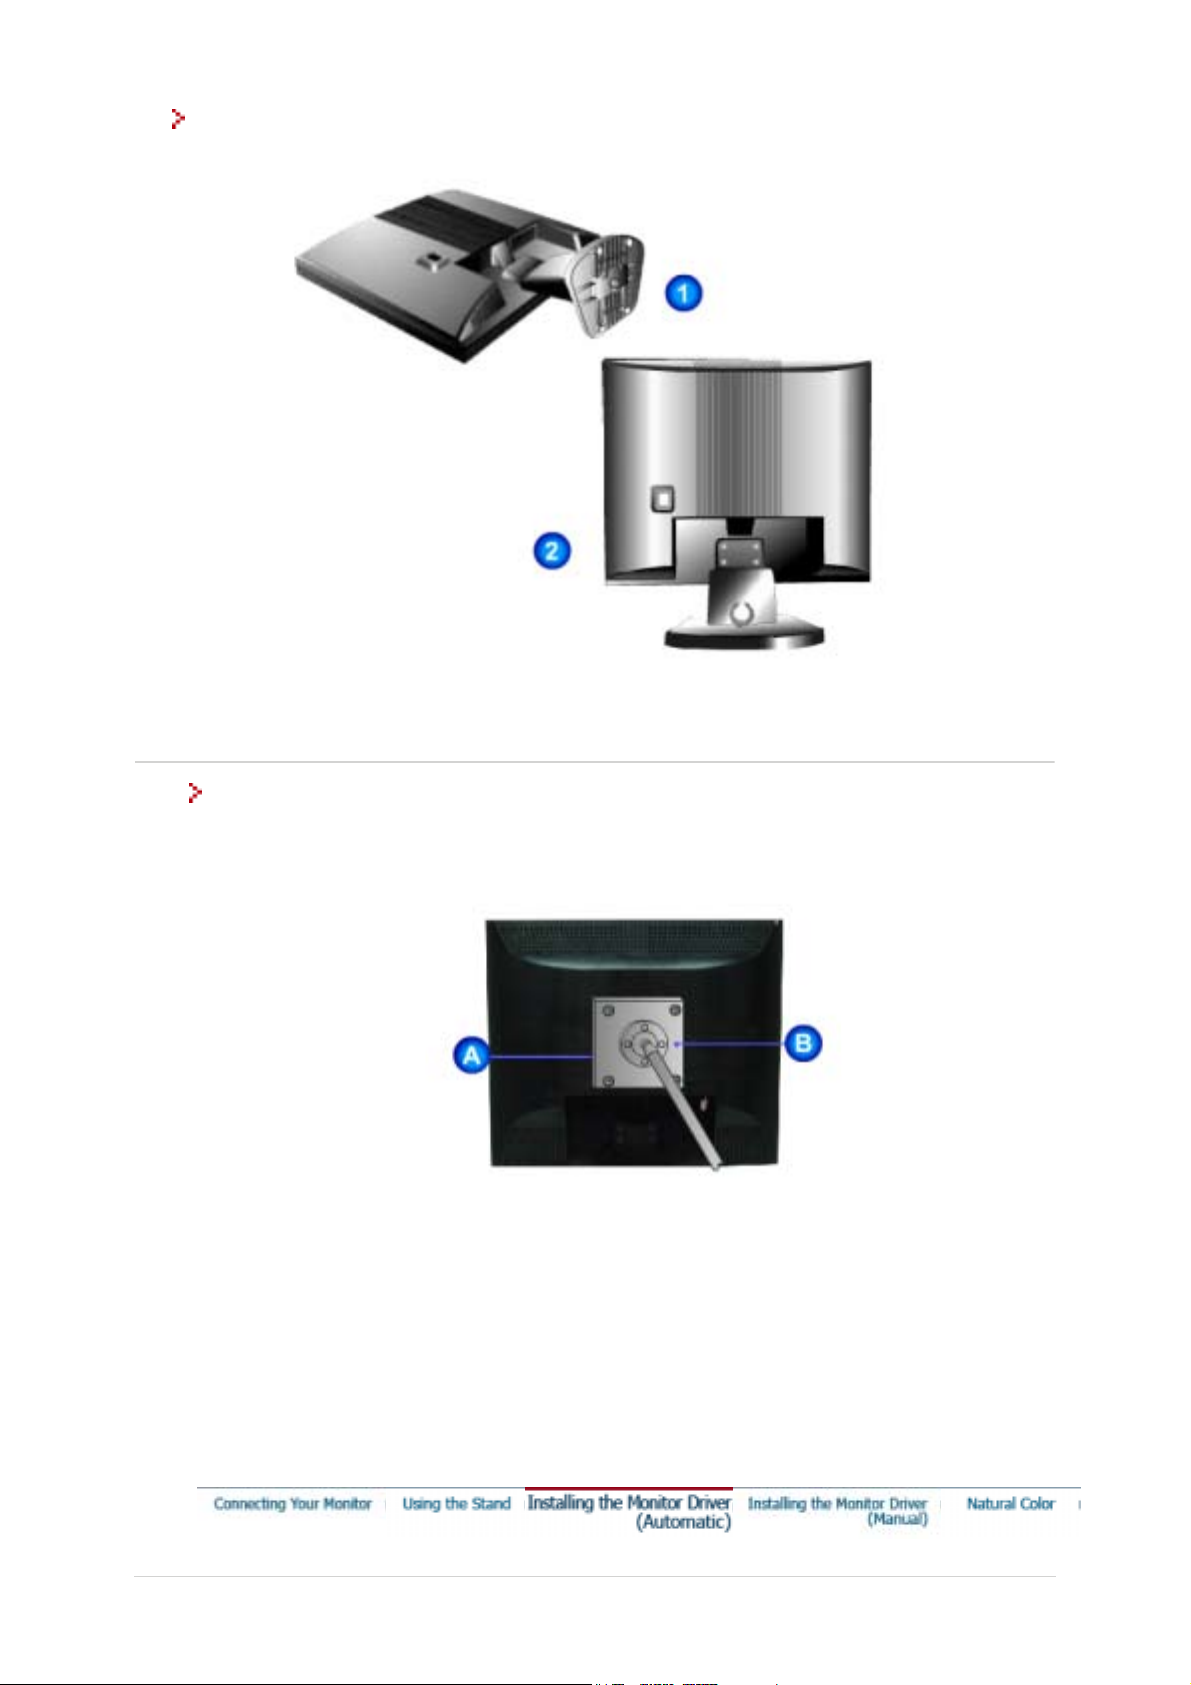
Monitor Assembly
A
1. Monitor and Bottom
2. Monitor and Hanger
Attaching a base
This monitor accepts a 100 mm x 100 mm VESA-compliant mounting interface pad.
A. Monitor
B. Mounting interface pad
. Turn off your monitor and unplug its power cord.
1
. Lay the LCD monitor face-down on a flat surface with a cushion beneath it to protect the screen.
2
. Remove the four screws and then remove the Stand from the LCD monitor.
3
lign the Mounting Interface Pad with the holes in the Rear Cover Mounting Pad and secure it with the
.
4
four screws that came with the arm-type base, wall mount hanger or other base.
Page 16

When prompted by the operating system for the monitor driver, insert the CD-ROM included
with this monitor. Driver installation is slightly different from one operating system to
another. Follow the directions as appropriate for the operating system you have.
Prepare a blank disk and download the driver program file at the Internet web site shown here.
Internet web site : http://www.samsung-monitor.com/ (Worldwide)
z
Windows XP/2000
http://www.samsungusa.com/monitor (USA)
http://www.sec.co.kr/monitor (Korea)
http://www.samsungmonitor.com.cn/ (China)
1. Insert CD into the CD-ROM drive.
2. Click
"Windows XP/2000 Driver"
3. Choose your monitor model in the model list, then click the
"OK"
button.
4. If you can see following
click
"OK"
button.
"Message"
window, then click the
This monitor driver is under certifying MS logo,and this installation don't damage
your system.The certified driver will be posted on Samsung Monitor Homepage
http://www.samsung-monitor.com/.
5. Monitor driver installation is completed.
"Continue Anyway"
button. Then
Windows XP | Windows 2000 | Windows NT | Linux
When prompted by the operating system for the monitor driver, insert the CD-ROM included
with this monitor. Driver installation is slightly different from one operating system to
another. Follow the directions as appropriate for the operating system you have.
Prepare a blank disk and download the driver program file at the Internet web site shown here.
Internet web site : http://www.samsung-monitor.com/ (Worldwide)
z
http://www.samsungusa.com/monitor (USA)
http://www.sec.co.kr/monitor (Korea)
Page 17

http://www.samsungmonitor.com.cn/ (China)
Microsoft® Windows® XP Operating System
1. Insert CD into the CD-ROM driver.
2. Click "
Start
" —> "
Control Panel
" then click the "
Appearance and Themes
" Icon.
3. Click "
Display
4. Click the "
" icon and choose the "
Properties
" button on the "
Settings
Monitor
" tab then click "
Advanced..
".
" tab and select "
Driver
" tab.
5. Click "
Update Driver..
" and select "
Install from a list or..
" then click "
Next
" button.
Page 18

6. Select "
Don't search ,I will..
7. Click the "
and click the "
Browse
Next
" then click "
" and then click "
Next
Have disk
".
" button then choose A:(D:\Driver) and choose your monitor model in the model list
" button.
8. If you can see following "
Message
" window, then click the "
Continue Anyway
" button. Then click
"OK" button.
This monitor driver is under certifying MS logo,and this installation don't damage your system.The
certified driver will be posted on Samsung Monitor Homepage
http://www.samsung-monitor.com/
9. Click the "
" button then click "OK" button continually.
Close
Page 19

10. Monitor driver installation is completed.
Microsoft
®
Windows® 2000 Operating System
When you can see "Digital Signature Not Found" on your monitor, follow these steps.
1. Choose "OK" button on the "
2. Click the "
Browse
" button on the "
Insert disk
" window.
File Needed
" window.
3. Choose A:(D:\Driver) then click the "Open" button and then click "OK" button.
How to install
1. Click "
2. Double click the "
3. Choose the "
4. Choose "
Start
Monitor
" , "
Setting
Settings
" , "
Control Panel
Display
" Icon.
" tab and then click "
".
".
Advanced..
".
Case1: If the "Properties" button is inactive, it means your monitor is properly configured. Please
stop installation
Case2: If the "Properties" button is active, click the "Properties" button then follow next steps
continually.
5. Click "
6. Choose "
driver
7. Click the "
8. Click the "
9. Choose your monitor model and click the "
10. Click the "
" and then click on "
Driver
Update Driver..
" then click on the "Next" button.
Display a list of the known drivers for this device so that I can choose a specific
" then click "
Browse
" button, then click "OK" button.
Open
Finish
" and then click "
Next
Have disk
" button then choose A:(D:\Driver).
" button then click "
Next
" button then the "
Close
" button.
".
Next
" button.
If you can see the "
the "
" button then the "
Finish
Digital Signature Not Found
" button.
Close
" window then click the "
"button. And click
Yes
Microsoft
1. Click
2. In Display Registration Information window, click Settings Tab and then click
®
Windows® NT Operating System
Start, Settings, Control Panel
, and then double-click
Display
icon.
All Display Modes
3. Select a mode that you wish to use (Resolution, Number of colors and Vertical frequency) and then
click OK.
4. Click
button if you see the screen working normally after clicking Test. If the screen is not
Apply
normal, change to a different mode (lower mode of resolution, colors or frequency).
If there is no Mode at
All Display Modes
, select the level of resolution and vertical frequency
by referring to the Preset Display Modes in the user guide.
.
Page 20

Linux Operating System
To execute X-Window, you need to make the X86Config file, which is a type of system setting file.
1. Press Enter at the first and the second screen after executing the X86Config file.
2. The third screen is for
setting your mouse
.
3. Set a mouse for your computer.
4. The next screen is for
selecting a keyboard
.
5. Set a Keyboard for your computer.
6. The next screen is for
7. First of all, set a
8. Set a
vertical frequency
9. Enter the
horizontal frequency
model name of your monitor
setting your monitor
for your monitor. (You can enter the frequency directly.)
.
for your monitor. (You can enter the frequency directly.)
. This information will not affect the actual execution of X-
Window.
10. You have
Execute
finished
X-Window after setting other requested hardware.
setting up your monitor.
Page 21

Select Model Name
SAMTRON 93V
1.
2-1.
2-2.
2-3.
3.
Connect the power cord for your monitor to the power port on the back of the monitor.
Plug the power cord for the monitor into a nearby outlet.
Using the D-sub (Analog) connector on the video card.
Connect the signal cable to the 15-pin, D-sub connector on the back of your monitor.
Connected to a Macintosh.
Connect the monitor to the Macintosh computer using the D-SUB connection cable.
In the case of an old model Macintosh, you need to connect the monitor using a special Mac adaptor.
Turn on your computer and monitor. If your monitor displays an image, installation is complete.
Page 22

Attaching a base
A
g
This monitor accepts a 100 mm x 100 mm VESA-compliant mounting interface pad.
A. Monitor
B. Mounting interface pad
. Turn off your monitor and unplug its power cord.
1
. Lay the LCD monitor face-down on a flat surface with a cushion beneath it to protect the screen.
2
. Remove the four screws and then remove the Stand from the LCD monitor.
3
lign the Mounting Interface Pad with the holes in the Rear Cover Mounting Pad and secure it with the
.
4
four screws that came with the arm-type base, wall mount hanger or other base.
Internet web site : http://www.samsung-monitor.com/ (Worldwide)
z
Windows XP/2000
When prompted by the operating system for the monitor driver, insert the CD-ROM included
with this monitor. Driver installation is slightly different from one operating system to
another. Follow the directions as appropriate for the operating system you have.
Prepare a blank disk and download the driver program file at the Internet web site shown here.
http://www.samsungusa.com/monitor (USA)
http://www.sec.co.kr/monitor (Korea)
http://www.samsungmonitor.com.cn/ (China)
1. Insert CD into the CD-ROM drive.
2. Click
"Windows XP/2000 Driver"
3. Choose your monitor model in the model list, then click the
button.
"OK"
4. If you can see following
"Messa
window, then click the
e"
"Continue Anyway"
button. Then
Page 23

click
"OK"
button.
This monitor driver is under certifying MS logo,and this installation don't damage
your system.The certified driver will be posted on Samsung Monitor Homepage
http://www.samsung-monitor.com/.
5. Monitor driver installation is completed.
When prompted by the operating system for the monitor driver, insert the CD-ROM included
with this monitor. Driver installation is slightly different from one operating system to
another. Follow the directions as appropriate for the operating system you have.
Prepare a blank disk and download the driver program file at the Internet web site shown here.
Internet web site : http://www.samsung-monitor.com/ (Worldwide)
z
http://www.samsungusa.com/monitor (USA)
http://www.sec.co.kr/monitor (Korea)
http://www.samsungmonitor.com.cn/ (China)
Microsoft® Windows® XP Operating System
Windows XP | Windows 2000 | Windows NT | Linux
1. Insert CD into the CD-ROM dr iver.
2. Click "
Start
" —> "
Control Panel
" then click the "
3. Click "
Display
" icon and choose the "
Settings
Appearance and Themes
" Icon.
" tab then click "
Advanced..
".
Page 24

4. Click the "
5. Click "
Update Driver..
Properties
" button on the "
" and select "
Monitor
" tab and select "
Install from a list or..
Driver
" then click "
" tab.
Next
" button.
6. Select "
Don't search ,I will..
7. Click the "
and click the "
Browse
Next
" then click "
" and then click "
Next
Have disk
".
" button then choose A:(D:\Driver) and choose your monitor model in the model list
" button.
Page 25

8. If you can see following "
Message
" window, then click the "
Continue Anyway
" button. Then click
"OK" button.
This monitor driver is under certifying MS logo,and this installation don't damage your system.The
certified driver will be posted on Samsung Monitor Homep a ge
http://www.samsung-monitor.com/
9. Click the "
" button then click "OK" button continually.
Close
10. Monitor driver installation is completed.
Microsoft
®
Windows® 2000 Operating System
When you can see "Digital Signature Not Found" on your monitor, follow these steps.
Page 26

1. Choose "OK" button on the "
2. Click the "
Browse
" button on the "
Insert disk
" window.
File Needed
" window.
3. Choose A:(D:\Driver) then click the "Open" button an d then click "OK" button.
How to install
1. Click "
2. Double click the "
3. Choose the "
4. Choose "
Start
Monitor
" , "
Setting
Settings
" , "
Control Panel
Display
" Icon.
" tab and then click "
".
".
Advanced..
".
Case1: If the "Properties" button is inactive, it means your monitor is properly configured. Please
stop installation
Case2: If the "Properties" button is active, click the "Properties" button then follow next steps
continually.
5. Click "
6. Choose "
driver
7. Click the "
8. Click the "
9. Choose your monitor model and click the "
10. Click the "
" and then click on "
Driver
Update Driver..
" then click on the "Next" button.
Display a list of the known drivers for this device so that I can choose a specific
" then click "
Browse
" button, then click "OK" button.
Open
Finish
" and then click "
Next
Have disk
" button then choose A:(D:\Driver).
" button then click "
Next
" button then the "
Close
" button.
".
Next
" button.
If you can see the "
the "
" button then the "
Finish
Digital Signature Not Found
" button.
Close
" window then click the "
"button. And click
Yes
Microsoft
1. Click
2. In Display Registration Information window, click Settings Tab and then click
®
Windows® NT Operating System
Start, Settings, Control Panel
, and then double-click
Display
icon.
All Display Modes
3. Select a mode that you wish to use (Resolution, Number of colors and Vertical frequency) and then
click OK.
4. Click
button if you see the screen working normally after clicking Test. If the screen is not
Apply
normal, change to a different mode (lower mode of resolution , colo rs or frequency).
If there is no Mode at
All Display Modes
, select the level of resolution and vertical frequency
by referring to the Preset Display Modes in the user guide.
Linux Operating System
To execute X-Window, you need to make the X86Config file, which is a type of system setting file.
1. Press Enter at the first and the second screen after executing the X86Config file.
2. The third screen is for
setting your mouse
.
3. Set a mouse for your computer.
4. The next screen is for
selecting a keyboard
.
5. Set a Keyboard for your computer.
6. The next screen is for
7. First of all, set a
8. Set a
vertical frequency
9. Enter the
horizontal frequency
model name of your monitor
setting your monitor
for your monitor. (You can enter the frequency directly.)
.
for your monitor. (You can enter the frequency directly.)
. This information will not affect the actual execution of X-
Window.
10. You have
Execute
finished
X-Window after setting other requested hardware.
setting up your monitor.
.
Page 27

Opens the OSD menu. Also used to exit the OSD menu or return to the previous menu.
1.
These buttons allow you to adjust items in the menu.
2.
These buttons allow you to adjust items in the menu.
3.
Activate a highlighted menu item.
4.
AUTO
Page 28

Menu Description
AUTO
MagicBright™
When the '
shown in the animated screen on the center.
Auto adjustment allows the monitor to self-adjust to the incoming video signal.
The values of fine, coarse and position are adjusted automatically.
To make the automatic adjustment function sharper, execute the 'AUTO' function
while the AUTO PATTERN is on.
' button is pressed, the Auto Adjustment screen appears as
AUTO
Menu Description
MagicBright™
Then push the MagicBright™ button again to circle through available
preconfigured modes.
Page 29

Brightness
- four different mode (Custom/Text/Internet/Entertain)
Menu Description
Brightness
Adjust Brightness.
Picture
Page 30

Menu Description Play/Stop
Adjust the Brightness.
Brightness
Direct Access Feature
the button to adjust brightness.
: When OSD is not on the screen, Push
Contrast
Color
Adjust the Contrast.
Menu Description Play/Stop
Color Tone
Color Control
Gamma
The tone of the color can be changed and one of four modes
can be selected - Cool, normal, Warm and Custom.
Follow these steps to adjust individual R,G,B color balance.
Select one of three pre-defined gammas.
Image
Page 31

Menu Description Play/Stop
Removes noise such as vertical stripes. Coarse adjustment may
Coarse
Fine
move the screen image area. You may relocate it to the center
using the Horizontal Control menu.
Removes noise such as horizontal stripes. If the noise persists
even after Fine tuning,
repeat it after adjusting the frequency (clock speed).
Sharpness
H-Position
V-Position
OSD
Follow these instuction to change the clearance of image.
Follow these instructions to change the horizontal position of the
monitor's entire display.
Follow these instructions to change the vertical position of the
monitor's entire display.
Page 32

Menu Description Play/Stop
Follow these steps to change the language used in the menu.
You can choose one of seven languages. (English, German,
Language
Spanish, French, Italian, Swedish, Russian)
:The language chosen affects only the language of the
Note
OSD. It has no effect on any software running on the computer.
H-Position
V-Positon
Transparency
Display Time
Setup
You can change the horizontal position where the OSD menu
appears on your monitor.
You can change the vertical position where the OSD menu
appears on your monitor.
Change the translucency of the background of the OSD.
The menu will automatically turn off if no adjustments are made
for a certain time period.
You can set the amount of time the menu will wait before it turns
off.
Page 33

Menu Description Play/Stop
Image Reset
Color Reset
Information
Image parameters are replaced with the factory default values.
Color parameters are replaced with the factory default values.
Menu Description
Information
Shows a video source, display mode on the OSD screen.
Page 34

Before calling for service, check the information in this section to see if you can remedy any
problems yourself. If you do need assistance, please call, the phone number on the Information
section or contact your dealer.
Symptom Check List Solutions
No images on the
screen. I cannot turn
on the monitor.
Is the power cord connected properly? Check the power cord connection and
supply.
Can you see
"Check Signal Cable"
on
Check the signal cable connection.
the screen?
If the power is on, reboot the computer
to see the initial screen(the login
screen), which can be seen.
If the initial screen (the login screen)
appears, boot the computer in the
applicable mode (the safe mode for
Windows ME/XP/2000) and then
change the frequency of the video card.
(Refer to the Preset Display Modes)
Note: If the initial screen (the login
screen) does not appear, contact a
service center or your dealer.
Can you see
"Not Optimum Mode"
"Recommanded mode 1280 x 1024
on the screen?
60Hz"
You can see this message when the
signal from the video card exceeds the
maximum resolution and frequency that
the monitor can properly handle.
Adjust the maximum resolution and
frequency that the monitor can properly
handle.
If the display exceeds SXGA or 75Hz, a
"
Not Optimum Mode. Recommended
mode 1280 x 1024 60Hz
" message is
displayed. If the display exceeds 85Hz,
the display will work properly but the
"
Not Optimum Mode. Recommended
mode 1280 x 1024 60Hz
" message
appears for one minute and then
disappears.
Please change to the recommended
mode during this one-minute period.
(The message is displayed again if the
Page 35

system is rebooted.)
The screen shows
strange colors or just
black and white.
The screen suddenly
has become
unbalanced.
The screen is out of
focus or OSD cannot
be adjusted.
There is no image on the screen.
Is the power indicator on the monitor
blinking at 1 second intervals?
Is the screen displaying only one color
as if looking at the screen through a
cellophane paper?
Have the screen colors become
strange after running a program or due
to a crash between applications?
Has the video card been set properly? Set the video card by referring to the
Have you changed the video card or
the driver?
Have you adjusted the resolution or
frequency to the monitor?
The screen can be unbalanced due to the cycle of the video card signals.
Readjust Position by referring to the OSD.
Have you adjusted the resolution or
frequency on the monitor?
The monitor is in PowerSaver mode.
press a key on the keyboard to activate
the monitor and restore the image on
the screen.
Check the signal cable
connection.Make sure the video card is
fully inserted in it's slot.
Reboot the computer.
video card manual.
Adjust screen image position and size
using the OSD.
Adjust the resolution and frequency at
the video card.
(Refer to the Preset Display Modes).
Adjust the resolution and frequency of
the video card.
(Refer to the Preset Display Modes).
LED is blinking but no
images on the screen.
There are only 16
colors shown on the
screen.
The screen colors have
changed after changing
the video card.
There is a message
that reads
"Unrecognized
monitor, Plug & Play
(VESA DDC) monitor
found".
Check the following items if there is trouble with the monitor.
1. check if the power cord and the video cables are properly connected to the computer.
2. Check if the computer beeps more than 3 times when booting.
(If it does, request an after-service for the main board of the computer.)
3. If you installed a new video card or if you assembled the PC, check if the installed the adapter(video)
driver and the monitor driver.
4. Check if the scanning ratio of the video screen is set at 75Hz.
(Do not exceed 60Hz when using the maximum resolution.)
5. If you have problems in installing the adapter (video) driver, boot the computer in Safe Mode, remove the
Display Adapter at the "
to reinstall the adapter (video) driver.
Is the frequency properly adjusted
when checking the Display Timing on
the menu?
Have the Windows colors been set
properly?
Has the video card been set properly? Set the video card by referring to the
Have you installed the monitor driver? Install the monitor driver according to
See the video card manual to see if the
Plug & Play (VESA DDC) function can
be supported.
Control Panel→System→Device Administrator
Adjust the frequency properly by
referring to the video card manual and
the Preset Display Modes.
(The maximum frequency per
resolution may differ from product to
product.)
Windows ME/2000/XP:
Set the colors properly at the
Panel → Display → Settings
video card manual.
the Driver Installation Instructions.
Install the monitor driver according to
the Driver Installation Instructions.
" and then reboot the computer
Control
.
If problems repeatedly occur, contact an authorized service center.
Page 36

Y
Q & A
Question Answer
How can I change the frequency? Frequency can be changed by reconfiguring the video card.
Note that video card support can vary, depending on the version of the
driver used. (Refer to the computer or the video card manual for
details.)
How can I adjust the resolution? Windows ME/XP/2000 : Set the resolution at the Control
Panel→Display→Settings.
* Contact the video card manufacturer for details.
How can I set the Power Saving
function?
How can I clean the outer
case/LCD Panel?
Self-Test Feature Check
Self-Test Feature Check | Warning Messages | Environment | Useful Tips
our monitor provides a self test feature that allows you to check whether your monitor is functioning
properly.
Self-Test Feature Check
1. Turn off both your computer and the monitor.
2. Unplug the video cable from the back of the computer.
3. Turn on the monitor.
If the monitor is functioning properly, you will see a box with a border and text inside as shown in
the following illustration: The three boxes inside the border are red, green and blue.
Windows ME/XP/2000 : Set the function at BIOS-SETUP of the
computer or the screen saver. (Refer to Windows/Computer Manual).
Disconnect the power cord and then clean the monitor with a soft cloth,
using either a cleaning solution or plain water.
Do not leave any remains of the detergent nor scratch the case. Do not
allow any water to go inside the monitor.
Failure of any of the boxes to appear indicates a problem with your monitor. This box also appears
during normal operation if the video cable becomes disconnected or damaged.
4. Turn off your monitor and reconnect the video cable; then turn on both your computer and the monitor.
If your monitor screen remains blank after using the previous procedure, check your video controller
and computer system; your monitor is functioning properly.
Page 37

Warning Messages
If there is something wrong with the input signal, a message appears on the screen or the screen
goes blank although the power indicator LED is still on. The message may indicate that the monitor
is out of scan range or that you need to check the signal cable.
Environment
The location and the position of the monitor may influence the quality and other features of
the monitor.
1. if there are any sub woofer speakers near the monitor, unplug and relocate the woofer to
another room.
2. Remove all electronic devices such as radios, fans, clocks and telephones that are within 3
feet (one meter) of the monitor.
Useful Tips
A monitor recreates visual signals received from the computer. Therefore, if there is trouble with the
z
computer or the video card, this can cause the monitor to become blank, have poor coloring, noise, Video
mode not supported, etc. In this case, first check the source of the problem, and then contact a service
center or your dealer.
z
Judging the monitor's working condition
If there is no image on the screen or a
message comes up, disconnect the cable from the computer while the monitor is still powered on.
60Hz"
If there is a message coming up on the screen or if the screen goes white, this means the monitor is
{
"Not Optimum Mode" "Recommanded mode 1280 x 1024
in working condition.
In this case, check the computer for trouble.
{
Page 38

General
Select Model Name
SAMTRON 73V
General
Model Name SAMTRON 73V
LCD Panel
Size 17inch Diagonal
Display area 337.92 (H) x 270.336 (V)
Pixel Pitch 0.264mm (H) x 0.264mm (V)
Type a-si TFT active matrix
Synchronization
Horizontal 30 ~ 81 kHz
Vertical 56 ~ 75 Hz
Display Color
16,194,277 Colors
Resolution
Optimum resolution 1280 x 1024@60 Hz
Maximum resolution 1280 x 1024@75 Hz
Input Signal, Terminated
RGB Analog, 0.7 Vpp positive at 75 ohms
Separate H/V sync, TTL level positive or negative.
Maximum Pixel Clock
140 MHz
Power Supply
AC 90 ~ 264 VAC, 60/50 Hz ± 3Hz
Signal Cable
Page 39

15pin-to-15pin D-sub cable, Detachable
Power Consumption(maximum)
Less than 34W
Dimensions (WxDxH)/ Weight
382.0 x 62.0 x 320.5 mm (Without Stand)
382.0 x 175.0 x 383.7 mm (with Basic Stand)/4.55kg
VESA Mounting Interface
100mm x 100mm (for use with Specialty(Arm) Mounting hardware.)
Environmental considerations
Operating Temperature: 50°F ~ 104°F(10°C ~ 40°C)
Humidity: 10% ~ 80%, non-condensing
Storage Temperature: -4°F ~113°F (-20°C ~ 45°C)
Humidity: 5% ~ 95%, non-condensing
Plug and Play Capability
This monitor can be installed on any Plug & Play compatible system. Interaction of the monitor and computer
systems will provide the best operating conditions and monitor settings. In most cases, monitor installation
will proceed automatically, unless the user wishes to select alternate settings.
Dot Acceptable
TFT LCD panel manufactured by using advanced semiconductor technology with precision of 99.999% above
is used for this product. But the pixels of RED, GREEN, BLUE and WHITE color seem to be bright sometimes
or some of black pixels could be seen. This is not from bad quality and you can use it without uneasiness.
For example, the number of TFT LCD pixels that is contained in this product are 3,932,160.
z
Note: Design and specifications are subject to change without prior notice.
PowerSaver
This monitor has a built-in power management system called PowerSaver. This system saves energy by
switching your monitor into a low-power mode when it has not been used for a certain amount of time. The
monitor automatically returns to normal operation when you press a key on the keyboard. For energy
conservation, turn your monitor OFF when it is not needed, or when leaving it unattended for long periods. The
PowerSaver system operates with a VESA DPMS compliant video card installed in your computer. Use a
software utility installed on your computer to set up this feature.
State
Normal Operation
Power saving mode
EPA/ENERGY 2000
Power Switch off
Power Indicator Green Green, Blinking Black
Power Consumption Less than 34W Less than 1W(Off-mode)
This monitor is EPA ENERGY STAR® compliant and ENERGY2000
compliant when used with a computer equipped with VESA DPMS
functionality.
®
As an ENERGY STAR
Partner, SAMSUNG has determined that this
product meets the ENERGY STAR
®
guidelines for energy efficiency.
Less than 1W
(110/120 Vac)
Page 40

Preset Timing Modes
If the signal transferred from the computer is the same as the following Preset Timing Modes, the screen will
be adjusted automatically. However, if the signal differs, the screen may go blank while the power LED is on.
Refer to the video card manual and adjust the screen as follows.
Table 1. Preset Timing Modes
Horizontal
Display Mode
IBM, 640 x 350 31.469 70.086 25.175 +/-
IBM, 640 x 480 31.469 59.940 25.175 -/-
IBM, 720 x 400 31.469 70.087 28.322 -/+
MAC, 640 x 480 35.000 66.667 30.240 -/-
MAC, 832 x 624 49.726 74.551 57.284 -/-
MAC, 1152 x 870 68.681 75.062 100.00 -/-
VESA, 640 x 480 37.500 75.000 31.500 -/-
VESA, 640 x 480 37.861 72.809 31.500 -/-
VESA, 800 x 600 35.156 56.250 36.000 -/-
VESA, 800 x 600 37.879 60.317 40.000 +/+
VESA, 800 x 600 46.875 75.000 49.500 +/+
VESA, 800 x 600 48.077 72.188 50.000 +/+
VESA, 1024 x 768 48.363 60.004 65.000 -/-
Frequency
(kHz)
Vertical
Frequency
(Hz)
Pixel Clock
(MHz)
Sync Polarity
(H/V)
VESA, 1024 x 768 56.476 70.069 75.000 -/-
VESA, 1024 x 768 60.023 75.029 78.750 +/+
VESA, 1152 x 864 67.500 75.000 108.00 +/+
VESA, 1280 x 1024 63.981 60.020 108.00 +/+
VESA, 1280 x 1024 79.976 75.025 135.00 +/+
Horizontal Frequency
The time to scan one line connecting the right edge to the left edge of the
screen horizontally is called Horizontal Cycle and the inverse number of the
Horizontal Cycle is called Horizontal Frequency. Unit: kHz
Vertical Frequency
Like a fluorescent lamp, the screen has to repeat the same image many
times per second to display an image to the user. The frequency of this
repetition is called Vertical Frequency or Refresh Rate. Unit: Hz
Page 41

General
Select Model Name
SAMTRON 93V
General
Model Name SAMTRON 93V
LCD Panel
Size 19inch Diagonal
Display area 372.32 (H) x 301.56 (V)
Pixel Pitch 0.294mm (H) x 0.294mm (V)
Type a-si TFT active matrix
Synchronization
Horizontal 31 ~ 81 kHz
Vertical 56 ~ 75 Hz
Display Color
16,194,277 Colors
Resolution
Optimum resolution 1280 x 1024@60 Hz
Maximum resolution 1280 x 1024@75 Hz
Input Signal, Terminated
RGB Analog, 0.7 Vpp positive at 75 ohms
Separate H/V sync, TTL level positive or negative.
Maximum Pixel Clock
135 MHz
Power Supply
AC 90 ~ 264 VAC, 60/50 Hz ± 3Hz
Signal Cable
Page 42

15pin-to-15pin D-sub cable, Detachable
Power Consumption(maximum)
Less than 38W
Dimensions (WxDxH)/ Weight
428.0 X 61.8 X 356.0 mm (Without Stand)
428.0 X 195.7 X 430.0 mm (with Basic Stand) / 5.55kg
VESA Mounting Interface
100mm x 100mm (for use with Specialty(Arm) Mounting hardware.)
Environmental considerations
Operating Temperature: 50°F ~ 104°F(10°C ~ 40°C)
Humidity: 10% ~ 80%, non-condensing
Storage Temperature: -4°F ~113°F (-20°C ~ 45°C)
Humidity: 5% ~ 95%, non-condensing
Plug and Play Capability
This monitor can be installed on any Plug & Play compatible system. Interaction of the monitor and computer
systems will provide the best operating conditions and monitor settings. In most cases, monitor installation
will proceed automatically, unless the user wishes to select alternate settings.
Dot Acceptable
TFT LCD panel manufactured by using advanced semiconductor technology with precision of 99.999% above
is used for this product. But the pixels of RED, GREEN, BLUE and WHITE color seem to be bright sometimes
or some of black pixels could be seen. This is not from bad quality and you can use it without uneasiness.
For example, the number of TFT LCD pixels that is contained in this product are 3,932,160.
z
Note: Design and specifications are subject to change without prior notice.
PowerSaver
This monitor has a built-in power management system called PowerSaver. This system saves energy by
switching your monitor into a low-power mode when it has not been used for a certain amount of time. The
monitor automatically returns to normal operation when you press a key on the keyboard. For energy
conservation, turn your monitor OFF when it is not needed, or when leaving it unattended for long periods. The
PowerSaver system operates with a VESA DPMS compliant video card installed in your computer. Use a
software utility installed on your computer to set up this feature.
State
Normal Operation
Power saving mode
EPA/ENERGY 2000
Power Switch off
Power Indicator Green Green, Blinking Black
Power Consumption Less than 38W Less than 1W(Off-mode)
This monitor is EPA ENERGY STAR® compliant and ENERGY2000
compliant when used with a computer equipped with VESA DPMS
functionality.
®
As an ENERGY STAR
Partner, SAMSUNG has determined that this
product meets the ENERGY STAR
®
guidelines for energy efficiency.
Less than 1W
(230 Vac)
Page 43

Preset Timing Modes
If the signal transferred from the computer is the same as the following Preset Timing Modes, the screen will
be adjusted automatically. However, if the signal differs, the screen may go blank while the power LED is on.
Refer to the video card manual and adjust the screen as follows.
Table 1. Preset Timing Modes
Horizontal
Display Mode
IBM, 640 x 350 31.469 70.086 25.175 +/-
IBM, 640 x 480 31.469 59.940 25.175 -/-
IBM, 720 x 400 31.469 70.087 28.322 -/+
MAC, 640 x 480 35.000 66.667 30.240 -/-
MAC, 832 x 624 49.726 74.551 57.284 -/-
MAC, 1152 x 870 68.681 75.062 100.00 -/-
VESA, 640 x 480 37.500 75.000 31.500 -/-
VESA, 640 x 480 37.861 72.809 31.500 -/-
VESA, 800 x 600 35.156 56.250 36.000 -/-
VESA, 800 x 600 37.879 60.317 40.000 +/+
VESA, 800 x 600 46.875 75.000 49.500 +/+
VESA, 800 x 600 48.077 72.188 50.000 +/+
VESA, 1024 x 768 48.363 60.004 65.000 -/-
Frequency
(kHz)
Vertical
Frequency
(Hz)
Pixel Clock
(MHz)
Sync Polarity
(H/V)
VESA, 1024 x 768 56.476 70.069 75.000 -/-
VESA, 1024 x 768 60.023 75.029 78.750 +/+
VESA, 1152 x 864 67.500 75.000 108.00 +/+
VESA, 1280 x 1024 63.981 60.020 108.00 +/+
VESA, 1280 x 1024 79.976 75.025 135.00 +/+
Horizontal Frequency
The time to scan one line connecting the right edge to the left edge of the
screen horizontally is called Horizontal Cycle and the inverse number of the
Horizontal Cycle is called Horizontal Frequency. Unit: kHz
Vertical Frequency
Like a fluorescent lamp, the screen has to repeat the same image many
times per second to display an image to the user. The frequency of this
repetition is called Vertical Frequency or Refresh Rate. Unit: Hz
Page 44

Service
SAMTRON CANADA
SAMSUNG ELECTRONICS CANADA INC.
7037 FINANCIAL DRIVE
MISSISSAUGA, ONTARIO L5N 6R3
TEL : 1-800-726-7864
FAX : 905-542-1199
SAMTRON EUROPE
SAMSUNG ELECTRONICS GMBH
SAMSUNG-HAUS, AM KRONBERGER HANG 6
65824 SCHWALBACH/TS., GERMANY
TEL: 49 (0180) 5121213*
FAX: 49 (0180) 5121214*
* DM 0,24/MIN.
SAMTRON MEXICO :
SAMSUNG ELECTRONICS MEXICO. S.A. DE C.V.
Saturno NO.44, Col. Nueva Industrial Vallejo
Gustavo A.Madero C.P.07700, Mexico D.F. Mexico
TEL. 52-55-5747-5100
Fax. 52-55-47 52 02
RFC: SEM950215S98
http://www.samsung.com.mx/
IMPORTADO POR: SAMSUNG ELECTRONICS MEXICO. S.A. DE C.V.
EXPORTADO POR: Samsung Electronics CO.,LTD.
SAMTRON SEOUL
15TH FL, JOONGANG DAILY NEWS BLDG. 7, SOONHWA-DONG,CHUNG-KU,
SEOUL, KOREA, 100-759
TEL : (82-2) 727-3114
SAMTRON SWEDEN
SAMSUNG ELECTRONICS SYENSKA, AB
BOX 713, S- 194 27 UPPLANDS VÄSBY
TEL : 468- 590- 966- 00 FAX : 468- 590- 966- 50
Saturno NO.44, Col. Nueva Industrial Vallejo
Gustavo A.Madero C.P.07700, Mexico D.F. Mexico
TEL. 52-55-5747-5100
416, Mae tan-3dong, Yeongtong-gu,
Suwon City, Kyoungki-Do Korea
Page 45

SAMTRON TOKYO
17TH, HAMACHO CENTER BLDG. 2-31-1, NIHONBASHI-HAMACHO,
CHOU-KU, TOKYO 103, JAPAN
TEL : (81-3) 5641-9860 FAX : (81-3) 5641-9861
SAMTRON U.S.A.
SAMTRON COMPUTER PRODUCTS CUSTOMER SERVICE
400 Valley Road Suite 201, Mt. Arlington, NJ 07856
TEL : 973-601-6200, FAX : 973-601-6001
1-800-SAMTRON (1-800-726-8766)
Terms
Dot Pitch
The image on a monitor is composed of red, green and blue dots. The closer the dots, the higher the
resolution. The distance between two dots of the same color is called the 'Dot Pitch'. Unit: mm
Vertical Frequency
The screen must be redrawn several times per second in order to create and display an image for the
user. The frequency of this repetition per second is called Vertical Frequency or Refresh Rate. Unit: Hz
Example:
Horizontal Frequency
The time to scan one line connecting the right edge to the left edge of the screen horizontally is called
Horizontal Cycle. The inverse number of the Horizontal Cycle is called Horizontal Frequency. Unit: kHz
Interlace and Non-Interlace Methods
Showing the horizontal lines of the screen from the top to the bottom in order is called the NonInterlace method while showing odd lines and then even lines in turn is called the Interlace method.
The Non-Interlace method is used for the majority of monitors to ensure a clear image. The Interlace
method is the same as that used in TVs.
Plug & Play
This is a function that provides the best quality screen for the user by allowing the computer and the
monitor to exchange information automatically. This monitor follows the international standard VESA
DDC for the Plug & Play function.
Resolution
The number of horizontal and vertical dots used to compose the screen image is called 'resolution'.
This number shows the accuracy of the display. High resolution is good for performing multiple tasks as
more image information can be shown on the screen.
Example: If the resolution is 1280 x 1024 , this means the screen is composed of 1280 horizontal
If the same light repeats itself 60 times per second, this is regarded as 60 Hz.
dots (horizontal resolution) and 1024 vertical lines (vertical resolution).
For Better Display
1. Adjust computer resolution and screen injection rate (refresh rate) oncomputer as described below to
enjoy the best quality of picture. You can have an uneven quality of picture in the screen if the best
quality of picture is not provided in TFT-LCD.
Page 46

Resolution: 1280 x 1024
{
Vertical frequency (refresh rate): 60 Hz
{
2. TFT LCD panel manufactured by using advanced semiconductor technology with precision of
99.999% above is used for this product. But the pixels of RED, GREEN, BLUE and WHITE color
seem to be bright sometimes or some of black pixels could be seen.
This is not from bad quality and you can use it without uneasiness.
For example, the number of TFT LCD pixels that is contained in this product are 3,932,160.
{
3. When you clean the monitor and the panel outside, please apply the recommended small amount of
cleaner by using soft and dry cloth and polish it. Let LCD area not to be forced but to be scrubbed out
softly.
If excessive force is applied, you can have a stain on it.
4. If you are not satisfied with the quality of picture, you can get better quality of picture by executing
"auto adjustment function" in display screen that is appeared as window termination button is
pressed.
If there's still noise after automatic adjustment, use FINE/COARSE adjustment function.
5. If you view a fixed screen for an extended period of time, residual image or blurriness may appear.
Change the mode to energy save or set a screensaver to moving picture when you need to be away
from the monitor for an extended period of time.
Authority
Information in this document is subject to change without notice.
© 2004 Samsung Electronics Co., Ltd. All rights reserved.
Reproduction in any manner whatsoever without the written permission of Samsung Electronics Co., Ltd. is
strictly forbidden.
Samsung Electronics Co., Ltd. shall not be liable for errors contained herein or for incidental or
consequential damages in connection with the furnishing, performance, or use of this material.
Samsung is the registered trademark of Samsung Electronics Co., Ltd.; Microsoft, Windows and Windows
NT are registered trademarks of Microsoft Corporation; VESA, DPMS and DDC are registered trademarks
of Video Electronics Standard Association; the ENERGY STAR name and logo are registered trademarks of
the U.S. Environmental Protection Agency (EPA). As an ENERGY STAR Partner, Samsung Electronics
Co., Ltd. has determined that this product meets the ENERGY STAR guidelines for energy efficiency. All
other product names mentioned herein may be the trademarks or registered trademarks of their respective
owners.
Page 47

 Loading...