

ENGLISH
CAM MODE
VIEWER SET
LCD ADJUST
DATE / TIME
TV DISPLAY
CAM MODE
INITIAL
LCD ADJUST
DATE / TIME
TV DISPLAY
CAMERA
A/V
MEMORY
VIEWER
Advanced Recording
●
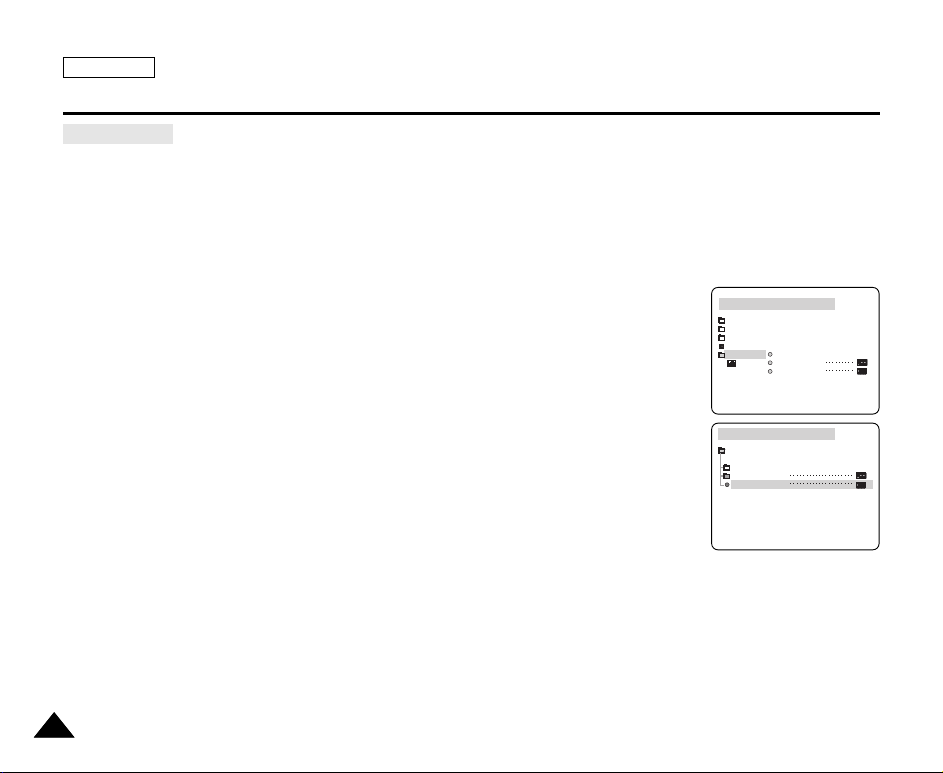
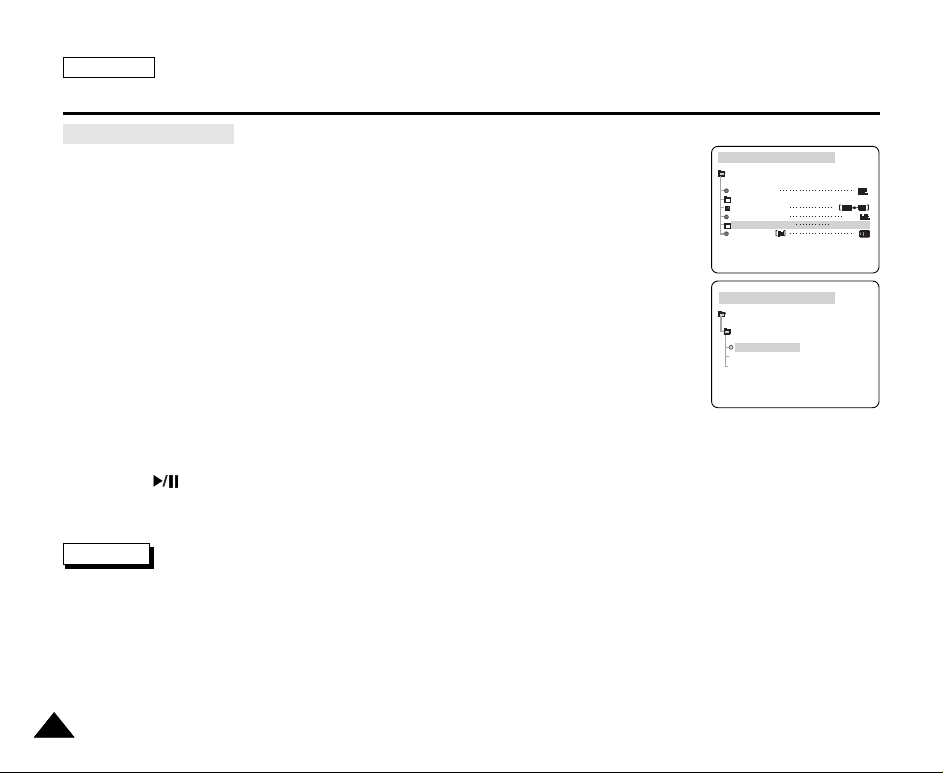
TV DISPLAY
✤ The TV DISPLAY function works in CAMERA, PLAYER, M.REC and M.PLAY modes.
✤ You can select the output path of the OSD (On Screen Display).
■
OFF: The OSD appears in the LCD screen and Viewfinder.
■
ON: The OSD appears in the LCD screen, View Finder and TV.
■
Use the DISPLAY button located at the left side of the camcorder to turn ON/OFF all of the OSD displayed on the
LCD/View Finder/TV.
1. Set the camcorder to CAMERA, PLAYER, M.REC and M.PLAY mode.
2. Press the MENU button.
■
The menu list will appear.
3. Move the MENU SELECTOR to highlight VIEWER and push the MENU SELECTOR.
4. Select the TV DISPLAY and push the MENU SELECTOR.
■
The DISPLAY mode switches between ON/OFF with each push.
5. To exit, press the MENU button.
5858

ENGLISH
1 0 : 0 0 A M
J A N . 10 , 2 0 0 4
MIRROR
Advanced Recording
Using Quick Menu(Navigation Menu)
✤ Quick menu is available only in CAMERA and M.REC mode.
✤ Quick menu is used to adjust camera functions by simply using the MENU SELECTOR button.
This feature is useful for when you want to make simple adjustments without having to access menus and submenus.
■ DATE/TIME (see page 57)
- Each time you select DATE/TIME and push the MENU SELECTOR, it will be displayed in
order of DATE - TIME - DATE/TIME - OFF.
■ WL.REMOTE( ) (see page 39)
- Each time you select WL.REMOTE and push the MENU SELECTOR, the WL.REMOTE is
switched to either enabled ( ) or disabled ( ).
■ EIS ( ) (see page 48)
- Each time you select EIS and push the MENU SELECTOR, the EIS icon is displayed or set to OFF.
■ DSE (Digital Special Effect) (see page 49)
- Each time you select DSE and push the MENU SELECTOR, the DSE preset values are applied or set to OFF.
DSE values will not switch between On and Off if they have not been preset in the menu.
■ PROGRAM AE (see page 43)
- Each time you select PROGRAM AE and push the MENU SELECTOR, you can choose between the preset PROGRAM
AE values and AUTO. You can’t choose between Auto and PROGRAM AE values if the values have not been preset in
the regular menu.
(CAMERA mode)
5959

ENGLISH
SHUTTER
MF
EXPOSURE
0 : 0 0 : 0 0
1 0 : 0 0 A M
J A N . 1 0 , 2 0 0 4
STBY
MIRROR
Advanced Recording
■ WHT. BALANCE (see page 45)
- Each time you select WHT. BALANCE and push the MENU SELECTOR, you can choose between
preset WHT.BALANCE values and AUTO. As in PROGRAM AE, you can't choose between
Auto and WHT.BALANCE values it they have not been preset.
■ FOCUS (Auto Focus/Manual Focus) (see page 64)
- Each time you select FOCUS and push the MENU SELECTOR, the FOCUS is switched to either Manual Focus (MF) or
Auto Focus ( ).
■ SHUTTER SPEED & EXPOSURE
- You can set values for SHUTTER SPEED and EXPOSURE by selecting ( ) icon and pushing the MENU SELECTOR.
For more information, see the next page.
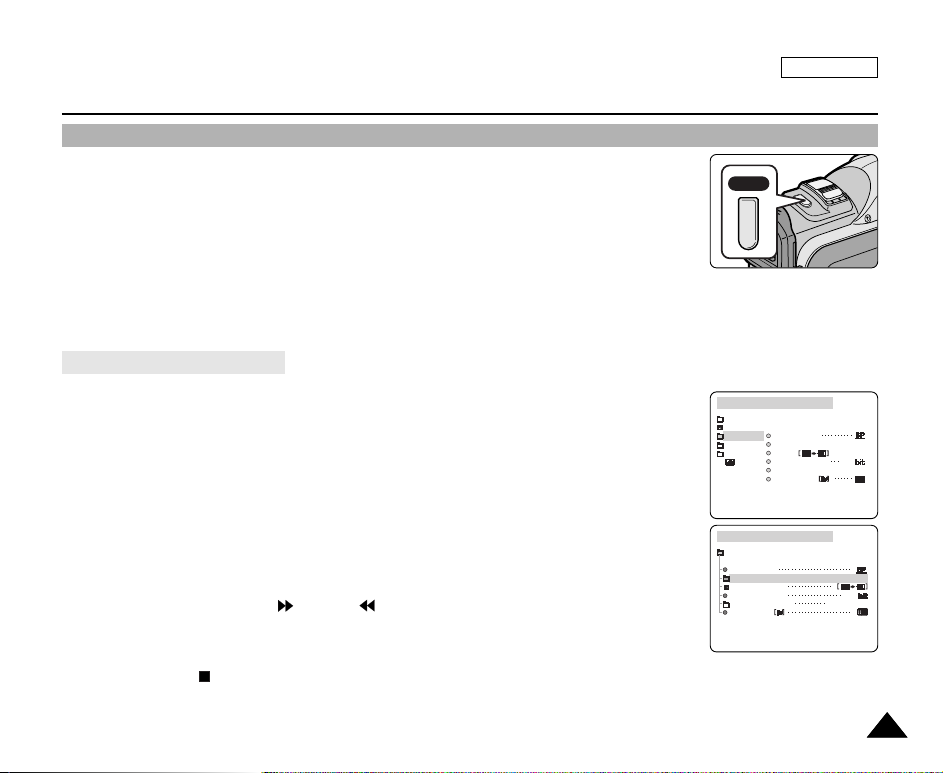
Setting the Quick menu
1. Set the camcorder to CAMERA mode.
2. Move the MENU SELECTOR to select a function you want and then push
the MENU SELECTOR to change the values.
Note
■
Quick menu function will not operate in EASY mode.
■
If you are using the M.FOCUS(MF) function,
you cannot use the Quick menu.
If you want to use the Quick menu
function, release the M.FOCUS(MF) mode.
6060
DSE
PROGRAM AE
WHT. BALANCE
FOCUS
SHUTTTER
EXPOSURE
EIS
WL.REMOTE
DATE/TIME
ENGLISH
Advanced Recording
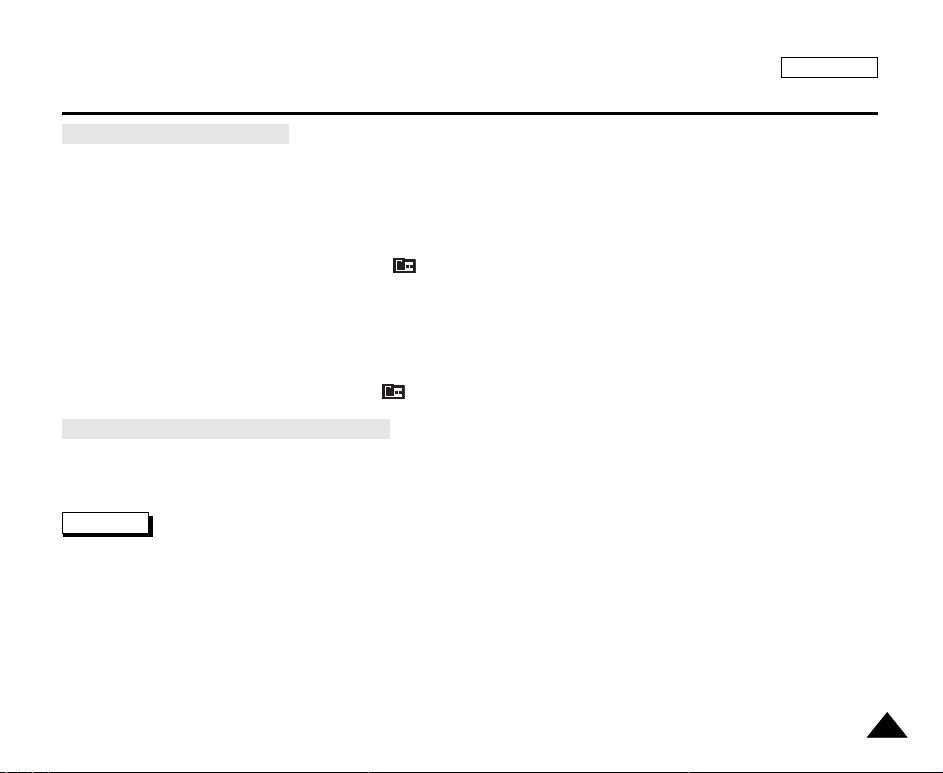
SHUTTER SPEED & EXPOSURE
✤ You can set SHUTTER SPEED and EXPOSURE only in CAMERA/M.REC mode.
✤ SHUTTER SPEED and EXPOSURE values can only be set in the Quick Menu.
✤ SHUTTER SPEED and EXPOSURE are automatically switched and/or deactivated.
1. Set the power switch to CAMERA mode.
2. Move the MENU SELECTOR until you see icon( ) on, and then push the MENU SELECTOR.
■
You see a screen on which you can select SHUTTER SPEED and EXPOSURE.
■
Move the MENU SELECTOR to select the item you want and then push the MENU SELECTOR.
■
SHUTTER SPEED can be set to 1/60, 1/100, 1/250, 1/500, 1/1000, 1/2000, 1/4000 or 1/10000.
■
Only SHUTTER SPEED up to 1/250 are available when using a M.REC mode.
■
EXPOSURE can be set between 00 and 29.
3. To exit from the setting screen, select the icon( ) and push the MENU SELECTOR.
Recommended Shutter speeds when recording
✤ Outdoor sports such as golf or tennis : 1/2000 or 1/4000.
✤ Moving cars or trains or other rapidly moving vehicles such as roller coasters : 1/1000, 1/500 or 1/250
✤ Indoor sports such as basketball : 1/100
Notes
■
If you want to use the selected shutter speed and exposure value, you should begin the recording with shutter speed and
exposure adjustment screens displayed on the LCD.
■
If you manually change the shutter speed and exposure value when Auto-exposure option is selected, the manual changes
will be applied first.
■
Image may not seem as smooth when a high shutter speed is set.
■
The camcorder returns to auto shutter setting and auto exposure setting when you change to the EASY, SLOW SHUTTER
modes.
■
When recording with a SHUTTER SPEED of 1/1000 or higher, make sure the sun is not shining into the lens.
■
When recording with a SHUTTER SPEED or EXPOSURE, the Flash function does not work.
6161

ENGLISH
SLOW SHUTTER
Advanced Recording
SLOW SHUTTER (Low Shutter Speed)
✤ The SLOW SHUTTER function works in CAMERA mode only.
✤ The shutter speed can be controlled, allowing you to record slow moving objects.
1. Set the power switch to CAMERA mode.
2. Press the SLOW SHUTTER button.
3. Each time you press the SLOW SHUTTER button, SHUTTER SPEED is changed to
S1/30, S1/15, S1/8, off.
4. To exit, press the SLOW SHUTTER button.
Notes
■
When using "SLOW SHUTTER" the image takes on a slow motion like effect.
■
The SLOW SHUTTER function will not operate in EASY mode.
■
While using the SLOW SHUTTER function, you cannot use the following functions:
- PROGRAM AE, EIS, Digital Zoom, SHUTTER SPEED, EXPOSURE, DSE, MEMORY MIX, Flash
■
When using “SLOW SHUTTER” function, the focus is adjusted slowly and sometimes the white dots will appear on the
screen, this is not a fault.
6262

ENGLISH
0 : 0 0 : 0 0
1 0 : 0 0 A M
J A N . 1 0 , 2 0 0 4
STBY
EASY
5 5 min
EASY
Advanced Recording
EASY Mode (for Beginners)
✤ The EASY mode allows a beginner to easily make good guality video recordings.
■
The EASY mode only operates in CAMERA mode.
1. Set the power switch to CAMERA mode.
2. By pressing the EASY button, all functions on the camera will be set to off and the recording
settings will be set to the following basic modes:
■
Battery level, recording mode, counter, DATE/TIME, and EIS ( ) will be displayed.
■
The word “EASY.Q” will appear on the LCD at the same time.
However, the DATE/TIME will only be seen if it has been previously set. (see page 57)
3. Press START/STOP to start recording.
■
Recording will begin using the basic automatic settings.
4. Pressing the EASY button again turns the EASY mode off.
■
The camera will return to the settings that were set prior to activating EASY mode.
Notes
■
In EASY mode, certain functions are not available, such as MENU, BLC, AF/MF.
- If you want to use these functions, you must first switch the EASY mode off.
■
The EASY mode settings are deleted when the battery pack is removed from the camcorder and therefore must be reset
when a battery pack has been replaced.
6363
ENGLISH
MF
0 : 0 0 : 0 0
5 3 min
1 0 : 0 0 A M
J U N . 8 , 2 0 0 4
STBY
Advanced Recording
AF/MF (Auto Focus/Manual Focus)
✤ The AF/MF function works in CAMERA, M.REC mode only.
✤ In most situations, it is better to use the automatic focus feature, as it enables you
to concentrate on the creative side of your recording.
✤ Manual focusing may be necessary under certain conditions that make automatic
focusing difficult and/or unreliable.
Auto Focusing
✤ If you are inexperienced in the use of camcorders, we recommend that you
make use of Auto Focus.
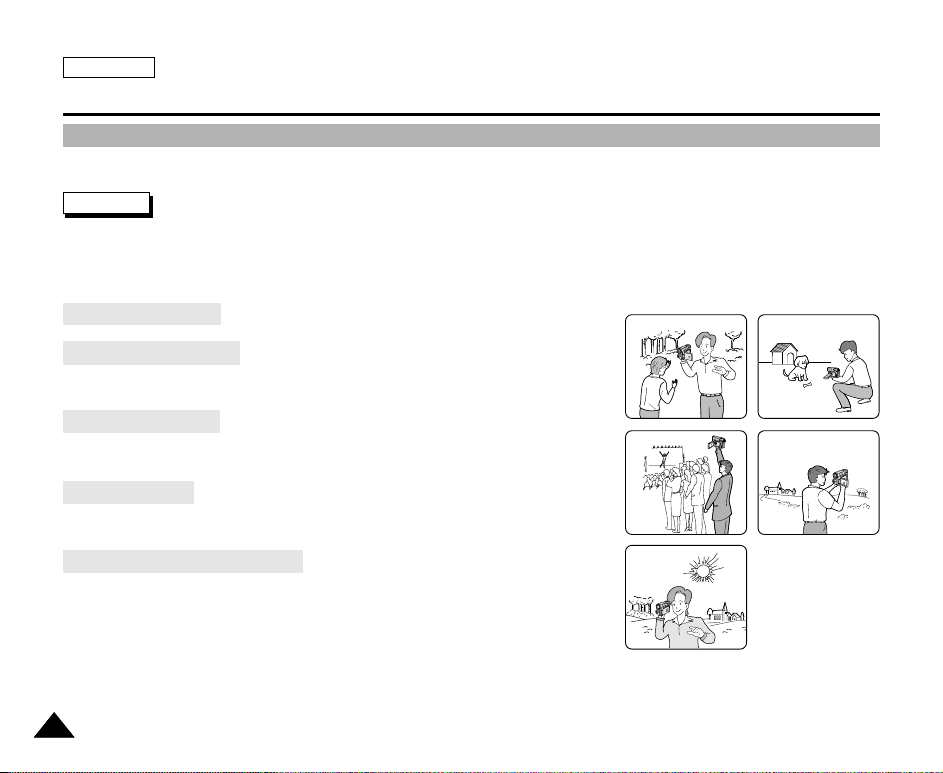
Manual Focusing
✤ In the following cases you may obtain better results by adjusting the focus
manually.
a. A picture containing several objects, some
close to the camcorder, others further away.
b. A person enveloped in fog or surrounded by snow.
c. Very shiny or glossy surfaces like a car.
d. People or objects moving constantly or quickly like an athlete or a crowd.
1. Set the power switch to CAMERA mode.
2. Move the MENU SELECTOR up or down until the FOCUS is highlighted and then
push the MENU SELECTOR.
■
M. FOCUS(MF) will display.
3. Move the MENU SELECTOR up or down until the object is in focus.
■
Zoom out a little if focusing is difficult.
4. To return to AF (Auto Focus: ), push the MENU SELECTOR again.
a
c
1
2
M. FOCUS
b
d
3
6464

Advanced Recording
BLC
BLC (Back Light Compensation)
✤ BLC works in CAMERA/M.REC mode.
✤ Back lighting exists when the subject is darker than the background:
■
The subject is in front of a window.
■
The person to be recorded is wearing white or shiny clothes and
is placed against a bright background; the person’s face is too dark to
distinguish his/her features.
■
The subject is outdoors and the background is overcast.
■
The light sources are too bright.
■
The subject is against a snowy background.
1. Set the power switch to CAMERA mode.
2. Press the BLC button.
■
Normal - BLC - Normal
■
BLC enhances the subject.
Note
■
The BLC function will not operate in EASY mode.
ENGLISH
* BLC on* BLC off
6565
ENGLISH
FADE
FADE
Advanced Recording
Fade In and Out
✤ The FADE function works in CAMERA mode only.
✤ You can give your recordings a professional look by using special effects such as fading in at the beginning of a sequence or
fading out at the end of a sequence.
STBY
To Start Recording
1. Before recording, hold down the FADE button.
The picture and sound gradually disappear (fade out).
2. Press the START/STOP button and at the same time release
the FADE button. Recording starts and the picture and sound
gradually appear (fade in).
➔
➔
➔
➔
0:00:00
REC
0:00:15
To Stop Recording (use FADE IN / FADE OUT)
3. When you wish to stop recording, hold down the FADE button.
The picture and sound gradually disappear (fade out).
4. When the picture has disappeared,
press the START/STOP button to stop recording.
a. FADE OUT
(Approx. 4 seconds)
b. FADE IN
(Approx. 4 seconds)
6666
Hold down the FADE button a. FADE OUT Gradual disappearance
Gradual appearance b. FADE IN Release the FADE button
➔
➔
➔
➔
REC
0:00:15
STBY
0:00:20

Advanced Recording
MIC
A/V
DC IN
Audio dubbing
✤ The AUDIO DUBBING function only works in PLAYER Mode.
✤ You can add sound to the original sound on a pre-recorded tape, recorded in SP mode with 12bit sound.
✤ Use the internal and external microphones or other audio equipment.
✤ The original sound will not be erased.
Dubbing sound
1. Set the camcorder to PLAYER mode.
■
If you want to use an external microphone, connect the microphone to the
external MIC input jack on the camcorder.
2. Press the (PLAY/STILL) button and find the timeframe of the scene to
be dubbed.
3. Press the (PLAY/STILL) button to pause the scene.
4. Press the A.DUB button on the Remote Control.
■
A.DUB will be displayed on the LCD.
■
The camcorder is in a ready-to-dub state for dubbing.
5. Press the (PLAY/STILL) button to start dubbing.
■
Press the (STOP) button to stop the dubbing.
Notes
■
You can not use the audio dubbing function while playing a write protected video tape.
■
When adding sound using the built-in microphone, make sure not to connect any cables to the camcorder.
■
You can not dub sound on a pre-recorded tape in LP mode or 16 bit mode.
ENGLISH
6767
ENGLISH
PLAYER MODE
A / V SET
AUDIO SELECT
SOUND [ 1 ]
SOUND [ 2 ]
MIX [ 1 + 2 ]
PLAYER MODE
REC MODE
PHOTO SEARCH
PHOTO COPY
AUDIO MODE 12
SOUND[1]
AUDIO SELECT
WIND CUT
A / V SET
Advanced Recording
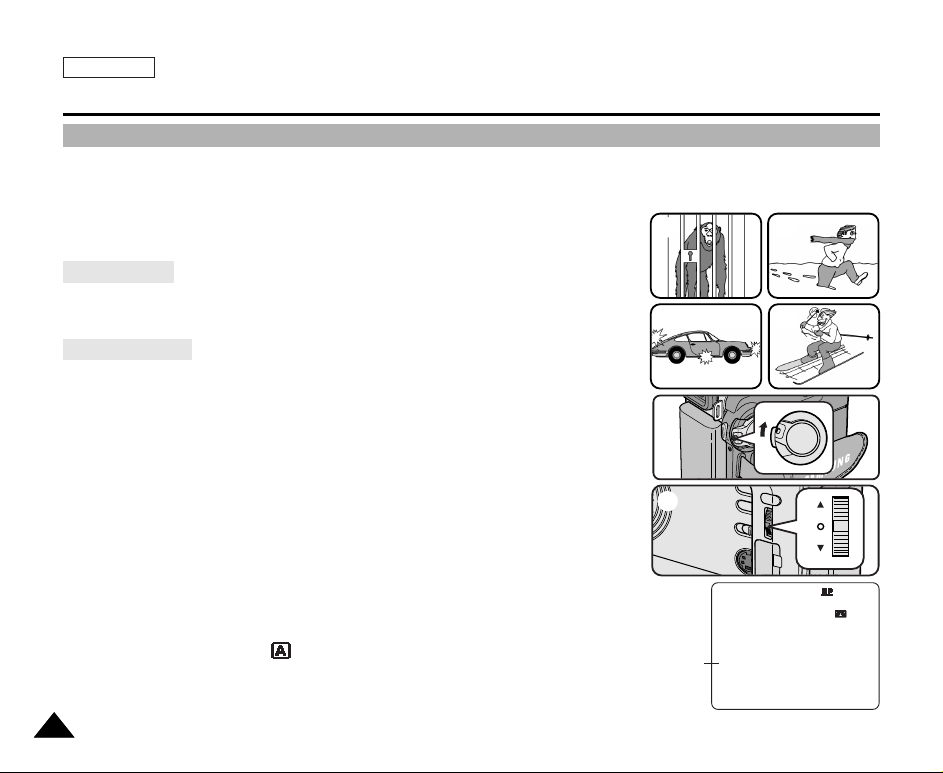
Dubbed audio Playback
1. Insert the dubbed tape and press MENU button.
2. Move the MENU SELECTOR to highlight A/V.
3. Push the MENU SELECTOR to enter the sub-menu.
4. Use the MENU SELECTOR to select AUDIO SELECT from the submenu.
5. Push the MENU SELECTOR to enter the sub-menu.
6. Using the MENU SELECTOR, select the AUDIO playback channel.
■
Push the MENU SELECTOR to confirm the audio playback channel.
- SOUND1 : play the original sound.
- SOUND2 : play the dubbed sound.
- MIX(1+2) : play back SOUND1 and 2 equally mixed.
7. To exit, press the MENU button.
8. Press the (PLAY/STILL) button to playback the dubbed tape.
Note
■
When you playback added sound (SOUND2 or MIX mode), you may experience loss of sound quality.
6868
Advanced Recording
PLAYER MODE
INITIAL
WIND CUT
REC MODE
PHOTO SEARCH
COPY
AUDIO MODE 12
AUDIO SELECT
CAMERA
A/V
MEMORY
VIEWER
PLAYER MODE
REC MODE
PHOTO SEARCH
PHOTO COPY
AUDIO MODE 12
SOUND[1]
AUDIO SELECT
WIND CUT
A / V SET
PHOTO
PHOTO Image Recording
1. Press the PHOTO button lightly (about halfway down) and hold it.
■
The still picture appears on the LCD monitor.
■
If you do not wish to record, release the button.
2. Press the PHOTO button fully down.
■
The still picture is recorded for about 6~7 seconds.
3. After the PHOTO has been recorded, the camcorder returns to STBY mode.
Searching for a PHOTO picture
✤ The PHOTO SEARCH works in PLAYER mode only.
1. Press the MENU button.
(or press the PHOTO SEARCH button on the remote control.)
■
The MENU list will appear.
2. Move the MENU SELECTOR to highlight A/V.
3. Push the MENU SELECTOR to enter the sub-menu.
4. Select PHOTO SEARCH from the sub-menu and push the MENU SELECTOR.
5. Search the PHOTO using the (FF) and (REW) buttons.
■
The PHOTO search process appears on the LCD while you are searching.
■
After completing the search, the camcorder displays the still image.
6. To exit, press the (STOP) button.
ENGLISH
6969
ENGLISH
Advanced Recording
Various Recording Techniques
✤ In some situations different recording techniques may be required for more dramatic results.
Note
Please rotate the LCD screen carefully as excessive rotation may cause damage to the inside of the hinge that connects the
LCD screen to the Camcorder.
1. General recording.
2. Downward recording.
Making a recording with a top view of the LCD screen.
3. Upward recording.
Making a recording viewing the LCD screen from below.
4. Self recording.
Making a recording viewing the LCD screen from the front.
5. Recording with the Viewfinder.
■
In circumstances where it is difficult to use the LCD monitor,
the viewfinder can be used as a convenient alternative.
7070
1 2
3
5
4

Playback
S-VIDEO
MIC
A/V
DC IN
Tape Playback
✤ The playback function works in PLAYER mode only.
Playback on the LCD
✤ It is practical to view a tape using the LCD when in a car or outdoors.
Playback on a TV monitor
✤ To play back a tape, the television must have a compatible color system.
✤ We recommend that you use the AC Power Adapter as the power source for the camcorder.
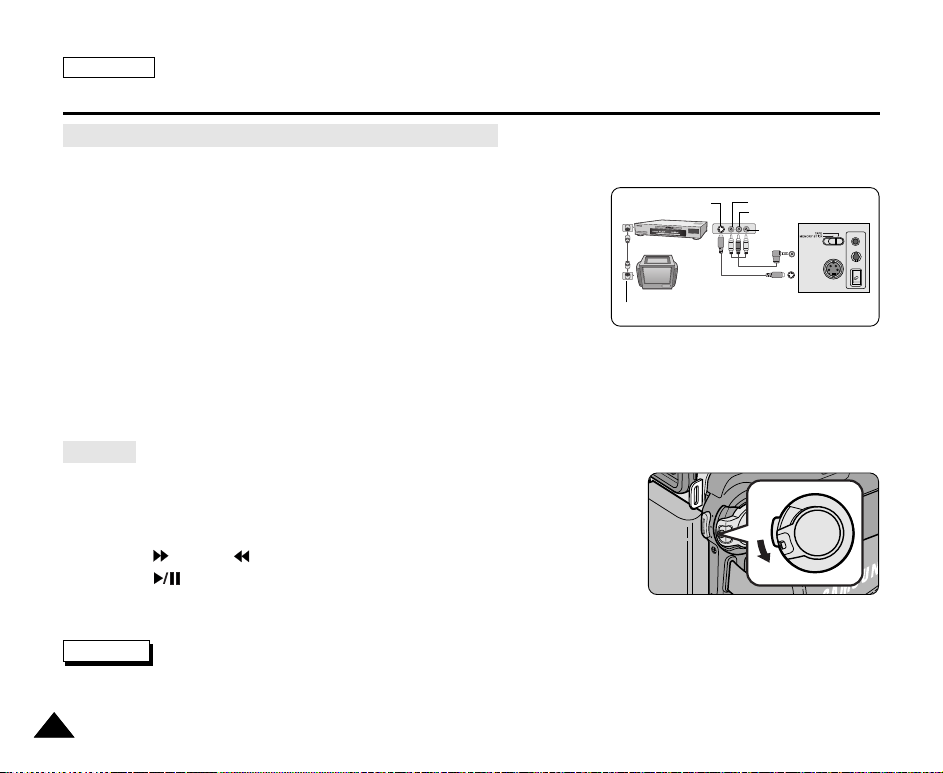
Connecting to a TV which has Audio/Video input jacks
1. Connect the camcorder and TV with the AUDIO/VIDEO cable.
■
The yellow plug : Video
■
The white plug : Audio(L)
■
The red plug : Audio(R) - STEREO only
S-VIDEO input
TV
- If you connect to a monaural TV or VCR, connect the yellow plug
(Video) to the video input of the TV or VCR and the white plug (Audio L) to
the audio input of the TV or VCR.
2. Set the power switch on the camcorder to PLAYER mode.
3. Turn on the TV and set the TV/VIDEO selector on the TV to VIDEO.
■
Refer to the TV or VCR user’s manual.
4. Play the tape back.
Notes
■
You may use the S-VIDEO cable to obtain better quality pictures if you have an S-VIDEO connector on your TV.
■
If you use a S-VIDEO cable, you will need to connect an audio cable.
■
If you connect the cable to the Audio/Video Jack, you will not hear sound from the Camcorder’s speakers.
Video input-Yellow
Audio input
(left)-White
Audio input
(right)-Red
ENGLISH
Camcorder
A/V
S-VIDEO
7171
ENGLISH
S-VIDEO
MIC
A/V
DC IN
Playback
Connecting to a TV which has no Audio and Video input jacks
✤ You can connect your camcorder to a TV through a VCR.
1. Connect the camcorder and VCR with the AUDIO/VIDEO cable.
■
The yellow plug : Video
■
The white plug : Audio(L) - Mono
■
The red plug : Audio(R)
2. Connect a TV to the VCR.
3. Set the power switch on the camcorder to PLAYER mode.
4. Turn on both the TV and VCR.
■
Set the input selector on the VCR to LINE.
■
Select the channel reserved for your VCR on the TV set.
5. Play the tape back.
Playback
✤ You can play the recorded tape in PLAYER mode.
1. Connect a power source and set the power switch to PLAYER mode.
2. Insert the tape you wish to play back.
3. Using the (FF) and (REW) buttons, find the first position you wish to play back.
4. Press the (PLAY/STILL) button.
■
The images you recorded will appear on the TV after a few seconds.
■
If a tape reaches its end while being played back, the tape will rewind automatically.
Note
■
The playback mode (SP/LP) is selected automatically.
7272
ANTENNA
S-VIDEO
VCR
TV
VIDEO
AUDIO(L)
AUDIO(R)
A/V
S-VIDEO
CAMCORDER

ENGLISH
REC SEARCH FADE BLC
REV FWD
EASY
MULTI DISP.
Playback
Various Functions while in PLAYER mode
✤ The PLAY/STILL, STOP, FF, REW buttons are located on the camcorder and the Remote Control.
✤ The F.ADV(Frame advance), X2, SLOW buttons are located on the Remote Control only.
✤ To prevent tape and head-drum wear, your camcorder will automatically stop if it is left in STILL or SLOW modes for more
than 3 minutes.
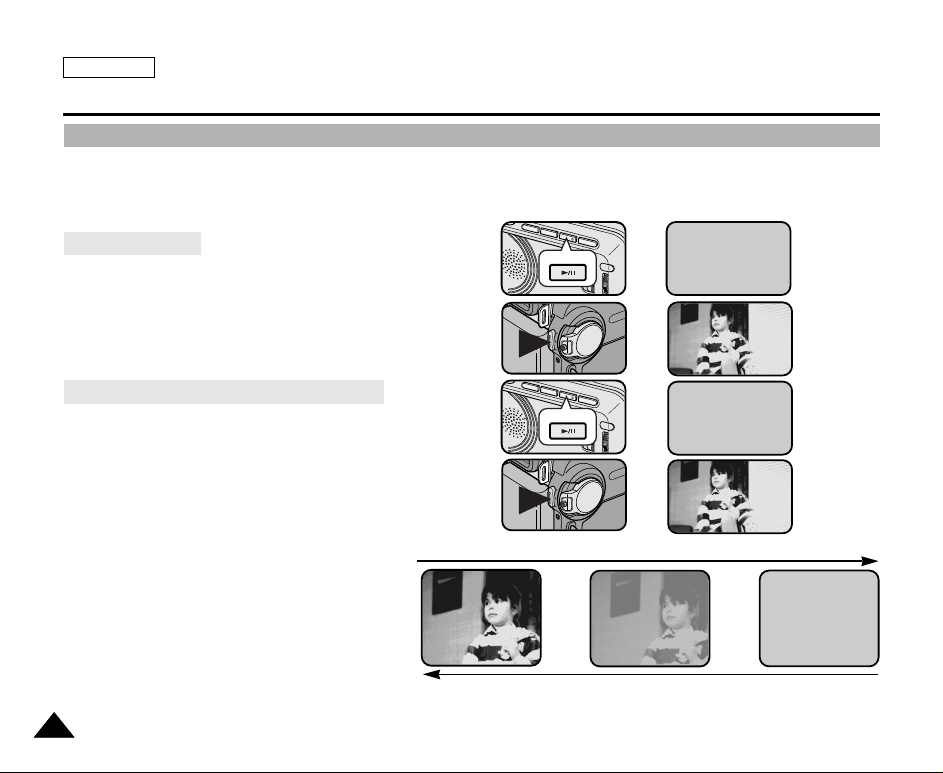
Playback pause
✤ Press the (PLAY/STILL) button during Playback.
✤ To resume playback, press the (PLAY/STILL) button.
Picture search (Forward/Reverse)
✤ Press the (FF) or (REW) buttons once during Playback or Still mode.
To resume normal playback, press the (PLAY/STILL) button.
✤ Keep pressing (FF) or (REW) buttons during Playback or Still mode.
To resume normal playback, release the button.
Slow playback (Forward/Reverse)
✤ Forward Slow Playback
■
Press the SLOW button on the remote control during Playback.
■
To resume normal playback, press the (PLAY/STILL) button.
✤ Reverse Slow Playback
■
Press the (_) button during Forward Slow Play back.
■
To resume forward slow playback, press the (+) button.
■
To resume normal playback, press the (PLAY/STILL) button.
7373
ENGLISH
Playback
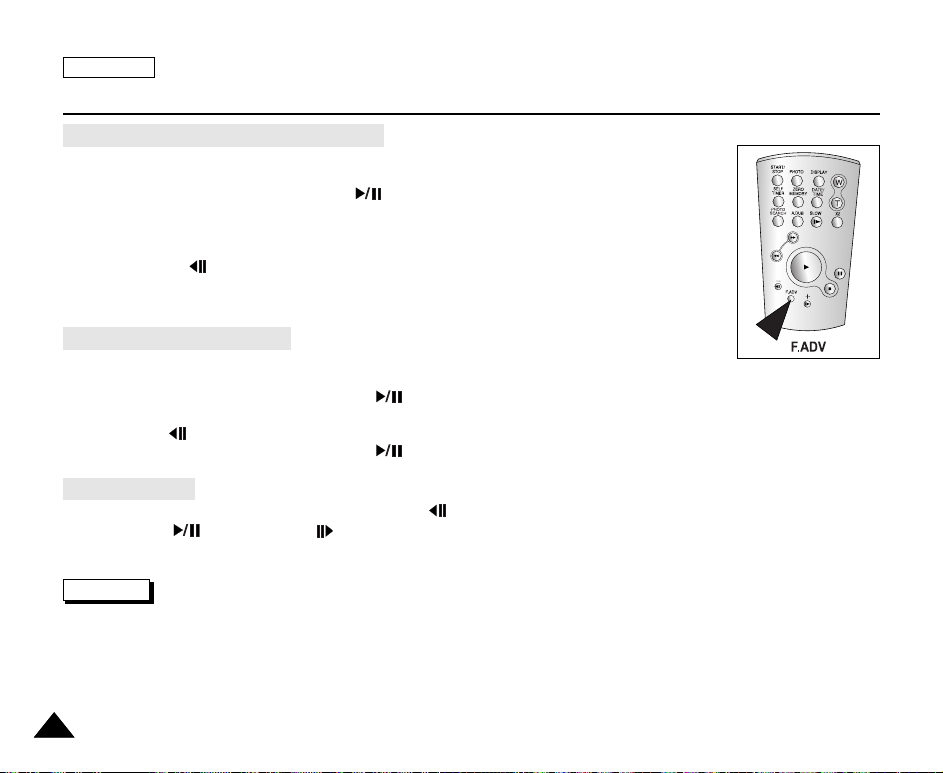
Frame advance (To play back frame by frame)
● Press the F.ADV button on the Remote Control while in Still mode.
The F.ADV function works in still mode only.
● To resume normal playback, press the (PLAY/STILL) button.
✤ Forward frame advance
■
Press the F.ADV button on the remote control in Still mode.
✤ Reverse frame advance
■
Press (_) the button on the remote control to change the direction in
F.ADV mode.
■
Press the F.ADV button on the remote control.
X2 Playback (Forward/Reverse )
✤ Forward X2 Playback
■
Press the X2 button on the Remote Control during Playback.
■
To resume normal playback, press the (PLAY/STILL) button.
✤ Reverse X2 Playback
■
Press (_) the button during during Forward X2 Playback
■
To resume normal playback, press the (PLAY/STILL) button.
Reverse playback
✤ To playback in reverse at normal speed, press the (_) button during normal forward playback.
✤ Press the (PLAY/STILL) or (+) button to return to normal forward playback.
Notes
■
Mosaic shaped distortion may appear on the screen while in some of the various playback modes.
- Mosaic shaped distortion or noise may be experienced when you play back tapes recorded in LP which contain various
playback functions.
■
Sound will only be heard during normal SP or LP playback.
7474
 Loading...