How it Works
Log In / Sign Up
Buy Points
How it Works
FAQ
Contact Us
Questions and Suggestions
Users
Samson
Loading...
A
AirLine
4
AirLine 77
5
AirLine 77 AH7
Airline 77 Series
Airline 77 UHF TD Wireless with Qe Fitness Headset
Airline 77 UHF TD Wireless with QL5 Lavalier
AirLine 88
2
AirLine 88 AG8 Guitar
AirLine 88 Series
AirLine AF1
2
AirLine AG1
2
AirLine AH1/35X
AirLine AH1/QE
AirLine AH1/QV
AirLine AL1
2
Airline AM1
AirLine AP1
2
AirLine AP1B
AirLine AR1
2
Airline AX1
2
AirLine Micro
5
AirLine Micro Camera
3
Airline Micro E1
AirLine Micro Earset
2
Airline Synth UHF Wireless Handheld Microphone System
AirLine UM1
2
AirLine UR1
4
AL1
3
AL1 P
AL300
AP1
AP1B
AR1
2
AR2
2
AR2D
AR300
2
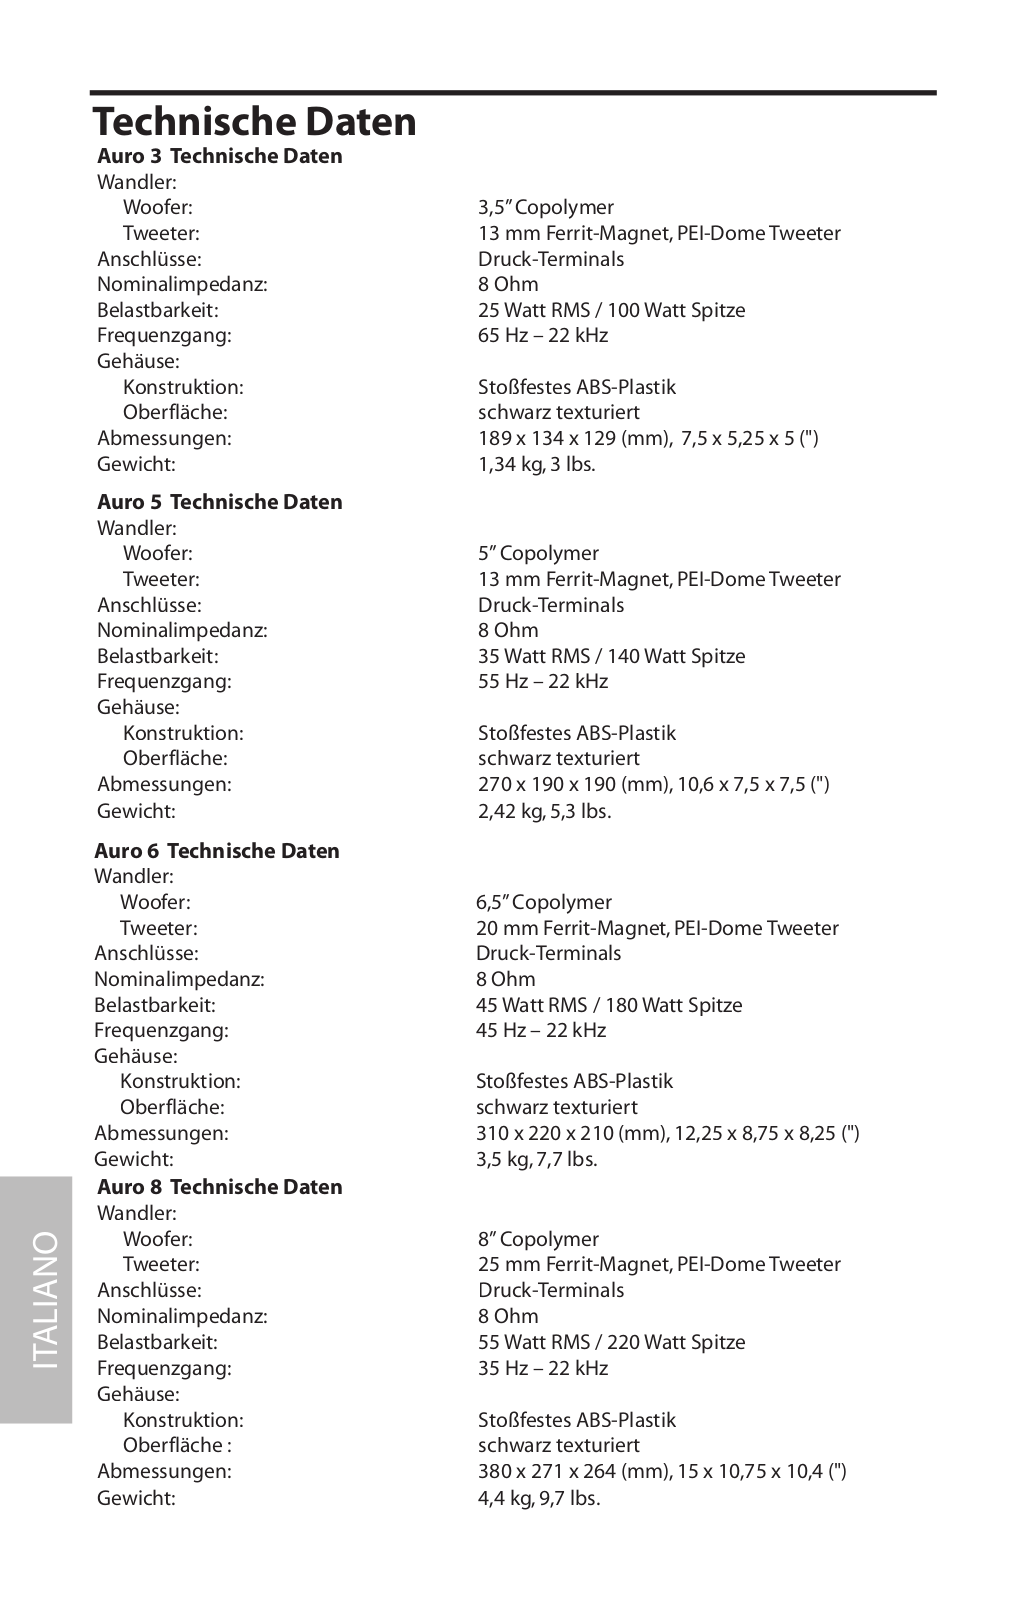
AURO3
AURO 415
AURO5
AURO6
AURO8
auro D12
auro D1200
2
auro D15
Auro D1500
Auro D208
2
Auro D209
auro D210
2
AURO D412
2
Auro D415
Auro X12D
Auro X15D
AURO X15DA
AWX
AX1
3
AX300
B
B90
BASS PRE-AMP
BR14a
BR14b
BR14b-Type HD
BR14c
BR14e
BR14p-Type PSA
BR14t
BR 26l
BR 26t
BR 26v
BR 26x
BR 31a DAP
BR 31a Series
BR 31a SRP
BR74b
BRS-2001
BT3
BT30
3
BT4
BT5
C
C01
C01U
3
C01UPRO
6
C02
2
C03
C03U
2
C03UCW
C05
C05CL handheld condensator zangmicrofoon
Carbon 49
2
Carbon 61
3
Cardioid Q2
2
CB88
C com 16
2
CCOMOPTI
2
C-Control
2
CHANNEL MIXER
CL2
CL5
CL7
C valve
C.valve C Class
Loading...
Loading...
Nothing found
AURO5
User Manual
62 pgs
23.4 Mb
0
Table of contents
Loading...
Samson AURO6, AURO8, AURO5, AURO3 User Manual
...
Samson User Manual
Download
Specifications and Main Features
Frequently Asked Questions
User Manual
Download
Loading...
+
hidden pages
Unhide
You need points to download manuals.
1 point = 1 manual.
You can buy points or you can get point for every manual you upload.
Buy points
Upload your manuals
 Loading...