

Page 1
Instruction Manual
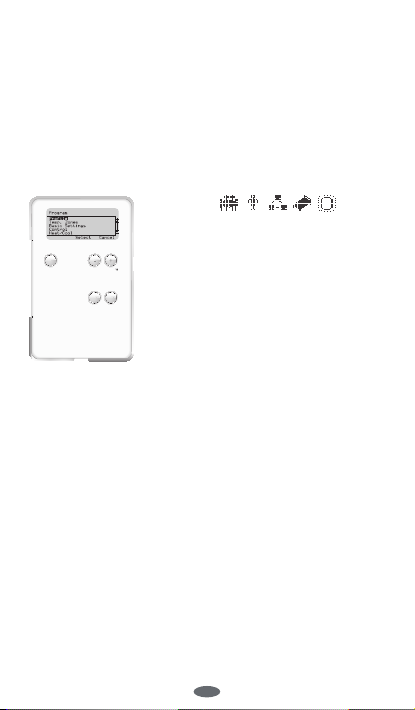
Menu
Select Cancel
Model no. ERT 52
EN Programmable room-thermostat
Page 2
SYSTEM INITIAL
Cancel
Menu
Select
Cancel
Menu
Select
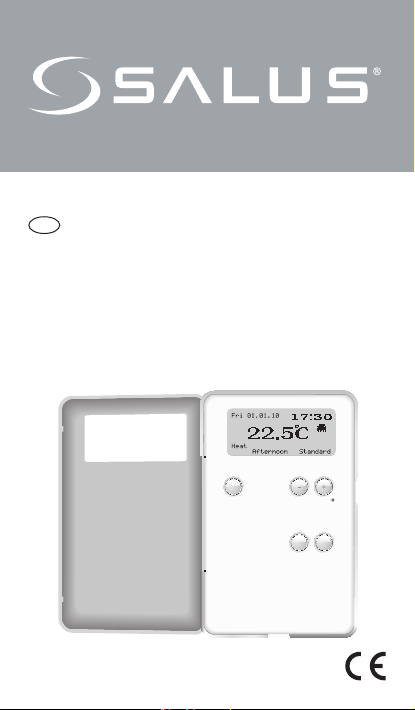
After connecting 230V AC or pressing
reset button, please select the Language,
Date and Time.
Press + or - to select
language then press
Select buttons to
confirm language
Remark: The default is
English.
LCD prompts user to
select Date, time and
Daylight Saving.
Press + or - to change the
value of Date, 24/12hr,
Time and Daylight Saving.
Press Select buttons to
next setting values.
Remark: DD/MM/YY
is different for the
different language.
2
GB
Page 3

NAVIGATION
Select Cancel
Menu
Menu
Select Cancel
Select Cancel
Menu
1
In the normal display,
press any key to activate
the display and turn on
the backlight. Access the
Main Menu by pressing
the Menu Button.
2
Navigate through the
menu by pressing – for
lower and + for higher
entries.
3
Enter the selected topic
by pressing the select
Button or leave to the
previous menu without
any changes by pressing
cancel.
GB
3
Page 4
BASIC OPERATION
Menu
Select Cancel
Menu
Select Cancel
Menu
Select Cancel
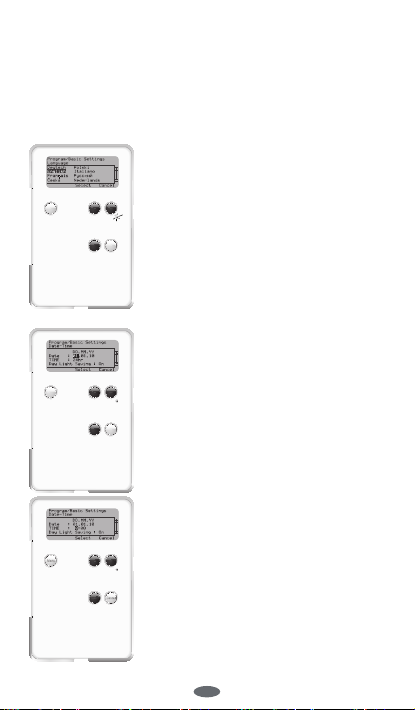
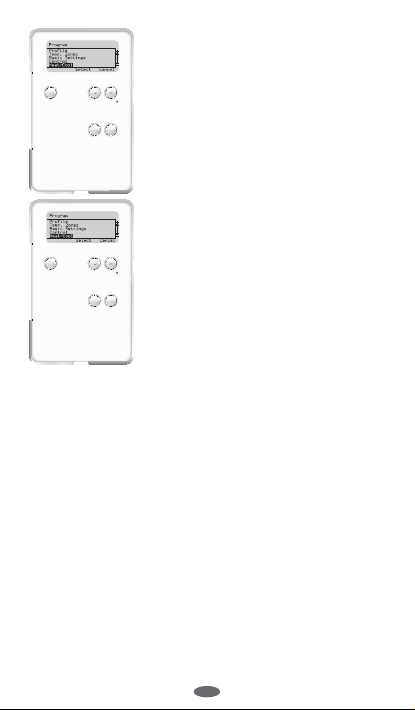
Change Display
The Change Display-Menu
offers the Full Screen,
Selected Screen and Basic
Screen view.
Change Profile
In the Change Profile-Menu
you can choose between
the Family, Single, Office,
Name 1 and Name 2
Profile.
Change Holiday
In the Change HolidayMenu you can make your
holidays settings and turn
them On or Off.
4
GB
Page 5
BASIC OPERATION
Menu
Select Cancel
Menu
Select Cancel
Menu
Select Cancel
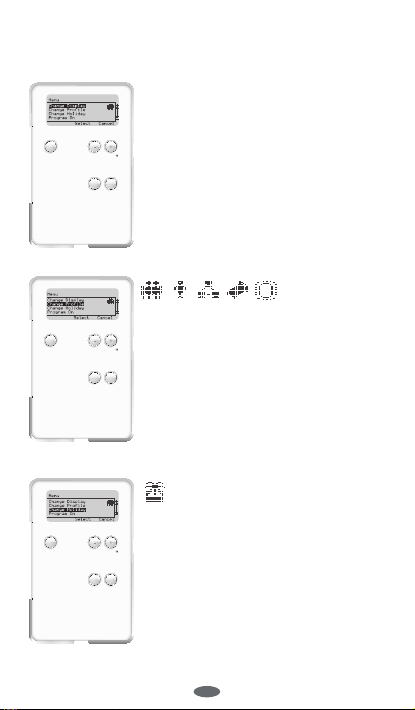
Program On/Off
In the Program-Menu
you can choose between
Program or Manual
operation mode.
Key Lock
By pressing the – and +
button for a few seconds,
a Key Lock can be activated
to protect the device from
failure operation.
Manual operation
By pressing the – or + buttons,
the manual operation mode
will be activated. Current
Programs will be overwritten
until the next daytime starts.
GB
5
Page 6

PROGRAM-MENU
Select Cancel
Menu
Menu
Select Cancel
Menu
Select Cancel
Program Menu
To access the programmenu, open the hatch
and press – button twice
and then press select and
cancel at the same time for
a few seconds.
Basic Settings
Enter the Basic SettingsMenu to adjust Date/Time
(24, 12 hrs), Language and
Maintenance settings.
Temp. Zones
Enter the Temp. ZonesMenu to adjust the
temperatures of the
Comfort, Standard and
Reduced zones.
6
GB
Page 7
The three temperature zones can be
Menu
Select Cancel
allocated to the six day times. If you modify
a temperature zone, the temperaturesettings within the profiles will change
as well. The zones are preinstalled with
these temeratures:
Comfort 24°C Standard 20°C Reduced 16°C
Profile
Enter the Profile-Menu to
adjust the detailed settings
of the Family, Single,
Office, Name 1 and Name
2 Profiles.
Daytimes Time Family Single Office Name 1 Name 2
Early Morning 06:00 - 08:00 Comfort Comfort Comfort Comfort Comfort
Morning 08:00 - 12:00 Standard Standard Standard Standard Standard
Noon 12:00 - 14:00 Comfort Comfort Comfort Comfort Comfort
Afternoon 14:00 - 18:00 Standard Standard Standard Standard Standard
Mon - Fri
Evening 18:00 - 23:00 Comfort Comfort Comfort Comfort Comfort
Night 23:00 - 06:00 Reduced Reduced Reduced Reduced Reduced
Early Morning 06:00 - 08:00 Comfort Comfort Comfort Comfort Comfort
Morning 08:00 - 12:00 Standard Standard Standard Standard Standard
Noon 12:00 - 14:00 Comfort Comfort Comfort Comfort Comfort
Afternoon 14:00 - 18:00 Standard Standard Standard Standard Standard
Sat - Sun
Evening 18:00 - 23:00 Comfort Comfort Comfort Comfort Comfort
Night 23:00 - 06:00 Reduced Reduced Reduced Reduced Reduced
GB
7
Page 8
Heat/Cool
Menu
Select Cancel
Menu
Select Cancel
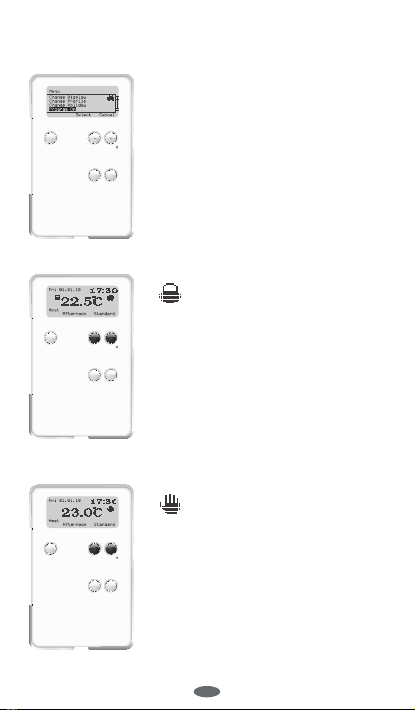
Enter the Heat/Cool-Menu
to activate the Heat or Cool
function of the device.
Control
Enter the Control-Menu
to make changes on the
Span, Communicate,
Frost*, Output ,VP and
Temperature Offset
settings.
* Thermostat serves as
protection against frost and
keeps temperature constant
at 5°C.
Communicate :
NSB On = Night Setback On
NSB Off = Night Setback Off
Com Off = Heat/Cool + Night
Setback Off
Com 4ºC = Heat/Cool + Night
Setback 4ºC
Com 2ºC = Heat/Cool + Night
Setback 2ºC
8
GB
Page 9

Com signal control not only Night
Setback, but also Heat/ Cool selection to
the slaves
Note : If you install ERT 22 or 32 in your
system, ERT 52 can control them via the
communication terminal.
The Heat/Cool and the Setback 2ºC
or 4ºC can be selected by ERT 52
via communication terminal. At this
moment, the original settings of Heat/
Cool and setback of ERT 22 and ERT 32
will be overridden by ERT 52.
GB
9
Page 10

Purpose and correct use:
The ERT 52 room thermostat is an
electronic digital temperature control
system for electrical control of hot-water
and heating systems, and functions as a
trigger for electro-thermal actuators or
other electrical devices
It may be used only in dry and closed
rooms. Relative air humidity in the room
may not exceed 95%.
This thermostat may be installed only
by qualified electricians in accordance
with these fitting instructions. These
professionals are responsible for
observing existing standards and
regulations.
Installation must always be implemented
while device is disconnected from
the mains, with due regard for safety
regulations.
The thermostat must be positioned so
that it is not covered by net curtains,
furniture or other objects. The control unit
must not be installed in the immediate
vicinity of heat sources either (e.g. lights,
fireplaces, direct sunlight, etc), and
should not be impaired by draughts.
Only in this way will room temperature
be detected with precision, with exact
control being implemented accordingly.
Important: disconnect thermostat from
mains before opening.
10
GB
Page 11

DATA SPECIFICATION SHEET
Operating voltage: 230V AC / 50Hz
Max. switching current: 4 (2) A
Protection class: IP 30
Dimensions W/H/D: 84 mm / 132 mm / 30 mm
Temperature setting
range: 10°C - 35°C
Operation temperature 0°C - 40°C
Storage temperature: -20°C - 60°C
Agency approved CE
GB
11
Page 12

WALL MOUNTING
N
Before mounting,
separate housing
cover from base plate.
Proceed as follows:
- Loosen screw located on lower side.
- Open the housing by pulling off the
housing cover on the lower side, then
lift off.
- Now mount the base plate with the
supplied screws firmly to the wall, or
onto the flush-mounting container.
Do not mount the thermostat ERT52 on
electricaly conductive surfaces.
12
GB
Page 13

WIRING PLAN
N
N
Wire the thermostat only in accordance with
the wiring plan below:
Version 230 V
Terminal
N Neutral wire
L 230 VAC supply
Switch output (actuator, terminal
ç
strip)
Supply for Setback / communication
º
terminal output
GB
13
Page 14

German Office
SALUS Controls GmbH
Deutschland
Dieselstr. 34
D-63165 Mühlheim am Main
Tel. 06108 825 850
www.salus-controls.de
Email: info@salus-controls.de
UK Office
Salus Controls plc, Salus House,
Dodworth Business Park South,
Whinby Road, Dodworth,
Barnsley S75 3SP
Tel: 01226 323961
www.salus-tech.com
Email: tech@salus-tech.com
14
GB
Page 15

Bedienungsanleitung
Menu
Select Cancel
Modellnr. ERT 52
DE Programmierbarer Raumthermostat
Page 16

Systeminitialisierung
Cancel
Menu
Select
Cancel
Menu
Select
Nach dem erstmaligen Einschalten oder
nach dem betätigen des Resets, können
Sie Sprache, Datum und Zeit einstellen.
Mit den Tasten + und
- gelangen Sie zu der
gewünschten Sprache.
Mit Select übernehmen
Sie die ausgewählte
Sprache.
Anschließend werden
Datum und Uhrzeit
mit Hilfe der - und +
Tasten ausgewählt und
mit der Select-Taste
übernommen.
Im Menü Sommerzeit
können Sie die
Sommerzeit aktivieren/
deaktivieren.
2
DE
Page 17

NAVIGATION
Select Cancel
Menu
Menu
Select Cancel
Select Cancel
Menu
1
Drücken Sie bei normaler
Display-Anzeige eine
beliebige Taste, um das
Display zu aktivieren und
die Hintergrundbeleuchtung
einzuschalten. Rufen Sie das
Hauptmenü auf, indem Sie
die Menu -Taste drücken.
2
„Navigieren Sie mit den
Tasten plus(+) und minus(-)
durch das Menü.
Wählen Sie den gewünschten
Menüpunkt mit der
Select-Taste aus. Mit der
Cancel-Taste gelangen
Sie zum vorherigen
Menü zurück ohne die
geänderten Eistellungen zu
übernehmen.
3
Geben Sie den gewählten
Inhalt ein, indem Sie die
Select-Taste drücken,
oder kehren Sie zum
vorherigen Menü zurück,
ohne Veränderungen
vorzunehmen, indem Sie
Cancel drücken.
DE
3
Page 18

GRUNDFUNKTIONEN
Menu
Select Cancel
Menu
Select Cancel
Menu
Select Cancel
Darstellung ändern
Das Anzeige ändern-Menü bietet die Ansicht Vollbild, Ausge-
wählte und Basis Ansicht
Profil ändern
Im Profil ändern-Menü können
Sie zwischen den Profilen
Famili, Einzel, Büro, Name 1
und Name 2 wählen.
Urlaub ändern
Im Urlaub ändern-Menü können
Sie Ihre Urlaubseinstellungen
festlegen und sie aktivieren
oder deaktivieren.
4
DE
Page 19

GRUNDFUNKTIONEN
Menu
Select Cancel
Menu
Select Cancel
Menu
Select Cancel
Programm Ein/Aus
Im Programm-Menü können
Sie zwischen den Betriebsmodi
Programm oder Manuellen
wählen.
Tastensperre
Wenn Sie die - und + Taste für
ca. drei Sekunden gedrückt
halten, können Sie die
Tastensperre aktivieren, um
das Gerät vor versehentlichen
Eingaben zu schützen. Durch
erneutes drücken der beiden
Tasten für ca. drei sekunden
wird die Tastensperre wieder
aufgehoben
Manueller Betrieb
Wenn Sie die – oder + Taste
drücken, wird der manuelle
Betriebsmodus aktiviert. Die
aktuellen Programme werden
bis zum Beginn der nächsten
programmierten Tageszeit
überschrieben.
DE
5
Page 20

PROGRAMM-MENÜ
Select Cancel
Menu
Menu
Select Cancel
Menu
Select Cancel
Programm-Menü
Um das Programm-Menü
aufzurufen, öffnen Sie die
Klappe und drücken Sie
zweimal die – Taste. Halten
Sie anschließend Select und
Cancel für etwa drei Sekunden
gleichzeitig gedrückt.
Grundeinstellungen
Öffnen Sie das
Grundeinstellungen-Me nü,
um Tag - Uhrzeit (12, 24
Stunden), Sprache und
Wartung einzustellen.
Temp.- Zonen
Öffnen Sie das Temp.- Bereich-
Menü, um die Temperaturen für
die Zonen Komfort, Standard
und Reduz einzustellen.
6
DE
Page 21

Die drei Temperaturzonen können den sechs
Menu
Select Cancel
Tageszeiten zugewiesen werden. Wenn Sie
eine Temperaturzone modifizieren, ändert
sich die Temperatureinstellung in den anderen
Profilen ebenfalls. Die Zonen sind mit den
folgenden Temperaturen vorprogrammiert:
Komfort 24°C Standard 20°C Reduz 16°C
Profil
Öffnen Sie das Profil-Menü, um
die detaillierten Einstellungen
der Profile Familie, Single,
Büro, Name 1 und Name 2 zu
ändern.
Wählen Sie das Profil ändern
Menü aus um die einzelnen
Profile anzupassen
Tageszeiten Zeit Familie Single Office Name 1 Name 2
Früher Morgen 06:00 - 08:00 Komfort Komfort Komfort Komfort Komfort
Morgen 08:00 - 12:00 Standard Standard Standard Standard Standard
Mittag 12:00 - 14:00 Komfort Komfort Komfort Komfort Komfort
Mo - Fr
Nachmittag 14:00 - 18:00 Standard Standard Standard Standard Standard
Abend 18:00 - 23:00 Komfort Komfort Komfort Komfort Komfort
Nacht 23:00 - 06:00 Verringert Verringert Verringert Verringert Verringert
Früher Morgen 06:00 - 08:00 Komfort Komfort Komfort Komfort Komfort
Morgen 08:00 - 12:00 Standard Standard Standard Standard Standard
Mittag 12:00 - 14:00 Komfort Komfort Komfort Komfort Komfort
Nachmittag 14:00 - 18:00 Standard Standard Standard Standard Standard
Sa - So
Abend 18:00 - 23:00 Komfort Komfort Komfort Komfort Komfort
Nacht 23:00 - 06:00 Verringert Verringert Verringert Verringert Verringert
DE
7
Page 22

Heizen/Kühlen
Menu
Select Cancel
Menu
Select Cancel
Öffnen Sie das Heizen/KühlenMenü, um die Heizungs- oder
Kühlfunktion zu aktivieren
Steuerung
Öffnen Sie das KontrollMenü, um die Einstellungen
Kommunikation, Frost,
Ventilschutzfunktion und
Temperaturabgleich
* Der Thermostat schützt gegen
Frost und hält die Temperatur
konstant bei 5ºC.
Kommunikation :
NSB EIN = Nachtabsenkung EIN
NSB AUS = Nachtabsenkung AUS
Kom OFF = Heizen/Kühlen +
Kommunikation AUS
Kom 4ºC = Heizen/Kühlen +
Kommunikation mit 4ºC
Absenkung
Kom 2ºC = Heizen/Kühlen +
Kommunikation mit 2ºC
Absenkung
Im Kommunikationsmodus werden die
Signale Absenkung mit 2ºC,Absenkung
mit 4ºC und Heizen/Kühlen an ERT22
und ERT32 übertragen.
8
DE
Page 23

Verwendungszweck und korrekte
Verwendung:
Der ERT 52 Raumthermostat
ist ein elektronisches digitales
Temperaturkontrollsystem zur elektrischen
Steuerung von Heißwasser- und
Heizungssystemen. Er fungiert als Auslöser
für elektrothermische Stellantriebe.
Er darf nur in trockenen und geschlossenen
Räumen verwendet werden. Die relative
Luftfeuchtigkeit in dem Raum darf 95 % nicht
überschreiten.
Dieser Thermostat darf nur von einem
qualifizierten Elektriker gemäß dieser
Installationsanleitung installiert werden.
Diese Fachleute sind verantwortlich für die
Einhaltung der bestehenden Normen und
Vorschriften.
Die Installation darf nur durchgeführt werden,
wenn das Gerät nicht mit dem Stromnetz
verbunden ist und nur unter Berücksichtigung
der Sicherheitsvorschriften.
Der Thermostat muss so platziert werden, dass
er nicht von Stores, Vorhängen oder anderen
Gegenständen verdeckt wird. Der Regler darf
nicht in unmittelbarer Nähe von Hitzequellen
installiert werden (z. B. Lampen, Kaminen,
direktem Sonnenlicht usw.) und sollte nicht
durch Zugluft beeinträchtigt werden. Nur so
wird die Raumtemperatur präzise erfasst und
die genaue Temperaturregelung entsprechend
ausgeführt.
Wichtig: Trennen Sie die Verbindung
zwischen Thermostat und Stromnetz, bevor
Sie ihn öffnen.
DE
9
Page 24

TECHNISCHES DATENBLATT
Betriebsspannung: 230V AC / 50Hz
Max. Schaltstrom: 4 (2) A
Schutzklasse: IP 30
Abmessungen B/H/T: 84 mm / 132 mm / 30 mm
wählbarer Temperaturbereich: 10°C - 35°C
Betriebstemperatur: 0°C - 40°C
Lagertemperatur: -20°C - 60°C
Behördlich zugelassen CE
10
DE
Page 25

WANDMONTAGE
N
Trennen Sie vor
dem Montieren das
Gehäuseoberteil von der
Auflageplatte. Gehen Sie
folgendermaßen vor:
- Lösen Sie die Schraube an der Unterseite.
- Öffnen Sie das Gehäuse, indem Sie
das Gehäuseoberteil an der Unterseite
wegziehen, nehmen Sie es dann ab.
- Bringen Sie nun das Gehäuseunterteil mit
den beiliegenden Schrauben fest an der
Wand oder auf der Einbaudose an.
Bringen Sie den ERT 52 Thermostaten nicht
auf elektrisch leitenden Oberflächen an.
DE
11
Page 26

VERDRAHTUNGSPLAN
N
N
Verkabeln Sie den Thermostaten nur dem
folgenden Verdrahtungsplan entsprechend:
Version 230 V
Anschluss
N Nullleiter
L 230 V AC Netzanschluss
ç
º
Schaltausgang (Stellantrieb, Anschlussleiste)
Ausgang für Steuersignale zu
anderen Geräten wir ERT32 etc.
ERT52 ist Master unit.
12
DE
Page 27

German Office
SALUS Controls GmbH
Deutschland
Dieselstr. 34
D-63165 Mühlheim am Main
Tel. 06108 825 850
www.salus-controls.de
Email: info@salus-controls.de
UK Office
Salus Controls plc, Salus House,
Dodworth Business Park South,
Whinby Road, Dodworth,
Barnsley S75 3SP
Tel: 01226 323961
www.salus-tech.com
Email: tech@salus-tech.com
DE
13
 Loading...