

Page 1
DELUXE FOOD SLICER WITH
®
PORTION SCALE
Model RHFS1
OWNER’S MANUAL
Page 2

2
Page 3

IMPORTANT SAFEGUARDS
When using electrical appliances, basic safety precautions should always
be followed including the following:
1. Read all instructions.
2. To protect against risk of electric shock, do not put Cord, Plug or
appliance in water or other liquid.
3. Close supervision is necessary when any appliance is used by or near
children.
4. Unplug from outlet when not in use, before putting on or taking off
parts, and before cleaning.
5. Avoid contacting moving parts. Never feed food by hand. Always use
completely assembled slicer with Feeder and Food Press.
6. Do not operate any appliance with a damaged cord or plug or after
the appliance malfunctions, or is dropped or damaged in any manner.
Contact Consumer Service.
7. The use of attachments not recommended or sold by the manufacturer may cause fire, electric shock or injury.
8. Do not use outdoors.
9. Do not let the cord hang over edge of table or counter.
10. Do not let cord contact hot surface, including the stove.
11. Blade is sharp. Handle carefully when cleaning.
SAVE THESE INSTRUCTIONS
For Household Use Only
3
Page 4

Additional Important Safeguards
1. All users of this appliance must read and understand this Owner's
Manual before operating or cleaning this appliance.
2. The cord to this appliance should be plugged into a 120V AC electrical outlet only.
3. Do not leave this appliance unattended during use.
4. If this appliance begins to malfunction during use, immediately release
the “Pulse” Switch, turn the unit OFF and unplug the cord. Do not
use or attempt to repair the malfunctioning appliance.
5. If this appliance falls or accidentally becomes immersed in water,
unplug it immediately. Do not reach into the water! Do not use this
appliance after it has fallen into or becomes immersed in water.
6. To reduce the risk of injury to persons or property, never use this
appliance in an unstable position.
7. Do not use this appliance for other than its intended use.
8. The safety switch prevents accidental operation of the Food Slicer by
pressing the switch plate. Do not attempt to defeat this safety feature.
9. Unplug the appliance from wall outlet when not in use, before putting
on or taking off parts and before cleaning. Be careful, the blade continues to turn for a while even after the appliance has been switched
off.
10. Do not operate the appliance continuously for more than 10 minutes.
Allow the appliance to cool down for one hour before second operation.
11. Do not use appliance to cut deep frozen food, bones or jellylike wet
food.
12. Operate the appliance only when the Blade-Locking Knob is properly
engaged and tightened.
13. Handle the Blade carefully when cleaning, removing and inserting, as
the Blade is extremely sharp. Do not touch the sharp edge of the
Blade. Do not use or install the Blade in any way other than recommended in this manual.
14. Do not touch sharp surfaces. To avoid danger of injury, always cut
food with Feeder and Food Press in place. The Food Press should
always be used, unless the size and shape of the food prohibits its
use. The Protective Rail requires the Feeder to be used in all slicing
situations. Do not attempt to defeat this safety feature.
4
Page 5

Additional Important
Safeguards (Cont.)
15. Always set the Adjustment Plate to minimum thickness position and
lock the Feeder after each use, before and after cleaning.
16. Operate this appliance on a flat, level surface only.
17. Do not incinerate the appliance even if it is severely damaged. The
batteries can explode in a fire.
18. It is normal that excessive heat from continuous usage may darken
the LCD display temporarily.
19. Do not overload the scale as shown ("O-LD") on the Electronic Scale
Overload Readout (#24). Maximum weight is 2000g/70.40 oz
(4 lb. 6 1/2 oz). Prolonged overloading will damage the electronic
scale permanently.
Polarized Plug
This appliance has a polarized plug (one blade is wider than the other). To
reduce the risk of electrical shock, this plug is intended to fit into a polarized outlet only one way. If the plug does not fit fully in the outlet, reverse
the plug. If it still does not fit, contact a qualified electrician. Do not
attempt to modify the plug in any way.
Short Cord Instructions
A short power-supply cord (or detachable power-supply cord) is provided
to reduce the risk resulting from becoming entangled in or tripping over a
longer cord.
Longer detachable power-supply cords or extension cords are available
and may be used if care is exercised in their use.
If a longer detachable power-supply cord or extension cord is used, (1)
the marked electrical rating of the cord set or extension cord should be at
least as great as the electrical rating of the appliance, and (2) the cord
should be arranged so that it will not drape over the countertop or tabletop where it can be pulled on by children or tripped over unintentionally.
5
Page 6

Electric Power
If the electric circuit is overloaded with other appliances, your appliance will not operate properly. It should be operated on a separate
electrical circuit from other appliances.
Battery Installation
1. Make sure the Food Slicer is unplugged and the Blade has come
to a complete stop.
2. Carefully turn the Food Slicer over and remove the battery cover
from the base.
3. Replace with 4 new AA-size alkaline batteries. Make sure the new
batteries are inserted according to the same polarities of the old
batteries. Refer to the "+" marks on the appliance for the correct
polarities.
4. Replace the battery cover and carefully turn the appliance upright.
Battery Safety
CAUTION: There is a danger of battery explosion if proper installation
and disposal is not followed. Do not incinerate or dispose of batteries
in a fire. Replace only with same or equivalent type batteries. Replace
the batteries when the LCD is dim or the electronic scale is not operating.
1. The old batteries should be disposed of according to your local
codes. Check with your local solid waste officials for details in your
area for recycling options or proper disposal.
2. Remove the batteries from the appliance for long-term storage.
Battery leakage (released electrolytes) can damage your appliance.
WARNING: Do not mix old and new batteries. Do not mix alkaline,
standard (carbon-zinc) or rechargeable (nickel-cadmium) batteries.
Introduction
Congratulations on your purchase of the Russell Hobbs®RHFS1
Deluxe Food Slicer with Portion Scale. Not only will this stylish yet
rugged appliance slice a wide variety of food ranging from Beef to
Zucchini but the built in scale will indicate what your slices weigh and
the electronic Control Display will identify the set thickness. Set-up
time for future use is practically eliminated. Now you can prepare exact
cuts of prime Rib, wafer thin slices of roast beef, and equal cuts of
freshly baked bread. Slicing cheese is a breeze and vegetables have
never been easier with this advanced 'State-of-the-Art' Food Slicer.
6
Page 7

Before Using for the First Time
CAUTION: Blade is sharp. Handle carefully. Do not wash in dishwasher. Do not immerse cord, plug or appliance in water or any
other liquid. Do not remove the the lubricant on the gears.
1. Remove any packaging materials
including any blue protective film.
To remove Feeder, slide away from
Blade and pull up from here.
Install batteries, see "Battery
Installation" on previous page.
2. Adjust the Thickness Adjustment
Knob to minimum thickness setting.
3. Always make sure the unit is
unplugged and the Blade has
come to a complete stop before
cleaning.
4. Remove the Food Press, Feeder,
(see Figure 1 for disassembly and
assembly) and Food Tray and wash
in warm, soapy water. Rinse and dry
To replace Feeder, put in front track
first and press back into place.
Figure 1
thoroughly.
5. Remove the Blade by inserting a
coin in the slot of the Blade-locking
Knob and turning clockwise.
Remove the Blade-locking Knob.
See Figure 2. With one hand on the
back side of the Blade, gently push
the Blade forward and at the same
time, grip the hole in the center of
the Blade from the front and lift off.
The Blade is very sharp, use
extreme care when handling. DO
NOT touch sharp edge of Blade.
6. Wipe all surfaces with a damp cloth.
Figure 2
Dry thoroughly. Keep the Control
Panel and electronic scale dry.
7. Wash the Blade, in warm, soapy water. Rinse and dry thoroughly.
Do not allow the Blade to soak in water. Trying to locate the Blade
under water is potentially dangerous.
8. We suggest that you wash, rinse, dry and reinstall the Blade immediately. Re-assemble the Blade in reverse order of Step 5. Make
sure the Blade-locking Knob is properly engaged and tightened.
9. Do not remove the White lubricant on the gears. The lubricant is
used to reduce the friction and noise of the gears.
7
Page 8

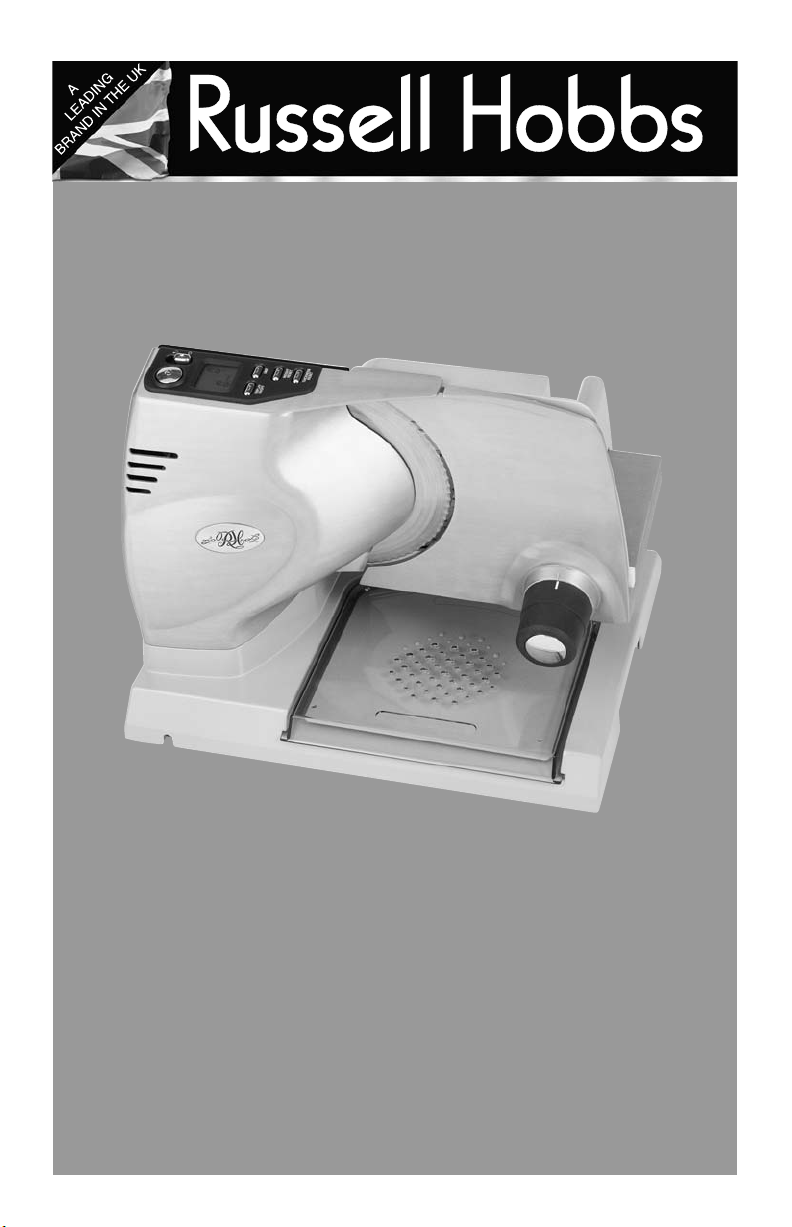
Russell Hobbs®RHFS1
Food Slicer Features
11
10
9
1
3
4
5
6
7
8
12
2
13
8
Page 9

Features
1. Base
2. Thickness Adjustment Knob
3. Control Panel
4. Blade - Stainless Steel.
(P/N 70710)
5. Blade-locking Knob
(P/N 70711)
6. Power cord
7. Protective Rail
8. Feeder (P/N 70934)
9. Feeder-locking Switch
10. Food Press (P/N 70935)
11. Adjustment Plate
12. Food Tray (P/N 70936)
13. Electronic Scale
14
15
14. Pulse Switch
15. Safety Switch (0=Off, I=On)
16. LCD Display
17. Weight Unit Button (g or oz)
18. Weight Reset Button
19 Thickness Reset Button
20. Display On/Off Button
21. Metric Electronic Scale
Readout
22. Digital Thickness Display
23. Imperial Electronic Scale
Readout
24. Electronic Scale Overload
Readout
21
22
16
20
23
17
18
19
24
9
Page 10

Instructions for Use
CONTROL PANEL
1. Install the batteries as instructed in "Battery Installation and Battery
Safety" on Page 5.
2. The weight reading will change according to the weight on the
Electronic Scale. It may include the weight of the provided Food
Tray.
3. To subtract the weight of the provided Food Tray or any food container in use, press the Weight Reset Button. The display will read
"0g" or "0.00 oz".
4. The thickness reading will change according to the position of the
Adjustment Plate. Turn the Thickness Adjustment Knob to the
desired thickness.
5. To set the thickness display to "0", turn the Thickness Adjustment
Knob counterclockwise to move the Adjustment Plate to the minimum thickness. Press the Thickness-Reset Button to set the display
to "0".
6. The thickness display may not show "0" when the adjustment plate
is returned to minimum position because of the tolerance of the
gears. Press the Thickness-Reset Button to read "0" again.
7. The display on the Control Panel will automatically turn off after 15
minutes of being idle, i.e., the weight or thickness has not been
changed for 15 minutes.
OPERATING THE FOOD SLICER
CAUTION: Blade is sharp. Handle carefully.
1. Place the Food Slicer on a hard, flat and level work surface. The
Electronic Scale will not operate properly if the work surface is not
level.
2. Plug the Food Slicer into a 120VAC, 60Hz,
10A outlet.
3. Before turning ON, ensure that the Blade is
installed correctly and not touching anything.
4. To turn on the appliance, first push the
Safety Switch from position "O" to "I" then
without releasing the Safety Switch, press
down on the Pulse Switch. KEEP HANDS
AWAY FROM BLADE! See Figure 3.
5. To turn off the appliance, release the Pulse switch. The Pulse Switch
will spring up and the Safety Switch will return to the "O" position
automatically. The Blade will stop in seconds.
10
Pulse
Switch
Safety
Switch
Figure 3
Page 11

Instructions for Use (Cont.)
6. Slide the Food Tray off the Electronic
Scale. Invert the Food Tray and place on
top of the Electronic Scale to collect the
food. Properly align the raised circles on
the Scale with the recessed circles on
the underside of the Food Tray. The
curved end of the Food Tray should
extend outward from the back of the
scale. See Figure 4. The weight of the
sliced food will be displayed on the control panel. You can use other containers
to collect the sliced food, however, the
Electronic Scale may not operate properly.
7. Set the desired cutting thickness by
turning the Thickness Adjustment Knob.
Turning the Knob clockwise will increase
the thickness of the slice. The setting
will be displayed on the Control Panel.
See Figure 5
8. Slide the Feeder Locking Switch to the
unlocked position.
9. Put the food on the feeder and push the
food with the Food Press Plate. Slice
the food by sliding the Feeder back and
forth across the Blade. See Figure 6. To
avoid injury, always cut the food with
Feeder and Food Press Plate. In case
the food shape or size does not allow
for the use of the Food Press, it can be
removed. However, extra care should be
taken during cutting. Once the food is
reduced in size, use the Food Press to
continue slicing the remainder of the
food.
IMPORTANT: The protective rail enforces the use of the Feeder at
all times. Do not attempt to defeat this safety device.
10. Do not use the slicer to cut deep frozen food or bones. The Slicer
may become overloaded and damage the Blade.
11. Do not use the slicer to cut jellylike or wet food. The jelly or the
excessive juice may spread into the electrical components of the
motor assembly. It may lead to fire and electric shock, personal
injury or death.
Figure 4
Figure 5
Figure 6
11
Page 12

User Maintenance Instructions
This Russell Hobbs®Food Slicer requires little maintenance. It contains no
user-serviceable parts. Contact qualified appliance repair technician if the
product requires servicing.
CAUTION: Blade is sharp. Handle carefully. Do not wash in dishwasher. Do not immerse cord, plug or appliance in water or any
other liquid. Do not remove the lubricant on the gears.
Cleaning
To keep your Food Slicer operating properly, clean after each use.
1. Always unplug the appliance and let the Blade come to a complete
stop before cleaning.
2. Adjust the Thickness Adjustment Knob to the minimum thickness setting before cleaning.
3. Remove the Food Press, Feeder, and Food Tray and wash in warm,
soapy water. Rinse and dry thoroughly.
4. Remove the Blade by inserting a coin in the slot of the Blade-locking
Knob and turning clockwise. Remove the Blade-locking Knob. With
one hand on the back side of the Blade, gently push the Blade forward and at the same time, grip the hole in the center of the Blade
from the front and lift off. The Blade is very sharp, use extreme care
when handling. DO NOT touch sharp edges
5. Wipe all surfaces with a damp cloth making sure to thoroughly clean
under the metal lip extending from the Control Panel. Dry completely
with a soft cloth. Keep the Control Panel and Electronic Scale dry. DO
NOT use harsh or abrasive cleansers or sharp metal objects to
remove food as these could damage the coating on the exterior
surface.
6. Wash the Blade in warm, soapy water. Rinse and dry thoroughly. Do
not allow the Blade to soak in water. Trying to locate the Blade under
water is potentially dangerous.
7. We suggest that you wash, rinse, dry and reinstall the Blade immediately. Reinstall the Blade in reverse order of Step 4. Make sure the
Blade-locking Knob is properly engaged and tightened. Replace the
Feeder, Food Press and Food Tray. Slide the Feeder in front of the
Blade and move the Feeder Locking Switch to the locked position.
8. Do not remove the White lubricant on the gears and Motor Assembly.
The lubricant is used to reduce the friction and noise of the gears.
Removal of the lubricant will reduce the cutting performance and
increase the operating noise. If the lubricant has been removed, a thin
film of margarine or food-grade lubricant may be applied. Never apply
industrial-use or automotive-use lubricants as they may not be safe for
consumption and may damage the gears.
9. Any servicing requiring disassembly other than the above cleaning
must be performed by a qualified appliance repair technician.
12
Page 13

Helpful Hints
The Food Slicer can be used to cut meat, cheese, vegetables or
bread.
1. Roasts: Beef, pork, poultry and lamb -- Allow roasts to stand for
20 minutes after removing from the oven before slicing.
2. Bulk Bacon: With a sharp knife, remove the rind from "thoroughly
chilled" bacon. Trim bacon to fit securely on Feeder, fat side down.
3. Cheese and cold cuts: Slice as needed to retain flavor. Remove
the plastic or hard casing from "well chilled" food before slicing.
Use gentle pressure for uniform slices.
4. When you are going to slice very thin food, unplug the unit and
moisten the Blade with a damp cloth; this helps to prevent sticking. If cheese builds up on the Blade or under the Blade Cover,
unplug the slicer and wipe the Blade clean with a damp cloth.
5. When slicing food that is not uniform in size, always slice with the
largest side first.
6. Vegetables and fruits: Slice potatoes, tomatoes, carrots,
cucumbers, cabbage, lettuce, eggplant, squash and zucchini in a
matter of minutes.
7. Breads: Do not use excessive pressure or squeeze the loaf. Trim
or cut bread to fit comfortably on the Feeder. Move the loaf of
bread smoothly through the blade with continuous "gentle" pressure on the loaf.
13
Page 14

LIMITED ONE YEAR WARRANTY
Warranty: This Russell Hobbs®product is warranted by Salton, Inc. to be free from defects in
materials or workmanship for a period of (1) year from the original purchase date. This product
warranty covers only the original consumer purchaser of the product.
Warranty Coverage: This warranty is void if the product has been damaged by accident in shipment, unreasonable use, misuse, neglect, improper service, commercial use, repairs by unauthorized personnel, normal wear and tear, improper assembly, installation or maintenance abuse or
other causes not arising out of defects in materials or workmanship. This warranty is effective only
if the product is purchased and operated in the USA, and does not extend to any units which have
been used in violation of written instructions furnished with the product or to units which have
been altered or modified or to damage to products or parts thereof which have had the serial number removed, altered, defaced or rendered illegible.
Implied Warranties: ANY IMPLIED WARRANTIES WHICH THE PURCHASER MAY HAVE ARE LIMITED IN DURATION TO ONE (1) YEAR FROM THE DATE OF PURCHASE. Some states do not
tations on how long an implied warranty lasts, so the above limitation may not apply to you.
Warranty Performance: During the above one-year warranty period, a product with a defect will
be either repaired or replaced with a reconditioned comparable model (at our option) when the
product is returned to the Repair Center, or the purchase price refunded. The repaired or replacement product will be in warranty for the balance of the one-year warranty period and an additional
one-month period. No charge will be made for such repair or replacement.
Service and Repair: Should the appliance malfunction, you should first call toll-free 1 (800) 2339054 between the hours of 9:00 am and 5:00 pm Central Standard Time and ask for CONSUMER
SERVICE stating that you are a consumer with a problem. Please refer to model number RHFS1
when you call.
In-Warranty Service (USA): For an appliance covered under the warranty period, no charge is
made for service or postage. Call for return authorization (1 800 233-9054).
Out-of Warranty Service: A flat rate charge by model is made for out-of-warranty service. Include
$15.00 (U.S.) for return shipping and handling. We will notify you by mail of the amount of the
charge for service and require you to pay in advance for the repair or replacement.
For Products Purchased in the USA, but Used in Canada: You may return the product insured,
packaged with sufficient protection, and postage and insurance prepaid to the USA address listed
below. Please note that all customs duty / brokerage fees, if any, must be paid by you and we will
require you to pay the cost of customs duty / brokerage fees to us in advance of our performing
any service.
Risk During Shipment: We cannot assume responsibility for loss or damage during incoming shipment. For your protection, carefully package the product for shipment and insure it with the carrier.
Be sure to enclose the following items with your appliance: any accessories related to your problem, your full return address and daytime phone number, a note describing the problem you experienced, a copy of your sales receipt or other proof of purchase to determine warranty status. C.O.D.
shipments cannot be accepted.
To return the appliance, ship to: To contact us, please write to, call, or email:
Attn: Repair Center Salton, Inc.
Salton, Inc. P.O. Box 7366
708 South Missouri Street Columbia, MO 65205-7366
Macon, MO 63552 1 800 233-9054
Email: Salton@Saltonusa.com
Limitation of Remedies: No representative or person is authorized to assume for Salton, Inc. any
other liability in connection with the sale of our products. There shall be no claims for defects or
failure of performance or product failure under any theory of tort, contract or commercial law
including, but not limited to negligence, gross negligence, strict liability, breach of warranty and
breach of contract. Repair, replacement or refund shall be the sole remedy of the purchaser under
this warranty, and in no event shall Salton be liable for any incidental or consequential damages,
losses or expenses. Some states do not allow the exclusion or limitation of incidental or consequential damages, so the above limitation or exclusion may not apply to you.
Legal Rights: This warranty gives you specific legal rights, and you may also have other rights
which vary from state to state.
For more information on Salton products: Visit our website: http://www.eSalton.com
“© 2002 Salton, Inc. P/N 61209
All Rights Reserved” Printed in China
allow limi-
 Loading...