

®
100 W. Sycamore Road ● Arvin, CA 93203
Phone: (661) 854-3166
1-800-421-0024
1-800-235-4203
Fax: (661) 854-3850
Toll Free Fax: 1-800-628-4690
Email: salterlabs@us.salterlabs.com www.salterlabs.com
ISO 13485
MT Promedt Consulting GmbH
Altenhofstrasse 80
D-66386 St. Ingbert
Germany
U.S. Patent number 5,792,665 Other U.S. and Worldwide patents pending
© Copyright 2007 October 2009 Salter Labs
121263 Rev. H
PRO2 check Elite ® is a registered trademark of Salter Labs
®
®

®
PRO
check Elite
2
Multifunction Concentrator Indicator
_____________________________________________
Multifunction Concentrator Indicator
Operation Manual
CONTENTS
I. Warning Notes 1
II. Introduction 2
III. Initial Setup 2
IV. Connections, Controls & Displays 3
V. Instructions For Checking Oxygen Concentrators
To Turn Unit On and Off 4
Measuring Oxygen Concentrations 4
Measuring Oxygen Flows 5
Measuring Concentrator Outlet Pressure 5
VI. Instructions For Spot Checking Liquid Oxygen
Vessels or Oxygen Cylinders 6
VII. Verification & Calibration Instructions Concentrator Mode
Pure Oxygen Verification Procedure 7
Quick "One Step" Pure Oxygen Calibration 7
Full "Two Step" Calibration Procedure 8
VIII. Calibration Instructions Pressure and Flow Modes
Quick Pressure Calibration (Zero for Accuracy)
Quick Flow Calibration (Zero for Accuracy) 9
IX. Maintenance
Setting Pressure Display Default 10
Battery Replacement 10
Cleaning 10
X. Environmental Effects
Temperature 11
Barometric Pressure- Optional Altitude Adjustment 11
Vibration 11
Relative Humidity 11
XI. Unit Specifications 12
XII. Frequently Asked Questions 13
XIII. Trouble Shooting Check List 15
XIV. Warranty 17
Manufactured by
Salter Labs ® - Arvin, California
_____________________________________________ PRO
Multifunction Concentrator Indicator
check Elite
2
®
WARRANTY
Salter Labs
check Elite
®
will extend the following warranty to the original purchaser of the PRO
®
Multifunction Concentrator Indicator:
If the unit becomes inoperable prior to two years from date of purchase
for any reason other than:
1. Unusual, abusive use or handling
2. Dead, defective battery
3. Water or water vapor has been introduced into unit.
Salter Labs
®
will, at its option, have the unit repaired or replaced. If re-
pair is authorized, Salter Labs
chaser will be responsible for all shipping charges to return the unit to
®
Salter Labs
. Salter Labs® will be responsible for normal shipping
charges for the return of the unit to purchaser.
All warranties are voided if the
opened or tampered with in any way.
If claim is made after two years from the date of purchase and unit is inoperable, all costs involved in such repair are to be paid by the purchaser.
In the event that the unit becomes inoperable, the purchaser should
promptly notify Salter Labs
the unit. Any return without prior authorization from Salter L abs
purchaser's expense and risk. Salter Labs
ability except as stated above.
®
will not charge for parts or labor. Pur-
PRO
check Elite
2
®
for instructions in handling repair/return of
®
does not assume any other li-
®
unit has been
®
is at
2
17

®
PRO
check Elite
2
Multifunction Concentrator Indicator
___________________________________________
Trouble Shooting Checklist (Continued)
Complaint Probable Cause
Display shows "err"
during calibration
Display shows "err"
during use
"LO BATT" appears
in display screen when
unit is turned on
Display shows "err"
or a reading other than
100% ± 2% after full
calibration
Calibration was performed
incorrectly or wrong calibration gas was used.
Unit has made a reading
outside normal ranges.
Battery is low. Change battery.
Unit may have been used
to check a concentrator
with a humidifier bottle in
line or water has gotten
inside of unit.
Suggested
Corrective Action
®
Cus-
Ensure USP oxygen (>
99.0%) is being used and
re-perform procedure
according to directions in
the Operation Manual.
Check calibration. Make
sure gas being measured
is from oxygen concentrator.
Call Salter Labs
tomer Service Department at (800) 235-4203
for authorization to return unit for repair.
___________________________________________________ PRO
Multifunction Concentrator Indicator
check Elite®
2
WARNING NOTES
USAGE: The PRO
designed for intermittent usage to determine the oxygen concentration, flow,
and outlet pressures produced by an oxygen concentrator. It may also be utilized to do spot checks of gaseous or liquid oxygen.
WARNING
tions, or for monitoring oxygen concentration from any source other than a conventional oxygen concentrator using molecular sieve beds. This unit will not
withstand fluid spillage. The unit will not withstand mechanical shock or vibration.
NOTE
Class B digital device, pursuant to Part 15 of the FCC Rules. These limits are designed to provide reasonable protection against harmful interference in a residential installation. This equipment generates, uses, and can radiate radio frequency
energy and if not installed in accordance with the instructions, may cause harmful interference to radio communications. However, there is no guarantee that interference will not occur in a particular installation. If this equipment does cause
interference to radio or television reception, which can be determined by turning
the equipment off and on, the user is encouraged to try and correct the interference by one or more of the following measures:
: The unit is not designed nor intended for use in anesthesia applica-
: This equipment has been tested and found to comply with the limits for a
check Elite® Multifunction Concentrator Indicator is
2
16
1
Reorient or relocate the receiving antenna
Increase the separation between the equipment and receiver.
Connect the equipment into an outlet on a circuit different from
that, to which the receiver is connected.
Consult the dealer or an experienced radio/TV technician for help.

®
d
PRO
check Elite
2
Multifunction Concentrator Indicator
_____________________________________________
INTRODUCTION
Thank you for purchasing a PRO
using this single, easy to operate device a home care provider can quickly and accurately
perform all of the most common field tests required to service oxygen concentrators:
• Measurement of the concentration of oxygen delivered from the concentrator
• Verification of accuracy of the concentrator's built-in flow control with in the tolerance
of the measuring device and altitude adjustment if needed.
• En s u r i n g t h a t t h e u n i t i s o p e r a t i n g w i t h i n m a n u f a c t u r e r ' s o u t p u t p r e s s u r e
specifications
When used to measure the concentration of oxygen being produced, the device utilizes
technology already used in many oxygen concentrators to trigger "Low O
trasound. By combining this proven sensor technology with built-in pressure and flow
measurement instruments, Salter Labs® has produced in a single unit a simple, convenient, and more cost effective product to check the major output parameters of oxygen concentrators. The indicator when operating in the oxygen concentration measurement mode
responds faster, has no fuel cell to replace, and is simpler to use than a fuel cell analyzer.
The flow and pressure measuring functions of the unit allow the provider to quickly and
easily measure these outputs without changing equipment.
1. Remove the PRO
package. Make sure you have the following items:
• PRO
• 9-volt battery (factory installed) – Spare Battery also included.
• 2 foot connecting tubing
• Carrying case and strap
• Operation Manual
2. The PRO
calibration of the unit's oxygen concentration measurement mode can be
quickly and easily verified by following the "Pure Oxygen Verification"
procedure on page 7 of this manual.
3. If accreditation organizations or internal policies and procedures require rou-
tine calibration, instructions on performing both a "Quick One Step Calibra-
tion Procedure" to USP oxygen can be found on page 7 of this manual. A
"Full Two Step Calibration Procedure" to both USP oxygen and room air can
be found on page 8 of this manual. Instructions on calibrating the pressure
2
2
check Elite
2
check Elite
check Elite
®
indicator unit
®
was calibrated at the factory. However, the proper
check Elite
2
INITIAL SETUP
®
Multifunction Concentrator Indicator from the
and flow measurement functions of this device are found of page 9 of this
manual.
2
®
Multifunction Concentrator Indicator. By
2
" alarms - ul-
____________________________________________________ PRO
Multifunction Concentrator Indicator
check Elite®
2
Trouble Shooting Checklist
Complaint Probable Cause
Display is blank when
unit is turned on.
Bad batteries. Corroded
battery terminals.
When unit is turned on
display flashes
"PRO O2 @ CAL" and
Unit requires calibration.
then turns off.
Display reads 91.8% on
a source of USP oxygen
99.0%).
(>
Unit is operating in mode
to check concentrators and
is adjusting for concentrator's output of argon.
Display reads between
98% to 102% (but not
99.9%) on a source of
USP oxygen (>
99.0%)
Unit requires quick calibration.
with button held down.
Unit is out of 98% to
102% range after quick
calibration.
Unit requires full calibration.
"---" appears on display
while unit is being cali-
Incomplete calibration.
brated.
Display shows "-U-".
Indicates an out of range
reading.
Suggested
Corrective Action
Replace batteries.
Clean battery terminals.
Perform "Full Calibration Procedure" outlined in Operation
Manual.
With unit still connecte
to source of USP oxy-
99.0%) push and
gen (>
continue to hold down
“pure O
/calibrate”
2
button to temporarily
remove argon correction
from unit's software.
With unit still connected to source of USP
oxygen (>
99.0%) push
and hold down “pure
O
/ calibrate” button
2
until display reads
99.9% - 101 (approximately 20 seconds). The
unit is then recalibrated.
Perform "Full Calibration Procedure" outlined in User Manual.
Release the "pure
O
/calibrate" but-
2
ton and restart calibration process.
Perform "Full Calibration Procedure" outlined in User Manual.
15

®
PRO
check Elite
2
Multifunction Concentrator Indicator
____________________________________________
Why doesn't the unit drop immediately to room air?
Oxygen is heavier than room air, so it will linger inside the unit. When there is a
flow (either from room air or another concentrator), the reading will change immediately.
Can I exhale (blow) into the unit to reach room air?
No. You may apply a small suction or flow of room air, but do not exhale into
the unit.
When I am in the Concentrator Mode and hook the unit up to a USP oxygen(>
99.0%) source the LCD does not read 99% (± 2), why?
When the unit is in its default (concentrator) mode the device's software enables
the unit to measure the output of an oxygen concentrator by compensating for the
argon that passes through the sieve beds. In this mode, it will display a false
reading (usually 91.8%) if connected to an oxygen source other than a concentrator. Pressing and holding the "pure O
/calibrate" button removes the argon
2
compensation and allows the device to measure the oxygen purity with ± 2% of
compressed gaseous or liquid oxygen.
When I am in the Concentrator Mode and hook the unit up to a USP oxygen
source the LCD the display reads - "Concentrator O
90.1" (approx). What's
2
wrong?
Nothing. When in the Concentrator Mode, the electronic components of the indicator automatically compensates for the argon found in the gas produced by an
oxygen concentrator. As a result the display will read approx imately 90% unless
this function is over-ridden by pushing the "pure O
/calibrate" button.
2
Whenever I check concentrators with the
an O
concentration reading of 96.0 on every concentrator. Why?
2
PRO
check Elite
2
®
, I consistently get
Concentrators work at their maximum efficiency (96.0%) at lower flow rates.
When the flow rate is increased the output of the concentrator typically will decrease slightly. If you question whether the device is functioning properly, stabilize it to room air and then re-test with the concentrator set on the maximum flow
rate or beyond. Be sure to allow the concentrator to stabilize at the higher flow
rate before testing. This may take as long as 10 minutes.
Will the unit lose calibration when I change batteries?
No. The unit holds calibration even when the battery is removed.
14
___________________________________________________ PRO
Multifunction Concentrator Indicator
check Elite
2
®
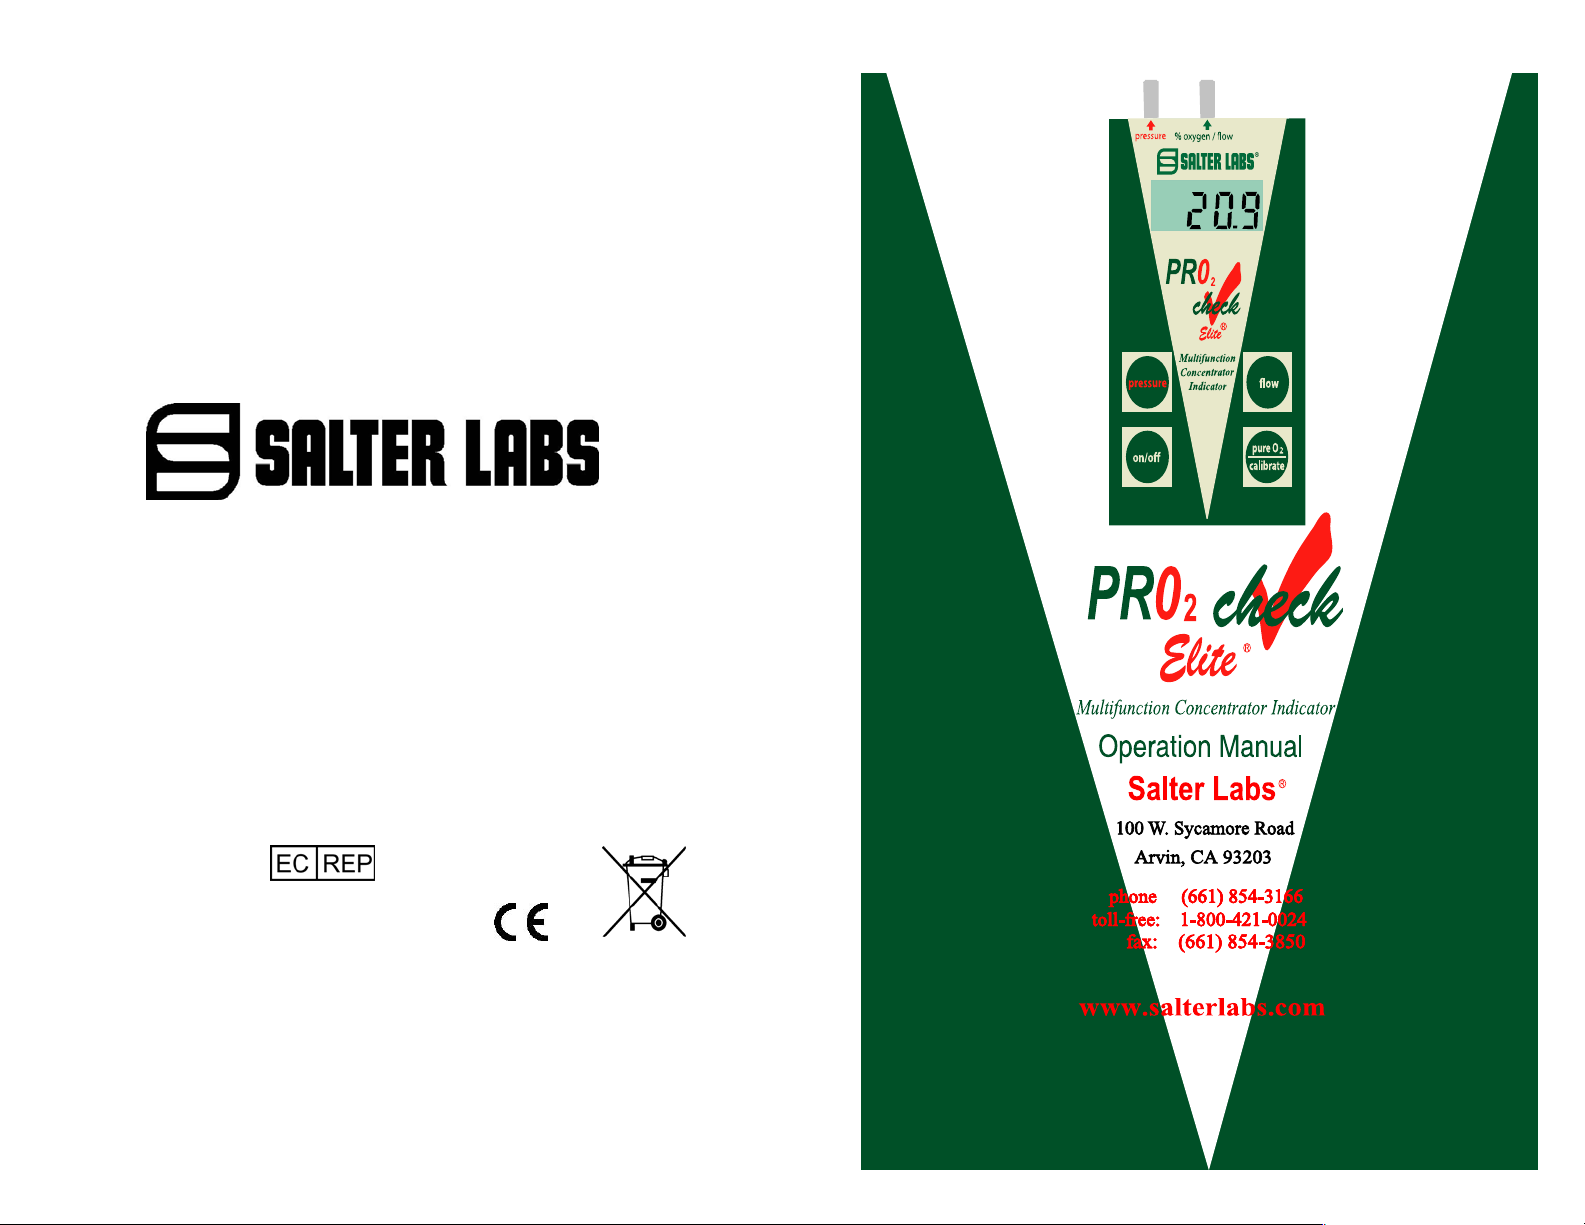
CONNECTIONS, CONTROLS & DISPLAYS
Inlet Ports:
There are two aluminum inlet ports on the top of the
PRO
check Elite
2
to a concentrator or other oxygen source:
a. The left port is used when measuring the
outlet pressure of an oxygen concentrator.
b. The other po rt i s use d to measure oxygen flows
and concentrations and to do verifications and
calibrations relating to oxygen concentrations.
The same connecting tube supplied with the
PRO
check Elite
2
a concentrator or another oxygen source.
LCD Display:
The PRO
calibration and verification procedures. These readouts are discussed in the other
sections of this Operation Manual. When in the Pressure Mode, the unit can display gauge pressure in either Kilopascal (HPA)* or Pounds per Square Inch (PSI).
See page 10 for information on setting pressure display. Additionally, the LCD
Display functions as a Low Battery Indicator. When the LCD displays "LO
BATT" in the lower left corner, the battery is low and should be replaced. See directions for Battery Replacement on page 10 of this manual.
2
Control Buttons:
There are four (4) control buttons on the PRO
a. Pushing and releasing the button on the lower left-hand side of the
check Elite
marked “pressure” and “flow” are used to change the operating modes of the
unit to measure pressure or flow from a concentrator (See page 5). These buttons
are also utilized to calibrate the pressure and flow modes of the unit (See page 9).
b. The button “pure O
functions of the device. (See pages 7-9 for instructions on cal i brati on ).
Back of Unit:
The back of the unit has a door to allow battery replacement.
(See page 10 for instructions).
*HPA on the display represents Kilopascals (kPa)
3
®
unit. These are used to connect the device
®
device is used to connect either port to
check Elite's
®
LCD displays values and directions during the testing,
check Elite
2
®
device:
PRO
®
unit marked “on/off” turns the device on and off. The buttons
/calibrate” is used to calibrate all three operational
2
2

®
PRO
check Elite
2
Multifunction Concentrator Indicator
________________________________________________
INSTRUCTIONS FOR CHECKING O
CONCENTRATORS
2
To turn unit on and off: To turn the unit on or off press and release the
“on/off” button on the lower left-hand side of the unit. (EXAMPLE: Concen-
trator O
20.9) When the unit is turned on the device defaults to the mode in
2
which the software enables the unit to measure the output of an oxygen con centrator compensating for the argon that passes through the sieve beds. The display will read "PRO", then "O
ber. If the
PRO
check Elite
2
" and finally "Concentrator O2" and a num-
2
®
unit is hooked up to an operating concentrator,
the device will automatically measure the concentration of the oxygen being
produced and show the value on the LCD display. The unit's default operating
mode automatically compensates for the argon that passes through the sieve
beds, it will display a false reading (approximately 91.8%) if connected to an
oxygen source other than a concentrator unless the specific actions discussed
on pages 6-8 of this manual are taken. If the device is not hooked up to an oxygen source it will measure and display the concentration of oxygen in the ambient air (usually 20.9%).
To turn the
PRO
check Elite
2
®
device off, press and release the “on/off” but-
ton. The unit will display “OFF” and shut down. To conserve battery life, it
automatically shuts down if any one of the unit's functions is not utilized for
approximately 5 minutes.
Measuring Oxygen Concentrations:
Follow the steps below to measure the concentration of oxygen being supplied
by an oxygen concentrator:
1. Make sure the concentrator has been running long enough (follow concen trator manufacturer's guidelines) to reach full operational output.
2. Make sure flow rate is above 2 LPM - preferably at the concentrator's high-
est output.
3. Remove any humidifier from concentrator.
4. Connect supply tubing to the concentrator oxygen outlet and the inlet port
PRO
on the
check Elite
2
5. Turn on the PRO
®
marked “% oxygen/flow.”
check Elite
2
®
device (See above).
6. The indicator will stabilize in about 10 seconds and provide an accurate
reading on the LCD display.
7. If there is any question to the accuracy of the reading, perform the "Pure
Oxygen Verification Procedure" and if necessary the “Quick One Step
Calibration Procedure” on page 7.
CAUTION: Do not check concentrator with humidifier in place.
Humidity can affect unit's readings and damage the unit.
NOTES: Never check a concentrator while holding down the "pure O2 /calibrate" button. You will get a false reading. You must hold down the "pure O
to check unit against a source of USP oxygen (> 99.0%) cylinder or liquid oxygen.
4
/calibrate" button
2
___________________________________________________ PRO
Multifunction Concentrator Indicator
check Elite®
2
FREQUENTLY ASKED QUESTIONS
Thank you for purchasing the PRO
Indicator. It will give you years of trouble-free operation. The following are
some of the frequently asked questions about the operation of this device.
Do I have to calibrate my
No. The
PRO
check Elite
2
PRO
®
indicator was calibrated at the factory.
How do I know that my
PRO
2
concentrations?
To verify, simply connect the multifunctional unit to a source of either compressed gas or liquid USP oxygen (>
and hold down the "pure O
/calibrate" button. As long as the display reads
2
between 99% and 101%, the unit is properly calibrated.
How often should I calibrate my
As long as you can verify (via the Pure Oxygen Verification Procedure) that
the unit is holding calibration against a USP oxygen (>
does not need calibration.
My accreditation organization as well as our internal policies require periodic calibration of this type of equipment. Can I calibrate the
®
device to comply with these requirements?
Elite
Yes, if accreditation organizations or internal policies and procedures require
routine calibration, instructions on calibrating the various functions of th e device are found on pages 7-9 of this manual.
Can we also calibrate the pressure and flow modes?
Yes, instructions on calibrating (zeroing) the pressure and flow measurement
functions of this device are found on page 9 of this manual.
Does the unit have to be turned off before verifying or calibrating?
Yes. The unit must be turned off and evacuated to room air before you begin
the oxygen verification or calibration procedures. This is not necessary for flow
or pressure calibration (zeroing).
check Elite
2
check Elite
2
check Elite
99.0%) at 2 LPM. Then turn on the device
PRO
check Elite
2
®
Multifunction Concentrator
®
unit daily?
®
device is accurately measuring
®
unit?
99.0%) source, the unit
PRO
check
2
13

®
PRO
check Elite
2
Multifunction Concentrator Indicator
________________________________________________
UNIT SPECIFICATIONS
General Specifications
Physical Data
Dimensions: 3.60" W x 5.75" H x 1.29" D
(9.14 cm W x 14.6 cm H x 3.28 cm D)
Weight: 9 ounces (255.15 Grams)
Connector: (2) ¼" anodized aluminum hose barbs
Case: Solid color ABS plastic with threaded metal bolt channels
Battery
type battery with polarized terminals.
A rechargeable type battery is not recommended.
Operating Temperature: 32º F to 105º F (0º C to 41º C)
Storage Temperature: -29º F to 160º F (-34º C to 71º C)
Specifications Concentration Mode
Measured Oxygen Concentration Range: 20.9% to 100%
Response Time: 10 seconds
Accuracy
ture of 32º F to 105º F (0º C to 41º C), and a flow rate of 2 to 5
LPM to the unit during calibration.
Input Gas Flow Rate
pling.
Sampling Frequency
Vents
Linearity
Sensor
Specifications Pressure Mode
Range: 0 to 25 PSIG (0 to 172 kPa)
Resolution
Accuracy
Specifications Flow Mode
Range: 0 to 10 LPM
Resolution
Accuracy
12
: The battery capacity is a standard 9-volt "transistor" alkaline
: ± 2%, assuming proper calibration with a sample gas at a tempera-
: Use a flow rate of .5 to 10 LPM for concentrator sam-
: Continuous
: The unit vents through the side vent port.
: ± 2% of Full Scale
: Ultrasonic
: 0.1 PSIG (.1 up to 99.9 kPa; 1.0 over 100 kPa)
: ± 1% of Full Scale
: 0.1 LPM
: ± .3 LPM (± 3% of full scale)
___________________________________________________ PRO
Multifunction Concentrator Indicator
check Elite®
2
Measuring Oxygen Flows
To measure oxygen flow rates from an oxygen concentrator follow the steps below (Not recommended for flows below 0.5 LPM):
1. Connect the supply tube to the “% oxygen/flow” port and an opera-
ting concentrator. Set the concentrator flow output at desired flow rate.
PRO
2. Turn on the
check Elite
2
3. Press the button on the upper right hand side of the
®
device.
PRO
check Elite
2
®
unit marked “flow.”
4. The LCD will display "Flow LPM" (indicating that the device is in
the mode to measure flow). A numeric read out indicating the oxygen
flow being delivered by the concentrator will display.
(Example: "Flow LPM 2.1")
5. Set the flow from the concentrator to maximum while the indicator is
still connected to it and compare the readings. If desired, measure
and compare the readings at various flow rates.
6. To exit the Flow Mode, press the “flow” button again and the unit
will return to the mode used to check oxygen concentrations.
NOTE: Your PRO
far more accurate than the “ball” type volumetric flow-meter on oxygen concentrators.
check Elite
2
®
is factory calibrated to measure true mass flow. It is
Measuring Concentrator Outlet Pressure
To measure an oxygen concentrator's output pressure follow the steps below:
1. Connect the supply tube to the device's “pressure” inlet port and an op-
erating concentrator. Set the concentrator flow output @ 2 LPM or greater.
PRO
2. Turn on the
check Elite
2
3. Press the button on the upper left-hand side of the
®
device.
PRO
check Elite
2
®
unit
marked “pressure.”
4. The LCD will flash "---" and then alternately display either "HPA"* or
"PSI" and a numeric read out indicating the output pressure of the
concentrator. (Example: alternat el y fl as hes "PSI" blank, "7.1 blank, "PSI"
blank, "7.1" blank, etc.)
5. Note and record the operating pressure indicated on the display. To exit
the Pressure Mode, disconnect the supply tube. Press the “pressure”
button again and the unit will return to the mode used to check oxygen
concentration or press the “flow” button to go directly to that mode.
NOTE: When the supply tube is connected to the "pressure" inlet port of the PRO2
check Elite
tor is occluded by the pressure measurement instrumentation.. This will generally cause
the concentration to drop and may trigger concentrator alarms and/or may cause the
supply tube to pop off the fittings. For this reason it is suggested that when operating
the
the readings be taken as rapidly as possible.
PRO
®
unit and an operating concentrator, the oxygen flow from the concentra-
check Elite® device in the Pressure Mode, that the unit be set up quickly and
2
CAUTION: Do not check concentrator in any indicator mode
with a humidifier in place. Humidity can affect unit's readings.
*HPA on the display represents Kilopascals (kPa) 5

®
PRO
check Elite
2
________________________________________________
Multifunction Concentrator Indicator
INSTRUCTIONS FOR SPOT CHECKING
LIQUID OXYGEN VESSELS or OXYGEN CYLINDERS
PRO
Although the
check Elite
2
signed, as its name implies, to check the various functions of an oxygen concentrator, it can also be used to perform spot checks (± 2%) of gaseous or liquid oxygen.
PRO
To utilize the
check Elite
2
1. Connect the “% oxygen/flow” inlet port on the
to a gaseous or liquid oxygen source (cylinder or liquid oxygen) via a
supply tube.
2. Turn the O
flow on to 2 LPM.
2
3. Press the “on/off” button to turn the PRO
4. When unit stabilizes the unit display will read "Concentrator O
(approx. concentration)
5. Press and continue to hold down the “pure O
6. Unit will display "Pure O2" and a numeric reading.
7. If the source gas is oxygen, the display should read between 99%
and 101%.
8. If the unit display reads "err", "---", "-U-" or any ot h e r readi n g ot h er
than 99.9 (± 2%), the source gas may not be pure oxygen and should be
quarantined for retesting using a more sophisticated method such as a
Servomex* oxygen analyzer.
PRO
NOTE:
check Elite
2
spot check the identity and purity of ga seous or liquid oxygen only, it can not
be used to perform or verify U.S.P. testing since it can not provide the required
U.S.P. accuracy of ± 0.1%.
* Servomex Inc. - Sugarland, TX
6
®
Multifunction Concentrator Indicator is de-
®
device for this purpose follow this procedure:
PRO
check Elite
2
check Elite
2
2
®
Multifunction Concentrator Indicator can be used to
®
unit on.
91.8"
2
/calibrate” button.
®
unit
___________________________________________________ PRO
check Elite®
2
Multifunction Concentrator Indicator
ENVIRONMENTAL EFFECTS
Temperature
Under normal operating conditions 32º F to 105º F (0º C to 41º C), the PRO
croprocessor and temperature circuit will compensate for variations in temperature. The temperature
during storage and shipping should not reach below -29ºF (-34º C) or above 160º F (71º C). If the
unit has been stored at other than normal room temperatures, allow unit to stabilize at room temperature for 15 to 30 minutes. Unit will stabilize quicker if turned on.
Barometric Pressure
The PRO
ing minor altitude changes. Please verify calibration if used over 5,000 feet.
check Elite
2
®
multifunctional unit's microprocessor makes it unnecessary to recalibrate dur-
check Elite® unit's mi-
2
Optional Altitude Adjustment
The PRO
altitude of the region in the world where the PRO
to re-set the altitude setting on the device. This is easily done by a qualified service technician who
reviews and follows these simple instructions:
SET ALTITUDE COMPENSATION:
1. Press the On/Off switch to turn the PRO
2. With The PRO
The On/Off switch. The PRO
3. Release the flow switch. The PRO
4. Press the FLOW switch to change altitude settings in increments of 1000 foot steps to the
closest altitude of the current location. Exam ple ( EL3 is the setting for 3000 foot).
5. After approximately 10 seconds from the last switch press, The PRO
the current altitude setting and starts oxygen concentration measurement displaying
“Concentrator”, “O
After performing the above calibration procedure, all functions of the PRO
should function within the tolerances specified in this manual.
check Elite
2
®
is pre-set at the factory at 2000 feet above sea level. Depending on the
check Elite
2
®
off, press and HOLD the FLOW switch, then press and release
check Elite
2
check Elite
2
” , and a value.
2
check Elite
2
check Elite
2
®
displays “Pro”, “O2”, then “---”.
®
displays “ELx” where x is a value from 0 to 7.
®
is being used, it may be necessary
®
OFF.
check Elite
2
check Elite
2
®
stores
®
Note: If readings do not seem accurate, recalibrate the unit.
Vibration
It is recommended that the unit be used in a stable position to prevent the display reading from fluctuating.
Note: Unit will not withstand excessive shock or vibration.
Relative Humidity/Water Vapor
The relative humidity (RH) of the gas being sampled will affect the reading being displayed. As the
RH increases, the sample gas becomes diluted with water vapor. This decreases the percentage of all
gases measured including oxygen. Gases from high-pressure cylinders and oxygen concentrators are
basically dry (< 0.5% RH). Gas measured after a humidifier or that has a high RH can cause a reading up to 10% lower than the actual reading.
Note: For accurate results, never measure oxygen percentage downstream from a humidifier. This
can also damage the unit!
11

®
check Elite
PRO
2
Multifunction Concentrator Indicator
________________________________________________
MAINTENANCE
Setting Pressure Display Default ("HPA"* or "PSI") :
PRO
The
check Elite
2
display pressure as either "HPA"* (Kilopascal) or "PSI" (Pounds per Square
Inch). The user can set the default display to either measurement or change the
default display at any time by doing the following:
1. With unit turned OFF - press and continue to hold the “pressure” button
2. While continuing to hold the “pressure” button - press the “on/off” button
3. The unit will display "PRO2" then "O2" followed by "---"
4. When "---" is displayed release the “pressure” button
5. The display will read either "HPA"* or "PSI"
6. Pressing the “pressure” button at this time will toggle the display between
"HPA" and "PSI"
7. When the preferred view is displayed, wait 10 seconds until unit returns to
concentrator mode and your default setting will be saved
8. To change the default setting, repeat the above procedure
Battery Replacement
When the LCD displays "LO BATT" in the lower left corner, the battery is
low and should be replaced.
NOTE: The
PRO
place battery. A spare battery is included with each unit.
Install a new 9-volt battery by sliding the battery door (located on the rear of the
unit) away from the case. Connect the 9-volt battery to the standard 9-volt battery connection and lay the battery sideways in the battery compartment. Insert
battery door by sliding door back onto unit in the reverse direction of opening.
PRO
check Elite
2
Cleaning
The
tergent or standard topical disinfectant and a soft cloth.
unit. Unit is not intended for any type of sterilization.
CAUTION: Do not let cleaning solution spill on or inside
*HPA on the display represents Kilopascals (kPa)
10
®
Multifunction Concentrator Indicator can measure and
check Elite
2
®
®
must be removed from the carrying case to re-
unit may be cleaned by wiping the case with a mild de-
___________________________________________________ PRO
Multifunction Concentrator Indicator
check Elite®
2
VERIFICATION & CALIBRATION INSTRUCTIONS
(Concentrator Mode)
PURE OXYGEN VERIFICATION PROCEDURE
To quickly verify that the indicator unit is accurately measuring the concentration of oxygen being produced by a concentrator, perform the following steps:
PRO
1. Connect the “% oxygen/flow” inlet port on the
unit to a USP oxygen(>
99.0%) source (cylinder or liquid oxygen ) via a
supply tube.
2. Turn the O
delivery flow to 2 LPM.
2
3. Press the “on/off” button to turn unit on.
4. When unit stabilizes the display will read - "Concentrator O
(approx. concentration).
NOTE: When in the Concentrator Mode, the electronic components of the
check Elite
®
indicator automatically compensate for the argon
found in the gas produced by an oxygen concentrator. As a result the display
will read 91.8% (± 2%) unless this function is over-ridden by pushing the "pure
O
/calibrate" button).
2
5. Press and continue to hold down the “pure O
6. Unit will display “Pure O
” and a numeric reading.
2
/calibrate” button.
2
7. If the unit is properly calibrated, the display should read between
99% and 101%. The unit is ready to use.
8. If the unit display reads "err, "---", "-U-" or any other reading
other than 99.9 (± 2%), the unit should be recalibrated (See below).
QUICK “ONE STEP” PURE OXYGEN CALIBRATION
The following procedure can be used to quickly and easily calibrate the Multifunction Concentrator Indicator to pure oxygen:
1. Follow ste ps 1 thr ou gh 6 of "P ur e Oxyg en Veri fi cat i o n Pr oced u re"
above.
2. When the unit di spl a y s "Pure O
holding down the “pure O
" and a numeric reading, continue
2
/calibrate” button.
2
3. After a few seconds, the LCD display (while continuing to read "Pure
") will start to alternately display "CAL" and a number.
O
2
4. Contin ue t o ho ld the “pure O
/calibrate” button down until the
2
display stops alternating and simply displays “Pure O
5. At that point, the unit is calibrated to pure oxygen and ready for use.
NOTE: If unit displays an O2 concentration reading outside of the ± 2% tolerance
range (eg.< 98% or >102%) unit will not
dure on the following page must be followed.
“Quick Cal” and the full two step proce-
check Elite
2
100”
2
91.8"
2
®
PRO
7
2

PRO
check Elite
2
®
________________________________________________
Multifunction Concentrator Indicator
VERIFICATION & CALIBRATION INSTRUCTIONS
(Concentrator Mode Continued)
FULL "TWO STEP" CALIBRATION PROCEDURE
The following procedure may be used to calibrate the PRO
to both room air and USP oxygen (>
99.0%):
1. Do not connect unit to oxygen source or introduce oxygen to the unit at this time
2. Turn unit on by pushing “on/off” button
3. Wait for the unit to stabilize at room air - and the LCD displays “Concentra-
tor O
not continue to flow air during the rest of this calibration process.
20.9%” (± 2%). If necessary, airflow will purge the oxygen. Do
2
NOTE: Do not exhale breath into unit. Moisture will affect calibration; a slight
suction can be used to evacuate the sampling chamber.
4. When unit is stabilized at room air and displays “Concentrator O 2 20.9%”
- turn unit OFF by pushing “on/off” bu tton.
5. Next, hold the “pure O
/calibrate” button down while pressing and re-
2
leasing the “on/off” button.
6. Continue to hold down the “pure O
/calibrate” button until the display
2
reads “---”.
7. Release the “pure O
/calibrate” button and the display will read
2
“CAL AIR” .
8. Press and release the “pure O
/calibrate” button again.
2
9. The unit's display will roll for approximately one minute while it calibrates
to room air.
10. When the unit display reads “CAL O
” - connect the PRO
2
port marked “% oxygen/flow” to an oxygen source (cylinder or liquid)
using the supplied tube.
11. Introduce USP oxygen (>
12. Press and release the “pure O
99.0%) at 2 LPM to the unit. (Do not use a humidifier).
/calibrate” button again.
2
13. The unit's display will roll for approximately one minute while it calibrates
to oxygen.
14. When the calibration sequence is complete the unit will display “CAL END”.
15. The unit is then calibrated and ready for use.
16. To verify that the unit is properly calibrated, repeat the "Pure Oxygen Verifi-
cation Procedure" on page 7.
NOTE: If unit displays "CAL ERR" during verification or calibration procedures, check to ensure that you are using USP oxygen (>
is turned on to at least 2 LPM, then repeat procedure.
NOTE: If unit displays "---" during verification or calibration procedures, release the "pure O
8
/calibrate” button or the unit will shut off automatically.
2
check Elite
2
check Elite
2
99.9%) and that the flow
®
indicator
®
inlet
___________________________________________________ PRO
check Elite®
2
Multifunction Concentrator Indicator
VERIFICATION & CALIBRATION INSTRUCTIONS
(FLOW MODE)
FLOW VERIFICATION/CALIBRATION PROCEDURE – Zeroing
To verify that the
PRO
check Elite
2
®
Multifunction Concen trator Ind icator is ac-
curately measuring the output flow of an oxygen concentrato r and calibrate it to
"0" flow, perform the following steps:
1. With the unit not connected to an oxygen or pressure source and the unit
turned on and stabilized, the LCD will display “Concentrator O
” and a
2
number
2. Press the “flow” button to enter the Flow Mode; the LCD will display
“Flow LPM” and a number
3. While still introducing no flow into the unit, press and hold the “pure
O
4. The unit will alternately flash “0.0” and “CAL” while the “pure O
/calibrate” button for approximately 4 seconds
2
/
2
calibrate” button is being held
5. After about 4 seconds release the “pure O
/calibrate” button and the
2
unit is ready for use
VERIFICATION & CALIBRATION INSTRUCTIONS
(PRESSURE MODE)
PRESSURE VERIFICATION/CALIBRATION PROCEDURE –
Zeroing
To verify that the PRO
curately measuring the output pressure of an oxygen concentrator and calib rate it
to "0" pressure, perform the following steps:
1. With the unit not connected to an oxygen or pressure source and the unit
turned on and stabilized, the LCD will display “Concentrator O
number.
2. Press the “pressure” button to enter the Pressure Mode; the LCD will
alternately display either "PSI" or "HPA"* and then alternately flash a
number.
3. While still introducing no flow into the unit, press and hold the “pure
/calibrate” button for approximately 4 seconds.
O
2
4. The unit will display either “PSI” or “HPA”* and then alternately flash
that with "0.0" and "CAL" while the “pure O
being held.
5. After about 4 seconds release the “pure O
unit is ready for use.
If any problems are encountered during the calibration sequences, contact Salter
Labs at 1-800-421-0024 or 1-661-854-3166.
*HPA on the display represents Kilopascals (kPa) 9
check Elite
2
®
Multifunction Concentrator Ind icator is ac-
” and a
2
/calibrate” button is
2
/calibrate” button and the
2
 Loading...