

Page 1
SM501
Color Screen GSM / GPRS Digital Mobile Phone
User Guide
Page 2

1
1 Safety Precautions ............................................................. 3
2 Your Phone ......................................................................... 4
2.1 The Names and Explanation of Each Part ................. 4
2.1.1Technical information .......................................... 4
2.1.2Appearance ........................................................ 5
2.1.3Keypad function descriptions ............................. 5
2.1.4Icons ................................................................... 6
2.2 Use descriptions ......................................................... 7
2.2.1Turning the Phone On and Off ........................... 7
2.2.2 Removing and Inserting the SIM Card .............. 8
2.2.3 Removing and Inserting the Memory Card ....... 8
2.2.4Remove and Install the Battery. ......................... 8
2.2.5Battery Charging ................................................. 8
2.2.6Headset use ........................................................ 9
2.2.7Phone/ SIM card unlock ..................................... 9
3 Quick Guide ...................................................................... 10
3.1 Emergency calls ....................................................... 10
3.2 Make a call ................................................................ 10
3.3 Answer a call ............................................................ 10
3.4 Call options ............................................................... 10
4 Function Menu .................................................................. 11
4.1 File manager ............................................................. 11
4.2 Phonebook ................................................................ 12
4.3 Fun and Games ........................................................ 12
4.3.1Games .............................................................. 12
4.4 Call cente .................................................................. 12
4.4.1Call history ........................................................ 12
4.4.2Call settings ...................................................... 13
4.5 Messages.................................................................. 14
4.5.1Write message .................................................. 14
4.5.2Inbox ................................................................. 15
4.5.3Drafts ................................................................ 15
4.5.4Outbox .............................................................. 15
4.5.5MMS.................................................................. 15
4.5.6Broadcast message .......................................... 16
4.5.7Templates ......................................................... 16
4.5.8SMS settings ..................................................... 16
4.6 Multimedia................................................................. 17
4.6.1Camera ............................................................. 17
4.6.2Image viewer .................................................... 18
4.6.3Video recorder .................................................. 18
4.6.4Video player ...................................................... 18
4.6.5Audio player ...................................................... 19
4.6.6Sound recorder ................................................. 19
Page 3

2
4.6.7FM radio ............................................................ 19
4.7 Organizer .................................................................. 20
4.7.1Bluetooth ........................................................... 20
4.7.2Calendar ........................................................... 21
4.7.3Calculator .......................................................... 21
4.7.4Tasks ................................................................. 21
4.7.5Alarm................................................................. 21
4.7.6World clock ....................................................... 21
4.8 Settings ..................................................................... 21
4.8.1Dual SIM settings ............................................. 21
4.8.2Touch calibration ............................................... 21
4.8.3Phone settings .................................................. 22
4.8.4Network setup ................................................... 23
4.8.5Security setup ................................................... 23
4.8.6Motion settings.................................................. 24
4.8.7Restore factory settings .................................... 24
4.8.8Sound effects .................................................... 24
4.9 User profiles .............................................................. 24
4.10 Extra .......................................................................... 25
4.10.1Answer machine ............................................. 25
4.10.2E-Book reader................................................. 25
4.11 Services .................................................................... 26
4.11.1STK* ................................................................ 26
4.11.2Data account ................................................... 26
4.11.3Internet service ............................................... 26
4.12 Shortcuts ................................................................... 27
5 Input Methods ................................................................... 28
6 Troubleshooting ............................................................... 28
7 Appendix (Webcam description) .................................... 31
Page 4

3
1 Safety Precautions
WARNING: Here are some information which you must read
before using the Phone to prevent injury to yourself and
others or damage to your phone.
Drive safely at all times, Avoid using your phone while driving
and obey all regulations that restrict the use of mobile phones
while driving. Use hands-free accessories to increase your
safety when possible.
Follow all safety warnings and regulations, Comply with any
regulations that restrict the use of a mobile phone in a certain
area.
Turn off the phone near medical equipment, Your phone can
interfere with medical equipment in hospitals or health care
facilities. Follow all regulations, posted warnings, and
directions from medical personnel.
Turn off the phone or when in an aircraft, Your phone can
cause interference with aircraft equipment. Follow all airline
regulations and turn off your phone when directed by airline
personnel.
Turn off the phone near the fuel, chemicals, or flammable
areas. Keep the device away from the children.
Use only Salora-approved accessories, using incompatible
accessories may damage your phone or cause injury.
Avoid exposing batteries to very cold or very hot temperatures
(below 0° C/32° F or above 45° C/ 113° F). Extreme
temperatures can reduce the charging capacity and life of your
batteries.
Store the battery pack in a dry place.
Prevent batteries from contacting metal objects, as this can
create a connection between the + and – terminals of your
batteries and lead to temporary or permanent battery damage.
Never use a damaged charger or battery.
Your Phone is not water-resistant. Keep it dry. Precipitation,
humidity and liquids contain minerals that will corrode the
connectors
Avoid using or storing your phone in dusty, dirty areas to
prevent damage to moving parts.
Your phone is a complex electronic device—protects it from
impacts and rough handling to avoid serious damage.
Your phone and memory cards may be damaged by exposure
to magnetic fields. Do not use carrying cases or accessories
with magnetic closures or allow your phone to come in contact
with magnetic fields for extended periods of time.
Page 5

4
STATEMENT: Our Company keeps the right to make
modifications to any of the content here in this user guide without
public announcement in advance.
2 Your Phone
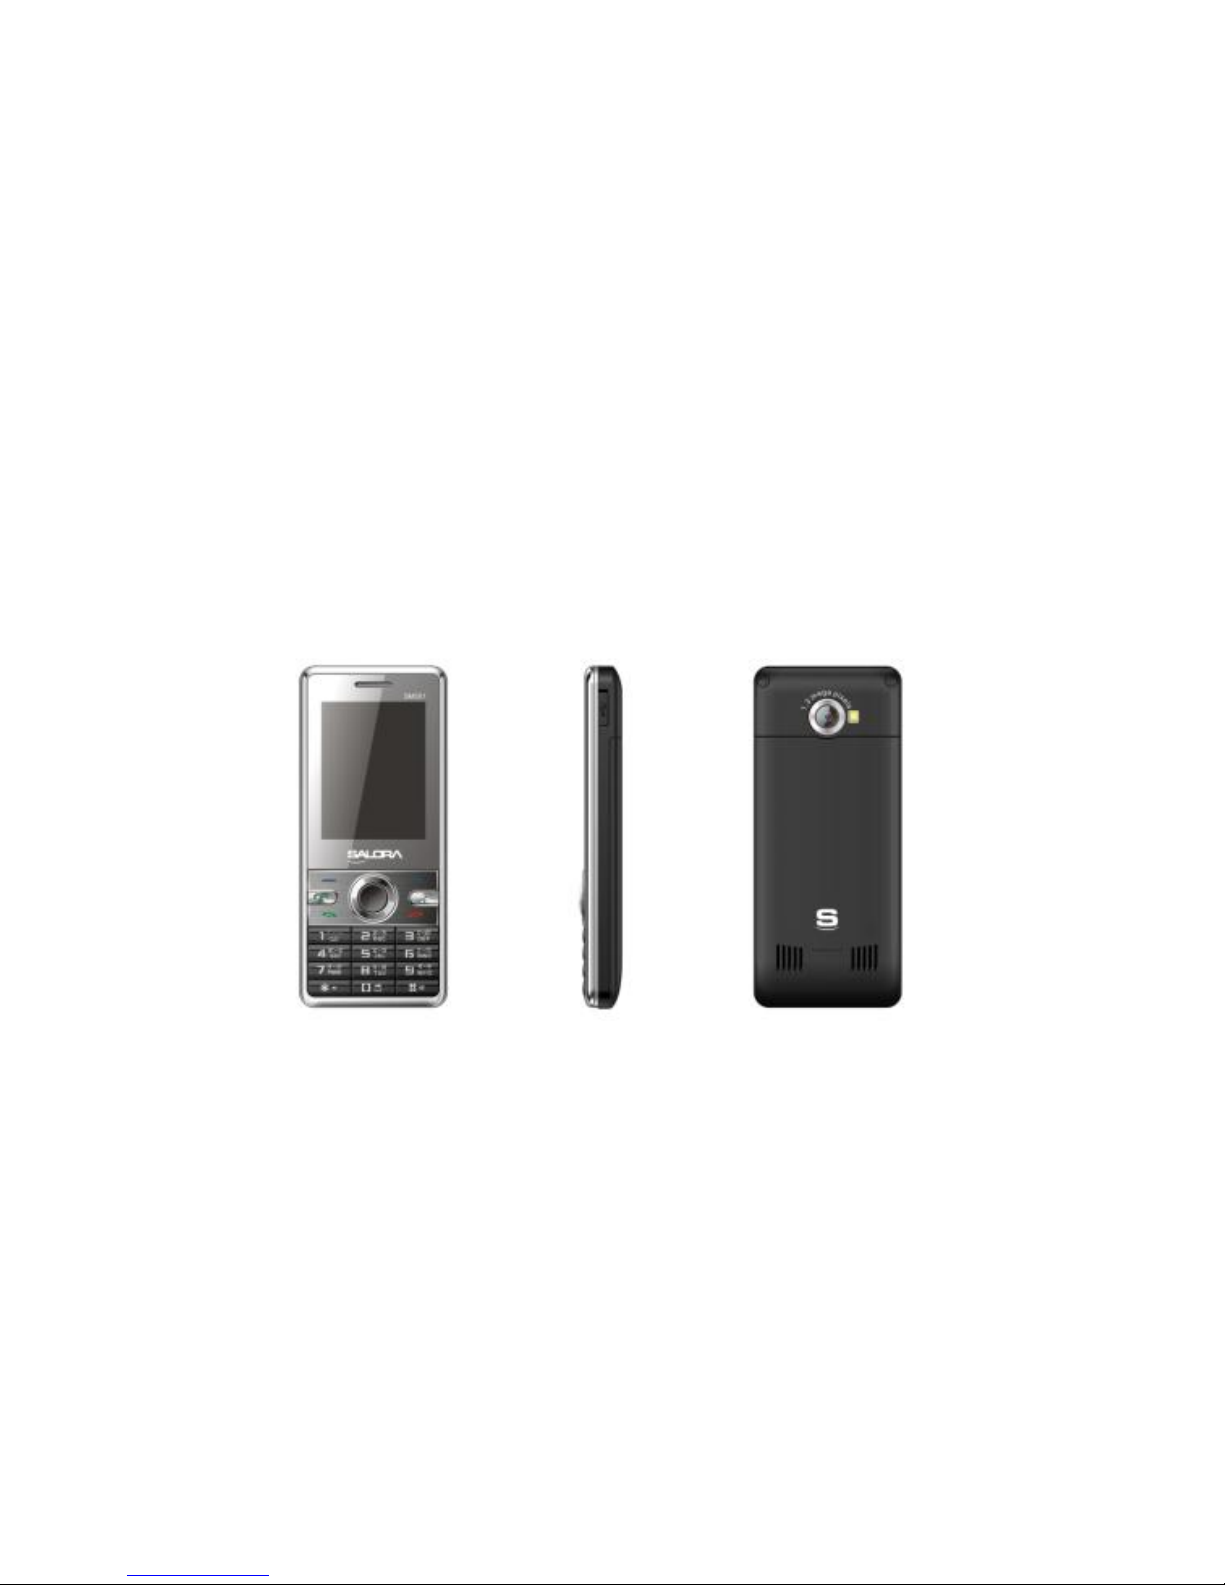
Thank you for choosing SM501 Color Screen GSM / GPRS
Digital Mobile Phone. You can read the manual, to get a
comprehensive understanding of the use of mobile phones
SM501, enjoy its perfect functions and simple operation.
SM501 Mobile Phones are for GSM / GPRS network
environment and the design of a bar phone. In addition to the
basic features of the call, SM501 also provides you with many
input methods, business card holder-telephone directories,
personalized 64 polyphonic ring-tones, caller picture, audio
player, camera, sound recorder, memory card(T-Flash card),
alarm clock, calendar, memo, GPRS Internet access, MMS,
hands-free calls, Bluetooth and so on, a number of practical
features to facilitate your work and leisure activities, Moreover,
SM501 using personalized human-computer interface design and
improve the function to meet your needs. SM501 Mobile Phones
are within GSM / GPRS technology norms, and access to
certification authority.
2.1 The Names and Explanation of Each Part
2.1.1 Technical information
Phone
Dimensions (w×h×t) 113.2*49.7*12.6MM
Weight 105g(With Battery)
Lithium Battery
Model SM501
Nominal voltage DC3.7V
Nominal Capacity rating 1000mAh / 3.7Wh
Travel charger
Model SM501
Input AC 100~300 V / 50~60Hz / 0.15A
Output DC 5.0V / 500mA
Call time/standby time
Note: the call time and standby time is depending on the
situation of the local network, use case and the SIM card
itself
Page 6
5
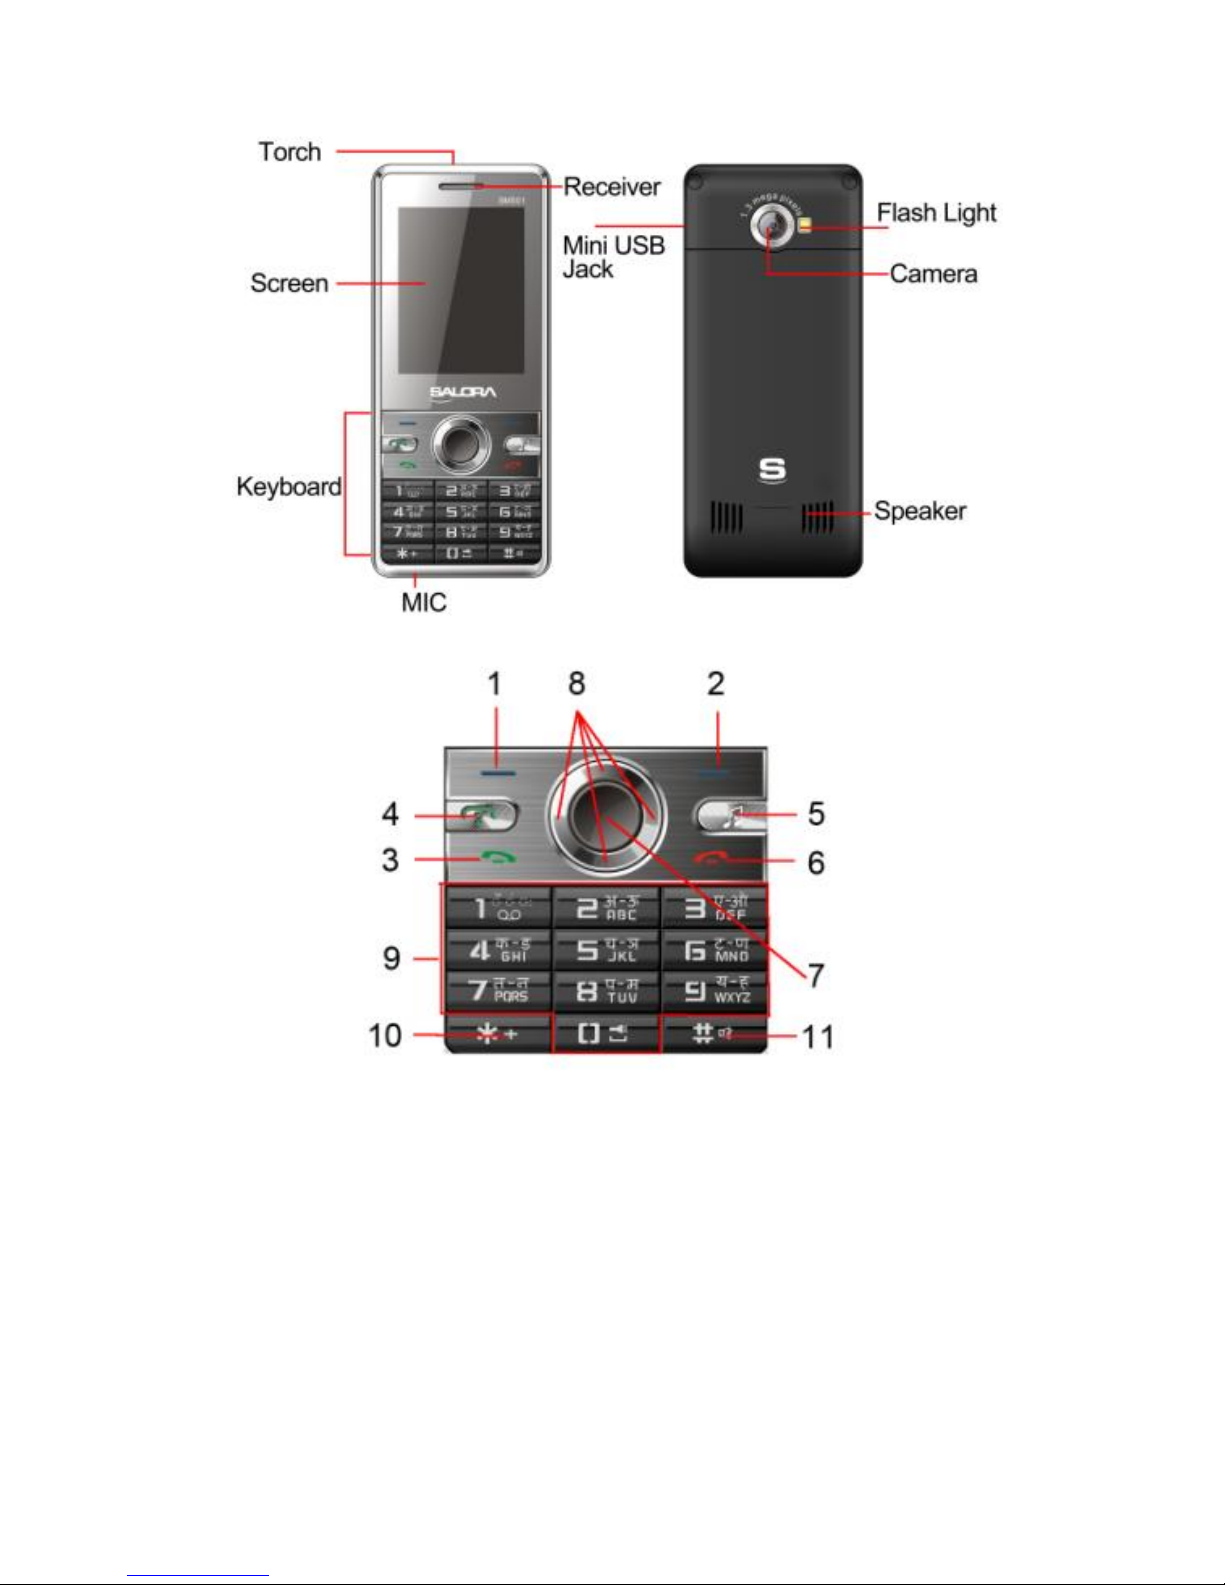
2.1.2 Appearance
2.1.3 Keypad function descriptions
1. Left soft key on standby, to execute the functions of
the display character at the left bottom of the screen; on
standby, to switch the interactive screen menu.
2. Right soft key to execute the functions of the display
character at the right bottom of the screen; on standby,
Into ―Phonebook‖.
3. SIM1 Dial key to dial with SIM1, pick up incoming calls;
on standby, to see the SIM1 call logs.
4. SIM2 Dial key to dial with SIM2, pick up incoming calls;
on standby, to see the SIM2 call logs.
5. MP3 shortcut key to enter ―Audio player‖ menu.
6. Hang-up key to end a call or reject incoming calls;
Page 7
6
under most circumstances pressing this key will put the
mobile phone into standby mode.
7. OK key on standby, to enter main menu. Mostly menu,
OK key function same with the Left soft key.
8. Navigation key on standby, press Up key to enter
―Camera‖; press Down key to enter ―Alarm‖; press Left
key to enter ―User profiles‖; press Right key to enter
―Tone settings‖.
9. Numbers key enter dial phone interface,press 0---9;
While Speed dialing function is on, long press 2-9 key to
dial the telephone number which you have assigned to the
key (the telephone number must store in the
phonebook).On standby, long press Number key one to
enter ―Voice mail server‖ menu, and long press Number
key zero to turn on Torch,and then press again, turn off
the Torch.
10. * key this key has different functions in different modes
and menus.
11. # this key has different functions in different modes
and menus; on standby, long press # key to activate
―Silent profile‖.
NOTICE: In this manual "short by" a certain button, the
button is pressed after the release; "long by" one button, the
button is pressed to maintain two seconds or more than two
seconds. Left/Right/Up/Down key are called the Navigation
key.
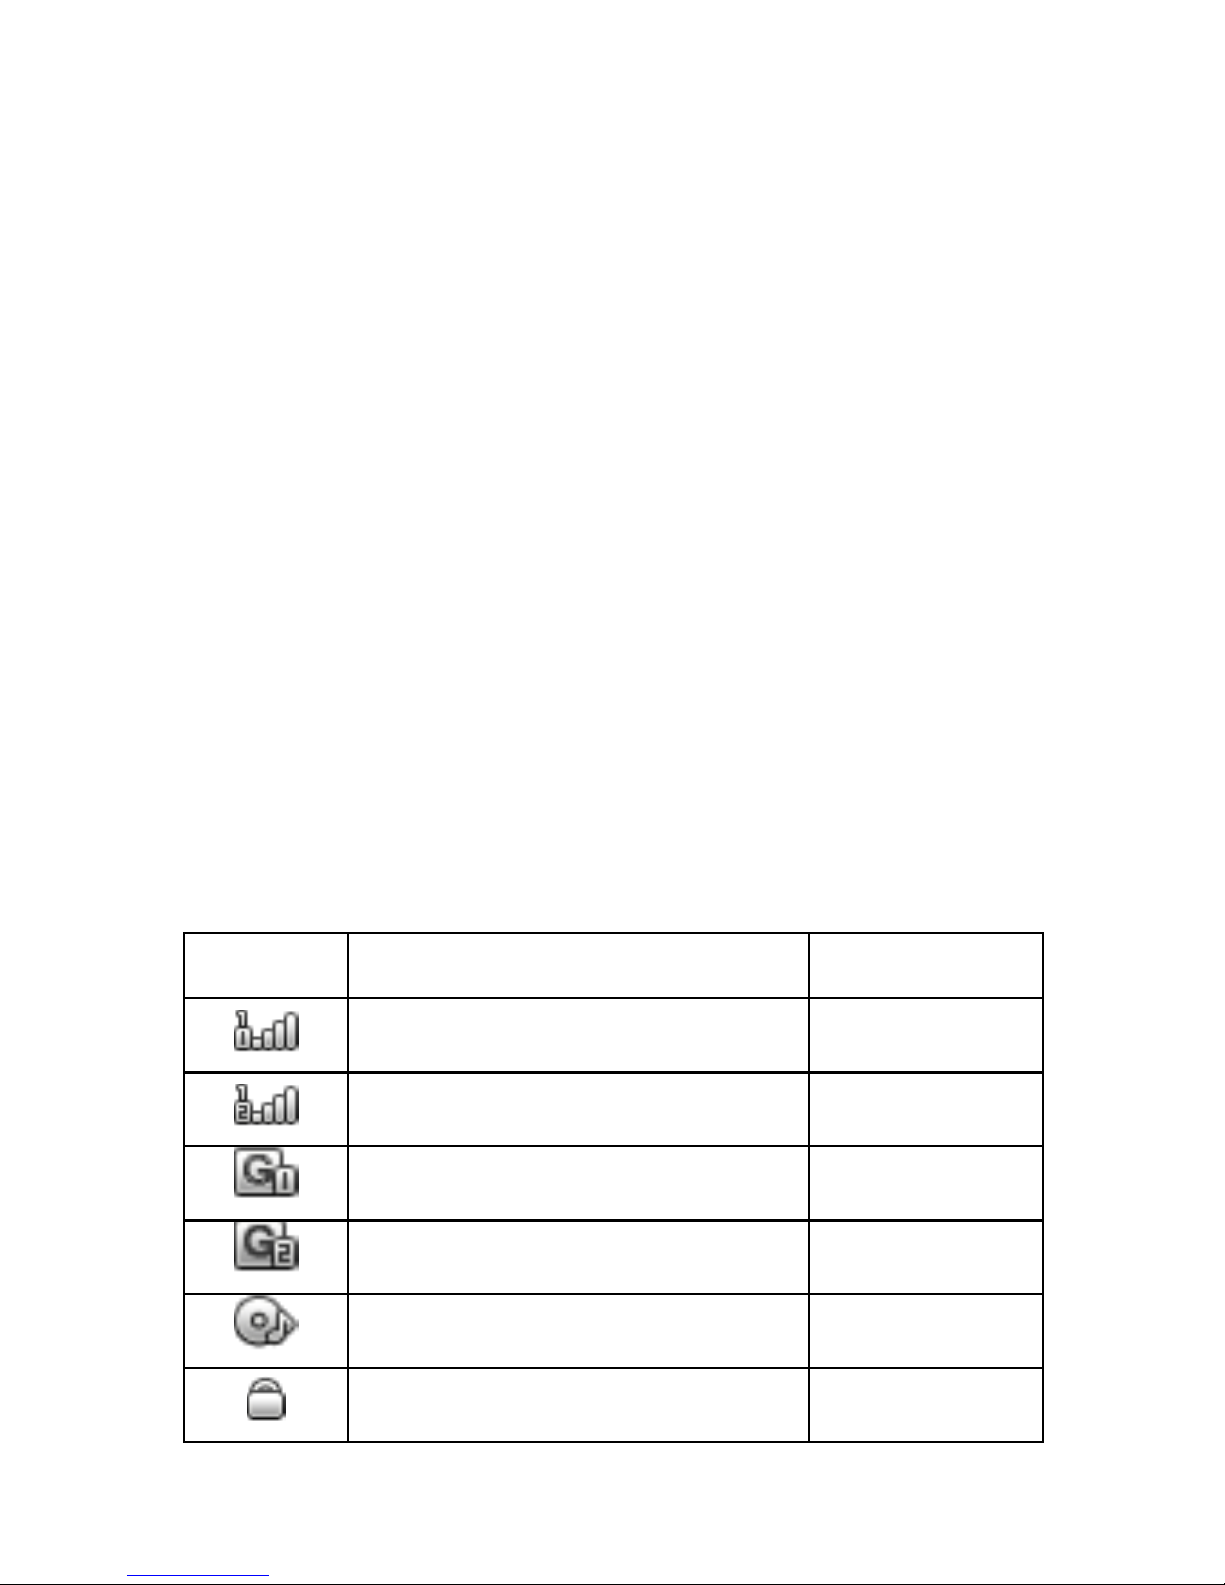
2.1.4 Icons
Icon
Explain
Display
place
SIM1 signal intensity of
internet
icon area
SIM2 signal intensity of
internet
icon area
SIM1 GPRS connect
icon area
SIM2 GPRS connect
icon area
Background play MP3
icon area
Keypad lock
icon area
Page 8

7
Vibration Only
icon area
Ring
icon area
Vibration and Ring
icon area
Vibration Then Ring
icon area
Silent activate
icon area
Earphone connect
icon area
Receive text message from
SIM1
icon area
Receive text message from
SIM2
icon area
Have not read MMS from
SIM1
icon area
Have not read MMS from
SIM2
icon area
Startup alarm
icon area
Bluetooth activate
icon area
SIM1 Divert all voice calls
icon area
SIM2 Divert all voice calls
icon area
Display batteries energy
icon area
SIM1 Missed calls
icon area
SIM2 Missed calls
icon area
2.2 Use descriptions
2.2.1 Turning the Phone On and Off
To turn on or off the phone please hold down the Hang-up key.
If you turn on the phone without having inserted the SIM card,
Page 9

8
phone will display ―Insert SIM1‖ ―Insert SIM2‖. After inserting the
SIM card, the phone will automatically check if the SIM is
useable.
The following will be displayed in this order:
Input Phone Lock Code
—If you set the Phone Lock.
Input PIN
—If you set the SIM Lock.
Searching
—The phone will conduct a search to find the appropriate
network connections.
2.2.2 Removing and Inserting the SIM Card
Metal interface of SIM card is very easy scraped.Before
inserting into the phone you must carefully remove it.
Turn off the phone; remove the battery and unplug other
external power sources.
Insert the SIM card into the SIM slot.
When you need to remove the SIM card, please first turn off
the phone, remove the battery, then remove the SIM card.
2.2.3 Removing and Inserting the Memory Card
Turn off the phone; remove the battery and unplug other
external power sources.
Insert the T-FLASH card to the T-FLASH trough.
When you need to remove it, please first turn off the phone,
remove the battery, then remove the memory card.
2.2.4 Remove and Install the Battery.
When removing the battery follow the following steps:
Push the battery cover towards bottom;
Raise the battery bottom, pull out the battery from the
mobile-phone.
WARNING: You must turn off your mobile phone before
removing the battery. Under no circumstances should you
remove the battery when the mobile phone is on as this may
damage the SIM card and your mobile phone.
When installing the battery follow the following steps:
Make the battery metal contact completely contact with the
battery connector metal contact, and then push the battery to
inset mobile-phone.
Put the battery cover on.
2.2.5 Battery Charging
Plug the charger connector with the phone.
Plug the charger into the electrical outlet.
At this time the charge level icon will repeatedly flash at the
top right corner of the mobile phone’s screen; if the mobile
Page 10

9
phone charging while power off, a charging indication will
appear on the screen. If the mobile phone was used even after
there was insufficient power, it might take some time after
having begun charging until indication of charging appears on
the screen. When the battery level icon does not flash
anymore, this means that the battery is fully charged. If
charging while power off, there will still be an indication on the
screen when the charging is complete. This process usually
takes more than 2.5 hours(The first three times you recharge,
you’d better keep 12-14 hours, as this will help extend battery
life).The mobile phone and charger will become warm during
charging and this is normal.
When charging is complete, unplug the charger connector
from the electrical outlet and the mobile phone.
ATTENTION:
Charging must be performed in a well-ventilated area with a
temperature between -10 C and +45 C. The factory-supplied
charger must be used. Using an unapproved charger could be
dangerous in addition to being in breach of the provisions of
the repair warranty.
If the mobile phone automatically shuts down, or indicates that
―Battery is low‖ you should immediately charge the battery. If
the battery has not been entirely used up before charging, the
mobile phone will automatically decrease the recharging
period.
2.2.6 Headset use
When you insert the headset, the phone will automatically switch
to headset mode. Through the automatic answer, you can pick up
calls; you also can listen to music with earphone.
2.2.7 Phone/ SIM card unlock
In order to prevent the illegal use, your phone and SIM card can
be separately setup lock password to encryption protection.
Default phone lock password: 0000, default SIM card PIN: 1234.
NOTICE: If you input wrong PIN code of the SIM card, your
SIM Card will be locked and the phone will ask for PUK code
which you’ll need to get from the Network Provider.
Page 11

10
3 Quick Guide
3.1 Emergency calls
Whether install the SIM card or not, the phone can call the
emergency phone number for help, for example dial number 112.
3.2 Make a call
Enter the phone number, including the area code, select one of
the SIM card and start to make a call. During in a call, it will
display the call status information, if you need to input the number,
please directly press the number key. For international calls,
press ―*‖ key to switch, until the international phone prefix ―+‖
appears on the screen, enter the country code and full number
you wish to call.
3.3 Answer a call
Press the Dial key, Left soft key or OK key to answer an
incoming call.
3.4 Call options
During the call, press the ―Options‖ to enter the call option menu,
or press the ―H-Free‖ to enter in Loudspeaker Mode, then you
can press the ―H-Held‖ to return to Normal Mode. While in calling,
you can do the operation:
Hold single call
Put a call on pause.
Resume single call
Resume the call.
End a single call
End the call.
New call
Begin to dial new call.
Phonebook
Enter phonebook menu.
SMS
Enter into SMS menu.
Sound Record
Record call voices.
Mute
To stop transmitting the user’s voice.
DTMF
Deactivate or activate DTMF sounds.
Page 12

11
4 Function Menu
In all main menu or submenu, you can use the Navigation
key to scroll to the desired item, and then press the Left soft
key or OK key to select the function.
Usually, when in the function menu, you can exit a menu item
by pressing the Right soft key. You can also press the
Hang-up key to return to the standby mode.
On standby, click ― ‖, some shortcut menus icon will display,
arbitrary choose a menu icon, drag it with the stylus anywhere
on standby screen, then click, can enter the corresponding
operation interface; if you want not to display theses icons,
first drag them to the left of the screen (their original location),
and then click― ‖ again to hide them.
On most menu interface, can click the corresponding menu
icon or menu characters on the screen to enter corresponding
menu interface.
ATTENTION: 1、The introduction of the function menu is
mainly about the operation of keyboard. You can see the
operation of touch panel by guide characters on the screen.
2、the following main menu features are to be introduced as
the phone setting as dual SIM open.
4.1 File manager
To enter ―File manager‖ submenu, menu display Memory card
(if the Memory card has been inserted into the mobile-phone) and
Phone, press the Left soft key "Options" to enter function list:
Open to display the list in the root catalog and file.
Format to format Memory card, this operation will
delete all data in the Memory card.
After opening the file, can display the list in the file, select one
datum, press the Left soft key ―Options‖:
Open to display the list in the current datum.
New folder to create new folder.
Rename to change the current file name.
Delete to delete the current file.
Sort by to select sort means with the current files, By
name, By type, By time and By size, or not array to select
None.
Select a file, press the Left soft key ―Options‖:
Page 13

12
View to look over the picture file. If photo format is not
supported, the phone shall show an error prompt.
Play to play multimedia file. If file format is not supported,
the option shall not show.
Use as to use as to different destination. Different thing
have the unlike option.
Send to forward the different format file to different
destination. Different thing have the unlike option.
Details to display the details, including Date and Size.
Rename to change the file name.
Copy to copy the current file to destination.
Move to move the current file to destination, Move is same
as Copy, but Move is done, file will not remain in primary
location.
Delete to delete the current file (Note: if the file attribute is
Read only, it can not be deleted).
Delete all files to delete all file in the current catalog.
Mark several After marked, at the same time more than
one file can be copied / deleted, etc.
4.2 Phonebook
You can use the phonebook function to save name card
information such as Name, Number, caller picture, caller ring
tone and Caller group.
NOTICE: This phone is able to save up to 500 phonebook
records (not including the SIM card capacity).
Enter Phonebook submenu, you can select ―And new contact‖,
to add a new record to the phonebook.
Select to select ―To SIM‖ or ―To phone‖.
Caller groups mobile telephone hold out incoming caller
group function, you can view and edit the Caller group detail.
Phonebook settings to set the preferred storage, Speed
dial, my number, Extra numbers, Copy contacts, Move
contacts, and view the Memory status.
Phone Book Backup first export the contacts, then import
them.
4.3 Fun and Games
4.3.1 Games
The phone provides three system games, which bring enormous
fun for your leisure time, for detailed operation, please view game
operation specification.
4.4 Call center
4.4.1 Call history
Enter Call history submenu, you can choose SIM1 call history or
SIM2 call history, can respectively review SIM1 and SIM2 call
Page 14

13
record information.
Missed calls\ Dialed calls\Received calls
The above can press Left soft key ―Options‖, delete, save, call,
edit, send SMS and send MMS.
Delete call log: press Left soft key to confirm, delete missed
calls, dialed calls, received calls or deleted all.
Call time: press Left soft key to confirm, select to check last
call time, total sent, total received or reset all time.
Call cost: press Left soft key to confirm, select to check last
call cost, total cost, reset cost, max cost or price per unit.
SMS counter: press Left soft key to confirm, select to check
the quantity of sent and receive messages.
GPRS counter: press Left soft key to confirm, select to
check the GPRS transmission flux. Included ―last sent‖, ―last
received‖, ―all sent‖ and ―all received‖ flux (units: Byte), and
also can clear the history by ―Reset counter‖ function.
NOTICE: The quantity of data flow must be based on you
network provider, the phone record is only a reference.
4.4.2 Call settings
4.4.2.1 SIM1 and SIM2 call settings
Call waiting
After activating this function, the network will notify you that you
have a new incoming call when you are talking on the phone. For
details of how to use this function you can contact your network
provider.
Call divert
The call diversion network service permits you to divert, under
certain preset situations, certain incoming calls to a telephone
number designated by you. This service requires network support.
You can set and cancel the incoming Call divert,It contains:
Divert all voice calls, Divert if unreachable, Divert if no
answer, Divert if busy, Divert all data calls and Cancel all
divert.
Call barring
The Call barring allows the user to prevent incoming or outgoing
calls based on user-defined conditions. The network provider
provides you with a 4 digit Barring PW to allow you to activate the
―Call barring‖ service. When you use this function, please
contact your network provider.
Outgoing calls allow the user to prevent calls being made to
other numbers.
Incoming calls allow the user to prevent calls being received
from other numbers.
Cancel All to input the barring password, can cancel all limits.
Page 15

14
Change barring password to input the old password, set the
new password.
4.4.2.2 Advance settings
Black list
To edit the Black list numbers, and then turn on or off the Reject
from list mode. Once turn on the mode, then can’t answer the
black phone numbers that you set.
Auto redial
Turn on or off this option, can activate or deactivate this function.
IP dial
The mobile-phone supports the IP number call, can set three
group IP number at best. First edit IP number, then activate it,
when you call, IP number will automatically add before the phone
number.
Call time display
Turn on or off to this option, can display or not display the call
time.
Call time reminder
Call time reminder allow user to remind about duration of a call. If
this option is enabled, there will be a short beep when duration of
a call exceeds the reminder timer. The reminder can be single or
periodic.
Auto quick end
Can set on or off, if you set on, the call may be ended
automatically according to the duration.
Save new number called
Can set on or off, if you set on, if turn on the function, when
receive a call from an unknown number, after ending the call, the
phone will pop up whether save the number to the phonebook.
4.5 Messages
4.5.1 Write message
Before writing a text message, please confirm that you have set
the correct text message service centre number.
Press the Left soft key to enter the ―Options‖ menu:
Send to can ―Enter number‖ or ―Add from Phonebook‖.
Input method to offer many different kinds of input
methods
Insert template to insert the text templates in the cursor of
the current message.
Advanced to select ―Insert number‖ ―Insert name‖ ―Insert
bookmark‖ to the current SMS.
Save to Drafts to save the SMS in the Drafts.
NOTICE: the phone doesn’t support the EMS functions.
Page 16

15
4.5.2 Inbox
Enter the ―Inbox‖ submenu, you can respectively view SIM1 and
SIM2 received messages.Press the Left soft key ―OK‖ to read
the message, and then press the Left soft key ―Options‖, can
carry out Reply, Delete, Forward and so on.
4.5.3 Drafts
View the messages that you saved.
4.5.4 Outbox
Enter the ―Outbox‖ submenu, you can respectively view SIM1
and SIM2 saved messages (including saved in SIM and phone).
4.5.5 MMS
MMS is a multimedia message service. Its biggest distinction is
that it supports multimedia functions and can send text, images,
sound and many formats of multimedia data.
The network operators must support MMS function. Before using
this function please confirm that your SIM card supports this
service or contact your network operator. If your mobile phone
supports MMS function, then after the necessary MMS settings,
you can send and receive MMS.
4.5.5.1 Writing message
In this interface, you need make out: To (addressee), Cc, Bcc,
Subject and Edit content.
You can select the phone number or E-mail as sending object,
every MMS can send to multi-object.
At the addressee list interface, press the Left soft key ―Options,
have options as follows: add number, add E-mail, edit, delete and
delete all.
The MMS subject can be empty, if subject empty, default subject
name is ―No subject‖.
When you select ―Edit content‖, press the Left soft key ―Edit‖ to
enter edit content interface, you can input content. Complete
editing the current MMS, press the Right soft key to select
"Done", you can select operate as follows: Send only, Save and
send, Save to Drafts, Send options, Exit.
NOTICE: Each page of a MMS can only contain one picture
and one sound.
4.5.5.2 Inbox
Enter the "Inbox" submenu. Your mobile phone will display a list
of the MMS in the "Inbox" (include not download). Press the
Up/Down key to scroll to the MMS, you wish to read, by pressing
the Left soft key "Options", you can carry out the following
operations on the current MMS: download, view, reply, reply by
SMS, reply all, forward, delete, delete all, save as template,
properties and use details.
Page 17

16
4.5.5.3 Outbox
This menu allows you to save the implementation of the "Save
and send" MMS.
4.5.5.4 Drafts
Select the ―Save to Drafts‖ function when send the message,
saved in the ―Drafts‖ menu.
4.5.5.5 MMS Settings
The user must make the necessary settings in order to use
the MMS.
Enter the "MMS settings" submenu and make the following
settings: compose, send, retrieve, filter, server profile and
memory status.
4.5.6 Broadcast message
Broadcast messages refer to public messages sent by your
network operator. If you use the broadcast message service you
can receive messages on all different subjects from your network
operator such as: the weather, taxi, hospitals, etc. Please contact
your network operator for available subjects.
NOTICE: The network operators must support the
“Broadcast message” function for it to be available.
4.5.7 Templates
Templates menu store some frequently-used SMS, for you to
use them directly.
4.5.8 SMS settings
When using the short message function you must first make
the necessary settings.
Enter the ―SMS settings‖ submenu to select SIM1/2 message
settings to operate as follows:
Profile setting: Please contact your network provider to get
the SC address. Select one Profile, and then press the Left
soft key ―Edit‖, can set the Profile name, SC Address,
Validity period and Message type. During Validity period,
the short message service centre will continuously resend a
message until it is received. The message Validity period is
applicable for all sent messages.
NOTICE: Message Valid Period, Fax, Page and E-mail need
support by the network operator.
Voicemail server this will automatically forward the
incoming calls to the voice mail centre when you cannot
accept a call so that the caller can leave a message on the
voice mail system of service network. If a message is left, you
can access the message by visiting the voice mail system.
Enter ―Voice mail server‖ submenu, every SIM card can set
two voice mail numbers at most.
Page 18

17
Press the Left soft key “Options” to enter mail option, can
―Edit‖ your voice mailbox number, or ―Call voice mail” to
listen to the messages recorded.
The network operators must support the ―Voice mail server‖
function for it to be available. You may have to apply for it
before it will be activated. For details and the voice mailbox
number, please contact your network operator.
Common settings: to set On/Off to Delivery report and
Reply path.
Memory status: to display the memory status, SIM card and
phone. SMS Memory is decided with SIM card capability.
Preferred storage: to select storage: SIM or Phone.
4.6 Multimedia
4.6.1 Camera
This mobile phone is equipped with a high vivid camera picture
which you can use to take pictures at anytime or place and then
save them on your mobile phone, use them as your mobile phone
wallpaper or send them to your friends and colleagues via MMS.
4.6.1.1 Camera settings
Enter the ―Camera‖ submenu, now the camera is in preview
mode.Press the OK key to take photos, Press the Left\Right
Navigation key to switch with EV; Press the Up\Down
Navigation key to adjust focus; Press 1-7 key to set camera
settings; Press # key to show or hide shortcut icon in the preview
mode interface.
During the view-finding mode, press the Left soft key, you can
set operations as follows:
Photos to go to photos list, display picture list that it is
saved in the current file.
Camera Settings to set content as follows, include Shutter
sound, EV, Delay timer, Cont shot.
Image settings to set Image size and Image quality.
White balance to set balance status.
Scene mode can set Auto or Night.
Effect settings can set special effect to the taking photos.
Restore default to make the parameter of camera to revert
to default setting capture mode.
4.6.1.2 Taking a photo
During the view-finding mode, adjust the lens to allow what is
being photographed to appear in the viewfinder.
After framing the picture you wish to take, keep the camera
steady and press OK key to take pictures.
After taking photos, press the Left soft key “Options”, select
―Send‖ and ―Delete. Or press the Right soft key ―Back‖ to
Page 19

18
enter to the next camera preview mode.
When Cont Shot set to ―off‖, save and take a photo will finish
at the same time.
You can look over photos from the ―photos” menu, or
[Photos] file under the [File manager] document.
4.6.2 Image viewer
Select ―Image view‖ submenu, you can conveniently look over
photo list. Press the Left soft key ―Options‖ to select content as
follows: View, Browse style, Send, Rename, Delete, Delete all
files and Sort by. Press Left/Right key to look over photo.
When viewing the photos, you can press 1 key to zoom in the
picture, press 2 key to zoom out it, press 3 key to circumrotate it.
NOTICE: Only the 640*480 size supports the zoom in and out
function.
4.6.3 Video recorder
The mobile-phone supports shoot function, the extent of film
restrict according as current memory space. Movies will be saved
to ―Video‖ submenu in the ―File manager‖ menu.
Enter ―Video recorder‖ submenu, screen will display scenery in
the video. When you shoot the film, can press the OK key to
pause or continue; press the Right soft key to exit and save
movies; press the Left/Right key to switch with EV; press
Up/Down key to adjust focus; Press the Left soft key, can
select the operation as follows:
Camcorder settings include EV, Night mode, Anti-flicker.
Video settings to set video quality.
Effect settings include several effects.
Restore default to make the parameter of camera revert
default settings.
4.6.4 Video player
Select ―Video player‖ submenu, press the Left soft key to enter,
can look over list of movies.
When playing the video, press the Left/Right key to control the
play progress; press the Number */# key to adjust the play
volume; press the OK key to pause, and then play the OK key to
continue; press 0 key to go to full-screen Mode.
ATTENTION: the phone doesn’t support AVI format videos
function.
Play to play the current movies.
Send can forward “As MMS” “Via Bluetooth”.
Rename to reedit the current movies name.
Delete to delete the current movies.
Delete all files to delete the all movies in the
mobile-phone.
Page 20

19
Sort by can array all movies to select By name, By type,
By time and By size, or not array movies to select None.
4.6.5 Audio player
In the Audio player menu interface, by the OK key can control
the music, pauses or resumes; by the Down key can stop the
music; by the Left/Right key can circularly play the music in the
play list; by the */# key can adjust the volume.
In the Audio player menu interface, press the Left soft key
―List‖ to display the play list of music, press the Left soft key
―Options‖, can Play the current music, look over Details
message of music, Add to rings, Refresh list, Settings the
attribute about the Audio Player.
You can set the item of Settings menu by the hint above the
screen:
Prefer Play list to select music in the Phone or Memory
card.
List Auto Gen to turn on or off. Turn on this item, music will
automatically update the play list in the [My music] file. Turn
off this item, return "Options" menu, can select "Add" to add
music to the play list, select "Remove" remove the selected
file or "Remove all" to remove all files from the play list.
Repeat to change the repeat mode, to set ―Off‖ (not repeat),
―One‖ (repeat to play one file) and ―All‖ (circularly play all
music).
Shuffle to change the order of playing, can set ―On‖
(random order) or ―Off‖ (play according to order of the play
list).
Bluetooth settings to set the BT stereo output and the
BT headset.
Audio effects to choose the balanced manner of the music
melody.
Lyrics display when open the lyrics, can realize the lyrics
synchronized display.
4.6.6 Sound recorder
Select Sound recorder, press the Left soft key “Ok” to enter
this submenu. Press the Up key to record, press Left soft key
―Options‖, you can see following submenus:
New Record to record a new voice memo.
List to display all the records.
Settings to change the Storage and File format.
4.6.7 FM radio
Enter FM radio interface, press the Left/Right to select the
different channel; press the OK key to turn on/off the FM
program; press the */# key to adjust volume, press the Left soft
Page 21

20
key ―Options‖, can select the operation as follows:
Channel list to edit twenty channels at most.
Manual input to manual input channel.
Auto search to auto search the channel of receiver and
save to channel list.
Settings can turn on or off the loud speaker, can set the
Record format and Record storage.
Record to record the current FM channel.
Append to ―AMR‖ file, can add record to the current file.
File list to display all record files.
4.7 Organizer
4.7.1 Bluetooth
You can connect your phone to the compatible device through
Bluetooth wireless technology; the longest distance is 10 meters.
Because it is through radio waves to communicate, your phone
and other Bluetooth devices are not required to keep face to face,
but it may interfered by the wall and other electronic equipment.
In some areas, it may be limited to use the Bluetooth wireless
technology, please consult local department or network service
provider.
NOTICE: use the Bluetooth wireless function and running
other applications in the background, these features may
faster consume the battery voltage, and short the battery
life.
Enter into the Bluetooth menu; you may carry out the following
operations:
Power to press the Left soft key to On/Off the Bluetooth
function.
Visibility if turn on the visibility, the phones can be
searched and viewed.
My device press Left soft key to enter into my device
submenu, it will show the connected device history. Select one
device and press Left soft key ―options‖ to operate:
Rename to revise the device name
Delete to delete the history
Delete all delete all history
Service list to display the service list of the device
Search audio device press Left soft key to search
hand-free devices, such as Bluetooth headset, if nearby there
is an active Bluetooth device, the phone will find out the device,
press ―connect‖, and enter the Bluetooth password to connect
successfully.
My name to revise the device name.
Advanced to set the Audio path, Storage and view the
Page 22

21
address.
4.7.2 Calendar
Enter ―Calendar‖ submenu, screen will display the current month,
press the Navigation key to change date. Press the Left soft
key ―Options‖:
View look up the current routing.
Add event to add a new task.
Jump to date input the date time, press the Left soft key
―OK‖ to the appointed date.
Go to weekly/monthly view switch between weekly view
and monthly view to view the date.
4.7.3 Calculator
Your mobile phone provides a calculator with 4 basic functions to
facilitate simple calculations.
Enter the ―Calculator‖ submenu to display the operation
interface of the calculator:
- Press the Number keys from 0 to 9 to input the numbers you
wish to input, use # key to input the decimal point.
- By pressing the Right soft key, you can delete the latest entry
or result, press the Right soft key ―Back‖ to exit the calculator,
press the Left soft key ―OK‖ to calculate the result.
- Press the Navigation key to enter the symbols for the four
mathematical operators +, –, x or ÷.
NOTICE: The precision of this calculator is limited so that
rounding errors may occur, especially in the case of
indivisibility.
4.7.4 Tasks
Display all theRoutines.
4.7.5 Alarm
The mobile-phone can set five alarms at most, and hold out the
alarm when the phone is power off.
4.7.6 World clock
Enter into the Word clock submenu, first you will see the world
time zone map, in lower screen will show the current country’s
date and time, then you can press the Left/Right key to view the
time and date of any other countries.
4.8 Settings
4.8.1 Dual SIM settings
Can set up standby mode for the phone: Dual SIM open, Only
SIM1 open, Only SIM2 open or choose Flight mode, If choose
flight mode, all of functions of SIM card will be shielded.
4.8.2 Touch calibration
According to the calibration screen shows, you can click the
cross center on the screen and touch the screen calibration to
Page 23

22
make the stylus more accurate.
4.8.3 Phone settings
Enter the ―Phone setup‖ submenu. Here you can make the
following settings:
4.8.3.1 Time and date
Set home city there are many different cities displayed,
according to different cities, you can change the system time.
Set foreign city there are many different cities displayed,
can set any city according to cities available.
Set time/date to can set the current time and date of
mobile-phone according as established format, and set
Daylight saving to turn on or off. The mobile-phone can only
set date between 2000 and 2030 year.
Set format to set time format, 12-hour or 24-hour, set date
format.
4.8.3.2 Schedule power on/off
You can edit four times to turn on/off the mobile-phone. Each
time includes: Status (Disable or Enable), Power on or off and
time. Finish setting, when the time arrive, mobile-phone will turn
on/off according as the status.
NOTICE: Time can not repeat, because same time can not be
activated at one time.
4.8.3.3 Language
To set the current language type, menu interface change
according to setting.
4.8.3.4 Preferred input methods
There are many kinds of input methods in the mobile-phone,
choose one kind as default characters editor.
4.8.3.5 Display characteristic
Wallpaper to setup the standby image.
Screen saver to setup whether open the screen saver
function.
Power on display can browse and select the animation
from User defined or file manager.
Power off display to operate the same with the Power on
display.
Show owner number to turn on or off, set whether display
the SIM1 or SIM2 owner number on standby.
4.8.3.6 Set Shortcuts
You can edit the shortcut menu list.
4.8.3.7 Dedicated key
In this menu, you can edit the shortcut function of
Navigation key: Up, Down, Left and Right key.
Page 24

23
4.8.3.8 Handwriting
This menu includes ―Pen speed and Pen color‖ submenu, for
pen speed, you can set switch among three levels, Medium,
Slow and Fast; for pen color, there are eight colors to choose.
4.8.3.9 LCD backlight
Set the Brightness and Time of LCD backlight.
4.8.4 Network setup
Enter this submenu, select appropriate SIM card, can make
settings to its network-related content.
NOTICE: options menu show and the number of the
preferred networks that the providers supply are related to
the SIM card, please contact with you network provider to
get more information.
4.8.5 Security setup
Enter the ―Security setup‖ submenu. Here you can set the
security options of your mobile phone to avoid the illegal use of
your mobile phone and SIM card.
4.8.5.1 SIM1 security setup
SIM1 Lock
The PIN number can prevent the illegal use of your SIM card.
NOTICE: If you successively input your PIN number three
times incorrectly, your SIM card will be locked. At this time
you need the PUK number to unlock the SIM card. The PIN
number and PUK number may have been provided to you
together with the SIM card. If you do not have it, please
contact your network provider. The default PIN number is
usually 1234. You should change it to your own code as
soon as possible.
Fixed dial
If your SIM card supports it, outgoing calls can be restricted
to certain numbers. When this function is activated, you may only
dial the numbers that are in the fixed dialling list, or numbers that
have the same initial numbers as those on the fixed dialling list.
NOTICE: You need to enter your PIN2 number to turn on or
off the fixed dial function. Please contact your network
provider to obtain the PIN2 number (Presently not supported
by any network provider across India). After turning on the
fixed dial function, only numbers in the fixed dialling number
list are displayed in the phone book.
Change password
User is allowed to change SIM1 PIN and SIM1 PIN2.
NOTICE: Password must be more than 4 digits (include 4
digits) and maximum 8 digits.
Page 25

24
4.8.5.2 SIM2 security setup
SIM2 security setup operates same with the SIM1 security
setup.
4.8.5.3 Auto keypad lock
A time select from 5 sec, 30sec, 1min and 5min, on standby,
if you do nothing in the time of setting, keypad will automatically
lock. If you select ―None‖, cancel this function.
4.8.5.4 Phone lock
It can prevent the illegal use of your phone.
Attention: The default phone lock code is 0000. You should
change it to your own code as soon as possible.
4.8.5.5 Change password
You can change the password of the phone.
4.8.5.6 Mobile Tracker
You can set a telephone number as a monitor. The telephone
number can be your family member or your friend. Turn on the
Stats, When change the SIM card, while turn on the phone,
Mobile phones can automatically send a message to the
number[Bonding Phone] that you have set, then you can know
who is using your mobile and take appropriate action to get your
lost phone.
Notes: The Bonding phone could receive SMS, it must be a
normally number; the default password is 0000.
4.8.6 Motion settings
Motion Sensor State to turn on or off the Motion
sensor state.
Motion Sensor Profiles can respectively turn on or off
the: Motion switch wallpaper, Motion switch mp3 and
so on, such as, if you turn on Motion switch mp3 function,
on standby or in the audio play interface, shake the phone
to play next song.
4.8.7 Restore factory settings
Enter the ―Restore factory settings‖ submenu. Here you can
restore the relevant settings to the manufacturer’s settings.
NOTICE: Restoring the manufacturer’s settings requires the
correct handset lock code to be entered. Some settings
cannot be restored to the manufacturer’s settings until the
phone is restarted.
4.8.8 Sound effects
Set the content of equalizer of the audio player, you can select
one format among the 8 equalizer formats, or select ―Restore
factory default‖ to the default setting.
4.9 User profiles
Your mobile phone provides many different user profiles, such
Page 26

25
as General, Meeting, Outdoor, Indoor, Headset, Bluetooth
and Power save, for you to set your mobile phone’s ring tone,
according to case and environments.
NOTICE: These profiles have already been set and the
default profile is “General” when the mobile phone leaves
the factory. On standby, hold press # key to quickly turn
Silent profile on or off.
Press the Up/Down key to select the needful profile, and then
press the Left soft key ―Options‖:
Activate: to activate selecting profile.
Customize: for you to set your profile, select corresponding
setting to change.
Tone settings to allow the user to set SIM1 and SIM2 ring
tones.
Volume two types of volume can be set: Ring tone and
Key tone.
Alert type this option allows the user to set the kind of alert
he expects, user can select only one option from Ring,
Vibration only, Vibration and ring or Vibration then ring.
Ring type this option allows the user to set mode of ring,
include Single, Repeat and Ascending.
Connect notice set the connect notice when others listen
to your telephone.
Extra tone the user can turn on or off the tone as follows:
Warning, Error and Camp on.
Answer mode the user can select different modes of
answering: Any key (except for the Hang-up key, Right soft
key) and Auto (display Only in Headset Mode).
4.10 Extra
4.10.1 Answer machine
When you turn on the ―Auto answer‖, and set the Settings, it will
automatically answer the incoming calls, when you can not
accept a call so that the caller can leave a message, then you
can enter ―Leaving messages‖ to listen the voice.
4.10.2 E-Book reader
This function can help you to read the text file of the TXT format
which stored in the [File manager], you only need copy the TXT
text file into the ―E-book‖ file, then enter E-book submenu to use
it.
By pressing the Left soft key "Options", you may carry out the
following operations:
Open E-book to open the current e-book
Clean up bookshelf to arrange the folders in the file.
Global settings to set up the Font style, Font size and Auto
Page 27

26
scroll etc.
Book info displays the Title, Size and Format of the current
e-book.
Delete to delete the current e-book.
Delete all files to delete all the e-books in the file.
Sort by to select sort means with the current files.
Apply global settings carry out the global settings.
Help to display how to use shortcuts.
4.11 Services
4.11.1 STK*
Press the Left soft key to enter the SIM1 or SIM2 ―STK‖ main
menu. Here you can use the value-added services provided by
your network operator.
Your mobile phone supports STK functions. This service is
provided by your network operator. If your SIM card and network
operator do not provide this service, then you will not be able to
use this function. For more information please contact your
network operator.
4.11.2 Data account
GPRS
In this menu, the mobile-phone will list GPRS data, can select
and edit the GPRS data: Account name, APN, User name,
Password and Auth type.
4.11.3 Internet service
Your mobile phone supports wireless application protocol (WAP)
service. You can access many different WAP services such as
news, weather reports, flight information, and others. Network
support is necessary for WAP services. Please contact your
network provider and the service provider of the desired service.
The service provider will also provide instructions about how to
use their service.
4.11.3.1 Homepage
Select "Homepage" to enter the homepage, Homepage is set in
the [Settings] \ [Edit Profile]\ [Homepage].
4.11.3.2 Bookmarks
Display the bookmark list.
Go to: to connect the address of appointed bookmark.
Edit: to edit the Title and Address of the bookmark.
Send: to send the bookmark to other phone.
Delete: to delete the selected bookmark.
Delete all: to delete all the bookmarks.
Add bookmark: to edit the title and address of new
Page 28

27
bookmark.
NOTICE: If Bookmarks is empty, you need input website at
first, then connect it.
4.11.3.3 Recent pages
Display the recent pages. Select one page, can go to at first
hand.
4.11.3.4 Input address
Use this menu to manually enter the URL address of a website
and access the website.
NOTICE: If you go up to Google website, only need input:
www.google.com.
4.11.3.5 Service inbox
Enter Service inbox submenu, you may view the received WAP
messages that from your service provider.
4.11.3.6 Settings
Select ―Settings‖ to enter settings for online browsing.
Select SIM to choose SIM card to use the web services.
Profiles to display the SIM1 and SIM2 edit profile list, after
finishing edited, press done to save, select "Activate profile"
to activate.
Browser options to set the Timeout and Show images.
Service message settings to set the Enable push, Trust
settings, SL Settings and Trust list.
Clear cache data or services that you have visited will be
saved in the cache memory of your mobile phone. Please
promptly clear these temporary files which record your online
data.
Clear cookies data or services that you have visited will be
saved in the cookies memory of your mobile phone. Please
clear these temporary files which record your online data.
Trusted certificates to display the WAP browser the
trusted certificate.
NOTICE: If you tried to visit, or successfully visit confidential
information that required a password (such as a bank
account), please clear your mobile phone's cache memory
each time.
4.12 Shortcuts
Display shortcut menu list, can directly enter into the selected
shortcut menu.
Page 29

28
5 Input Methods
General outline
This mobile phone supports many different input methods, can
select any one according to the current language.
Keyboard values
The keyboard values are as follows:
Generally the Left soft key indicates confirmation; the Right
soft key is to return or eliminate.
Navigation key (Up/Down and Left/Right key): Generally
used to move the cursor or candidate characters for inputting.
“#” key: to switch between different input methods.
Number keys from 2 to 9: according to the different input
methods, can input different contents.
“*” key: to show the Symbol interface.
6 Troubleshooting
If anything unusual occurs while using your mobile phone,
please refer to the following table.
Frequently
Occurring
Problems
Cause
How to Fix
Poor reception
Using the mobile
phone in an area with
poor reception such as
near tall buildings or in
a basement where
radio waves cannot be
transmitted.
Try to avoid.
Using the
mobile phone when
the network is busy,
such as during rush
hour, when the lines
are full making it
impossible to get
through.
Try to avoid.
Page 30

29
Related to the distance
from the base station
built by the network.
You can
request that the
network service
provider provide
a service area
plan.
Echo or noise
Caused by poor
network relay, a
regional problem.
Hang up and
redial, if the
relay is
changed then
the line may be
better.
Some calling regions
have poor lines.
Shortening of
the standby
time
Standby time is related
to the network system.
Please
temporarily turn
off your mobile
phone, as you
are located in
an area with
poor reception.
Batteries need to be
replaced
Replace the
batteries
When you cannot get a
signal, the phone will
continue to transmit in
order to find a base
station, thereby
expending large
amounts of electricity
will cause the standby
time to decrease.
Please move to
an area with a
strong signal or
temporarily turn
off your mobile
phone.
Unable to turn
on the phone
The battery is empty.
Keep a check
on Battery level
before it
completely
drains
SIM card
malfunction
SIM card is damaged.
Contact your
network service
provider.
SIM card is not
properly inserted.
Confirm SIM
card is properly
inserted.
Page 31

30
There is a dirty
substance on the metal
surface of the SIM
card.
Use a clean
cloth to wipe off
the metal
contact point of
the SIM card.
Unable to
connect with
the network
Expired SIM card
Contact your
network
provider.
Outside the GSM
service area
Consult your
network
provider on the
service area.
Poor signal.
Please move to
a place with a
better signal
and try again.
Unable to make
a call
Using the call bar
function
Cancel the call
bar function.
Using the fixed dial
function.
Cancel
the fixed call
setting.
Incorrect PIN
number
Consecutively enter
the wrong password
three times.
Contact your
network
provider.
Unable to
charge
The Battery or charger
is damaged.
Replace the
battery or
charger.
recharging in the
environment of less
than -10℃or higher
than 55℃.
Change the
charging
environment.
Poor contact
Check if the
plug is properly
connected
Unable to add
new phone
book entries
The storage space of
the phone book is full
Delete a portion
of the phone
number entries
Unable to set
certain
functions
Your network provider
does not support this
function or you have
not applied for it.
Contact your
network
provider.
Page 32

31
7 Appendix (Webcam description)
In a word, Webcam function is through the mobile phone camera
and PC-Internet network connection to conduct video chat
features.
Webcam asks the configuration of PC to satisfy below
requirements:
1. PC machines are windows XP SP2 operating system or a
newer version than that.
2. Need to install MSN, QQ and other video chat function to
support the instrument.
3. Internet network connection is working
The operation of the webcam:
1. Press the Hang-up key to turn on the mobile.
2. Through the USB data line to connect the mobile phone
with PC.
3. In the USB selecting interface, select the Webcam option
and then press the Left soft key to enter webcam using
status.
4. Make sure the PC network connect fine.
5. Through QQ, MSN and other support tools for video chat
to chat with each other.
The Webcam features:
1. Supported Plug and Play function.
2. Auto Exposure.
3. AGC
4. Can adjust the camera options on the network content,
such as: brightness, contrast, hue, saturation, sharpness,
gamma, white balance, backlighting contrast to enhance
the visual effects.
NOTICE: when using the video chat, the refresh rate is
related to the actual speed of the Internet, the reasons for
non-mobile phone.
Important Notice: Please refer company website
www.salora.com or customer care for All Updates related to
Product info/Service Centre details/PC Suit Software etc.
 Loading...