

Page 1

PL-5035TN
50" PLASMA TELEVISION
INSTRUCTION MANUAL
V- V+ P- P+ MENUSEL
SALORA EROS 50" OPLUS ING 9/5/06 9:33 Page 1
Page 2

DEAR CUSTOMER . . . . . . . . . . . . . . . . . . . . . . . . . . . . . . . . . . . . . .3
WHAT TO DO FOR THE TV SET'S SAFETY . . . . . . . . . . . . . . . . . . .4
FUNCTIONS OF THE TV PARTS . . . . . . . . . . . . . . . . . . . . . . . . . . .6
REMOTE CONTROL . . . . . . . . . . . . . . . . . . . . . . . . . . . . . . . . . . . .8
AERIAL CONNECTION . . . . . . . . . . . . . . . . . . . . . . . . . . . . . . . . .10
VIDEO, COMPUTER AND DECODER CONNECTION . . . . . . . . . .11
MODE RESOLUTIONS (PC & HDMI) . . . . . . . . . . . . . . . . . . . . . . . .15
TV SWITCHING ON AND OFF . . . . . . . . . . . . . . . . . . . . . . . . . . .16
TV FUNCTIONS . . . . . . . . . . . . . . . . . . . . . . . . . . . . . . . . . . . . . .17
TV FUNCTIONS (MENUS) . . . . . . . . . . . . . . . . . . . . . . . . . . . . . . .19
TELETEXT . . . . . . . . . . . . . . . . . . . . . . . . . . . . . . . . . . . . . . . . . . .31
BEFORE CALLING SERVICE . . . . . . . . . . . . . . . . . . . . . . . . . . . . . .33
TECHNICAL SPECIFICATIONS . . . . . . . . . . . . . . . . . . . . . . . . . . . .34
CONTENTS
2
SALORA EROS 50" OPLUS ING 9/5/06 9:33 Page 2
Page 3

CCoonnggrraattuullaattiioonnss
This is an excellent selection. Your new TV will provide happiness to
your home. But before using, or even setting it, please read this guide
carefully and keep for future reference.
TThhee ffeeaattuurreess ooff yyoouurr TTVV::
* Your color TV is remote controlled
* You can adjust all commands related to video and audio, by means of
the on screen menus (On Screen Display)
* You can set the menu language from the options
* You can save up to 100 channels in the VHF, UHF and S bands
* Allows cable TV receipts
* Thanks to the automatic channel search, you can find the required
channel easily, save and name it (ATS)
* You can adjust your TV set with 90 minutes automatic switching off
in 15 minutes intervals
* TV set automatically shifts to Stand-by after 5 minutes of broadcast
ending (Auto Shut Off)
* You can use the TV as a Computer Monitor.
DEAR CUSTOMER
3
SALORA EROS 50" OPLUS ING 9/5/06 9:33 Page 3
Page 4
FFiirrsstt wwaarrnniinngg
To prevent contact or fire risk, protect your TV from rain and
humidity
* There is a high voltage in your TV set. So, please do not open its
cover
* Only apply to an authorized service, where necessary
MMeeaassuurreess
* Opertat your TV at 220 V AC 50 Hz, city network voltage
* Please pay attention to the power cable of your TV. It must be
attached to the grounded plug.
* Immediately switch off your TV set if any liquid flows or an
objects falls, remove the plug from the outlet and apply to
authorized service
* Do not remove the plug by pulling its cable. Hold the plug body
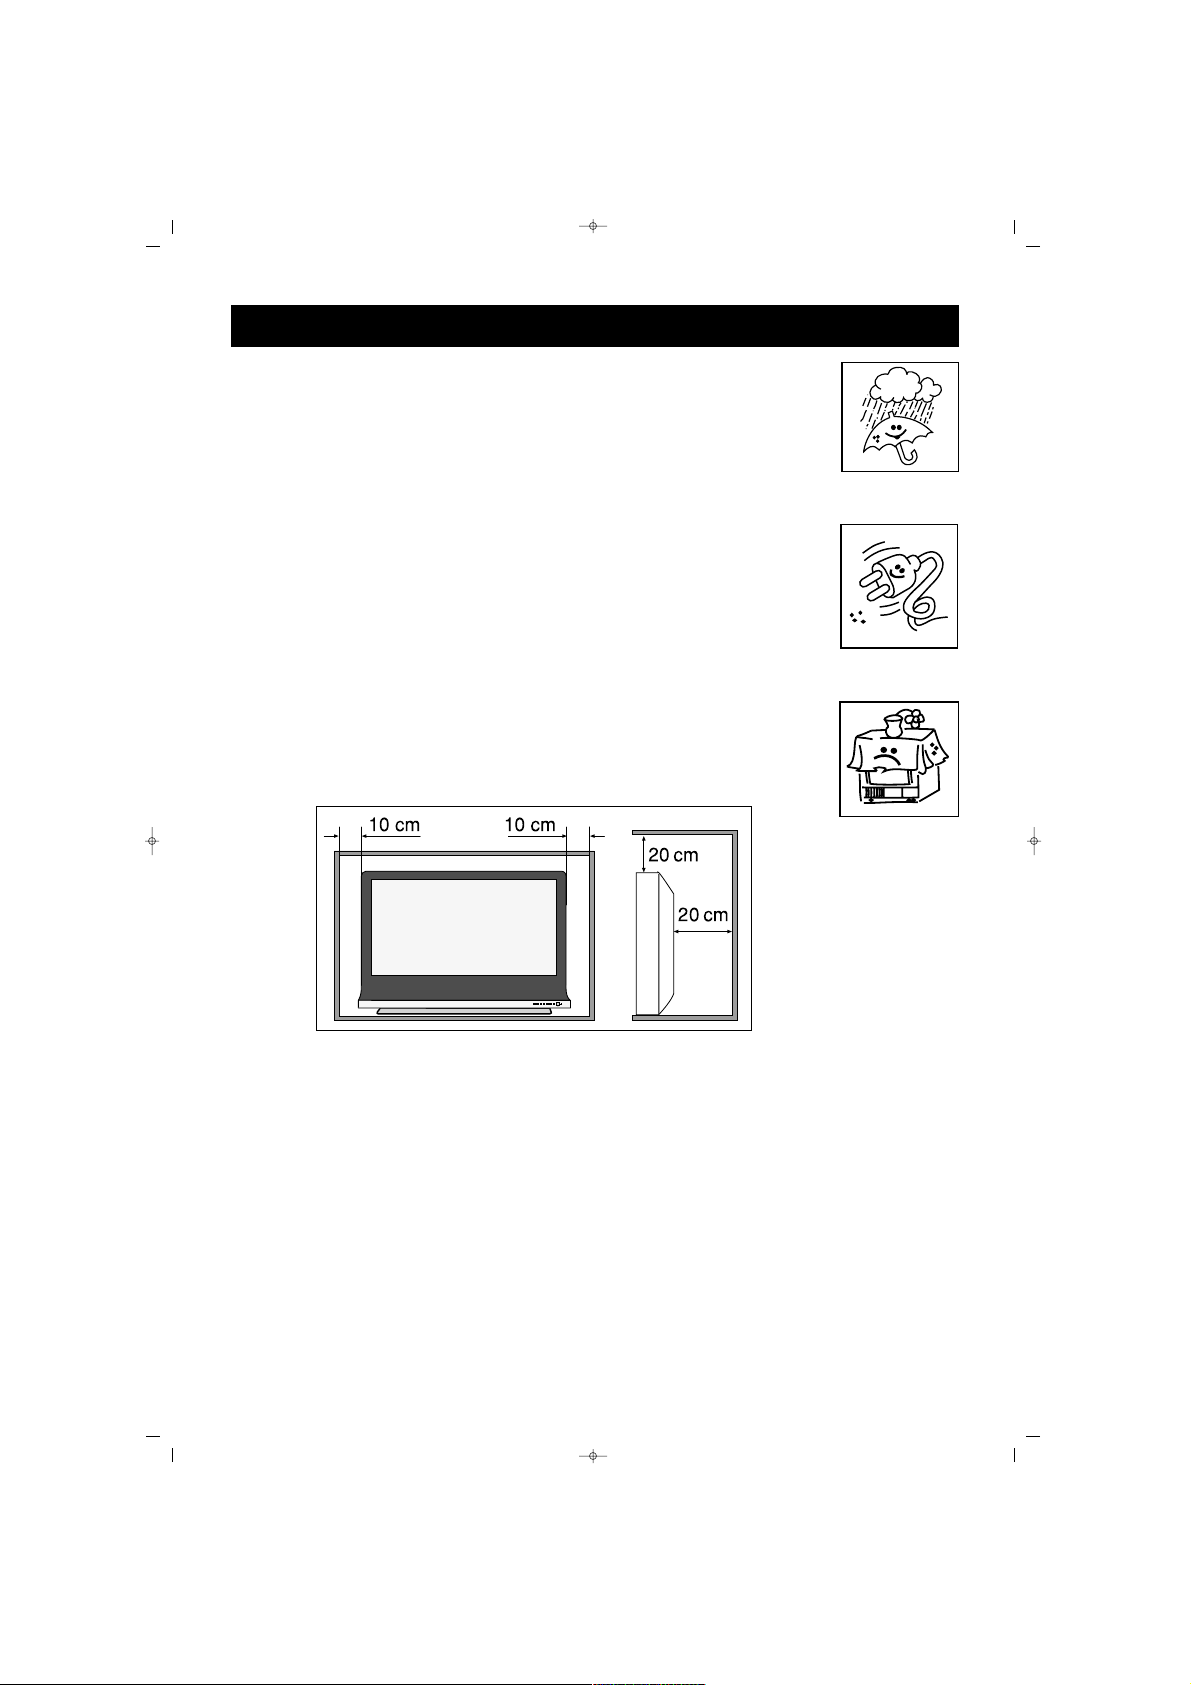
PPoossiittiioonniinngg
* Do not position your TV set near a heat source or humid,
dusty, mechanically vibrating or direct sun light receiving places
* Take care of leaving space in the periphery of the TV set. Do
not cover it with cloth etc.
* Do not place vases etc. containing water on your TV set
* Do not position your TV set near a fire source
CClleeaanniinngg
Do not use chemical or mechanical cleaners that may impair its outer paint
and the panel.
RReeppaacckkaaggiinngg
Keep the original cardboard box and packing materials to reuse where
necessary
V- V+ P- P+ MENUSEL
WHAT TO DO FOR YOUR TV'S SAFETY?
4
SALORA EROS 50" OPLUS ING 9/5/06 9:33 Page 4
Page 5

5
WARNING!
DO NOT LEAVE THE SCREEN WITH A FREEZED PICTURE FOR A
LONG TIME.
PREVENT LONG TIME FIXED DISPLAY
OTHERWISE, THE FIXED DISPLAY MAY LEAVE PERMANENT MARKS
ON THE SCREEN
EXAMPLE:
AFTER WATCHING THE SAME CHANNEL FOR A LONG TIME, A
PERMANENT MARK MAY BE LEFT ON THE SCREEN BECAUSE OF
THE LOGO'S FIXED POSITION. LIKEWISE, ALSO PREVENT
REMAINING OF A TELETEXT PAGE ON THE SCREEN FOR A LONG
TIME.
DO NOT LEAVE THE SET SWITCHED ON FOR A LONG TIME WITH
SUCH BROADCASTING OPEN.
WHAT TO DO FOR YOUR TV'S SAFETY?
SALORA EROS 50" OPLUS ING 9/5/06 9:33 Page 5
Page 6
6
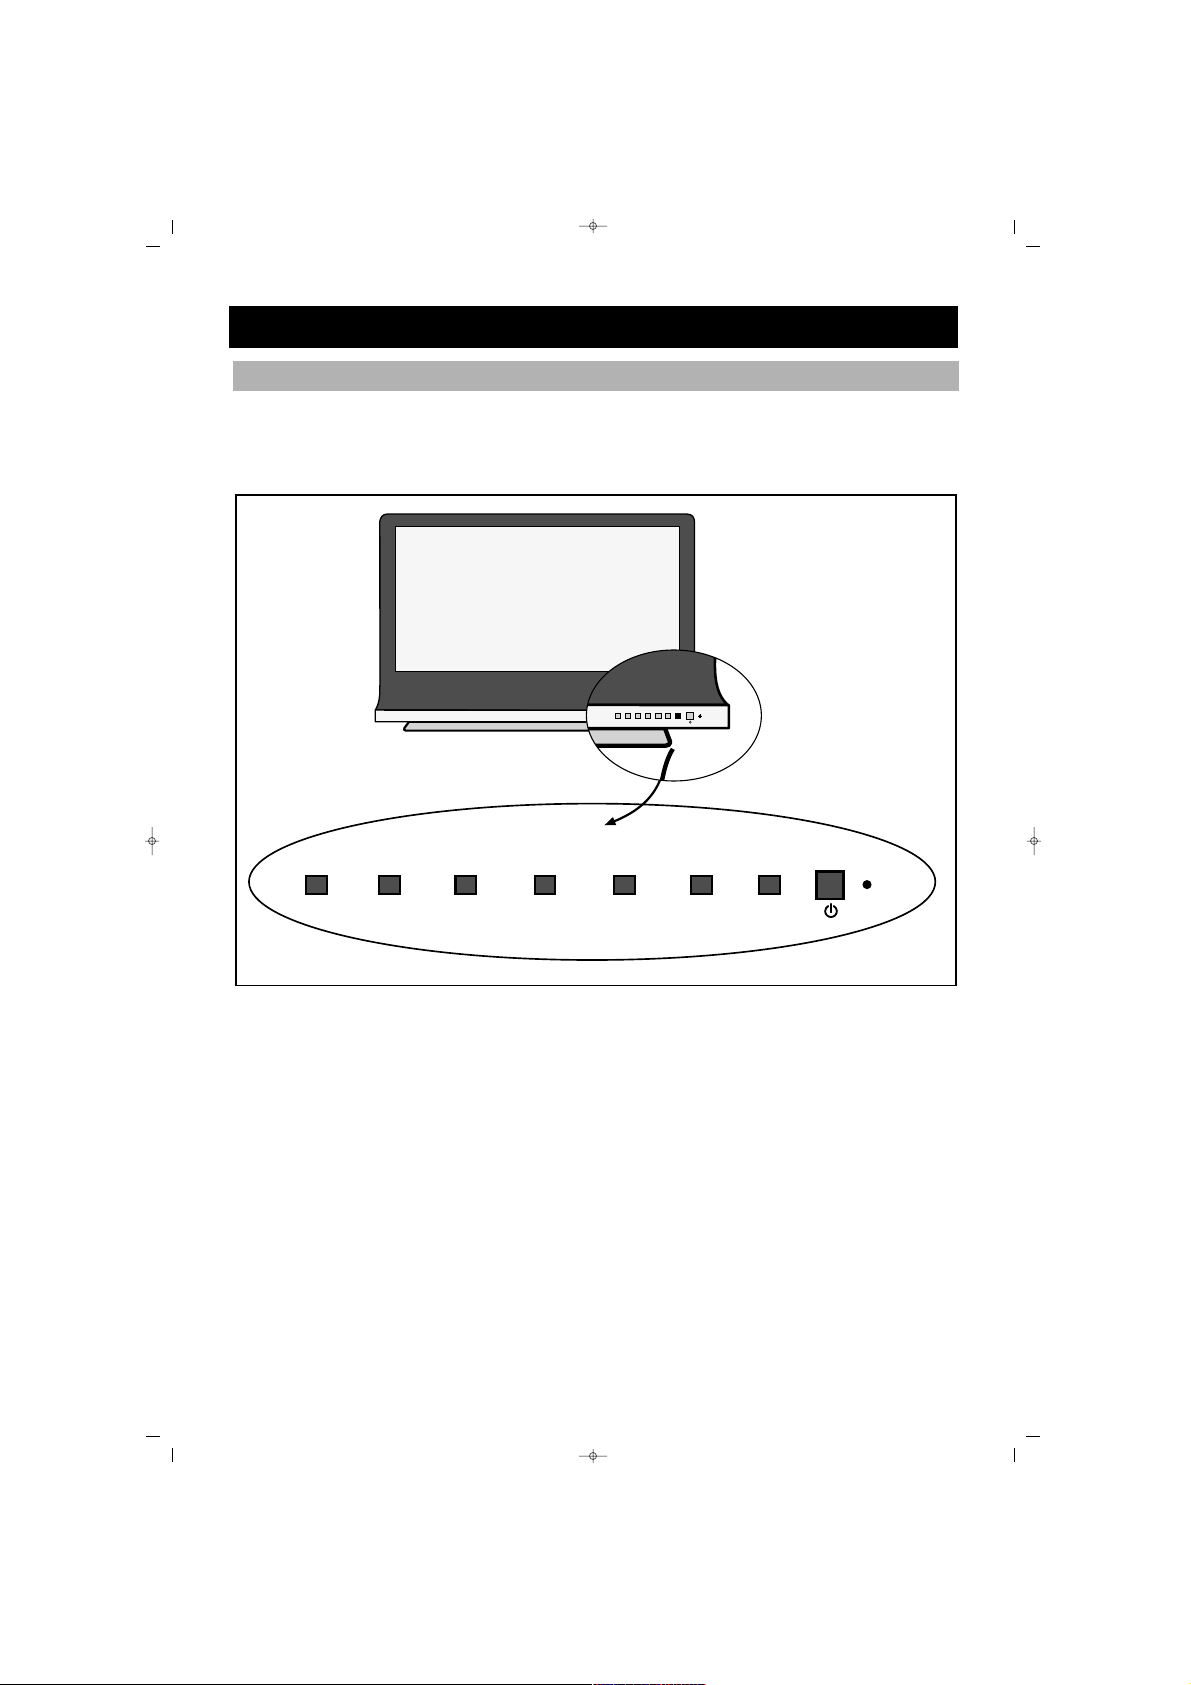
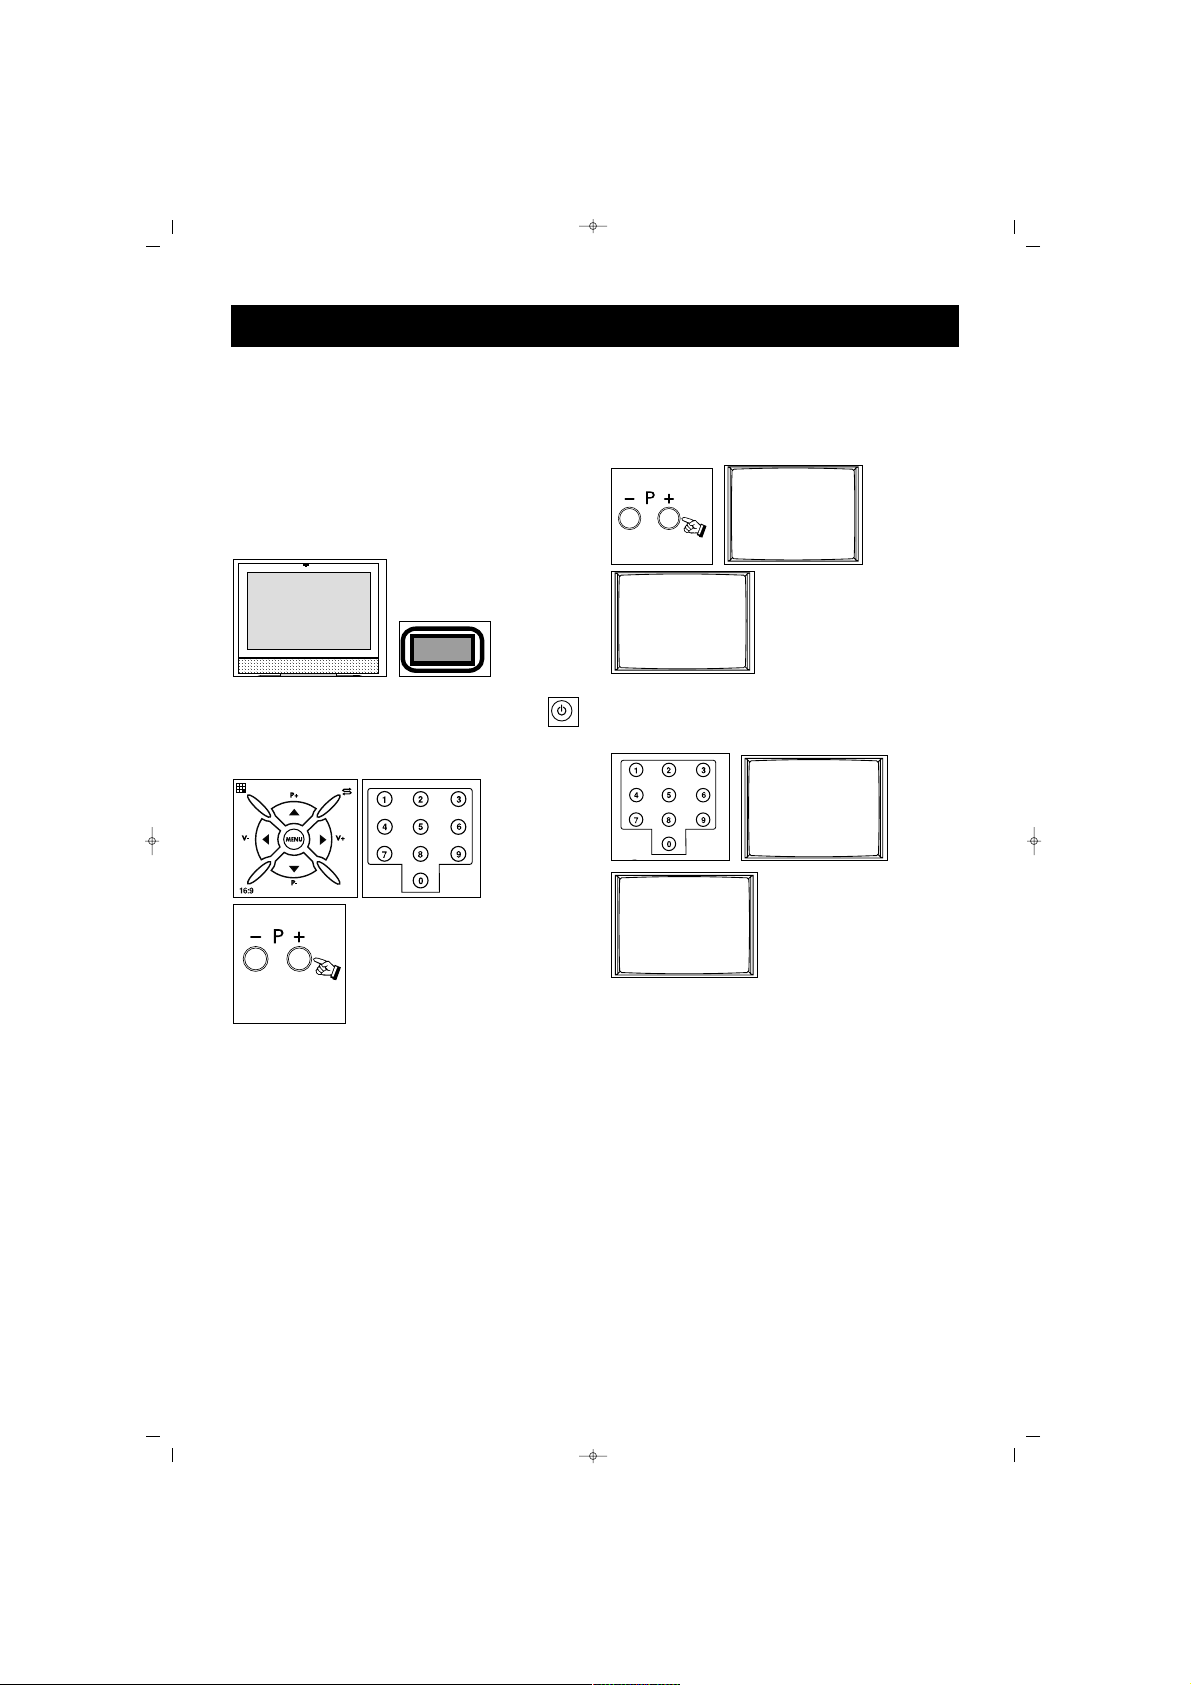
FRONT VIEW
On the front side of the PLASMA TV you can find
VV++//VV--,, PP++//PP--,, MMEENNUU,, SSEELL
buttons and also
SSttaanndd--bbyy bbuuttttoonn,, RReecceeiivveerr EEyyee
and
LLeedd
.
V- V+ P- P+ MENU SEL
FUNCTIONS OF THE TV PARTS
SALORA EROS 50" OPLUS ING 9/5/06 9:33 Page 6
V–
V+
P– P+
MENU
V- V+ P- P+ MENU SEL
SEL
Page 7
7
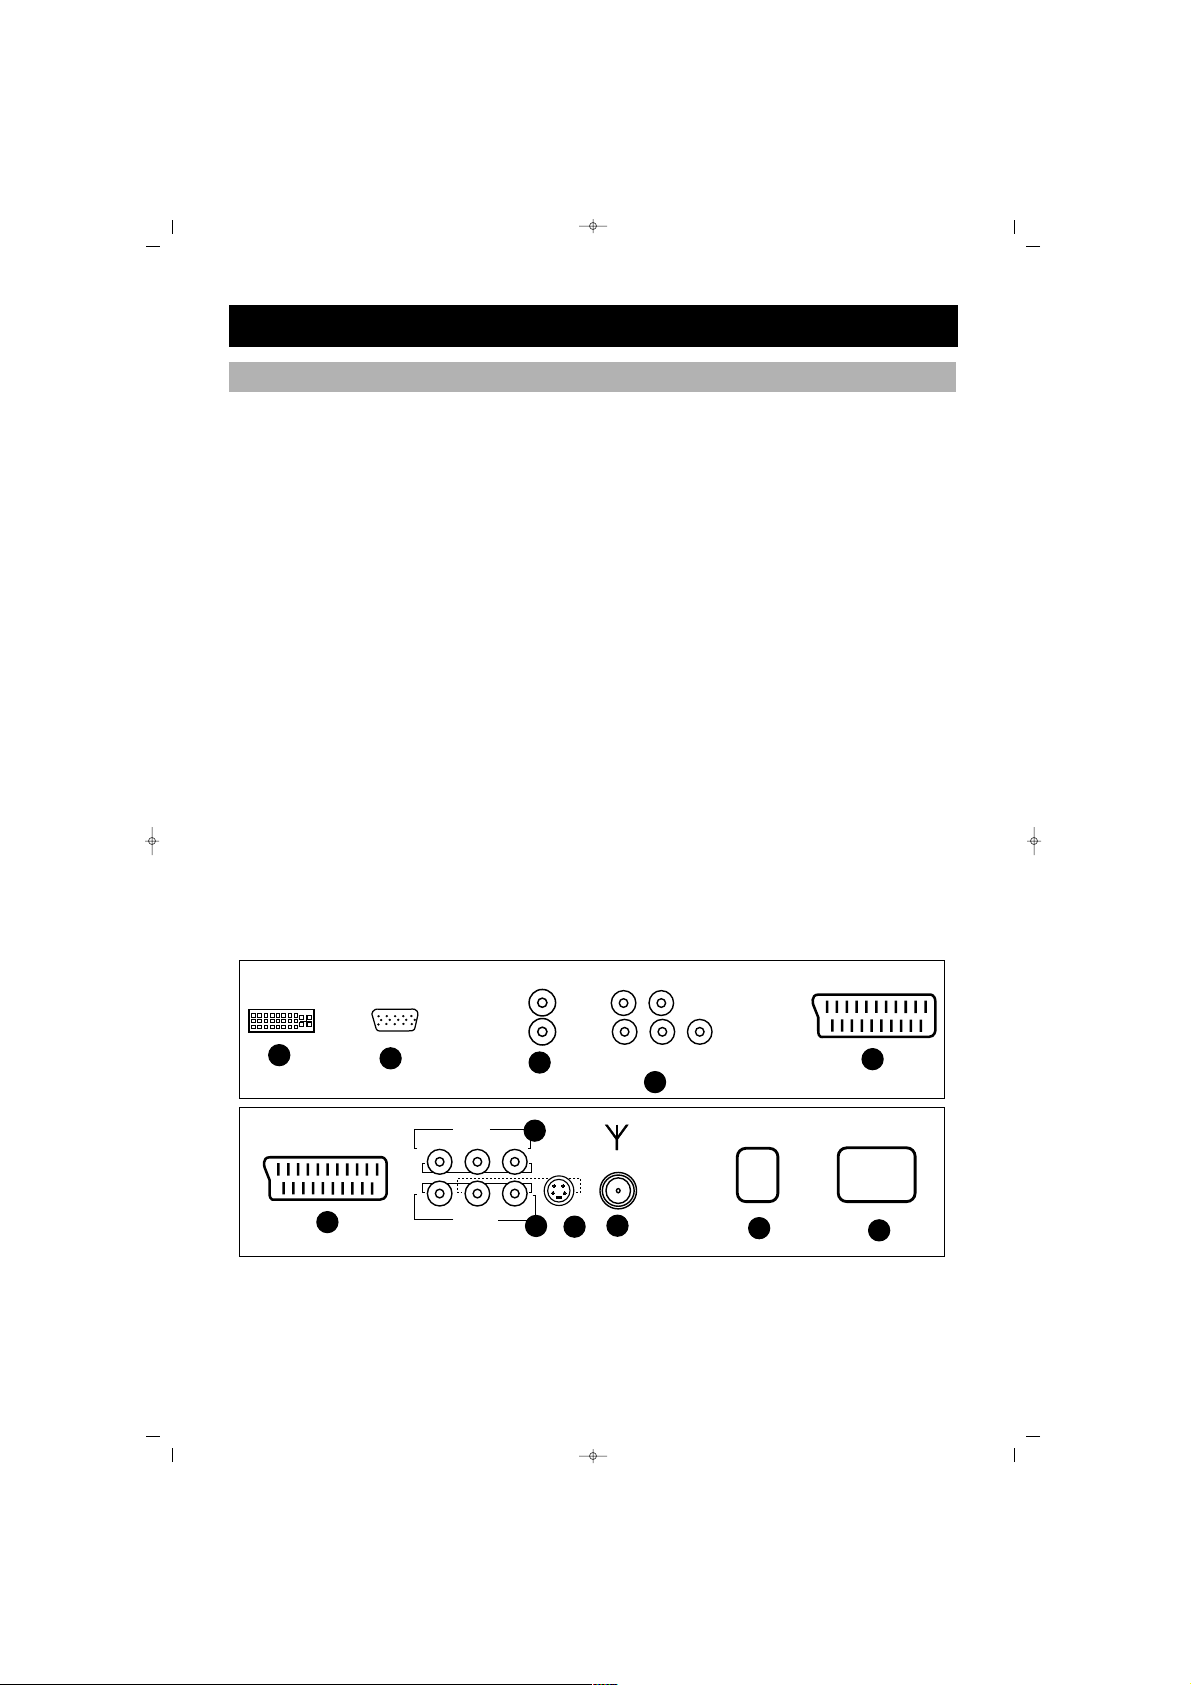
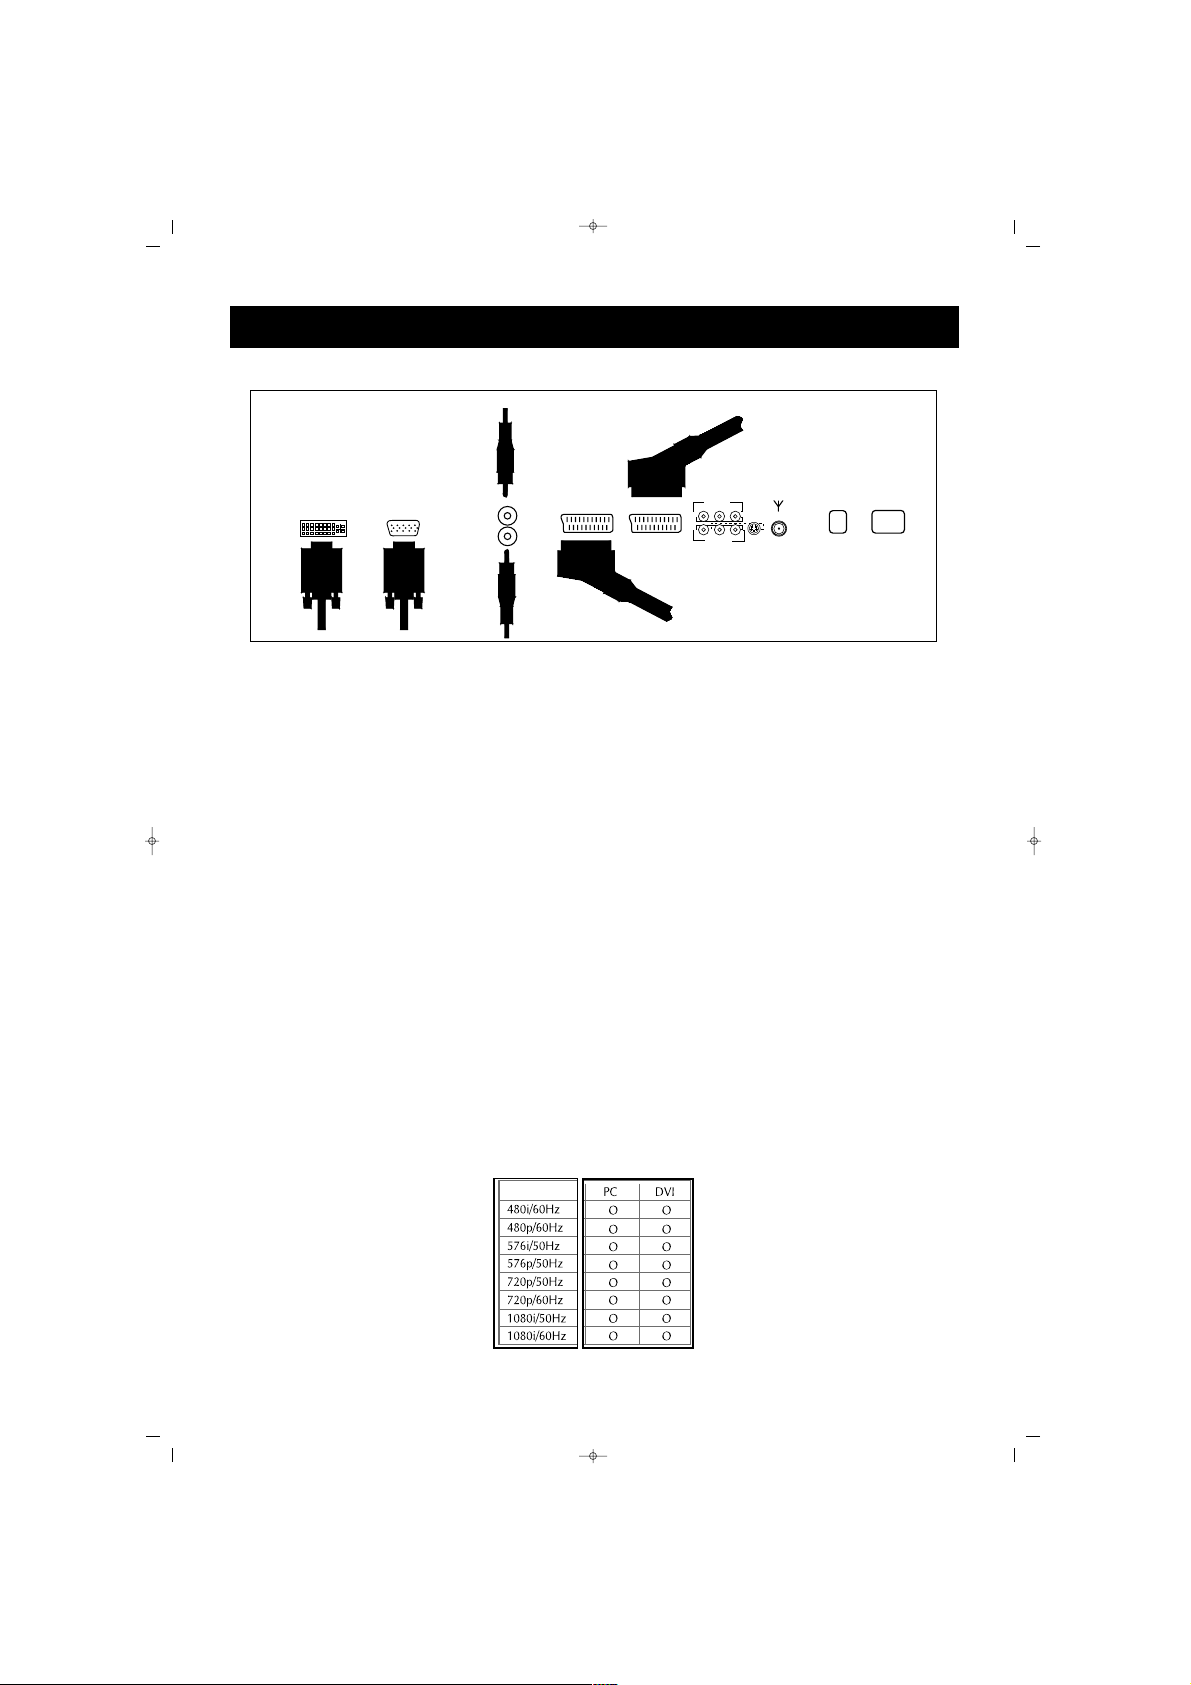
REAR VIEW
In the rear part of your Plasma TV:
1. PC
2. HDMI (for PC, Set top Box)
3. Speakers (PC/HDMI Sound input)
4. ON/OFF Key
5. SCART 1 (Euroconnector) For VCR, DVD Set top box
6. SCART 2 (Euroconnector) For VCR, DVD Set Top Box
7. S-Video (For DVD, Set top box and S-VHS)
8. AV Out
9. AV Input (For VCR, DVD or Set top box)
10. TV Antenna Input (For TV antenna cable) (continental)
11. AC power cable inlet
12. YPbPr video input and audio L/R input
AV OUT
AV IN
POWER
SCART 2
ON
OFF
S-Video
IN
LRCVBS
OUT
AV
6
7
8
9
10
11
12
ANT.IN
SCART 1
PC AUDIO
R
L
PCHDMI
1
2
3
5
Y Pb Pr
L R
13
4
FUNCTIONS OF THE TV PARTS
4
12
SALORA EROS 50" OPLUS ING 9/5/06 9:33 Page 7
Page 8
8
1. Switching ON and OFF
2. Direct program selection buttons
3. Zoom button (no function)
4. Mute button
5. Menu selection button
6. Swap button
7. Program up & down button in TV
position, and Page number up &
down button in Teletext position,
or move in menus
8. Volume up & down and menu
adjustment buttons
9. Channel shift in mosaic mode.
Confirmation or cancellation
button in the menus
10. PIP button (At some models)
11. User normalization button
12. Audio selection button DUAL A,
DUAL B, Stereo, Mono
(DUAL A, DUAL B, ST/MONO)
13. AV button
14. Mosaic Screen button
(At some models)
15. Red button (for zooming out or in
the PIP picture in PIP models, for
leaving HDMI and PC mode in
the TV position)
16. Green button (moves the PIP
picture on the corners of the
screen in the models with
PIP. If this button is pressed in TV
position, it is used for shifting to
PC mode)
17. Yellow button (To shift to HDMI
mode in TV position)
18. Blue button (Picture Freezing
Button)
19. Picture format selection
20. Provides information on the
displayed channel
NNoottee::
In order to use the other button
functions described in the menus,
please refer to the remote control
figure shown in the TELETEXT section.
REMOTE CONTROL
SALORA EROS 50" OPLUS ING 9/5/06 9:33 Page 8
Page 9
9
REMOTE CONTROL
Never drop your RC to
the floor.
Never try to disassemble
your RC
Do not press two
buttons on the RC at the
same time
Please remove the
batteries if you are not
going to use the RC for
a long time.
NNoottee::
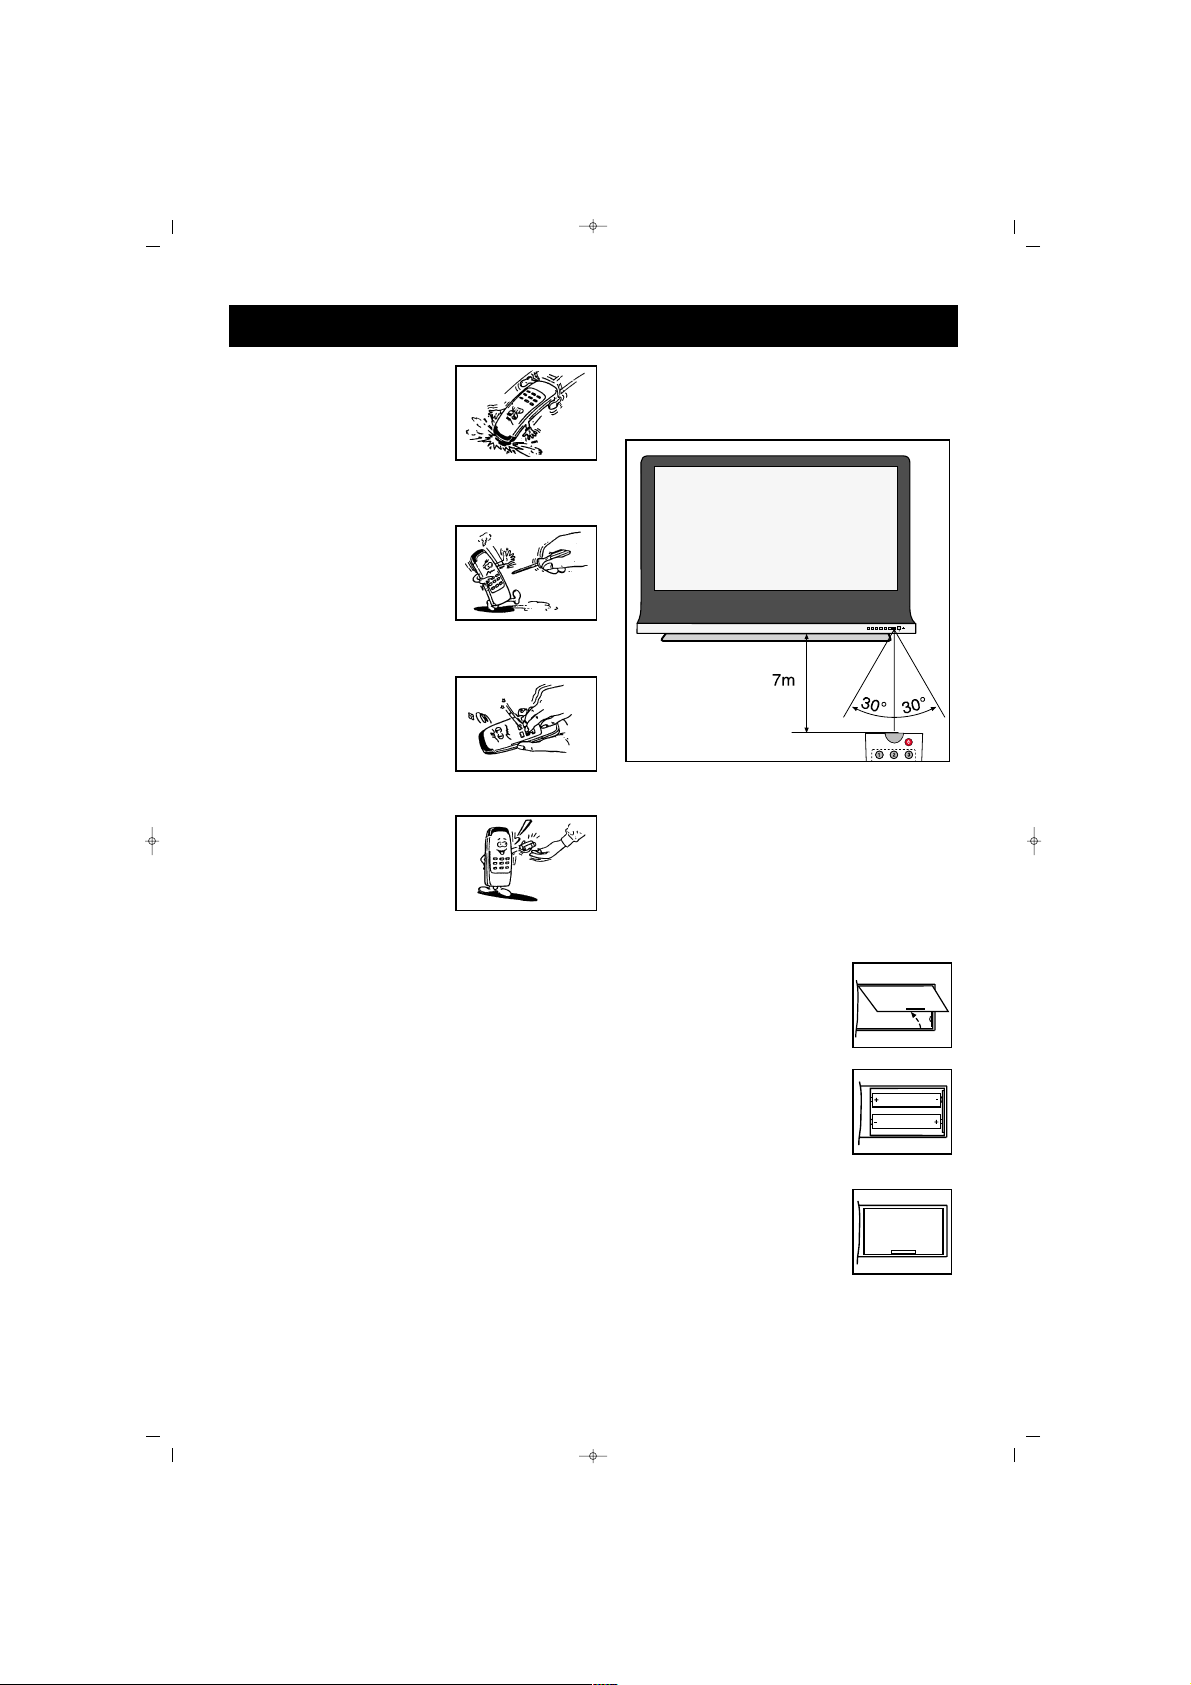
The RC is effective at a
maximum distance of 7 m and an
angle of 30°
PPllaacciinngg tthhee BBaatttteerriieess ((11..55VV AAAAAA xx 22))
* Open the battery cover in the direction of arrow
* Place the batteries paying attention to the poles
* Close the cover
SALORA EROS 50" OPLUS ING 9/5/06 9:33 Page 9
V- V+ P- P+ MENU SEL
Page 10
10
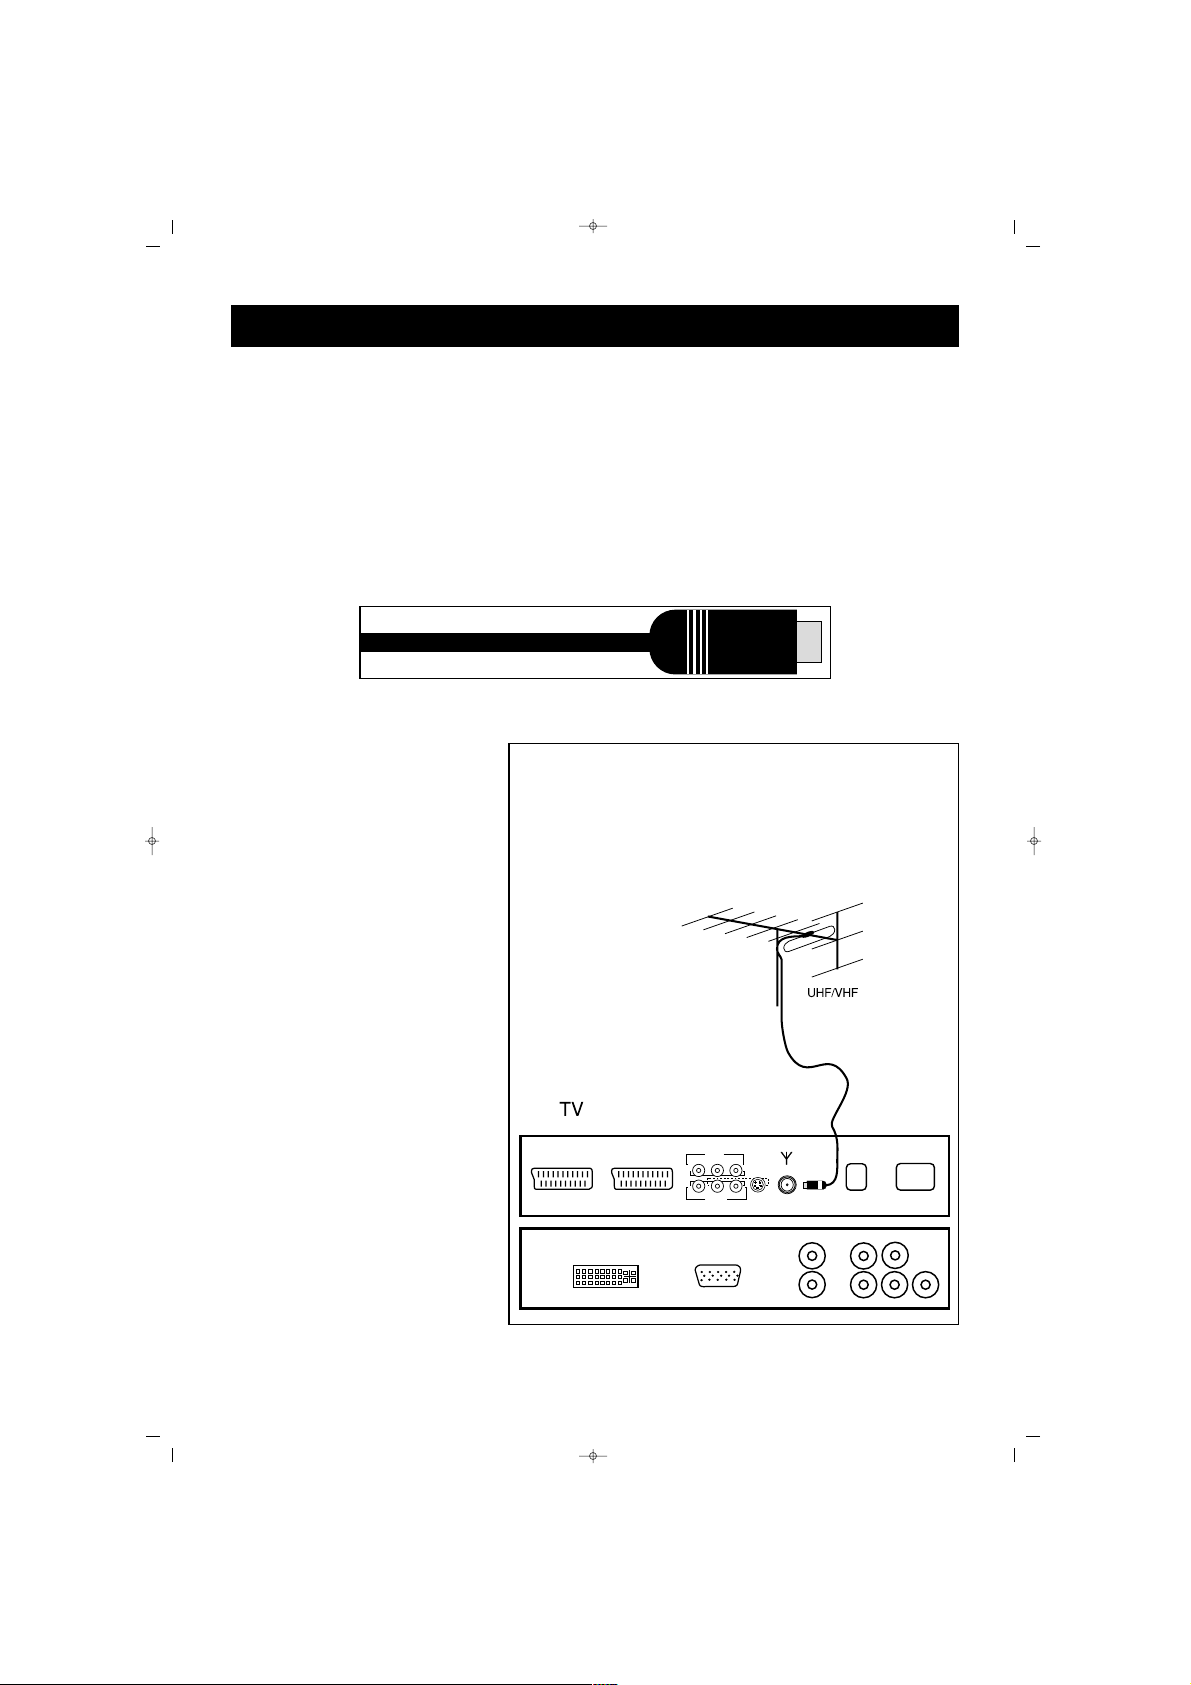
AAeerriiaall CCoonnnneeccttiioonn
First, select the aerial connection. The below given aerials are suitable for your TV
* VHF antenna
* VHF / UHF joint antenna
* UHF Antenna
While connecting one of those antennas to your TV set, you should use 75 Ohm
rounded "coaxial" cable and unplug your TV from the outlet.
If the cable is a 300 ohm
(double wire flat cable), an
adapter converting 300 ohm
to 75 ohm should be installed
to the TV antenna inlet. For
watching the cable broadcast,
the cable broadcasting line
should be connected to
antenna inlet. Motor vehicles,
energy and communication
lines create noise. Please
firmly install your antenna far
from these and metal surfaces.
Do not install the antenna
cable longer than necessary
neither roll it. As antenna and
cable may be affected by
environmental conditions such
as rain, wind, smoke or
humidity, check your antenna
and equipment periodically.
AERIAL CONNECTION
SALORA EROS 50" OPLUS ING 9/5/06 9:33 Page 10
SCART 1
SCART 2
ANT.IN
PCHDMI
ON
POWER
OFF
Page 11
VIDEO, COMPUTER AND DECODER CONNECTION
11
WWaattcchhiinngg vviiddeeoo
MMaakkiinngg aa ccoonnnneeccttiioonn
SSCCAARRTT ((EEuurrooccaabbllee))
Attach the SCART cable to the SCART outlets of the video player and TV
SS--VViiddeeoo
Connect S-Video cable to the S-Video inlets of the video device and TV
Connect the L (white) and R (red) sound cable (RCA) to the sound inlets of the
video device
AAVV IInnlleett
Connect the Audio Video cable to the TV and Video inlets of the video player.
Connect the L (white) and R (red) sound cable (RCA) to the sound inlets of the TV set.
AAVV OOuuttppuutt
Connect the Audio Video cable to the external amplifier/music system. Connect the
L (white) and R (red) sound cable (RCA) to the sound inputs of the external set. You
can also connect Yellow Video Output to other display device.
WWaattcchhiinngg VViiddeeoo
1. Press the AV button on the remote control and select Video Sources
2. Insert video cassette into the video player and press PLAY
NNoottee::
To prevent visual interference, leave sufficient distance between the video player
and monitor (more than 3 m)
* While connecting the TV to outer equipment, be careful that the colors of the
connection ports are the same (for example, Video-yellow, Sound (left) white,
Sound (right) red)
* If you connect the S-VHS Video device to the S-VIDEO inlet socket, you can
obtain a display better than normal video inlet (AV)
** TTaakkee ccaarree tthhaatt aa ffiixxeedd ddiissppllaayy ddooeess nnoott rreemmaaiinn oonn tthhee ssccrreeeenn ffoorr lloonngg ttiimmeess..
Generally, these are fixed displays or program information in VCR 4:3 display format.
SCART 2
SCART 1
CVBS L R
AV
S-VIDEO
ANT.IN
SALORA EROS 50" OPLUS ING 9/5/06 9:33 Page 11
Page 12
12
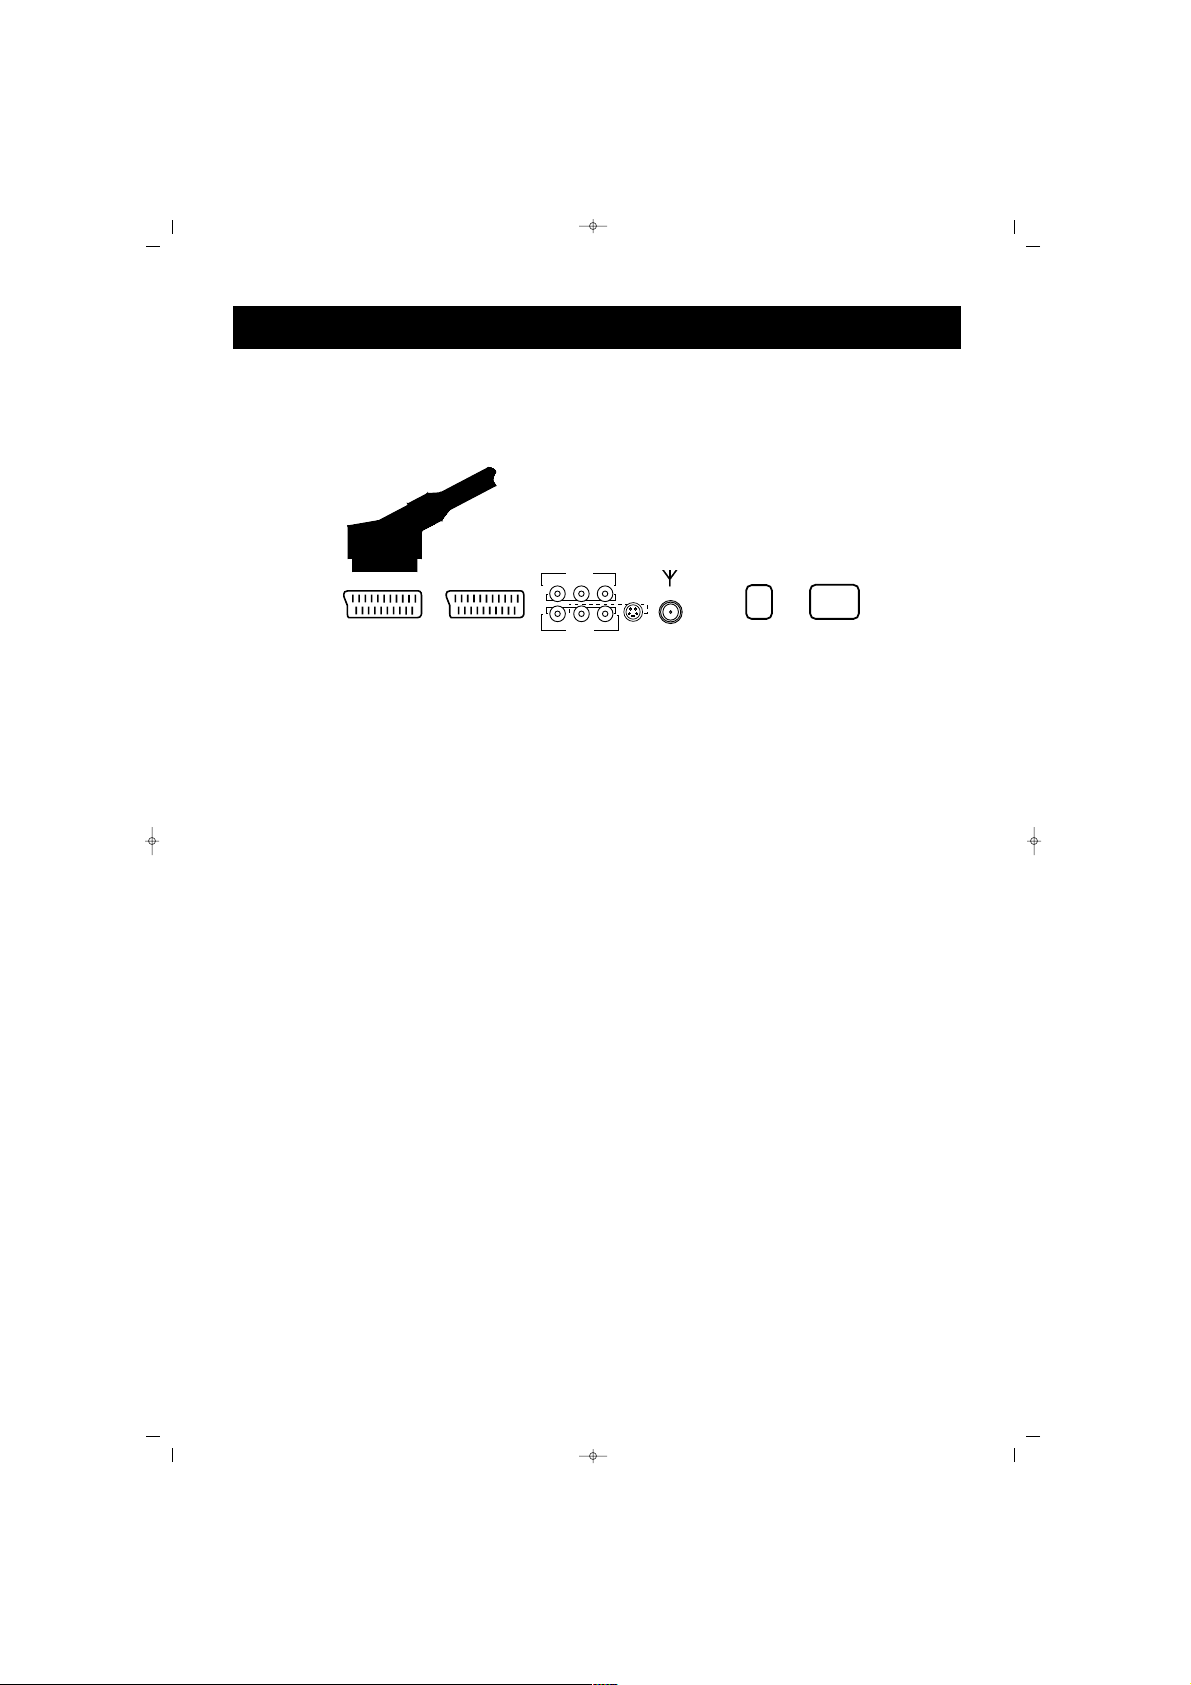
WWaattcchhiinngg DDVVDD
CCoonnnneeccttiioonn
* Please connect the DVD player via scart cable to Scart 1
UUssaaggee
1. Start the DVD player
2. Press AV button on the remote control of TV and select Scart 1
POWER
SCART 1
SCART 2
ON
OFF
S-Video
LRCVBS
ANT.IN
VIDEO, COMPUTER AND DECODER CONNECTION
SALORA EROS 50" OPLUS ING 9/5/06 9:33 Page 12
Page 13
13
WWaattcchhiinngg SSeett TToopp BBooxx ((SSTTBB))
CCoonnnneeccttiioonn
Connect the Set Top Box display connectors to SCART, CHINCH, PC or HDMI
inlets of the TV. Connect the sound inlets to the sound sockets next to the L (white)
and R (Red)
UUssaaggee
1. Operate the set top box
2. Select PC, YPbPr or HDMI on the remote control of PDP
CCoonnnneeccttiioonn
UUssiinngg SSCCAARRTT ((EEuurrooccaabbllee))
Connect the SCART cable to the SCART connectors of STB and PDP
HHDDMMII
Connect HDMI cable to the HDMI sockets of STB and PDP.
NNoottee::
When you connect an external device with DVI output to HDMI input of
your TV.
Please connect analog audio outputs of DVI to PC/AUDIO sound inputs of your TV
to get sound at HDMI mode.
YYPPbbPPrr
Connect YPbPr sockets of STB and PDP by using chinch cables. Connect audio
output of STB to YPbPr audio inputs.
NNoottee::
* Only one of the component PC, YPbPr and HDMI ports can send video signal. If
one sends a video signal, the other sockets cannot be used.
HDMI/PC AUDIO
R
L
PCHDMI
AV IN1
AV IN2
POWER
SCART 1
SCART 2
ON
OFF
S-Video
IN2
LRCVBS
IN1
AV
ANT.IN
VIDEO, COMPUTER AND DECODER CONNECTION
CCoommppoonneennttssssiiggnnaall
SALORA EROS 50" OPLUS ING 9/5/06 9:33 Page 13
Page 14
14
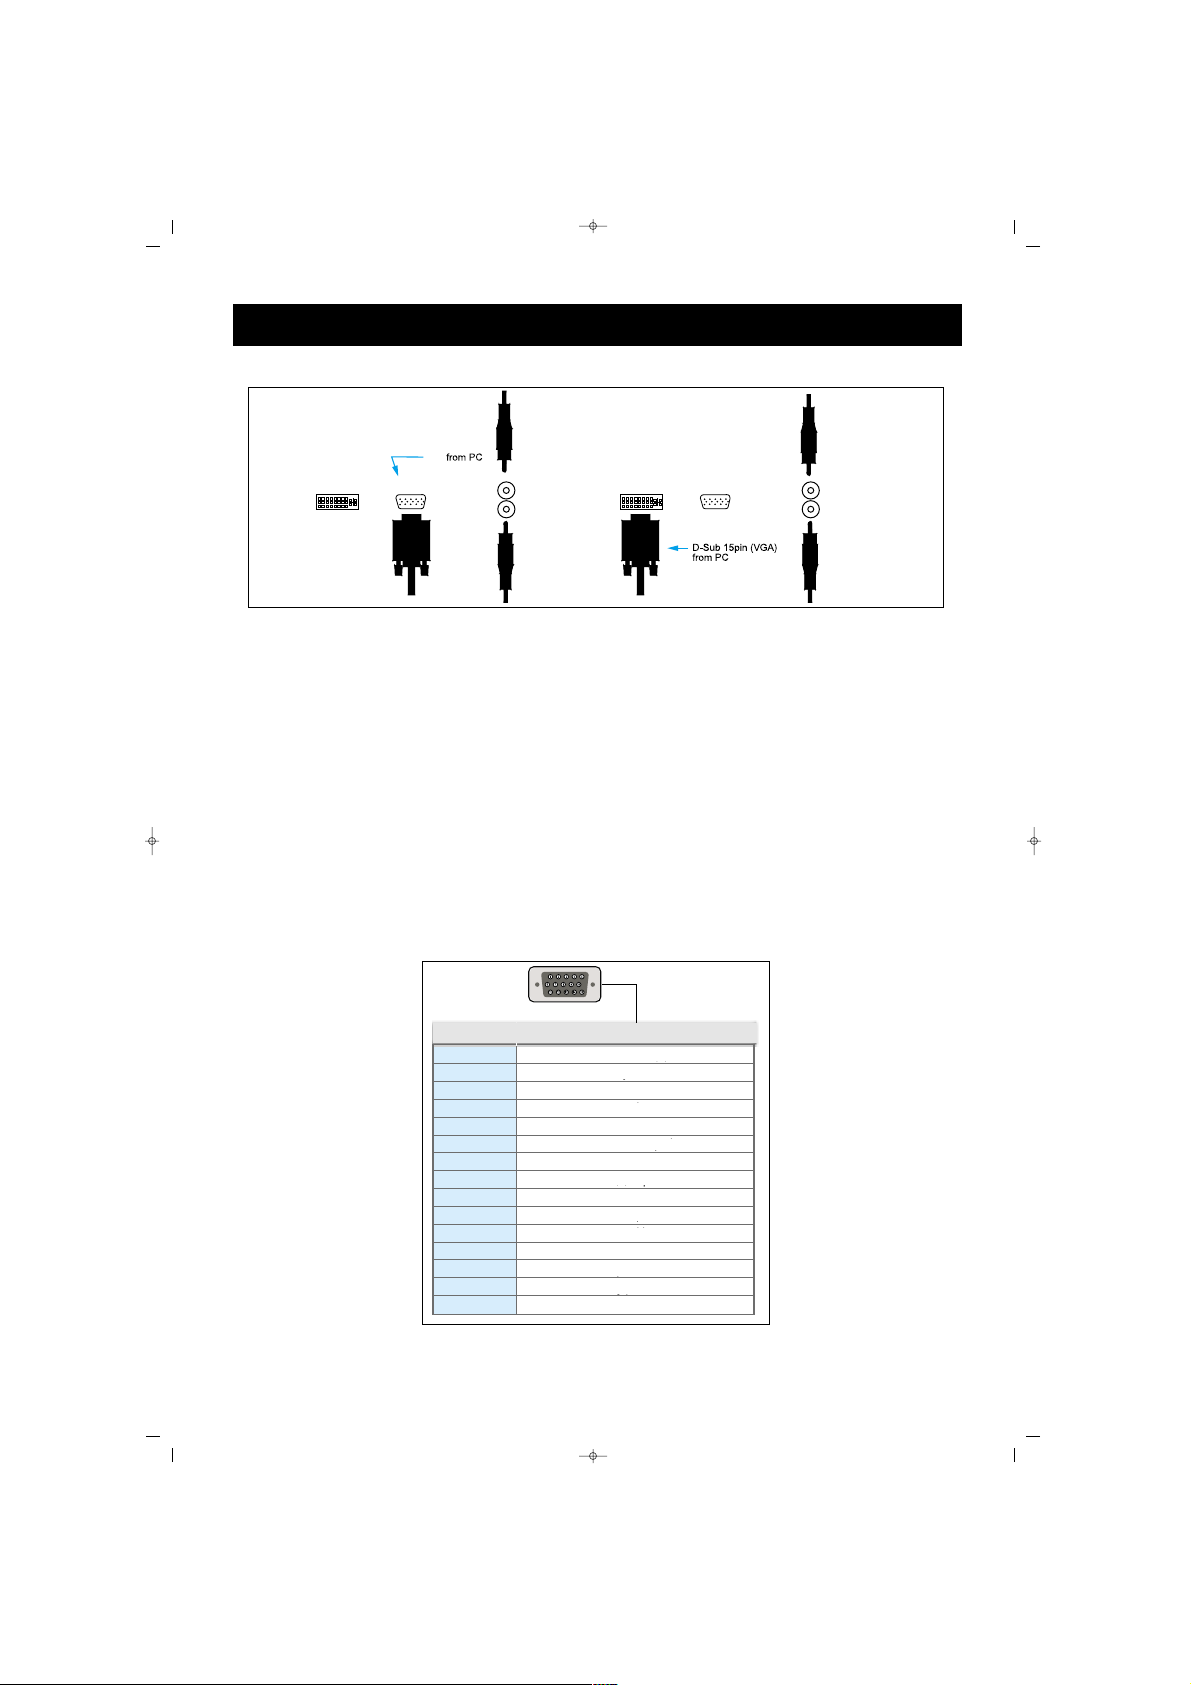
CCoonnnneeccttiioonn ooff PPCC,, DD SSuubb aanndd DDVVDD
** CCoonnnneeccttiioonn ooff PPCC aanndd TTVV
Connect a PC video cable (15 pin) on the Video Outlet Port on PC
and PC port on TV.
** PPiinn CCoonnffiigguurraattiioonn
15 Pin Signal Cable (based on grooved pin)
** PPiinn CCoonnffiigguurraattiioonn
1. Switch on the TV set and press AV button to select PC mode
2. Start the PC and check PC requirements
3. Adjust the PC screen in the Geometry menu
1
2
3
4
5
6
7
8
9
10
11
12
13
14
15
K›rm›z› (R)
Yeflil (G)
Mavi (B)
Toprak
Toprak (DDC)
K›rm›z› (R) Toprak
Yeflil (G) Toprak
Mavi (B) Toprak
Rezerve
Senk. Topraklama
Topraklama
Veri (DDC)
Yatay senk.
Düfley senk.
Saat (DDC)
Pin No. Tan›m›
HDMI/PC AUDIO
R
L
PCHDMI
DVI/PC AUDIO
R
L
PCDVI
HDMI
VIDEO, COMPUTER AND DECODER CONNECTION
PPiinn NNrr.. DDeessccrriippttiioonn
RReedd ((RR))
GGrreeeenn ((GG))
GGrroouunndd
GGrroouunndd ((DDDDCC))
RReedd ((RR)) GGrroouunndd
GGrreeeenn ((GG)) GGrroouunndd
BBlluuee ((BB)) GGrroouunndd
BBlluuee ((BB))
RReesseerrvvee
SSeennccrr.. GGrroouunndd
GGrroouunndd
TTiimmee ((DDDDCC))
VVeerrtt.. SSeennccrr..
HHoorr.. SSeennccrr..
DDaattaa ((DDDDCC))
SALORA EROS 50" OPLUS ING 9/5/06 9:33 Page 14
Page 15

15
HHDDMMII SSuuppppoorrtteedd RReessoolluuttiioonnss
RRGGBB SSiiggnnaall RReessoolluuttiioonn FFrreeqquueennccyy
1080I 1920 * 1080 60
1080I 1920 * 1080 50
720P 1280 * 720 60
720P 1280 * 720 50
576P 720 * 576 50
480P 640 * 480 60
PPCC:: AAllll VVEESSAA SSttaannddaarrddss uupp ttoo 11228800xx11002244
640x480 50Hz/60Hz/70Hz/75Hz/85Hz/90Hz/100Hz
800x600 60Hz/70Hz/75Hz/85Hz/100Hz
1024x768 60Hz/70Hz/75Hz/85Hz
1152x864 60Hz/70Hz/75Hz/85Hz
1280x960 60Hz/70Hz/75Hz/85Hz
1280x1024 60Hz/70Hz/75Hz/85Hz
MODE RESOLUTIONS (PC & HDMI)
SALORA EROS 50" OPLUS ING 9/5/06 9:33 Page 15
Page 16
16
NNOOTTEE:: RRCC iiss aann aabbbbrreevviiaattiioonn ooff
RReemmoottee CCoonnttrrooll
11.. OOppeerraattiinngg
aa.. SSwwiittcchhiinngg oonn tthhee TTVV
Press the on/ off button on the TV
set. wait for its switching on.
bb.. SSttaanndd bbyy mmooddee
While the TV is in standby,
you can switch on with the Power
button or pressing P±.
22.. SSwwiittcchhiinngg ooffff
aa.. SSwwiittcchhiinngg ooffff tthhee TTVV
When you want to switch off the
TV completely, press on/off button.
bb.. SSttaanndd bbyy mmooddee
For switching off the TV for a short
time, press the Standby button on
the RC or TV.
If you are not to use the TV for a
long time, press the on/off button
on the TV set.
11.. PPrrooggrraamm NNuummbbeerr SSeelleeccttiioonn
* You can select the program you
want by pressing P± button on the
TV control panel
* If you want to select a program
from 1 to 9, press the related
button on the RC
* For selecting a program from 10
to 100, the number is pressed on
the RC swiftly.
EExxaammppllee::
To shift to the program
No. 100, first press 1. In that case,
on the left corner “1” message
appears. Then, without waiting,
press “0” button twice. TV set
shifts to the program No. 100.
2--
2--
001
1--
OK
TV SWITCHING ON AND OFF
5
6
1
8
SALORA EROS 50" OPLUS ING 9/5/06 9:33 Page 16
Page 17
17
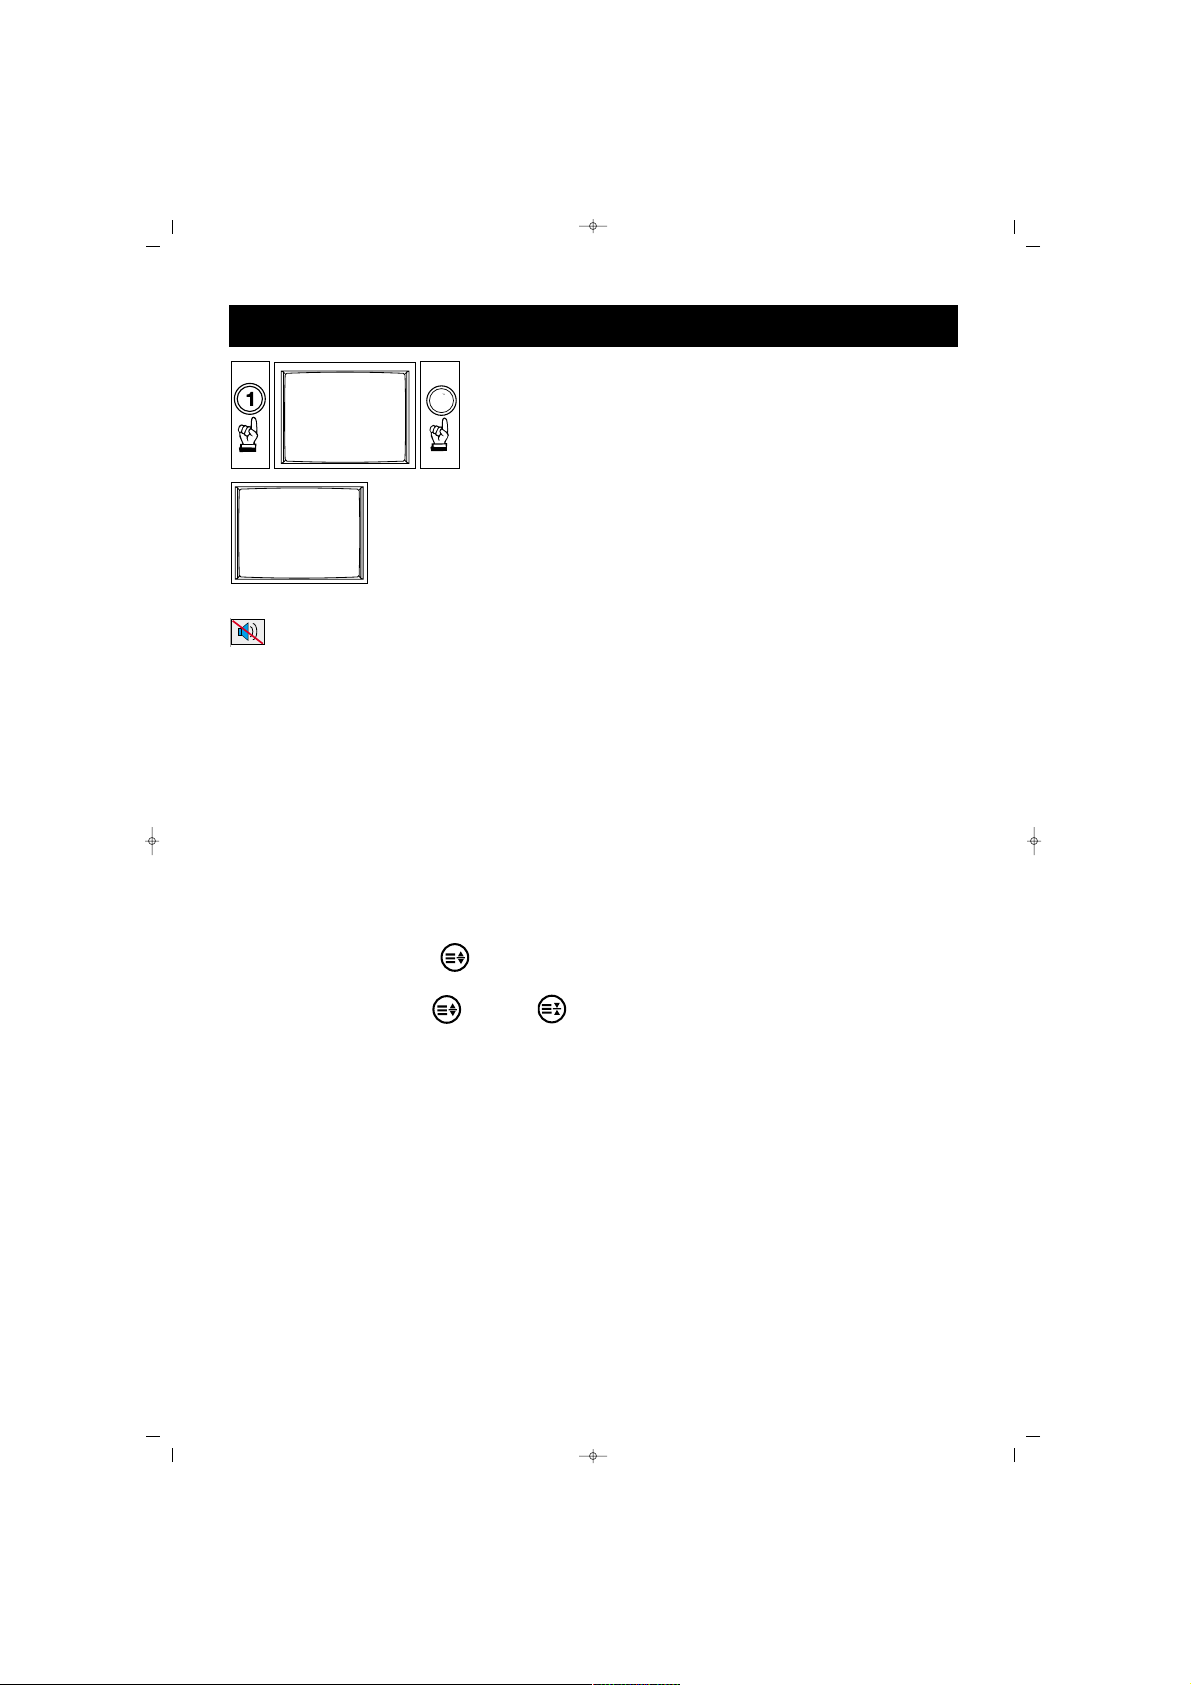
22.. MMuuttee
For muting the sound, press
MUTE button on the RC. Pressing
this button again restores the
sound.
33.. 1166::99 BBuuttttoonn::
This is for changing
the picture dimension.
44::33
CCiinneemmaa,, 1144::99,, AAuuttoommaattiicc
and
1166::99
are accessed through a single key
press.
MMaannuuaall ZZoooomm::
While in Cinema
picture mode, you can activate
Manual Zoom function by pressing
“ZOOM” button
(( ))
on R/C.
Then by pressing
(( ))
and
(( ))
hold buttons, vertical zoom level
can be adjusted.
44.. PPPP::
Pressing this button loads
the audio and video values in the
memory to the TV
If you keep PP button pressed for
a time, the current TV audio and
picture values are saved as “User
Values” and the message
““UUsseerr
VVaalluueess SSaavveedd””
appears on the
screen.
55.. SS//MM//DD bbuuttttoonn::
For stereo
broadcasting, you can change the
volume as Mono, Stereo or DUAL
A, DUAL B. You can’t do this in
case of mono broadcasting. You
can only see the bil screen of the
broadcasting.
66.. AAVV::
To shift to AV mode, press
AV (0) button on the RC. The Info
(information) menu appears on the
screen. In suitable AV Mode, leave
pressing the button. Each time you
press the AV button, the inlet
modes that could be connected
to your device appears and the
“TV” mode, that is the latest mode
you started will appear on the
screen. Furthermore, you can shift
to TV mode pressing the “Red”
button in any mode. As long as
the main menu is on the screen,
you cannot take your TV to AV
position.
77:: AAuuttoommaattiicc SSwwiittcchhiinngg OOffff::
The
TV automatically switches off in 5
minutes after the broadcast ends.
Note: If you leave the TV at AV
mode, the set does not shift to
Stand By mode after 5 minutes
even the broadcast ends.
88.. OOKK BBuuttttoonn::
In the mosaic mode,
this is used to shift to channel or
for
CCoonnffiirrmmiinngg
or
CCaanncceelliinngg
the
changes in menus.
99.. IInnffoo BBuuttttoonn ((‹‹))::
The channel
No., screen format, channel name
(if written), audio type etc.
information are given here.
TV FUNCTIONS
1
100
00
SALORA EROS 50" OPLUS ING 9/5/06 9:33 Page 17
Page 18

18
SSwwaapp::
By pressing Swap
button, you can return to the
former channel you watched
NNoottee::
If there is a menu on the
screen, pressing Swap will change
nothing.
MMoossaaiicc::
(At some models)
Pressing mosaic button will reveal
a mosaic window on the left side
of the screen (from your point).
In the mosaic screen so opened,
when the picture screening is over,
the cursor stops at 8th small
picture. “V-“ button goes to other
small picture “V+” button goes
back. If you want to see the
program in the small picture, just
press OK.
If you press V+ button on the 8th
picture, the mosaic pictures of the
8th picture appears on the screen.
While on 1st picture, if you press
V- button the mosaic pictures of
the former 8 channels appear on
the screen.
NNoottee::
The mosaic function is
available only when your TV set is
in the 16:9 format.
PPIIPP::
Some models have Picture in
Picture (PIP) feature
By pressing PIP button, function
opens or closes.
GGrreeeenn BBuuttttoonn::
Each time you press
the Green button, the corner
where the PIP is located, changes.
RReedd BBuuttttoonn::
Each time you press
the Red button, the size of the PIP
changes in 3 steps
IInnffoo BBuuttttoonn::
If you press info button
in PIP position, an “Info” menu
appears on the upper left corner.
In this menu, select “V-“ button
and “PIP wind”, you can change
the PIP programs pressing P± or
provide AV mode display in the
PIP by pressing “AV” button. To
change the programs in the main
screen, select “Main Window” in
the “Info” menu pressing “V+”
SSwwaapp bbuuttttoonn::
When Swap button
is pressed, the main picture and
that in the PIP interchange.
NNoottee::
When PC or HDMI modes
are selected at PIP, dimensions of
PIP frame may change due to
source video format and
resolution.
TV FUNCTIONS
SALORA EROS 50" OPLUS ING 9/5/06 9:33 Page 18
Page 19
19
TV FUNCTIONS (MENUS)
AAcccceessss iinn tthhee MMeennuuss
Pressing the Menu button, the
Main Menu appears on the screen,
you can press V± to surf in the
menus or press OK or P- button
to change any menu.
You can scroll on the menu lines
pressing P± or press OK or V+
button to change values. You can
reduce or increase the values
pressing V±.
11.. IINNSSTTAALLLLAATTIIOONN ((AAuuttoommaattiicc
SSeeaarrcchh,, FFiinnddiinngg oorr RReeccoorrddiinngg))
The automatic programming for
your device is told below. In the
following pages, you can find a
more comprehensive description
on the settings and menus.
1. Connect the device as defined
in the former pace and take the
TV into display mode
2. Press “Menu” button on the RC.
The main menu will appear on the
screen.
3. Shift the “Installation” menu
pressing V+ button
4. Enter into the menu pressing
OK
5. Access to “Auto Scanning”
option pressing P- or V+ button
and confirm by pressing OK.
6. Select the country pressing V+
button, if your country is not
mentioned, then confirm “Others”.
7. Go to “Start” option pressing P-
8. Start a search pressing “OK”
button. On the lower part of the
screen, a bar will appear, showing
that the search has been started.
DDoo nnootthhiinngg uunnttiill tthhee sseeaarrcchh iiss
oovveerr..
Your set will automatically
find and memorize the channels.
When the search is over, the bar at
the bottom will disappear.
Naming, program deletion,
moving and manual channel
search are defined in the following
pages.
SALORA EROS 50" OPLUS ING 9/5/06 9:33 Page 19
Picture Sound PIP Source Installation Setup
Brightness
Contrast
Color
Hue
Sharpness
Noise Red.
Color Temp
Preset
Picture Sound PIP Source Installation Setup
Stations
Auto Scan
Man. Search
Picture Sound PIP Source Installation Setup
Stations
Auto Scan
Man. Search
Auto Search
Country GB
Start
Page 20
20
PPIICCTTUURREE MMEENNUU::
You can adjust the picture values
in this menu.
BBrriigghhttnneessss
You can adjust the “Brightness” as
defined below:
1. Go to “Brightness” line pressing
P±
2. Confirm pressing OK or V+
3. Adjust to a suitable value
pressing V± buttons.
4.You can return to “Picture” menu
by pressing MENU button.
CCoonnttrraasstt
You can adjust a suitable Contrast
value.
Go to the Contrast line pressing
P± button. Repeat the procedure
given in 2, 3 and 4 of the
“Brightness” setting.
CCoolloorr
You can set the color.
Go to “Color” line pressing P±
button. Repeat the procedure given
in 2, 3 and 4 of the “Brightness”
setting.
TV FUNCTIONS (MENUS)
SALORA EROS 50" OPLUS ING 9/5/06 9:33 Page 20
Picture Sound PIP Source Installation Setup
Brightness
Contrast
Color
Hue
Sharpness
Noise Red.
Color Temp
Preset
Picture Sound PIP Source Installation Setup
Brightness
Brightness
Contrast
Color
Hue
Sharpness
Noise Red.
Color Temp
Preset
Picture Sound PIP Source Installation Setup
Brightness
Contrast
Color
Hue
Sharpness
Noise Red.
Color Temp
Preset
Contrast
50
Picture Sound PIP Source Installation Setup
Brightness
Contrast
Color
Hue
Sharpness
Noise Red.
Color Temp
Preset
Color
50
50
Page 21
21
SShhaarrppnneessss
You can set the Sharpness.
Go to “Sharpness” line pressing
P±. Repeat the procedure given in
2, 3 and 4 of the “Brightness”
setting.
LLeessss NNooiissee
You can improve the bad picture
display caused by bad signal using
“Noise Reduction” function.
1. Press P± button to go to “Less
Noise” line
2. Confirm pressing OK or V+
button
3. Press P± to select “Open”
4. Press MENU button to return to
“Picture” menu.
CCoolloorr TTeemmppeerraattuurree
You can select the factory set
color values
1.Press P± to go to line “Color
Temp.”
2. Confirm pressing OK or V+
buttons
3. Select the color option you
want pressing P± buttons
4. You can return to Picture menu
by pressing MENU button
PPRREESSEETT PPIICCTTUURREE MMOODDEESS
((aavvaaiillaabbllee ffoorr ssoommee mmooddeellss))::
In
Picture sub menu, Preset Picture
mode selection option is available.
Desired preset picture mode can
be selected from following options;
Standard, Dynamic, Soft, User
TV FUNCTIONS (MENUS)
SALORA EROS 50" OPLUS ING 9/5/06 9:33 Page 21
Picture Sound PIP Source Installation Setup
Brightness
Contrast
Color
Hue
Sharpness
Noise Red.
Color Temp
Preset
Sharpness
10
Picture Sound PIP Source Installation Setup
Brightness
Contrast
Color
Hue
Sharpness
Noise Red.
Color Temp
Preset
Color Temperature
Warm
Cool
Normal
Picture Sound PIP Source Installation Setup
Brightness
Contrast
Color
Hue
Sharpness
Noise Red.
Color Temp
Preset
Noise Reduction
Off
On
Picture Sound PIP Source Installation Setup
Brightness
Contrast
Color
Hue
Sharpness
Noise Red.
Color Temp
Preset
Preset
Standard
Dynamic
Mild
User
Page 22
22
SSOOUUNNDD MMEENNUU
1. Enter to the Main Menu,
pressing Menu button
2. Go to “Volume” menu by V+
button
3. Enter to Volume submenu by
pressing OK or P-
You can adjust the volume settings
as you want:
1. Go to the volume line pressing
P± button.
2. Confirm pressing OK or V+
button
3. Adjust to suitable values
pressing V± buttons
4. You can return to the Volume
menu pressing MENU button
BBaallaannccee
You can adjust balance (the
volume intensity ratio between the
speakers)
Go to Balance line pressing P±
buttons. Repeat the “Volume”
setting procedure No. 2, 3 and 4.
EEqquuaalliizzeerr
4. Equalizer (Direct, Film, Music,
Speech) mode adjustments can be
carried out
1. Press P± to go to the Equalizer
line
2. Press OK or V+ button to
confirm
3. Go to the Equalizer mode you
want to set pressing V± buttons
4. Go to the frequency line you
want to adjust pressing V± buttons
5. Set to the suitable value by V±
buttons
TV FUNCTIONS (MENUS)
SALORA EROS 50" OPLUS ING 9/5/06 9:33 Page 22
Picture Sound PIP Source Installation Setup
Volume
Balance
Equalizer
Surround
BASS
AVL
Picture Sound PIP Source Installation Setup
Volume
Balance
Equalizer
Surround
BASS
AVL
Balance
RL
Picture Sound PIP Source Installation Setup
Volume
Balance
Equalizer
Surround
BASS
AVL
Volume
15
Picture Sound PIP Source Installation Setup
Volume
Balance
Equalizer
Surround
BASS
AVL
Equalizer
Flat Movie Music Speech User
120Hz
500Hz
1.5KHz
5KHz
10KHz
Page 23
23
6. Repeat the procedures 4 and 5
for the other frequencies
7. When you press P- button after
the lowest frequency line, you
access to the Equalizer modes
line. If you want to set the other
modes, repeat the parts 2 and 6.
8. You can return to the “Volume”
menu by pressing MENU button
SSuurrrroouunndd
You can activate or deactivate the
Surround sound effect
1. Go to the Surround line pressing
P± button
2. Confirm by pressing OK or V+
button
3. Select Open by P± buttons
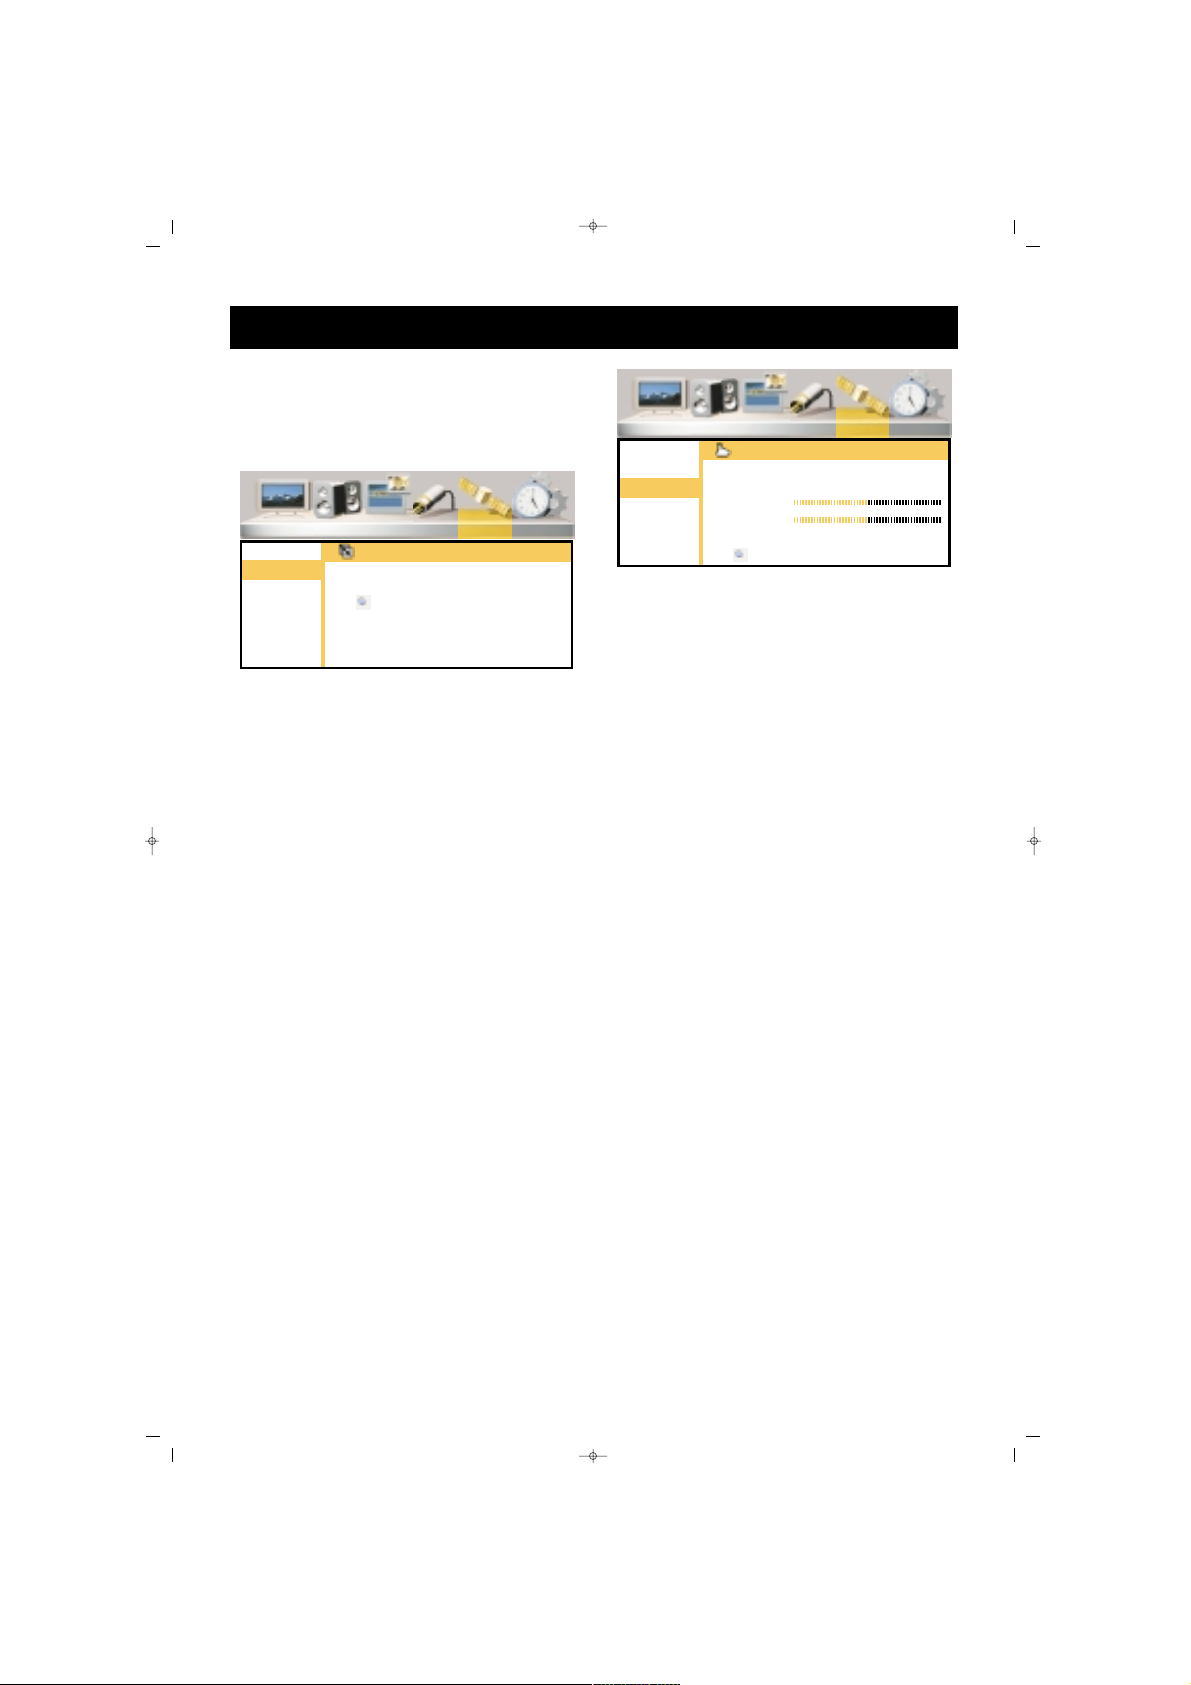
4. You can return to the "Sound"
menu by pressing MENU button
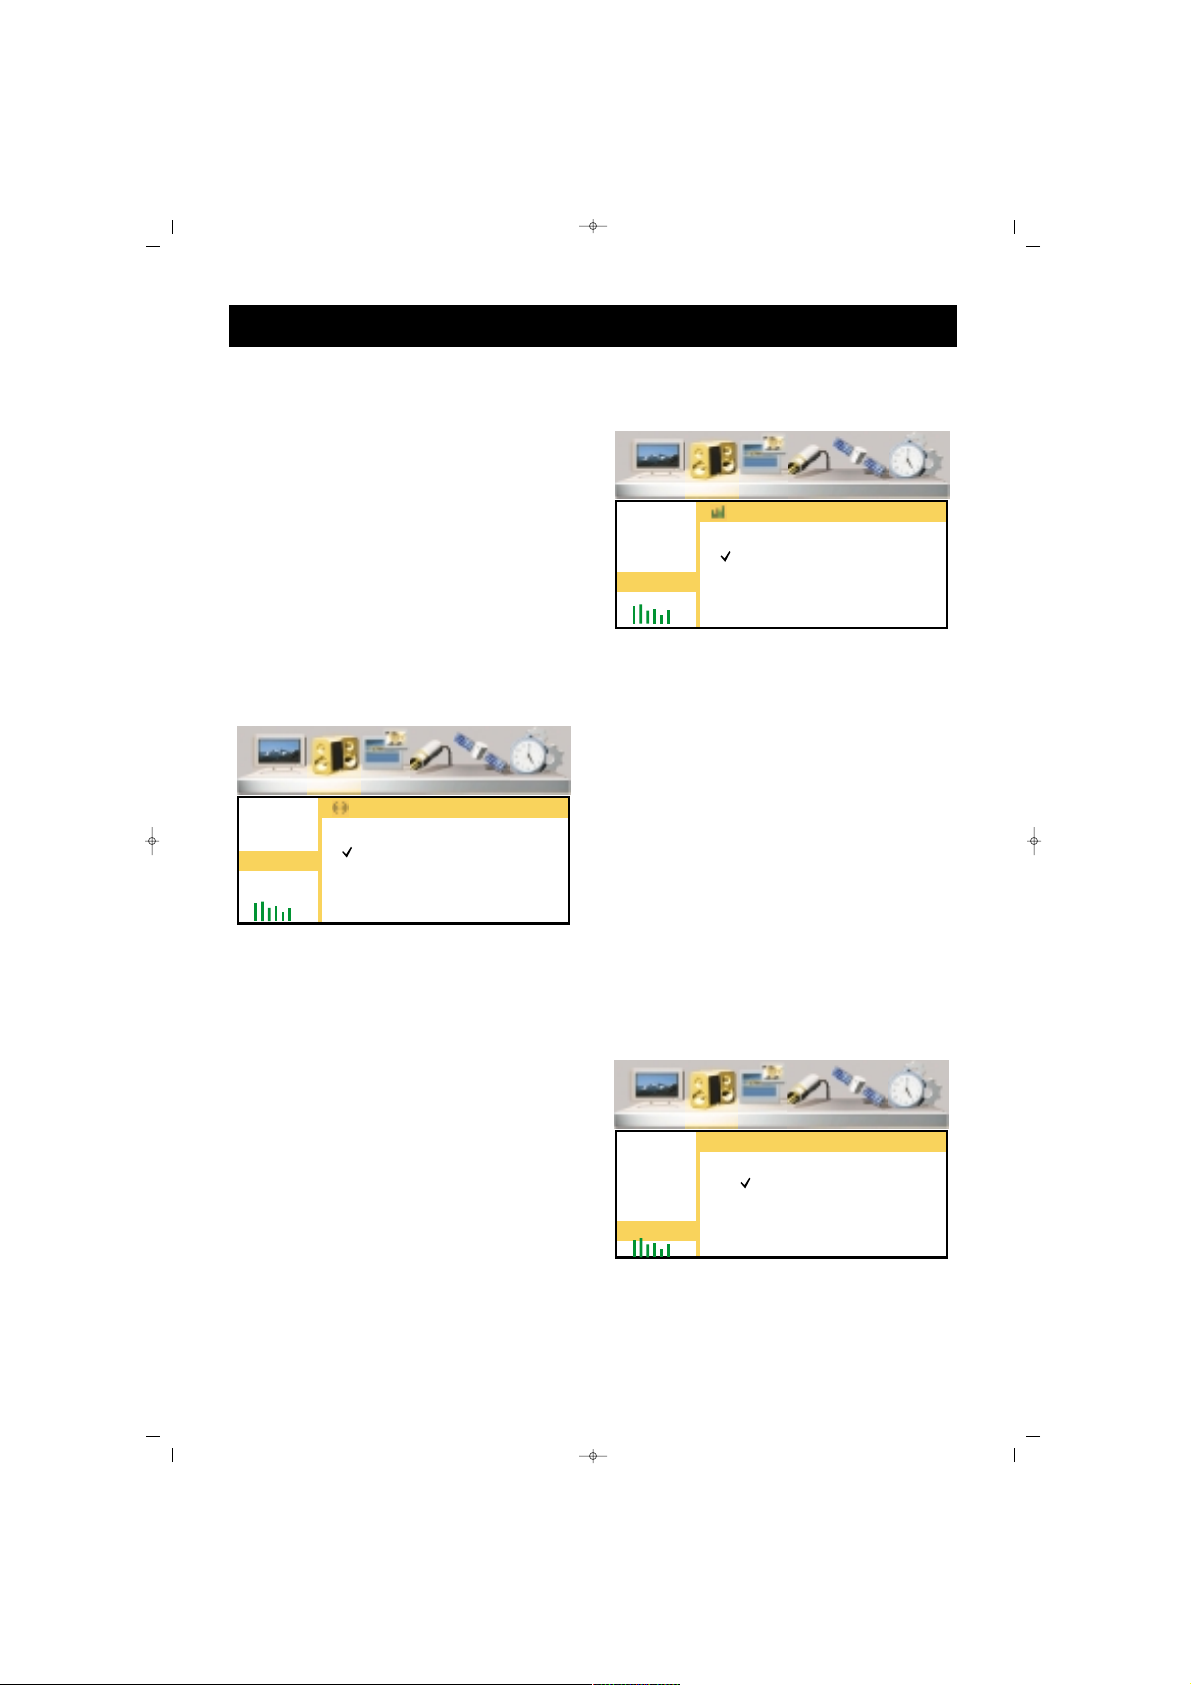
BBaassss EEffffeecctt
You can activate or deactivate the
Bass Effect function
1. Press P± button to go to the
Bass Effect line.
2. Confirm by pressing OK or V+
button
3. Select "Open" option by
pressing P± buttons
4. You can return to the Sound
menu pressing MENU button
AAVVLL ((aavvaaiillaabbllee ffoorr ssoommee mmooddeellss))::
AVL(Automatic Volume Levelling)
option in Sound sub menu, can be
switched on for automatically
levelling sound during switching
of channels with different sound
levels.
TV FUNCTIONS (MENUS)
SALORA EROS 50" OPLUS ING 9/5/06 9:33 Page 23
Picture Sound PIP Source Installation Setup
Volume
Balance
Equalizer
Surround
BASS
AVL
Surround
On
Off
Picture Sound PIP Source Installation Setup
Volume
Balance
Equalizer
Surround
BASS
AVL
BASS Enhance
On
Off
Picture Sound PIP Source Installation Setup
Volume
Balance
Equalizer
Surround
BASS
AVL
AVL
On
Off
Page 24
24
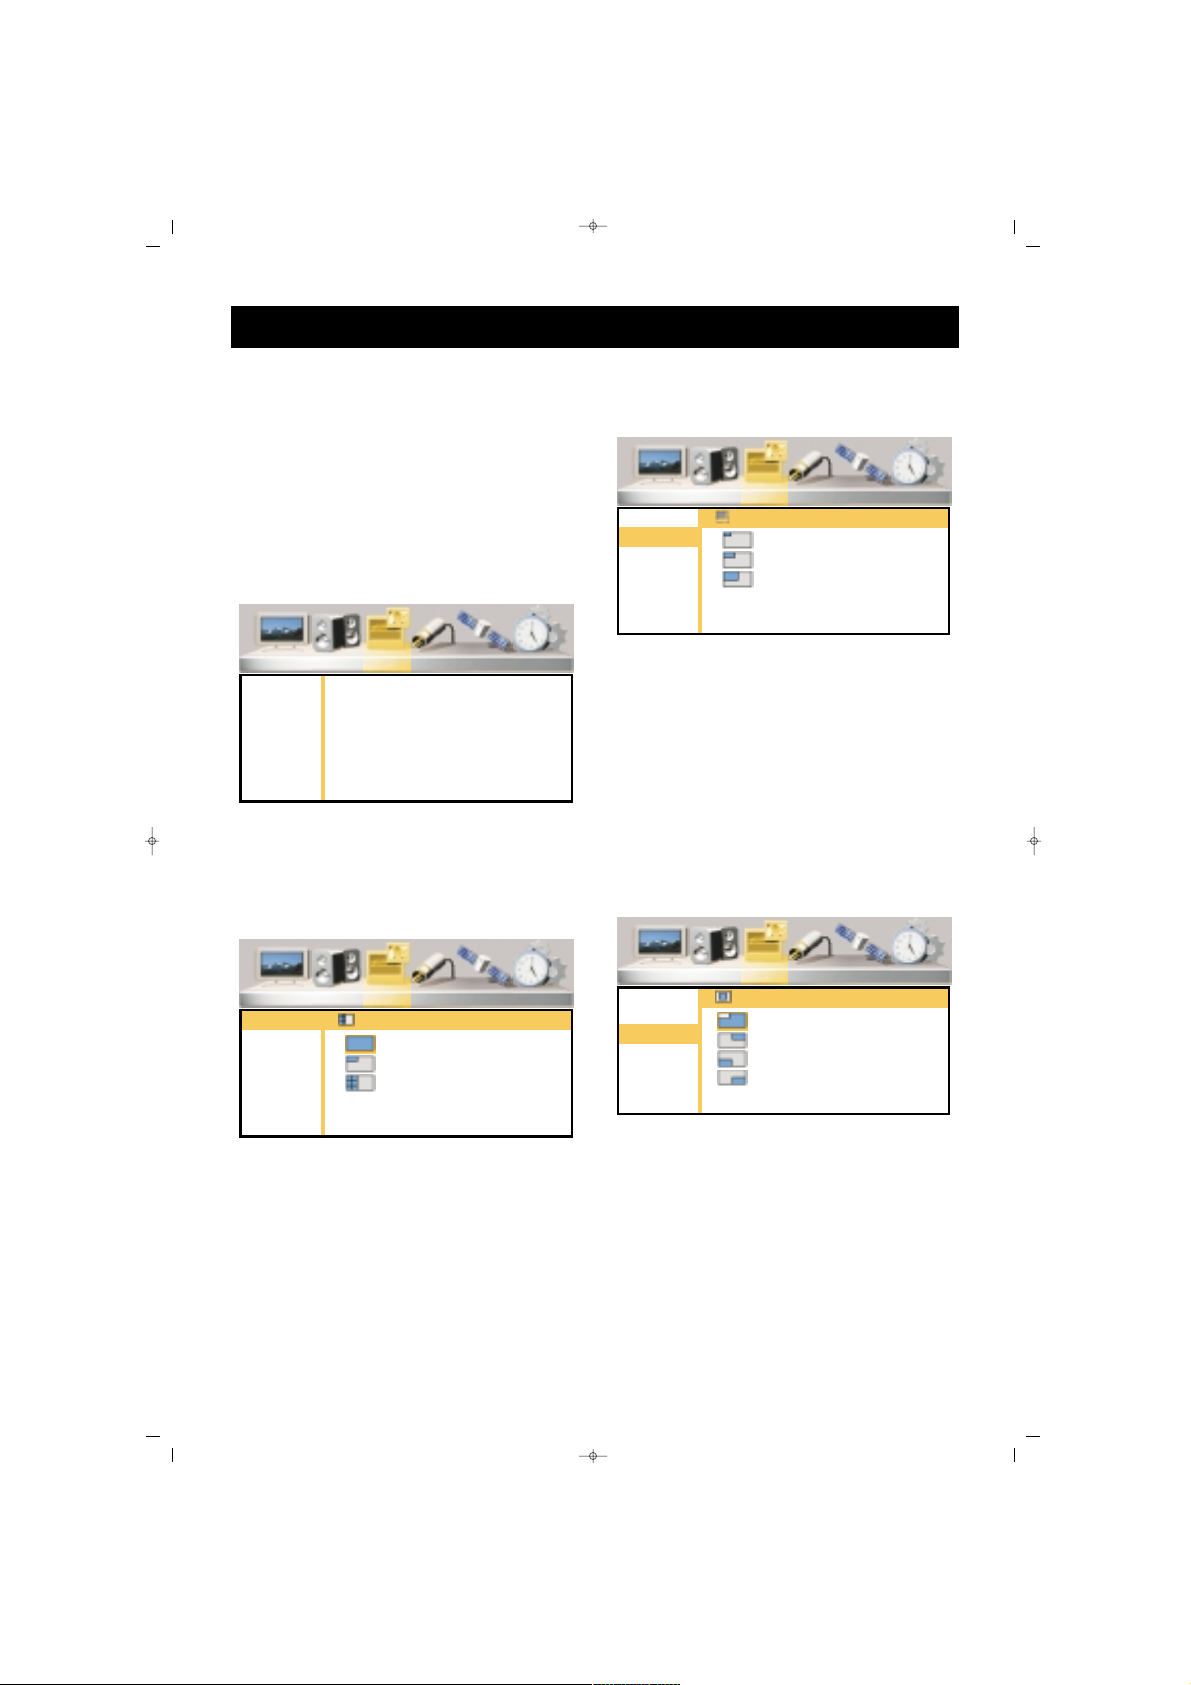
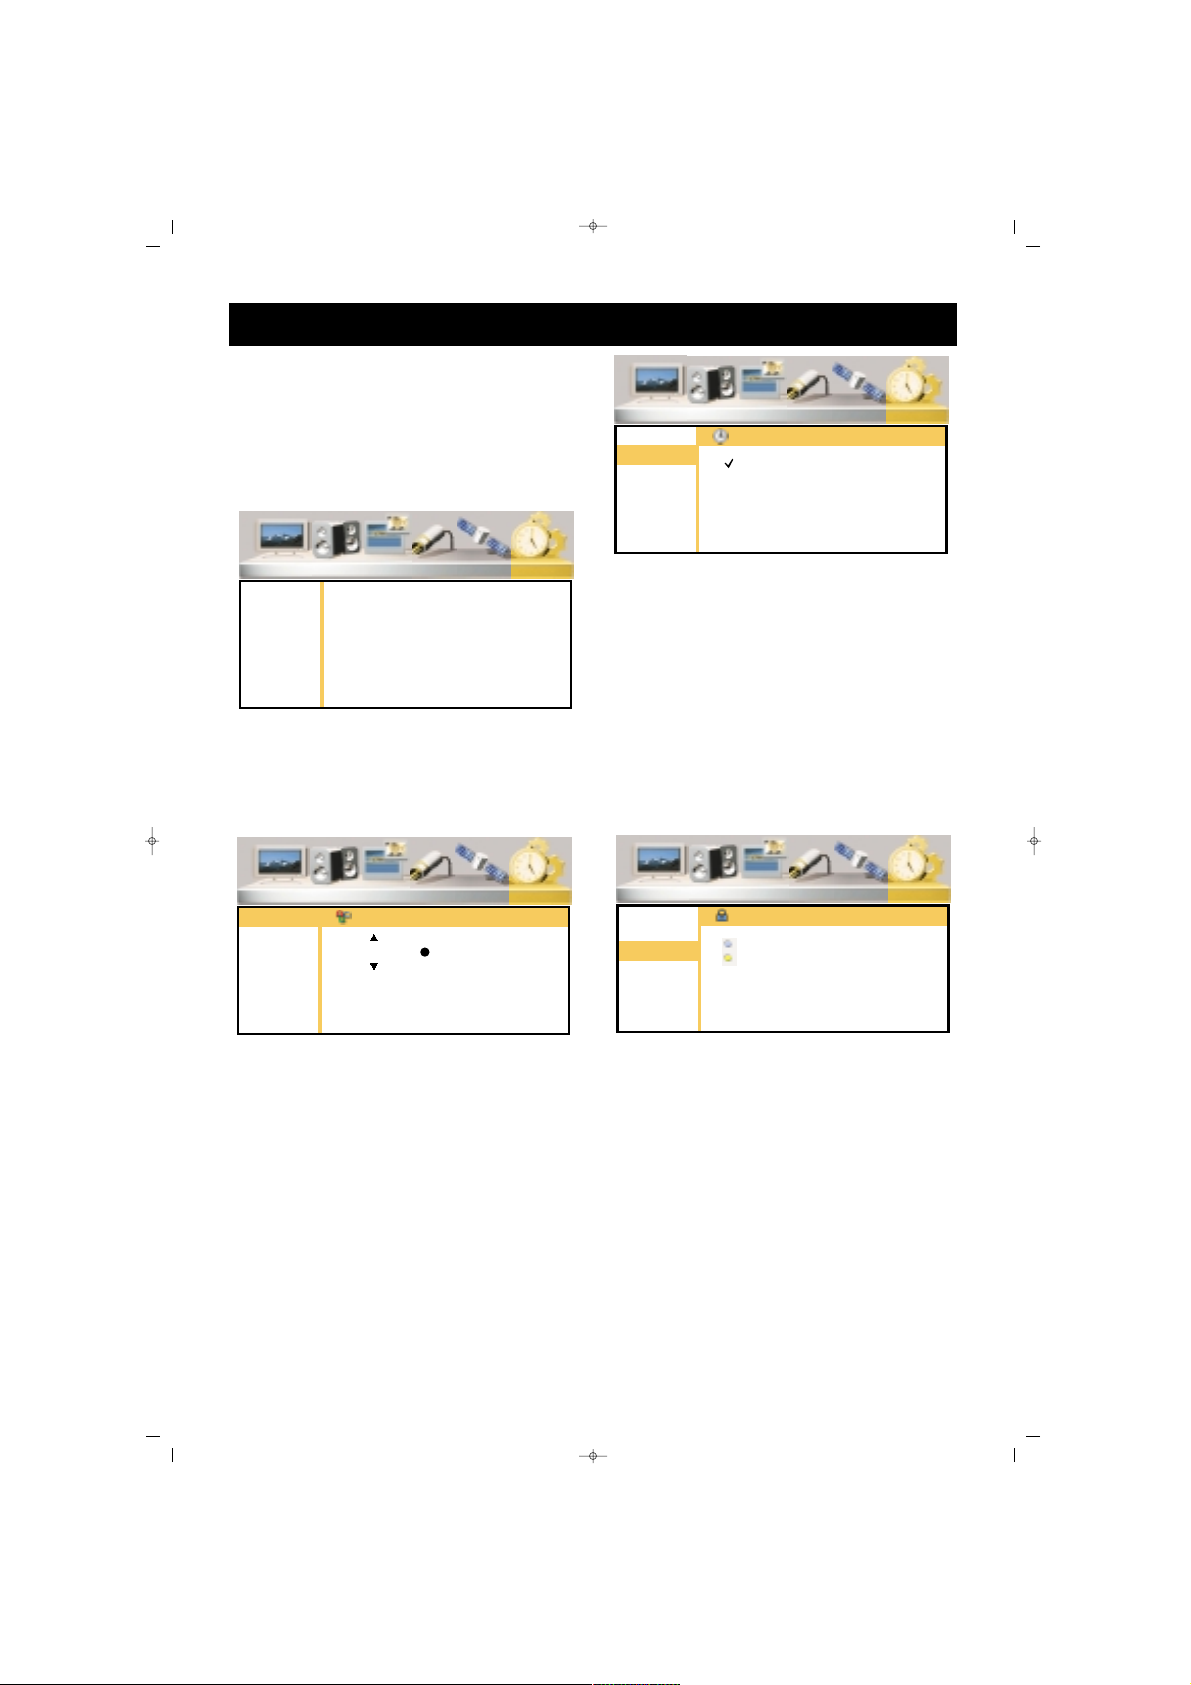
PPIIPP MMEENNUU
1. Go to the Main Menu by
pressing Menu button
2. Press V+ to access to PIP menu
3. Go to the PIP submenu by
pressing OK or P-
PPIIPP ((PPiiccttuurree iinn PPiiccttuurree)) MMooddee
You can activate or deactivate the
screen or mosaic screen
OOppeenniinngg aa PPIIPP SSccrreeeenn
1. Go to the PIP Mode line by
pressing P±
2. Confirm by pressing OK or V+
3. Select the PIP option by pressing
P± buttons
4. You can return to PIP menu by
pressing MENU button
PPIIPP DDiimmeennssiioonn
In this menu you can select the
PIP size from among 3 different
options
1. Press P± to go to the PIP line
2. Confirm by pressing OK or V+
button
3. Select the suitable PIP size by
pressing P± buttons
4. You can return to PIP menu by
pressing MENU button
PPIIPP PPoossiittiioonn
You can adjust the PIP position on
the TV
1. Press P± to the PIP Position line
2. Confirm by pressing OK or V+
buttons
3. Select the suitable PIP position
by pressing P± buttons
4. You can return to PIP menu by
pressing MENU button
TV FUNCTIONS (MENUS)
SALORA EROS 50" OPLUS ING 9/5/06 9:33 Page 24
Picture Sound PIP Source Installation Setup
PIP Modes
PIP Size
PIP Position
PIP Size
Small
Medium
Large
Picture Sound PIP Source Installation Setup
PIP Modes
PIP Size
PIP Position
Picture Sound PIP Source Installation Setup
PIP Modes
PIP Size
PIP Position
PIP Modes
Off
PIP
Mosaic
Picture Sound PIP Source Installation Setup
PIP Modes
PIP Size
PIP Position
PIP Position
Top Left
Top Right
Bottom Left
Bottom Right
Page 25
25
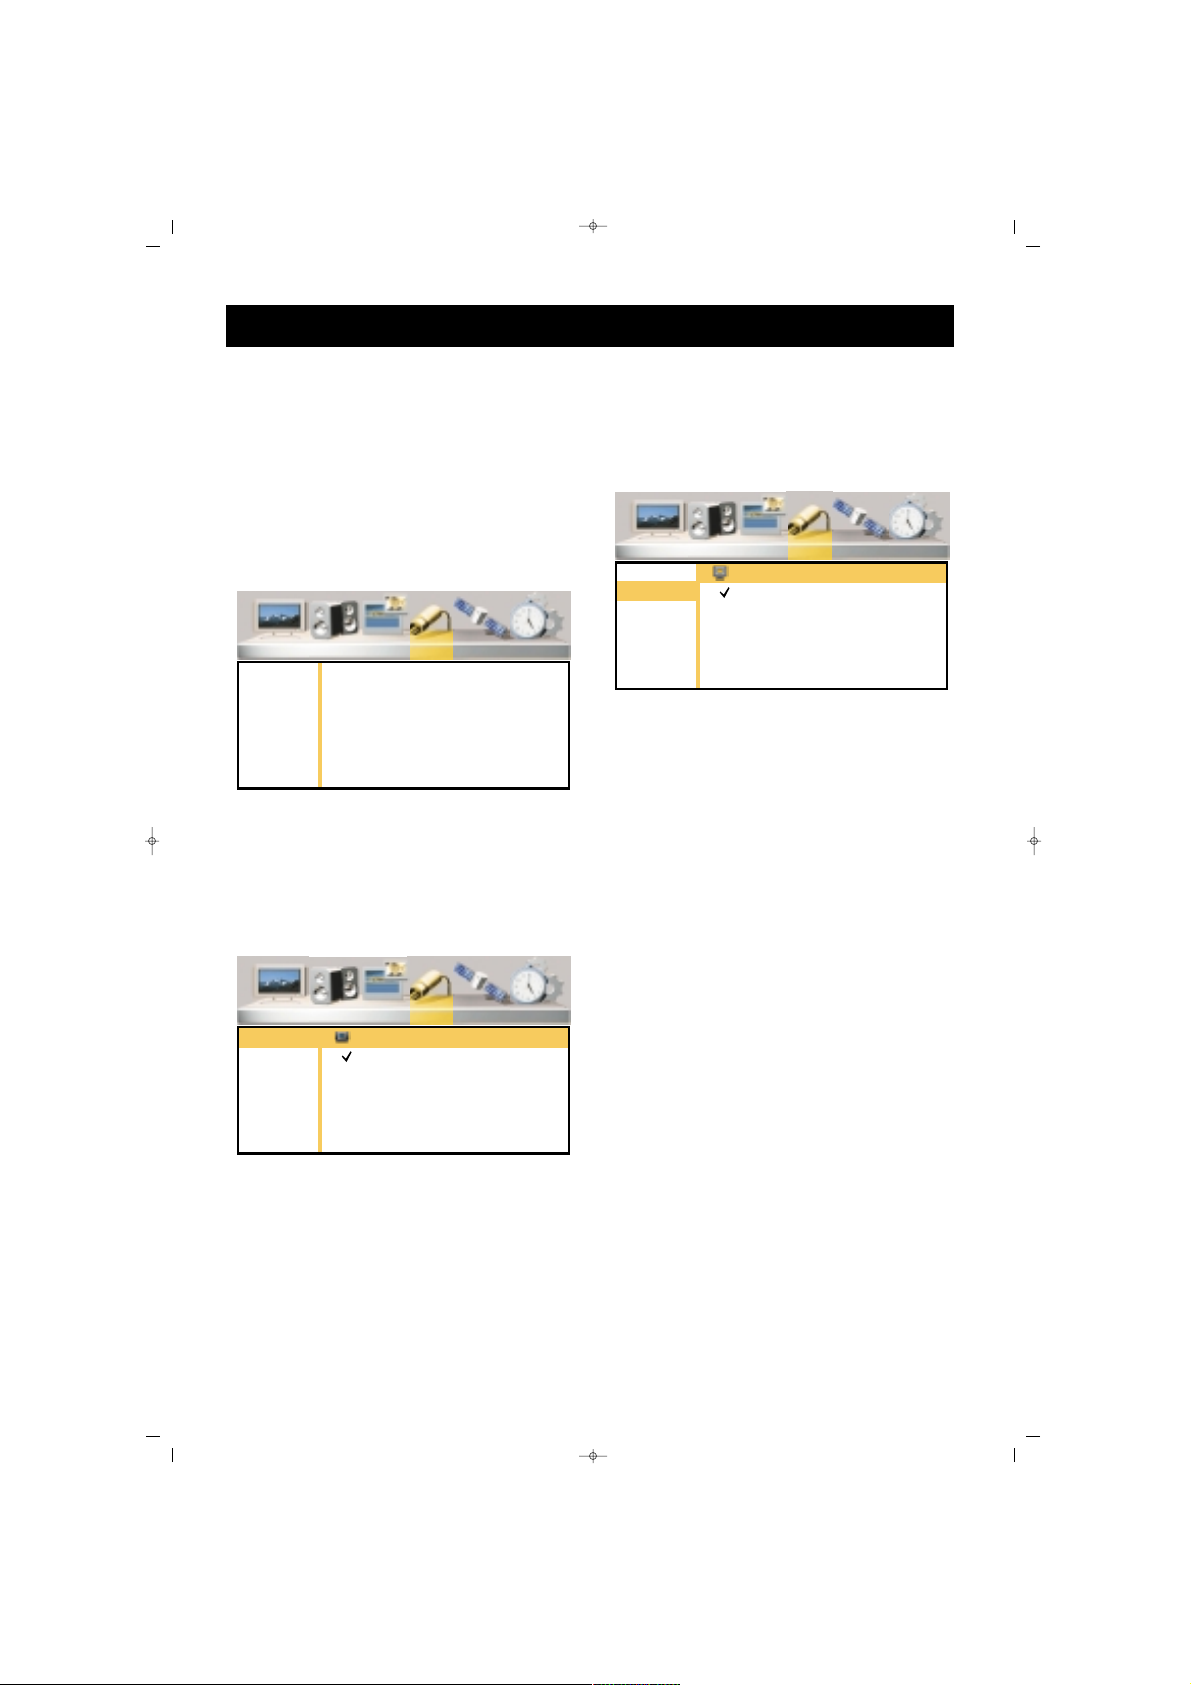
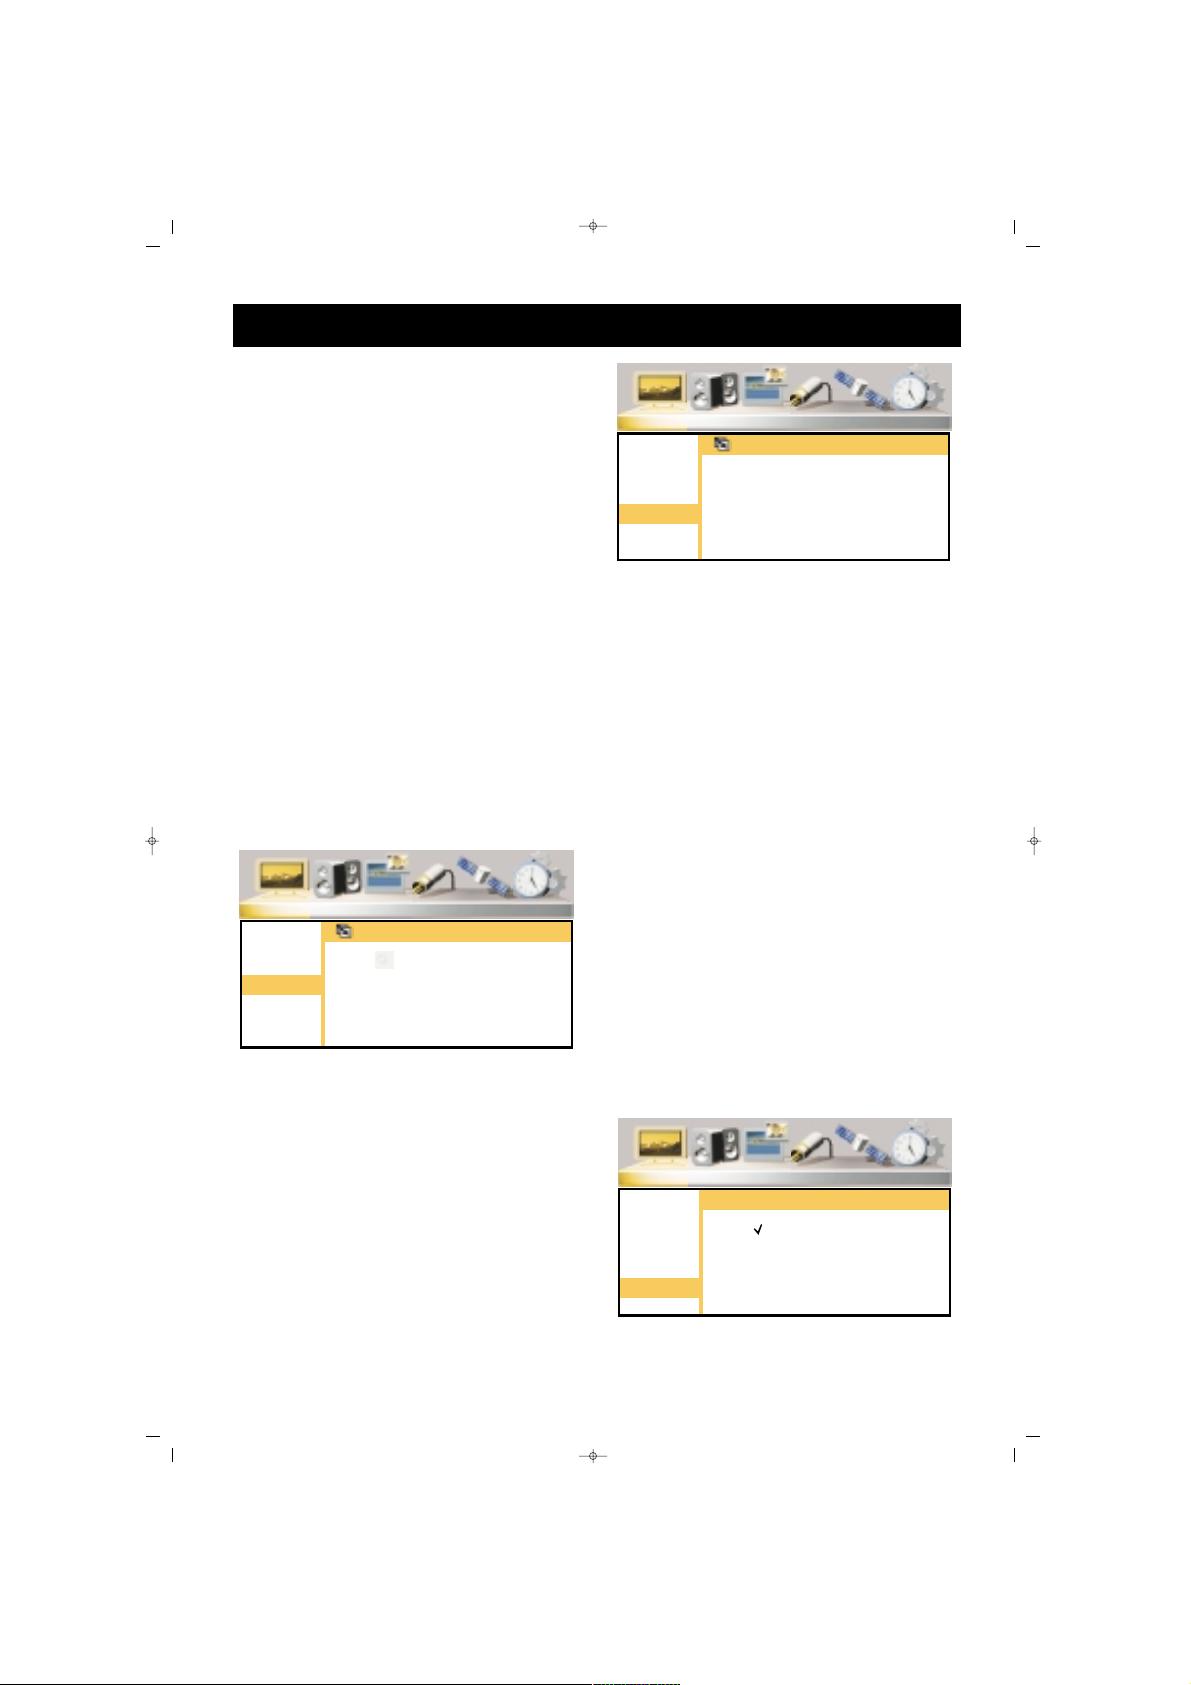
SSOOUURRCCEE MMEENNUU
1. Go to the Main Menu by
pressing Menu button
2. Go to the Source Menu pressing
V+
3. Enter to the Source Submenu by
pressing OK or PYou can select the external device
(AV) modes in this menu
MMaaiinn WWiinnddooww
You can select the AV modes for
the main screen
1. Go to the Main Window line by
pressing P±
2. Confirm by pressing OK or V+
button
3. Press P± to select the AV mode
where the device you want to
display is connected
4. Press MENU button to return to
Resource menu.
PPIIPP WWiinnddooww
You can select the AV modes for
the PIP screen
1. Go to the PIP Window Line by
pressing P±
2. Confirm by pressing OK or V+
3. Select the AV mode of the
device you want to use, pressing
P±
4. You can return to the Resource
menu by pressing MENU button
TV FUNCTIONS (MENUS)
SALORA EROS 50" OPLUS ING 9/5/06 9:33 Page 25
Picture Sound PIP Source Installation Setup
Main
PIP
Picture Sound PIP Source Installation Setup
Main
PIP
PIP Source Select
TV
Side AV
AV-IN
S-Video
Y Pb Pr
HD-YPbPr
PC
HDMI
SCART1
SCART2
Picture Sound PIP Source Installation Setup
Main
PIP
Main Source Select
TV
Side AV
AV-IN
S-Video
Y Pb Pr
HD-YPbPr
PC
HDMI
SCART1
SCART2
Page 26
26
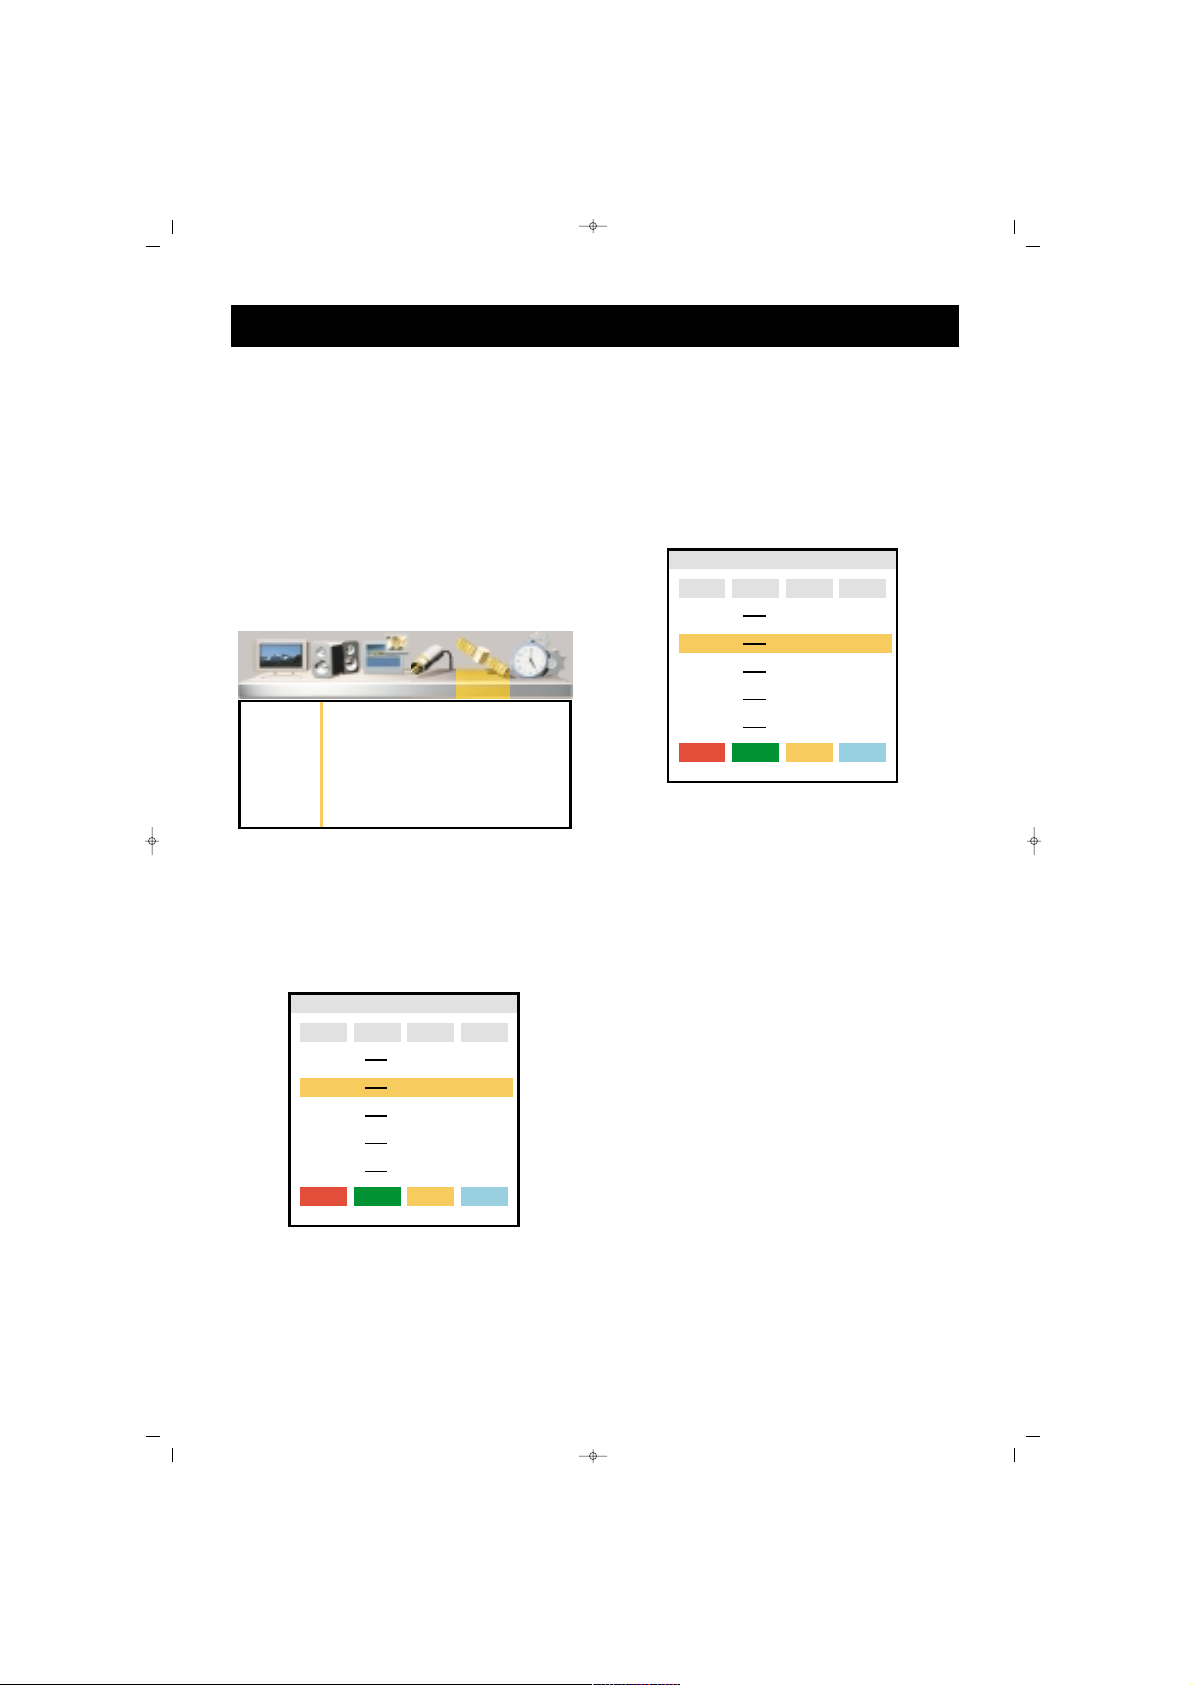
IINNSSTTAALLLLAATTIIOONN MMEENNUU
1. Press Menu button to enter to
the Main Menu
2. Go to the Installation Menu by
pressing V+ button
3. Go to the Installation Submenu
pressing OK or P-
CChhaannnneell TTaabbllee
In this menu, you can delete,
scroll, name and lock channels.
DDeelleettiinngg CChhaannnneellss
1. Press P± to go to the Channel
Table Line
2. Confirm by pressing OK or V+
buttons
3. Highlight the channel to be
deleted using P± buttons
4. Delete the channel pressing
Red button
5. You can return to Channel Table
menu by pressing Menu button.
CChhaannnneell MMoovvee
1. Highlight the Channel Table
line pressing P±
2. Confirm by pressing OK or V+
3. Highlight the channel to be
moved by pressing P± buttons
4. Press Green button
5. Highlight the line where the
channel to be moved, using P±
buttons
6. End the move by pressing Green
button
7. You can return to Channel Table
menu by pressing MENU button
TV FUNCTIONS (MENUS)
SALORA EROS 50" OPLUS ING 9/5/06 9:33 Page 26
Picture Sound PIP Source Installation Setup
Stations
Auto Scan
Man. Search
TV Stations
Program Channel
17
18
19
20
21
Delete Move Name Lock
Program Channel
17
18
19
20
21
Frequency
Lock
266,00
273,00
280,00
294,00
303,00
Delete Move Name Lock
TV Stations
Lock
Frequency
266,00
273,00
280,00
294,00
303,00
Page 27

27
CChhaannnneell nnaammiinngg
1. Go to the Channel Table line
pressing P±
2. Confirm by pressing OK or V+
button
3. Highlight the channel to name
by pressing P+
4. Press yellow button
5. Type the letter by pressing P±
6. Proceed to the following letter
pressing V+ button
7. Carry out the parts 5 and 6 until
the letter is typed
8. Complete the naming by
pressing Yellow button
9. You can return to Channel
Table menu by pressing MENU
button
CChhaannnneell LLoocckk
The channels locked in this menu
are not visible when P± is
pressed. When you try to enter
channel number directly, you
should enter the "password".
1. Go to the Channel Table line by
pressing P± buttons
2. Confirm by pressing OK or V+
button
3. Highlight the channel by P±
4. Press blue button
5. Enter the password on the menu
appearing on the screen. The
password is set as "00000" in the
factory. To cancel the locking
function, repeat parts 3, 4 and 5.
6. Press menu button to return to
"Channel Table" menu.
TV FUNCTIONS (MENUS)
SALORA EROS 50" OPLUS ING 9/5/06 9:33 Page 27
TV Stations
Program Channel
17
18
19
20
21
Delete Move Name Lock
Frequency
Lock
266,00
273,00
280,00
294,00
303,00
Program Channel
17
18
19
20
21
Delete Move Name Lock
TV Stations
Lock
Frequency
266,00
273,00
280,00
294,00
303,00
Page 28
28
AAuuttoommaattiicc SSeeaarrcchh
1. Press P- button to go to
Automatic Search option and
confirm by pressing OK button
2. Press V+ to select the country, if
there is no reference for country,
select Others.
3. Press P- button to access to
"Start" option
4. Start Automatic Search by
pressing OK. Below the screen,
the search bar will appear.
DDoo nnootthhiinngg uunnttiill tthhee sseeaarrcchh iiss
oovveerr..
Your device will
automatically find and memorize
the channels.
WWaarrnniinngg::
This will delete the
channels memorized before
MMaannuuaall SSeeaarrcchh
In this menu you can set channels
and fine tuning
1. Access to Manual Search option
by pressing P- and confirm by
OK.
2. Access to "System" line by
pressing P- button and select the
country by pressing V± (This
option should be set as Europe
except for France)
3. Go to the "Program No." Line
pressing P±
4. Specify the program number
pressing V+ button
5.
a.1. Go to the "Frequency" option
pressing Pa.2. Enter the frequency of the
channel you want to find from
the numerical keyboard 0….9
OORR
b.1. Go to the SEARCH option by
pressing P- button
b.2. Start SEARCH pressing V+
button and continue until finding
the required channel continue
pressing V+ button.
6. Go to the Fine Tuning Line
pressing P± and if necessary, fine
tune using V±
7. Go to the Record line pressing
P± and memorize the action by
pressing OK button
8. Press MENU button to return to
Channel Table menu.
TV FUNCTIONS (MENUS)
SALORA EROS 50" OPLUS ING 9/5/06 9:33 Page 28
Picture Sound PIP Source Installation Setup
Stations
Auto Scan
Man. Search
Auto Search
Country GB
Start
Picture Sound PIP Source Installation Setup
Stations
Auto Scan
Man. Search
Manual Search
Program Nr. 4
Frequency 175 Mhz
Scan
Fine Tune
System Europe
Store
Page 29
29
SSEETTTTIINNGGSS MMEENNUU
1. Enter to the Main Menu pressing
Menu button
2. Go to the Settings menu by V+
button
3. Go to the Settings submenu by
pressing OK and P-
LLaanngguuaaggee
In this menu you can change the
Menu language.
1. Go to the language line pressing
P± button
2. Confirm by pressing OK or V+
button
3. Select the language by P± and
press V+ to access to OK line.
4. Let the set memorize the entry
by pressing OK
5. Press MENU button to return
"Settings" menu, if you want to.
SSlleeeepp TTiimmeerr
You can adjust your set for
automatic switching off.
1. Go to "Sleep Timer" line by
pressing P± button
2. Confirm by pressing OK or V+
buttons
3. Select the time section for
closing by pressing P± buttons
4. You may press MENU button to
return to the "Settings" menu.
CChhiilldd LLoocckk
You can activate the Child Lock
1. Go to "Child Lock" line pressing
P± buttons
2. Confirm by pressing OK or V+
button
3. Go to "Change Password" line
by P± buttons
4. Confirm by pressing OK and
enter a password in the password
menu, which should be easy to
remember
5. Re-enter the Password as
instructed in the menu
6. Go to "Lock" line by P± buttons
7. Confirm by pressing OK and
enter the Password in the password
TV FUNCTIONS (MENUS)
SALORA EROS 50" OPLUS ING 9/5/06 9:33 Page 29
Picture Sound PIP Source Installation Setup
Languages
Sleep Timer
Child Lock
Graphics
AV Config.
TXT Lang.
Picture Sound PIP Source Installation Setup
Languages
Sleep Timer
Child Lock
Graphics
AV Config.
TXT Lang.
Sleep Timer
Off
90
60
45
30
15
Picture Sound PIP Source Installation Setup
Languages
Sleep Timer
Child Lock
Graphics
AV Config.
TXT Lang.
Languages
English OK
Picture Sound PIP Source Installation Setup
Languages
Sleep Timer
Child Lock
Graphics
AV Config.
TXT Lang.
Child Lock
Lock
Change Password
Page 30
30
menu. Child Lock is now
deactivated. Your set will ask for a
password while opening and will
not start if the password is not
entered correctly.
NNOOTTEE:: IIff yyoouu ffoorrggeett tthhee cchhiilldd lloocckk,,
ttyyppee 11--99--22--33--00 oonn tthhee RRCC.. WWhheenn
yyoouu wwaanntt ttoo cchhaannggee tthhee ppaasssswwoorrdd,,
tthhee TTVV wwiillll aasskk aa ppaasssswwoorrdd,, yyoouu
ccaann eessttaabblliisshh aa nneeww ppaasssswwoorrdd bbyy
rree--eenntteerriinngg tthhiiss nnuummbbeerr..
8. By pressing MENU button you
can return to "Settings" menu
GGrraapphhiiccss
Your TV set can automatically set
graphics for PCI mode.
1. Go to the Graphic line pressing
P±
2. Confirm by pressing OK or V+
3. Start Auto Setting by pressing
OK
4. You can return to Settings menu
by pressing MENU
SSCCAARRTT CCoonnffiigguurraattiioonn
You can configure the SCART
inlets.
1. Go to the SCART Config. Line
by pressing P±
2. Confirm by OK or V+ button
3. Select the SCART inlet to be set
by P±
4. Select the configuration
according to the your TV’s external
out with V+/V- button when you
connect Scart1, Scart2 and Side AV.
5. You can return to "Settings"
menu by pressing MENU.
TTXXTT LLAANNGGUUAAGGEE::
In Setup Menu,
TXT Language East/West selection
is available.
To get the correct characters in
Teletext mode, please choose east
or west according to station.
WWeesstt::
English, German,
Swedish,Danks, Italian, French,
Spanish, Turkish
EEaasstt::
Polish, Czech, Estonian,
Slovenian, Rumanian
TV FUNCTIONS (MENUS)
SALORA EROS 50" OPLUS ING 9/5/06 9:33 Page 30
Picture Sound PIP Source Installation Setup
Languages
Sleep Timer
Child Lock
Graphics
AV Config.
TXT Lang.
Graphics (PC Mode Only)
Picture Sound PIP Source Installation Setup
Languages
Sleep Timer
Child Lock
Graphics
AV Config.
TXT Lang.
Auto Adjust
Picture Sound PIP Source Installation Setup
Languages
Sleep Timer
Child Lock
Graphics
AV Config.
TXT Lang.
Scart Configuration
SCART1 CVBS/RGB
SCART2 CVBS
Side AV
TXT Language
West
East
Page 31

31
TTeelleetteexxtt MMooddee
If the channel has a teletext
broadcasting, you can carry out
various actions by passing to
teletext mode
11.. TTeelleetteexxtt
: This shifts to
teletext broadcasting in the
channel. Pressing twice will
transform into a double teletext
page. If you press SWAP button
while in this mode, the first
page remain fixed, you can carry
out teletext actions in the 2nd
page. Pressing 3rd time will shift
to the TV broadcasting.
22.. RReevveeaall // CCoonncceeaall::
: In
teletext, this provides revealing or
concealing of some information
in the text broadcasting
33.. TTeelleetteexxtt ttiimmeerr::
: Displays
the time taken from the teletext of
the channel while in TV mode on
the upper right corner of the
screen. (At some models)
44.. CCaanncceell ((uuppddaattiinngg))::
: While
in teletext mode pressing this
button brings the TV broadcasting.
But teletext is still active and if a
new page number is entered, page
search continues. When the
required page is accessed, a
message showing the page number
TELETEXT
1. Teletext button
2. Reveal/Conceal button
3. Teletext timer button
4. Cancel button (Updating)
5. Size (Page Enlarging) button
6. Mix (Combined TV and
Teletext) button
7. Hold (Subpage holding)
button
8. Index (Main Page) button
9. Color (Red, Green, Yellow
and Blue) button
SALORA EROS 50" OPLUS ING 9/5/06 9:33 Page 31
Page 32

32
appears on the screen. Pressing this button again brings the teletext
page. (At some models)
55.. SSiizzee ((PPaaggee eexxppaannssiioonn))
: This button is used to display the
teletext page in 3 different formats. This brings the display in normal
sizes, upper part double sized or lower part double sized
66.. MMiixx ((MMiixxeedd TTVV aanndd TTeelleetteexxtt BBrrooaaddccaassttiinngg))
: You can display the
TV and Teletext broadcasting side to side.
77.. HHoolldd ((HHoollddiinngg aa ssuubbppaaggee))::
: If there are subpages of a Teletext
Page, these subpages are displayed at certain time intervals. In this
case, this button is used to keep any page permanently on the screen.
When the page is kept by pressing HOLD button, the Hold icon
appears on the upper left corner of the Teletext Page.
88.. IInnddeexx ((HHoommee PPaaggee))::
: This button provides a direct access to the
index page of Teletext.
99.. CCoolloorr BBuuttttoonnss ((RREEDD // GGRREEEENN // YYEELLLLOOWW // BBLLUUEE))
These four colored text buttons provide an easier scan of the teletext
information. When you press MENU button while this mode is on,
color options change and you can access to the required option with
the color buttons.
EExxaammppllee
TTVV GGUUIIDDEE SSPPOORRTTSS NNEEWWSS WWEEAATTHHEERR
(The above information are for example purposes, such information
may change depending on the concerned page)
TELETEXT
Press RED
button to
receive TV
information
Press GREEN
button to
receive Sport
news
Press YELLOW
button to
receive News
Press BLUE
button to
receive
Weather
Report
SALORA EROS 50" OPLUS ING 9/5/06 9:33 Page 32
Page 33

33
BEFORE CALLING SERVICE
SSyymmppttoomm RReeaassoonn RReemmeeddyy
NNoo ppoowweerr
No power to TV Check the power source to TV
RReemmoottee CCoonnttrrooll DDooeess
The sensor is blocked Remove the block
nnoott ooppeerraattee
The batteries of remote Replace the batteries
sensor are weak
NNoo ssiiggnnaall
Video source is not Check the video source
correct connection
Check if the TV is connected to
correct video source
PPiiccttuurree sslliiddeess oorr iiss nnoott
Antenna type or place Replace the antenna
aappppaarreenntt
Try the antenna at
another place
PPiiccttuurree ccoommeess bbuutt
Sound is at minimum Increase the sound
wwiitthhoouutt ssoouunndd
Speakers are not Connect the speakers
connected properly
Sound input is Check the sound input
incorrect connection
SSoommee ppaarrtt ooff tthhee ppiiccttuurree
Wrong position setting Set the position correctly
iiss ccuutt oorr tthhee ppiiccttuurree iiss
nnoott cceenntteerreedd
Signal is unbalanced Adjust correct resolution in the
RGB, DTV/HD mode, also
set frequency and phase
PPiiccttuurree iiss ttoooo llaarrggee oorr
Incorrect screen size Adjust screen size
ttoooo ssmmaallll
BBrriigghhttnneessss rreedduucceess
Fixed pictures are Picture freezing
ggrraadduuaallllyy
displayed for long time Set to Minimization mode
SALORA EROS 50" OPLUS ING 9/5/06 9:33 Page 33
Page 34

34
TECHNICAL SPECIFICATIONS
DIAGONAL SIZE 50" (127 cm)
RESOLUTION 1366 x 768 (PIXEL)
DISPLAY COLORS 16777216
BRIGHTNESS 1000 cd/m2
CONTRAST 10000:1
VIEWING ANGLE OVER 1600(H) / OVER 1600(V)
POWER
POWER SUPPLY AC 230V 50/60Hz
POWER CONSUPTION 350 W
AUDIO
AUDIO OUTPUT 2 x 8 W
INPUT / OUTPUT TERMINALS
ANTENA 75 ohm COAXIAL
SCART 1 x FULL EURO SCART
1 x AV EURO SCART
VIDEO IN 1 x RCA (COMPOSITE VIDEO IN)
1 x S-VHS
1 x D-SUB 15PIN RGB IN
1 x HDMI IN
1 x YPbPr IN
AUDIO IN 1 x L/R RCA FOR COMPOSITE VIDEO & S-VHS
1 x L/R RCA FOR HDMI IN AND D-SUB 15 P RGB IN
1 x L/R RCA FOR YPbPr IN
SALORA EROS 50" OPLUS ING 9/5/06 9:33 Page 34
Page 35

35
TECHNICAL SPECIFICATIONS
Channel Coverage
System VHF UHF S-BAND
PAL D/K 1-12 13-57 Z1~Z37
PAL-B/G 2-12 21-69 X~Z+2,S1~S41
PAL-I 2-12 21-69
SECAM-B/G 2-12 21-69 X~Z+2,S1~S41
SECAM-D/K 1-12 21-69
SECAM-L’ 2-4 21-69
SECAM-L 5-12 21-69 X~ZC57,S1~S41
TV SYSTEM
CHANNELS
PAL/SECAM BG, DK, PAL-I, SECAM-L, SECAM-L', NTSC PLAYBACK
SALORA EROS 50" OPLUS ING 9/5/06 9:33 Page 35
Page 36

SALORA EROS 50" OPLUS ING 9/5/06 9:33 Page 36
Page 37

065 001 053 830
PL-5035TN
TV PLASMA 50”
Manuel d’instructions
V- V+ P- P+ MENU SEL
065001053830 OPLUS 50" PLAS FRA 2/3/06 9:36 Page 1
Page 38

CHER CLIENT . . . . . . . . . . . . . . . . . . . . . . . . . . . . . . . . . . . . . . . . .3
CONSIGNES DE SECURITE . . . . . . . . . . . . . . . . . . . . . . . . . . . . . . .4
FONCTIONS DES PIECES DU TELEVISEUR . . . . . . . . . . . . . . . . . . . .6
TELECOMMANDE . . . . . . . . . . . . . . . . . . . . . . . . . . . . . . . . . . . . . .8
BRANCHEMENT DE L'ANTENNE . . . . . . . . . . . . . . . . . . . . . . . . . .10
BRANCHEMENT D'UN LECTEUR VIDEO, D'UN ORDINATEUR ET
D'UN DECODEUR . . . . . . . . . . . . . . . . . . . . . . . . . . . . . . . . . . . .11
RESOLUTIONS HDMI COMPATIBLES . . . . . . . . . . . . . . . . . . . . . . .15
MISE EN MARCHE/EXTINCTION DU TELEVISEUR . . . . . . . . . . . . .16
FONCTIONS DU TELEVISEUR . . . . . . . . . . . . . . . . . . . . . . . . . . . .17
FONCTIONS DU TELEVISEUR (MENUS) . . . . . . . . . . . . . . . . . . . .19
RECHERCHE AUTOMATIQUE . . . . . . . . . . . . . . . . . . . . . . . . . . . .19
MENU IMAGE . . . . . . . . . . . . . . . . . . . . . . . . . . . . . . . . . . . . . . . .20
MENU SON . . . . . . . . . . . . . . . . . . . . . . . . . . . . . . . . . . . . . . . . . .21
MENU PIP . . . . . . . . . . . . . . . . . . . . . . . . . . . . . . . . . . . . . . . . . . .23
MENU SOURCE . . . . . . . . . . . . . . . . . . . . . . . . . . . . . . . . . . . . . .25
RECHERCHE AUTOMATIQUE . . . . . . . . . . . . . . . . . . . . . . . . . . . . .27
TELETEXTE . . . . . . . . . . . . . . . . . . . . . . . . . . . . . . . . . . . . . . . . . .31
GUIDE DE DEPANNAGE . . . . . . . . . . . . . . . . . . . . . . . . . . . . . . . .33
CARACTÉRISTIQUES TECHNIQUES . . . . . . . . . . . . . . . . . . . . . . . .34
TABLE DES MATIERES
2
065001053830 OPLUS 50" PLAS FRA 2/3/06 9:36 Page 2
Page 39

FFéélliicciittaattiioonnss !!
Vous avez fait un excellent choix. Votre nouvelle TV vous procurera
entière satisfaction. Toutefois, veuillez lire attentivement ce manuel
avant toute installation ou utilisation. Conservez-le pour pouvoir vous y
référer ultérieurement.
CCaarraaccttéérriissttiiqquueess ddee vvoottrree ttéélléévviisseeuurr ::
* Votre TV est un téléviseur couleur équipé d’une télécommande.
* Les menus OSD (affichage à l’écran) vous permettent d’effectuer tous
les réglages audio et vidéo.
* Il est possible de choisir la langue des menus.
* Vous pouvez mémoriser jusqu’à 100 chaînes sur les bandes VHF, UHF
et S.
* Votre TV peut recevoir des émissions câblées.
* La fonction de recherche automatique des chaînes vous permet de
trouver aisément les chaînes désirées, de les mémoriser et de les
nommer (ATS).
* Votre TV possède une fonction d’arrêt automatique dont la
temporisation peut être réglée par intervalles de 15 minutes et jusqu’à
90 minutes.
* Elle passe automatiquement en mode de veille 5 minutes après la fin
des émissions (arrêt automatique).
* Elle peut également servir d’écran d’ordinateur.
CHER CLIENT
3
065001053830 OPLUS 50" PLAS FRA 2/3/06 9:36 Page 3
Page 40

PPrrééccaauuttiioonnss àà pprreennddrree
Pour éviter les faux contacts ou les risques d'incendie, veuillez
protéger votre téléviseur de la pluie et de l'humidité.
* Votre téléviseur fonctionne avec une tension élevée. Veuillez
par conséquent ne pas le démonter
* Faites uniquement appel à un service après-vente agréé lorsque
cela s'avère nécessaire
MMeessuurreess
*Utilisez votre téléviseur à une tension de 220 V A 50 Hz, tension
du réseau de ville
* Manipulez avec soin le cordon d'alimentation de votre TV. Il
doit être raccordé à une prise de terre.
* Eteignez immédiatement votre téléviseur en cas de projection de
liquide ou de chute d'objet. Débranchez-le du secteur et faites
appel à un service après-vente agréé.
*Ne le débranchez pas en tirant sur le câble. Tenez-le par
l'élément de maintien de la prise.
PPoossiittiioonn ::
*Ne placez pas votre TV à proximité d'une source de chaleur ni
dans un endroit humide, poussiéreux, soumis à des vibrations
mécaniques ou à la lumière directe du soleil.
* Faites attention à laisser suffisamment d'espace autour du téléviseur. Ne le
recouvrez pas avec un tissu ou autre.
* Ne placez pas de vase ou autre récipient contenant de l'eau sur votre
téléviseur.
* Ne placez pas votre téléviseur à proximité d'un foyer ou d'une cheminée.
NNeettttooyyaaggee
Utilisez un chiffon légèrement humidifié pour nettoyer votre téléviseur.
N'utilisez pas de nettoyants chimiques ou mécaniques : ils risquent
d'endommager la peinture extérieure.
RRééeemmbbaallllaaggee
Conservez le carton et les matériaux d'emballage originaux pour une
éventuelle réutilisation ultérieure.
V- V+ P- P+ MENUSEL
CONSIGNES DE SECURITE
4
065001053830 OPLUS 50" PLAS FRA 2/3/06 9:36 Page 4
Page 41

5
ATTENTION !
NE LAISSEZ PAS UNE IMAGE FIXE AFFICHEE A L'ECRAN PENDANT
UNE PERIODE PROLONGEE.
SINON, L'AFFICHAGE FIXE RISQUE DE LAISSER DES MARQUES
PERMANENTES SUR L'ECRAN
EXEMPLE :
APRES AVOIR REGARDE LA MEME CHAINE PENDANT UNE PERIODE
PROLONGEE, IL ARRIVE QU'UNE MARQUE RESTE SUR L'ECRAN
EN RAISON DE LA POSITION FIXE DU LOGO. DE MEME, EVITEZ
L'AFFICHAGE PROLONGE D'UNE PAGE DE TELETEXTE.
NE LAISSEZ PAS LE TELEVISEUR BRANCHE PENDANT UNE
PERIODE PROLONGEE LORSQUE UN TEL PROGRAMME EST
OUVERT.
CONSIGNES DE SECURITE
065001053830 OPLUS 50" PLAS FRA 2/3/06 9:36 Page 5
Page 42

6
PANNEAU FRONTAL
En bas à droite du panneau frontal du téléviseur, se trouvent le bouton de mise
en marche/arrêt, les touches V+/V-, P+/P-, MENU et SEL. Le capteur de la
télécommande et l’indicateur Led se trouvent sur côté droit.
V- V+ P- P+ MENU SEL
FONCTIONS DES PIECES DU TELEVISEUR
065001053830 OPLUS 50" PLAS FRA 2/3/06 9:36 Page 6
V- V+ P- P+ MENU SEL
V–
V+
P– P+
MENU
SEL
Page 43

‹Ç‹NDEK‹LER
7
PANNEAU ARRIERE
AA ll''aarrrriièèrree ddee vvoottrree TTVV PPllaassmmaa ::
1. Entrée RVB à 15 broches D-Sub
2. HDMI (pour PC, décodeur)
3. Haut-parleurs (Entrée de son PC/DVI)
4. Touche ON/OFF
5. SCART 1 (Euroconnecteur) pour magnétoscope, lecteur DVD, décodeur
6. SCART 2 (Euroconnecteur) pour magnétoscope, lecteur DVD, décodeur
7. S-Vidéo (Pour DVD, décodeur et S-VHS)
8. Sortie AV
9. Entrée AV (pour un magnétoscope, un lecteur DVD ou un décodeur)
10. Entrée antenne TV (pour le câble d'antenne du téléviseur) (continental)
11. Prise du câble d'alimentation AC
POWER
SCART 2
ON
OFF
S-Video
LRCVBS
AV
6
7
8
9
10
11
12
ANT.IN
SCART 1
AUDIO
R
L
1
2
3
5
FONCTIONS DES PIECES DU TELEVISEUR
4
HHDDMMII
HHDDMMII
065001053830 OPLUS 50" PLAS FRA 2/3/06 9:36 Page 7
Page 44

‹Ç‹NDEK‹LER
8
1. Touche VEILLE
2. Pavé numérique (sélection directe
d’une chaîne)
3. Touche ZOOM
4. Touche de mise en sourdine
5. Touche MENU (sélection du menu)
6. Touche de permutation
7. Touches P± (chaîne
précédente/suivante en mode TV,
page précédente/suivante en
mode Télétexte ou navigation
dans les menus)
8.Touches V± (augmentation et
diminution du volume et réglage
dans les menus)
9. Touche OK (changement de chaîne
en mode mosaïque, confirmation
ou d’annulation dans les menus)
10. Touche PIP (sur certains modèles)
11. Touche PP (réglages utilisateur)
12. Touche S/M/D (sélection audio
DUAL A, DUAL B, Stéréo, Mono)
13. Touche AV
14. Touche MOSAÏQUE (affichage
mosaïque)
((nnoonn ddiissppoonniibbllee ddaannss
ccee mmooddèèllee))
15. Touche rouge (pour effectuer un
zoom avant ou arrière sur la
fenêtre PIP sur les modèles munis
de cette fonction, pour quitter le
mode HDMI ou PC en mode TV)
16. Touche verte (pour déplacer la
fenêtre PIP d’un coin à l’autre sur
les modèles munis de cette
fonction, pour passer du mode TV
au mode PC)
17. Touche jaune (pour passer du
mode TV au mode HDMI)
18. Touche bleue (arrêt sur image)
19. Touche 16:9 (sélection du format
d’affichage)
20. Touche INFO (informations sur la
chaîne à l’écran)
RReemmaarrqquuee ::
Pour de plus amples
informations sur les autres fonctions
des touches décrites dans les menus,
référez-vous à l’illustration de la
télécommande reprise à la section
TÉLÉTEXTE.
TELECOMMANDE
065001053830 OPLUS 50" PLAS FRA 2/3/06 9:36 Page 8
Page 45

‹Ç‹NDEK‹LER
9
TELECOMMANDE
Ne laissez jamais
tomber votre
télécommande.
Ne tentez pas d’ouvrir le
boîtier de la
télécommande vousmême.
N’appuyez jamais sur 2
touches de la
télécommande
simultanément.
Otez les piles de la
télécommande si celleci n’est pas utilisée
pendant une période
prolongée.
RReemmaarrqquuee::
Pour un bon fonctionnement de votre télécom-mande,
placez-vous à 7 mètres du téléviseur
et à un angle de 30 degrés maximum.
IINNSSEERRTTIIOONN DDEESS PPIILLEESS ((22 xx 11,,55 VV AAAAAA))
- Otez le couvercle du compartiment pour piles en suivant
le sens des flèches.
- Insérez les piles correctement en respectant la polarité.
- Refermez le compartiment pour piles.
065001053830 OPLUS 50" PLAS FRA 2/3/06 9:36 Page 9
V- V+ P- P+ MENU SEL
Page 46

‹Ç‹NDEK‹LER
10
BBrraanncchheemmeenntt ddee ll''aanntteennnnee
Commencez par sélectionner le branchement de l'antenne. Les antennes indiquées
ci-dessous sont adaptées à votre téléviseur.
* Antenne VHF
* Antenne double VHF / UHF
* Antenne UHF
Pour le branchement d'une de ces antennes à votre téléviseur, utilisez un câble
coaxial rond 75 Ohm et débranchez votre téléviseur du secteur.
Si vous disposez d'un câble
300 ohms (câble plat à double
fil), installez un adaptateur
(300 ohms > 75 ohms) sur
l'entrée d'antenne du
téléviseur. Pour visionner les
programmes du câble, la ligne
de câblodistribution doit être
raccordée à l'entrée de
l'antenne. Les véhicules à
moteur, les lignes d'énergie et
de communication sont des
générateurs de bruit. Installez
donc votre antenne à distance
de ces derniers et des surfaces
métalliques. N'utilisez pas une
longueur de câble superflue à
l'installation, et n'enroulez pas
le câble. L'antenne et le câble
pouvant être affectés par les
conditions environnementales
telles que la pluie, le vent, la
fumée ou l'humidité ; vérifiez
de temps à autre l'état de
l'antenne et de l'équipement.
CONNEXION DE L'ANTENNE
HHDDMMII
HHDDMMII
065001053830 OPLUS 50" PLAS FRA 2/3/06 9:36 Page 10
SCART 1
SCART 2
LRCVBS
AV
S-Video
ANT.IN
L
R
ON
OFF
AUDIO
POWER
Page 47

BRANCHEMENT D'UN LECTEUR VIDEO, D'UN ORDINATEUR ET D'UN DECODEUR
11
LLeeccttuurree dd''uunnee vviiddééoo
RRaaccccoorrddeemmeenntt
PPEERRIITTEELL ((EEuurrooccââbbllee))
Raccordez le câble PERITEL aux prises PERITEL du magnétoscope et à la prise SVidéo du téléviseur.
Raccordez le câble S-Vidéo aux entrées S-Vidéo de la TV et de votre appareil vidéo.
Raccordez le câble audio (composite) L (blanc) et R (rouge) aux entrées audio du
téléviseur.
EEnnttrrééee AAVV
Raccordez le câble audio vidéo aux entrées TV et Vidéo du lecteur vidéo.
Raccordez le câble audio (composite) L (blanc) et R (rouge) aux entrées audio du
téléviseur.
LLeeccttuurree dd''uunnee vviiddééoo
1. Appuyez sur le bouton AV de la télécommande et sélectionnez la source vidéo.
2. Insérez une cassette vidéo dans le magnétoscope et appuyez sur LECTURE.
Pour éviter toute interférence visuelle, laissez un espace suffisant entre le
magnétoscope et l'écran (plus de 3 m)
*Au moment de raccorder le téléviseur à un équipement externe, faites attention à
ce que les couleurs des ports de raccordement soient identiques (par exemple,
Vidéo-jaune, Son (gauche) blanc, Son (droite) rouge)
* Si vous disposez d’ un magnétoscope mono, raccordez le câble audio de
l'appareil aux entrées AUDIO (L/MONO) du téléviseur.
* Si vous raccordez le lecteur vidéo S-VHS à l’entrée S-VIDEO, vous pouvez obtenir
un meilleur affichage de l'image qu’avec une entrée AV ordinaire.
*Faites attention à ne pas laisser à l'écran un affichage fixe pendant une longue
durée. Il s'agit en général d'affichages fixes ou d'informations sur le programme
dans le format d'affichage 4:3 du magnétoscope.
SCART 2
SCART 1
CVBS L R
AV
S-VIDEO
ANT.IN
065001053830 OPLUS 50" PLAS FRA 2/3/06 9:36 Page 11
Page 48

12
LLeeccttuurree dd''uunn DDVVDD
BBrraanncchheemmeenntt
* Veuillez relier le joueur de DVD par l'intermédiaire du câble de scart à Scart 1
UUttiilliissaattiioonn
1. Démarrez le lecteur DVD
2. Appuyez sur le bouton AV de la télécommande du téléviseur et sélectionnez
Composant1
POWER
SCART 1
SCART 2
ON
OFF
S-Video
LRCVBS
ANT.IN
BRANCHEMENT D'UN LECTEUR VIDEO, D'UN ORDINATEUR ET D'UN DECODEUR
065001053830 OPLUS 50" PLAS FRA 2/3/06 9:36 Page 12
Page 49

13
LLeeccttuurree àà ppaarrttiirr dd''uunn ddééccooddeeuurr
BBrraanncchheemmeenntt
Branchez les connecteurs d'affichage du décodeur aux entrées PERITEL, CHINCH,
PC ou HDMI du téléviseur. Raccordez les entrées audio aux prises audio à L
(blanc) et R (rouge)
UUttiilliissaattiioonn
1. Allumez le décodeur
2. Sélectionnez PC ou HDMI sur la télécommande du téléviseur.
BBrraanncchheemmeenntt
AA ll’’aaiiddee dd’’uunn ccââbbllee PPEERRIITTEELL ((EEuurrooccââbbllee))
Raccordez le câble PERITEL aux connecteurs PERITEL du décodeur et du téléviseur
HHDDMMII
Reliez le câble de HDMI aux douilles de HDMI de STB et de PDP.
NNoottee ::
Quand vous reliez un dispositif externe à DVI produit à l'entrée de HDMI
de votre TV. Veuillez relier les sorties audio analogues de DVI aux entrées saines
de PC/AUDIO de votre TV pour obtenir le bruit au mode de HDMI.
YYPPbbPPrr
Reliez les douilles de YPbPr de STB et de PDP en employant des câbles de chinch.
Reliez le rendement audio de STB aux entrées d'acoustique de YPbPr.
RReemmaarrqquuee ::
* Seul l'un des ports composante PC et HDMI permet de transmettre un signal
vidéo. Si l'un des deux ports envoie un signal vidéo, les autres prises ne peuvent
pas être utilisées.
AUDIO
R
L
POWER
SCART 1
SCART 2
ON
OFF
S-Video
LRCVBS
ANT.IN
BRANCHEMENT D'UN LECTEUR VIDEO, D'UN ORDINATEUR ET D'UN DECODEUR
SSiiggnnaauuxx ccoommppoossaanntteess
HHDDMMII
HHDDMMII
065001053830 OPLUS 50" PLAS FRA 2/3/06 9:36 Page 13
Page 50

14
RRaaccccoorrddeemmeenntt dd''uunn PPCC,, dd''uunn DD SSuubb eett dd''uunn lleecctteeuurr ddee DDVVDD
** BBrraanncchheemmeenntt dd''uunn PPCC eett dd''uunn ttéélléévviisseeuurr
Branchez un câble vidéo PC (15 broches) à la sortie vidéo sur le PC
ou sur le port PC du téléviseur.
** CCoonnffiigguurraattiioonn ddeess bbrroocchheess
Câble d'interface 15 broches (broches à rainure)
** CCoonnffiigguurraattiioonn ddeess bbrroocchheess
1. Allumez votre téléviseur et appuyez sur le bouton AV pour
sélectionner le mode PC
2. Démarrez le PC et vérifiez la configuration requise du PC
3. Réglez l'écran du PC dans le menu Géométrie
1
2
3
4
5
6
7
8
9
10
11
12
13
14
15
K›rm›z› (R)
Yeflil (G)
Mavi (B)
Toprak
Toprak (DDC)
K›rm›z› (R) Toprak
Yeflil (G) Toprak
Mavi (B) Toprak
Rezerve
Senk. Topraklama
Topraklama
Veri (DDC)
Yatay senk.
Düfley senk.
Saat (DDC)
Pin No. Tan›m›
AUDIO
R
L
AUDIO
R
L
BRANCHEMENT D'UN LECTEUR VIDEO, D'UN ORDINATEUR ET D'UN DECODEUR
NN°° bbrroocchhee DDeessccrriippttiioonn
RRoouuggee ((RR))
VVeerrtt ((GG))
TTeerrrree
TTeerrrree ((DDDDCC))
TTeerrrree RRoouuggee ((RR))
TTeerrrree VVeerrtt ((GG))
TTeerrrree BBlleeuu ((BB))
BBlleeuu ((BB))
RRéésseerrvvee
TTeerrrree SSeennccrr..
TTeerrrree
TTeemmppss ((DDDDCC))
SSeennccrr.. VVeerrtt..
SSeennccrr.. HHoorr..
DDoonnnnééeess ((DDDDCC))
HHDDMMII
HHDDMMII
HHDDMMII
HHDDMMII
065001053830 OPLUS 50" PLAS FRA 2/3/06 9:36 Page 14
Page 51

15
RRééssoolluuttiioonnss HHDDMMII ccoommppaattiibblleess
SSiiggnnaall RRVVBB RRééssoolluuttiioonn FFrrééqquueennccee
1080I 1920 * 1080 60
1080I 1920 * 1080 50
720P 1280 * 720 60
720P 1280 * 720 50
576P 720 * 576 50
480P 640 * 480 60
PPCC//HHDDMMII :: TToouutteess lleess nnoorrmmeess VVEESSAA jjuussqquu’’àà 11228800 xx 11002244
640x480 50Hz/60Hz/70Hz/75Hz/85Hz/90Hz/100Hz
800x600 60Hz/70Hz/75Hz/85Hz/100Hz
1024x768 60Hz/70Hz/75Hz/85Hz
1152x864 60Hz/70Hz/75Hz/85Hz
1280x960 60Hz/70Hz/75Hz/85Hz
1280x1024 60Hz/70Hz/75Hz/85Hz
NNoottee ::
Quand vous reliez un dispositif externe à DVI produit à l'entrée
de HDMI de votre TV. Veuillez relier les sorties audio analogues de DVI
aux entrées saines de PC/AUDIO de votre TV pour obtenir le bruit au
mode de HDMI.
RRÉÉSSOOLLUUTTIIOONNSS HHDDMMII CCOOMMPPAATTIIBBLLEESS
065001053830 OPLUS 50" PLAS FRA 2/3/06 9:36 Page 15
Page 52

‹Ç‹NDEK‹LER
16
11.. FFoonnccttiioonnnneemmeenntt
aa.. MMiissee ssoouuss tteennssiioonn
Appuyez sur la touche ON/OFF
de la TV. Elle s’allume après
quelques instants.
bb.. MMooddee vveeiillllee
Lorsque la TV est en mode veille,
vous pouvez l’allumer en
appuyant sur la touche VEILLE ou
sur P±.
22.. AArrrrêêtt ddee llaa TTVV
aa.. MMiissee hhoorrss tteennssiioonn
Pour arrêter complètement la TV,
appuyez sur la touche ON/OFF.
bb.. MMooddee vveeiillllee
Pour arrêter la TV pour une courte
période, appuyez sur la touche
VEILLE de la télécommande ou de
la TV.
En cas de non-utilisation prolongée
de la TV, appuyez sur la touche
ON/OFF de la TV.
11.. SSéélleeccttiioonn dd’’uunnee cchhaaîînnee
* Vous pouvez sélectionner la chaîne
de votre choix avec les touches P±
de la face avant de la TV.
* Vous pouvez sélectionner une
chaîne comprise entre 1 et 9 à
l’aide du pavé numérique de la
télécommande.
* Pour sélectionner une chaîne
comprise entre 10 et 100, saisissez
rapidement les chiffres à l’aide du
pavé numérique de la
télécommande.
EExxeemmppllee ::
Pour passer à la chaîne
n° 100, appuyez tout d’abord sur
la touche 1. L’indication « 1 »
apparaît alors dans le coin gauche
de l’écran. Appuyez
immédiatement sur la touche 0 à
deux reprises. La TV passe à la
chaîne n° 100.
2--
2--
001
1--
OK
MISE EN MARCHE/EXTINCTION DU TELEVISEUR
5
6
1
8
065001053830 OPLUS 50" PLAS FRA 2/3/06 9:36 Page 16
Page 53

17
22.. SSoouurrddiinnee
Pour couper le son, appuyez
sur la touche de mise en sourdine
de la télécommande. Appuyez
une nouvelle fois sur cette touche
pour rétablir le son.
33.. TToouucchhee 1166::99 ::
Appuyez sur cette
touche pour modifier le format
d’affichage. Les formats
44::33
CCiinnéémmaa,, 1144::99,, AAuuttoommaattiiqquuee
et
1166::99
sont accessibles par une
simple pression de cette touche.
ZZoooomm MMaannuueell ::
Tandis qu'en mode
d'image de cinéma, vous pouvez
activer la fonction manuelle de
zoom par la pression bouton de
"ZOOM"
(( ))
sur R/C. Alors par
la pression
(( ))
et
(( ))
les
boutons de prise, le niveau vertical
de zoom peut être ajusté.
44.. PPPP ::
Appuyez sur cette touche
pour mémoriser les réglages audio
et vidéo de la TV.
Si vous maintenez la touche PP
enfoncée, les réglages audio et
vidéo actuels de la TV sont
sauvegardés en tant que « Réglages
utilisateur » et le message « User
Values Saved » (Réglages utilisateur
sauvegardés) apparaît à l’écran.
55.. TToouucchhee SS//MM//DD ::
Vous pouvez
modifier le volume une émission
diffusée en stéréo et passer à
Mono, Stéréo, DUAL A ou DUAL
B. Toutefois, vous ne pouvez
effectuer ce réglage lors d’une
émission monaurale.
66.. TToouucchhee AAVV ::
Pour passer en
mode AV, appuyez sur la touche
AV (0) de la télécommande. Le
menu Info (Informations) apparaît
à l’écran. Lorsque le mode AV
adéquat est sélectionné, quittez le
menu en appuyant à nouveau sur
la touche AV. A chaque fois que
vous appuyez sur la touche AV, la
liste des entrées de votre appareil
apparaît. Vous êtes alors en mode
TV, car c’est celui que vous avez
utilisé en dernier. Vous pouvez
également passer en mode TV en
appuyant sur la touche rouge
depuis n’importe quel mode. Vous
ne pouvez pas passer au mode AV
tant que le menu principal est
affiché à l’écran.
77.. AArrrrêêtt aauuttoommaattiiqquuee ::
La TV passe
automatiquement en mode veille
5 minutes après la fin des
émissions.
Remarque : L’arrêt automatique
n’est pas activé en mode AV.
88.. TToouucchhee OOKK ::
Cette touche
permet de changer de chaîne en
mode mosaïque et de confirmer
ou
dd’’aannnnuulleerr
les
mmooddiiffiiccaattiioonnss
apportées dans les menus.
99..TToouucchhee IInnffoo ((II)) ::
Appuyez sur
cette touche pour afficher le
numéro de chaîne, le format
d’affichage, le nom de la chaîne
(le cas échéant), le type audio,
etc.
FONCTIONS DU TELEVISEUR
1
100
065001053830 OPLUS 50" PLAS FRA 2/3/06 9:36 Page 17
Page 54

18
TToouucchhee ddee ppeerrmmuuttaattiioonn ::
La
touche de permutation vous
permet de revenir à la chaîne que
vous regardiez précédemment.
RReemmaarrqquuee ::
Si un menu est affiché
à l’écran, la touche SWAP n’a
aucun effet.
MMoossaaïïqquuee ::
((nnoonn ddiissppoonniibbllee ddaannss
ccee mmooddèèllee))
Appuyez sur la touche
MOSAIC pour ouvrir une fenêtre de
mosaïque à gauche de l’écran. Dans
cet écran de mosaïque, une fois le
balayage terminé, le curseur s’arrête
sur la 8ème miniature. Les touche
V-/+ vous permettent de passer à la
miniature précédente/suivante. Si
vous voulez voir la chaîne affichée
dans la miniature sélectionnée,
appuyez simplement sur la touche
OK.
Si vous appuyez sur la touche V+
alors que le curseur se trouve sur
la 8ème miniature, les miniatures
des 8 chaînes suivantes s’affichent.
Si vous appuyez sur la touche Valors que le curseur se trouve sur
la 1ère image, les miniatures des
8 chaînes précédentes s’affichent.
RReemmaarrqquuee ::
La fonction mosaïque
n’est disponible que lorsque votre
TV est en format 16:9.
PPIIPP::
Certains modèles disposent
d’une fonction Image dans l’Image
(PIP).
Appuyez sur la touche PIP pour
activer ou désactiver cette
fonction.
TToouucchhee vveerrttee ::
Appuyez sur cette
touche pour déplacer la fenêtre
PIP d’un coin à l’autre.
TToouucchhee rroouuggee ::
Appuyez sur cette
touche pour modifier la dimension
de l’image PIP (3 dimensions
disponibles).
TToouucchhee IINNFFOO ::
En mode PIP,
appuyez sur cette touche pour
afficher un menu « Info » dans le
coin supérieur gauche de l’écran.
Dans ce menu, sélectionnez « PIP
Wind » (Fenêtre PIP) à l’aide de la
touche V-. Vous pouvez modifier
les chaînes de la fonction PIP à
l’aide des touches P± ou passer en
mode d’affichage AV en mode PIP
à l’aide de la touche AV. Pour
changer la chaîne affichée dans
l’écran principal, sélectionnez «
Main Window » (Fenêtre
principale) dans le menu « Info »
à l’aide de la touche V+.
TToouucchhee ddee ppeerrmmuuttaattiioonn ::
Appuyez
sur cette touche pour permuter
l’image principale et la fenêtre
PIP.
RReemmaarrqquuee::
Quand des modes de
PC ou de DVI sont choisis au PIP,
les dimensions de l'armature de
PIP peuvent changer en raison du
format visuel et de la résolution
de source.
FONCTIONS DU TELEVISEUR
065001053830 OPLUS 50" PLAS FRA 2/3/06 9:36 Page 18
Page 55

19
AAccccèèss aauuxx mmeennuuss
Appuyez sur la touche MENU pour
afficher le menu principal.
Appuyez alors sur les touches V±
pour naviguer dans les menus ou
sur la touche OK ou P- pour
modifier un paramètre.
Vous pouvez dérouler les lignes de
menu à l’aide des touches P± et
modifier le réglage à l’aide des
touches OK ou V+. Vous pouvez
également augmenter ou diminuer
les valeurs des réglages à l’aide
des touches V±.
11.. IINNSSTTAALLLLAATTIIOONN ((RReecchheerrcchhee
aauuttoommaattiiqquuee,, sséélleeccttiioonn eett
mméémmoorriissaattiioonn))
Cette section décrit la
programmation automatique de
votre appareil. Consultez les pages
suivantes si vous désirez une
description plus détaillée des
réglages et menus.
1. Connectez l’appareil comme
illustré précédemment et mettez
votre TV en mode d’affichage.
2. Appuyez sur la touche MENU
de la télécommande. Le menu
principal apparaît à l’écran.
3. Sélectionnez le menu «
Installation » en appuyant sur la
touche V+.
4. Validez votre sélection à l’aide
de la touche OK.
5. Sélectionnez l’option «
Recherche automatique » à l’aide
de la touche P- ou V+ et validez
votre sélection à l’aide de la
touche OK.
6. Sélectionnez le pays à l’aide de
la touche V+. Si votre pays ne
figure pas dans la liste,
sélectionnez l’option « Autres ».
7. Sélectionnez l’option « Start »
(Démarrer) à l’aide de la touche P-.
8. Lancez la recherche à l’aide de
la touche OK. Dans la partie
inférieure de l’écran, une barre
indiquant l’état de la recherche
apparaît.
AAtttteennddeezz qquuee llaa rreecchheerrcchhee
ss’’aacchhèèvvee..
Votre appareil recherche
et mémorise automatiquement les
FONCTIONS DU TELEVISEUR (MENUS)
065001053830 OPLUS 50" PLAS FRA 2/3/06 9:36 Page 19
‹mage Son PIP Source Installat. Config.
Luminosité
Contraste
Couleur
Nuance
Netteté
NR
Temp.Coul.
Image Son PIP Source Installat. Config.
Stations
Rech. Auto
Rech. Manuel
Image Son PIP Source Installat. Config.
Stations
Rech. Auto
Rech. Manuel
Rech. auto
Pays F
Début
Page 56

20
FONCTIONS DU TELEVISEUR (MENUS)
chaînes. Une fois la recherche
terminée, la barre d’état disparaît.
Les fonctions de dénomination, de
suppression, de déplacement et de
recherche manuelle de chaînes
sont décrites dans les pages
suivantes.
MMeennuu IImmaaggee ::
Ce menu vous permet d’effectuer
les réglages de l’image.
LLuummiinnoossiittéé
Vous pouvez régler la luminosité
en procédant comme suit :
1. Sélectionnez l’option «
Luminosité » à l’aide des touches
P±.
2. Validez votre sélection à l’aide
des touches OK ou V+.
3. Effectuez le réglage adéquat à
l’aide des touches V±.
4. Vous pouvez revenir au menu «
Image » à l’aide de la touche
MENU.
CCoonnttrraassttee
Vous pouvez régler le contraste.
Sélectionnez l’option « Contraste
» à l’aide des touches P±. Répétez
la procédure décrite aux points 2,
3 et 4 du réglage « Luminosité ».
CCoouulleeuurr
Vous pouvez régler la couleur.
Sélectionnez l’option « Couleur »
à l’aide des touches P±. Répétez
la procédure décrite aux points 2,
3 et 4 du réglage « Luminosité ».
065001053830 OPLUS 50" PLAS FRA 2/3/06 9:37 Page 20
‹mage Son PIP Source Installat. Config.
Luminosité
Contraste
Couleur
Nuance
Netteté
NR
Temp.Coul.
‹mage Son PIP Source Installat. Config.
Luminosité
Contraste
Couleur
Nuance
Netteté
NR
Temp.Coul.
Contraste
50
‹mage Son PIP Source Installat. Config.
Luminosité
Luminosité
Contraste
Couleur
Nuance
Netteté
NR
Temp.Coul.
‹mage Son PIP Source Installat. Config.
50
Luminosité
Contraste
Couleur
Nuance
Netteté
NR
Temp.Coul.
Couleur
50
Page 57

21
NNeetttteettéé
Vous pouvez régler la netteté.
Sélectionnez l’option « Netteté » à
l’aide des touches P±. Répétez la
procédure décrite aux points 2, 3
et 4 du réglage « Luminosité ».
RRéédduuccttiioonn iinntteerrfféérreenncceess
La fonction «Réduction
interférences» vous permet
d’améliorer la mauvaise qualité
d’une image due à un mauvais
signal.
1. Sélectionnez l’option « Less
noise » (Réduction interférences )
à l’aide des touches P±.
2. Validez votre sélection à l’aide
des touches OK ou V+.
3. Sélectionnez l’option « Open »
(Activer) à l’aide des touches P±.
4. Appuyez sur la touche MENU
pour revenir au menu « Image ».
TTeemmppéérraattuurree ddeess ccoouulleeuurrss
Vous pouvez sélectionner le
réglage d’usine des couleurs.
1. Sélectionnez l’option « Temp.
Couleur » à l’aide des touches P±.
2. Validez votre sélection à l’aide
des touches OK ou V+.
3. Sélectionnez l’option de couleur
désirée à l’aide des touches P±.
4. Vous pouvez revenir au menu «
Image » à l’aide de la touche
MENU.
MMeennuu SSoonn
1. Entrez dans le menu principal à
l’aide de la touche MENU.
2. Sélectionnez le menu « Volume
» à l’aide de la touche V+.
3. Validez votre sélection à l’aide
de la touche OK ou P-.
Ajustez le volume au niveau
souhaité.
FONCTIONS DU TELEVISEUR (MENUS)
065001053830 OPLUS 50" PLAS FRA 2/3/06 9:37 Page 21
‹mage Son PIP Source Installat. Config.
Luminosité
Contraste
Couleur
Nuance
Netteté
NR
Temp.Coul.
Netteté
4
‹mage Son PIP Source Installat. Config.
Luminosité
Contraste
Couleur
Nuance
Netteté
NR
Temp.Coul.
Temp. Couleur
Chaud
Froid
Normal
Utilisateur
‹mage Son PIP Source Installat. Config.
Luminosité
Contraste
Couleur
Nuance
Netteté
NR
Temp.Coul.
NR
Arret
Marche
‹mage Son PIP Source Installat. Config.
Volume
Balance
Egaliseur
Surround
Augum.Basses
Écouteur
Page 58

22
1. Sélectionnez l’option « Volume
» à l’aide des touches P±.
2. Validez votre sélection à l’aide
de la touche OK ou V+.
3. Effectuez le réglage adéquat à
l’aide des touches V±.
4. Vous pouvez revenir au menu «
Volume » à l’aide de la touche
MENU.
BBaallaannccee
Vous pouvez effectuer un réglage
de la balance (rapport d’intensité
de volume entre les différents
haut-parleurs).
Sélectionnez l’option « Balance »
à l’aide des touches P±. Répétez
la procédure définie aux points 2,
3 et 4 du réglage « Volume ».
ÉÉggaalliisseeuurr
4. Vous pouvez effectuer des
réglages du mode Égaliseur
(Direct, Film, Musique, Speech).
1. Sélectionnez l’option « Égaliseur
» à l’aide des touches P±.
2. Validez votre sélection à l’aide
de la touche OK ou V+.
3. Sélectionnez le mode Égaliseur
que vous souhaitez régler à l’aide
des touches V±.
4. Sélectionnez l’option «
Fréquence » que vous souhaitez
régler à l’aide des touches V±.
5. Effectuez le réglage adéquat à
l’aide des touches V±.
6. Répétez les procédures décrites
aux points 4 et 5 pour les autres
fréquences.
7. Appuyez sur la touche P- après
la ligne des plus basses fréquences
pour accéder aux modes
d’Égaliseur. Si vous désirez régler
les autres modes, répétez les points
2 à 6.
8. Vous pouvez revenir dans le
menu « Volume » à l’aide de la
touche MENU.
FONCTIONS DU TELEVISEUR (MENUS)
065001053830 OPLUS 50" PLAS FRA 2/3/06 9:37 Page 22
‹mage Son PIP Source Installat. Config.
Volume
Balance
Egaliseur
Surround
Augum.Basses
Écouteur
Volume
15
‹mage Son PIP Source Installat. Config.
Volume
Balance
Egaliseur
Surround
Augum.Basses
Écouteur
Egaliseur
Normal Film Musigue La Parole Utilisateur
120Hz
500Hz
1.5KHz
5KHz
10KHz
‹mage Son PIP Source Installat. Config.
Volume
Balance
Egaliseur
Surround
Augum.Basses
Écouteur
Balance
DG
Page 59

23
SSuurrrroouunndd
Vous pouvez activer ou désactiver
la fonction d’effet Surround.
1.Sélectionnez l’option « Surround »
à l’aide des touches P±.
2. Validez votre sélection à l’aide
de la touche OK ou V+.
3. Sélectionnez l’option « Open »
(Activer) à l’aide des touches P±.
4. Vous pouvez revenir au menu «
Son » à l’aide de la touche MENU.
EEffffeett BBaasssseess
Vous pouvez activer ou désactiver
la fonction d’effet Basses.
1. Sélectionnez l’option « Effet
Basses » à l’aide des touches P±.
2. Validez votre sélection à l’aide
de la touche OK ou V+.
3. Sélectionnez l’option « Open »
(Activer) à l’aide des touches P±.
4. Vous pouvez revenir au menu «
Son » à l’aide de la touche MENU.
MMeennuu PPIIPP
1. Entrez dans le menu principal à
l’aide de la touche MENU.
2. Appuyez sur la touche V+ pour
accéder au menu PIP.
3. Entrez dans le sous-menu « PIP
» à l’aide de la touche OK ou P-.
MMooddee PPIIPP ((IImmaaggee ddaannss ll’’IImmaaggee))
Vous pouvez activer ou désactiver
la fonction mosaïque.
OOuuvveerrttuurree dd’’uunnee ffeennêêttrree PPIIPP
1. Sélectionnez l’option « Modes
PIP » à l’aide des touches P±.
2. Validez votre sélection à l’aide
de la touche OK ou V+.
3. Sélectionnez l’option « PIP » à
l’aide des touches P±.
4. Vous pouvez revenir au menu «
PIP » à l’aide de la touche MENU.
FONCTIONS DU TELEVISEUR (MENUS)
065001053830 OPLUS 50" PLAS FRA 2/3/06 9:37 Page 23
‹mage Son PIP Source Installat. Config.
Volume
Balance
Egaliseur
Surround
Augum.Basses
Écouteur
Surround
Marche
Arret
‹mage Son PIP Source Installat. Config.
Modes PIP
Formats PIP
Position PIP
‹mage Son PIP Source Installat. Config.
Volume
Balance
Egaliseur
Surround
Augum.Basses
Écouteur
Augum. Basses
Marche
Arret
‹mage Son PIP Source Installat. Config.
Modes PIP
Formats PIP
Position PIP
Modes PIP
Arrét
PIP
Mosaik
Page 60

24
TTaaiillllee ddee llaa ffeennêêttrree PPIIPP
Ce menu vous permet de
sélectionner la taille de la fenêtre
PIP parmi 3 options proposées.
1. Sélectionnez l’option « PIP » à
l’aide des touches P±.
2. Validez votre sélection à l’aide
de la touche OK ou V+.
3. Sélectionnez la taille de la
fenêtre PIP de votre choix à l’aide
des touches P±.
4. Vous pouvez revenir au menu «
PIP » à l’aide de la touche MENU.
PPoossiittiioonn ddee llaa ffeennêêttrree PPIIPP
Ce menu vous permet de régler la
position de la fenêtre PIP sur la
TV.
1. Sélectionnez l’option « Position
PIP » à l’aide des touches P±.
2. Validez votre sélection à l’aide
de la touche OK ou V+.
3. Sélectionnez la position
adéquate de la fenêtre PIP à l’aide
des touches P±.
4. Vous pouvez revenir au menu «
PIP » à l’aide de la touche MENU.
MMeennuu SSoouurrccee
1. Entrez dans le menu principal à
l’aide de la touche MENU.
2. Entrez dans le menu « Source » à
l’aide de la touche V+.
3. Entrez dans le sous-menu «
Source » à l’aide de la touche OK
ou P-.
Ce menu vous permet de
sélectionner les modes des
appareils périphériques (AV).
FFeennêêttrree pprriinncciippaallee
Ce menu vous permet de
sélectionner les modes AV pour
l’écran principal.
1. Sélectionnez l’option « Main
window » (Fenêtre principale) à
l’aide des touches P±.
2. Validez votre sélection à l’aide
de la touche OK ou V+.
FONCTIONS DU TELEVISEUR (MENUS)
065001053830 OPLUS 50" PLAS FRA 2/3/06 9:37 Page 24
‹mage Son PIP Source Installat. Config.
Modes PIP
Formats PIP
Position PIP
‹mage Son PIP Source Installat. Config.
Modes PIP
Formats PIP
Position PIP
Formats PIP
Petit
Moyen
Grand
Position PIP
Haut gauche
Haut droite
Bas gauche
Bas droite
Image Son PIP Source Installat. Config.
Principal
PIP
Image Son PIP Source Installat. Config.
Principal
PIP
Principal
TV
Side AV
AV-IN
S-Video
Y Pb Pr
HD-YPbPr
PC
HDMI
SCART1
SCART2
Page 61

25
3. Appuyez sur les touches P±
pour sélectionner le mode AV
correspondant à l’entrée à laquelle
l’appareil périphérique est
connecté.
4. Appuyez sur la touche MENU
pour revenir au menu « Source ».
FFeennêêttrree PPIIPP
Vous pouvez sélectionner les
modes AV pour l’écran PIP.
1. Sélectionnez l’option « PIP
window » (Fenêtre PIP) à l’aide
des touches P±.
2. Validez votre sélection à l’aide
de la touche OK ou V+.
3. Appuyez sur les touches P±
pour sélectionner le mode AV
correspondant à l’appareil
périphérique que vous souhaitez
utiliser.
4. Vous pouvez revenir au menu «
Sources » à l’aide de la touche
MENU.
MMeennuu IInnssttaallllaattiioonn
1. Appuyez sur la touche MENU
pour entrer dans le menu
principal.
2. Sélectionnez le menu «
Installation » à l’aide de la touche
V+.
3. Validez votre sélection à l’aide
de la touche OK ou P-.
TTaabblleeaauu ddeess cchhaaîînneess
Ce menu vous permet de
supprimer, de déplacer, de
nommer et de verrouiller des
chaînes.
SSuupppprreessssiioonn ddee cchhaaîînneess
1. Sélectionnez l’option « Channel
Table » (Tableau des chaînes) à
l’aide des touches P±.
2. Validez votre sélection à l’aide
de la touche OK ou V+.
FONCTIONS DU TELEVISEUR (MENUS)
065001053830 OPLUS 50" PLAS FRA 2/3/06 9:37 Page 25
Image Son PIP Source Installat. Config.
Principal
PIP
Sél. So. PIP
TV
Side AV
AV-IN
S-Video
Y Pb Pr
HD-YPbPr
PC
HDMI
SCART1
SCART2
Image Son PIP Source Installat. Config.
Stations
Rech. Auto
Rech. Manuel
Chaine TV
Prog. Chaine
17
18
19
20
21
Effacer
Déplacer
Fré qu Verrouill.
266,00
273,00
280,00
294,00
303,00
Nom
Verrouiller
Page 62

26
3. Sélectionnez la chaîne à
supprimer à l’aide des touches P±.
4. Supprimez la chaîne à l’aide de
la touche rouge.
5. Vous pouvez revenir au menu «
Channel Table » (Tableau des
chaînes) à l’aide de la touche
MENU.
DDééppllaacceemmeenntt ddee cchhaaîînneess
1. Sélectionnez l’option « Channel
Table » (Tableau des chaînes) à
l’aide des touches P±.
2. Validez votre sélection à l’aide
de la touche OK ou V+.
3. Sélectionnez la chaîne à
déplacer à l’aide des touches P±.
4. Appuyez sur la touche verte.
5. Sélectionnez la ligne où vous
souhaitez déplacer la chaîne à
l’aide des touches P±.
6. Pour terminer, appuyez sur la
touche verte.
7. Vous pouvez revenir au menu «
Channel Table » (Tableau des
chaînes) à l’aide de la touche
MENU.
DDéénnoommiinnaattiioonn ddeess cchhaaîînneess
1. Sélectionnez l’option « Channel
Table » (Tableau des chaînes) à
l’aide des touches P±.
2. Validez votre sélection à l’aide
de la touche OK ou V+.
3. Sélectionnez la chaîne à
nommer à l’aide des touches P±.
4. Appuyez sur la touche jaune.
5. Saisissez la première lettre à
l’aide des touches P±.
6. Passez à la lettre suivante à
l’aide de la touche V+.
7. Répétez les étapes 5 et 6 pour
taper les autres lettres.
8. Terminez le réglage à l’aide de
la touche jaune.
9. Vous pouvez revenir au menu «
Table des chaînes » à l’aide de la
touche MENU.
VVeerrrroouuiillllaaggee ddeess cchhaaîînneess
Les chaînes verrouillées au moyen
de ce menu ne sont pas visibles
lorsque vous utilisez les touches
P±. Si vous tentez d’accédez à
l’une de ces chaînes à l’aide du
pavé numérique, vous devez entrer
le mot de passe.
1. Sélectionnez l’option « Channel
FONCTIONS DU TELEVISEUR (MENUS)
065001053830 OPLUS 50" PLAS FRA 2/3/06 9:37 Page 26
Prog. Chaine
17
18
19
20
21
Effacer
Chaine TV
Déplacer
Prog. Chaine
17
18
19
20
21
Effacer
Fré qu Verrouill.
266,00
273,00
280,00
294,00
303,00
Nom
Verrouiller
Chaine TV
Déplacer
Fré qu Verrouill.
266,00
273,00
280,00
294,00
303,00
Nom
Verrouiller
Page 63

27
Table » (Tableau des chaînes) à
l’aide des touches P±.
2. Validez votre sélection à l’aide
de la touche OK ou V+.
3. Sélectionnez la chaîne à l’aide
des touches P±.
4. Appuyez sur la touche bleue.
5. Saisissez le mot de passe dans
le menu qui apparaît à l’écran. Le
paramétrage d’usine du mot de
passe est « 00000 ». Pour annuler
la fonction de verrouillage, répétez
les points 3, 4 et 5 ci-dessus.
6. Appuyez sur la touche MENU
pour revenir au menu « Channel
Table » (Tableau des chaînes).
RReecchheerrcchhee aauuttoommaattiiqquuee
1. Appuyez sur la touche P- pour
sélectionner l’option « Recherche
automatique » et validez votre
sélection à l’aide de la touche OK.
2. Sélectionnez le pays à l’aide de
la touche V+. Si votre pays n’est
pas dans liste, sélectionnez «
Autres ».
3. Appuyez sur la touche P- pour
accéder à l’option « Start »
(Démarrer).
4.Lancez la recherche
automatique à l’aide de la touche
OK. La barre de recherche apparaît
au bas de l’écran.
AAtttteennddeezz qquuee llaa rreecchheerrcchhee
ss’’aacchhèèvvee..
Votre appareil recherche
et mémorise automatiquement les
chaînes.
AAvveerrttiisssseemmeenntt::
Cette fonction
supprime les chaînes mémorisées
précédemment.
RReecchheerrcchhee mmaannuueellllee
Ce menu vous permet de régler et
d’affiner le réglage des chaînes.
1. Sélectionnez l’option « Rech.
manuelle » en appuyant sur la
touche P- et validez votre sélection
à l’aide de la touche OK.
FONCTIONS DU TELEVISEUR (MENUS)
065001053830 OPLUS 50" PLAS FRA 2/3/06 9:37 Page 27
Chaine TV
Prog. Chaine
17
18
19
20
21
Effacer
Déplacer
Fré qu Verrouill.
266,00
273,00
280,00
294,00
303,00
Nom
Verrouiller
Image Son PIP Source Installat. Config.
Stations
Rech. Auto
Rech. Manuel
Rech. auto
Pays F
Début
Page 64

28
2. Sélectionnez l’option « Pays » à
l’aide de la touche P- et
sélectionnez le pays à l’aide des
touches V± (Cette option doit être
réglée sur Europe sauf pour la
France.).
3. Sélectionnez l’option « Program
No. » (Numéro de chaîne) à l’aide
des touches P±.
4. Spécifiez le numéro de chaîne à
l’aide de la touche V+.
5.
a.1. Sélectionnez l’option «
Fréquences » à l’aide de la touche
P-.
a.2. Saisissez la fréquence de la
chaîne que vous souhaitez régler
à l’aide du pavé numérique.
a.2. Voer de frequentie in van het
kanaal dat u wilt vinden via de
cijfertoetsen 0….9
OOUU
b.1. Sélectionnez l’option « Search
» (Recherche) à l’aide de la touche
P-.
b.2. Lancez la recherche à l’aide
de la touche V+ et continuez à
appuyer sur cette touche jusqu’à
ce que vous ayez trouvé la chaîne
désirée.
6. Sélectionnez l’option « Réglage
affiné » à l’aide des touches P± et,
au besoin, effectuez le réglage fin
à l’aide des touches V±.
7. Sélectionnez l’option « Record
» (Mémorisation) à l’aide des
touches P± et validez votre
sélection à l’aide de la touche OK.
8. Appuyez sur la touche MENU
pour revenir au menu « Channel
Table » (Table des chaînes).
MMeennuu RRééggllaaggeess
1. Entrez dans le menu principal à
l’aide de la touche MENU.
2. Entrez dans le menu « Settings »
(Réglages) à l’aide de la touche V+.
3. Validez votre sélection à l’aide
de la touche OK ou P-.
LLaanngguuee
Ce menu vous permet de modifier
la langue du menu.
1. Sélectionnez l’option « Langues
» à l’aide des touches P±.
2. Validez votre sélection à l’aide
de la touche OK ou V+.
FONCTIONS DU TELEVISEUR (MENUS)
065001053830 OPLUS 50" PLAS FRA 2/3/06 9:37 Page 28
Image Son PIP Source Installat. Config.
Stations
Rech. Auto
Rech. Manuel
Rech. Manuelle
Prog.Nr. 0
Fréqu. 245 Mhz
Rech.
Réglage aff.
Pays Europe
Mémoriser
‹mage Son PIP Source Installat. Config.
Langues
Minuteur Veille
Verr.Enfants
Graphiques
Config de AV
Page 65

29
3. Sélectionnez la langue à l’aide
des touches P± et utilisez la touche
V+ pour accéder à l’option OK.
4. Mémorisez le réglage à l’aide
de la touche OK.
5. Appuyez sur la touche MENU
pour revenir au menu « Settings »
(Réglages).
MMiinnuutteeuurr VVeeiillllee
Vous pouvez régler votre appareil
pour qu’il s’arrête automatiquement après un temps déterminé.
1.Sélectionnez l’option « Minuteur
Veille » à l’aide des touches P±.
2. Validez votre sélection à l’aide
de la touche OK ou V+.
3. Sélectionnez le laps de temps
avant l’arrêt à l’aide des touches P±.
4. Appuyez sur la touche MENU
pour revenir au menu « Settings »
(Réglages).
CCoonnttrrôôllee ppaarreennttaall
Vous pouvez activer le contrôle
parental.
1. Sélectionnez l’option « Verr. enfants
» à l’aide des touches P±.
2. Validez votre sélection à l’aide
de la touche OK ou V+.
3. Sélectionnez l’option « Changer
le mot de passe » à l’aide des
touches P±.
4. Validez votre sélection à l’aide
de la touche OK et saisissez un
mot de passe facile à retenir dans
le menu « Mot de passe ».
5. Re-saisissez le mot de passe
comme demandé dans le menu.
6.Sélectionnez l’option « Verro-
uiller » à l’aide des touches P±.
7. Validez votre sélection à l’aide
de la touche OK et saisissez le mot
de passe dans le menu Mot de
passe. Le contrôle parental est
désormais activé. Votre appareil
vous demandera un mot de passe
au démarrage et ne s’allumera
qu’une fois le mot de passe
correctement saisi.
RREEMMAARRQQUUEE :: SSii vvoouuss oouubblliieezz llee
mmoott ddee ppaassssee,, ttaappeezz lleess cchhiiffffrreess 11--
99--22--33--00 ssuurr llaa ttééllééccoommmmaannddee.. SSii
vvoouuss ddééssiirreezz mmooddiiffiieerr llee mmoott ddee
ppaassssee,, vvoouuss ppoouuvveezz ddééffiinniirr uunn
nnoouuvveeaauu mmoott ddee ppaassssee eenn ssaaiissiissssaanntt
ccee nnuumméérroo..
FONCTIONS DU TELEVISEUR (MENUS)
065001053830 OPLUS 50" PLAS FRA 2/3/06 9:37 Page 29
‹mage Son PIP Source Installat. Config.
Langues
Minuteur Veille
Verr.Enfants
Graphiques
Config de AV
Langues
Français OK
‹mage Son PIP Source Installat. Config.
Langues
Minuteur Veille
Verr.Enfants
Graphiques
Config de AV
Verr. Enfants
Verrouillage
Changer le mot de passe
‹mage Son PIP Source Installat. Config.
Langues
Minuteur Veille
Verr.Enfants
Graphiques
Config de AV
Minuteur Veille
Arrét
90
60
45
30
15
Page 66

30
8. Appuyez sur la touche MENU
pour revenir au menu « Settings »
(Réglages).
GGrraapphhiiqquueess
Votre TV peut automatiquement
régler les graphiques en mode PCI.
1.Sélectionnez l’option « Graphiques » à l’aide des touches P±.
2. Validez votre sélection à l’aide
de la touche OK ou V+.
3. Lancez le réglage automatique
à l’aide de la touche OK.
4. Vous pouvez revenir dans le
menu « Settings » (Réglages) à
l’aide de la touche MENU.
CCoonnffiigguurraattiioonn ddee SSccaarrtt
Vous pouvez configurer les entrées
scart.
1. Sélectionnez l’option « Scart
Configuration » (Configuration
Scart) à l’aide des touches P±.
2. Validez votre sélection à l’aide
de la touche OK ou V+.
3. Sélectez l’entrée Scart à régler à
l’aide des touches P±.
4. Sélectionnez la configuration
en fonction des appareils
connectés aux entrées SCART1 et
SCART2 de votre TV à l’aide des
touches V±.
5. Vous pouvez revenir au menu «
Settings » (Réglages) à l’aide de la
touche MENU.
FONCTIONS DU TELEVISEUR (MENUS)
065001053830 OPLUS 50" PLAS FRA 2/3/06 9:37 Page 30
‹mage Son PIP Source Installat. Config.
Langues
Minuteur Veille
Verr.Enfants
Graphiques
Config de AV
Graphiques (Mode de PC)
Ajust. Auto
‹mage Son PIP Source Installat. Config.
Langues
Minuteur Veille
Verr.Enfants
Graphiques
Config de AV
Config de AV
SCART1 CVBS/RGB
SCART2 S-Video
Page 67

31
MMooddee TTéélléétteexxttee
Si la chaîne dispose d’un système
de télétexte, vous pouvez effectuer
différentes actions en passant en
mode Télétexte.
11..TTéélléétteexxttee ::
: Cette touche
permet de passer au mode
d’émission Télétexte de la chaîne
en cours. Appuyez deux fois sur
cette touche pour transformer
l’affichage en une double page de
télétexte. Dans ce mode, appuyez
sur la touche SWAP pour
garder la première page fixe et
effectuer des actions sur la
seconde. Appuyez une troisième
fois sur cette touche pour revenir
à l’émission TV.
22.. AAffffiicchheerr//MMaassqquueerr ::
: En
mode Télétexte, cette touche
permet d’afficher ou de masquer
certaines informations de
l’émission télétexte.
33.. HHoorrllooggee dduu ttéélléétteexxttee ::
: En
mode TV, cette touche permet
d’afficher l’heure du télétexte de
la chaîne en cours dans le coin
supérieur droit de l’écran.
NNOOTTEE ::
Quelques modèles n'ont
pas le dispositif de SystèmeTemporisateur.
44.. AAnnnnuullaattiioonn//MMiissee àà jjoouurr::
:
En mode Télétexte, cette touche
permet de revenir à l’émission TV.
Le télétexte demeure toutefois
TELETEXTE
1. Touche Télétexte
2. Touche Afficher/Masquer
3. Touche Horloge du télétexte
4. Touche Annulation / Mise à
jour)
5. Touche Format
(Agrandissement de la page)
6. Touche Mixte (Affichage
simultané du télétexte et de
la TV)
7. Touche d’arrêt sur une sous-
page
8. Touche Index (Page
d’accueil)
9. Touches de couleur
(rouge, vert, jaune, bleu)
065001053830 OPLUS 50" PLAS FRA 2/3/06 9:37 Page 31
Page 68

32
actif et il est possible de continuer à rechercher des pages. Lorsque la
page désirée est atteinte, un message indiquant le numéro de page
apparaît à l’écran. Appuyez une nouvelle fois sur cette touche pour
afficher la page du télétexte. (sur certains modèles)
55.. FFoorrmmaatt ((AAggrraannddiisssseemmeenntt ddee llaa ppaaggee)) ::
: Cette touche permet
d’afficher la page du télétexte en 3 formats différents : taille normale,
partie supérieure agrandie, partie inférieure agrandie.
66.. MMiixxttee ((AAffffiicchhaaggee ssiimmuullttaannéé dduu TTéélléétteexxttee eett ddee llaa TTVV))
: Vous pouvez afficher les émissions de TV et de Télétexte côte à côte.
77.. AArrrrêêtt ssuurr uunnee ssoouuss--ppaaggee ::
: Si une page de télétexte compte des
sous-pages, ces sous-pages apparaissent tour à tour à l’écran. Dans ce
cas, cette touche vous permet d’afficher la sous-page en cours en
permanence à l’écran. L’icône d’arrêt sur une sous-page apparaît alors
dans le coin supérieur gauche de la page de télétexte.
88.. IInnddeexx ((PPaaggee dd’’aaccccuueeiill)) ::
Cette touche permet d’accéder
directement à la page d’index du télétexte.
99.. TToouucchheess ddee ccoouulleeuurrss ((rroouuggee,, vveerrtt,, jjaauunnee,, bblleeuu))
Ces quatre touches de couleur permettent une recherche facile des
informations du télétexte. En mode Télétexte, si vous appuyez sur la
touche MENU, les fonctions des touches de couleur changent. Ces
touches vous permettent d’accéder à l’information désirée.
EExxeemmppllee ::
GGUUIIDDEE TTVV SSPPOORRTTSS NNOOUUVVEELLLLEESS MMÉÉTTÉÉOO
(Les informations ci-dessus sont données à titre d’exemple. Elles
peuvent varier en fonction de la page consultée.)
TELETEXTE
Appuyez sur la
touche rouge pour
recevoir les
informations
relatives à la TV
Appuyez sur la
touche verte pour
recevoir les
informations sur le
sport
Appuyez sur la
touche verte pour
recevoir les
informations sur
l’actualité
Appuyez sur la
touche bleue pour
recevoir les
informations sur la
météo
065001053830 OPLUS 50" PLAS FRA 2/3/06 9:37 Page 32
Page 69

33
GUIDE DE DEPANNAGE
SSyymmppttôômmee CCaauussee SSoolluuttiioonn
LLee ttéélléévviisseeuurr nn''eesstt ppaass
Le téléviseur n'est pas Vérifiez l’alimentation
aalliimmeennttéé
alimenté
LLaa ttééllééccoommmmaannddee nnee
Le capteur est bloqué Supprimez la source du blocage
rrééppoonndd ppaass
Les piles de la Remplacez les piles.
télécommande sont
déchargées
AAbbsseennccee ddee ssiiggnnaall
La source vidéo est Vérifiez le branchement de la
incorrecte source vidéo
Vérifiez que le téléviseur est
raccordé à la bonne source vidéo
LL''iimmaaggee gglliissssee oouu
Type ou emplacement Remplacez l'antenne
nn''aappppaarraaîîtt ppaass
de l'antenne Essayez de placer l'antenne à un
autre endroit
LL''iimmaaggee aappppaarraaîîtt,, mmaaiiss
Le son est réglé au Augmentez le sonV
ssaannss ssoonn
volume minimum
Les haut-parleurs ne Augmentez le son
sont pas raccordés
L'entrée sonore est Raccordez correctement les haut
incorrecte parleurs
CCeerrttaaiinneess ppaarrttiieess ddee
Mauvais réglage de la Réglez correctement la position
ll''iimmaaggee ssoonntt ccoouuppééeess
position
oouu ll''iimmaaggee nn''eesstt ppaass
cceennttrrééee
Le signal n'est pas Réglez correctement la résolution
équilibré dans le mode RGB/ DTV/HD,
ainsi que la fréquence et la phase
LL’’iimmaaggee eesstt ttrroopp
La taille de l'écran est Réglez la taille de l'écran
ggrraannddee oouu ttrroopp ppeettiittee
incorrecte
LLaa lluummiinnoossiittéé ssee rréédduuiitt
Des images fixes restent Image rémanente à l’écran
ggrraadduueelllleemmeenntt
affichées pendant une Réglez en mode Minimisation
longue durée
065001053830 OPLUS 50" PLAS FRA 2/3/06 9:37 Page 33
Page 70

34
CARACTÉRISTIQUES TECHNIQUES
TAILLE DIAGONALE 127 cm (50 pouces)
RESOLUTION 1366 x 768 (PIXEL)
(V) COULEURS D'AFFICHAGE 16777216
LUMINOSITE 1100 cd/m2
CONTRASTE 10000 :1
ANGLE DE VISION Supérieur à 160° (H) / Supérieur à 160° (V)
TV SYSTEM MULTI SYSTEM / NTSC PLAYBACK
ALIMENTATION
ALIMENTATION AC 120-220 V 50/60 Hz
CONSOMMATION 350 W
AUDIO
SORTIE AUDIO 2 x 8 W
BORNES ENTREE / SORTIE
ANTENNE 75 Ohms COAXIALE
PERITEL 1 x EURO SCART COMPLET
1 x PERITEL AV EURO
ENTRÉE VIDEO 1 x RCA (ENTREE VIDEO COMPOSITE)
1 x S-VHS
1 x ENTREE D-SUB 15 broches RGB
1 x ENTREE HDMI
ENTREE AUDIO 1 x L/R RCA POUR VIDEO COMPOSITE ET S-VHS
1 x L/R RCA POUR ENTREE HDMI ET ENTREE D-
SUB 15 P RGB
065001053830 OPLUS 50" PLAS FRA 2/3/06 9:37 Page 34
Page 71

35
CARACTÉRISTIQUES TECHNIQUES
Channel Coverage
System VHF UHF S-BAND
PAL D/K 1-12 13-57 Z1~Z37
PAL-B/G 2-12 21-69 X~Z+2,S1~S41
PAL-I 2-12 21-69
SECAM-B/G 2-12 21-69 X~Z+2,S1~S41
SECAM-D/K 1-12 21-69
SECAM-L’ 2-4 21-69
SECAM-L 5-12 21-69 X~ZC57,S1~S41
TV SYSTEM
CHANNELS
PAL/SECAM BG, DK, PAL-I, SECAM-L, SECAM-L', NTSC PLAYBACK
065001053830 OPLUS 50" PLAS FRA 2/3/06 9:37 Page 35
Page 72

065 001 053 820
PL-5035TN
50" PLASMA TELEVISIE
Handleiding
V- V+ P- P+ MENU SEL
065001053820 OPLUS 50" PLAS HOL 2/3/06 9:35 Page 1
Page 73

BESTE KLANT . . . . . . . . . . . . . . . . . . . . . . . . . . . . . . . . . . . . . . . . .3
DE TV VEILIG AANSLUITEN . . . . . . . . . . . . . . . . . . . . . . . . . . . . .4
WERKING VAN DE VERSCHILLENDE ONDERDELEN . . . . . . . . . . . .6
AFSTANDSBEDIENING . . . . . . . . . . . . . . . . . . . . . . . . . . . . . . . . . . .8
AANSLUITEN VAN DE ANTENNE . . . . . . . . . . . . . . . . . . . . . . . . . .10
AANSLUITEN VAN VIDEO, COMPUTER EN DECODER . . . . . . . . .11
PC/HDMI ONDERSTEUNDE RESOLUTIES . . . . . . . . . . . . . . . . . . . .15
TV AAN- EN UITSCHAKELEN . . . . . . . . . . . . . . . . . . . . . . . . . . . .16
TV-FUNCTIES . . . . . . . . . . . . . . . . . . . . . . . . . . . . . . . . . . . . . . . .17
TV-FUNCTIES (MENU’S) . . . . . . . . . . . . . . . . . . . . . . . . . . . . . . . .19
AUTOMATISCH ZOEKEN . . . . . . . . . . . . . . . . . . . . . . . . . . . . . . .19
BEELD MENU . . . . . . . . . . . . . . . . . . . . . . . . . . . . . . . . . . . . . . . . .20
GELUIDS MENU . . . . . . . . . . . . . . . . . . . . . . . . . . . . . . . . . . . . . .21
PIP-MENU . . . . . . . . . . . . . . . . . . . . . . . . . . . . . . . . . . . . . . . . . . .23
BRON-MENU . . . . . . . . . . . . . . . . . . . . . . . . . . . . . . . . . . . . . . . .25
KANAAL TABEL . . . . . . . . . . . . . . . . . . . . . . . . . . . . . . . . . . . . . . .26
AUTOMATISCH ZOEKEN . . . . . . . . . . . . . . . . . . . . . . . . . . . . . . .27
TELETEKST . . . . . . . . . . . . . . . . . . . . . . . . . . . . . . . . . . . . . . . . . .31
VOOR U DE KLANTENDIENST BELT . . . . . . . . . . . . . . . . . . . . . . .33
TECHNISCHE KENMERKEN . . . . . . . . . . . . . . . . . . . . . . . . . . . . . .34
INHOUD
2
065001053820 OPLUS 50" PLAS HOL 2/3/06 9:35 Page 2
Page 74

GGeeffeelliicciitteeeerrdd!!
Dit is een uitstekende keuze. Uw nieuwe TV zal veel vreugde in uw
woonkamer verschaffen. Maar vooraleer u deze in gebruik neemt of op
zijn plaats zet, verzoeken we u deze handleiding zorgvuldig door te
lezen en bij te houden als referentiemateriaal voor achteraf.
DDee kkeennmmeerrkkeenn vvaann uuww ttvv::
* TV is een kleuren-TV met afstandsbediening
* U kunt alle commando’s in verband met video en audio aanpassen via
de schermmenu’s (On Screen Display of OSD)
* U kunt de menutaal instellen via de opties
* U kunt maximum 100 kanalen opslaan in de VHF-, UHF- en Sbanden.
* Maakt kabeltelevisieontvangst mogelijk
* Dank zij de automatische kanalenzoekfunctie kunt u het vereiste
kanaal gemakkelijk vinden, bewaren en een naam geven (ATS)
* U kunt uw TV-toestel instellen met 90 minuten automatische
uitschakeling met tussenpozen van 15 minuten
* TV-toestel schakelt automatisch naar Standby na 5 minuten nadat de
uitzending is geëindigd (Auto Shut Off)
* U kunt de TV gebruiken als een Computer Monitor.
BESTE KLANT
3
065001053820 OPLUS 50" PLAS HOL 2/3/06 9:35 Page 3
Page 75

EEeerrssttee wwaaaarrsscchhuuwwiinngg
Om de kans op contact of brand te voorkomen, moet u uw tv
beschermen tegen regen en vochtigheid.
* Uw televisietoestel bevat hoge spanningen. Gelieve dus de
bbeehhuuiizziinngg nniieett ttee ooppeenneenn..
* Doe wanneer nodig uitsluitend beroep op een erkende dienst.
Maatregelen
* Gebruik uw TV op 220 V A 50 Hz op het stadsstroomnet.
* Let op het stroomsnoer van uw tv. Het moet verbonden zijn met
een geaarde stekker.
* Schakel onmiddellijk de tv uit indien er vloeistof over stroomt of
een object erop valt, haal de stekker uit de contactdoos en bel de
erkende dienst.
* Trek de stekker niet uit door aan de kabel te trekken. Hou de stekker zelf vast
PPllaaaattsseenn
* Plaats uw tv niet in de buurt van een warmtebron, vocht, in een
stoffige omgeving, plaatsen die onderhevig zijn aan mechanische
trillingen of rechtstreeks zonlicht.
* Laat voldoende ruimte rondom de tv. Dek het toestel niet af met
een doek, enz.
* Plaats geen vazen, enz. met water op uw tv.
* Plaats uw tv niet nabij een bron van vuur
SScchhoooonnmmaakkeenn
Maak uw toestel schoon met een zachte licht vochtige doek. Gebruik geen
chemische of mechanische schoonmaakmiddelen die de buitenste laag kunnen
beschadigen.
HHeerrvveerrppaakkkkeenn
Hou de originele kartonnen doos en verpakkingsmaterialen bij om ze wanneer
nodig opnieuw te gebruiken
V- V+ P- P+ MENUSEL
DE TV VEILIG AANSLUITEN
4
065001053820 OPLUS 50" PLAS HOL 2/3/06 9:35 Page 4
Page 76

5
WAARSCHUWING!
LAAT HET SCHERM NIET LANGDURIG AANSTAAN MET EEN VAST
BEELD.
VERMIJD LANGDURIG HETZELFDE BEELD WEER TE GEVEN,
ANDERS KAN DIT PERMANENTE SPOREN ACHTERLATEN OP HET
SCHERM
VOORBEELD:
ALS U LANG NAAR HETZELFDE KANAAL GEKEKEN HEEFT, KAN
ER EEN PERMANENT SPOOR ACHTERGELATEN WORDEN OP HET
SCHERM DOOR DE VASTE POSITIE VAN HET LOGO. VERMIJD OOK
DAT EEN TELETEKSTPAGINA VOOR LANGE TIJD OP HET SCHERM
BLIJFT STAAN.
LAAT HET TOESTEL NIET LANGDURIG INGESCHAKELD MET EEN
DERGELIJKE WEERGAVE.
DE TV VEILIG AANSLUITEN
065001053820 OPLUS 50" PLAS HOL 2/3/06 9:35 Page 5
Page 77

6
VOORAANZICHT
Rechts onderaan op de PLASMA TV ziet u de toetsen Switch on/off, V+/V-,
P+/P-, MENU en SEL en het oog en de led van de ontvanger.
V- V+ P- P+ MENU SEL
WERKING VAN DE VERSCHILLENDE ONDERDELEN
065001053820 OPLUS 50" PLAS HOL 2/3/06 9:35 Page 6
V- V+ P- P+ MENU SEL
V–
V+
P– P+
MENU
SEL
Page 78

‹Ç‹NDEK‹LER
7
ACHTERAANZICHT
AAcchhtteerraaaann uuww ppllaassmmaa ttvv::
1. D-SUB 15 PIN RGB Input
2. HDMI (voor PC, Set top Box)
3. Luidsprekers (PC/DVI Sound input)
4. Toets ON/OFF
5. SCART 1 (Euroconnector) voor VCR, DVD Set top box
6. SCART 2 (Euroconnector) voor VCR, DVD Set top box
7. S-Video (voor DVD, Set top box en S-VHS)
8. Uitgang AV
9. Ingang AV (voor VCR, DVD Set top box)
10. Ingang TV-antenne (voor antennekabel) (continent)
11. Ingang AC-stroomsnoer
POWER
SCART 2
ON
OFF
S-Video
LRCVBS
AV
6
7
8
9
10
11
12
ANT.IN
SCART 1
AUDIO
R
L
1
2
3
5
WERKING VAN DE VERSCHILLENDE ONDERDELEN
4
HHDDMMII
HHDDMMII
065001053820 OPLUS 50" PLAS HOL 2/3/06 9:35 Page 7
Page 79

‹Ç‹NDEK‹LER
8
1. AAN- en UITZETTEN
2. Toetsen voor rechtstreekse
programmaselectie
3. Zoom-toets
4. Dempingstoets
5. Menukeuzetoets
6. Swap-toets
7. Programma op- & neer-toets in
TV-stand en Paginanummer op- &
neer-toets inTeletekstpositie, of
verplaatsen binnen menu’s
8. Volume op- & neer- en menuinsteltoetsen
9. Kanaalverschuiving in
mozaïekmodus. Bevestigings- of
annulatietoets in de menu’s
10. PIP-toets (in sommige modellen)
11. Gebruikernormalisatietoets
12. Audioselectietoets DUAL A, DUAL
B, Stereo, Mono (DUAL A, DUAL
B, ST/MONO)
13. A/V-toets
14. Mozaïekschermtoets
((nniieett bbeesscchhiikkbbaaaarr iinn ddiitt mmooddeell))
15. Rode toets (voor uitzoomen of in
het PIP-beeld bij PIP-modellen,
voor verlaten van HDMI- en PCmodus in de TV-positie)
16. Groene toets (verplaatst het PIPbeeld naar de hoeken van het
scherm bij modellen met PIP. Als
deze toets wordt ingedrukt in TVpositie, wordt deze gebruikt voor
verschuiving naar PC-modus
17. Gele toets (Voor verschuiving naar
HDMI-modus in TV-positie)
18. Blauwe toets
(Beeldbevriezingstoets)
19. Beeldformaatselectie
20. Verschaft informatie over het
weergegeven kanaal
NNoottaa::
Om de andere toetsfuncties
beschreven in de menu’s te gebruiken,
zie de afstandsbedieningsafbeelding
getoond in het TELETEKST-hoofdstuk.
AFSTANDSBEDIENING
065001053820 OPLUS 50" PLAS HOL 2/3/06 9:35 Page 8
Page 80

‹Ç‹NDEK‹LER
9
AFSTANDSBEDIENING
Laat de
afstandsbediening nooit
vallen.
Probeer nooit de
afstandsbediening uit
elkaar te halen.
Druk geen twee toetsen
van de
afstandsbediening
tezelfdertijd in
Verwijder de batterijen
als u de
afstandsbediening voor
een langere periode niet
wilt gebruiken.
OOppmmeerrkkiinngg::
De afstandsbediening
werkt op een maximale afstand van 7
m en in een hoek van 30°
DDee bbaatttteerriijjeenn ppllaaaattsseenn ((11,,55 VV AAAAAA xx 22))
* Open het batterijdeksel in de richting van het pijltje
* Plaats de batterijen met de polen in de juiste richting
* Sluit het deksel
065001053820 OPLUS 50" PLAS HOL 2/3/06 9:35 Page 9
V- V+ P- P+ MENU SEL
Page 81

‹Ç‹NDEK‹LER
10
AAaannsslluuiitteenn vvaann ddee aanntteennnnee
Kies eerst de aansluiting van de antenne. De onderstaande antennes zijn geschikt
voor uw toestel.
* VHF-antenne
* gecombineerde VHF/UHF-antenne
* UHF-antenne
Wanneer u één van deze antennes op uw toestel wil aansluiten, moet u 75 Ohm
ronde coaxkabel gebruiken en de stekker van uw tv uit het stopcontact halen.
Indien de kabel er één van
300 Ohm is (dubbele platte
kabel), moet een adapter die
300 Ohm omzet in 75 Ohm
geïnstalleerd worden op de
antenne-ingang op de tv. Om
kabeltelevisie te bekijken,
moet de distributiekabel
aangesloten worden op de
antenne-ingang.
Motorvoertuigen, energie en
communicatielijnen kunnen
voor storing zorgen. Installeer
uw antenne op een stevige
manier ver verwijderd van
deze elementen en van
metalen oppervlakken. Maak
de antennekabel niet langer
dan nodig en rol hem ook niet
op. Vermits de antenne en de
kabel beïnvloed kunnen
worden door omgevingsfactoren zoals regen, wind,
rook of vocht controleert u
best de antenne en de
uitrusting regelmatig.
AANSLUITEN VAN DE ANTENNE
HHDDMMII
HHDDMMII
065001053820 OPLUS 50" PLAS HOL 2/3/06 9:35 Page 10
SCART 1
SCART 2
LRCVBS
AV
S-Video
ANT.IN
L
R
ON
OFF
AUDIO
POWER
Page 82

AANSLUITEN VAN VIDEO, COMPUTER EN DECODER
11
VViiddeeoo bbeekkiijjkkeenn
EEeenn aaaannsslluuiittiinngg mmaakkeenn
SSCCAARRTT ((EEuurrooccaabbllee))
Verbind de SCART-kabel met de SCART-uitgangen van de videospeler en TV Svideo.
Sluit de S-Video-kabel aan op de S-Video-ingangen van het videotoestel en de TV.
Sluit de L (wit) en R (rood) –klankkabel (composiet) aan op de klankingangen van
het videotoestel.
AAVV--iinnggaanngg
Verbind de audio/video-kabel met de TV en de video-ingangen van het
videotoestel. Sluit de L (wit) en R (rood) –klankkabel (composiet) aan op de
klankingangen van het TV-toestel.
VViiddeeoo bbeekkiijjkkeenn
1. Druk op de AV-toets op de afstandsbediening en selecteer Video Sources
2. Plaats een videocassette in het videotoestel en druk op PLAY Opmerking:
Om visuele storing te vermijden, moet u voldoende ruimte laten tussen het
videotoestel en het scherm (meer dan 3 m)
* Als u de TV aansluit op externe uitrustingen, moet u ervoor zorgen dat de kleuren
van de aansluitpoorten dezelfde zijn (bijvoorbeeld video-geel, klank (links) wit,
klank (rechts) rood)
* Als u een mono videotoestel heeft, sluit dan de klankkabel van het toestel aan op
de AUDIO (L/MONO)-ingang van de tv.
* Als u een S-VHS-videotoestel aansluit op de S-VIDEO-ingang, verkrijgt u een
betere weergave dan met een normale video-ingang (AV)
* Zorg ervoor dat hetzelfde beeld niet langdurig op het scherm wordt weergegeven.
Meestal zijn dat vaste beelden of programma-informatie in VCR 4:3-formaat.
SCART 2
SCART 1
CVBS L R
AV
S-VIDEO
ANT.IN
065001053820 OPLUS 50" PLAS HOL 2/3/06 9:35 Page 11
Page 83

12
DDVVDD bbeekkiijjkkeenn
AAaannsslluuiittiinnggeenn
* Gelieve te sluiten de speler DVD via scartkabel aan Scart 1 aan
GGeebbrruuiikk
1. Start de DVD-speler
2. Druk op de AV-toets op de afstandsbediening en selecteer Component 1
POWER
SCART 1
SCART 2
ON
OFF
S-Video
LRCVBS
ANT.IN
AANSLUITEN VAN VIDEO, COMPUTER EN DECODER
065001053820 OPLUS 50" PLAS HOL 2/3/06 9:35 Page 12
Page 84

13
SSeett TToopp BBooxx bbeekkiijjkkeenn
AAaannsslluuiittiinnggeenn
Sluit de Set Top Box-aansluitingen aan op de SCART-, CHINCH-, PC- of
HDMI
ingangen van het TV-toestel. Verbind de klankingangen met de klankcontacten
naast de L (wit) en R (Rood)
GGeebbrruuiikk
1. Schakel de set top box in
2. Selecteer PC of
HDMI
op de afstandsbediening van PDP
AAaannsslluuiittiinnggeenn
GGeebbrruuiikk vvaann SSCCAARRTT ((EEuurrooccaabbllee))
Sluit de SCART-kabel aan op de SCART-aansluitingen van STB en PDP
HHDDMMII
Verbind kabel HDMI met de contactdozen HDMI van STB en PDP.
NNoottaa::
Wanneer u een extern apparaat aan output DVI aan input HDMI
van uw TV aansluit.
Gelieve te verbinden analoge audiooutput van DVI met PC/AUDIO
correcte input van uw TV bij wijze correct te worden HDMI.
YYPPbbPPrr
Verbind contactdozen YPbPr van STB en PDP door chinch kabels te gebruiken.
Verbind audiooutput van STB met audioinput YPbPr.
SSTTBB eenn PPDDPP OOppmmeerrkkiinngg::
* Slechts één van de PC- en
HDMI
poorten kan een videosignaal sturen. Indien één
ervan een videosignaal stuurt, kunnen de andere uitgangen niet gebruikt worden.
AUDIO
R
L
POWER
SCART 1
SCART 2
ON
OFF
S-Video
LRCVBS
ANT.IN
AANSLUITEN VAN VIDEO, COMPUTER EN DECODER
CCoommppoonneenntt ssiiggnnaaaall
HHDDMMII
HHDDMMII
065001053820 OPLUS 50" PLAS HOL 2/3/06 9:35 Page 13
Page 85

14
AAaannsslluuiitteenn vvaann PPCC,, DD--SSuubb eenn DDVVDD
** AAaannsslluuiittiinngg vvaann PPCC eenn TTVV
Sluit een PC-videokabel (15 pinnen) aan op de video-uitgang op de
PC. en op de PC-poort op de tv.
** CCoonnffiigguurraattiiee vvaann ddee ppiinnnneenn
Signaalkabel met 15 pinnen (gebaseerd op gegroefde pin)
** CCoonnffiigguurraattiiee vvaann ddee ppiinnnneenn
1. Schakel het tv-toestel in en druk op de toets AV om de PC-modus
te selecteren.
2. Start de PC en controleer de vereisten van de PC.
3. Pas het PC-scherm aan in het menu Geometry.
1
2
3
4
5
6
7
8
9
10
11
12
13
14
15
K›rm›z› (R)
Yeflil (G)
Mavi (B)
Toprak
Toprak (DDC)
K›rm›z› (R) Toprak
Yeflil (G) Toprak
Mavi (B) Toprak
Rezerve
Senk. Topraklama
Topraklama
Veri (DDC)
Yatay senk.
Düfley senk.
Saat (DDC)
Pin No. Tan›m›
AUDIO
R
L
AUDIO
R
L
AANSLUITEN VAN VIDEO, COMPUTER EN DECODER
PPiinn NNrr.. BBeesscchhrriijjvviinngg
RRoooodd ((RR))
GGrrooeenn ((GG))
AAaarrddiinngg
AAaarrddiinngg ((DDDDCC))
AAaarrddiinngg RRoooodd ((RR))
AAaarrddiinngg GGrrooeenn ((GG))
AAaarrddiinngg BBllaauuww ((BB))
BBllaauuww ((BB))
RReesseerrvvee
SSeennccrr.. AAaarrddee
AAaarrddiinngg
TTiijjdd ((DDDDCC))
VVeerrtt.. SSeennccrr..
HHoorr.. SSeennccrr..
DDaattaa ((DDDDCC))
HHDDMMII
HHDDMMII
HHDDMMII
HHDDMMII
065001053820 OPLUS 50" PLAS HOL 2/3/06 9:35 Page 14
Page 86

15
HHDDMMII OOnnddeerrsstteeuunnddee rreessoolluuttiieess
RRGGBB--ssiiggnnaaaall RReessoolluuttiiee FFrreeqquueennttiiee
1080I 1920 * 1080 60
1080I 1920 * 1080 50
720P 1280 * 720 60
720P 1280 * 720 50
576P 720 * 576 50
480P 640 * 480 60
PPCC//HHDDMMII:: AAllllee VVEESSAA--ssttaannddaaaarrddeenn ttoott 11228800xx11002244
640x480 50Hz/60Hz/70Hz/75Hz/85Hz/90Hz/100Hz
800x600 60Hz/70Hz/75Hz/85Hz/100Hz
1024x768 60Hz/70Hz/75Hz/85Hz
1152x864 60Hz/70Hz/75Hz/85Hz
1280x960 60Hz/70Hz/75Hz/85Hz
1280x1024 60Hz/70Hz/75Hz/85Hz
NNoottaa::
Wanneer u een extern apparaat aan output DVI aan input HDMI
van uw TV aansluit. Gelieve te verbinden analoge audiooutput van DVI
met PC/AUDIO correcte input van uw TV bij wijze correct te worden
HDMI.
PC/HDMI ONDERSTEUNDE RESOLUTIES
065001053820 OPLUS 50" PLAS HOL 2/3/06 9:35 Page 15
Page 87

‹Ç‹NDEK‹LER
16
11.. GGeebbrruuiikk vvaann ddee TTVV
aa.. DDee TTVV aaaannzzeetttteenn
Druk op de aan/uit-toets van het
TV-toestel en wacht tot het wordt
ingeschakeld.
bb.. SSttaannddbbyy--mmoodduuss
Terwijl de TV op standby staat
kunt u deze inschakelen via de
Voedingstoets of door op P± te
drukken.
22.. UUiittzzeetttteenn
aa.. DDee TTVV uuiittzzeetttteenn
Als u de TV volledig wilt uitzetten,
druk dan op de Aan/Uit-toets.
bb.. SSttaannddbbyy--mmoodduuss
Om de TV korte tijd uit te
schakelen drukt u op de Standbytoets van de afstandsbedieng of de
TV.
Als u de TV langere tijd niet zult
gebruiken, druk dan op de
Aan/Uit-toets van het TV-toestel.
11.. PPrrooggrraammmmaannuummmmeerrsseelleeccttiiee
* U kunt het gewenste programma
selecteren door op de “P±”-toets
van het TV-bedieningspaneel te
drukken
* Als u een programma van 1 tot 9
wenst te selecteren, druk dan op
de betreffende toets van de
afstandsbediening
* Voor de selectie van een
programma van 10 tot 100 moet u
het nummer kort indrukken op de
afstandsbediening.
VVoooorrbbeeeelldd::
Om naar het
programmanummer 100 te gaan
drukt u eerst op 1. In dat geval
verschijnt de boodschap “1” in de
linker bovenhoek. Druk dan
zonder te wachten twee maal op
de “0”-toets. TV-toestel gaat over
op programma nr. 100.
2--
2--
001
1--
OK
TV AAN- EN UITSCHAKELEN
5
6
1
8
065001053820 OPLUS 50" PLAS HOL 2/3/06 9:35 Page 16
Page 88

17
22.. MMuuttee ((ggeelluuiidd ddeemmppeenn))
Druk voor het dempen van
het geluid op de MUTE-toets van
de afstandsbediening. Als u deze
toets opnieuw indrukt wordt de
geluidsweergave hersteld.
33.. 1166::99--ttooeettss::
Deze toets dient
voor het aanpassen van het
beeldformaat.
44::33 CCiinneemmaa,, 1144::99,,
AAuuttoommaattiicc
en
1166::99
zijn
toegankelijk via een druk op de
juiste toets.
MMaannuuaall ZZoooomm::
Terwijl op het
beeldwijze van de Bioskoop, kunt
u de Handfunctie van het Zoom
activeren door de knoop
(( ))
van
het "ZOOM" op R/C te drukken.
Dan door
(( ))
en
(( ))
greepknopen te drukken, kan het
verticale zoomniveau worden
aangepast.
44.. PPPP::
Het indrukken van deze
toets laadt de audio- en
videowaarden in het geheugen
naar de TV
Als u de PP-toets enige tijd
ingedrukt houdt, worden de
huidige TV audio- en
beeldwaarden bewaard als
“Gebruikerwaarden” en de
boodschap “Gebruikerwaarden
Bewaard” verschijnt op het
scherm.
55.. SS//MM//DD--ttooeettss::
Voor stereo
uitzendingen kunt u het volume
wijzigen als Mono, Stereo of DUAL
A, DUAL B. U kunt dit niet doen in
geval van mono uitzendingen. U
kunt alleen het rekeningscherm
van de uitzending zien.
66.. AAVV::
Om naar A/V-modus over
te gaan drukt u op de AV (0)-toets
van de afstandsbediening. Het
Info (informatie)-menu verschijnt
op het scherm. In geschikte A/Vmodus laat u de toets weer los.
Telkens u de AV-toets indrukt
verschijnen de ingangsmodi die
op uw toestel kunnen worden
aangesloten en de “TV”-modus,
dat is de laatste door u gestarte
modus, verschijnt op het scherm.
Bovendien kunt u naar TV-modus
overgaan door op de ‘Rode” toets
te drukken in elke modus. Zolang
het hoofdmenu op het scherm
staat, kunt u het TV-toestel niet
omschakelen op A/V-modus.
77:: AAuuttoommaattiisscchhee uuiittsscchhaakkeelliinngg::
De
TV schakelt automatisch uit 5
minuten nadat de uitzending is
geëindigd.
Nota: Als u de TV in A/V-modus
laat staan, schakelt het toestel niet
over op Standby na 5 minuten,
zelfs als de uitzending is
geëindigd.
88.. OOKK--ttooeettss::
In de mozaïekmodus
wordt deze toets gebruikt om naar
kanaal over te gaan of om de
menuveranderingen te
BBeevveessttiiggeenn
of
AAnnnnuulleerreenn..
TV-FUNCTIES
1
100
065001053820 OPLUS 50" PLAS HOL 2/3/06 9:35 Page 17
Page 89

18
99.. IInnffoo--ttooeettss ((‹‹))::
Het kanaalnummer, het schermformaat, de
kanaalnaam (indien geschreven),
audiotype en andere informatie
worden hier verstrekt.
SSwwaapp::
Door de Swap-toets in
te drukken kunt u terugkeren naar
het vorige door u bekeken kanaal
Nota: Als er een menu op het
scherm is, verandert er niets door
op Swap te drukken.
MMoozzaaïïeekk:: ((nniieett bbeesscchhiikkbbaaaarr iinn
ddiitt mmooddeell))
Door op de
mozaïektoets te drukken verschijnt
een mozaïekvenster aan de
linkerkant van het scherm (vanaf
uw punt).
In het aldus geopende
mozaïekscherm, als de
beeldscreening klaar is, stopt de
cursor bij het 8ste kleine beeldje.
“V-“-toets gaat naar ander klein
beeldje, “V+”-toets gaat terug. Als
u het programma in een klein
beeld wilt bekijken, druk dan
gewoon op OK.
Als u op de “V+”-toets drukt bij
het 8ste beeldje, verschijnen de
mozaïelbeeldjes van het 8ste beeld
op het scherm. Terwijl u op het
1ste beeld staat, als u op de “V-“toets drukt, verschijnen de
mozaïekbeeldjes van de vorige 8
kanalen op het scherm.
NNoottaa::
De mozaïekfunctie is alleen
beschikbaar als uw TV-toestel in
16:9-formaat staat.
PPIIPP::
Sommige modellen hebben
een Beeld in Beeld (PIP)-functie
Door op de PIP-toets te drukken
zal de functie openen of sluiten.
GGrrooeennee ttooeettss::
Telkens u op de
Groene toets drukt, verandert de
hoek waar het PIP is gesitueerd.
RRooddee ttooeettss::
Telkens u op de Rode
toets drukt verandert de grote van
het PIP in 3 stappen
IInnffoo--ttooeettss::
Als u op de Info-toets
drukt in PIP-positie, verschijnt een
“Info”-menu in de linker
bovenhoek. Selecteer in dit menu
de “V-“-toets en “PIP wind”, u
kunt de PIP-programma’s wijzigen
door op P± te drukken of AVmodusdisplay voorzien in het PIP
door op de “AV”-toets te drukken.
Om de programma’s in het
hoofdscherm te wijzigen selecteert
u “Hoofdvenster” in het “Info”menu door op “V+” te drukken.
SSwwaapp--ttooeettss::
Als de Swap-toets
wordt ingedrukt zullen hoofdbeeld
en PIP-beeld worden
omgewisseld.
NNoottaa::
Wanneer de wijzen PC of
DVI bij PIP worden geselecteerd,
kunnen de afmetingen van het
kader van de PIP wegens bron
videoformaat en resolutie
veranderen.
TV-FUNCTIES
065001053820 OPLUS 50" PLAS HOL 2/3/06 9:35 Page 18
Page 90

19
TTooeeggaanngg ttoott ddee MMeennuu’’ss
Door de Menu-toets in te drukken
verschijnt het Hoofdmenu op het
scherm, u kunt V± indrukken om
door de menu’s te surfen of op OK
of de “P-“-toets drukken om elk
menu te wijzigen.
U kunt scrollen doorheen de
menuregels door op P± te drukken
of op OK of de “V+”-toets drukken
om waarden te veranderen. U kunt
de waarden verminderen of
vermeerderen door op V± te
drukken.
11.. IINNSSTTAALLLLAATTIIEE ((AAuuttoommaattiisscchh
zzooeekkeenn,, vviinnddeenn ooff ooppnneemmeenn))
De automatische programmering
voor uw toestel wordt hieronder
uitgelegd. Op de volgende
pagina’s kunt u een uitvoerigere
beschrijving vinden van de
instellingen en menu’s.
1. Sluit het toestel aan zoals
gedefinieerd in vorig hoofdstuk en
zet de TV op displaymodus
2. Druk op de “Menu”-toets van
de afstandsbediening. Het
hoofdmenu verschijnt op het
scherm.
3. Verschuif het “Installatie”-menu
door op de “V+”-toets te drukken.
4. Ga in het menu door op OK te
drukken.
5. Ga naar de “Autom. Zoeken”optie door op de “P-“-of “V+”toets te drukken en bevestig door
op OK te drukken.
6. Selecteer het land door op de
“V+”-toets te drukken, als uw land
niet vermeld is, bevestig dan
“Andere”.
7. Ga naar de “Start”-optie door
op “P-“ te drukken
8. Start een zoekbewerking door
op de “OK”-toets te drukken. In
het onderste gedeelte van het
scherm verschijnt een balk om
aan te geven dat de
zoekbewerking werd gestart.
Doe niets tot de zoekbewerking is
voltooid. Uw toestel zal de
kanalen automatisch vinden en
opslaan. Als de zoekbewerking
TV-FUNCTIES (MENU’S)
065001053820 OPLUS 50" PLAS HOL 2/3/06 9:35 Page 19
Beeld Geluid PIP Bron Installatie Instellen
Helderheid
Contrast
Kleur
Kleurtint
Scherpte
NR
KleurTemp.
Beeld Geluid PIP Bron Installatie Instellen
Zenders
Autom. Zoeken
Man. Zoeken
Beeld Geluid PIP Bron Installatie Instellen
Zenders
Autom. Zoeken
Man. Zoeken
Autom. Zoeken
Land NL
Begin
Page 91

20
TV-FUNCTIES (MENU’S)
voltooid is, zal de balk onderaan
verdwijnen. Benoemen,
programma wissen, verplaatsen en
manueel kanalen zoeken worden
gedefinieerd op de volgende
pagina’s.
BBeeeellddmmeennuu::
U kunt de beeldwaarden in dit
menu aanpassen.
HHeellddeerrhheeiidd
U kunt de “Helderheid” aanpassen
zoals hieronder gedefinieerd:
1. Ga naar de “Helderheid”-regel
door op “P±“ te drukken
2. Bevestig door op OK of V+ te
drukken
3. Stel in op een geschikte waarde
door op de “V±”-toetsen te drukken.
4. U kunt terugkeren naar het
“Beeld”-menu door op de MENUtoets te drukken.
CCoonnttrraasstt
U kunt een geschikte
Contrastwaarde instellen.
Ga naar de Contrastregel door op
de “P±”-toets te drukken. Herhaal
de procedure aangegeven in 2, 3
en 4 van de “Helderheid”instelling.
KKlleeuurr
U kunt de kleur instellen.
Ga naar de “Kleur”-regel door op
“P±“ te drukken. Herhaal de
procedure aangegeven in 2, 3 en
4 van de “Helderheid”-instelling.
065001053820 OPLUS 50" PLAS HOL 2/3/06 9:35 Page 20
Beeld Geluid PIP Bron Installatie Instellen
Helderheid
Contrast
Kleur
Kleurtint
Scherpte
NR
KleurTemp.
Beeld Geluid PIP Bron Installatie Instellen
Contrast
Helderheid
Contrast
Kleur
Kleurtint
Scherpte
NR
KleurTemp.
50
Beeld Geluid PIP Bron Installatie Instellen
Helderheid
Helderheid
Contrast
Kleur
Kleurtint
Scherpte
NR
KleurTemp.
50
Beeld Geluid PIP Bron Installatie Instellen
Helderheid
Contrast
Kleur
Kleurtint
Scherpte
NR
KleurTemp.
Kleur
50
Page 92

21
SScchheerrppttee
U kunt de Scherpte instellen.
Ga naar de “Scherpte”-regel door
op “P±“ te drukken. Herhaal de
procedure aangegeven in 2, 3 en
4 van de “Helderheid”-instelling.
MMiinnddeerr rruuiiss
U kunt de slechte beeldweergave
veroorzaakt door slecht signaal
verbeteren met behulp van de
“Ruisvermindering”-functie.
1. Druk op de “P±”-toets om naar
de “Minder Ruis”-regel te gaan
2. Bevestig door op OK of V+ te
drukken
3. Druk op P± om “Openen” te
selecteren
4. Druk op de MENU-toets om
terug te keren naar het “Beeld”menu.
KKlleeuurrtteemmppeerraattuuuurr
U kunt de in de fabriek ingestelde
kleurwaarden selecteren
1.Druk op P± om naar de regel
“Kleurtemp.” te gaan
2. Bevestig door op OK of V+ te
drukken
3.Selecteer de gewenste kleuroptie
door op de “P±”-toetsen te drukken
4. U kunt terugkeren naar het
“Beeld”-menu door op de MENUtoets te drukken
GGeelluuiiddssmmeennuu
1. Ga naar het Hoofdmenu door
op de Menu-toets te drukken
2. Ga naar het “Volume”-menu
via de “V+”-toets
3. Ga naar het Volumesubmenu
door op OK of P- te drukken
U kunt de volume-instellingen
volgens uw wensen aanpassen:
TV-FUNCTIES (MENU’S)
065001053820 OPLUS 50" PLAS HOL 2/3/06 9:35 Page 21
Beeld Geluid PIP Bron Installatie Instellen
Helderheid
Contrast
Kleur
Kleurtint
Scherpte
NR
KleurTemp.
Scherpte
4
Beeld Geluid PIP Bron Installatie Instellen
Helderheid
Contrast
Kleur
Kleurtint
Scherpte
NR
KleurTemp.
Kleur Temp.
Warm
Koud
Normaal
Gebruiker
Beeld Geluid PIP Bron Installatie Instellen
Helderheid
Contrast
Kleur
Kleurtint
Scherpte
NR
KleurTemp.
NR
Uit
Aan
Beeld Geluid PIP Bron Installatie Instellen
Volume
Balans
Equalizer
Surround
BAS versterk.
Koptelefoon
Page 93

22
1. Ga naar de Volumeregel door
op de “P±”-toets te drukken.
2. Bevestig door op OK of V+ te
drukken
3. Stel in op geschikte waarden
door op de “V±”-toetsen te
drukken
4. U kunt terugkeren naar het
“Volume”-menu door op de
MENU-toets te drukken
BBaallaannss
U kunt de balans aanpassen (de
volumesterkteverhouding tussen
de luidsprekers)
Ga naar de “Balans”-regel door op
“P±“ te drukken. Herhaal de
“Volume-instellingsprocedure N’.
2, 3 en 4.
EEqquuaalliizzeerr
4. Equalizer (Direct, Film, Music,
Speech)-modusaanpassingen
kunnen worden uitgevoerd
1. Druk op P± om naar de
Equalizerregel te gaan
2. Druk op OK of V+ om te
bevestigen
3. Ga naar de gewenste
Equalizermodus voor instelling
door op de “V±”-toetsen te
drukken
4.Ga naar de gewenste frequentieregel voor instelling door op de
“V±”-toetsen te drukken
5. Stel in op de geschikte waarde
via “V±”-toetsen
6. Herhaal procedures 4 en 5 voor
de andere frequenties
7. Als u op de “P-“-toets drukt na
de onderste frequentieregel, krijgt
u toegang tot de Equalizermodiregel. Als u de andere modi
wenst in te stellen, herhaal dan
stappen 2 en 6.
8. U kunt terugkeren naar het
“Volume”-menu door op de
MENU-toets te drukken
TV-FUNCTIES (MENU’S)
065001053820 OPLUS 50" PLAS HOL 2/3/06 9:35 Page 22
Beeld Geluid PIP Bron Installatie Instellen
Volume
Balans
Equalizer
Surround
BAS versterk.
Koptelefoon
Volume
15
Beeld Geluid PIP Bron Installatie Instellen
Volume
Balans
Equalizer
Surround
BAS versterk.
Koptelefoon
Equalizer
Normaal Film Muziek Toespr. Gebruiker
120Hz
500Hz
1.5KHz
5KHz
10KHz
Beeld Geluid PIP Bron Installatie Instellen
Volume
Balans
Equalizer
Surround
BAS versterk.
Koptelefoon
Balans
RL
Page 94

23
SSuurrrroouunndd
U kunt het Surround Sound-effect
activeren of deactiveren
1. Ga naar de Surround-regel door
op de “P±”-toets te drukken
2. Bevestig door op OK of V+ te
drukken
3. Selecteer Openen via “P±”toetsen
4. U kunt terugkeren naar het
“Geluid”-menu door op de MENUtoets te drukken
BBaassss EEffffeecctt
U kunt de Bass Effect-functie
activeren of deactiveren
1. Druk op de “P±”-toets om naar
de “Bass Effect”-regel te gaan
2. Bevestig door op OK of V+ te
drukken
3. Selecteer de “Openen”-optie
door op de “P±”-toetsen te
drukken
4. U kunt terugkeren naar het
“Geluid”-menu door op de MENUtoets te drukken
TV-FUNCTIES (MENU’S)
065001053820 OPLUS 50" PLAS HOL 2/3/06 9:35 Page 23
Beeld Geluid PIP Bron Installatie Instellen
Volume
Balans
Equalizer
Surround
BAS versterk.
Koptelefoon
Surround
Aan
Uit
Beeld Geluid PIP Bron Installatie Instellen
Volume
Balans
Equalizer
Surround
BAS versterk.
Koptelefoon
BAS versterk.
Aan
Uit
Page 95

24
PPIIPP--mmeennuu
1. Ga naar het Hoofdmenu door
op de Menu-toets te drukken
2. Druk op V+ om toegang te
krijgen tot het PIP-menu
3. Ga naar het PIP-submenu door
op OK of P- te drukken
PPIIPP ((BBeeeelldd iinn BBeeeelldd))--mmoodduuss
U kunt het scherm of mozaïekscherm activeren of deactiveren
EEeenn PPIIPP--sscchheerrmm ooppeenneenn
1. Ga naar de PIP-modusregel
door op P± te drukken
2. Bevestig door op OK of V+ te
drukken
3. Selecteer de PIP-optie door op
de “P±”-toetsen te drukken
4. U kunt terugkeren naar het PIPmenu door op de MENU-toets te
drukken
PPIIPP--ffoorrmmaaaatt
In dit menu kunt u het PIP-formaat
selecteren uit 3 verschillende
opties
1. Druk op P± om naar de PIPregel te gaan
2. Bevestig door op OK of V+ te
drukken
3. Selecteer het geschikte PIPformaat door op de “P±”-toetsen
te drukken
4. U kunt terugkeren naar het PIPmenu door op de MENU-toets te
drukken
PPIIPP--ppoossiittiiee
U kunt de PIP-positie aanpassen
op de TV
1. Druk op P± om naar de PIPpositieregel te gaan
2. Bevestig door op OK of V+ te
drukken
3. Selecteer de geschikte PIPpositie door op de “P±”-toetsen te
drukken
4. U kunt terugkeren naar het PIPmenu door op de MENU-toets te
drukken
TV-FUNCTIES (MENU’S)
065001053820 OPLUS 50" PLAS HOL 2/3/06 9:35 Page 24
Beeld Geluid PIP Bron Installatie Instellen
PIP Modi
PIP-afmetinge
PIP-positie
PIP-afmetingen
Klein
Medium
Groot
Beeld Geluid PIP Bron Installatie Instellen
PIP Modi
PIP-afmetinge
PIP-positie
Beeld Geluid PIP Bron Installatie Instellen
PIP Modi
PIP-afmetinge
PIP-positie
PIP-Modi
Uit
PIP
Mozaiek
Beeld Geluid PIP Bron Installatie Instellen
PIP Modi
PIP-afmetinge
PIP-positie
PIP-Positie
Linksboven
Rechtsbdven
Linksonder
Rechtsonder
Page 96

25
BBrroonn--mmeennuu
1. Ga naar het Hoofdmenu door
op de Menu-toets te drukken
2. Ga naar het Bron-menu door
op V+ te drukken
3. Ga naar het Bron-submenu door
op OK of P- te drukken
U kunt de extern toestel (AV)-modi
selecteren in dit menu
HHooooffddvveennsstteerr
U kunt de A/V-modi selecteren
voor het hoofdscherm
1. Ga naar de Hoofdvensterregel
door op P± te drukken
2. Bevestig door op OK of V+ te
drukken
3. Druk op P± om de AV-modus te
selecteren waarop het gewenste
toestel is aangesloten
4. Druk op de MENU-toets om
terug te keren naar het “Bron”menu.
PPIIPP--vveennsstteerr
U kunt de A/V-modi selecteren
voor het PIP-scherm
1. Ga naar de PIP-vensterregel
door op P± te drukken
2. Bevestig door op OK of V+ te
drukken
3. Selecteer de A/V-modus van het
toestel dat u wenst te gebruiken
door op P± te drukken
4. U kunt terugkeren naar het
“Bron”-menu door op de MENUtoets te drukken
IInnssttaallllaattiieemmeennuu
1. Druk op de Menu-toets om naar
het Hoofdmenu te gaan
2. Ga naar het Installatiemenu
door op de “V+”-toets te drukken
3. Ga naar het Installatiesubmenu
door op OK of P- te drukken
KKaannaaaallttaabbeell
In dit menu kunt u kanalen
wissen, scrollen, benoemen en
vergrendelen.
TV-FUNCTIES (MENU’S)
065001053820 OPLUS 50" PLAS HOL 2/3/06 9:35 Page 25
Beeld Geluid PIP Bron Installatie Instellen
Hoofd
PIP
Beeld Geluid PIP Bron Installatie Instellen
Hoofd
PIP
PIP-bronselec.
TV
Side AV
AV-IN
S-Video
Y Pb Pr
HD-YPbPr
PC
HDMI
SCART1
SCART2
Beeld Geluid PIP Bron Installatie Instellen
Hoofd
PIP
Hoofdbronselec.
TV
Side AV
AV-IN
S-Video
Y Pb Pr
HD-YPbPr
PC
HDMI
SCART1
SCART2
Page 97

26
KKaannaalleenn wwiisssseenn
1.Druk op P± om naar de
Kanaaltabelregel te gaan
2. Bevestig door op OK of V+ te
drukken
3. Laat het te wissen kanaal
oplichten met behulp van de “P±”-
toetsen
4. Wis het kanaal door op de Rode
toets te drukken
5. U kunt terugkeren naar het
Kanaaltabelmenu door op de
Menu-toets te drukken.
KKaannaaaall vveerrppllaaaattsseenn
1.Laat de Kanaaltabelregel
oplichten door op P± te drukken
2. Bevestig door op OK of V+ te
drukken
3. Laat het te verplaatsen kanaal
oplichten met behulp van de “P±”toetsen
4. Druk op de Groene toets
5.Laat de regel oplichten waarnaar
het kanaal moet worden verplaatst
met behulp van de “P±”-toetsen
6. Eindig de verplaatsing door op
de Groene toets te drukken
7. U kunt terugkeren naar het
Kanaaltabelmenu door op de
MENU-toets te drukken
KKaannaaaallbbeennooeemmiinngg
1. Ga naar de Kanaaltabelregel
door op P± te drukken
2. Bevestig door op OK of V+ te
drukken
3. Laat het te benoemen kanaal
TV-FUNCTIES (MENU’S)
065001053820 OPLUS 50" PLAS HOL 2/3/06 9:35 Page 26
Beeld Geluid PIP Bron Installatie Instellen
Zenders
Autom. Zoeken
Man. Zoeken
TV-zender
Program.
Kanaal
17
18
19
20
21
Wissen
Verplaast
Program.
17
18
19
20
21
Wissen
Frequent.
Lock
266,00
273,00
280,00
294,00
303,00
Naam
Lock
Program.
17
18
19
20
21
Wissen
TV-zender
Kanaal
Verplaast
TV-zender
Kanaal
Verplaast
Frequent.
266,00
273,00
280,00
294,00
303,00
Naam
Frequent.
266,00
273,00
280,00
294,00
303,00
Naam
Lock
Lock
Lock
Lock
Page 98

27
oplichten door op P+ te drukken
4. Druk op de gele toets
5. Typ de letter door op P± te
drukken
6. Ga naar de volgende letter door
op de “V+”-toets te drukken
7. Voer stappen 5 en 6 uit tot de
letter is getypt
8. Voltooi de benoeming door op
de Gele toets te drukken
9. U kunt terugkeren naar het
Kanaaltabelmenu door op de
MENU-toets te drukken
KKaannaaaallvveerrggrreennddeelliinngg
De in dit menu vergrendelde
kanalen zijn niet zichtbaar als P±
wordt ingedrukt. Als u het
kanaalnummer rechtstreeks
probeert in te voeren, moet u het
“wachtwoord” invoeren.
1. Ga naar de Kanaaltabelregel
door op P± te drukken
2. Bevestig door op OK of V+ te
drukken
3. Laat het kanaal oplichten door
op P± te drukken
4. Druk op de blauwe toets
5. Voer het wachtwoord in binnen
het op het scherm verschijnende
menu. Het wachtwoord wordt in
de fabriek ingesteld als “00000”.
Om de vergrendelfunctie te
annuleren moet u stappen 3, 4 en
5 herhalen.
6. Druk op de menutoets om terug
te keren naar het “Kanaaltabel”menu.
AAuuttoommaattiisscchh zzooeekkeenn
1. Druk op de “P-“-toets om naar
de optie Automatisch Zoeken te
gaan en bevestig door op OK te
drukken
2. Druk op V+ om het land te
selecteren, als er geen referentie is
voor land, selecteer dan Andere.
3. Druk op de “P-“-toets om naar
de “Start”-optie te gaan
4. Start Automatisch Zoeken door
op OK te drukken. Onder het
scherm verschijnt de zoekbalk.
Doe niets tot de zoekbewerking is
voltooid. Uw toestel zal de
kanalen automatisch vinden en
opslaan.
WWaaaarrsscchhuuwwiinngg::
Dit zal de eerder
opgeslagen kanalen wissen
TV-FUNCTIES (MENU’S)
065001053820 OPLUS 50" PLAS HOL 2/3/06 9:35 Page 27
Program.
TV-zender
Kanaal
17
18
19
20
21
Wissen
Verplaast
Beeld Geluid PIP Bron Installatie Instellen
Zenders
Autom. Zoeken
Man. Zoeken
Frequent.
Lock
266,00
273,00
280,00
294,00
303,00
Naam
Lock
Autom. Zoeken
Land NL
Begin
Page 99

28
MMaannuueeeell zzooeekkeenn
In dit menu kunt u kanalen
instellen en fijnafstemmen
1. U krijgt toegang tot de optie
Manueel Zoeken door op P- te
drukken en bevestig met OK.
2. U krijgt toegang tot de "Land"-
regel door op de “P-“-knop te
drukken en u kunt het land
selecteren door op V± te drukken
(Deze optie moet als Europa
worden ingesteld behalve voor
Frankrijk)
3. Ga naar de “Programmanr.”-
regel door op P± te drukken
4. Specificeer het programma-
nummer door op de “V+”-toets te
drukken
5.
a.1. Ga naar de “Frequentie”-optie
door op “P-“ te drukken
a.2. Voer de frequentie in van het
kanaal dat u wilt vinden via de
cijfertoetsen 0….9
OOFF
b.1. Ga naar de ZOEK-optie door
op de “P-“-toets te drukken
b.2. Start het ZOEKEN door op de
“V+”-toets te drukken en ga verder
tot u het vereiste kanaal vindt, blijf
de “V+”-toets indrukken.
6. Ga naar de Fijnafstemmingsregel door op P+ te drukken
en voer fijnafstemming uit indien
nodig met behulp van V±
7. Ga naar Registreren-regel door
op P± te drukken en sla de actie
op door op de OK-toets te drukken
8. Druk op de MENU-toets om
terug te keren naar het
“Kanaaltabel”-menu.
IInnsstteelllliinnggeennmmeennuu
1. Ga naar het Hoofdmenu door
op de Menu-toets te drukken
2. Ga naar het “Instellingen”-menu
via de “V+”-toets
3. Ga naar het Instellingensubmenu door op OK en P- te
drukken
TTaaaall
In dit menu kunt u de Menutaal
wijzigen.
1. Ga naar de Taal-regel door op
de “P±”-toets te drukken
2. Bevestig door op OK of V+ te
drukken
TV-FUNCTIES (MENU’S)
065001053820 OPLUS 50" PLAS HOL 2/3/06 9:35 Page 28
Beeld Geluid PIP Bron Installatie Instellen
Zenders
Autom. Zoeken
Man. Zoeken
Man. Zoeken
Program.Nr. 18
Frequent. 245 Mhz
Zoeken
Fijnafstem.
Land Europa
Opslaan
Beeld Geluid PIP Bron Installatie Instellen
Talen
Uitschakeltijd
Kinderslot
Grafieken
AV Config
Page 100

29
3. Selecteer de taal via P± en
druk op V+ om toegang te krijgen
tot de OK-regel.
4. Laat het toestel de invoer
opslaan door op OK te drukken
5. Druk op de MENU-toets om
terug te keren naar het
“Instellingen”-menu als u dat
wenst.
SSlleeeepp ttiimmeerr
U kunt uw toestel instellen op
automatische uitschakeling.
1. Ga naar de "Sleep Timer"-lijn
door op de “P±”-toets te drukken
2. Bevestig door op OK of V+ te
drukken
3. Selecteer het tijdhoofdstuk voor
afsluiting door op de “P±”-toetsen
te drukken
4. U kan ook op de MENU-toets
drukken om terug te keren naar
het “Instellingen”-menu.
PPaarreennttaall LLoocckk
U kunt het Kinderslot activeren
1. Ga naar de “Kinderslot”-regel
door op “P±“ te drukken
2. Bevestig door op OK of V+ te
drukken
3. Ga naar de “Wachtwoord
wijzigen”-regel via de “P±”toetsen
4. Bevestig door op OK te drukken
en voer een wachtwoord in het
wachtwoordmenu in dat
gemakkelijk te onthouden moet
zijn
5. Voer het wachtwoord opnieuw in
volgens de instructies in het menu
6. Ga naar de “Vergrendeling”regel door op “P±“ te drukken
7. Bevestig door op OK te drukken
en voer het Wachtwoord in het
wachtwoordmenu in. Kinderslot is
nu gedeactiveerd. Uw toestel zal
vragen naar een wachtwoord
tijdens het openen en zal niet
starten als het wachtwoord niet
correct wordt ingevoerd.
NNOOTTAA:: AAllss uu hheett kkiinnddeerrsslloott
vveerrggeeeett,, ttyypp ddaann 11--99--22--33--00 oopp ddee
aaffssttaannddssbbeeddiieenniinngg.. AAllss uu hheett
TV-FUNCTIES (MENU’S)
065001053820 OPLUS 50" PLAS HOL 2/3/06 9:35 Page 29
Beeld Geluid PIP Bron Installatie Instellen
Talen
Uitschakeltijd
Kinderslot
Grafieken
AV Config
Talen
Nederlands OK
Beeld Geluid PIP Bron Installatie Instellen
Talen
Uitschakeltijd
Kinderslot
Grafieken
AV Config
Uitschakeltijd
Uit
90
60
45
30
15
Beeld Geluid PIP Bron Installatie Instellen
Talen
Uitschakeltijd
Kinderslot
Grafieken
AV Config
Kinderslot
Ingeschakeld
Wachtwoord wijzigen
 Loading...