

Page 1
24”
FHD LED TV COMBO DVD
MODEL:LED2438FHDVX
USER GUIDE
Page 2

Page 3

Nederlands
Page 4

Page 5

Inhoud
Inhoud
Verwittigingen 1
Veiligheidsinformatie 2
Accessoires
Technische specificaties
Productintroductie
Vooraanzicht
Achteraanzicht
Aansluitingen
Afstandsbediening
Basisbediening
OSD Menu
1. ZENDER menu
2. BEELD menu
3. GELUID menu
4. INSTELLINGEN menu
5. FUNCTIE menu
6. PC INSTEL menu
3
3
4
4
4
5
6-7
8
9-16
9-10
11
12
13
14-15
15
DVD bediening
1. Algemene instellingen
2. AUDIO instellingen
3. Dolby Digital instellingen
4. Voorkeuren
In geval van problemen
16-23
16-18
18-19
20
20-23
24
Page 6

Verwittigingen
Verwittigingen
Het bliksemsymbool in een gelijkbenige driehoek dient om de gebruiker te
verwittigen dat er binnen het product niet geïsoleerde ‘gevaarlijke
spanningen’ voorkomen die voldoende sterk zijn om een risico van elektrische
schok voor personen te veroorzaken.
Het uitroepteken in een gelijkbenige driehoek betekent dat er bij het apparaat
belangrijke instructies voor de bediening en het onderhoud (service)
meegeleverd wordt.
Juist verwijderen van dit product
(Afval van Elektrische en Elektronische Apparatuur – AEEA)
Uw product is ontwikkeld en gemaakt met hoge kwaliteitsmaterialen en
onderdelen die gerecycleerd en terug gebruikt kunnen worden.
Dit symbool betekent dat elektrische en elektronische apparatuur bij het einde
van hun leven gescheiden moet worden van ander huishoudelijk afval.
Breng dit apparaat naar een inzamelpunt en een recyclagecenter.
Er bestaan collectieve inzamelsystemen voor elektrische en elektronische
apparaten. Help ons om het milieu zuiver te houden !
Dit toestel voldoet aan de Europese veiligheids- en interferentierichtlijnen.
Dit toestel is een “CLASS 1” laser product. Dit product gebruikt een
zichtbare laser die gevaarlijke radiatie kan veroorzaken. Zorg ervoor dat
het toestel gebruikt wordt zoals aangegeven. Open het toestel niet en kijk
niet in de DVD lade wanneer deze geopend wordt. Wijzig NIETS waardoor
de laserstraling beïnvloed kan worden. Als het toestel niet goed meer werkt,
consulteer dan een bekwame technicus.
1
Page 7

Veiligheidsinformatie
Veiligheidsinformatie
Om een zeker en veilig gebruik van dit toestel te garanderen is het nodig de instructies in
deze gebruiksaanwijzing te leze en zeker de veiligheidsinformatie hieronder.
Elektrische veiligheid
De TV mag alleen aangesloten worden op een stopcontact dat overeenkomt met die van
de aangebrachte label.
Om overbelasting te vermijden mag dit toestel niet aangesloten worden op een stopcontact
waarop reeds veel andere apparatuur aangesloten is.
- Zorg ervoor dat er niet op de snoeren getrapt kan worden.
- Plaats geen zware zaken op de snoeren.
- Trek aan de stekker, niet aan het snoer.
- Wanneer de TV lang niet gebruikt wordt of in geval van onweer is het aanbevolen de
stekker en de antenne uit te trekken.
- Zorg ervoor dat er geen water of vocht in de TV of de stroomadapter terecht komt.
Gebruik het toestel NIET in vochtige ruimtes zoals badkamers, keukens of naast een
zwembad.
7UHNRQPLGGHOOLMNGHVWHNNHUXLWKHWVWRSFRQWDFWHQFRQVXOWHHUHHQVSHFLDOLVWDOV
- het netsnoer of de stekker beschadigd is;
- er vloeistof op het toestel terecht gekomen is of wanneer het blootgesteld is geworden
aan water of vocht;
- wanneer er iets via de ventilatieopeningen in het toestel gekomen is;
- het toestel niet goed meer werkt;
- OPEN het toestel niet; er bevinden zich binnenin geen bruikbare onderdelen. Daardoor
kan de garantie komen te vervallen. Alleen bevoegd personeel mag het toestel herstellen.
- om het lekken van batterijen te vermijden moeten oude batterijen uit de afstandsbediening
gehaald worden, ook wanneer deze gedurende lange tijd niet gebruikt wordt.
- open de oude batterijen NIET en werp ze niet in een vuur.
Veiligheid
6OXLWGHYHQWLODWLHRSHQLQJHQRSGHDFKWHU]LMGH1,(7DI$OVXKHWWRHVWHOLQHHQNDVWSODDWVW
zorg er dan voor dat er minstens 5 cm ruimte rondom het toestel is.
6FKXG1,(7PHWKHW7YVFKHUPYHUPLWVGLWKHWLQWHUQHFLUFXLWNDQEHVFKDGLJHQ=RUJJRHG
YRRUGHDIVWDQGVEHGLHQLQJODDWKHPQLHWYDOOHQHQ]RUJHUYRRUGDWKLMQLHWLQFRQWDFWNRPW
met vloeistoffen. Gebruik GEEN solventen of producten op basis van petroleum. Gebruik een
met detergent licht bevochtigd doekje om hevig vuil te verwijderen.
2
Page 8
Accessoires en technische specificaties
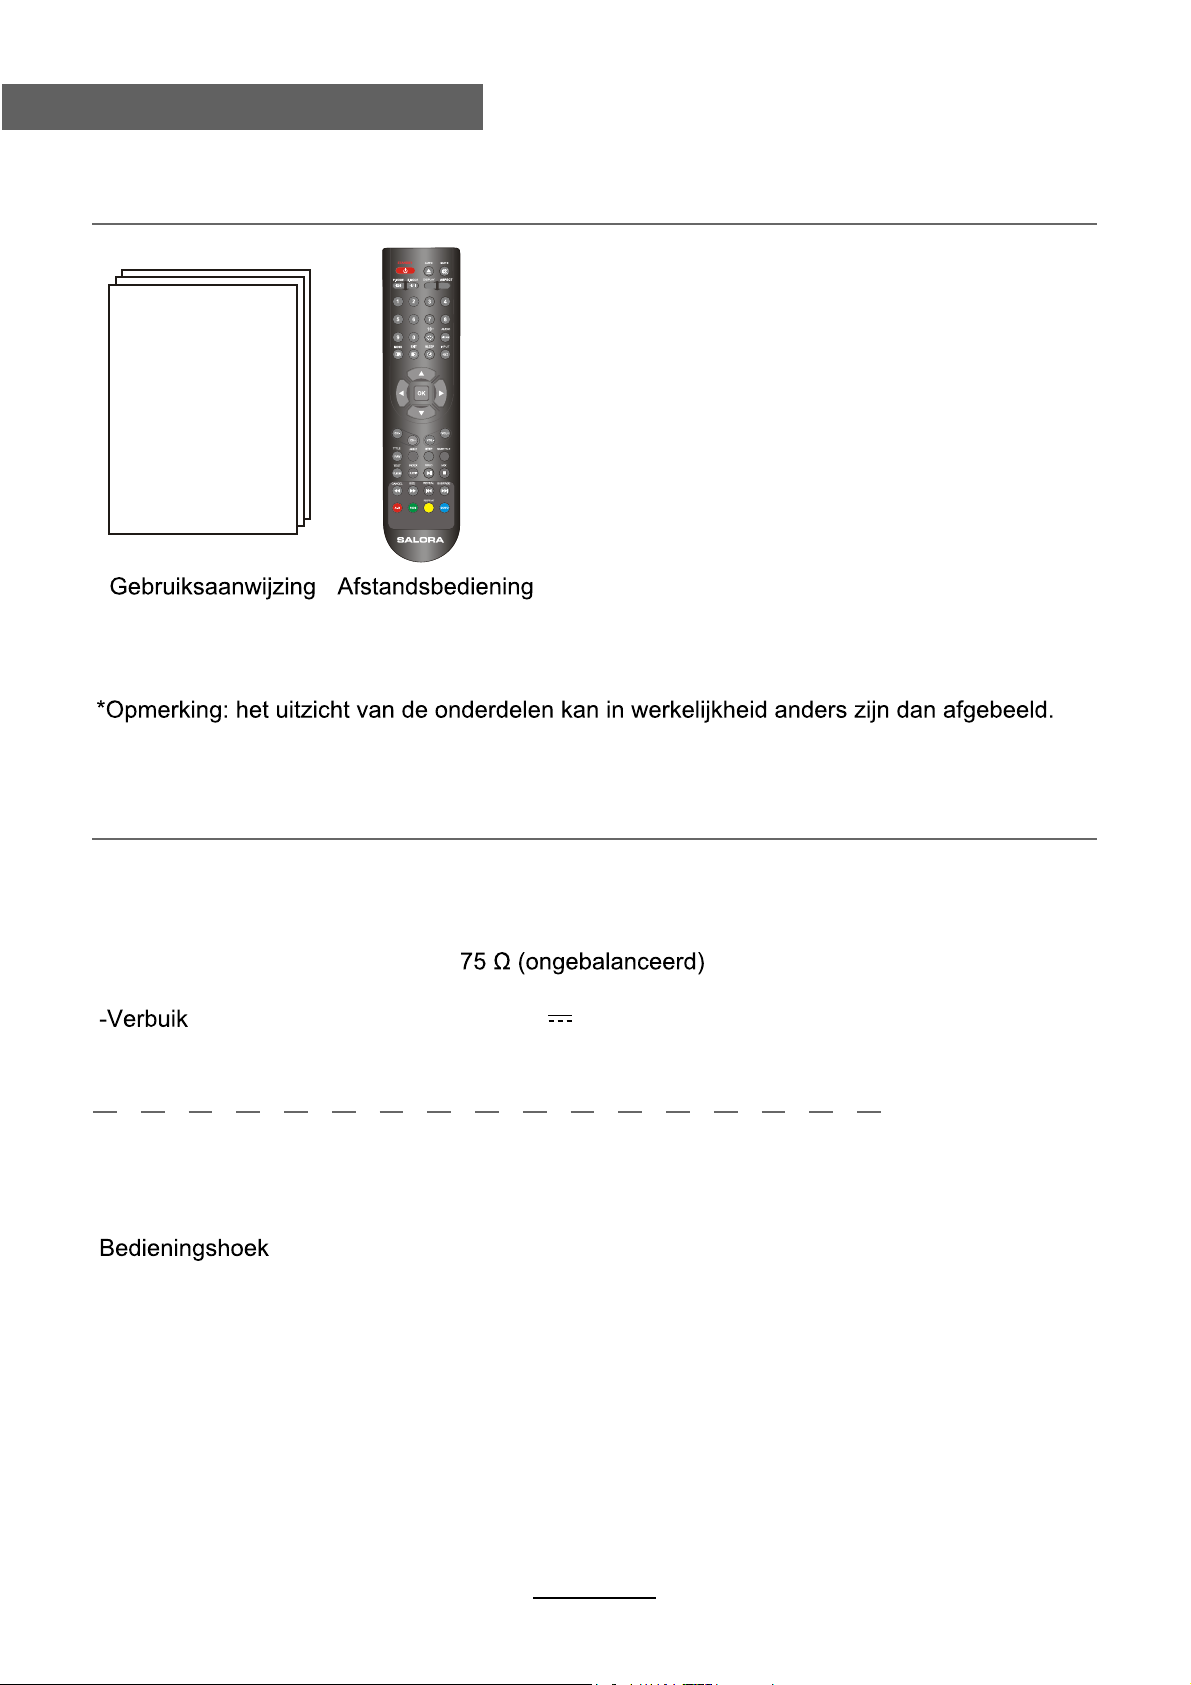
Accessoires
Technische specificaties
-TV systeem PAL, SECAM, NTSC
-Grootte scherm 24 inch (diagonaal)
-Resolutie 1920 x 1080
-Antenne-ingang
-Uitgangsvermogen 2 x 3 W
DC 12V 5A 60W
Afstandsbediening
Type Infrarood
Bedieningsafstand 5 m
30° (horizontaal)
Batterijen 2 x 1.5 V, AA formaat.
3
Page 9
Productintroductie
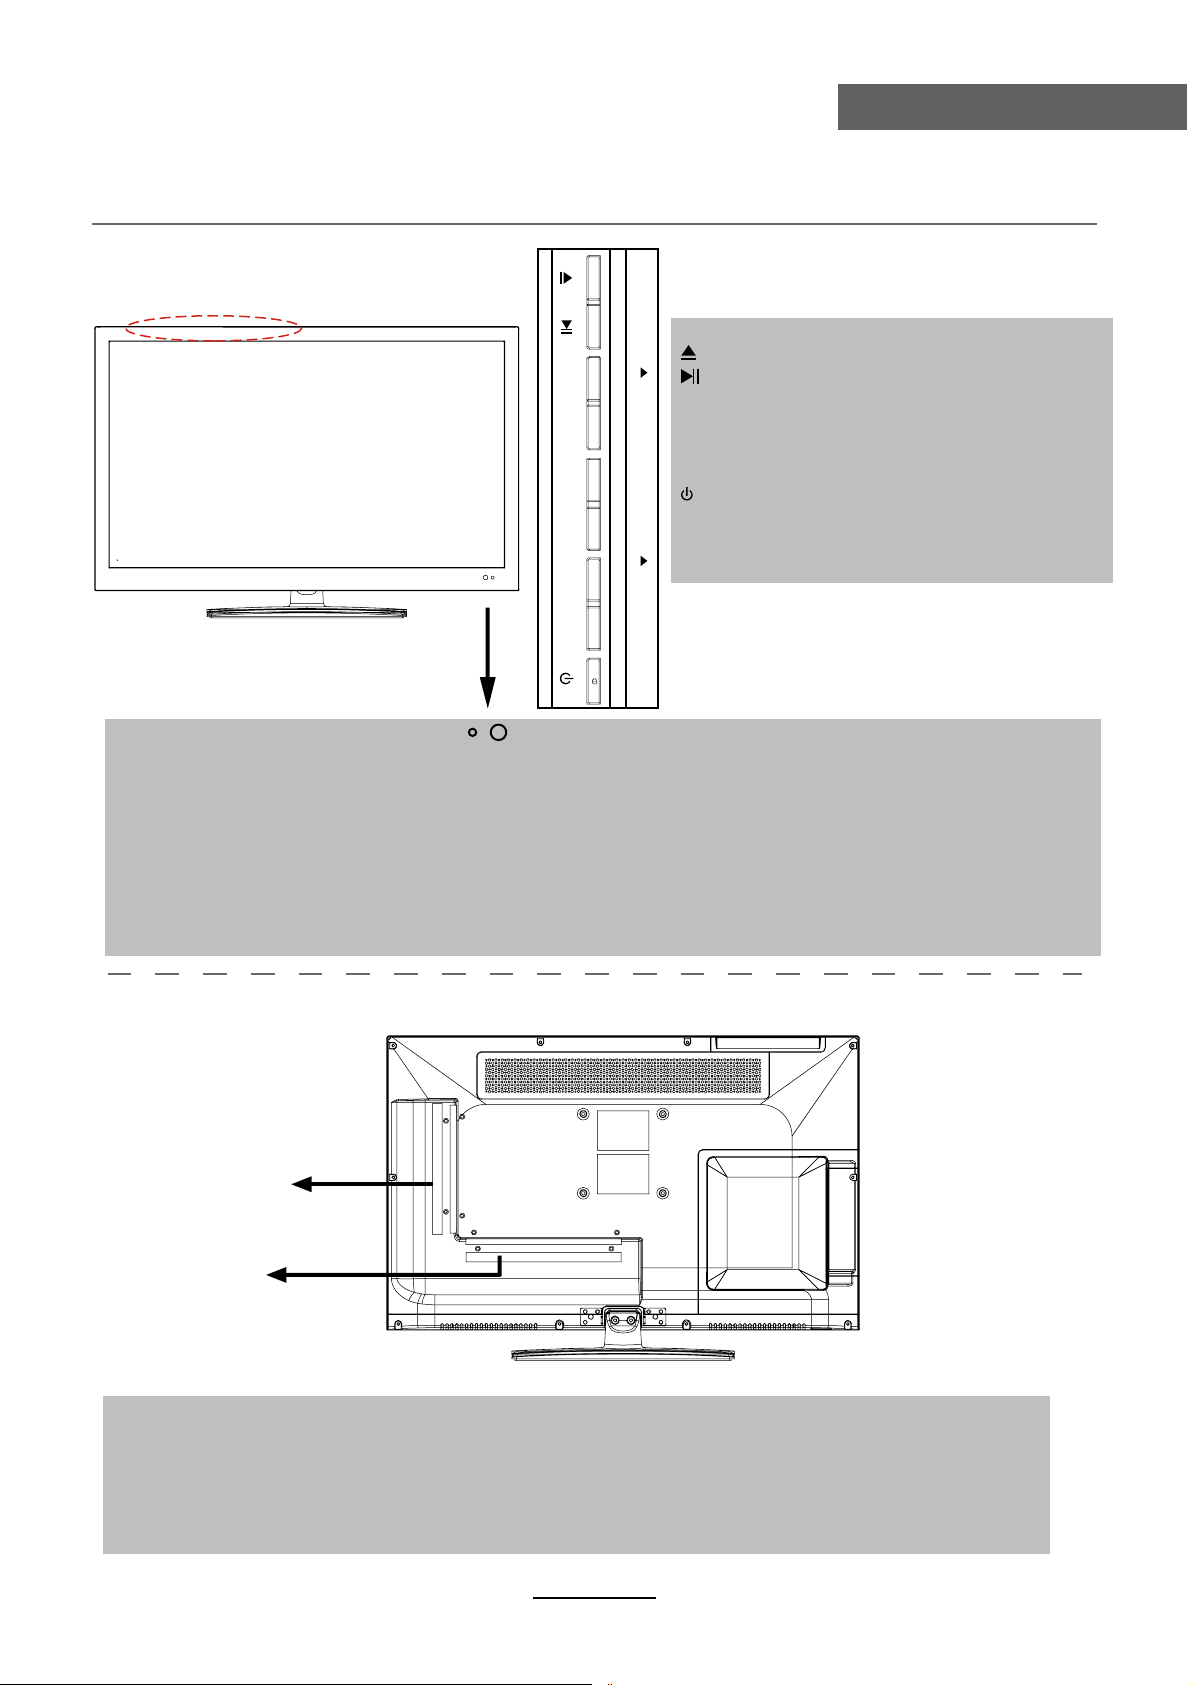
Vooraanzicht
Productintroductie
VOL- VOL+ CH- CH+
INPUT MENU
(EJECT):
Insert disc with label side towards back
(PLAY):
VOL+/-:
CH+/-:
INPUT:
MENU:
(POWER):
DVD: om een 12 cm disk in t brengen
de disk uitwerpen
weergave/pauze van de disk
volumeregeling
door de zenders gaan
weergave van het ingangsmenu
het OSD menu openen/sluiten
TV aanschakelen of in stand-by zetten
LED indicator Ontvanger afstandsbediening (vrij houden)
(IR) Infrarood ontvanger: ontvangt de IR signalen van de afstandsbediening
(Power on/standby) LED indicator: druk op POWER om het toestel in en uit te schakelen
Indicator (Rood) Stand-by
Indicator (Groen) Ingeschakeld
Het bereik van de afstandsbediening is 5-8 meter tegenover de infrarood ontvanger en
binnen een hoek van 30° links en rechts en 20° naar boven.
Achteraanzicht
Aansluitingen
Zie volgende pagina
Montage aan de muur
De TV is voorzien van openingen voor de montage van een VESA goedgekeurde muurbevestiging
(NIET MEEGELEVERD). Monteer de VESA steun met gebruik van 4xM4x10mm ISO schroeven
(niet meegeleverd). Gebruik geen schroeven die langer zijn dan 10mm vermits dit interne schade kan
veroorzaken. Monteer de muurbevestiging volgens de instructies van de fabrikant.
4
Page 10
Aansluitingen
Aansluitingen
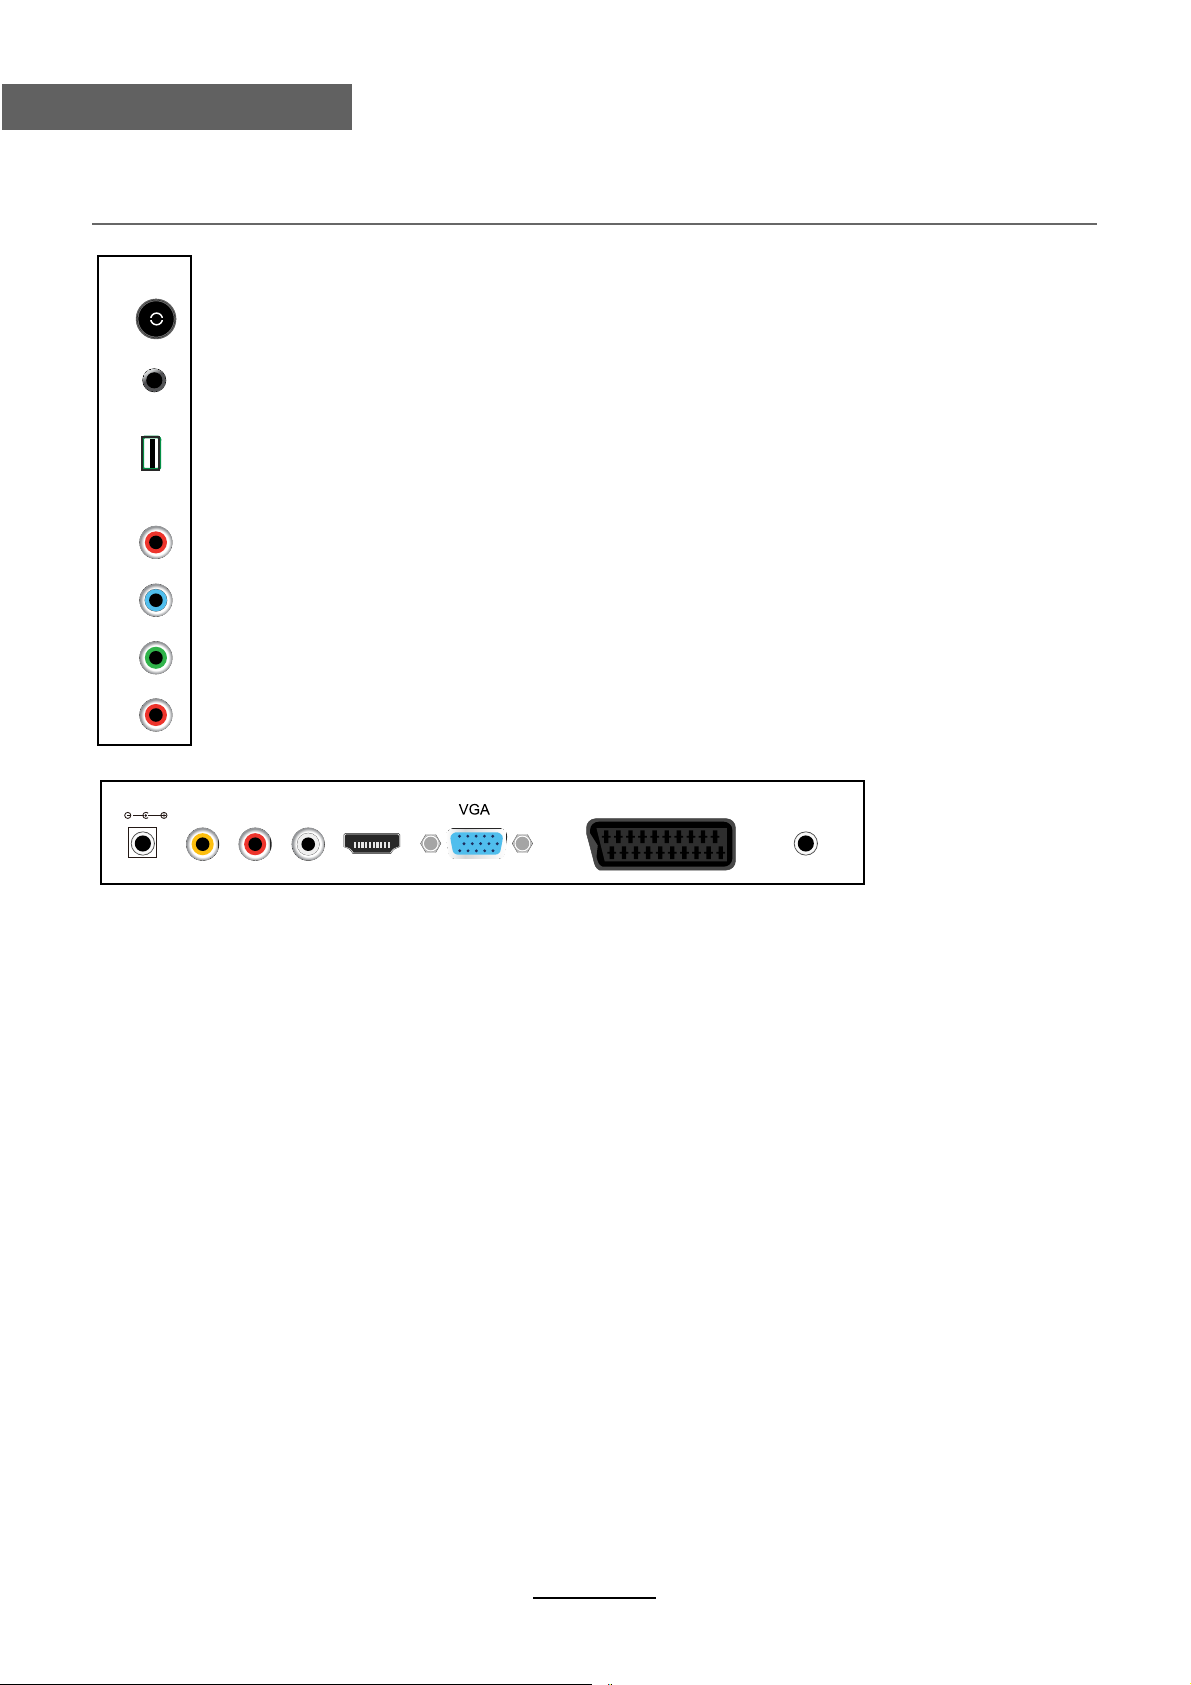
RF:
aansluiting voor coaxiale 75 Ohm antenne.
Headphone out:
hoofdtelefoonaansluiting.
USB: USB-aansluiting.
COAX Y PB PR USB Earphone RF
POWER
VIDEO R L
YPbPr:
Coax:
voor aansluiting aan de YPbPr uitgang van een DVD-speler.
digitale coaxiale uitgang.
HDMI
SCART
POWER: Sluit het netsnoer met DC 12V aan op deze ingang.
VIDEO:
video-ingang.
PC Audio
R/L in:
HDMI:
VGA:
SCART:
audio-ingang (tezamen met YPbPr).
aansluiting voor HDMI uitgang van andere apparatuur.
voor PC weergave. Voor aansluiting aan de D-Sub 15 pins uitgang van de PC.
voor aansluiting aan de SCART uitgang van andere apparatuur.
PC Audio:
aansluiting van de audio-uitgang van de PC.
5
Page 11
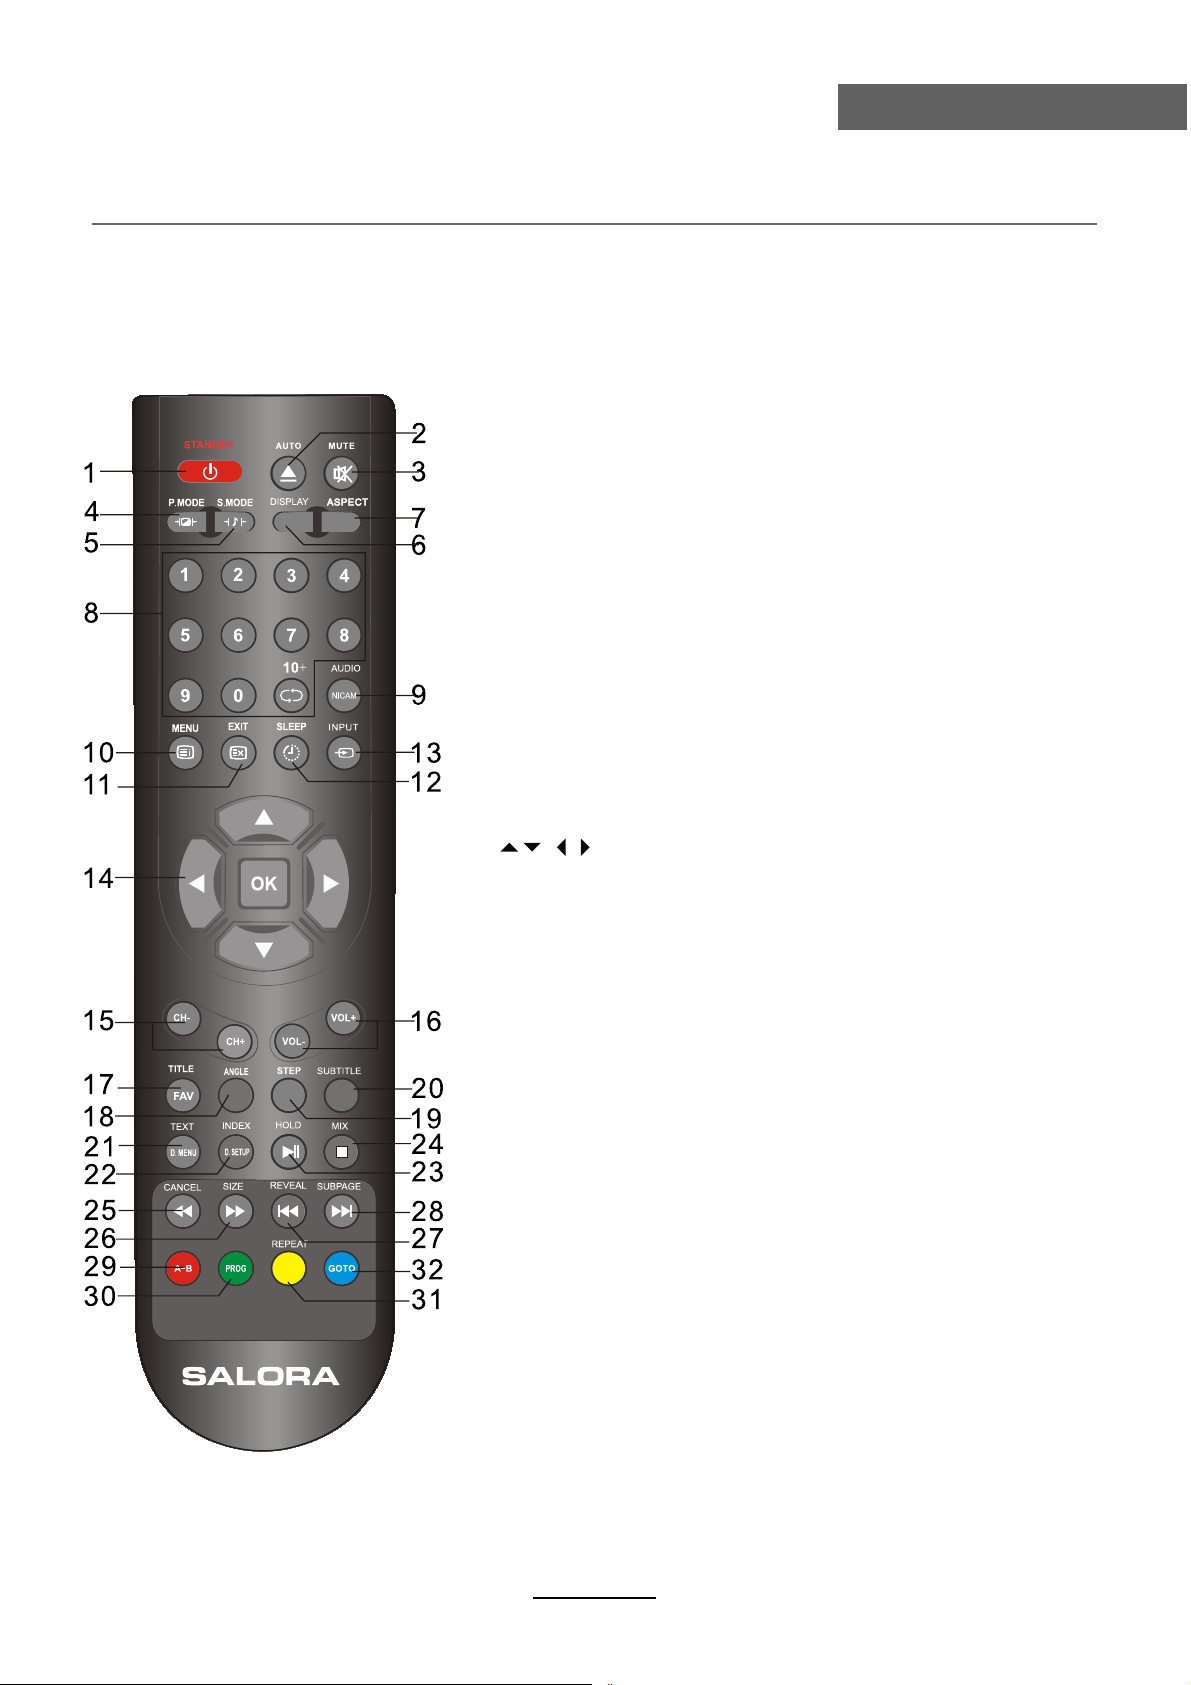
Afstandsbediening
Afstandsbediening
De afstandsbediening gebruikt infrarode (IR) signalen. Richt hem op de voorzijde van de LED
TV. De afstandsbediening kan slecht werken als hij buiten het bereik gebruikt wordt.
Toetsen voor TV functies
1
STANDBY:
2
AUTO:
Automatisch aanpassen van de afbeelding wordt op
de televisie in de PC-modus.
3
MUTE:
4
P.MODE:
Druk op deze knop om de gewenste
beeldmodus te kiezen.
5
S.MODE:
Druk op deze knop om de gewenste klank
te selecteren.
DISPLAY:
6
7
ASPECT:
8
0~9,10+:
druk 0 tot 9 voor de eerste tien zenders, druk
10+ voor 10 tot 99 en opnieuw voor 100 tot 199.
9
NICAM:
10
MENU:
11
EXIT:
12
SLEEP:
gaat na die tijd automatisch in stand-by.
13
INPUT:
14
OK:
bevestiging in OSD menu.
CH+/-:
15
16
VOL+/-:
17
FAV:
19
STEP:
20
SUBTITLE:
Om de Elektronische Programma Gids vertonen
wanneer er geen menu staat alleen.
21
TEXT:
22
INDEX:
23
HOLD:
24
MIX:
Schakel de teletekst in of 0ff.
25
CANCEL:
26
SIZE:
opnieuw drukken om de onderste helft vergroot te zien.
Nogmaals drukken om terug op normale lettergrootte
te komen.
27
REVEAL:
antwoord op een quizvraag.
28
SUBPAGE:
te gaan:
druk op SUBPAGE, dan 0,0,0,4
druk opnieuw op SUBPAGE om de subpagina modus
te verlaten.
om de TV in te schakelen.
om het geluid te dempen.
weergave van de huidige modus.
Pas beeldgrootte.
Druk op om TV-geluid te selecteren.
TV systeem menu (zie pagina 9).
Verlaat het huidige menu.
om de sleep timer in te schakelen, de TV
keuze van de ingangsbron.
richtingstoetsen voor OSD menu.
:
zender omhoog/omlaag.
volume ophoog/omlaag.
Geef het favoriete programma lijst.
Speel programma frame voor frame in de media modus.
Schakel de teletekst in of 0ff.
om direct naar pagina 100 te gaan.
om de huidige subpagina vast te houden.
de teletekst weergave stoppen.
drukken om de bovenste helft vergroot te zien,
verborgen tekst weergeven, bijvoorbeeld
voorbeeld: om direct naar de subpagina 4
6
Page 12
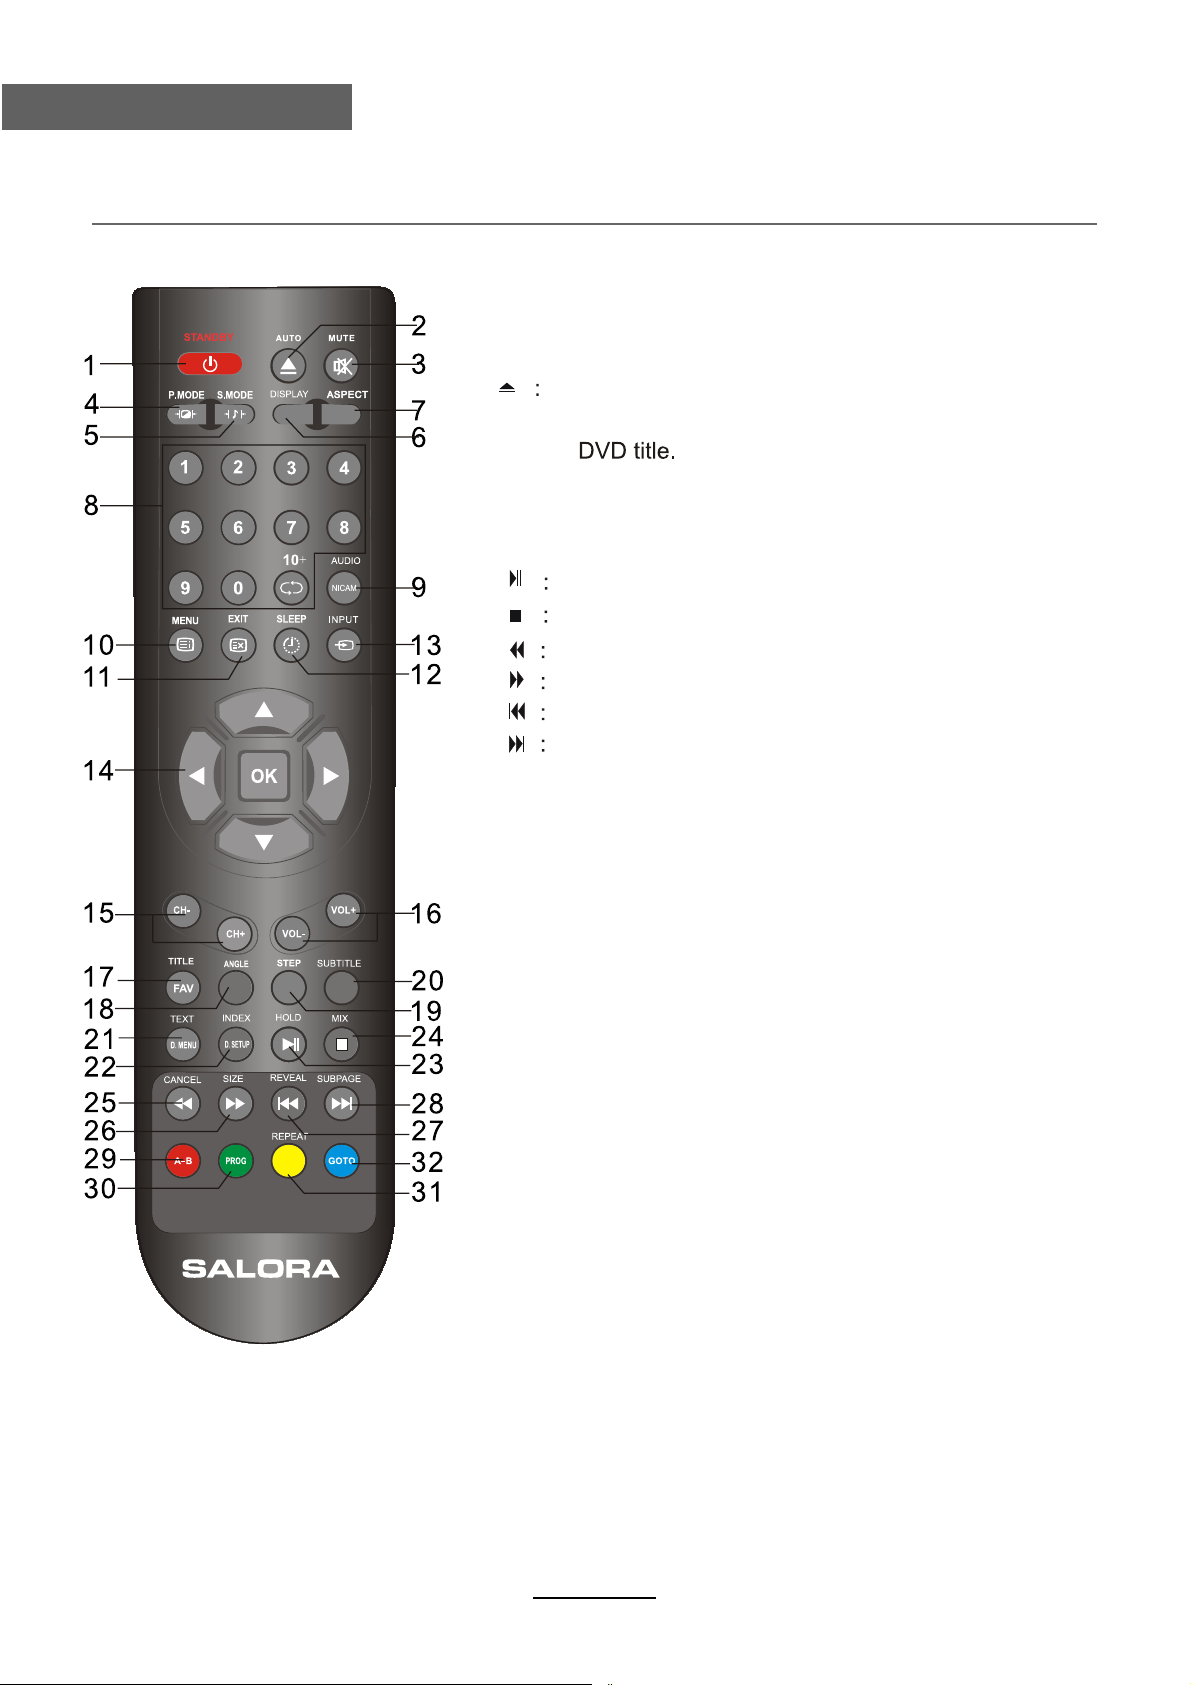
Afstandsbediening
Afstandsbediening
Toetsen voor DVD functies
2
9
17
18
21
22
23
24
25
26
27
28
29
30
31
32
laden/uitwerpen van de DVD disk
AUDIO:
Wijzig de DVD-audio-modus: links, rechts, mono, stereo.
TITLE:
ANGLE:
D.MENU:
D.SETUP:
A-B:
worden tussen twee punten.
PROG:
REPEAT:
GOTO:
DVD af te spelen vanaf het gewenste tijdstip. Druk op tijd
en voer de tijd. Het apparaat begint te spelen vanaf die u hebt
geselecteerd.
om de weergavehoek te kiezen
Geef het DVD MENU.
Geef het DVD SETUP menu.
weergave/pauze
stoppen
snel achterwaarts
snel voorwaarts
naar vorig hoofdstuk
naar volgend hoofdstuk
om een deel te bepalen dat herhaald moet
Om de DVD geprogrammeerde weergave te selecteren.
Herhaal het afspelen van de dvd-weergave.
7
Page 13
Basisbediening
In- en uitschakelen
1.Verbinding maken met de voeding met het stopcontact en zet de schakelaar.
2.Om de TV in te schakelen:
Druk op de POWER toets op de TV of de afstandsbediening
Om de TV uit te schakelen:
Druk op de POWER toets op de TV of de afstandsbediening
TV
Keuze van de ingangsbron
Druk op de INPUT toets op de TV of de afstandsbediening om het
ingangsmenu op te roepen en gebruik CH+/- toetsen op de TV of de
afstandsbediening om de gewenste bron te kiezen en druk op OK van
de afstandsbediening om te bevestigen.
Opmerking: controleer de aansluitingen alvorens de ingangskeuze
te gebruiken.
AV
SCART
YPBPR
VGA
HDMI
DVD
Basisbediening
SOURCE
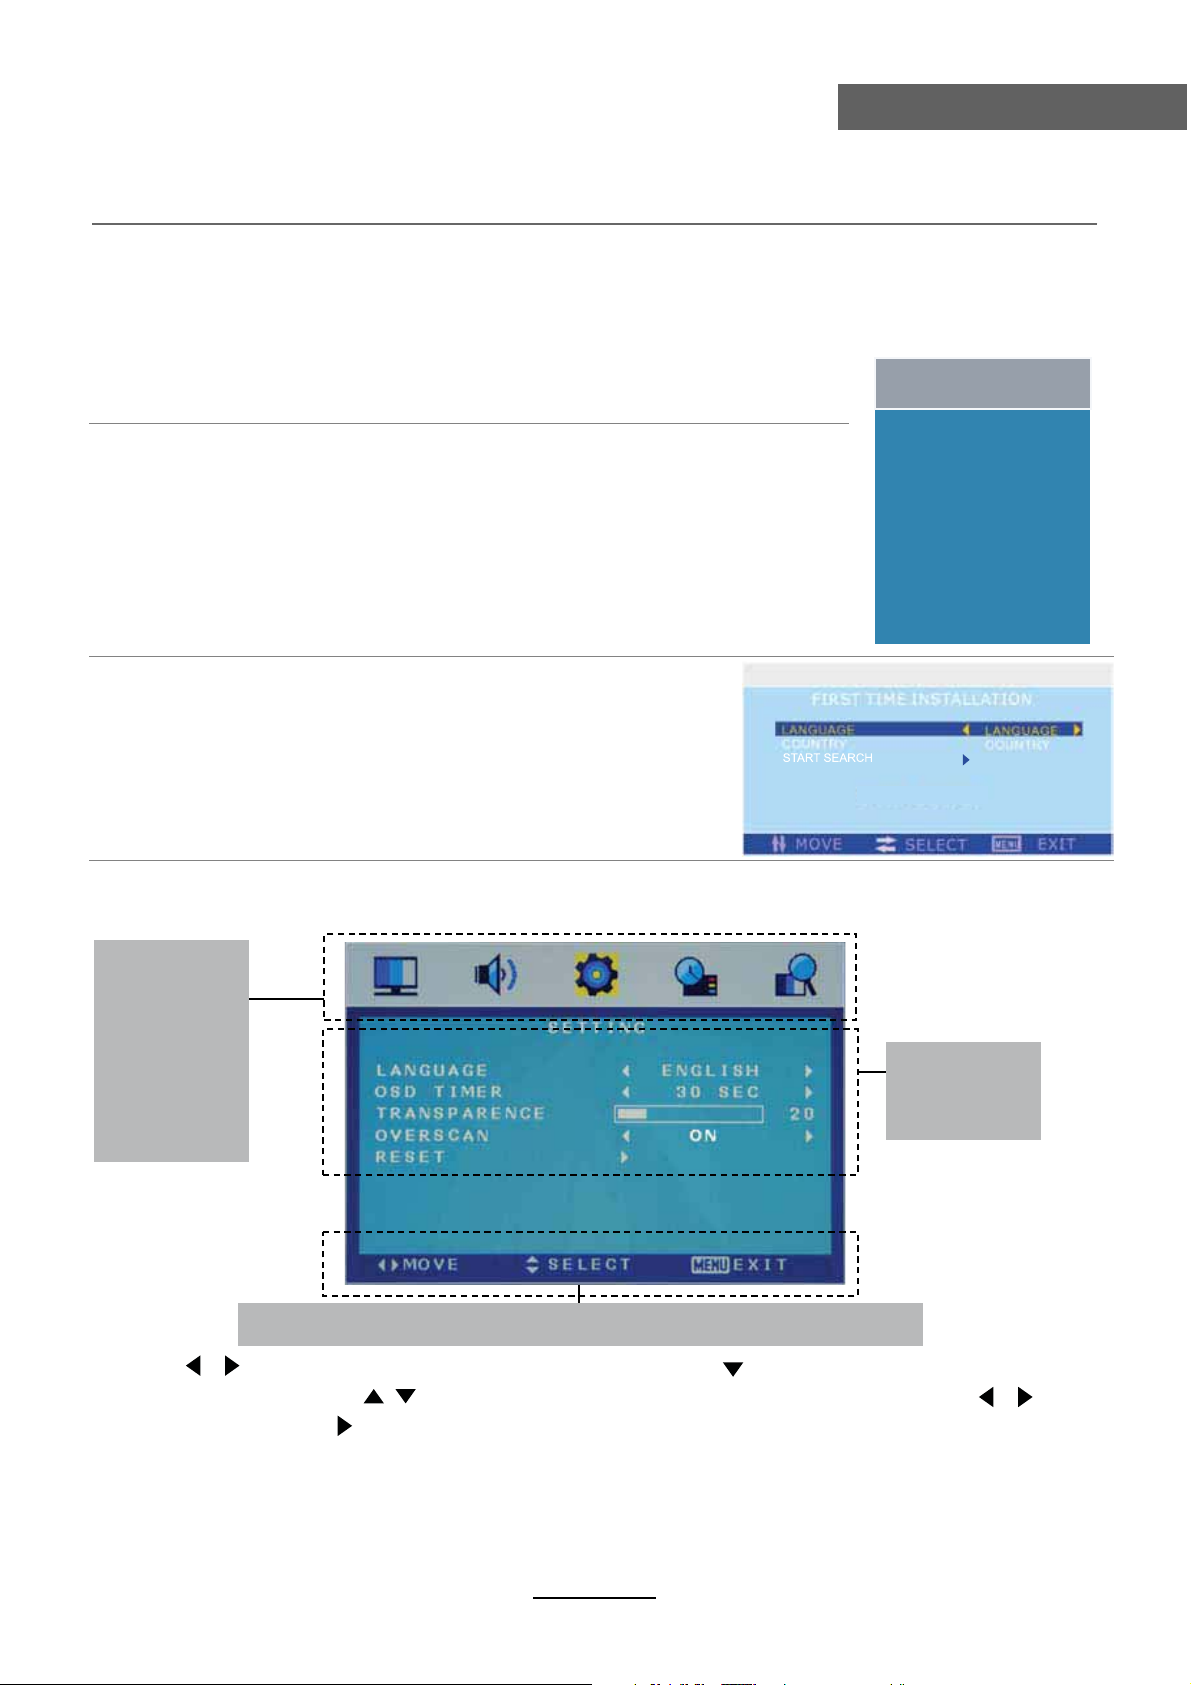
Eerste installatie
Als u de TV voor het eerst inschakelt verschijnt het ‘Eerste
installatie’ menu en kunt u de zenders gemakkelijk opzoeken
door de instructies te volgen.
Basis OSD menu bediening
Druk op MENU (SYS-MENU) om het OSD menu weer te geven, zoals hieronder getoond.
Hoofdmenu
Beeld
Geluid
Zenders
Ontspanning
Blokkering
Instellingen
Submenu
(Bijvoorbeeld
video menu)
volg de tips die in het OSD menu gegeven worden.
Tip:
Gebruik om het hoofdmenu te selecteren en druk op CH- om in het submenu te gaan.
Gebruik in het submenu CH+/- om de gewenste functie te selecteren, druk op om te
selecteren of druk op om in het optie menu te gaan.
*(Druk op MENU(SYS-MENU) om terug te gaan naar het vorig menu.
*(Druk op SYS-EXIT om het menu te verlaten).
Opmerking 1: De relevante items kunnen alleen geactiveerd worden als u de juiste input geeft.
Opmerking 2: Gebruik het OSD menu volgens de tips die onderaan gegeven worden.
/
/
8
/
Page 14
OSD Menu
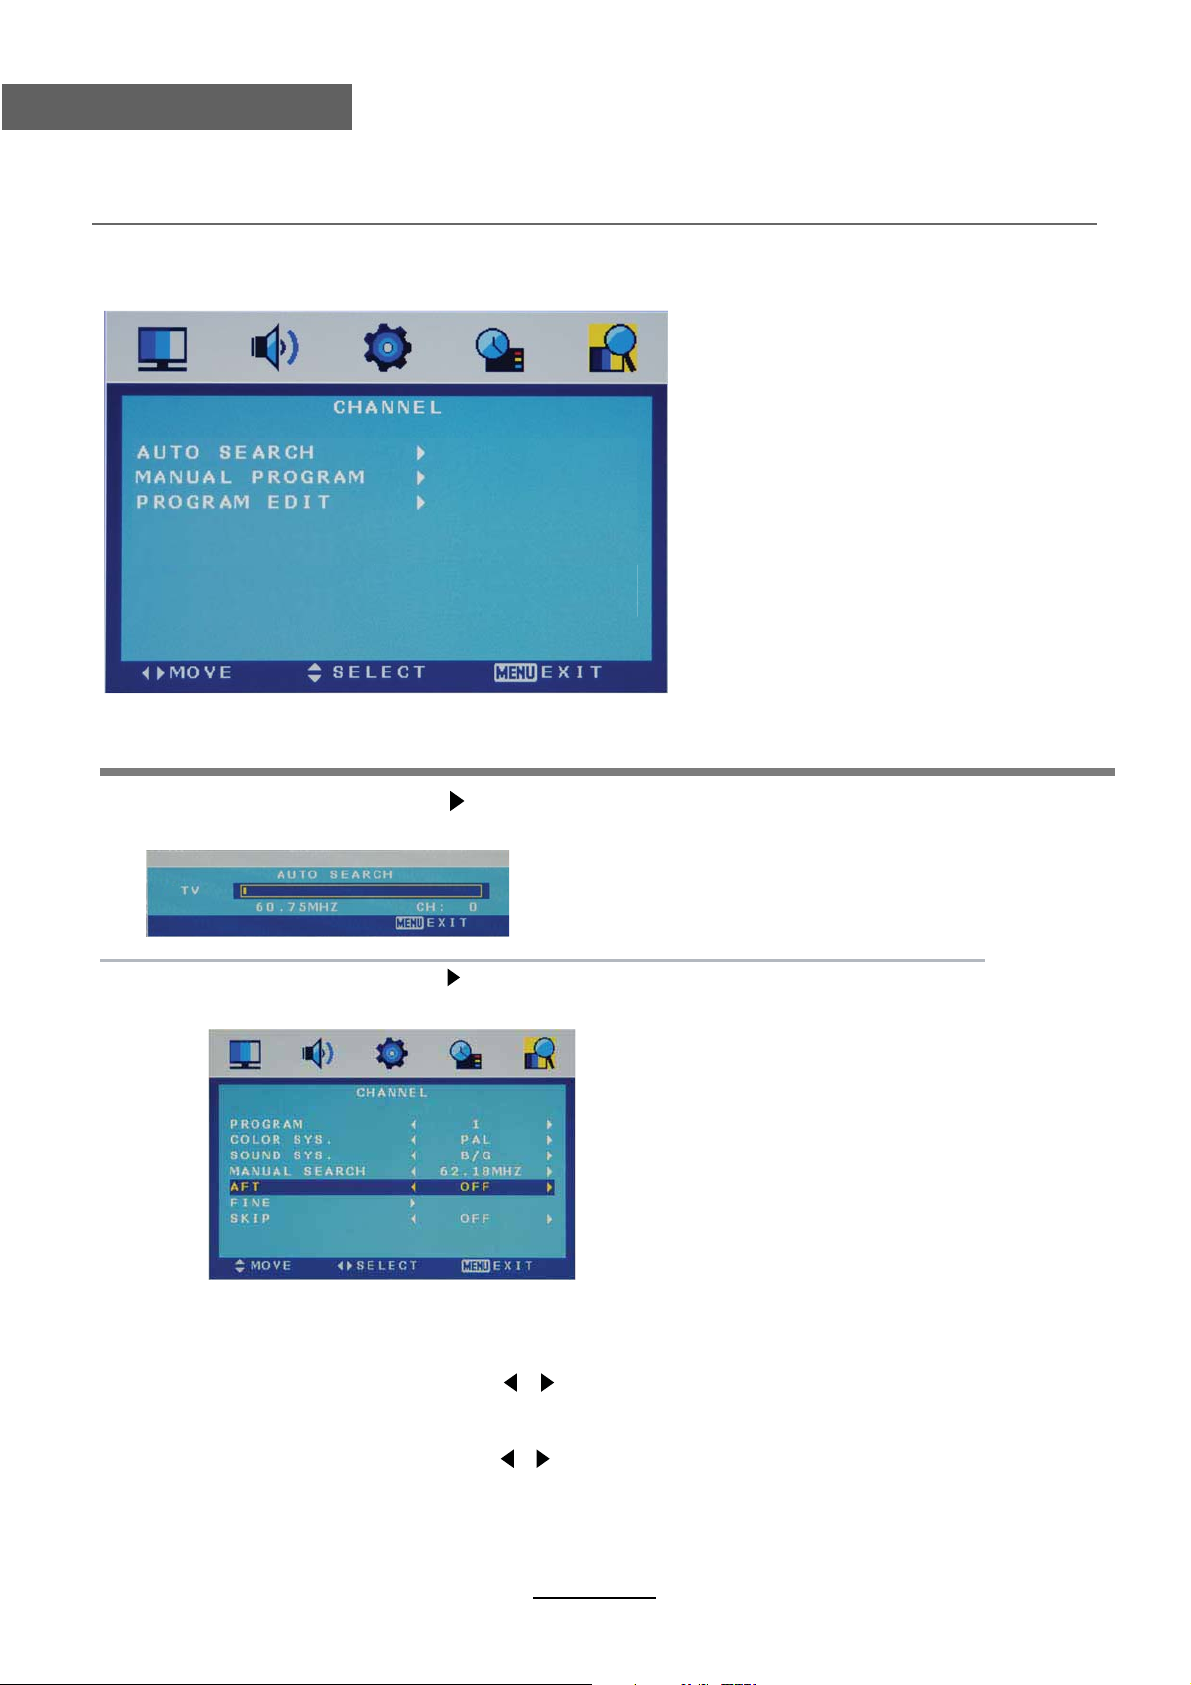
OSD Menu
1. ZENDER menu
Beschrijving
Automatisch zoeken Druk op om het automatisch zoeken te starten.
Automatisch zoekmenu voor TV
TV
Handmatig zoeken Druk op om in het submenu te gaan.
Handmatig zoekmenu voor TV
Program Selecteer de zender die u wil bewerken.
Kleursysteem Selecteer het kleurensysteem van de zender
Geluidsysteem Selecteer het geluidsysteem van de zender
Handmatig zoeken Gebruik / om handmatig te zoeken
AFT Om de Auto Frequency Tuning in of uit te schakelen tijdens het
handmatig zoeken
Fijnafstemming Gebruik / om fijn af te stemmen
Skip Kies “Ja” als u wil dat de zender bij gebruik van CH+/ overgeslagen wordt.
9
Page 15
OSD Menu
OSD Menu
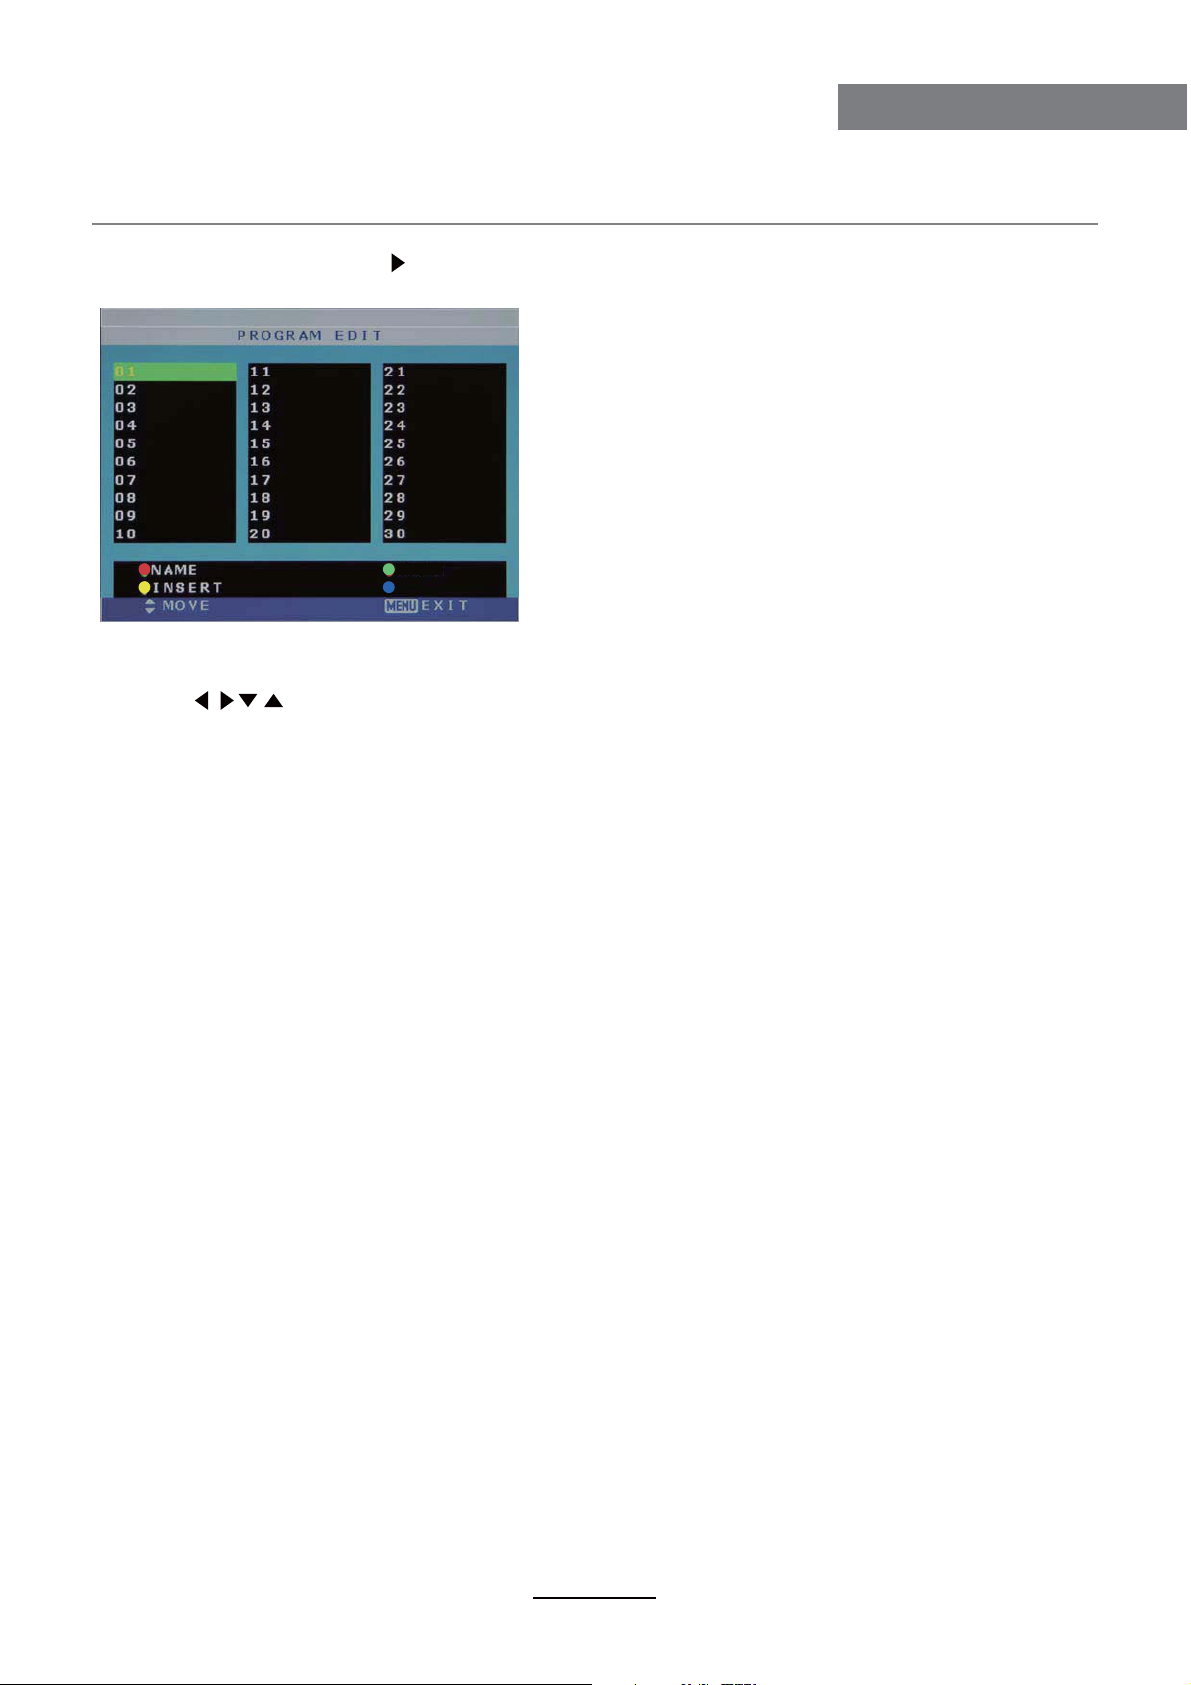
Zender bewerken: gebruik om in het submenu te komen zoals hieronder afgebeeld.
Zender bewerken menu voor TV
DELETE
FAV
NAAM: kies de zender, druk op de RODE toets op de afstandsbediening om de naam van
de zender te wijzigen.
(Gebruik om de naam in te voeren en druk op OK om te bevestigen).
DELETE: Druk op de GROENE toets om het huidige kanaal te verwijderen.
INSERT: selecteer een zender die u wil invoegen
Druk op de GELE toets en kies de plaats.
Druk op de GROENE toets om in te voegen, of
Druk op de RODE toets om de optie te annuleren.
FAV: Druk op FAV toets om de gunstige kanaal in te stellen.
10
Page 16
OSD Menu
OSD Menu
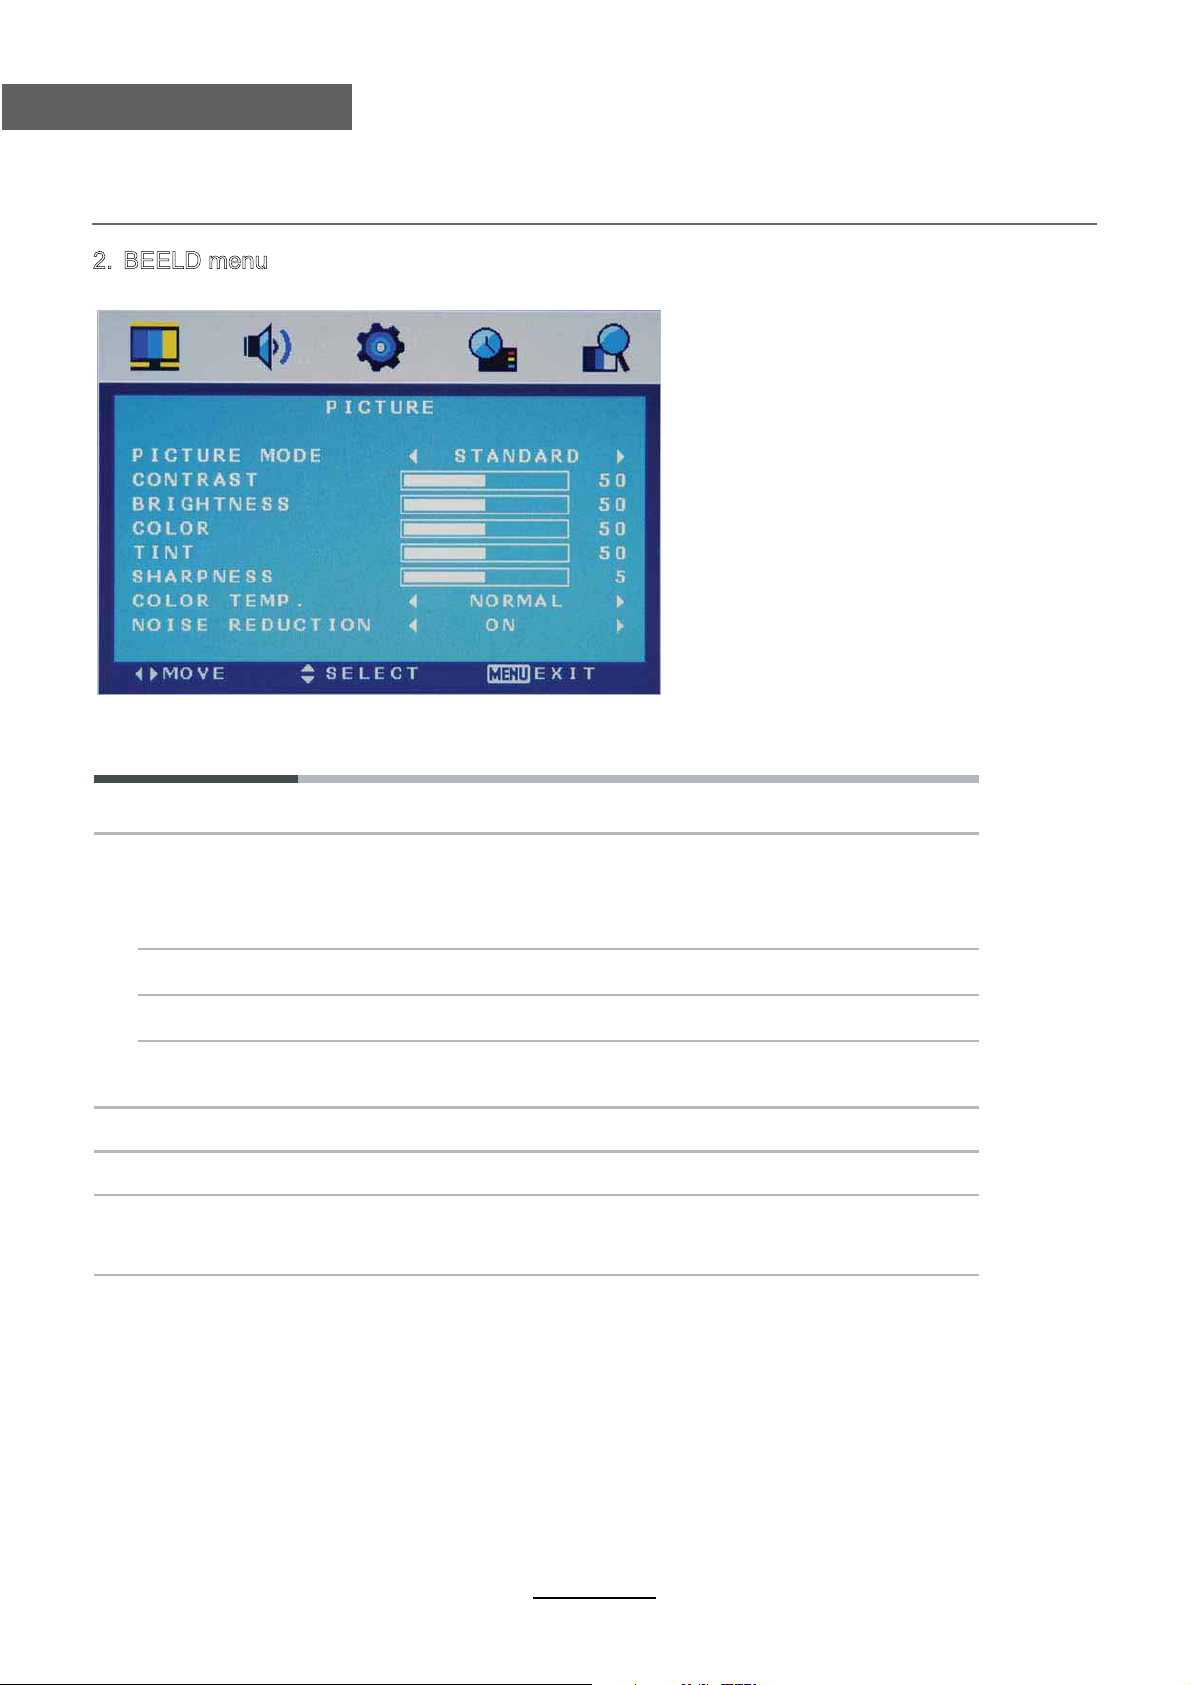
2. BEELD menu
Het BEELD menu geeft de volgende opties.
Beeldmodus Kies tussen Standaard, Film, Levendig en Persoonlijk
Opmerking: Contrast, helderheid, kleur en scherpte kunnen alleen ingesteld
worden als u voor Persoonlijk heeft gekozen
Contrast Regelt het verschil tussen de helderste en de donkerste
zones van het beeld.
Helderheid Regelt de helderheid van het beeld.
Kleur Regelt de kleuren.
Scherpte Verhogen om de randen scherper te maken, verlagen om
zachte randen te bekomen.
Tint Regelt de tint (alleen in NTSC)
Kleurtemperatuur Kies tussen Normaal, Koel of Warm
Ruisonderdrukking Kies voor “On” om interferentieruis te verminderen
(Kan geselecteerd worden in ATV modus).
11
Page 17
OSD Menu
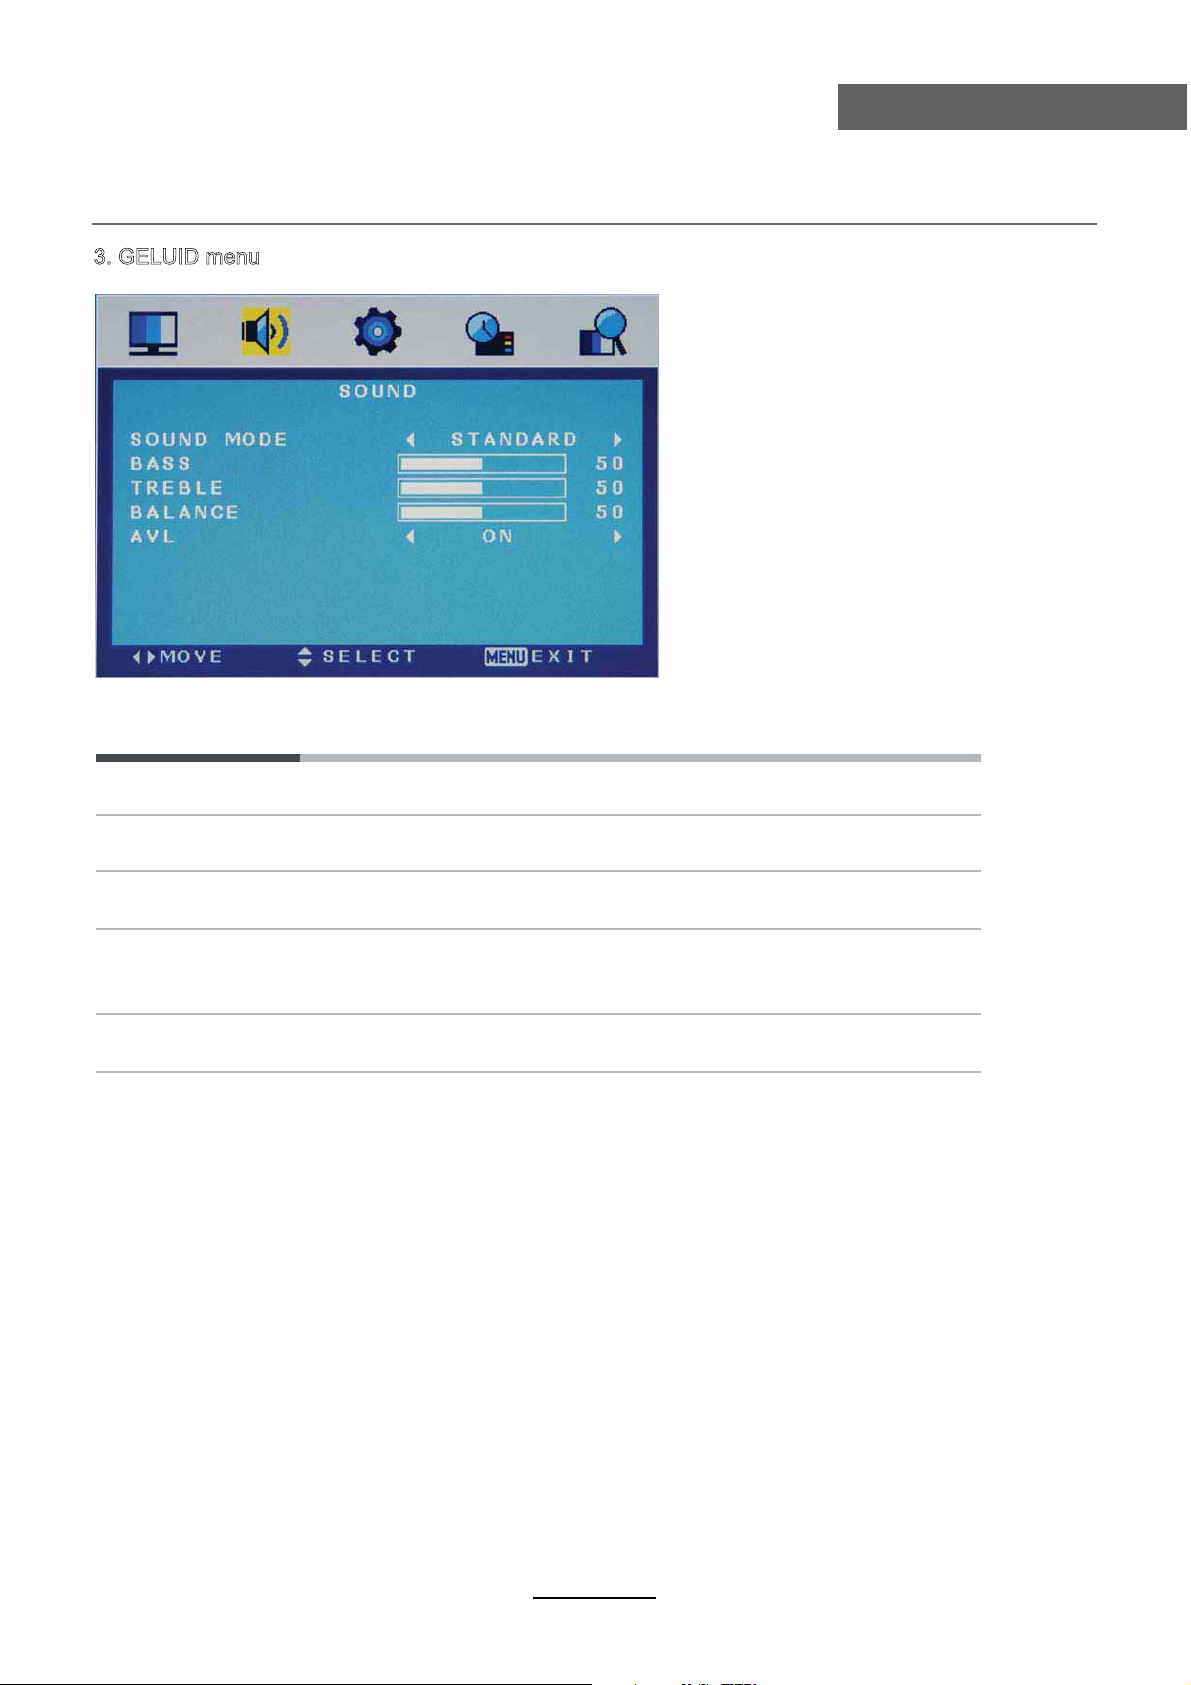
3. GELUID menu
OSD Menu
Het GELUID menu geeft de volgende opties.
Geluidmodus Kies tussen Standaard, Muziek, Film en Persoonlijk
Bass (kan ingesteld worden als u voor Persoonlijk gekozen heeft)
Regelt het niveau van de lage tonen.
Hoge tonen (kan ingesteld worden als u voor Persoonlijk gekozen heeft)
Regelt het niveau van de hoge tonen.
Balans Om de balans tussen het linker en het rechter kanaal in te stellen.
Of voor het instellen van het volume van het linkse of rechtse
geluidskanaal.
AVL Controleert automatisch het volume van de zender als u deze
functie in “On” zet
12
Page 18
OSD Menu
OSD Menu
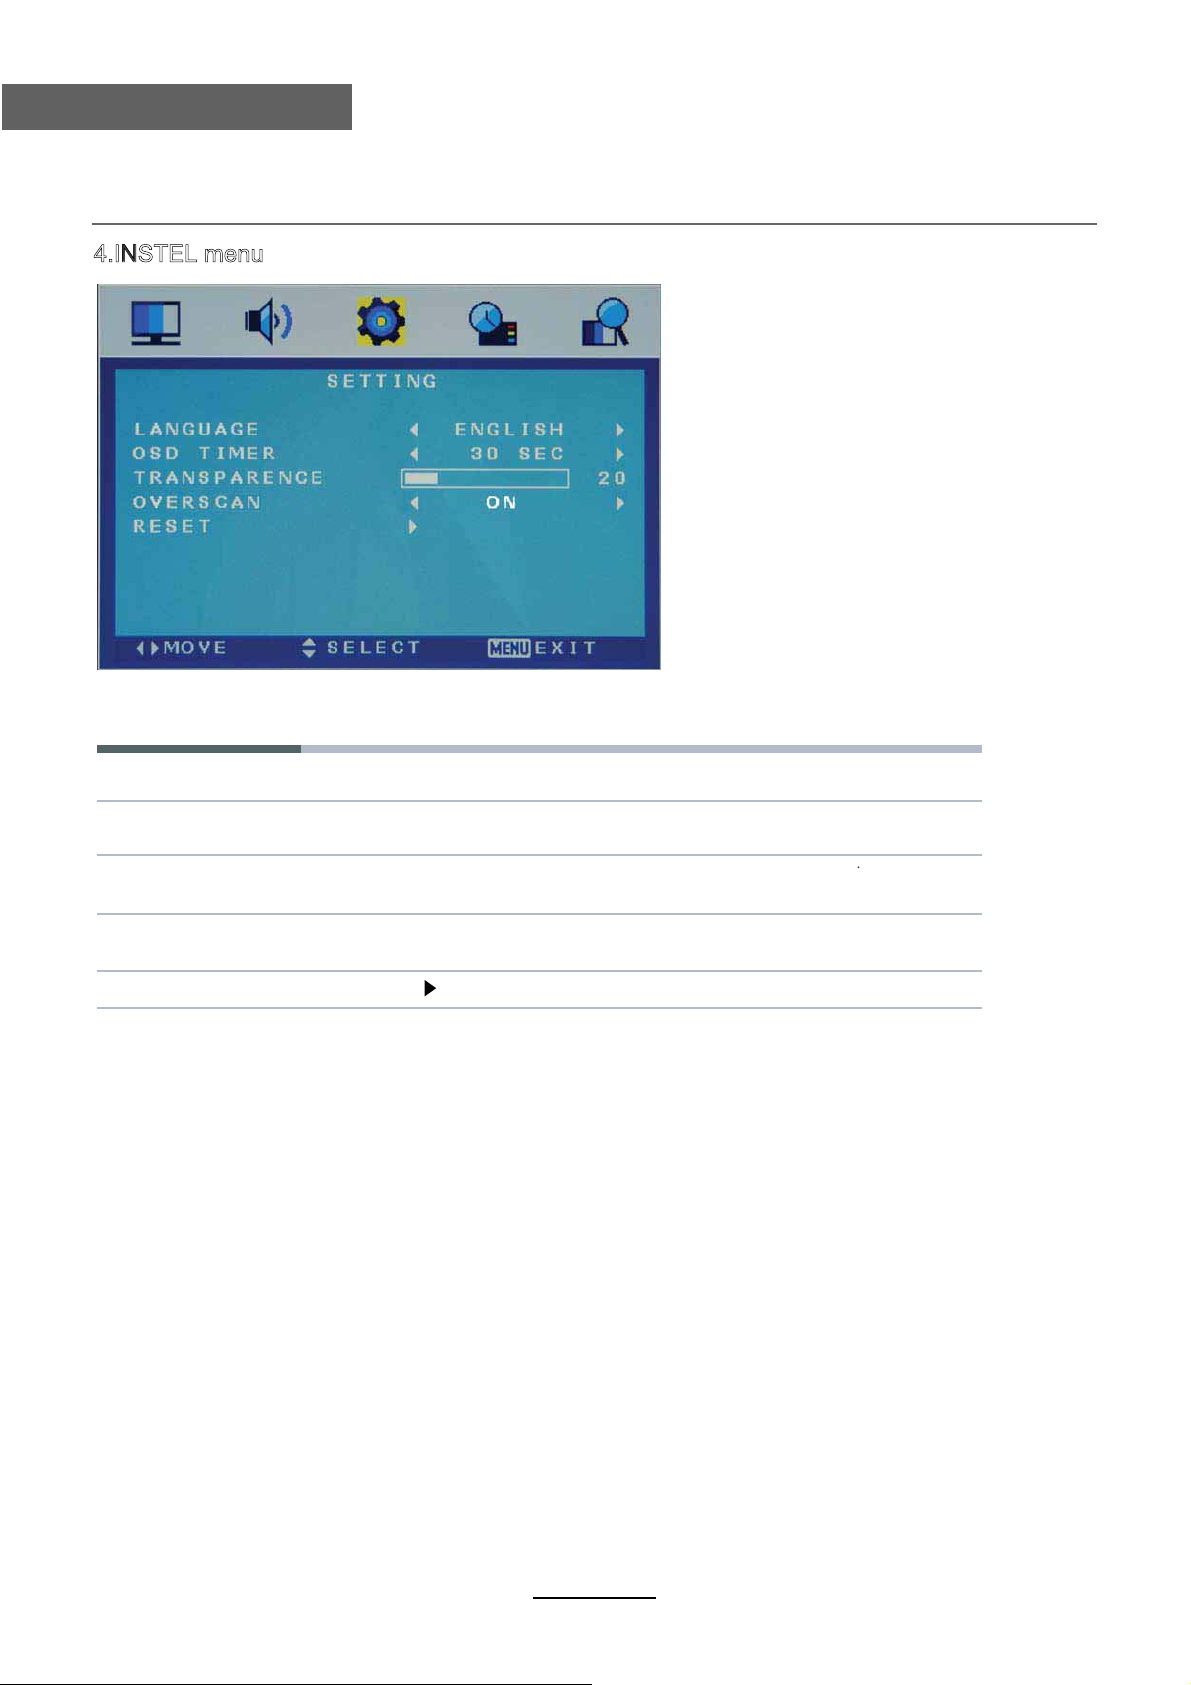
4.INSTEL menu
Het INSTEL menu geeft volgende opties.
Taal Om de taal van het menu te kiezen.
OSD Timer Laat toe de duur in te stellen waarmee het OSD menu op het
scherm verschijnt.
Transparantie Laat toe om de transparantie van het OSD menu op het scherm
in te stellen.
Overscan Om de overscan functie in of uit te schakelen.
(kan in HDMI modus geselecteerd worden).
Terugzetten Druk op om terug op de fabriekswaarden te komen.
13
Page 19
OSD Menu
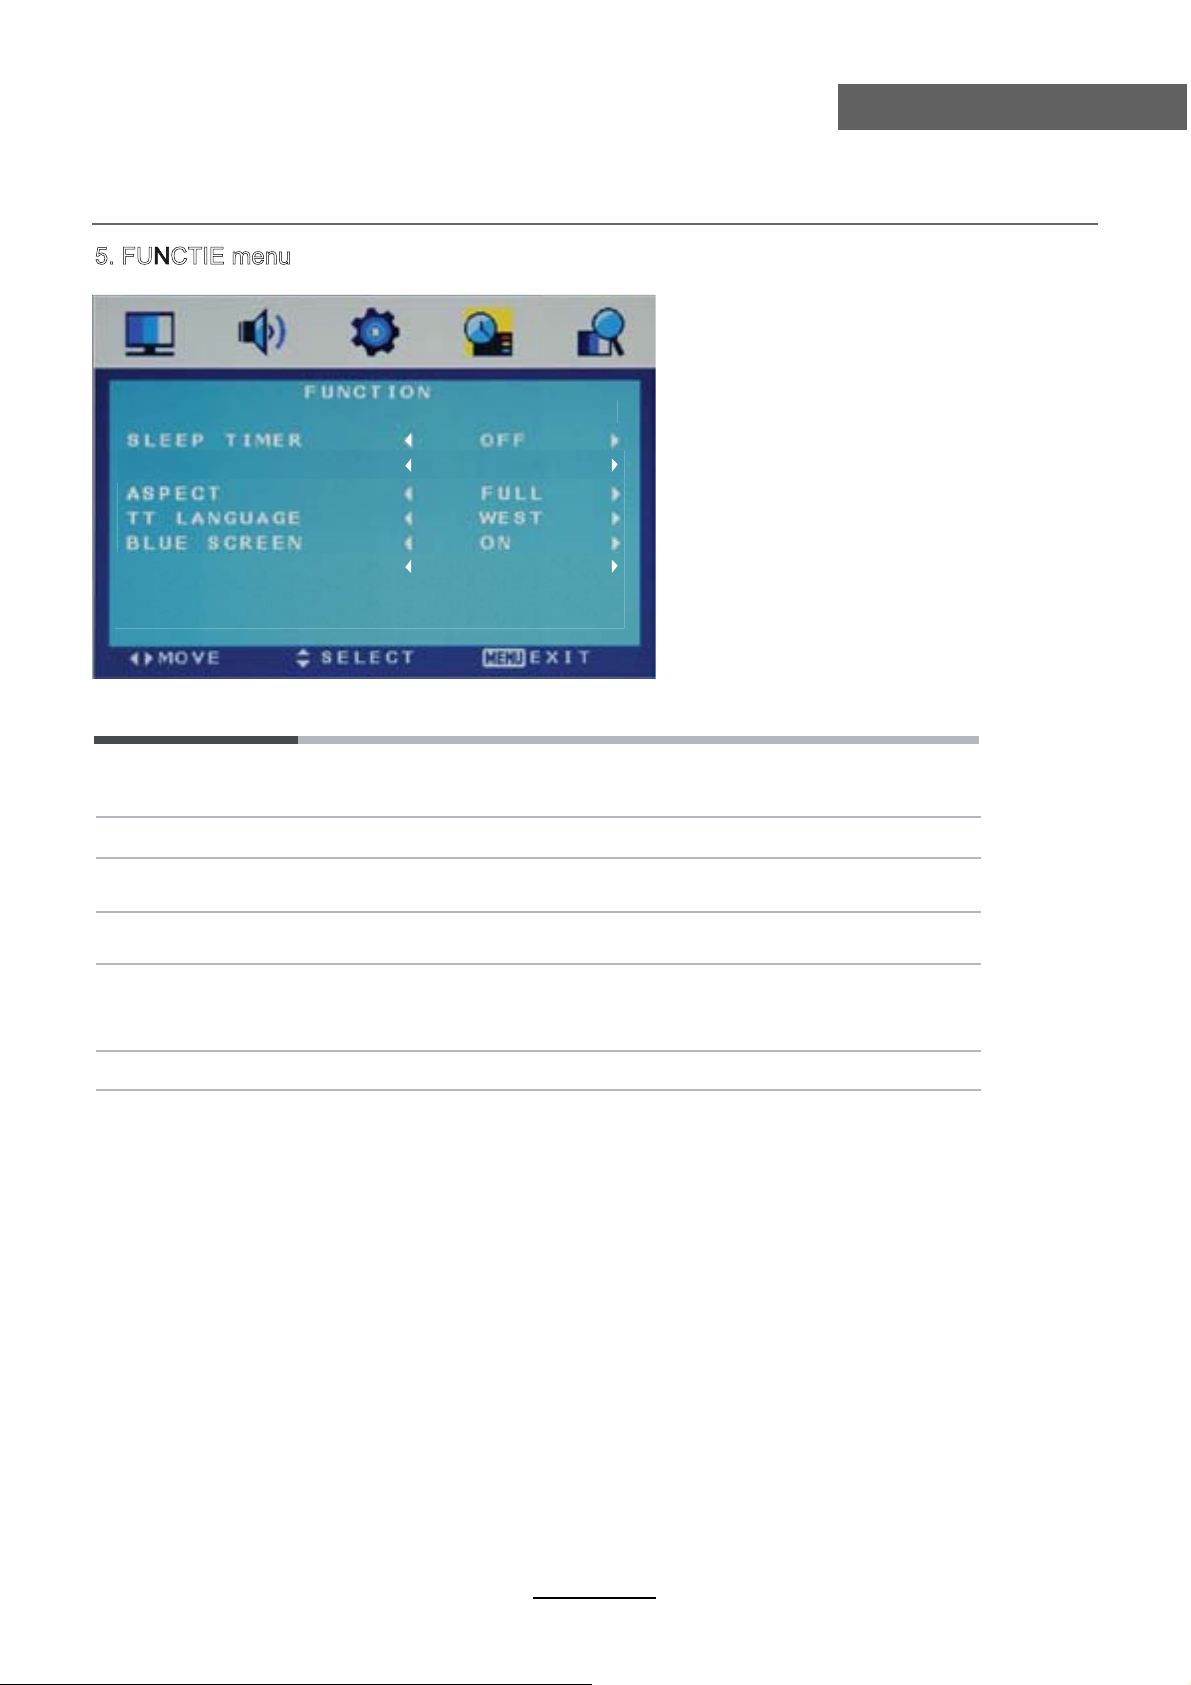
5. FUNCTIE menu
AUTO SLEEP 4H
DLC OFF
OSD Menu
Het FUNCTIE menu geeft de volgende opties:
Sleep Timer Om de tijd van de sleep timer in te stellen: 15 min, 30 min, 45 min,
60 min, 75 min, 90 min, 105 min, 120 min of uit.
Auto Sleep Schakel aan / uit de auto stand-by functie als waar is geen signaal.
Beeldformaat Om het beeldformaat te selecteren
(kan in TV modus geselecteerd worden)
TT taal Om de taal van teletekst te kiezen
(kan in TV modus geselecteerd worden)
Blauw scherm Om het scherm blauw te laten worden als er geen signaal is, dient
dit in “ON” geplaatst te worden.
(kan in TV modus geselecteerd worden)
DLC Dynamische Luminantie AAN / UIT.
14
Page 20
OSD Menu
OSD Menu
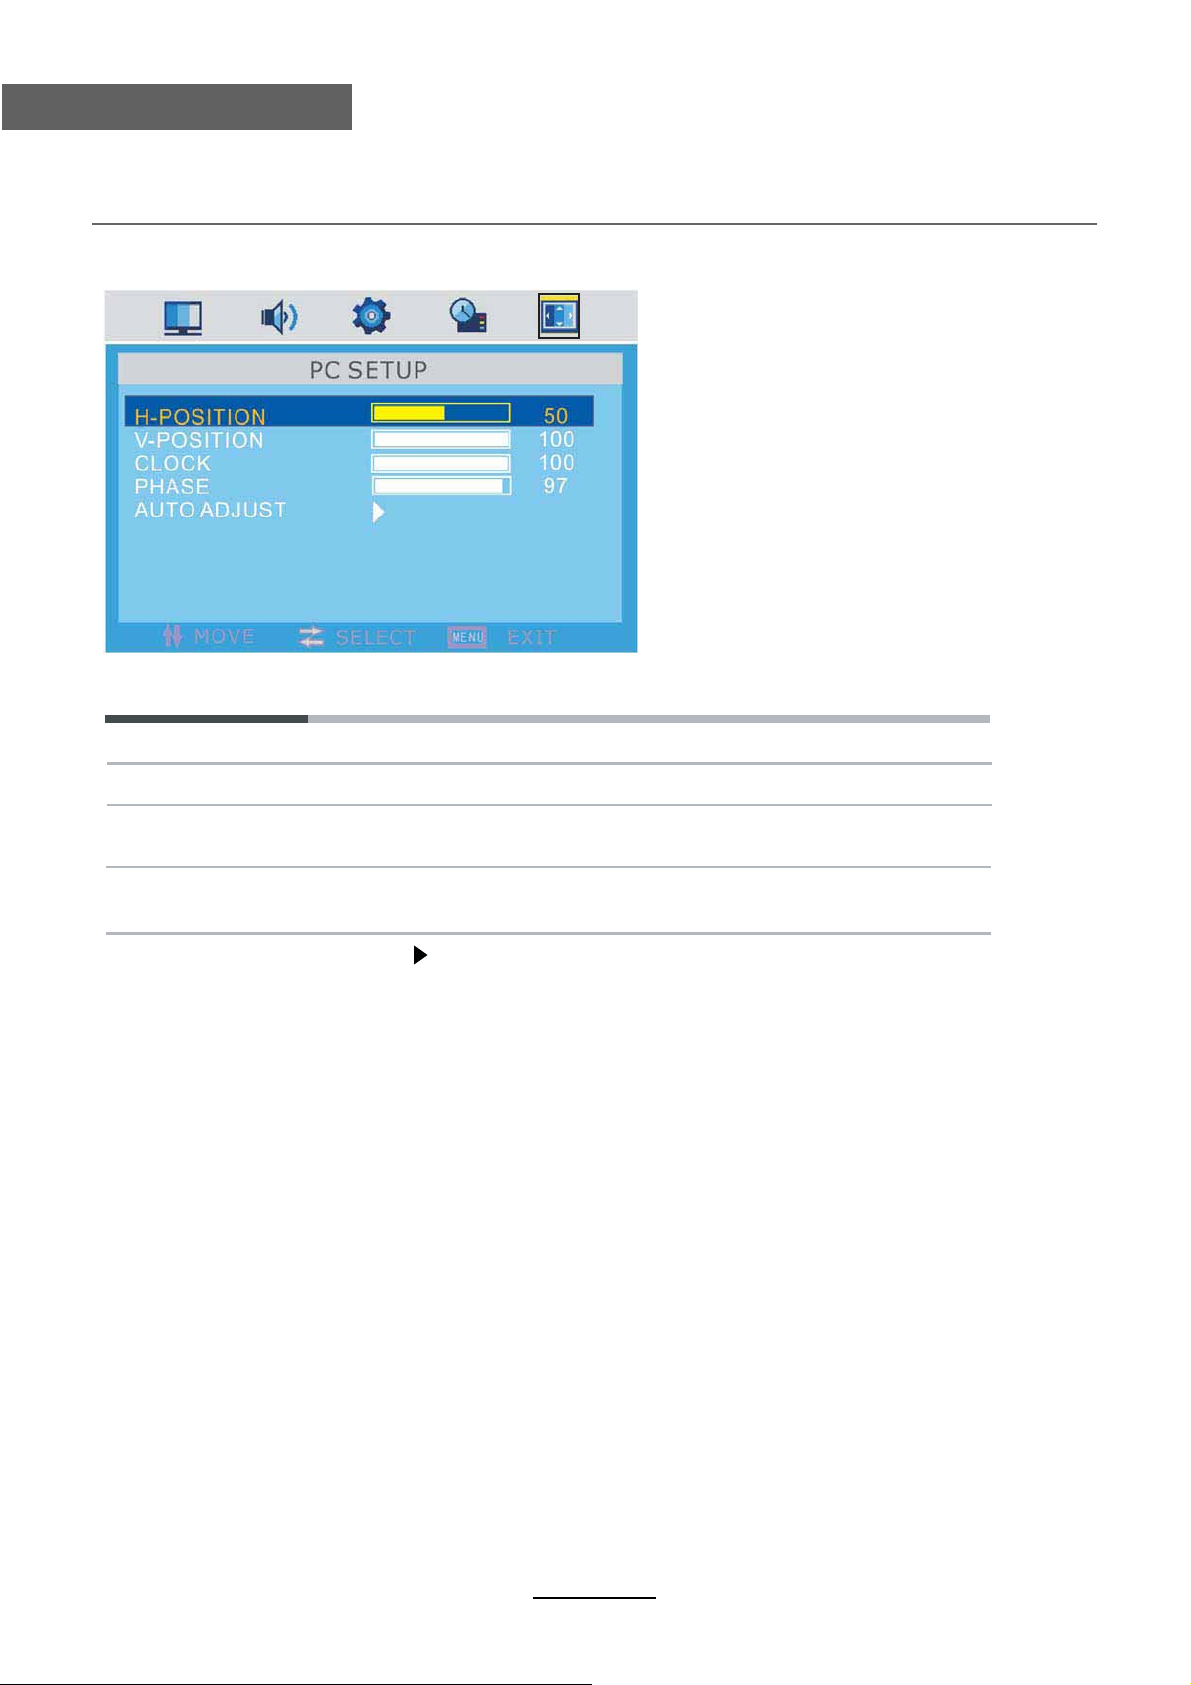
6.PC INSTEL menu
Het PC INSTEL menu geeft de volgende opties.
H-Positie Om de horizontale positie van het scherm in te stellen.
V-Positie Om de verticale positie van het scherm in te stellen.
Klok Om de klokfrequentie in te stellen, zodat het beeld op het
scherm gemaximaliseerd wordt.
Fase Om de fase van de ADC bemonsteringsklok in te stellen volgens
het sync signaal, totdat er een stabiel beeld ontstaat.
Automatisch Druk op om alle parameters automatisch in te stellen.
15
Page 21
DVD bediening
DVD bediening
DVD bediening
Druk op de POWER toets van de TV of de afstandsbediening, druk dan op INPUT om DVD
te selecteren. Als er zich geen disk in het toestel bevindt toont het scherm “NO DISC”.
Breng een disk in de diskgleuf.
Raak de speelzijde van de disk niet aan.
Hou de disk met uw vingers vast aan de rand bij het inbrengen van de disk. De speler trekt
de disk automatisch naar binnen.
Om de disk uit te werpen, druk op de EJECT toets op de TV of op “ ” op de afstandsbediening.
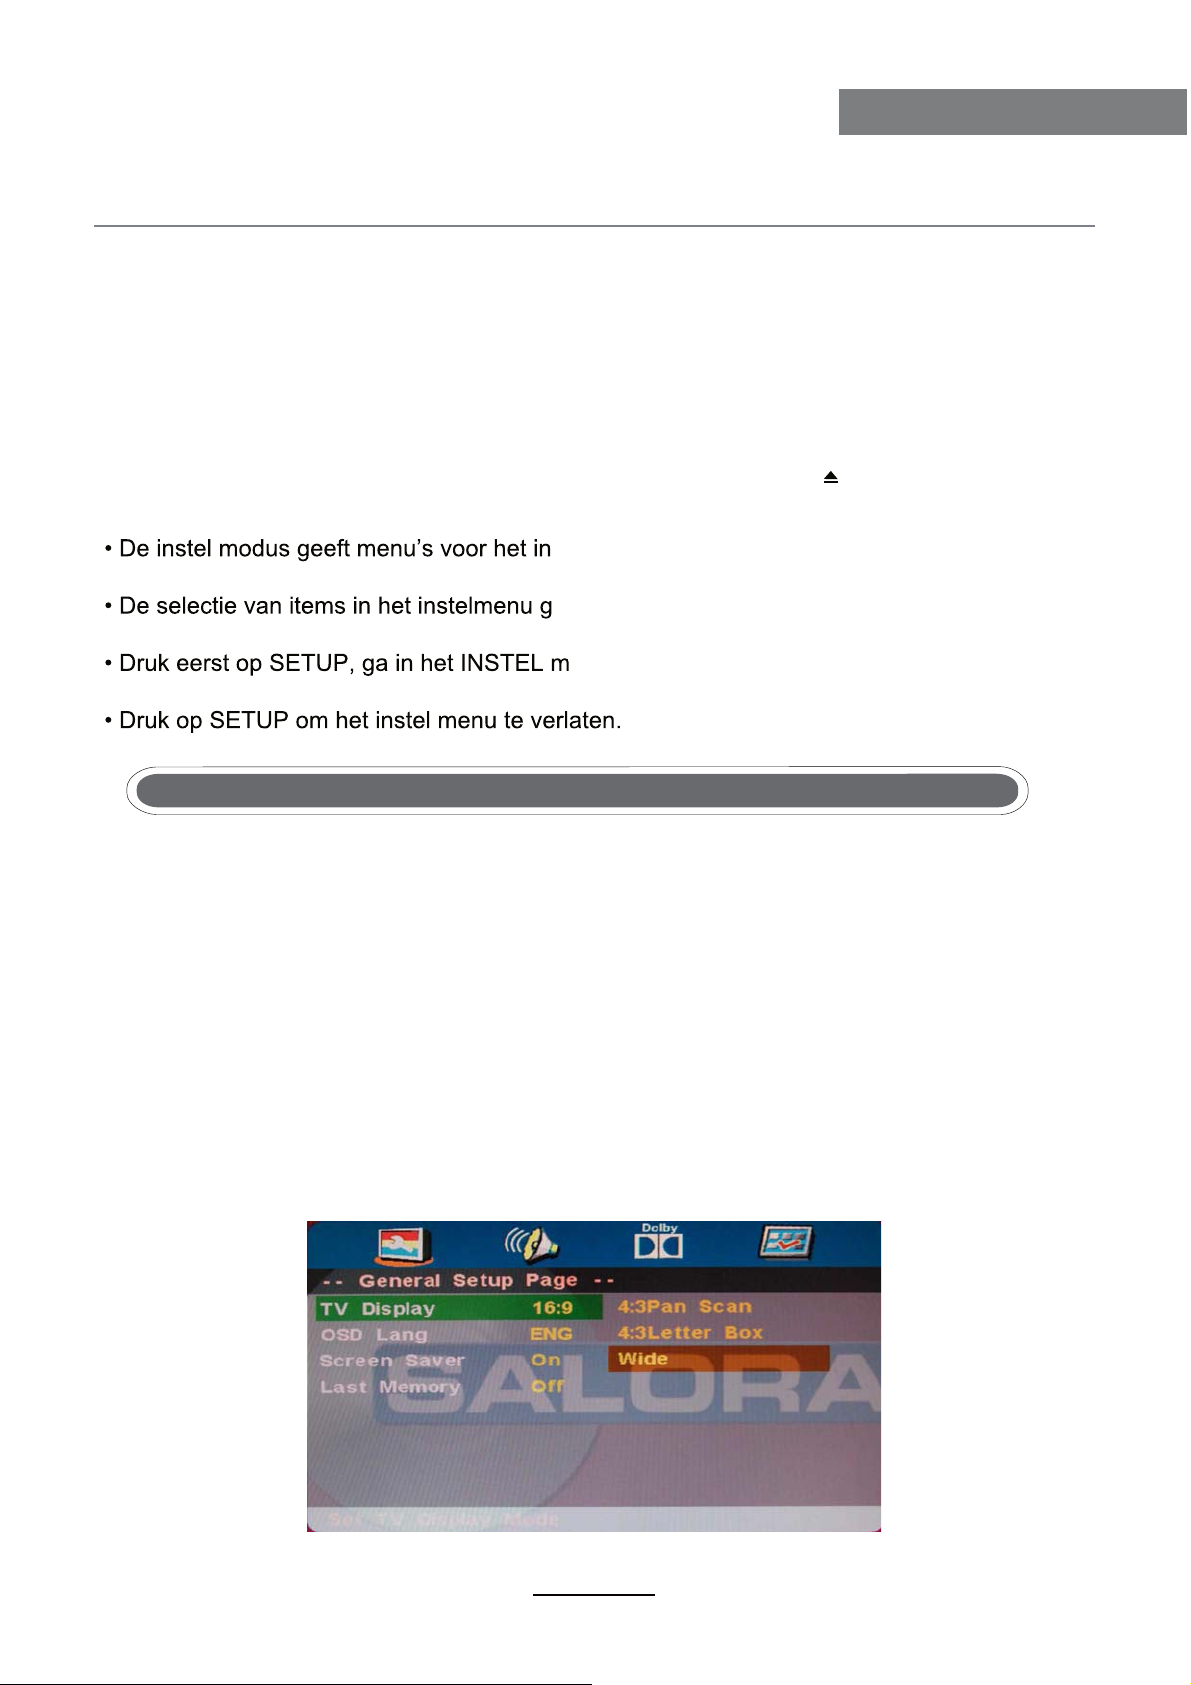
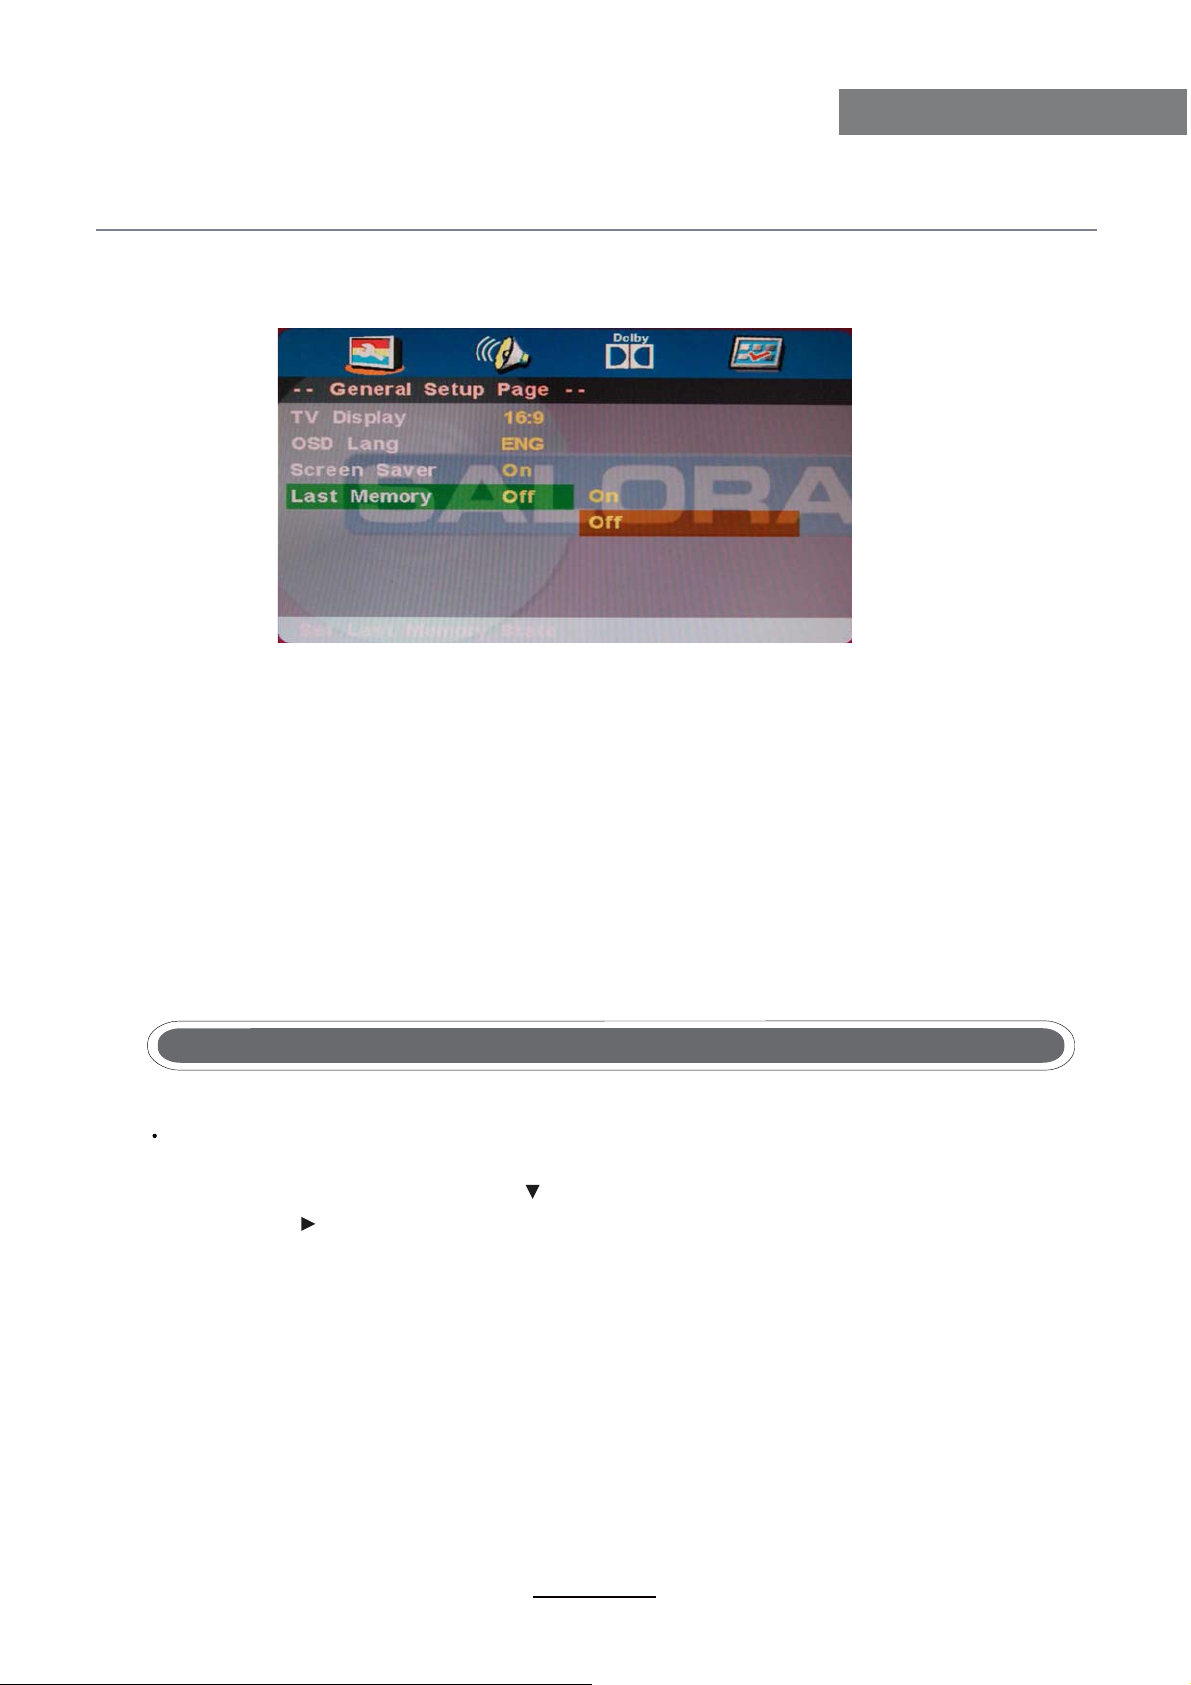
DVD instel modus
stellen van de Algemene Instelpagina, de
Audio instelpagina, Dolby Digital instelling en de Voorkeurpagina.
ebeurt met de pijltoetsen, SETUP toets en
de OK toets.
enu en druk dan op de rechtse pijl om in
het submenu te komen.
TV Scherm
4:3 Pan Scan
Dit kan gekozen worden als de Dvd-speler aangesloten wordt op een normale TV. Breedbeeld
wordt weergegeven, maar sommige delen zijn afgesneden.
4:3 Letter Box
Dit kan gekozen worden als de Dvd-speler aangesloten wordt op een normale TV. Breedbeeld
wordt weergegeven, maar er verschijnen bovenaan en onderaan zwarte stroken.
Breed
Dit kan gekozen worden als de Dvd-speler aangesloten wordt op een breedbeeld TV.
16
Page 22
DVD bediening
DVD bediening
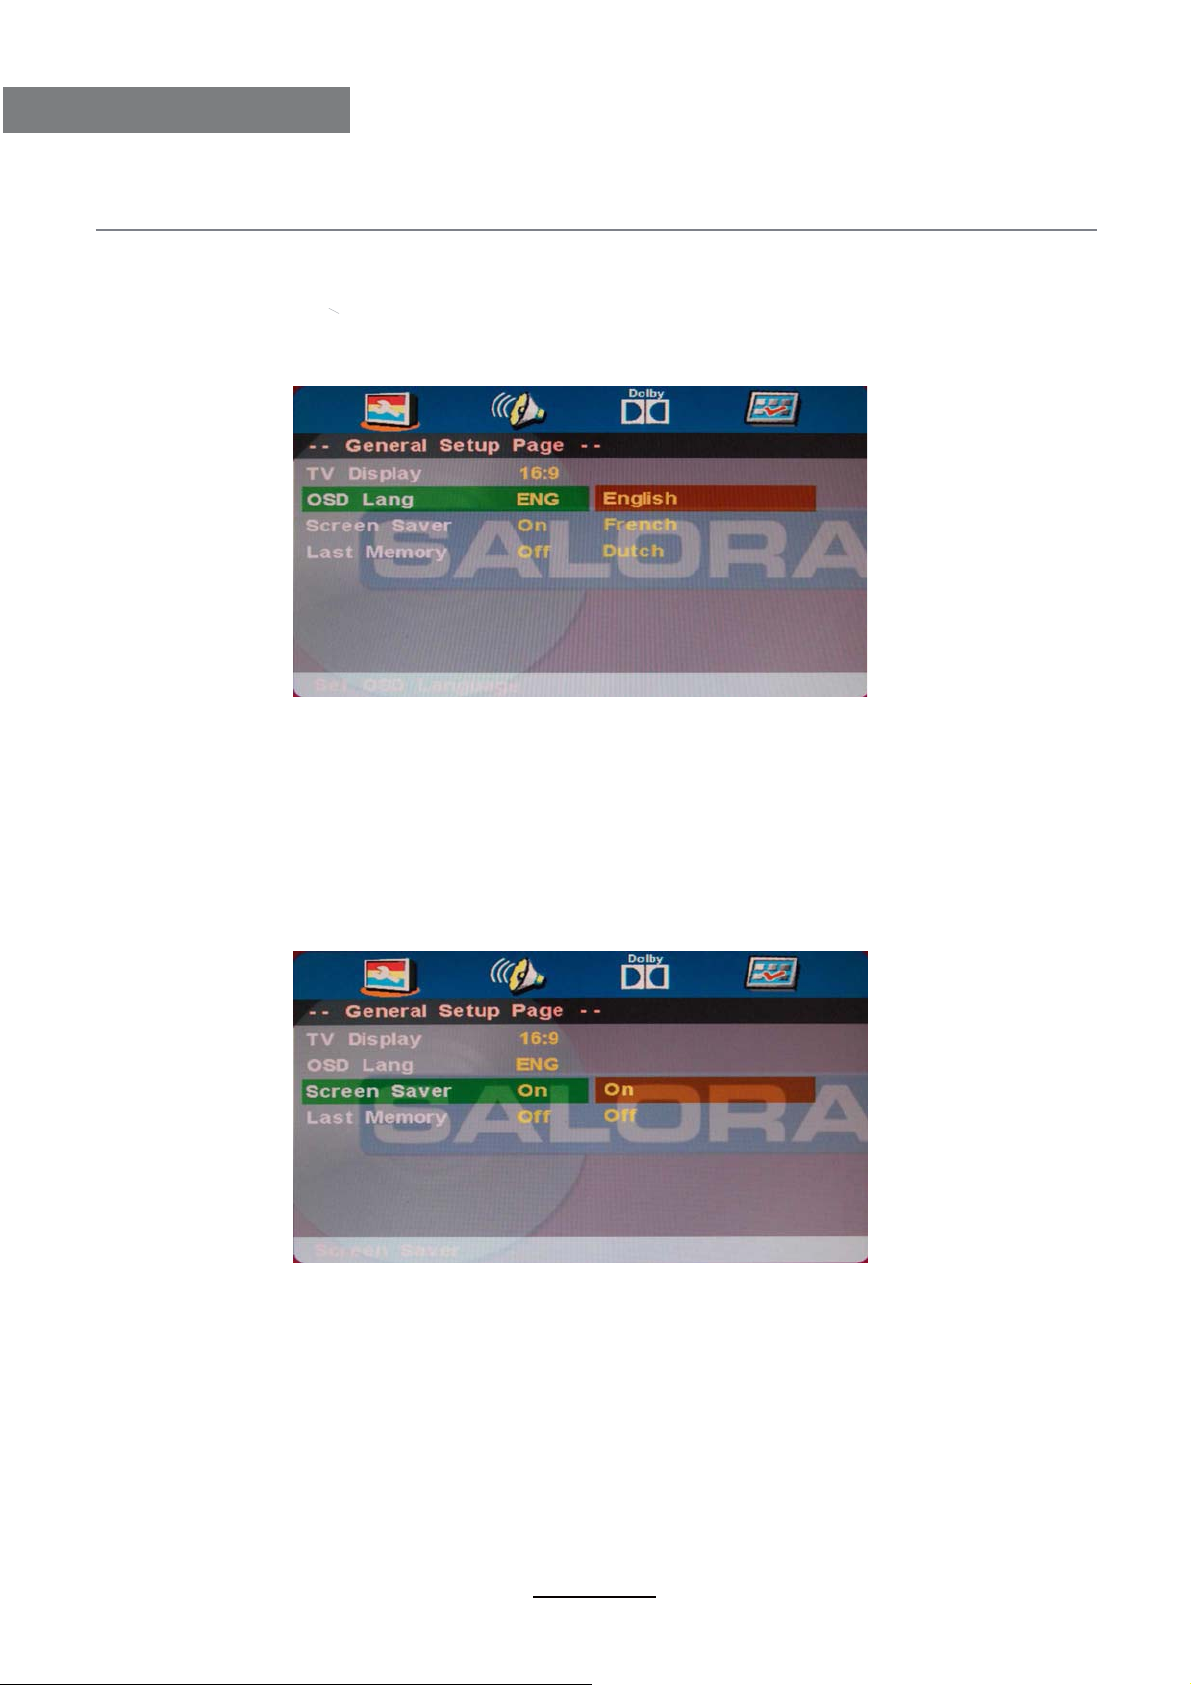
OSD taal
Dit wordt gebruikt om de OSD taal te kiezen.
Screen Saver
De screen saver gaat in actie wanneer de speler stopt of wanneer het beeld
gedurende meerdere minuten bevroren wordt. De screen saver zorgt ervoor
dat het scherm niet beschadigd wordt.
*Aan: de screen saver is ingeschakeld
*Uit: de screen saver is uitgeschakeld.
Laatste geheugen
Er kan gekozen worden voor ‘aan’ of ‘uit’.
*Aan : start het geheugen
*Uit: schakelt het geheugen uit.
17
Page 23
DVD bediening
DVD bediening
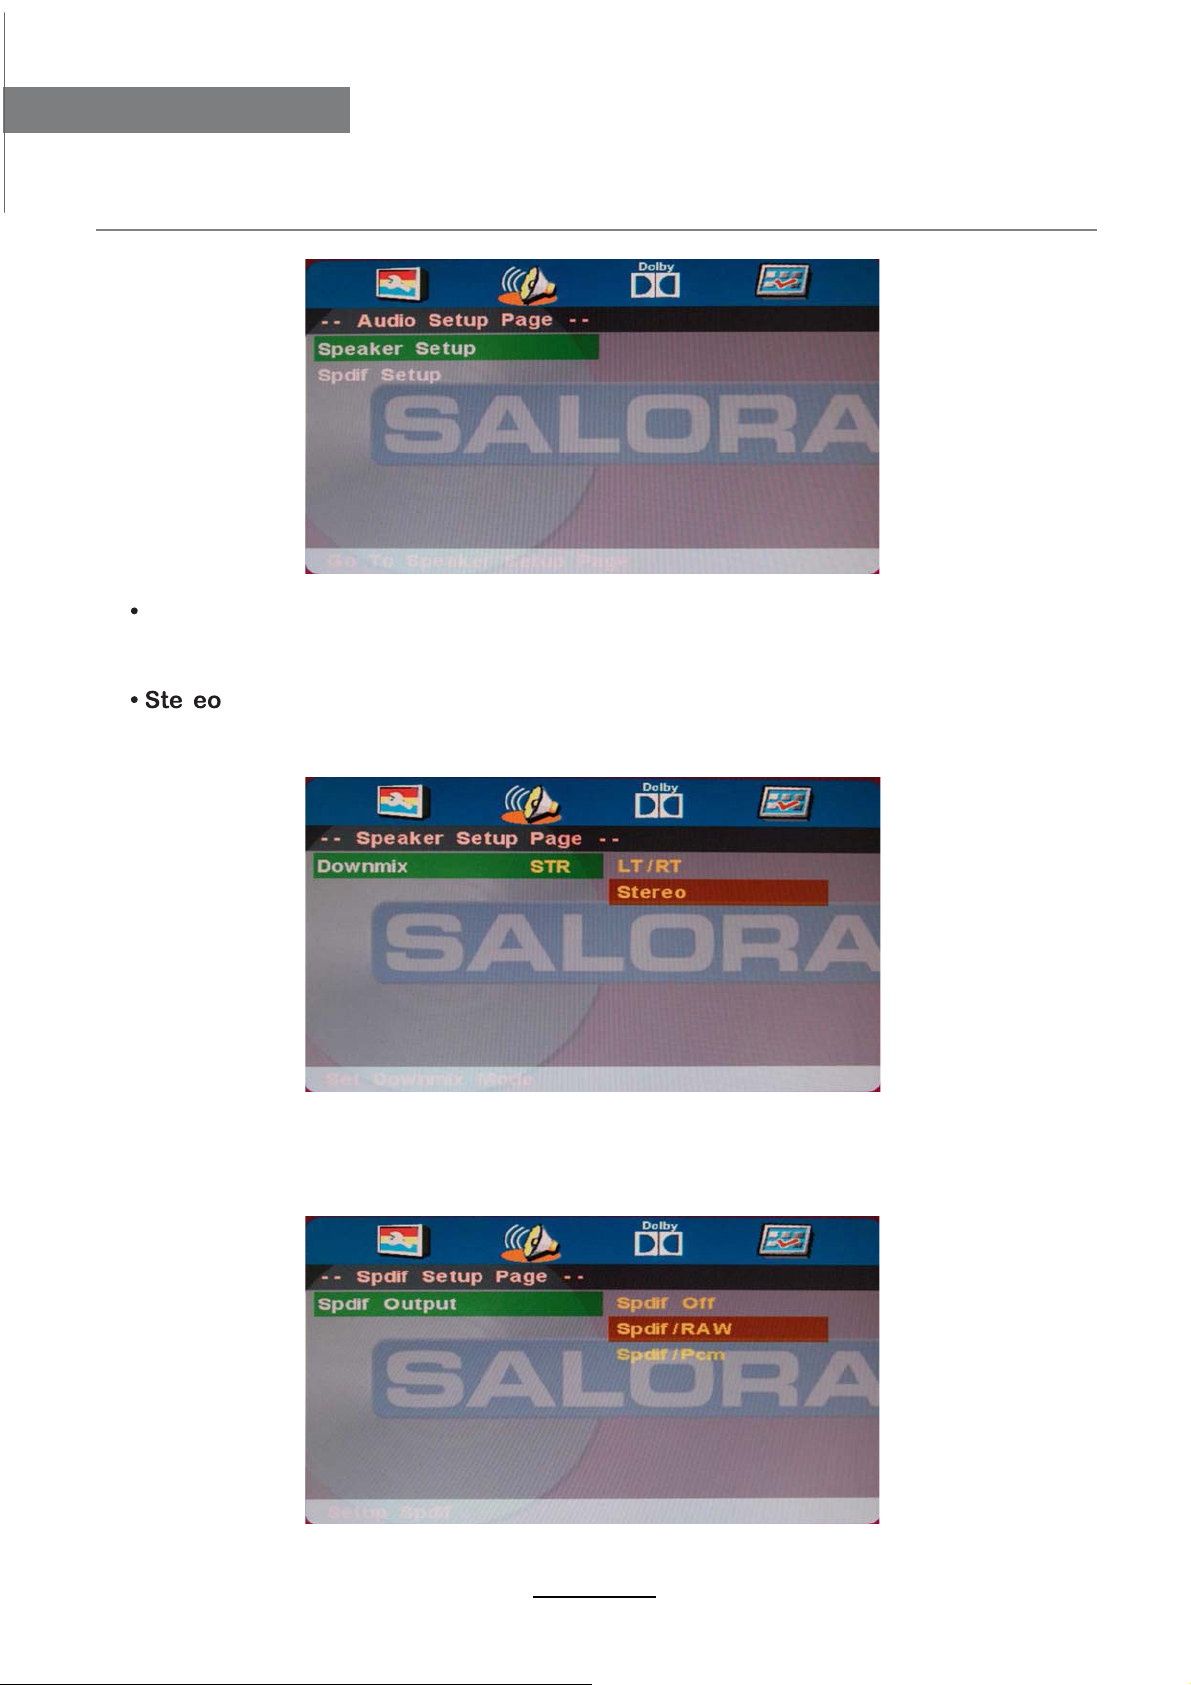
Luidprekerinstelling
In de “Audio instelpagina”, gebruik om ‘luidsprekerinstelling’ te kiezen, druk dan op OK
ENTER of op (weergave) om in de luidspreker instelpagina te komen.
18
Page 24
DVD bediening
DVD bediening
Downmix
LT/RT
Het geluid van een disc met meerdere geluidskanalen wordt teruggebracht naar een
links en rechts kanaal.
r
Het geluid van een disc met meerdere geluidskanalen wordt teruggebracht naar
een stereo signaal.
Spdif uitgang
Er zijn dire optionele audio uitgangsmogelijkheden: SPDIF UIT, SPDIF RAW en SPDIF PCM.
SPDIF RAW wordt gebruikt met versterkers met een ingebouwde digitale decoder.
SPDIF PCM wordt gebruikt met versterkers zonder een ingebouwde digitale decoder.
19
Page 25
DVD bediening
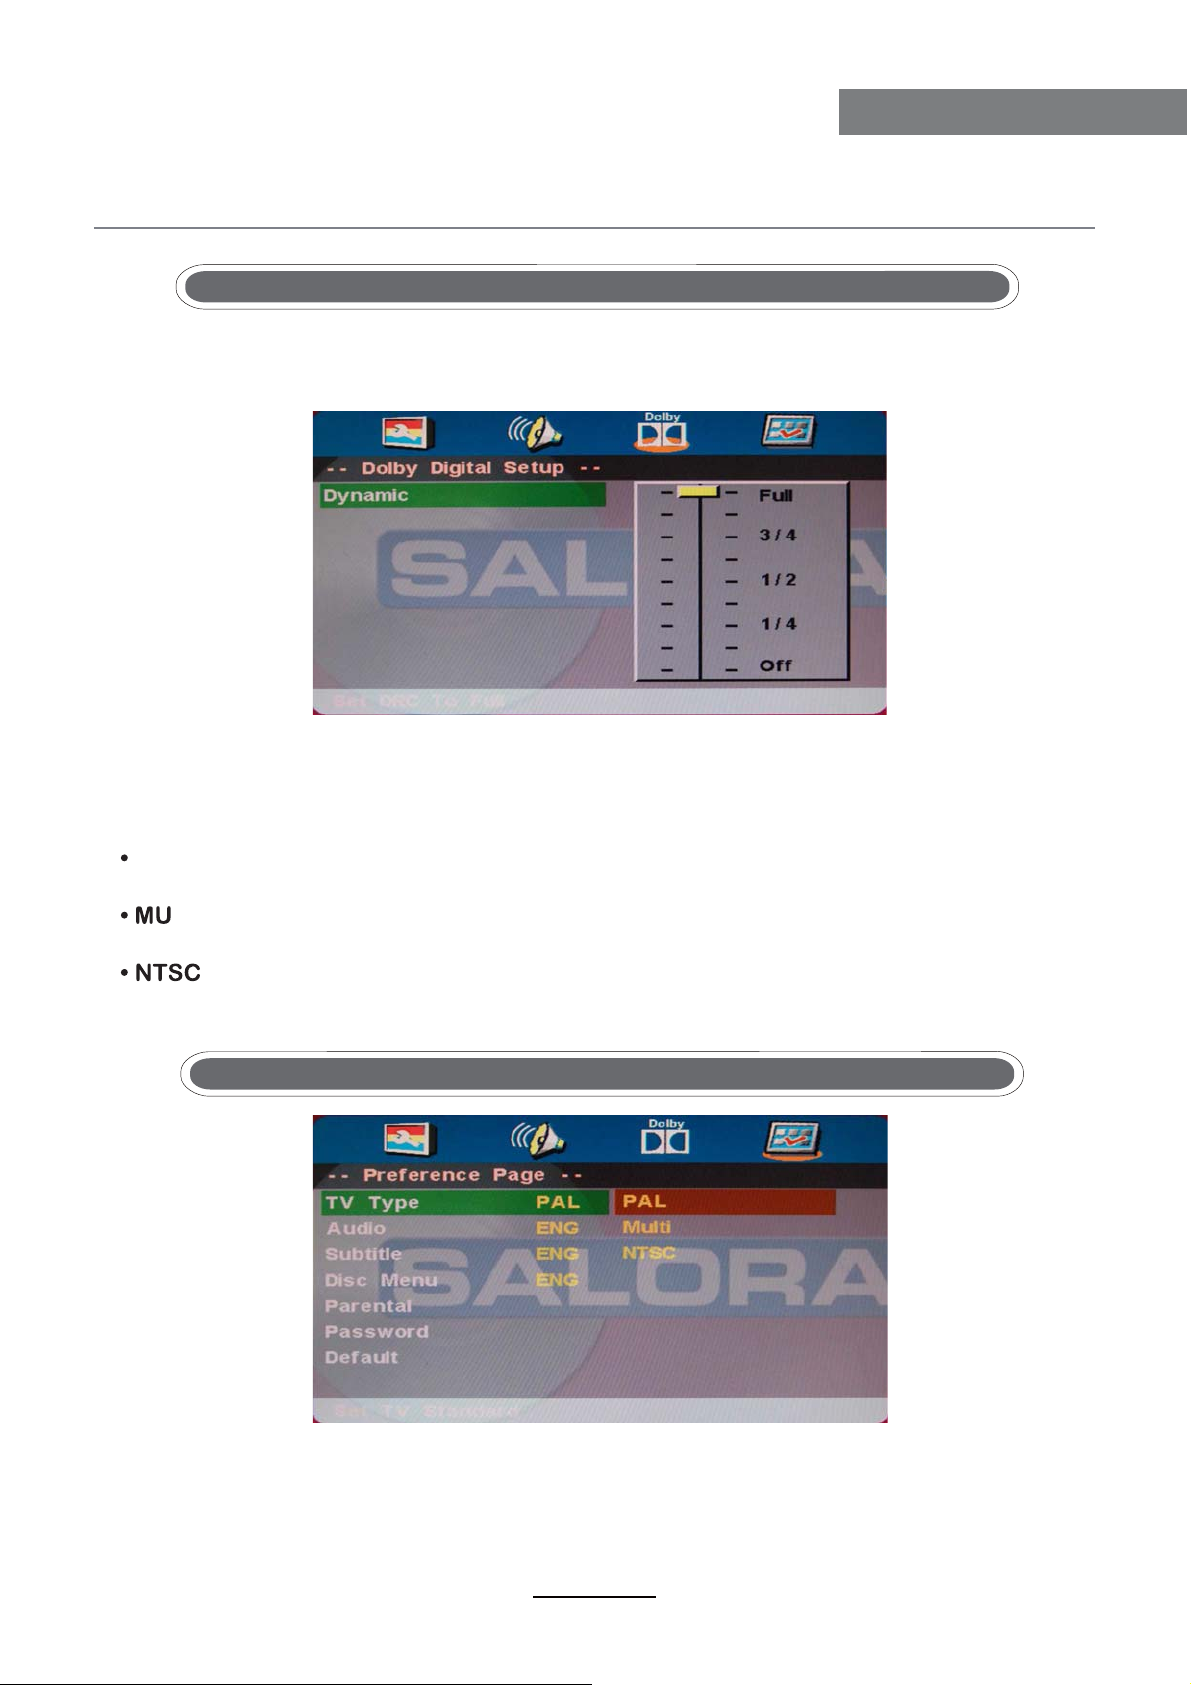
Dolby Digital instelling
Dynamisch
Deze optie wordt gebruikt om de compressie in te stellen die gebruikt wordt bij het
volumecontrast.
DVD bediening
U moet tweemaal op STOP drukken om in de voorkeurpagina te gaan.
TV type
PAL
Kies dit als de speler aangesloten wordt aan een PAL TV
LT I
De speler stelt de TV in volgens het systeem van de disk.
Gebruik dit als de speler aangesloten wordt aan een NTSC TV.
Audio
Als een taal in de lijst op de disk is opgenomen, wordt deze taal gebruikt.
Indien niet, wordt de taal van de disk gebruikt.
20
Page 26
DVD bediening
DVD bediening
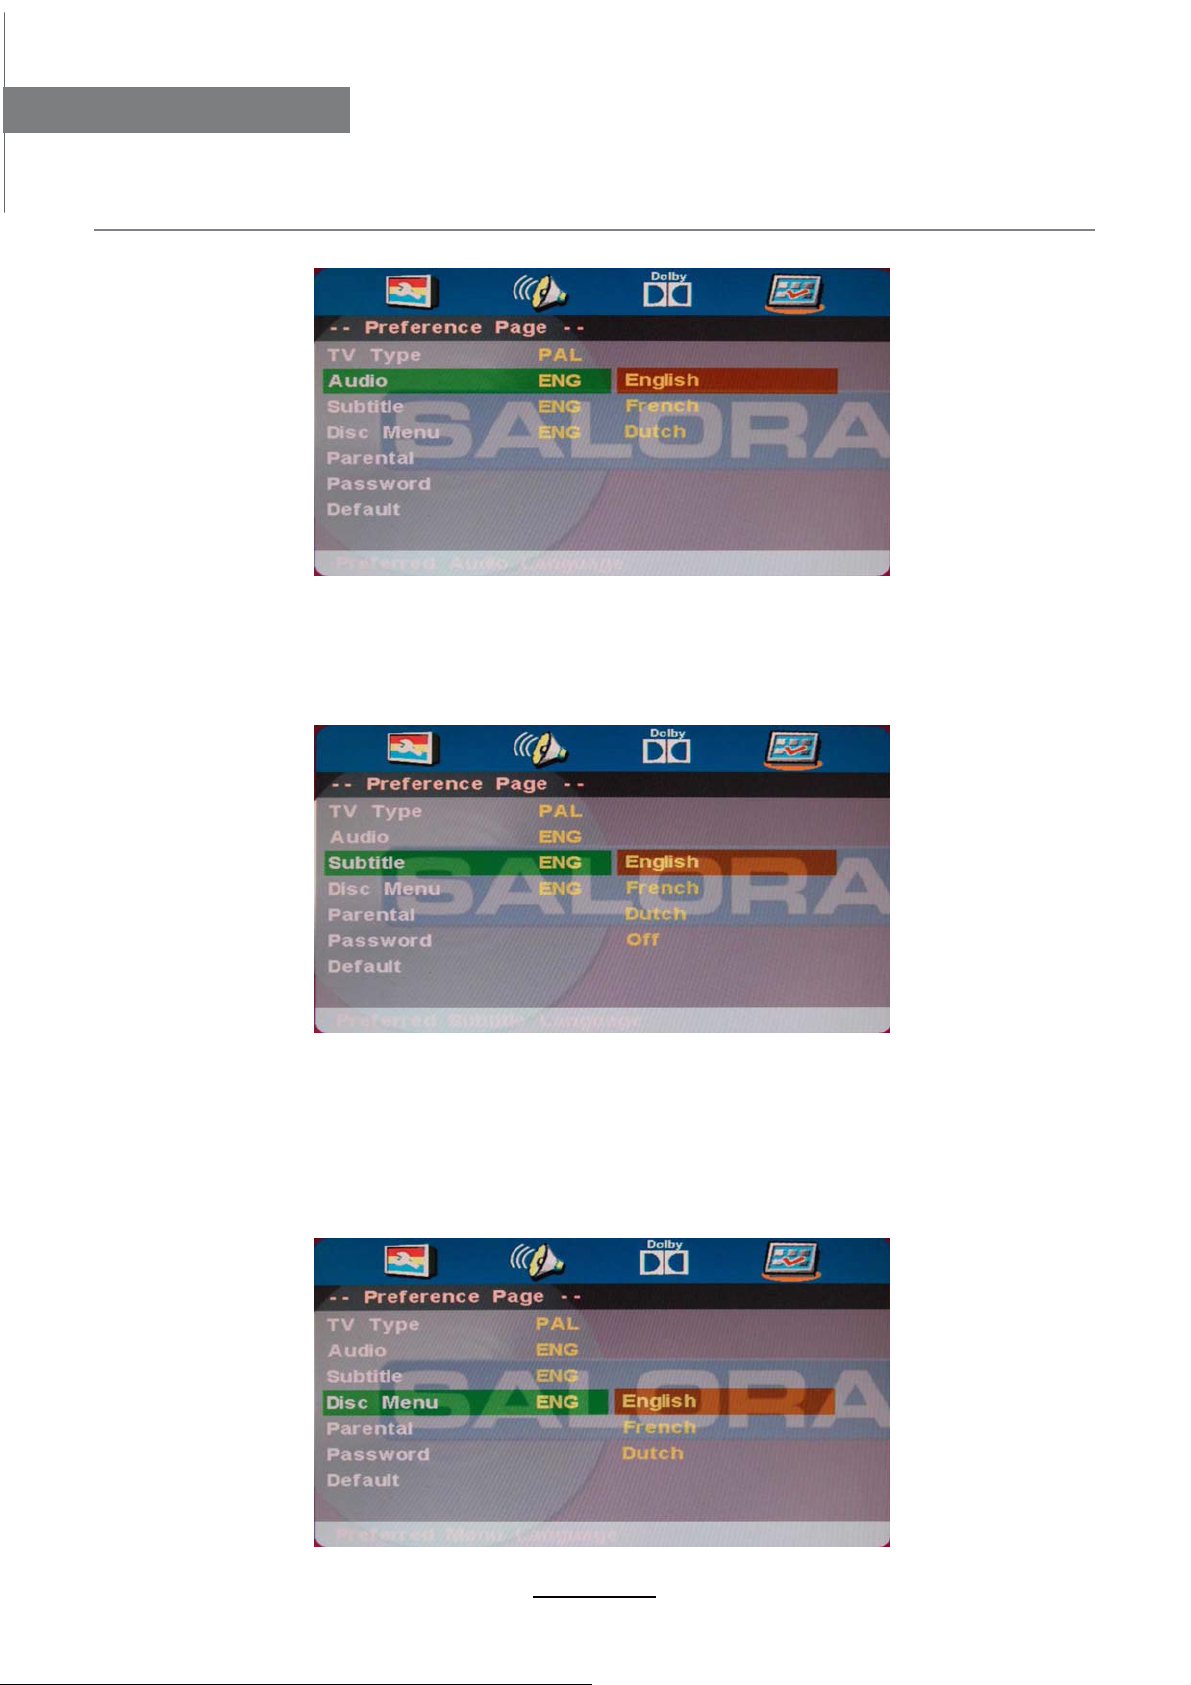
Ondertitels
Als een taal in de lijst op de disk is opgenomen, wordt deze taal gebruikt.
Indien niet, wordt de taal van de disk gebruikt.
Disk menu
Als een taal in de lijst op de disk is opgenomen, wordt deze taal gebruikt.
Indien niet, wordt de taal van de disk gebruikt.
21
Page 27

DVD bediening
DVD bediening
Ouderlijke controle
Bij disks die over een ouderlijke controle beschikken, kan de gebruiker naar eigen wenst het
niveau instellen. Als bijvoorbeeld PG ingesteld is, kan een disk met een hoger niveau dan PG
niet weergegeven worden.
R
VO
aswoord
De gebruiker kan zijn paswoord, dat nodig is om de ouderlijke controle in te stellen, wijzigen.
rd paswoor
22
Page 28

DVD bediening
DVD bediening
Standaard
U kan terug de fabriekswaarden instellen door op de afstandsbediening op RESET en dan
op OK te drukken.
23
Page 29

In geval van problemen
In geval van problemen
Als het toestel niet goed functioneert, gebruik onderstaande lijst om te controleren. Controleer
ook of andere aangesloten apparatuur niet mogelijk de bron van het slecht functioneren is.
Indien dit niet helpt, contacteer dan een service afdeling.
Schakelt niet in
- Controleer de aansluitingen van de TV.
- Druk op de POWER toets van de TV of op de afstandsbediening.
Geen beeld of geluid
- Controleer of de TV op de netstroom is aangesloten en ingeschakeld is.
- Controleer of de antenne aangesloten is.
- Probeer een andere zender.
Slechte beeldkwaliteit
- Controleer de antenneaansluiting
- Controleer of de zender goed is afgestemd.
- Regel de beeldinstellingen: helderheid, kleur, scherpte, contrast.
- Controleer of de TV niet te dicht is geplaatst bij elektrische apparaten die een radio interferentie
kunnen veroorzaken.
Geen kleur
- Regel de kleuren.
- Controleer of de zender in kleur uitzendt.
- Controleer of de zender goed is afgestemd.
TV reageert niet op de afstandsbediening
- Controleer of er zich geen voorwerpen bevinden tussen de TV en de afstandsbediening.
- Controleer of de afstandsbediening binnen het bereik gebruikt wordt.
- Controleer de batterijen in de afstandsbediening.
Deze LED TV is voor huishoudelijk gebruik en veroorzaakt geen schadelijke elektromagnetische
straling. Daarom kan het overal en in residentiële wijken gebruikt worden.
24
Page 30

Page 31

English
Page 32

Page 33

Contents
Contents
Caution
Safety Information
Accessories
Technical Specification
Product Introduction
Front View
Rear View
Connections
Remote Control
Basic Operation
OSD Menu
1. CHANNEL menu
2. PICTURE menu
3. SOUND menu
4. SETTING menu
5. FUNCTION menu
6. PC SETUP menu
1
2
3
3
4
4
4
5
6-7
8
9-16
9-10
11
12
13
14-15
15
DVD Operation
1. General Setup
2. AUDIO Setup
3. Dolby Digital Setup
4. Preference
Simple Troubleshooting
16-23
16-18
18-19
20
20-23
24
Page 34

Caution
Caution
The lightning flash with arrowhead symbol, within an equilateral triangle
is intended to alert the user to the presence of un-insulated “dangerous
voltage” within the products enclosure that may be of sufficient magnitude
to constitute a risk of electric shock to the persons.
The exclamation point within an equilateral triangle is intend to alert the
user to the presence of important operating and maintenance (servicing)
instructions in the literature accompanying the appliance.
Correct disposal of this Product
(Waste Electrical & Electronic Equipment (WEEE)
Your product is designed and manufactured with high quality materials and
components which can be recycled and reused.
This symbol means that electrical and electronic equipment, at their endof-life should be disposed of separately from your household waste.
Please dispose of this equipment at your local community waste collection/
recycling center.
In the USA there are separate collection systems for used electrical and
electronic products. Please help us to conserve the environment we live in!
directives.
1
Page 35

Safety Information
Safety Information
To ensure reliable and safe operation of this equipment, please read carefully all the
instructions in this user guide, especially the safety information below
Electrical safety
• The TV set should only be connected to a mains supply which matches that stated on
the label on the mains adaptor.
• To prevent overload, don't share the same mains supply socket with too many other
items of equipment.
- Do not place any connecting wires where they may be stepped on or tripped over.
- Do not place heavy items on the leads, which may damage them.
- Hold the Mains plug, not the wires, when removing from a socket.
- During a thunderstorm or while leaving the TV for long periods, disconnect the aerial
(if outdoor) and mains adaptor from the supply.
- Do not allow water or moisture to enter the TV or mains adaptor. Do NOT use in wet
or moist areas such as Bathrooms, steamy kitchens or near swimming pools.
• Pull the plug out immediately, and seek professional help if:
- the mains plug or cable is damaged.
- liquid is spilt onto the set, or if it is accidentally exposed to water or moisture.
- anything accidentally penetrates the ventilation slots.
- the set does not work normally.
- Do NOT remove the safety covers. There are no user serviceable parts inside.
You may invalidate the warranty. Qualified personnel only are permitted to service
this apparatus.
- To avoid battery leakage, remove exhausted batteries from the remote control
handset, or when not using for along period.
- Do NOT break open or throw exhausted batteries on a fire.
.
Physical safety
• Do NOT block ventilation slots in the back cover. You may place the TV in a cabinet,
but ensure at least 5cm (2") clearance all around the unit.
• Do NOT tap or shake the TV screen, you may damage the internal circuitry. Take good
care of the remote control, do not drop it or allow it to come into contact with liquids.
• To clean the TV use a soft dry cloth. Do NOT use solvents or petrol based fluids. For
stubborn stains, you may use a damp soft cloth with diluted detergent.
2
Page 36

Accessories & Technical Specification
Accessories
User’s Manual
* Note: The configuration of the components may look different from the following illustration
Remote control
Technical Specification
- TV System
- Screen Size
- Resolution
- Aerial input
- Audio output power
- Power Consumption
Remote Control
PAL, SECAM, NTSC
24 inch(diagonal)
1920x1080
(unbalanced)
75
2x3W
DC 12V 5A 60W
Type
Control distance
Control angle
Batteries
infrared
5m
0
30 (horizontal)
2 x 1.5V, size
3
AAA
Page 37

Product Introduction
Front View
Product Introduction
VOL- VOL+ CH- CH+
INPUT MENU
Insert disc with label side towards back
(EJECT): Eject the disc.
Play/pause the disc playing.(PLAY):
VOL+/-: Adjust the volume.
CH+/-: Scan through channels.
INPUT: Display the input source menu.
MENU: Display/exit the OSD menu.
(POWER): Turn on/standby the TV set.
DVD: Insert a 12cm disc according to the silk.
Remote Control window(keep clear)LED indicator
(IR) Infrared Receiver: Receives IR signals from the remote control.
(Power on/Standby) LED indicator: Press POWER to turn on and off.
Indicator on(Red) Standby mode
Indicator on(Green) Power on mode
The effective receiving range for the signal is 5-8 metres from the front of the remote
0
control window, and 30
to the left or right side and 200 above or below the control
window.
Rear View
Connections
See next page
Wall Mounting
The TV is provided with mounting holes for a VESA approved wallmounting bracket (NOT SUPPLIED).
Remove the Posi screws holding the base to the base bracket and lift the base away (do not remove the
basemounting bracket).Mount the VESA bracket using 4xM4x10mm ISO metric threaded screws (not
supplied). Do not use screws longer than 10mm, it will occur damage to the internal parts. Fit the wall
bracket securely following themanufacturers instructions.
4
Page 38

Connections
Connections
RF: Connect antenna or cable 75 Ohm coaxial to receive TV signal.
Headphone out: Connect it to your headphone or other audio equipment.
USB: USB jack.
YPbPr: Connect them to the YPbPr video output terminal of DVD.
COAX Y PB PR USB Earphone RF
POWER
Coax: Digital coaxial output.
VIDEO R L
HDMI
SCART
PC Audio
POWER: Connect the power cord with DC 12V to this input.
VIDEO: Connect it to video output terminal of DVD.
R/L in: Connect them to the audio output terminal of DVD.(shared with YPbPr)
HDMI: Connect it to the HDMI of DVD or other equipment.
VGA: For PC display.Connect it to the D-Sub 15 pins analog output connector of the PC.
SCART: Connect them to the SCART video output terminal of DVD.
Connect it to the audio output terminal of PC.PC Audio:
5
Page 39

Remote Control
Remote Control
The remote control is using Infra-Red(IR). Point it towards the front of the LED TV. The remote
control may not work correctly if it is operated out of range or out of angle.
1
STANDBY:
2
AUTO:
3
MUTE:
4
P.MODE:
5
S.MODE:
DISPLAY:
6
7
ASPECT:
8
0~9,10+:
Auto adjust the picture screen on the TV in PC mode.
Press this button to select the desired picture mode.
Press this button to select the desired sound mode.
display the current mode.
Adjust picture size.
10+
9
NICAM:
10
MENU:
11
EXIT:
12
SLEEP:
13
INPUT:
14
OK:
CH+/-:
15
16
VOL+/-:
17
FAV:
19
STEP:
20
SUBTITLE:
21
TEXT:
22
INDEX:
23
HOLD:
24
MIX:
25
CANCEL:
26
SIZE:
Press to select TV sound.
Exit from the current menu.
:
Dispaly the favorite program list.
Play program frame by frame in media mode.
To show the Electronic Program Guide during
no-menu state only.
Switch the teletext on or 0ff.
Switch the teletext on or 0ff.
27
REVEAL:
28
SUBPAGE:
6
Page 40

RemoteControl
RemoteControl
2
9
AUDIO:
17
TITLE:
18
ANGLE:
Change the DVD audio mode:left,right,mono,stereo.
21
D.MENU:
22
D.SETUP:
23
24
25
26
27
28
29
A-B:
30
PROG:
31
REPEAT:
32
GOTO:
DVD start palying from the desired time. Press time
and enter time. The unit starts playing from you selected.
Dispaly the DVD MENU.
Dispaly the DVD SETUP menu.
To selsct the DVD progran playback.
Repeat playback the DVD play.
7
Page 41

Basic Operation
Power on/off
1. Connect to the power supply with the power cord and turn on the switch.
2. -To turn on the TV
Press POWER button on the TV or remote control.
-To turn off the TV
Press POWER button on the TV or remote control.
Input Source select
Press INPUT button on the TV set or remote control to display input
source menu, and use CH+/- button on the TV set or remote control
to select the input source, press OK button on the remote control to
enter.
Note: Before you select the input source, make sure the
connections are prepared.
First Time Installation
Basic Operation
SOURCE
TV
AV
SCART
YPBPR
VGA
HDMI
DVD
When you initially turn on the TV you will see the first time
Installation menu, and you could search the progeams
immediately according to the hints.
Basic OSD Menu operation
Press MENU(SYS-MENU) button to display the OSD menu as below:
Main menu
Picture
Sound
Channels
Enterainment
Locks
Setup
Submenu
(Video menu
for example)
Hint---you should operate the OSD menu according to the hint.
Use /
In the submenu, use (CH+/-)
adjust, or press button to enter the option menu.
* (Press MENU(SYS-MENU) button to return to the upper menu.)
* (Press SYS-EXIT button to exit the menu display.)
Note1: Only when you input the suitable signal or on the suitable mode, the relevant
items can be activated
Note2: Please operating the OSD menu according to hint on the bottom of the banner.
button to select the main menu, and press (CH-) button to enter the submenu.
/
button to select the function item, press button to select/
8
/
Page 42

OSD Menu
OSD Menu
1. CHANNEL menu
Description
Auto Search Press button to start auto search.
Auto Search menu for TV
TV
Manual Program Press button to enter the submenu.
Manual Program menu for TV
Program Select the program you want to edit.
Color Sys. Select the color system for the program you want to edit.
Sound Sys. Select the sound system for the program you want to edit.
Manual Search Use and button to manual search.
AFT Turn on/off the Auto Frequency Tuning function for Manual Search.
Fine Use and button to fine-tune.
Skip Select “Yes” to skip the program when you scan the programs by
CH+/-.
9
Page 43

OSD Menu
Program Edit: Press button to enter the submenu as the following picture.
Program Edit menu for TV
DELETE
FAV
NAME: Select the channel, press RED button on the remote control to change the name of
the channel.
(Use button to name, and press OK button to confirm)
DELETE: Press GREEN key to delete current channel.
INSERT: Select a channel you want to insert,
press YELLOW button, then select the position,
press GREEN button to insert, or you could
press RED button to cancel the option.
FAV: Press FAV key to set your favorable channel.
OSD Menu
10
Page 44

OSD Menu
OSD Menu
2. PICTURE menu
Picture Mode
Note: Contrast, Brightness, Color and Sharpness can only be adjusted in the
Personal mode option in the Picture Mode Settings.
Contrast Controls the difference between the brightest and darkest regions of
the picture.
Brightness Controls the overall brightness of the picture
Color Control the color.
Sharpness
Tint Controls the tint ( NTSC mode only).
Color Temp.
Noise Reduction
Choose from Standard, Movie, Vivid and Personal.
Increase this setting to see crisp edges in the picture; decrease it for
soft edges .
Choose from Normal, Cool, and Warm.
Reduce any interference noise by selecting “ON”.
(Can be selected in ATV mode).
11
Page 45

OSD Menu
3. SOUND menu
OSD Menu
Sound Mode Allows you to select among: Standard, Music, Movie and Personal.
Bass (Can be adjusted when the sound mode is set to User)
Controls the relative intensity of lower pitched sounds.
Treble (Can be adjusted when the sound mode is set to User)
Controls the relative intensity of higher pitched sounds.
Balance To adjust the balance of the left and right sound track, or turn off the
volume of the left and right sound track.
AVL Control the volume of the program automatically when you turn on the
function by selecting “On”.
12
Page 46

OSD Menu
OSD Menu
4. SETTING menu
The SETTING menu includes the following options:
Language Allows you to select menu language.
OSD Timer Allows you to select the time for OSD menu displays on the
screen.
Transparence Allows you to select the transparence for OSD menu
displays on the screen.
Overscan
Reset Press button to restore factory default.
Turn on/off the overscan funciton.
(Can be selected in HDMI mode )
13
Page 47

OSD Menu
5. FUNCTION menu
AUTO SLEEP 4H
DLC OFF
OSD Menu
The FUNCTION menu includes the following options :
Sleep Timer
Auto Sleep Turn on/off the auto standby function when where’s no signal.
Aspect Allows you to select the screen display mode.
TT Language Allows you to select the Teletext language.
Blue Screen Turn on the blue screen display in no signal state by selecting “ON”
DLC
Allows you to setup the sleep timer to : 15min, 30min, 45min,
60min, 75min, 90min,105min, 120min and off.
(Can be selected in TV mode)
(Can be selected in TV mode)
(Can be selected in TV mode)
Dynamic Luminance control ON/OFF.
14
Page 48

OSD Menu
OSD Menu
6. PC SETUP menu
The PC SETUP menu includes the following options :
H-Position
V-Position Adjust the vertical position of the screen.
Clock Adjust the pixel clock frequency, until the image size is maximized
Phase Adjust the phase of the ADC sampling clock relative to the sync
Auto Adjust Press button to setup the parameter of the screen automatically.
Adjust the transverse position of the screen.
for the screen.
signal, until a stable image is obtained.
15
Page 49

DVD Operation
DVD Operation
Press the Power button on the TV or the remote control, then press the INPUT button to select DVD mode.
If there is no disc in the DVD player the screen will show "NO DISC".
Insert Disc according to picture next to disc slot.
Do not touch the playing surface.
Hold the disc around the outside with your fingers and place the disc into the slot. The player will
automatically draw the disc into the player.
To "Eject" the disc, press the EJECT button on the TV or the " " button on the remote control.
Audio
TV Display
4:3 Pan Scan
This is selected when the DVD player is connected to a normal TV. Wide-screen images are shown
on the screen,but with some parts cut automatically.
4:3 Letter Box
This is selected when the player is connected to a normal TV. Wide-screen images are shown on the
screen,with black belt on the top and bottom.
Wide
This is selected when the player is connected to a wide-screen TV.
16
Page 50

DVD Operation
DVD Operation
17
Page 51

DVD Operation
DVD Operation
18
Page 52

DVD Operation
DVD Operation
Spdif Output
There are 3 optional audio output modes: SPDIF OFF, SPDIF / RAW, and SPDIF / PCM, SPDIF / RAW
is for amplifiers with a built in digital decoder SPDIF / PCM is selected for amplifiers with no built in
digital decoder.
19
Page 53

DVD Operation
DVD Operation
or NO disc
20
Page 54

DVD Operation
DVD Operation
21
Page 55

DVD Operation
DVD Operation
22
Page 56

DVD Operation
DVD Operation
23
Page 57

Simple Troubleshooting
Simple Troubleshooting
If the display fails or performance dramatically deteriorates check the Display in accordance
with the following instructions.Remember to check the peripherals topinpiont the source of the
failure.
If the display still fails to perform as expected,connect your helpline for assistance.
No power
- Check all connections to the TV.
- Press either the power button or the Standby button on the Remote control.
No picture or sound
- Ensure that the TV is plugged in and the power is on.
- Ensure that the aerial is connected.
- Try a different program.
Poor picture quality
- Check the aerial connections.
- Check that the channel is tuned in properly.
- Adjust the picture settings:brightness,color,sharpness,contrast,hue.
- Make sure that the TV is not located close to electrical appliances that may emit radio
frequency interference.
No colour
- Adjust the color setting.
- Check that the programme is broadcast in color.
- Check that the channel is tuned properly.
TV does not respond to remote control
- Check that there are no obstructions between the remote control and the unit.
- Check that the remote control is within range of the unit.
- Check that the batteries in the remote control and not weak or exhausted.
This LED TV is for household use and registered as harmless on electromagnetic waves.
Therefor,you can use it in every location as well as residential areas.
24
Page 58

Page 59

Française
Page 60

Page 61

Sommaire
Sommaire
Attention
Informations de sécurité
Accéssoires
Spécifications techniques
Introduction du produit
Panneau frontal
Panneau arrière
Connexions
Télécommande
Opérations de base
Menu OSD
1. Menu EMETTEURS
2. Menu IMAGE
3. Menu SON
4. Menu REGLAGES
5. Menu FONCTIONS
6. Menu REGLAGES PC
1
2
3
3
4
4
4
5
6-7
8
9-15
9-10
11
12
13
14-15
15
Opération DVD
1. Réglage général
2. Réglage AUDIO
3. Réglage Dolby Digital
4. Préférences
En cas de problèmes
16-23
16-18
18-19
20
20-23
24
Page 62

Attention
Attention
Le symbole éclair dans un triangle isocèle sert à prévenir l’utilisateur
qu’à l’intérieur de l’appareil se trouvent des hauts voltages non isolés
avec une puissance assez élévée pour former un risque de choc
électrique pour les personnes.
Le point d’exlamation dans un triangle isocèle sert à prévenir l’utilisateur
que des instructions d’opération et d’entretiens importantes sont livrées
avec l’appareil.
Enlèvement correct de ce produit
(Déchets d’Equipement Electrique et Electronique – DEEE)
Votre appareil a été développé et fabriqué avec des matériaux et des
composants qui peuvent être recyclés et réutilisés.
Ce symbole signifie que les appareils électriques ou électroniques ne peuvent pas,
à la fin de leur vie, être déposés avec les autres déchets domestiques.
Déposez l’appareil au centre de collecte ou de recyclage.
Il existe des systèmes de collecte spécials pour les appareils
électriques et électroniques. Aidez à conserver l’environnement.
Cet appareil est compatible avec les directives européennes de
sécurité et d’interférence électrique.
Cet appareil est un produit laser ‘CLASS 1’. Ce produit utilise un laser visible
qui peut causer une radiation dangereuse. Assurez-vous que l’appareil est
utilisé comme indiqué. Ne l’ouvrez pas et ne regardez pas dans le tiroir DVD
quand l’appareil est en fonction. NE changez pas les contrôles qui peuvent
influencer les émissions laser. Consultez un spécialiste quand l’appareil ne
fonctionne pas bien.
1
Page 63

Informations de sécurité
Informations de sécurité
Pour assurer une opération correcte de l’appareil, lisez les instructions dans ce manuel
d’utilisation et spécialement les informations ci-dessous.
Sécurité électrique
v Le TV doit être connecté à la prise courant secteur qui correspond avec celui marqué
sur le label de l’appareil.
.
Afin de prévenir une surcharge, ne connectez pas trop d’appareils à la même prise
v
courant secteur.
- Faites attention qu’on ne peut pas marcher sur les câbles de connexion.
- Ne mettez pas des objets lourds sur les câbles.
- Tirez à la prise, jamais au câble.
- Déconnectez le courant secteur et l’antenne en cas d’orage ou quand l’appareil
n’est pas utilisé pendant un certain temps.
- Ne laissez pas pénétrer de l’eau ou des liquides dans le TV ou l’adaptateur courant
secteur.N’utilisez PAS l’appareil dans des environs humides tels que salle de bain,
cuisine ou à côté d’une piscine
v Retirez immédiatement la prise courant secteur dans les cas suivants :
- quand le câble courant secteur ou la prise est endommagé
- quand l’appareil a été exposé à l’eau ou une liquide
- quand un objet a pénétré les ouvertures de ventilation
- quand l’appareil ne fonctionne pas normalement
- N’ouvres PAS l’appareil. Il n’y a pas des fonctions d’utilisation à l’intérieur
de l’appareil. Ceci peut annuler la garantie. Uniquement des personnes qualifiées
peuvent réparer l’appareil.
- Afin d’éviter des fuites des piles, enlevez les anciennes piles de la télécommande
ou quand vous n’utilisez pas la télécommande pendant un certain temps.
- N’ouvres pas les anciennes piles et ne les jettez pas dans un feu.
Sécurité physique
v6MJTWKY]MbXI[TM[W]^MZ\]ZM[LM^MV\QTI\QWV[]ZTMXIVVMI]IZZQÇZMLMTsIXXIZMQT
Si vous placez l’appareil dans une armoire, faites attention qu’il y a une espace libre
de 5 cm autour de l’appareil.
Ne soucuez pas l’écran TV car ceci peut endommager le circuit interne. Soignez
v
bien la télécommande, ne le laissez pas tomber et évitez les liquides.
v=\QTQ[Mb]VKPQNNWVLW]`M\[MKXW]ZVsÈ\\WaMZTsIXXIZMQT6MXI[]\QTQ[MZLM[[WT^MV\[
ou des produits sur base de pétrole. Utilisez un chiffon avec un détergent pour enlevez
des taches plus dures.
2
Page 64

Accéssoires et spécifications techniques
Accéssoires et spécifications techniques
Manuel d’utilisation Télécommande
*Remarque : les accéssoires peuvent avoir un design différent des illustrations.
Spécifications techniques
- Système TV
- Format écran
- Résolution
- Entrée antenne
- Puissance de sortie
- Consommation
Télécommande
Type
Distance d’opération
Angle d’opération
PAL, SECAM, NTSC
24 pouces (diagonal)
1920x1080
(non balancé)
75
2x3W
DC 12V 5A 60W
infrarouges
5m
0
30 (horizontal)
Piles
2 x 1.5 V, format
3
AAA
Page 65

Introduction du produit
Panneau frontal
Introduction du produit
éjecter le disque.
lecture/pause du disque.
réglage du volume.
appeler les émetteurs.
affichage du menu de la source.
ouvrir/fermer le menu OSD.
en/hors fonction du TV.
Indicateur LED
VOL- VOL+ CH- CH+
INPUT MENU
Insert disc with label side towards back
(EJECT):
(PLAY):
VOL+/-:
CH+/-:
INPUT:
MENU:
(POWER):
DVD:ouverture pour insérer le disque 12 cm.
Récepteur télécommande (laisser libre)
(IR)récepteur infrarouges: Reçoit les signaux de la télécommande.
(Power on/Standby) indicateur LED : poussez POWER pour mettre en/hors fonction.
Indicateur (Rouge) Mode stand-by
Indicateur (Vert) En fonction
La distance d’opération de la télécommande est 5-8 mètres en face du récepteur à
infrarouges et sous un angle de 30° vers la gauche ou la droite et 20° vers le haut.
Connexions
Voyez page suivante
Montage au mur
Le TV est fourni avec des ouvertures pour une fixation murale approuvée VESA (PAS FOURNI).
Montez la fixation murale avec des vis VESA 4xM4x10mm ISO (non livrés).
N’utilisez pas des vis plus long que 10 mm, car ceci peut endommager les composants internes.
Montez la fixation murale selon les instructions du fabricant.
4
Page 66

Connexions
Connexions
Connexion pour antenne 75 ohms coaxiale.
RF:
Headphone out:
Connexion pour casque d’écoute.
USB: Prise USB.
Connexion pour sortie YpbPr d’un lecteur DVD.
Sortie digitale coaxiale.
HDMI
SCART
PC Audio
COAX Y PB PR USB Earphone RF
POWER
VIDEO R L
YPbPr:
Coax:
POWER: Branchez le cordon d'alimentation en courant continu 12V à cette entrée.
VIDEO:
Connexion pour sortie vidéo d’un lecteur DVD.
R/L in:
HDMI:
VGA:
SCART:
Connexions pour sortie audio d’un lecteur DVD (ensemble avec YpbPr).
Connexion pour sortie HDMI d’un lecteur DVD ou autre équipement.
Connexion pour sortie D-Sub 15 pins d’un PC.
Connexion pour sortie SCART d’un lecteur DVD.
PC Audio:
Connexion pour sortie audio d’un PC.
5
Page 67

Télécommande
Télécommande
La télécommande utilise des signaux infrarouges (IR). Dirigez la vers le panneau frontal du TV.
La télécommande ne peut pas bien fonctionner en dehors de la rangée d’opération
(distance et angle).
1
STANDBY:
2
Ajustement automatique de l'écran image sur le
AUTO:
téléviseur en mode PC.
3
MUTE:
4
P.MODE:
Appuyez sur ce bouton pour sélectionner le
mode souhaité.
5
S.MODE:
Appuyez sur ce bouton pour sélectionner le
mode sonore souhaité.
DISPLAY:
6
7
ASPECT:
8
0~9,10+:
poussez 0-9 pour les dix premiers émetteurs,poussez
mise en fonction d
pour couper le son.
affichage du mode actuel.
Ajuster la taille du tableau.
uTV.
10+ pour les émetteurs 10-99 et à nouveau pour 100-199.
9
NICAM:
10
MENU:
11
EXIT:
pour régler le temps du sleep timer, après
12
SLEEP:
lequel le
13
INPUT:
14
OK:
CH+/-:
15
16
VOL+/-:
17
FAV:
19
STEP:
Lecture image par image du programme en mode
multimédia.
20
SUBTITLE:
programmes pendant Hors menu seulement.
21
TEXT:
22
INDEX:
23
HOLD:
24
MIX:
25
CANCEL:
26
SIZE:
repoussez pour agrandit la moitié inférieure de l’écran,
repoussez pour revenir à l’écran normal.
Appuyez sur pour sélectionner le son du téléviseur.
menu système TV (voyez page 9)
Quittez le menu en cours.
TV se met automatiquement hors fonction.
sélection de la source d’entrée.
:
boutons direction pour menu OSD
bouton de confirmation pour menu OSD
émetteur précédent/suivant
réglage volume
Afficher la liste des chaînes préférées.
Pour afficher le guide électronique des
Activer le télétexte ou 0ff.
pour aller directement vers la page 100
pour fixer une souspage
Activer le télétexte ou 0ff.
quitter le télétexte
poussez pour agrandir la moitié supérieure de l’écran,
27
REVEAL:
par exemple réponse à question quiz.
28
SUBPAGE:
afficher des informations cachées,
exemple, pour aller directement vers la
souspage 4 :
poussez SUBPAGE et ensuite 0,0,0,4 ;
repoussez SUBPAGE pour annuler le mode souspage
6
Page 68

Télecommande
Télécommande
Boutons pour opération DVD
2
9
17
18
21
22
23
24
25
26
27
28
29
30
31
32
insérez/éjecter le disque DVD.
Changez le mode DVD audio: gauche, droite,
AUDIO:
mono, stéréo.
TITLE:
ANGLE:
D.MENU:
D.SETUP:
A-B:
PROG:
REPEAT:
GOTO:
titre DVD.
choisir l’angle DVD
Affichez le menu DVD.
Affichez le menu de configuration du DVD.
lecture/pause du disque DVD.
arrêt du disque DVD.
avancement rapide en arrière.
avancement rapide en avant.
chapitre précédent.
chapitre suivant.
répétition d’une section entre deux points
Pour sélectionner la lecture du programme DVD.
Répéter la lecture de la lecture de DVD.
recherche DVD, numéros ou chapitres
7
Page 69

Opération de base
Opération de base
En/hors fonction
1. Connectez-vous à l'alimentation avec le cordon d'alimentation et activez l'interrupteur.
2. Mise en fonction du TV
Poussez
-Mise hors fonction du TV
Poussez POWERsur le TV ou la rélécommande.
POWER
Sélection de la source d’entrée
Poussez INPUT sur le TV ou la télécommande pour afficher me
menu source et utilisez CH+/- sur le TV ou la télécommande pour
sélectionner la source ; poussez OK sur la télécommande pour
confirmer.
Remarque : avant de sélectionner une source, vérifiez si
celle-ci a été connectée à l’appareil.
Première installation
sur le TV ou la rélécommande.
SOURCE
TV
AV
SCART
YPBPR
VGA
HDMI
DVD
Quand vous utilisez pour la première fois le TV, le menu première
installation apparaît sur l’écran et vous pouvez facilement
chercher les émetteurs en suivant les indications.
Opération de base Menu OSD
Poussez MENU(SYS-MENU)pour afficher le menu OSD comme montré ci-dessous:
Menu principal
Image
Son
Emetteurs
Amusement
Bloquage
Réglages
Sousmenu
(par exemple
menu Vidéo)
Remarque :
Utilisez /
Dans le sousmenu utilisez CH+/- pour choisir la fonction et utilisez / pour sélectionner/ajuster ou
poussez pour entrer dans le menu option.
*(Poussez MENU(SYS-MENU) pour revenir au menu précédent).
*(Poussez SYS-EXIT pour quitter le menu).
Remarque 1 : vous pouvez uniquement activer les items relevants.
Remarque 2 : opérez le menu OSD en suivant les indications en bas de l’écran.
pour sélectionner le menu principal et poussez CH- pour entrer dans le sousmenu.
opérez le menu OSD en suivant les indications
8
Page 70

Menu OSD
Menu OSD
1. Menu EMETTEURS
Description
Syntonisation automatique Poussez pour commencer la recherche automatique.
Menu recherche manuelle pour TV
TV
Syntonisation manuelle Poussez pour entrer dans le sousmenu.
Manual Program menu for TV
Program Sélectionnez l’émmetteur que vous voulez changer.
Système couleurs Sélectionnez le système couleurs de l’émetteur.
Système son Sélectionnez le système son de l’émetteur.
Recherche manuelle Utilisez / pour la recherche manuelle.
AFT Pour mettre en/hors fonction le Auto Frequency Tuning pour la recherche manuelle.
Fine Utilisez / pour faire un réglage fin
Skip Sélectionnez ‘oui’ si vous voulez que l’émetteur n’est pas
disponible avec le bouton CH+/-
9
Page 71

OSD Menu
Changer l’émetteur : poussez pour entrer dans le sousmenu, comme ci-dessous.
Menu changement émetteur pour TV
DELETE
FAV
NOM :
sélectionnez l’émetteur, poussez le bouton ROUGE de la télécommande,
pour changer le nom de l’émetteur..
(Utilisez les boutons pour choisir les lettres et poussez Ok pour confirmer)
DELETE: Appuyez sur la touche VERTE pour supprimer le canal actuel.
INSERER: sélectionnez un émetteur que vous voulez insérer
Poussez le bouton JAUNE et sélectionnez la position,
Poussez le bouton VERT pour insérer ou.
poussez le bouton ROUGE pour annuler l’opération.
FAV: Appuyez sur la touche FAV pour régler votre canal favorable.
Menu OSD
10
Page 72

Menu OSD
Menu OSD
2. Menu IMAGE
Le menu IMAGE offre les options suivantes
Mode image
Remarque : le contraste, la luminosité, les couleurs et la netteté peuvent
uniquement être réglés si vous avez choisi Personnel
Contrast Régle la différence entre les régions les plus claires et les plus
fonçées de l’écran.
Luminosité Réglage de la luminosité de l’écran.
Couleurs Réglage des couleurs.
Netteté
Teinte Réglage de la teinte (uniquement en NTSC).
Température couleurs
Réduction du souffle
Choisissez entre Standard, Film, Vivant ou Personnel.
Augmenter pour obtenir des bords très nettes, diminuer pour
obtenir des bords plus faibles.
Choisissez entre Normal, Froid ou Chaud.
Mettez en position ‘on’ pour réduire le souffle d’interférence.
(peut être sélectionné en mode ATV).
11
Page 73

Menu OSD
3. Menu SON
Menu OSD
Le menu SON offre les options suivantes
Mode son Choisissez entre Standard, Musique, Film ou Personnel.
Graves (peut être réglé si vous avez choisi Personnel)
Réglage de l’intensité des graves.
Aigües (peut être réglé si vous avez choisi Personnel)
Réglage de l’intensité des aigües.
Balance Pour régler la balance entre le canal gauche et le canal droite.
Réglage du volume du canal gauche et droite.
AVL Le volume se règle automatiquement si vous mettez cette
option en ‘on’.
12
Page 74

Menu OSD
Menu OSD
4. Menu REGLAGES
Le menu REGLAGES offre les options suivantes:
Langue Sélection de la langue menu.
OSD Timer Réglage de la durée de l’affichage OSD.
Transparence Réglage de la transparance du menu OSD
Overscan
Reset Poussez pour revenir aux réglages usine.
Pour mettre la fonction overscan en/hors fonction
(peut être sélectionné en mode HDMI)
13
Page 75

Menu OSD
5. Menu FONCTIONS
AUTO SLEEP 4H
DLC OFF
Menu OSD
Le menu FONCTIONS offre les options suivantes:
Sleep Timer
Auto Sleep
Aspect Format d’écran.
Langue TT Langue pour télétexte.
Ecran bleu
DLC Dynamic Luminance control ON/OFF.
Réglage du temps sleep timer : 15 min, 30 min, 45 min,
60 min, 75 min, 90 min, 105 min, 120 min et hors fonction
Activer / désactiver la fonction de mise en veille automatique quand,
où a pas de signal.
(peut être sélectionné en mode TV)
(peut être sélectionné en mode TV)
L’écran se met en bleu quand il n’y a pas de signal, quand
vous choisissez pour ‘on’
(peut être sélectionné en mode TV)
14
Page 76

Menu OSD
Menu OSD
6. Menu REGLAGE PC
Le menu REGLAGE PC offre les options suivantes:
Position H
Position V Réglage verticale de l’écran.
Montre Réglage de la fréquence pixels, pour maximaliser l’image
Phase Réglage de la phase de l’échantillonage ADC relative au
Réglage automatique
Réglage horizontale de l’écran.
sur l’écran.
signal sync pour obtenir un image stable .
Poussez pour régler automatiquement les paramètres.
15
Page 77

DVD Operation
Opération DVD
Opération de base
Poussez le bouton Power du TV ou de la télécommande et poussez le bouton INPUT pour
sélectionner le mode DVD.
Quand il n’y a pas de disque dans l’appareil, l’écran affiche ‘NO DISC’.
Insérez le disque comme marqué sur l’appareil.
Ne touchez pas la surface de lecture.
Tenez le disque avec vos doigt au bord quand vous insérez le disque. L’appareil tire
automatiquement le disque à l’intérieur.
Pour éjecter le disque, poussez le bouton EJECT sur le TV ou le bouton de la télécommande.
Mode réglage DVD
Le mode de réglage offre des menus dans Page de réglage
général, page de réglage audio, page de réglage Dolby Digital et page de préférences.
La sélection des items dans le menu se fait avec les boutons
flèches, le bouton SETUP et le bouton OK.
Poussez le bouton SETUP, entrez dans le menu SETUP, poussez
le bouton flèche droite pour entrer dans le sousmenu suivant.
Repoussez le bouton SETUP pour quitter le menu de réglage.
" "
Ecran TV
4:3 Pan Scan
Choisissez ceci quand le lecteur DVD est connecté au téléviseur normal. L’image large est affichée
mais certains sections sont perdues.
4:3 Letter Box
Choisissez ceci quand le lecteur DVD est connecté au téléviseur normal. L’image large est affichée
mais des bandes noires apparaissent en haut et en bas de l’écran.
Large
Choisissez ceci quand le lecteur DVD est connecté au téléviseur écran large.
16
Page 78

Opération DVD
Opération DVD
Langue OSD
Pour choisir la langue OSD.
Screen Saver
Le Screen Saver fonctionne quand l’appareil s’arrête ou quand une image est pausée pendant
plusieurs minutes. Le Creen Saver protège l’écran.
:screen saver en fonction
:screen saver hors fonction
Dernière mémoire
Pour mettre la dernière mémoire en ou hors fonction.
:dernière mémoire en fonction
:dernière mémoire hors fonction
17
Page 79

Opération DVD
DVD Operation
Réglage haut-parleurs
Dans la page réglages Audio, utilisez pour sélectionner réglages haut-parleurs et poussez OK
ENTER ou pour entrer dan la page réglages haut-parleurs .
18
Page 80

Opération DVD
Opération DVD
Downmix
Avec un disque enregistré avec multi-canaux, les multi-canaux sont incorporés dans un canal de
gauche et un canal de droite.
Avec un disque enregistré avec multi-canaux, les multi-canaux sont incorporés dans un signal stéréo
Il existe 3 modes de sortie audio optionnels : SPDIF OFF, SPDIF/RAW et SPDIF/PCM.
SPDIF/RAW est pour les amplficateurs avec décodeur digital incorporé.
SPDIF/PCM est pour les amplificateurs sand decodéur digital.
19
Page 81

DVD Operation
Opération DVD
Réglage Dolby Digital
Dynamique
Cette option sert à régler le format de compression pour contrôler le contraste du volume.
Vous devez pousser deux fois STOP pour entrer dans la page de préférences.
Type TV
Sélectionnez ceci quand le lecteur DVD est connecté au téléviseur PAL
Le lecteur règle le système TV en fonction du disque.
Sélectionnez ceci quand le lecteur DVD est connecté au téléviseur NTSC
Quand la langue sélectionnée se trouve sur le disque,cette langue sera utilisé.
Sinon, la langue du disque sera utilisée.
20
Page 82

Opération DVD
Opération DVD
Sous-titres
Quand la langue sélectionnée se trouve sur le disque,cette langue sera utilisé.
Sinon, la langue du disque sera utilisée.
Menu disque
Quand la langue sélectionnée se trouve sur le disque,cette langue sera utilisé.
Sinon, la langue du disque sera utilisée.
21
Page 83

DVD Operation
Opération DVD
Contrôle parental
Si vous reproduisez un disque avec contrôle parental, vous pouvez vous-même
déterminer le niveau de lecture. Exemple : si vous avez choisi PG, le disque avec
un niveau supérieure à PG ne peut pas être reproduit.
Mot de passe
le contrôle parental.
REMARQUE (le mot de passe standard est 123456)
22
Page 84

Opération DVD
Opération DVD
Standard
L’utilisateur peut revenir aux réglages usine en poussant RESET et ensuite OK.
23
Page 85

En cas de problèmes
En cas de problèmes
Quand la qualité de reproduction se déteriore considérablement, consultez le guide ci-dessous
pour trouver une solution. N’oubliez pas de contrôler également les autres appareils connectés
au TV.
Si ceci ne donne pas de solution, consultez un spécialiste.
Pas de puissance
- Contrôlez les connexions du TV.
- Poussez le bouton POWER du TV ou de la télécommande
Pas d’image et pas du son
- Contrôlez que le TV est connecté au courant secteur et qu’il est en fonction.
- Vérifiez que l’antenne est connectée.
- Essayez un autre émetteur.
Pauvre qualité d’image
- Contrôlez la connexion antenne.
- Vérifiez que l’émetteur est bien syntonisé.
- Réglez les contrôles image : luminosité, couleurs, netteté, contraste.
- Vérifiez que le TV ne se trouve pas trop proche d’autres appareils électriques qui émettent des
fréquences radio interférence.
Pas de couleurs
- Réglez les couleurs.
- Vérifiez que l’émetteur transmet en couleurs.
- Vérifiez que l’émetteur est bien syntonisé.
Le TV ne répond pas à la télécommande
- Contrôlez qu’il n’y a pas des objets entre le TV et la télécommande.
- Contrôlez la rangée d’utilisation de la télécommande.
- Contrôlez l’état des piles dans la télécommande.
24
Page 86

 Loading...