

Page 1

Inhoud
anigaPremmuN
1.
2.
3.
4. 4seitcnufskiurbeG
5.
6.
7.
8.
9.
10.
11.
12.
13.
14.
15.
16.
Veiligheidsinformatie
Veiligheidsinstructies
Onderdelen en accessoires
Aansluitingen achteraan
Afstandsbediening
DVD toetsen
Gebruik afstandsbediening
Selectie ingangsbron
Basisbediening
Beeldmenu
Geluidsmenu
Functiemenu
TV-menu
HDMI/YPBPR menu
PC-menu
1
2
3
5
6
7
8
9
9
10
11
12-15
16-18
18-19
19
17.
18.
19.
20.
21.
22.
23.
24.
25.
USB poort en kaartlezer
Teletekst bekijken
Gebruik van de DVD-speler
Speciale DVD-functies
DVD functie-instellingen
Gids voor oplossen problemen
Montage aan de muur
Verzorging van de disk
Technische specificaties
20
21
21-22
22-24
25-31
32
33
33
34
Page 2

Veiligheidsinformatie
OPGEL ET
RISICO VAN ELEKTRISCHE
OPGELET: OM HET RISICO OPELEKTRISCHE
SCHOK
TE VERMIJDEN, HETTOESTEL NIET OPENEN.
BINNENIN BEVINDEN ZICH GEEN
GEBRUIKSFUNCTIES
CONTACTEER GESPECIALISEERD PERSONEEL
VOOR SERVICE
De driehoek met een bliksem in afgebeeld, dient om de gebruiker te
verwittigen dat er zich in het toestel onafgeschermde gevaarlijke
spanningen bevinden die voldoende hoog zijn om elektrische
schokken bij personen te veroorzaken.
De driehoek met een uitroepteken in afgebeeld, dient om de gebruiker
te verwittigen dat er zich bij het toestel belangrijke instructies voor het
gebruik en het onderhoud bevinden.
Juist verwijderen van dit product
(Afval van Elektrische en ElektronischeApparatuur,AEEA).
Het vuilbakje met een kruis over dient om te verwittigen dat dit
apparaat, bij het einde van zijn leven, niet verwijderd mag worden met
ander huishoudelijk afval. Om vanwege ongecontroleerde afval,
mogelijke schade aan het milieu en de menselijke gezondheid te
vermijden, hou dit apparaat gescheiden van huishoudelijk afval en laat
het recycleren om het hergebruik van materiaal te promoten.
Consumenten dienen hun verkoper of de locale autoriteiten
contacteren om te zien waar en hoe ze het product op een
milieuvriendelijke wijze kunnen laten recycleren.
Professionele gebruikers dienen contact op te nemen
leverancier om de voorwaarden in het contract te bekijken. Dit product
mag niet tezamen verwijderd worden met ander commercieel afval.
SCHOK
NIET OPENEN
.
met hun
LASER RADIATION
Dit toestel is een 'CLASS 1' laserproduct. Het toestel gebruikt een
zichtbare laserstraal die gevaarlijke straling uitzendt. Zorg ervoor dat
het toestel juist gebruikt wordt. Open het toestel niet en kijk niet in de
DVD opening terwijl het werkt. Wijzig geen bedieningsfuncties die
een invloed kunnen hebben op de laserstraal. Als het toestel defect is,
consulteer dan een gespecialiseerde technicus.
Dit toestel voldoet aan de Europese richtlijnen inzake veiligheid en
elektriciteit.
NL-1
Page 3
VEILIGHEIDSINSTRUCTIES
LEES AANDACHTIG EN HOU REKENING MET ALLE VERWITTIGINGEN EN
INSTRUCTIES IN DEZE GEBRUIKSAANWIJZING EN AANDUIDINGEN OP
HET TOESTEL. HOU DE GEBRUIKSAANWIJZING BIJ VOOR LATER
GEBRUIK. Dit toestel is ontwikkeld en gefabriceerd met het oog op uw veiligheid.
Onjuist gebruik kan resulteren in elektrische schokken of brand. De instructies
zullen u beschermen als u deze opvolgt bij de installatie, het onderhoud en het
gebruik. Binnenin bevinden zich GEEN gebruiksfuncties. OPEN HET TOESTEL
NIET WANT U KAN BLOOTGESTELD WORDEN AAN GEVAARLIJKE
SPANNINGEN EN LASERSTRALING EN DE GARANTIE ZAL EVENEENS
VERVALLEN. CONSULTEER EEN SPECIALIST ALS SERVICE NEE DI
G IS.
Uitpakken.
Haal deTV voorzichtig uit de doos en plaats hem op een stabiele ondergrond. Haal
de plastic zak van het toestel en hou alle verpakking bij voor later gebruik. Hou de
verpakking verwijderd van kinderen en dieren.
Plaatsing TV
het niet in een kast tenzij er voldoende vrije ruimte is voor ventilatie en de opening
van de DVD-speler.
Aansluitingen
zorg ervoor dat er niet op de kabels getrapt kan worden. Plaats gee
Bovenkant vanTV.
objecten boven op deTV.
Ventilatie en warmtebronnen.
oververhitting kan leiden. Plaats deTV niet in direct zonlicht of naast
warmtebronnen zoals een radiator.
Vochtigheid.
of andere vochtige ruimtes. Zorg ervoor dat er geen water of andere vloeistoffen in
vochtige handen.Als er vocht in het toestel moest komen, trek dan destekker uit
het stopcontact en contacteer de serviceafdeling.
Reinigen.
Voor hevig vuil, gebruik een zacht doekje met een zachte detergent. Gebruik GEEN
producten op basis van petrolium.
Open de doos voorzichtig en verwijder de bovenste laag piepschuim.
. De TV dient geplaatst te worden op een stevige tafel of plank. Plaats
. Bij het aansluiten van deTV aan andere bronnen en de netstroom,
.tein meh ioolp ne lebakmoorts ed po neprewroov
Plaats geen voorwerpen zoals een vaas of een kaars of andere
Sluit de ventilatieopeningen net af, vermits dit tot
Plaats deTV niet in vochtige omstandigheden zoals keukens, kelders
o lebakmoorts ed kaaR .nemok nennuk letseot teh
Trek de stekker uit het stopcontact. Gebruik een zacht droog doekje.
n zware
niet aan met
retpadamoorts ed f
Laa
TV achterlaten.
uit. Om energie te besparen, laat het toestel niet te lang in stand-by staan.Wanneer
het toestel lange tijd niet gebruikt wordt of in geval van onweer, haal de antenne uit
het toestel en trek de stekker uit het stopcontact.
t deTV niet onbewaakt spelen. Schakel in dat geval het toestel
NL- 2
Page 4
Onderdelen en accessoires
itpakken.
Haal de TV voorzichtig uit de verpakking.
Controleer of alles aanwezig is. Moest iets missen, contacteer dan uw verkoper.
Verwijder de verpakking niet alvorens er zeker van te zijn dat de TV normaal
functioneert.
In de doos.
TV
Afstandsbediening
READY LCD/DVD TELEVISION
Gebruiksaanwijzing
NL-3
Page 5
Gebruiksfuncties
POWER MENU VOL- VOL+ CH- CH+ INPUT
Beschrijving gebruiksfuncties
POWER
INPUT Om de ingangsbron te selecteren
CH+ / C H-
VOL+/VOL Om het volume te regelen. Regelt eveneens de instellingen in een menu.
MENU Om in het menu te gaan.
STOP
Om deTV vanuit stand-by in te schakelen en terug uit te schakelen naar stand-by
Om de zender te kiezen. Beweegt eveneens de cursor naar boven en benedenin
een menu.
Beschrijving DVD-bediening
Om de DVD-weergave te stoppen
DVD bedieningen
Stop
Weergave/pauze
Uitwerpen
SD/MMC/MS
USB
Infrarood ontvanger
Stand-by LED
kaart
PLAY/
PAU SE
EJECT Om de disk uit de speler te werpen.
SD/MMC/MS kaart
USB poort
Druk op de weergave te starten. Druk om de weergave te pauzeren.
Druk opnieuw om de weergave verder te zetten.
Kaartlezer voor SD, MMC, MS media kaart
USB poort (neem DTV programma's op via deze poort)
NL-4
Page 6
Aansluitingen achteraan
U kan een groot aantal externe apparaten aan dit toestel aansluiten.
Consulteer de gebruiksaanwijzing van de andere toestellen voor meer informatie.
Zie tabel onderaan voor de beschrijving van de beschikbare aansluitingen.
STROOM
HDM I
VGA
SCART
S-VI DEO
Y CVB S
Pb R
Pr L
P
C AU DI O I N
RF
COAX IAAL
nav gnitiulsnaarooVgnitiulsnaA
HDMI Hoge kwaliteit HD. Satellietontvanger, DVD, spelconsole
VGA Computer Video Graphics Array uitgang
SCART
Composietsignalen van DVD,VCR en satellietontvanger
S-VIDEO Beeldinformatie van camcorder, DVD of spelconsole
VIDEO (CVBS)
Beeldinformatie van camcorder, spelconsole, enz.
L(AV)/R (AV) Gel uid van c amcorder, spelconsole, DVD, VCR, enz.
PC AUDIO IN Geluid v an computer
Hoofdtelefoon
TUNER (RF)
AUDIO COAXIAAL
Uitgang voor hoofdtelefoon
Ingang tunerTV
Geluidsuitgang van de DVD-speler voor aansluiting met Hi-Fi versterker
YPBPRL/R Video-uitgang van DVD-speler
POWER
Netstroomaansluiting
NL-5
Page 7
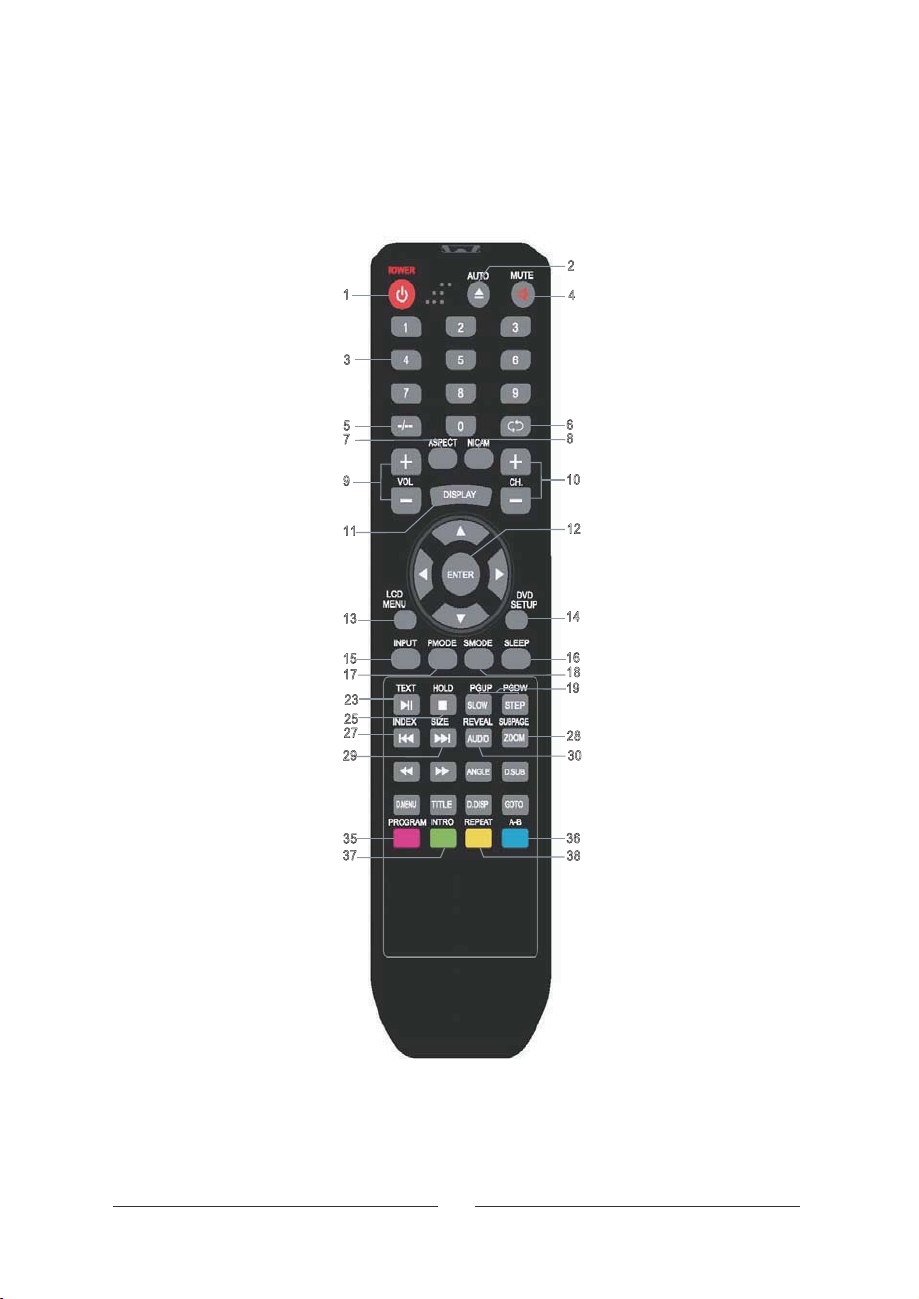
1.
POWER: om deTV uit stand-by in
te schakelen en terug in stand-by te
brengen
3.
0-9: Numerieke toetsen om direct
een TV-zender of een nummer van
een DVD te kiezen
5.
-/--: om te selecteren tussen het
inbrengen van een eencijferig of
tweecijferig getal
7.
ASPECT: om het beeldformaat te
selecteren
9.
VOL+/-: om het volume te regelen
en in een menu de instellingen te
regelen
11
. DISPLAY: om verschillende
informatie op te roepen
13.
LCD Menu: om in het TV
hoofdmenu te gaan. Gebruik de
toetsen 12 om in het menu te
navigeren
15.
INPUT: om te kiezen tussen de
verschillende
ingangsmogelijkheden
17.
PMODE: om te kiezen tussen de
verschillende beeldinstellingen
23.
TEKST: om teletekst te selecteren,
druk opnieuw om tekst te mengen
met beeld, nogmaals om teletekst te
erlaten
v
25.
HOLD: om de huidige pagina vast
te houden
INDEX: om naar de index pagina te
27.
gaan
SIZE: om de grootte van het
29.
lettertype te bepalen
ROOD: toets voor fasttext
35.
GROEN: toets voor fasttext
37.
Afstandsbediening
Algemene toetsen
1
3
5
7
9
11
13
15
17
23
25
27
29
35
37
AUTO: regelt de PC aan hetTV-
2.
2
scherm in PC-modus. Start de
4
Favoriete List inTV-modus;
MUTE: om het geluid uit en terug
4.
in te schakelen.
</>: om tussen de twee laatst
6.
gekozen zenders te schakelen.
NICAM: om te kiezen tussen
8.
NICAM/mono geluidsweergave
6
(alleen bij analogeTV)
8
CH+/CH-: om de zenders te
10.
kiezen en in een menu een
10
selectie te maken.
NAVIGATE: om in de menu's te
12.
bewegen. Met Voer wordt de
12
selectie bevest
14.
VERLATEN: om het menu te
verlaten
SLAAP: om de slaaptimer te
16.
activeren
14
SMODE: om te kiezen tussen de
18.
verschillende
16
geluidsmogelijkheden
18
19
PGUP/PGDN: om de vorige of de
19.
volgende teletekstpagina te
en
kiez
28
SUBPAGE: om een
28.
30
onderliggende pagina op te
roepen
REVEAL: om verborgen tekst op
30.
te roepen
BLAUW: toets voor fasttext
36.
36
38
GEEL: toets voor fasttext
38.
igd.
NL-6
Page 8
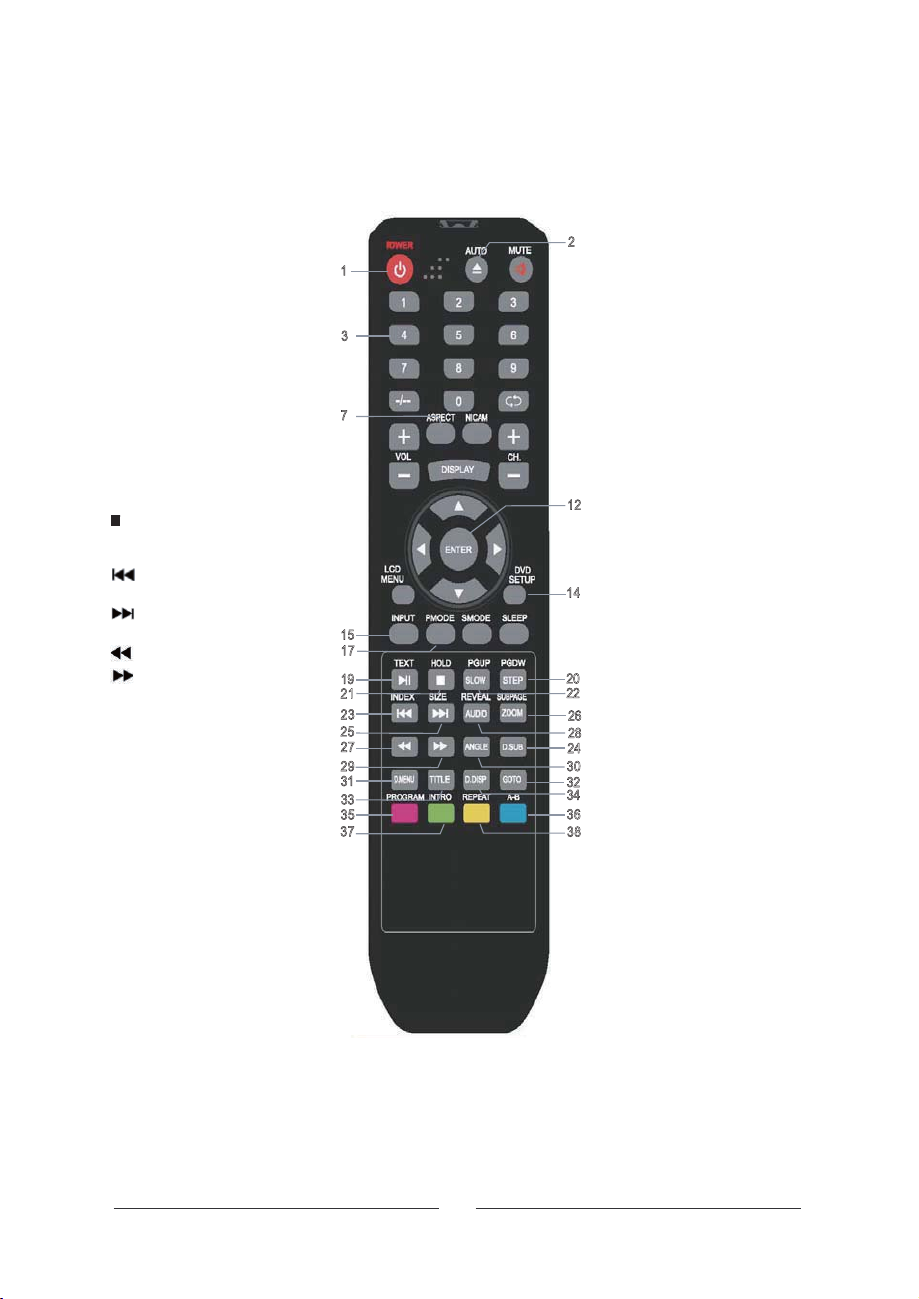
0-9: numerieke toetsen om direct
3.
een nummer op DVD, CD en
Mpeg disks op te roepen
ASPECT. Selecteert aspect ratio
7.
om te stemmen met disc materiaal.
INPUT: om te kiezen tussen de
15.
verschillende
ingangsmogelijkheden
Play/pause: druk om de
19.
II
weergave te starten, druk opnieuw
om te pauzeren, druk nogmaals
om weergave verder te zetten
STOP: druk eenmaal voor
21.
voorlopige stop, druk tweemaal
voor volledige stop
om naar het vorig hoofdstuk
23.
of nummer te gaan
om naar het volgend
25.
hoofdstuk of nummer te gaan
om snel achterwaarts te gaan
27.
om snel voorwaarts te gaan
29.
DMENU: om de inhoud van de
31.
disk te bekijken
TITEL: om de disktitels te zien
33.
PROG: om de weergavevolgorde
35.
te selecteren
INTRO: om 9 segmenten van de
37.
disk weer te geven (afhankelijk
van de disk)
1
3
7
15
17
19
21
23
25
27
29
31
33
35
37
DVD-toetsen
2
2.
EJECT: om de disk uit te werpen.
12.
NAVIGATION: om in de menu's
te navigeren. MetVoer wordt de
selectie bevestigd.
14.
DVD SETUP: om in het D VDmenu te gaan.Druk opnieuw om te
verlaten.
20.
STEP: om beeld voor beeld
I
weergave te bekijken.
SLOW: om vertraagde weergave
22.
te krijgen
D.SUB: om de aanwezige
24.
ondertitelingen op te roepen.
12
ZOOM: druk verschillende malen
26.
om op het beeld in te zoomen
AUDIO: om de gesproken taal te
28.
kiezen
14
ANGLE: om de verschillende
30.
beeldhoeken te bekijken (indien
aanwezig op de disk)
GOTO: om direct een hoofdstuk te
32.
selecteren (afhankelijk van de
20
disk)
22
D
.DISP: geeft de status van de
34.
26
disk weer
28
A-B: om een sectie voor herhaling
36.
24
te bepalen
30
32
REPEAT: om een hoof dstuk of
38.
34
nummer te herhalen.
36
38
NL-7
Page 9
Gebruik van de afstandsbediening
Om de afstandsbediening te kunnen gebruiken, dienen eerst de batterijen in het
batterijencompartiment geplaatst te worden. Controleer of de TVingeschakeld is. Richt de
afstandsbediening naar de infrarood ontvanger van de TVen druk op STANDBY. DeTV komt nu uit
stand-by en het scherm licht op.
Het bereik van de afstandsbediening is ongeveer 5 meter en de hoek is maximaal 30°.
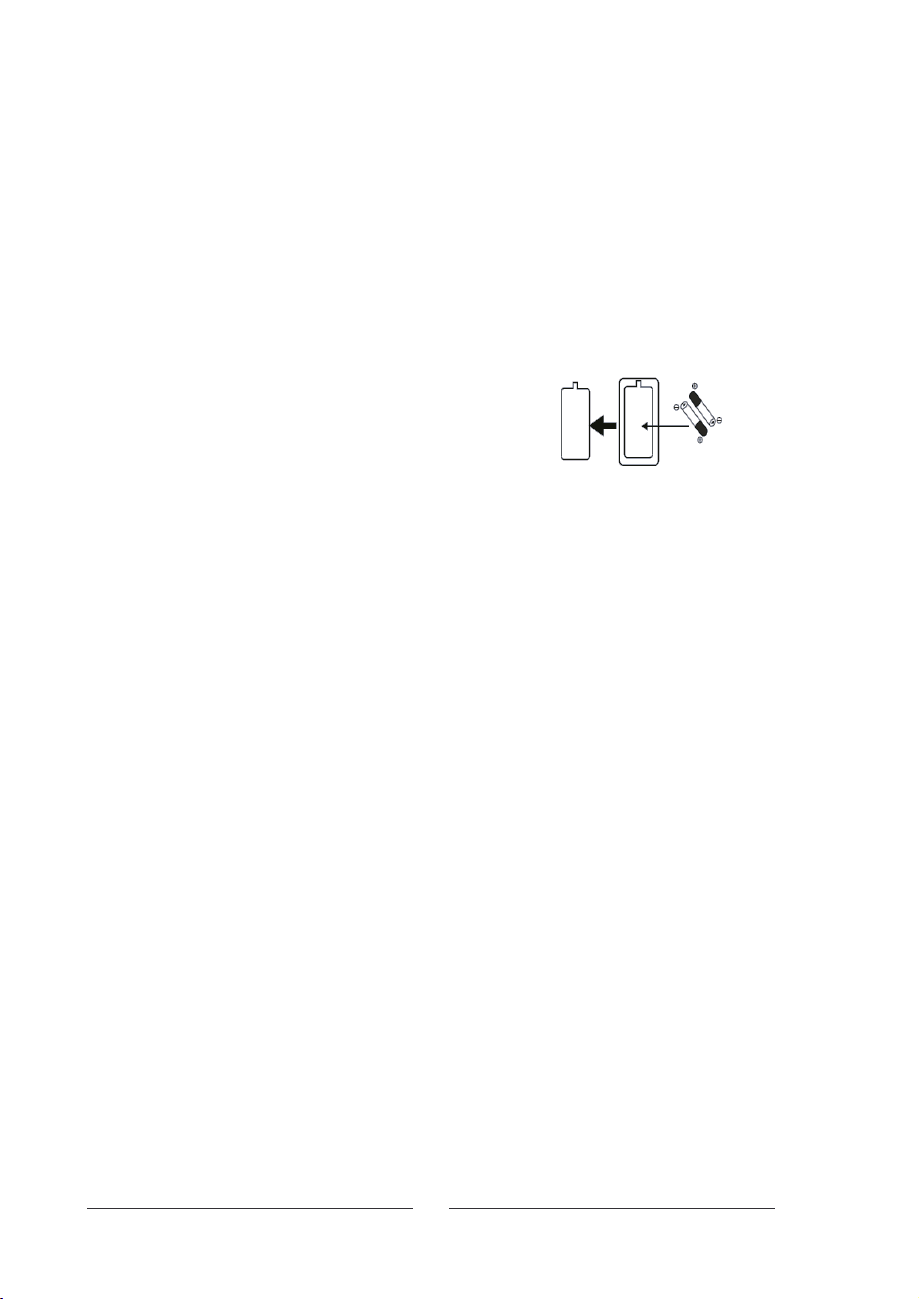
Installeren van de batterijen (niet meegeleverd).
Open het batterijencompartiment op de achterkant van de
afstandsbediening. Plaats twee AlkalineAAA batterijen 1.5 V
zoals aangeduid in de afstandsbediening. Hou rekening met
de polariteit (+/-) en sluit het batterijencompartiment.
Opmerking:
. Oude batterijen mogen niet met ander huishoudelijk afval
verwijderd worden.
. Werp oude batterijen niet in een vuur, vermits deze kunnen
ontploffen en kwetsuren kunnen aanbrengen.
. Gebruik alleen 1.5V AAA batterijen.
. Gebruik batterijen van hetzelfde type. Meng geen
verschillende batterijen.
. Gebruik geen oude en nieuwe batterijen tegelijkertijd.
Vervang steeds beide batterijen.
. Probeer de batterijen niet te ontmantelen, dat kan
kwetsuren opleveren.
- Haal de batterijen uit de afstandsbediening als deze
gedurende een bepaalde tijd niet gebruikt wordt.
Batterij
compartment
deksel
2xAAABatterijen
NL-8
Page 10
Keuz e van de ingangsbron
BRON
TV
DVD
AV
S-VIDEO
SCART
YPBPR
HDMI
PC
INPUT
Druk op om de bronlijs t weer te geven.
Gebrui k om de bron te selecteren .
Dru k op om de bro n te bevestigen .
VOER
Basisbediening
BEELD
BEELDMODUS
HELDERHEID
CONTRAST
VERZADIGING
SCHERPTE
TINT
KLEURTINT
ONLY RE
BEWEEG PAS AAN
LCD-MENU OSD hoofdmen u
Druk op op het te openen.
Gebrui k om het gewenst e menu te selecteren .
Druk op om in het submen u te gaan.
regelen .
Dru k op LCD-MENU of VERLATEN om de gegeven s vas t te legge n en
terug te gaan naar het vorig menu .
NL- 9
PERSOONLIJK
NORMAAL
MENU
50
50
50
5
50
VERLATEN
50
5
Page 11
Toont de mogelijkheden wanneer u deTV-modus kiest zonder zenders op te zoeken.
TV
001
PAL
DK
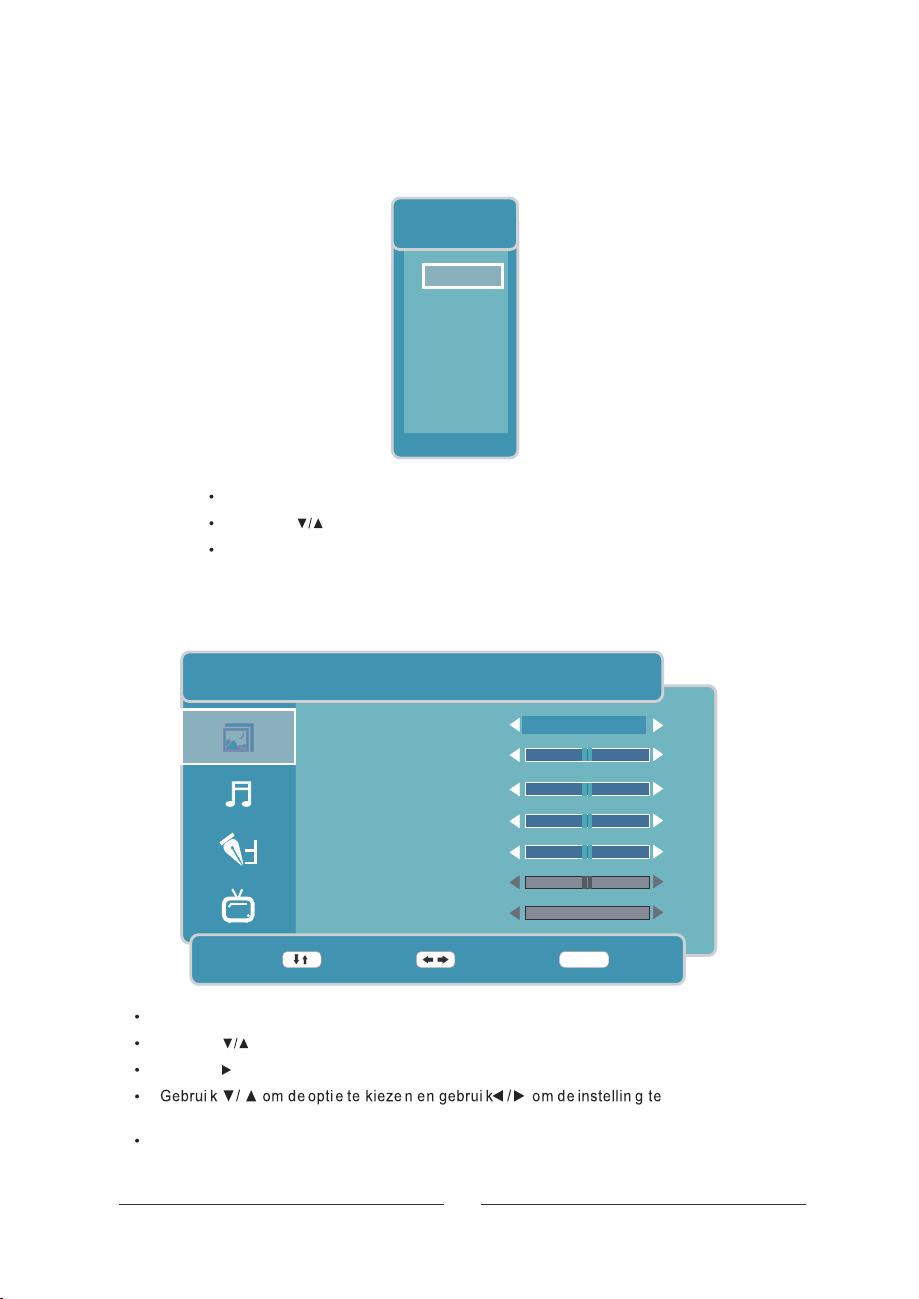
Beeldmenu
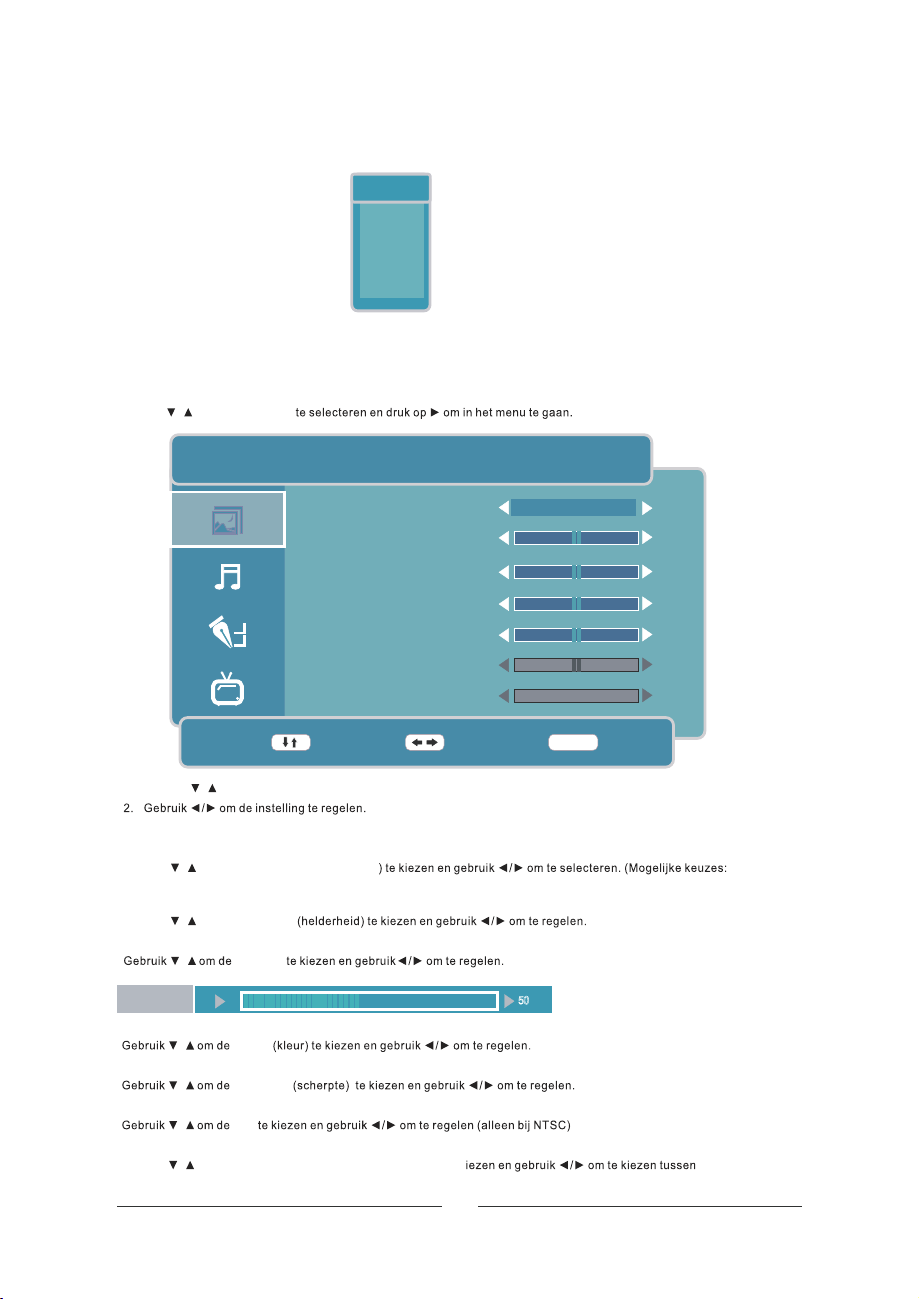
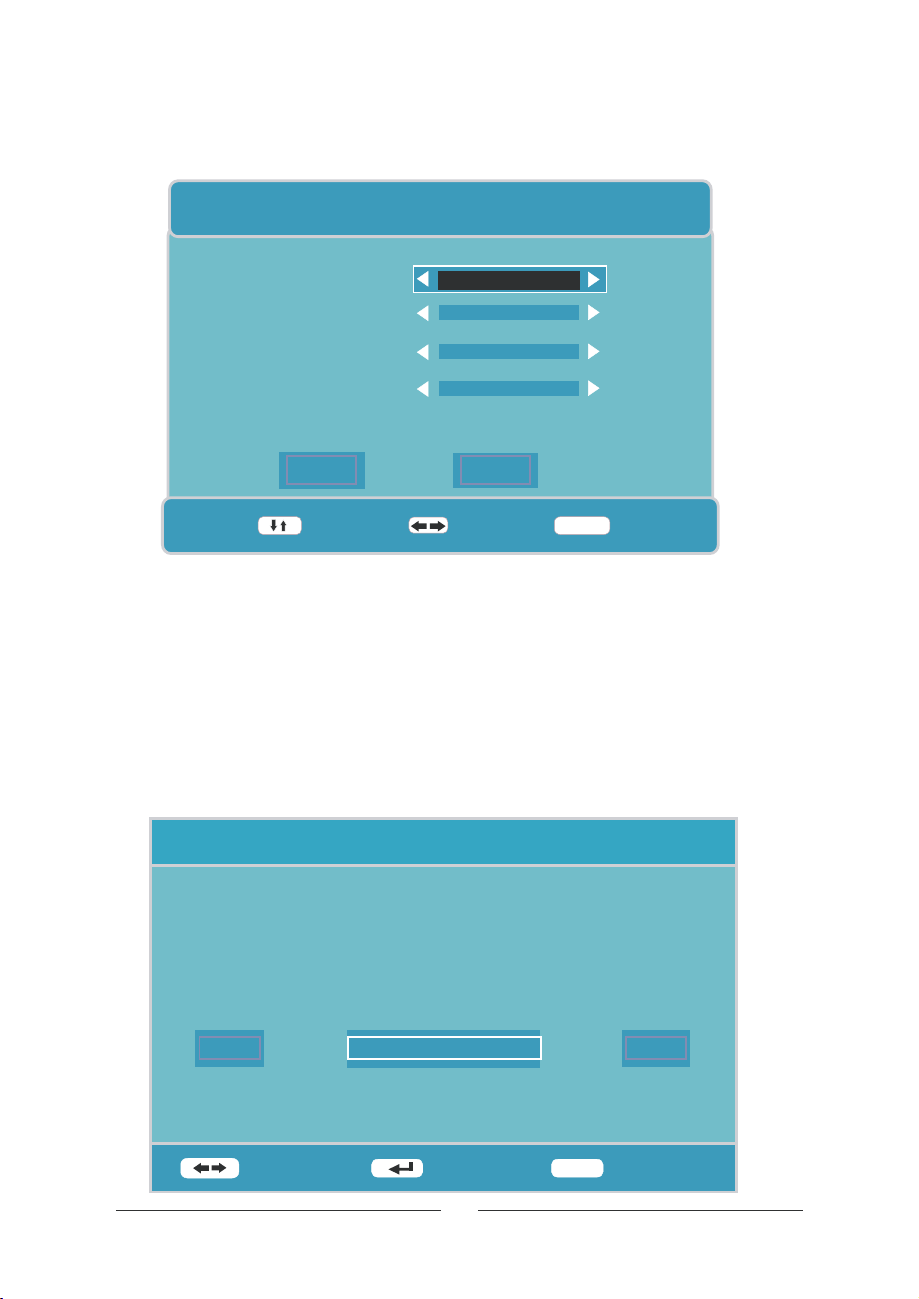
Druk op op het toestel of op van de afstandsbediening om het hoofdmenu af te beelden.
MENU
Gebruik om
Picture (beeld)/
LCD-MENU
BEELD
BEELDMODUS
HELDERHEID
CONTRAST
VERZADIGING
SCHERPTE
TINT
KLEURTINT
BEWEEG PAS AAN
1. Gebruik om de gewenste optie in het menu te kiezen.
3. Druk op of om de gege vens va st te leggen e n terug te g aan naa r het vorig me nu.
Beeldmodus
Gebruik om de Picture Mode (
persoonlijk, standaard, film, zacht, spel).
Helderheid
Gebruik om de
Contrast
Contrast
Verzadiging
Scherpte
Tint
Kleurtint
Gebruik
normaal, warm of koud.
/
LCD-MENU
/
/
/
/
/
/
om de
/
VERLATEN
beeldmodus
Bright ness
Contrast
Colour
Sharpness
Tint
ColourTemperature
beeld
(kleurtemperatuur) te k
NL-10
PERSOONLIJK
NORMAAL
MENU
50
50
50
50
3
50
VERLATEN
50
5
Page 12
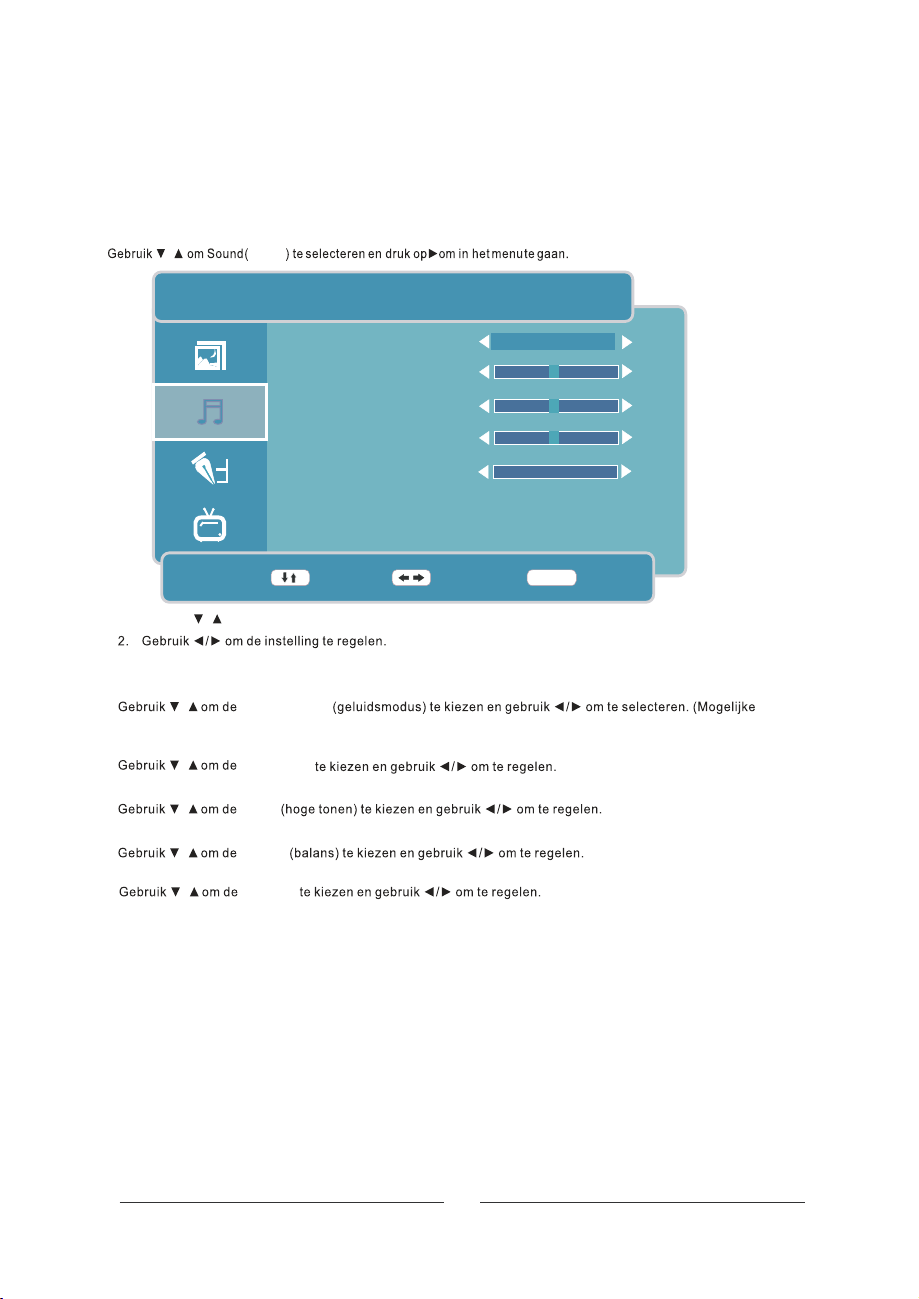
Druk op op het toestel of op van de afstandsbediening om het hoofdmenu af te beelden.MENU LCD-MENU
/ geluid
Geluidsmenu
GELUID
GELUID MODUS
PERSOONLIJK
BASS
TREBLE
HOGE TONEN
BAL ANCE
BALANS
AVL
BEWEEG PAS AAN
1. Gebruik om de gewenste optie in het geluidsmenu te .
3. Druk op of om de gegevens vast te leggen en terug te gaan naar het vorig menu.
Geluid Modus
keuzes: persoonlijk, standaard, muziek, stem, theater).
Laag
Hoge tonen
Balans
Avl
/
LCD-MENU VERLATEN
/
Geluid Modus
Bass (laag)
Tre bl e
Balance
Avc (avl)
/
/
/
/
kiezen
UIT
MENU
VERLATEN
50
05 GAAL
50
0
0
NL-11
Page 13
Functiemenu
Druk op op het toestel of op van de afstandsbediening om het hoofdmenu af te beelden.
MENU LCD-MENU
Gebruik om Functies ( ) te selecteren en druk op om in het menu te gaan.
functie/
FUNCTIES
TAAL
BEELD FORMAAT
TT TAAL
SLAAP TIMER
OSD-TIJD
BLAUW SCHERM
DUTCH
VOL
WEST EURO
UIT
30 SECONDS
AAN
RESETTEN
MENU
BEWEEG PAS AAN
1. Gebruik om de gewenste optie in het functiemenu te kiezen.
2. Gebruik /om de instelling te regelen.
3. Druk op of om de gegevens vast te leggen en terug te gaan naar het vorig menu.
Taa l
Gebruik om de te kiezen en gebruik / om te selecteren. (Mogelijke keuzes: Engels, Italiaans,
Spaans,Frans, Duits, Nederlands).
Beeld formaat
4:3, 14:9, zoom, auto).
TT Taal
Europees, Oost-Europees, Russisch,Arabisch, Farsi, Grieks, Cryllic en Hebreeuws).
Slaap Timer
Gebruik om de te kiezen en gebruik /om
60 min, 75min,90 min, 105 min, 120 min, uit).
OSD -Tijd
Gebruik om de te kiezen en gebruik /om te selecteren. (Mogelijke keuzes: 5 sec, 10 sec, 30 sec, 60
sec, uit).
Blauw Scherm
Gebruik om de (blauw scherm) te kiezen en gebruik / om te kiezen tussen aan of uit.
Resetten
Gebruik om de (terugzetten naar fabriekswaarden) te kiezen en druk op omte bevestigen.
/
LCD-MENU VERLATEN
/
Language (taal)
/
Vide o Si ze (beeld fo rm aat )
/
/
/
/
/
Language (TT Taal)
Slaap
Timer
OSD -Tijd
Blauw Scherm
te selecteren. (Mogelijke keuzes: 15 min, 30 min, 45 min,
EXIT
VERLATEN
REOVnetteseR
kjilegoM( .neretceles et mo/kiurbeg ne nezeik etTTed mokiurbeG
-tseW:sezuek e
,gidellov :sezuek ekjilegoM( .neretceles et mo/kiurbeg ne nezeik eted mokiurbeG
Opmerking: TTTaal
is niet beschikbaar in het functiemenu en
wordt in het grijs aangeduid. Andere menu's en beschrijvingen zijn
hetzelfde als in de TV modus.
Opmerking: Videoformaat en TT Taal zijn niet beschikbaar
in het functiemenu en worden in het grijs aangeduid. Andere
menu's en beschrijvingen zijn hetzelfde als in de TV modus.
NL-12
Page 14

FUNCTIES
JA
BEWEEG VOER
Gebruik / om of te kiezen. Druk op om terug op fabriekswaarden te komen als voor
JA is gekomen, druk op om het menu te verlaten als er NEEN is gekozen.
JA NEEN VO ER
VO ER
NEE
MENU
TERUG
FUNCTIES
KINDERSLOT
INSTALLEREN
BEWEEG VOER
Kinderslot
MENU
VERLATEN
.naag et unem teh ni mopo kurd ne nezeik eted mokiurbeG/ Kinderslot (kinderslot) V OER
NL-13
Page 15
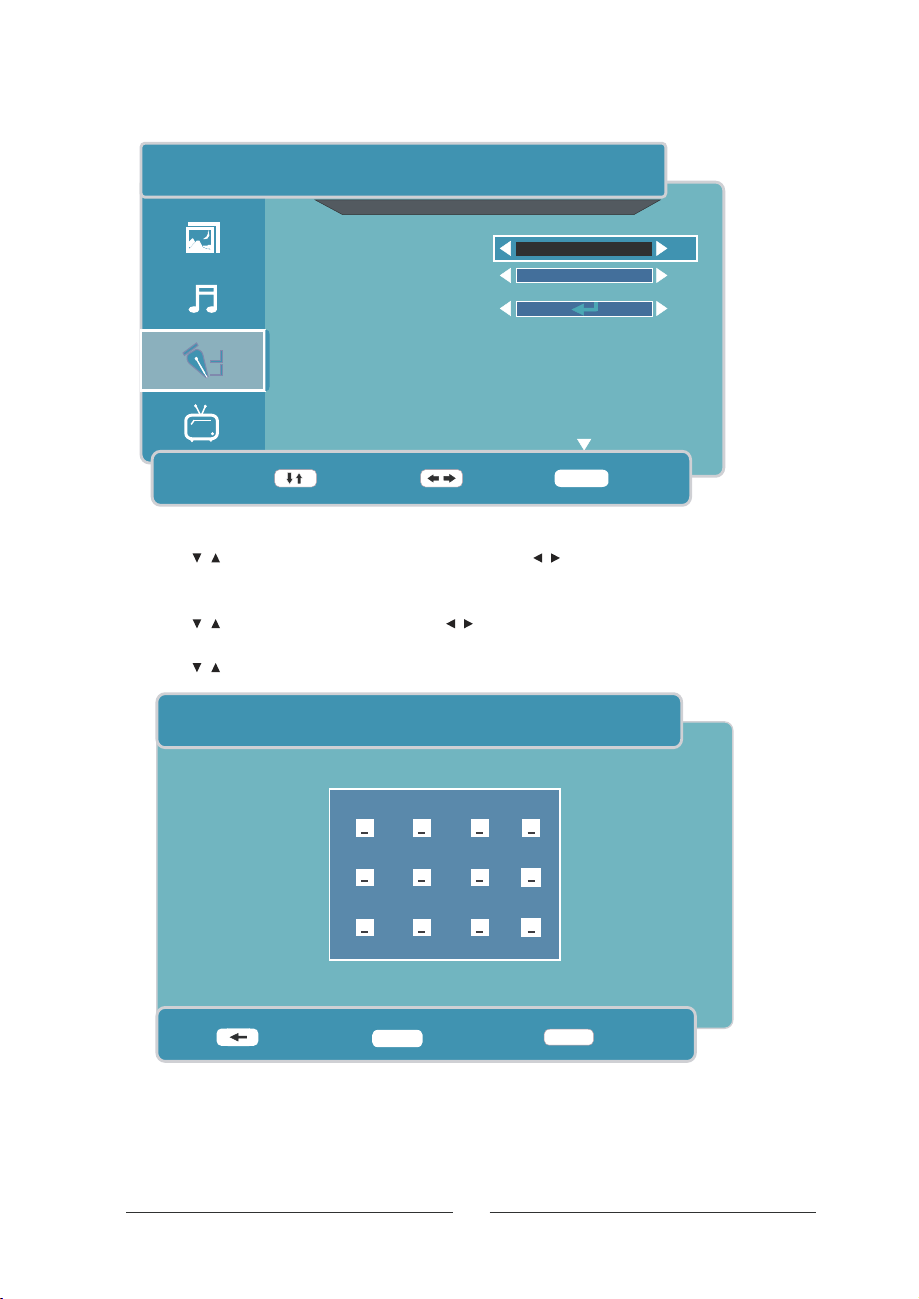
FUNCTIES
KINDERSLOT
KINDERSLOT
BLOK TOETSEN
UIT
UIT
WIJZIG CODE
VERLATEN
BEWEEG PAS AAN
Kinderslot
/
Kinderslot (kinderslot)
Breng uw paswoord in wanneer het kinderslot ingeschakeld is. Het standaard paswoord is '0000'.
Blok toetsen
/kiurbeg ne nezeik eted mokiurbeG
Wijzig code
/
/
Key Lock
ed mokiurbeG
Change Code(wijzig code)
MENU
/kiurbeg ne nezeik eted mokiurbeG
VOER
EXIT
.TIU fo NAAnessut nezeik et mo
mopo kurd ne nezeik et
in het menu te gaan.
WIJZIG CODE
VOER OUD WACHTWOORD
.TIU fo NAAnessut nezeik et mo
VOER NIEUWE WACHTWOORD
VOER WACHTWOORD OPNIEUW
MENU
VOER
Breng het oude paswoord in op de plaats 'VOER OUD WACHTWOORD'. Het standaard paswoord is '0000'.
Breng een nieuw paswoord in op de plaats 'VOER NIEUWE WACHTWOORD '.
Herhaal het nieuw paswoord op de plaats 'VOER WACHTWOORD OPNIEUW'.
0-9
AANTAL
NL-14
TERUG
Page 16
Installatie
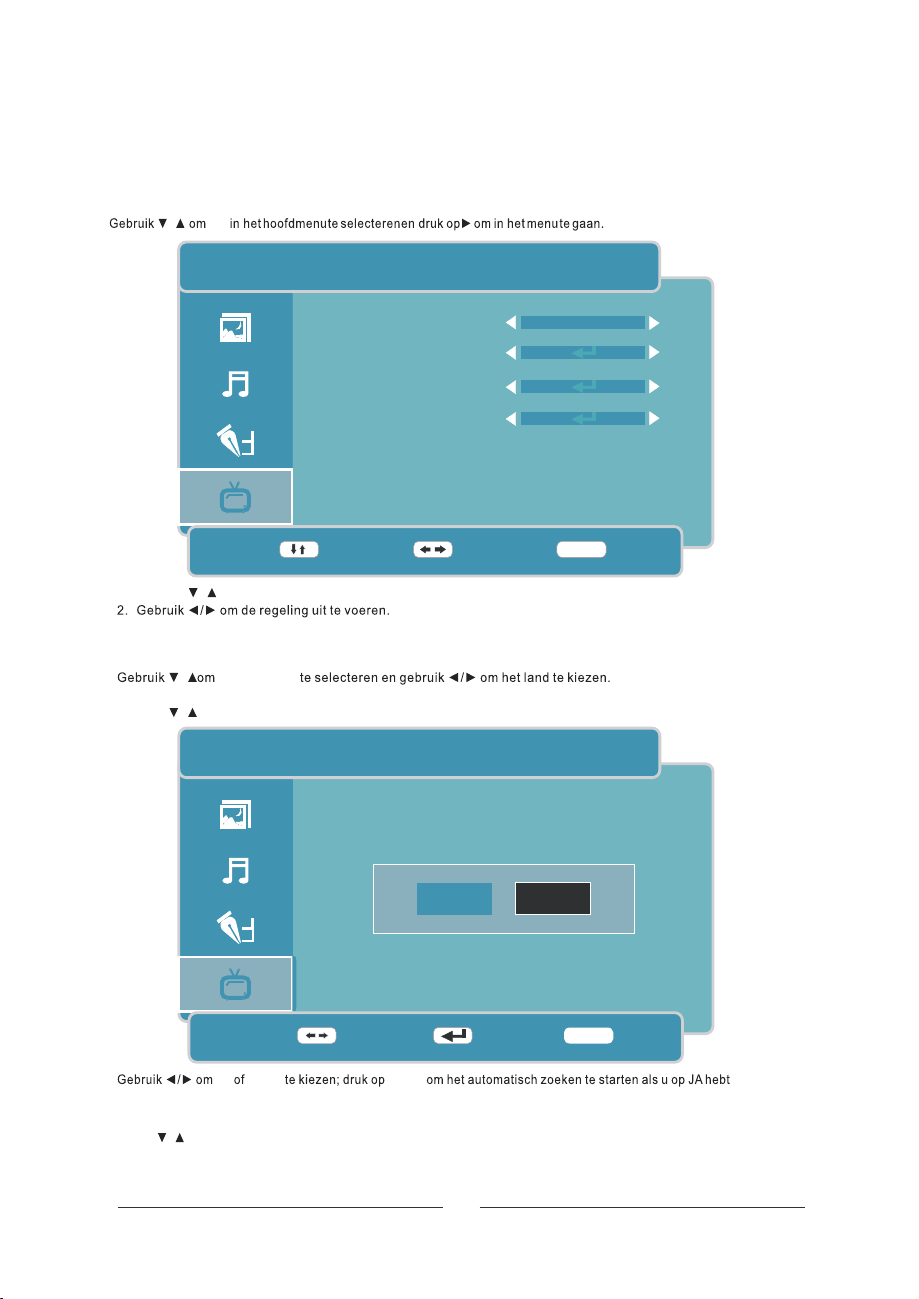
Gebruik om Installatie te selecteren en druk op om in het menu te gaan./ VO ER
EERSTE KEER INSTALLEREN
LAND
TAAL
VERWIJDER PROGRAMMA
ZOEK PROGRAMMA
JA
BEWEEG
Land
/
Gebruik om te selecteren en gebruik / om het land te kiezen.
Taa l
Gebruik om te selecteren en gebruik / om de taal te kiezen.
Zenders verwijderen
verwijderen.
Zenders zoeken
van zenders te starten.
zoeken
Na deze items te hebben ingevuld, kies JA om de installatie te voleindigen of kies NEEN om het menu te verlaten.
Indien u de installatie onderbreekt, zal u er de volgende keer aan herinnerd worden.
Land (Land)
/
Language (Taal)
/
Verwijderen Program (Zenders verwijderen)
/
Zoek Programma (Zenders zoeken)
OTHER
DUTCH
JA
JA
NEE
PAS AAN
VERLATEN
MENU
neretceles etmokiurbeG
teh mo nessilseb et mo/kiurbeg ne
EERSTE KEER INSTALLEREN
et srednez ella mo/kiurbeg ne neretceles etmokiurbeG
EERSTE KEER INSTALLATIE IS NIET GEREED
WILT U AFSLUITEN?
JA
BEWEEG
DOE VOLGENDE KEER
VOER
NL-15
MENU
NEE
VERLATEN
Page 17
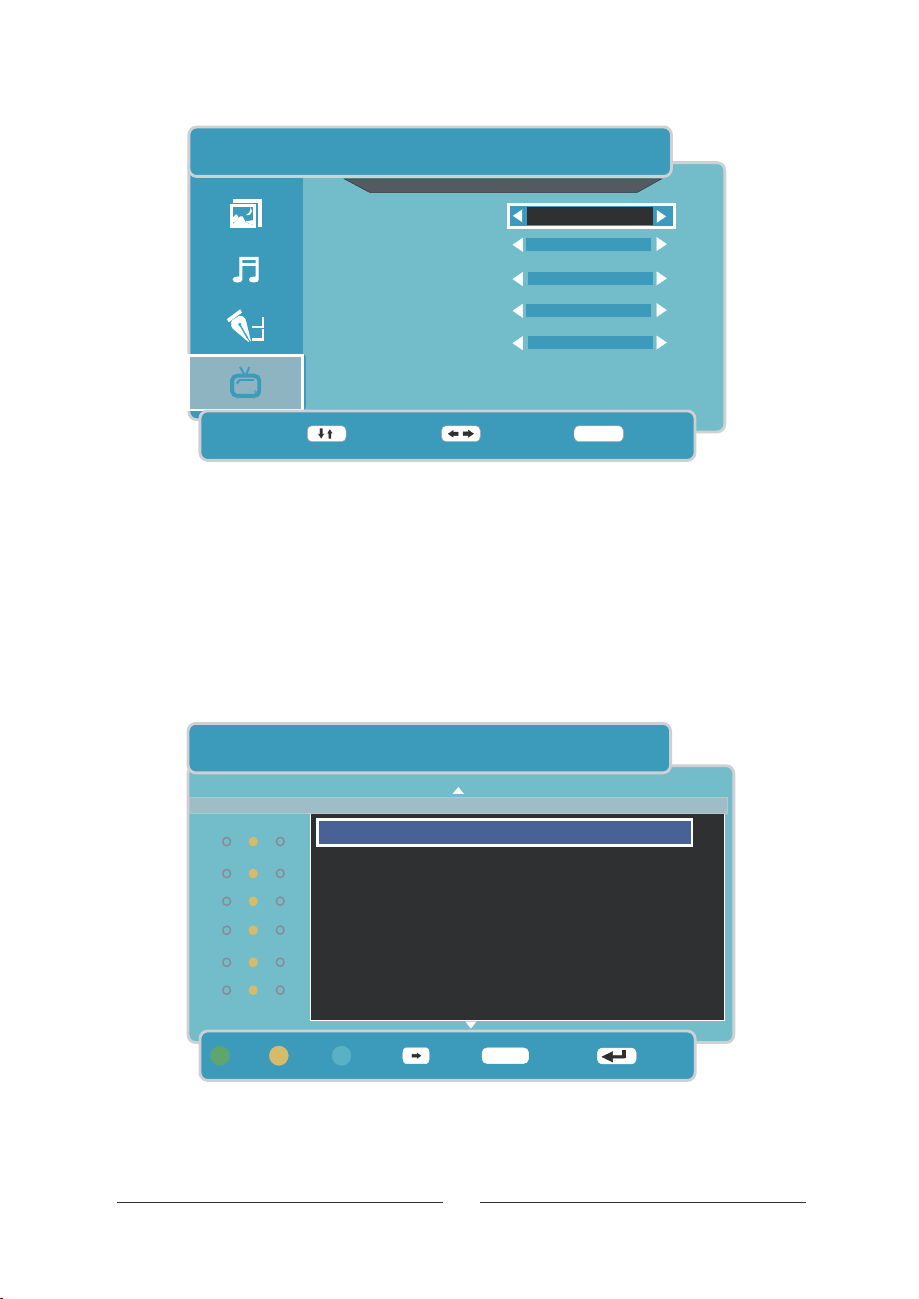
Druk op van het toestel of op van de afstandsbediening om in het hoofdmenu te komen.MENU LCD-MENU
/ TV
TV Menu
TV
LAND
OTHER
AUTO AFSTEMMEN
HANDMATIG
KANAAL BEWERKEN
VERLATEN
BEWEEG PAS AAN
1. Gebruik om de optie te kiezen die u in het menu wil gebruiken.
3. Na de instelling, druk op of om vast te leggen en naar het vorig menu
terug te keren.
Land
Automatisch afstemmen
Geb ruik om te selecter en en druk op om in het menu te gaan.
/
/
/
TV
LCD-MENU VERLATEN
Land (Land)
REOVgninuTotuA
MENU
TV
START TO SEARCH?
JA
NEE
BEWEEG VOER
gedrukt, druk op om naar het vorig menu te gaan als u op NEEN heeft gedrukt.
Handmatig afstemmen
Gebruik om te selecteren en druk op om in het menu te gaan.
JA NEEN VOER
VOER
/ REOVgninuTlaunaM
NL- 16
MENU
TERUG
Page 18
TV
TV
HANDMATIG
KANAAL
GELUID SYSTEEM
KLEURSYSTEEM
AFT
HANDMATIG
001
DK
PA L
UIT
49.7 MHz
BEWEEG PAS AAN
Voorkeuzezendernummer
kiezen.
Geluidsysteem
Kleursysteem
AFT
Gebruik om te selecteren en gebruik / om te Aan of Uit te kiezen.
Manual Tuning
passen, druk lang om te zoeken.
Zender instellen
Channel (Voorkeuzezendernummer)
/
Geluid Systeem
/
Systeem
Color (Kleursysteem)
/
AFT
/
Manual Tuning (Handmatig afstemmen)
kiurbeG Druk kort op/ om de frequentie aan te
/
Channel Edit (Zender instellen)
/
(Geluidsysteem)
neretceles etmokiurbeG en gebruik / om het voorkeuzezendernummer te
neretceles etmokiurbeG en gebruik / om te kiezen tussen BG, I, L of DK
neretceles etmokiurbeG en gebruik / om te kiezen tussenAuto, Pal of Secam.
.neretceles etmo
neretceles etmokiurbeG en druk op om in het menu te gaan.
VO ER
MENU
TERUG
TV
KANAAL BEWERKEN
VTEITPO
001 _______
002 _______
003 _______
004 _______
005 _______
006 _______
FAVO OVER
Deze optie biedt vier functies:
1. Druk op de groene toets om de gevonden zender aan het voorkeuzendernummer toe te voegen.Als de gevonden zender
reeds gememoriseerd was, druk opnieuw op de groene toets om er terug een normale zender van te maken.
2. Druk op de blauwe toets om de gevonden zender vast te leggen. Als het gekozen voorkeuzezendernummer reeds
geblokkeerd is, druk op de blauwe toets om het te deblokkeren.
3. Druk op de gele toets om de gevonden zender over te slaan.
BLOK
WISSEL
NL- 17
MENU
TERUG
VOER
Page 19

4. Met knop om een zender in de lijst aan te duiden en druk op om in het volgende menu te komen./ VOER
TV
EDIT NAME
_______
1 2 3 4 5 6 7 8 9
1 2 3 4 5 6 7 8
A B C D E F G H I J K L M N O P Q R S T U V W X Y Z
a b c d e f g h Ik j m l n o p q r s t u v w x y z
0
a b c d e f g h I j k l m n o p q r s t u v w x y z
1 2 3 4 5 6 7 8 9 0 _ ( )
LEEG
0~9
SNELKOPP KEY
Vul de zendernaam in op de plaats '__________'.
gaan naar het vorig menu.
/
Gebruik om de zender naar een ander voorkeuzezendernummer te beweeg.
/
Druk op om uw keuze uit te voeren.
VO ER
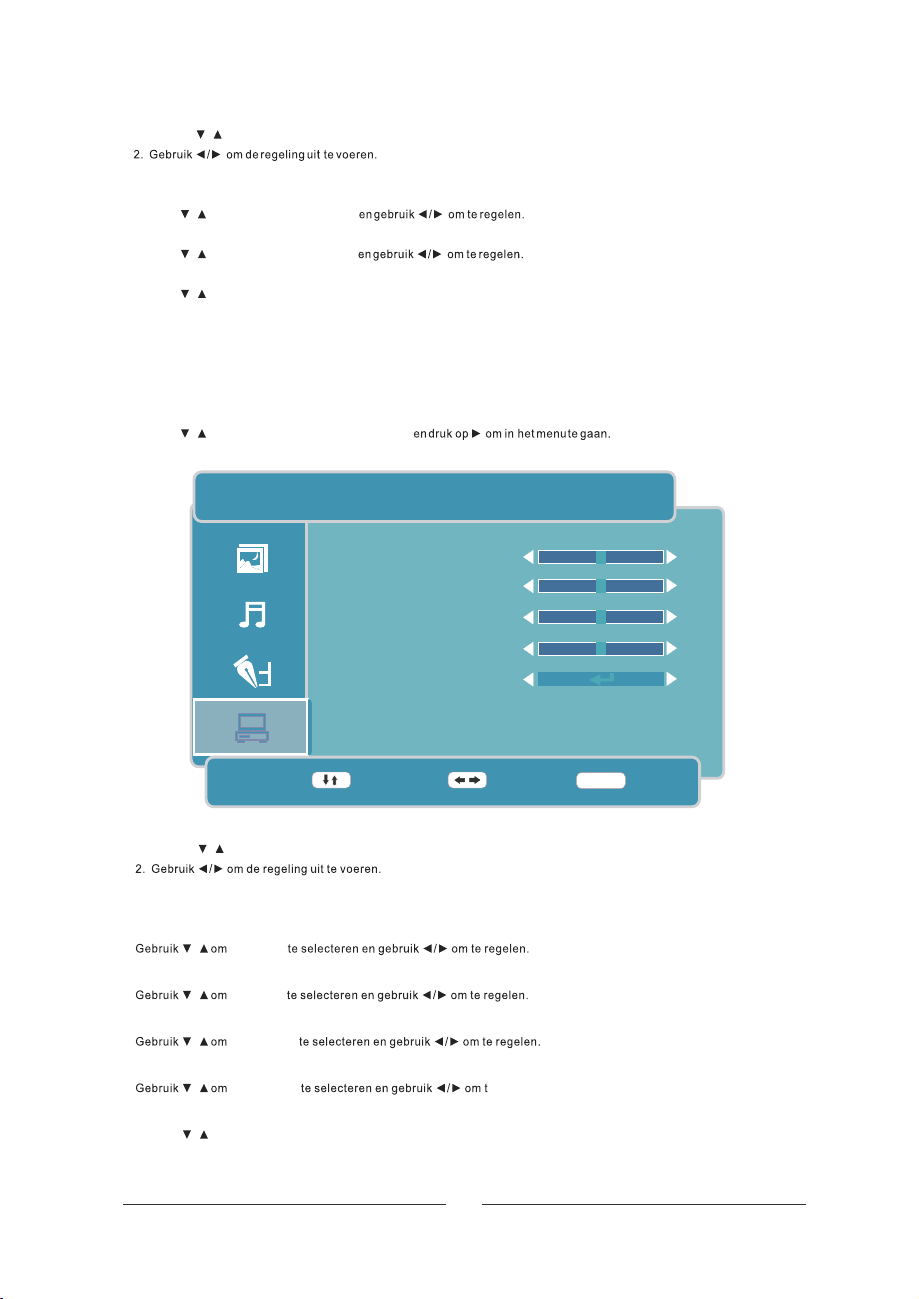
Druk op van het toestel of op van de afstandsbediening om in het hoofdmenu te komen.
MENU LCD-MENU
Gebruik om in het hoofdmenu te selecteren
HDM I/YPBPR/
H.POSITIE
V.POSITIE
WISSEN OKE ANNULE
BEWEEG
HDMI/YPBPR
H p osi t i on
H.POSITIE
O
V. POSITIE
V position
RESET POSITIE
HDMI/YPBPR
VOER
OKE
Menu
MENU
TERUG
50
50
BEWEEG
PAS AAN
NL- 18
MENU
VERLATEN
Page 20
1. Gebruik om de optie te kiezen die u in het HDM I/YPBPR menu wil gebruiken.
/
3. Na de instelling, druk op of om vast te leggen en naar het vorig menu terug te keren.
H Positie
/
Gebruik om te selecteren
V Positie
/
Gebruik om te selecteren
Resetten
/
Gebruik
om (Terugzetten) te selecteren en gebruik om te bevestigen.REOVnetteseR
LCD-MENU VERLATEN
H Position
V Position
PC Menu
UNEM-
Druk op van het toestel of op van de afstandsbediening om in het hoofdmenu te komen.
/
Gebruik om PC in het hoofdmenu te selecteren
DCLUNEM
H. POSITIE
V. POSITIE
FASE
KLOK
AUTO SYNCHR
PC
0
0
0
0
BEWEEG PAS AAN
1. Gebruik om de optie te kiezen die u in het menu wil gebruiken.
3. Na de instelling, druk op of om vast te leggen en naar het vorig menu terug te keren.
H Positie
V Positie
Fase
Klok
Aut o Synchr
Gebruik om te selecteren en gebruik om te bevestigen.
/
/
/
/
/
/
LCD-MENU
H Pos iti on
V Position
Phase (Fase)
Clock (Klok)
Auto Sync
PC
VERLATEN
e regelen.
VOER
NL- 19
MENU
VERLATEN
Page 21
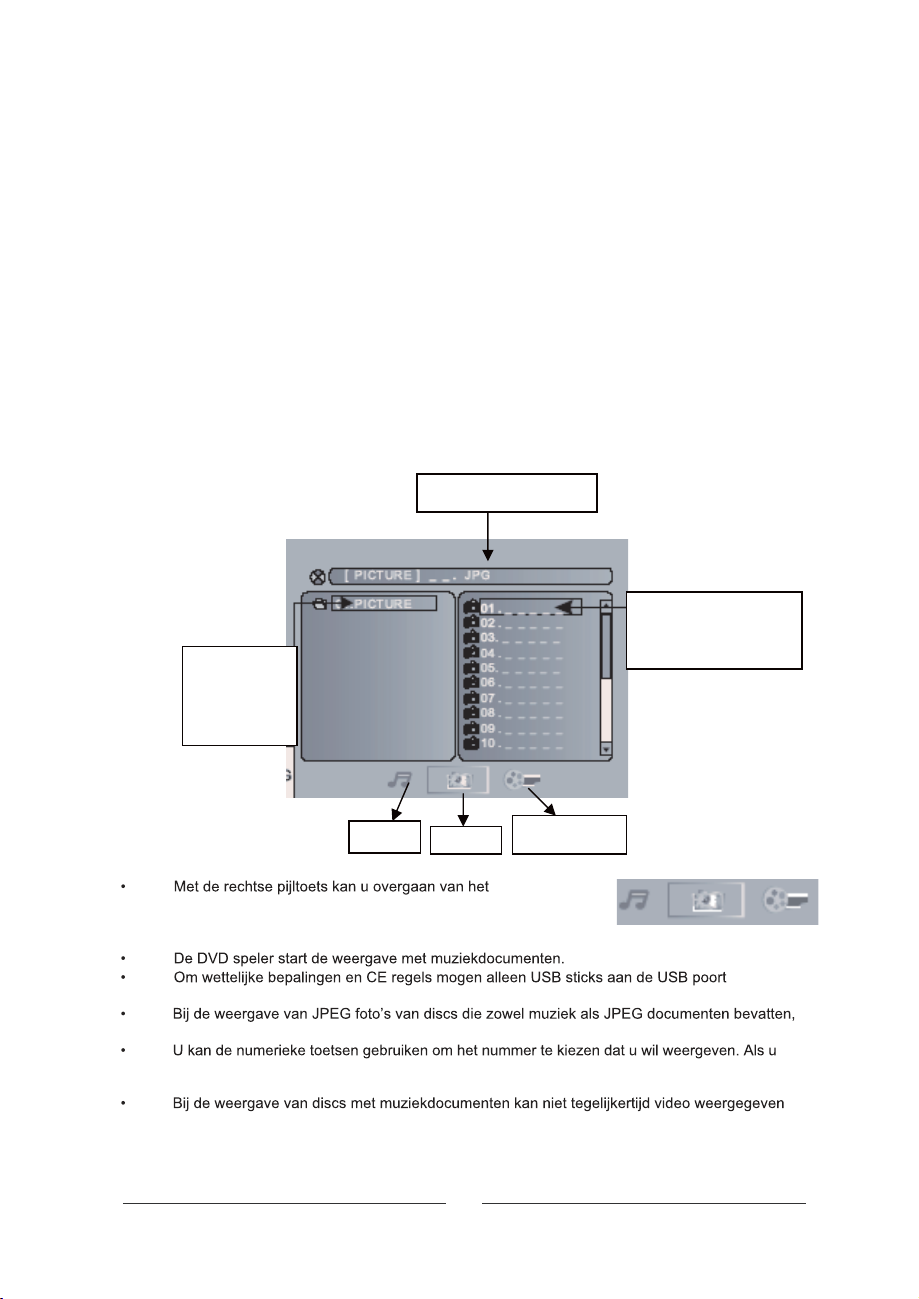
USB poort en kaartlezer
Druk op de SOURCE toets op de afstandsbediening en kies DVD om de interne DVD speler
te gebruiken.
Sluit de UDB stick of de mediakaart aan op de USB poort of in de kaartlezer op de rechterzijde
van het toestel. Normalerwijze moet de bedrukte zijde van de geheugenkaart aan de achterkant zijn.
Om de USB poort of de kaartlezer te starten, druk op DVD SETUP, ga naar systeem instellingen en
kies in de optie SOURCE voor USB of Card.
Data geheugen met Muziek, JPEG of Video documenten
Breng de disc in, sluit de USB stick aan of breng een geheugenkaart (SD, MMC of MS) in en de speler
zoekt automatisch de opgeslagen video/muziek/JPEG documenten. Na het zoeken, gaat de speler
automatisch naar de eerste lijst met opgeslagen muziekdocumenten (in geval van een disc met zowel
muziek als JPEG documenten. Als de disc slechts één type documenten bevat, gaat de speler naar de
eerste lijst) en geeft het eerste nummer uit de lijst weer (de naam wordt weergegeven). Het scherm
ziet er uit als hieronder getoond:
Als de interne DVD speler de USB stick of de geheugenkaart niet leest, druk op de DVD SETUP toets
en kies in systeeminstelling de optie SOURCE. Dan kan u de USB poort of de kaartlezer activeren.
Huidig documentnaam
Nummer van de lijst
Label van de
folder
Opmerkingen:
catalogusoverzicht naar de nummerlijst en naar het
documentformaat. De documentformaten zijn: muziek
(muzieknoten), foto’s (camera) en video (pijl).
aangesloten worden.
druk op STOP om terug te gaan naar de JPEG lijst.
bijvoorbeeld het 15 nummer uit de huidige lijst wil weergeven, druk dan eenmaal op de
10+ toets en dan op 5. De weergave van het 15 nummer start.
worden.
Muziek
e
JPEG
NL-20
Videodocument
e
Page 22
AnalogeTV
Druk op INPUT en kiesTV met de toetsen en druk VOER om te bevestigen .
Kies deTV-zender die u wenst te bekijken.
Druk eenmaal op deTEKST toets om de teletekstindex op het scherm af te beelden.
Druk tweemaal op de TEKST toets om de teletekst gemengd met het TV-beeld te zien.
Druk nogmaals op deTEKST toets om de teletekst te verlaten.
Gebruik de numerieke toetsen om het nummer van de gewenste pagina in te brengen of gebruik
gekleurde toetsen (Fasttext) om naar de overeenkomende pagina te gaan.
Om de letters van de tekst te vergroten, druk op SIZE. De bovenste helft van de pagina wordt
getoond. Druk opnieuw en de onderste helf t van de pagina wordt getoond. Druk nogmaals of o
VERL ATEN om terug op het normale formaat te komen.
Om de pagina vast te houden druk op HOLD . Druk nogmaals om de pagina terug vri j te maken
Om verborgen tekst af te beelden (bv. antwoorden op een quiz), druk op REVEAL . Druk
opnieuw om dit item te verlaten.
Om naar een subpag ina van de huidige pagina te gaan, druk op SUBPAGE. Onderaan het scher
verschijnt er een zone. Druk opnieuw om teverlaten.
Om terug naar de hoofdpagina of indexpagi
Om ondertitels bij een TV-programma weer te geven, druk 888 terwij l u in de teletekstmodus
bent. A ls de zender ondertitels meestuurt, verschijnen die onderaan het scherm.
Om de ondertitels weg te halen, druk op VERLATEN.
/
na te gaan, druk op INDEX.
p
;
Gebruik van de DVD-speler
Opmerking: dit toestel heeft geenAU TO DVD functie.
Geschikte disks
De DVD-speler is geschikt voor de weergave van disks met de volgende logo's:
Teletekst
de
m
12 cm DV D Video disks 12 cm Compact Recordable di sks
12 cm Compact Re-Writable Disks 12 cm Compact Audio disks
12 cm Photo Compact Disk s
Regionale Code
Al s de regionale code van de disk niet overeenkomst met die van deze speler, kan
de disk niet worden weergegeven
.
De regionale code van deze speler is 2 (zie symbool).
Inbrengen van een disk
Om de DVD-speler te kunnen bedienen moet u eerst DVD selecteren met de
INPUT toets. Probeer NIE T een disk in te brengen alvorens DV D geselecteerd te
hebben..
Duw zachtjes de CD in de gleuf aan de rechterkant van deTV, met de bedrukte
zijdeWEG van u. Het mechanisme neemt de disk vanzelf i n de speler.
Na een paar seconden verschijnt READ op het scherm en na nog enkele seconden
begint de automatische weergave of verschijnt hetdiskmenu.
NL- 21
Page 23
DVD weergave
De weergave van de film kan automatisch starten of er kan eerst een menu verschijnen,
afhankelijk hoe de DVD gemaakt werd.
Druk opVOER om de weergave te starten of gebruik om in het menu te navigeren.
Pauze
II
Druk op om de weergave te pauzeren. Het symbool verschijnt op het scherm. Druk
nogmaals om terug tot gewone weergave te komen.
Stop
Druk op om de weergave te stoppen.
Druk op om de weergave verder te zetten vanaf de plaats waar gestopt werd.
DVD uit de speler gehaald werd of er tweemaal op gedrukt werd.
Stoppen om de disk te verwijderen
Druk tweemaal op en het stopsymbool verschijnt op het scherm.
Als u op drukt, begint de weergave vanaf het eerste hoofdstuk.
Snel voorwaarts/achterwaarts
Om snel de inhoud van de disk te bekijken.
Druk op om snel voorwaarts te zoeken of druk op om snel achterwaarts te zoeken
keer als u op of drukt, zal de zoeksnelheid wijzigen. Dit is 2x, 4x, 8x en 20x de normale
snelheid. De geselecteerde snelheid wordt afgebeeld op het scherm als 2x, 4x, 8x 20 x bij
voorwaarts zoeken en als 2x, 4x, 8x 20 x bij achterwaarts zoeken.
Druk op eender welk moment op om terug op normale snelheid te komen.
Springen naar volgend/vorig hoofdstuk
Om tijdens de weergave naar het volgend of vorig hoofdstuk te gaan.
Druk op om naar het begin van het volgend hoofdstuk te gaan.
Druk op om naar het begin van het vorig hoofdstuk te gaan.
II
II
Opmerking: de weergave zal starten vanaf de exacte plaats waar gestopt werd, tenzij de
II
II
. Iedere
Bevriezen, beeld voor beeld weergave
Druk op om de actie te bevriezen en druk opnieuw om beeld voor beeld weergave te
bekomen.
Druk op eender welk moment op om terug op normale snelheid te komen.
I
II
Speciale DVD-functies
Titelweergave
Met de D.TITLE toets kan u de verschillende titels op de DVD zien, selecteren en weergeven.
Druk op D.TITLE om naar de gewenste titel te navigeren.
Druk VOER.
NL- 22
Page 24

Geprogrammeerde weergave
Druk op PROGRAM om in het programmamenu te komen.
Gebruik om door elke sequentie te navigeren.
Gebruik de numerieke toetsen om de nummers van de gewenste titels en hoofdstukken in te brengen.
Gebruik om naar 'Play' te gaan.
Druk opVOER.
Indien gewenst, gebruik om naar 'Clear' te gaan en het programma te wissen.
Herhaling
Druk op REPEAT om te kiezen tussen drie mogelijkheden.
Chapter: herhaling van het huidige hoofdstuk. Title: herhaling van de huidige titel. Repeat all: herhaling van de
hele disk.
Druk opnieuw op REPEATom de herhalingsfunctie te annuleren.
Display
De display functie geeft informatie over de huidige titel:
'Disk type' 'Titel ' 'Hoofdstuk ' 'Verlopen tijd'
Druk voor de tweede maal op D.DISP om het volgende te zien:
Audio
Taal,Audio type, Ondertitel (huidigotaal
Taal ondertitels
Hoek camera
Druk nogmaals op D.DISP om de display uit te schakelen.
Goto
Met de GOTO toets kan u gaan naar een bepaalde plaats o
p de disk.
Druk op GOTO om in het menu te komen.
Gebruik om naar de in te stellen parameters te gaan.
Gebruik de numerieke toetsen om de waarde in te vullen.
Druk opVOER om naar de aangeduide plaats te gaan.
Ondertitels
Sommige DVD disks beschikken over ondertitels in verschillende talen.
Druk op de ONDERTITELING toets om doorheen de verschillende talen te gaan en diegene te kiezen die u wenst.
De ondertitels verschijnen kort na de selectie. Om de ondertitels te verwijderen, druk op ONDERTITELING
totdat er 'Ondertitelings off' verschijnt.
Opmerking: zie het doosje van de DVD om de mogelijke talen te zien.
Audio (gesproken taal)
Druk opAUDIO om de huidige gesproken taal te zien. Druk verschillende malen om de mogelijke talen te
doorlopen.
Zoom
U kan kiezen uit drie vooringestelde opties.
Druk op ZOOM om op het beeld in te zoomen. Druk verschillende malen op ZOOM om door de mogelijkheden te
navigeren. Opties zijn: x2, x3 en x4.
Terwijl het beeld ingezoomd is, gebruik om het beeld te beweeg.
NL- 23
Page 25

WeergaveAudio CD's
Breng eenAudio CD in en de weergave begint automatisch met het eerste nummer. Het huidige nummer, het totaal
aantal nummers, de herhalingsmodusen de verlopen tijd worden bovenaan het scherm afgebeeld.
Mogelijkheden tijdens de weergave.
De volgende mogelijkheden bestaan tijdens de weergave:
Weergave, pauze, stop, snel voorwaarts, snel achterwaarts, voorwaarts springen, achterwaarts springen,A-B
herhaling, Goto, programmeren en audio.
Preview
Druk PREVIEW in om de eerste 15 seconden van elk nummer weer te geven.
Weergave JPEG CD's
Breng een JPEG CD in de speler. Het JPEG inhoudscherm verschijnt. Let op: alleen JPEG documenten tot 3 MB
kunnen worden weergegeven.
/
Gebruik ►/◄ om door de files en folders te navigeren.
Gebruik VOER om een file o
▼▲
f een folder te selecteren.
U kan ook gebruik maken van de numerieke toetsen om een file te selecteren.
De volgende mogelijkheden bestaan tijdens de weergave:
Weergave, pauze, stop, voorwaarts springen, achterwaarts springen, D.Disp, Goto, Zoom.
Herhaling
U kan het huidig nummer, directory of de hele disk herhalen.
Druk op de REPEAT toets om uit de drie mogelijkheden te kiezen:
Herhaal 1, herhaal directory, herhaal alles.
Druk op REPEAT om de herhaling stop te zetten.
Overgangseffecten
Als het JPEG inhoud scherm is weergegeven, het PROGRAMMA knop maakt het mogelijk voor U om de de order
te pre-selecteren.
Wanneer de JPEG beeldenworden weergegeven, druk op PROGRAM om te kiezen uit de overgangseffecten. Er
zijn 16 mogelijkheden:
Wissen vanaf bovenaan Horizontaal vanuit midden
Wissen vanaf onderaan
Verticaal vanuit midden
Wissen vanaf links Verticaal naar midden
Wissen vanaf rechts Horizontaal naar midden
Diagonaal vanaf linksboven Horizontaal venster
Diagonaal vanaf linksonder Verticaal venster
Diagonaal vanaf rechtsboven Van rand naar midden
Diagonaal vanaf rechtsonder Willekeurig
Beelden draaien
Bij de weergave van JPEG, gebruik de pijltoetsen om de beelden te draaien.
Als het beeld wordt getoond:
Gebruik ► om het beeld met 90° naar rechts te draaien. Gebruik om het beeld verticaal te kantelen.
Gebruik ◄ om het beeld met 90° naar links te draaien. Gebruik om het beeld horzontaal te kantelen.
▲
▼
A-B herhaling
U kan een bepaalde sectie van een DVD, binnenin een hoofdstuk herhalen.
Druk opA-B om het beginpunt van de sectie te bepalen.
Druk opA-B om het eindpunt van de sectie te bepalen. De sectie wordt nu herhaald.
Druk opA-B om de herhaling stop te zetten.
NL- 24
Page 26
DVD functie-instellingen
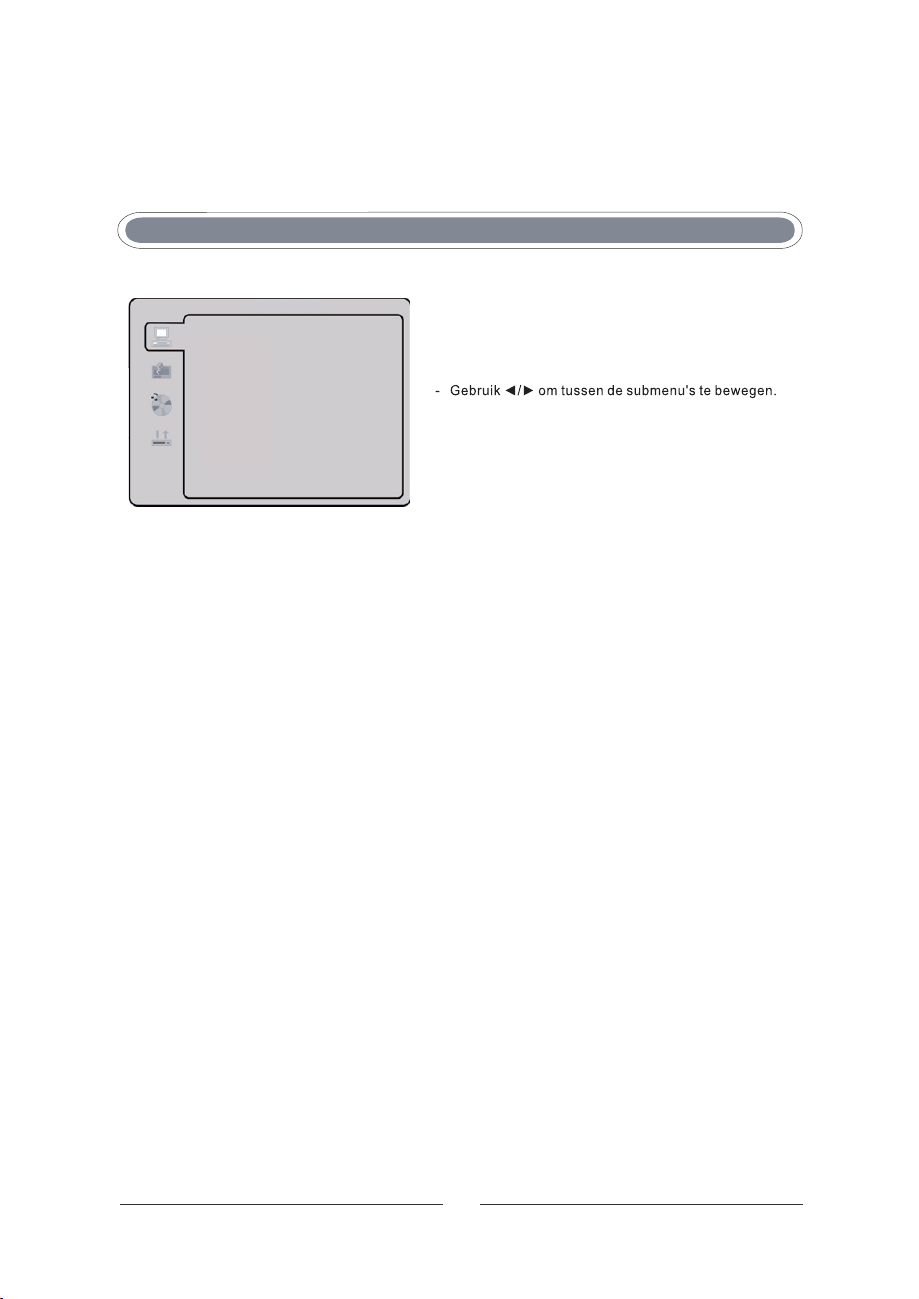
DVD FunctiesAlgemene instellingen
SYSTEEMINST
BRON
TV SYSTEEM
WEERG.FORMAAT
PINCODE
LEEFTIJD
POWER RESUME
STANDAARD
INST.VERLATEN
Opmerking: in de instelmodus zijn de volgende functies niet beschikbaar:
TITEL, ONDERTITELS, DISPLAY, WEERGAVE, INSTELLINGEN, STOP, VERTRAAGD,
STEP, NICAM, AUDIO, FF, FR, VORIGE, VOLGENDE, GOTO, ZOOM, HOEK,
PROGRAMMA, PREVIEW, HERHALING,A-B HERHALING.
- Druk op om het OSD menu van de DVD te
activeren.
SETUP
Druk opVOER om in het submenu te gaan.
-
Druk op om het OSD menu te verlaten of ga
naar VERLATEN SETUP en druk op VOER.
NL-25
Page 27
Systeem instelmenu's
BRON
SYSTEEMINST
BRON
TV SYSTEM
WEERG.FORMAAT
PINCODE
LEEFTIJD
POWER RESUME
STANDAARD
INST.VERLATEN
AUTO
DISK
USB
KAART
TV kleurensysteem
Dit menu stelt u in staat het beeldformaat voor uwTV/DVD in te stellen
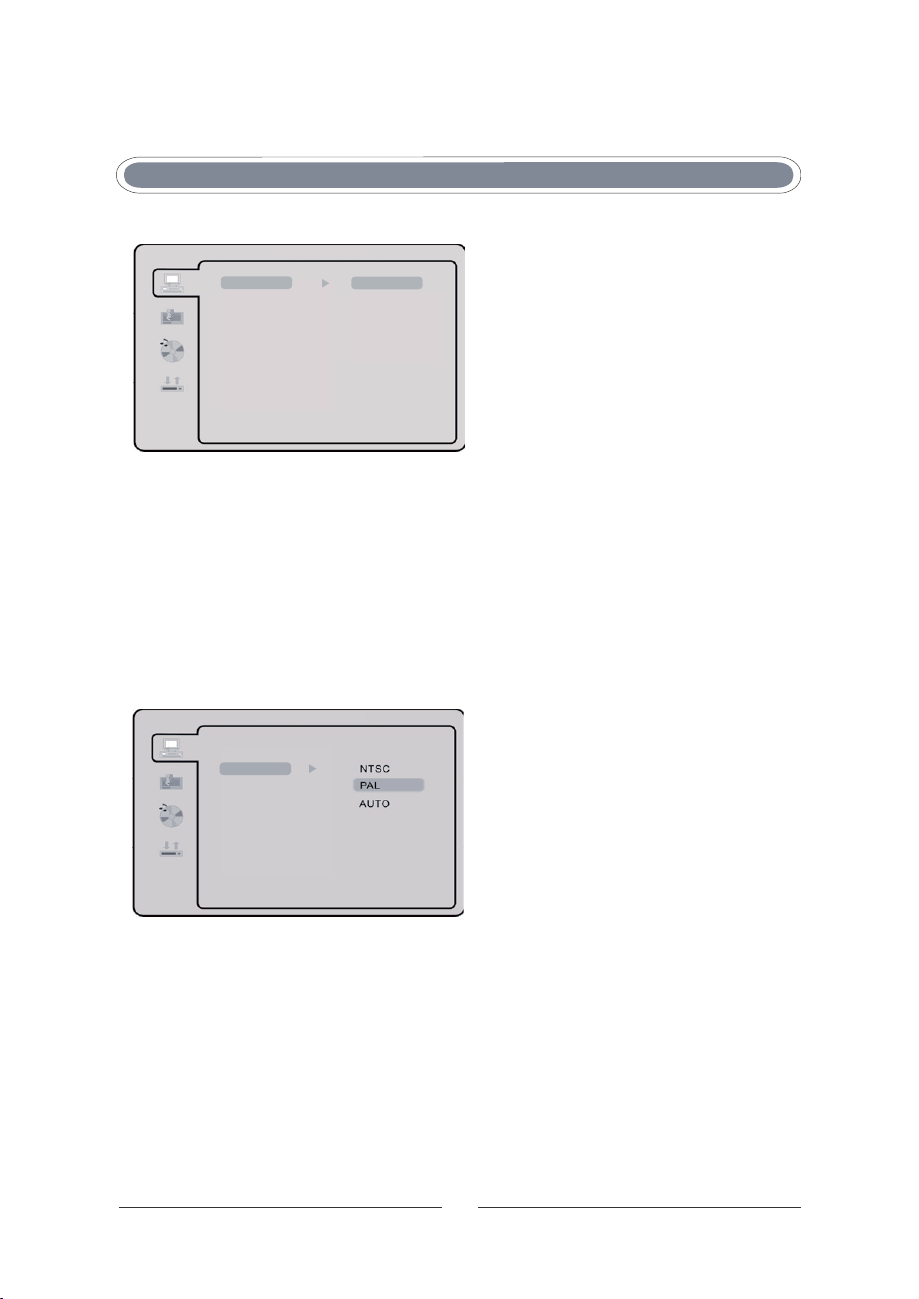
NTSC
Dit systeem wordt gebruikt in Japan en USA
PAL
Dit systeem wordt gebruikt in Europa
AUTO
Dit systeem kan gebruikt worden als uw TV/DVD geschikt is voor PAL en NTSC.
SYSTEEMINST
BRON
TV SYSTEEM
WEERG.FORMAAT
PINCODE
LEEFTIJD
POWER RESUME
STANDAARD
INST.VERLATEN
Met deze optie kan u kiezen voor disc, USB poort
of Kaartlezer. Kies de gewenste bron en bevestig
door op OK te drukken. Indien u voor AUTO kiest,
start de speler met de weergave van de bron die
ingebracht werd.
OPMERKING: PALwordt gebruikt als formaat
in Europa.Als NTSC gekozen wordt op een niet
compatible televisie kan er interferentie en
rollende beelden ontstaan.
NL- 26
Page 28
Weerg.formaat
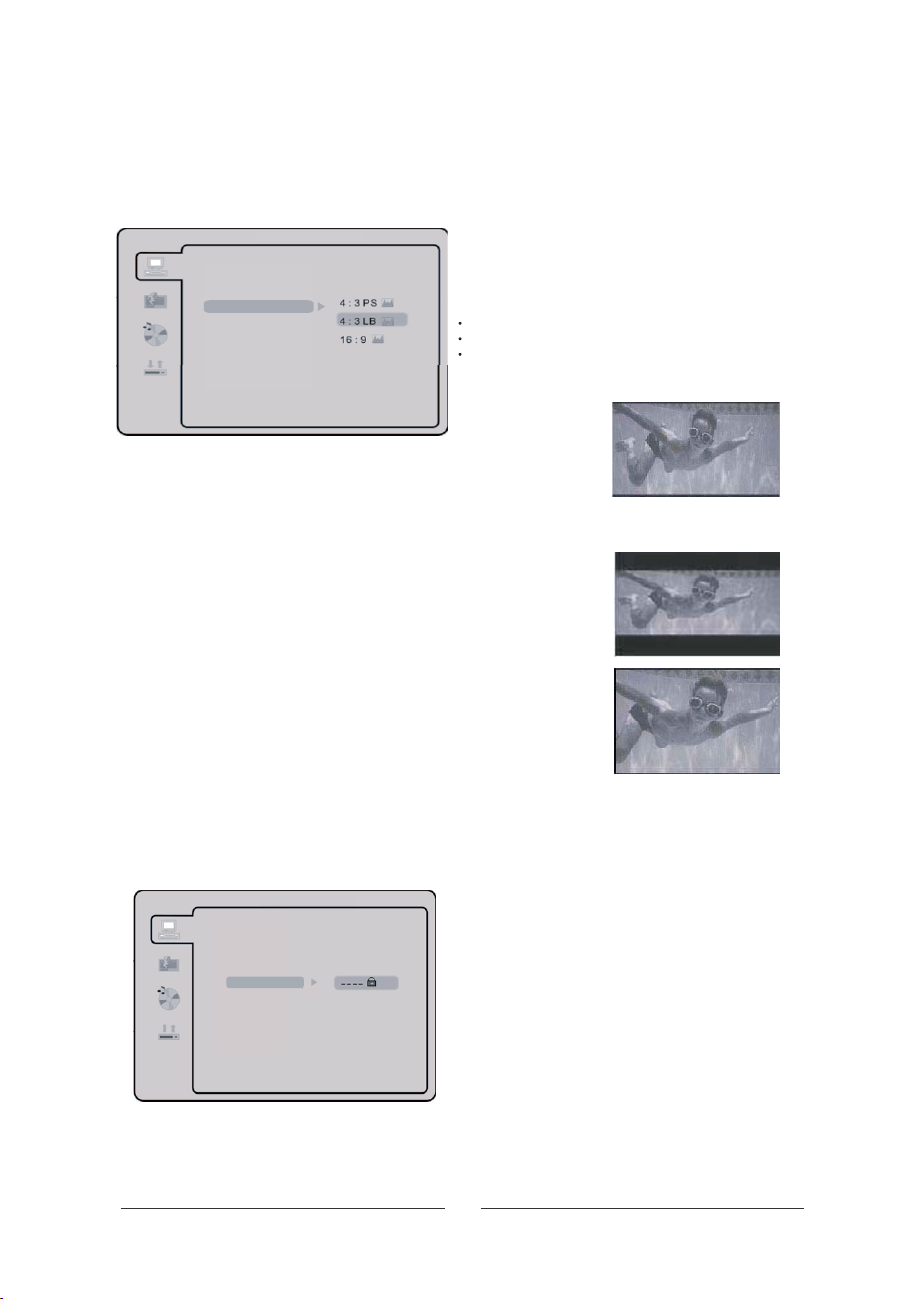
DVD's worden gemaakt met verschillende beeldverhoudingen. In dit menu kan u kiezen uit drie
verschillende beeldverhoudingen:
SYSTEEMINST
BRON
TV SYSTEEM
WEERG.FORMAAT
PINCODE
LEEFTIJD
POWER RESUME
STANDAARD
INST.VERLATEN
4:3 PS (normaal)
4:3 LB (normaal)
16:9 (breedbeeld)
- Selecteer de best overeenkomende
beeldverhouding.
4:3 PS (Normaal)
PanScan is gebruikt voor de meeste normale TV-uitzendingen en is de
standaardinstelling. Het heeft een beeldverhouding van 4:3. Als u dit
formaat kiest bij de weergave van een DVD zal het scherm volledig
gevuld worden, maar delen links en rechts van het beeld worden niet
weergegeven.
4:3 LB (Normaal)
Met LetterBox wordt de originele beeldverhouding van de DVD
behouden. Op een normale televisie verschijnen bovenaan en onderaan
zwarte stroken.
16:9 (Breedbeeld)
Kies voor deze instelling als u over een breedbeeldtelevisie beschikt.
OPMERKINGEN:
- Het beeldformaat hangt af van de inhoud van de disk.
- Disks met een4:3 beeldverhouding worden steeds in die verhouding
weergegeven.
- De keuze van de beeldverhouding moet in functie zijn van de
aangeslotenTV.
Paswoord
- In de standaardinstelling is deze geblokkeerd. Geen ouderlijk niveau of paswoord kan gewijzigd
worden. Om het ouderlijk niveau te wijzigen, breng eerst het standaard paswoord '0000' in via de
numerieke toetsen en druk op om te bevestigen.
- Om het paswoord te wijzigen, breng een getal van vier cijfers in. Vanaf dan is dat het nieuwe
aswoord.
p
SYSTEEM
VO ER
INST
BRON
TV SYSTEEM
WEERG.FORMAAT
PINCODE
LEEFTIJD
POWER RESUME
STANDAARD
INST.VERLATEN
NL- 27
Page 29

Ouderlijke contr
- De weergave van een DVD kan gecontroleerd worden door een ouderlijke controle. Het kijken kan
ingesteld worden op acht verschillende niveaus, gaande van 'geschikt voor kinderen' tot
'volwassenen'.
ole
SYSTEEM
BRON
TV SYSTEEM
WEERG.FORMAAT
PINCODE
LEEFTIJD
POWER RESUME
STANDAARD
INST.VERLATEN
INST
1KIND
2G
3PG
4PG13
5 PG-R
6R
7NC-17
8VOLWASSENE
Opmerking: alleen beschikbaar als het paswoord
ontsloten is. De ouderlijke controle kan alleen
werken als het paswoord ingeschakeld is.
POWER RESUME
Laatste geheugen. Hervat het afspelen vanaf het laatst afgespeelde punt van de disk.
SYSTEEMINST
BRON
TV SYSTEEM
WEERG.FORMAAT
PINCODE
LEEFTIJD
POWER RESUME
STANDAARD
INST.VERLATEN
AAN
UIT
Standaardinstelling
VO ER- Druk op om te komen op de
fabrieksinstellingen.
BRON
TV SYSTEM
WEERG.FORMAAT
PINCODE
LEEFTIJD
POWER RESUME
STANDAARD
INST.VERLATEN
SYSTEEMINST
HERSTELLEN
GB-28
Page 30
Druk op om in het OSD menu van de DVD te komen.SETUP
TAALINST
OSD TAAL
AUDIO TAA
ONDERTIT.TAAL
MENUTAAL
INST.VERLATEN
ENGELS
DUITS
SPAANS
FRANS
ITALIAANS
DUTCH
ITALIAN
Taal instelmenu's
- OSD taal
Gebruik de pijltoetsen om OSD LANGUAGE te
kiezen en druk opVOER om te bevestigen. U kan
kiezen uit twee talen. Gebruik om te kiezen
tussenEngels of Nederlands. Druk VOER om te
bevestigen.
/
OPMERKING:
op de gebruikte DVD, wordt de standaardtaal van de
disk gebruikt. De standaardinstelling is Engels.
als de gekozen taal niet beschikbaar is
- Gesproken taal.
Gebruik de pijltoetsen om te kiezen en druk op om te bevestigen. Gebruik om
te kiezen tussen Engels, Frans, Spaans, Nederlands, Duits, Italiaans. Druk om te bevestigen.
TAALINST
OSD TAAL
AUDIO TAA
ONDERTIT.TAAL
MENUTAAL
INST.VERLATEN
OPMERKING:
gebruikt. De standaardinstelling is Engels.
als de gekozen taal niet beschikbaar is op de gebruikte DVD, wordt de standaardtaal van de disk
FRENCH
ENGELS
SPANISH
DUITS
DUTCH
SPAANS
ITALIAN
FRANS
GERMAN
ITALIAANS
DUTCH
REOVGNALOIDUA
VO ER
/
- Taal ondertitelingen.
Gebruik de pijltoetsen om te kiezen en druk op om te bevestigen. Gebruik
om te kiezen tussen Engels, Frans, Spaans, Nederlands, Duits, Italiaans, uit. Druk om te bevestigen.
TAALINST
OSD TAAL
AUDIO TAA
ONDERTIT.TAAL
MENUTAAL
INST.VERLATEN
ITALIAN
ENGELS
DUITS
SPAANS
DUTCH
FRANS
ITALIAANS
OFF
DUTCH
UIT
REOVGNALELTITBUS
V
OER
/
OPMERKING: als de gekozen taal niet beschikbaar is op de gebruikte DVD, wordt de standaardtaal
van de disk gebruikt. De standaardinstelling is Engels.
NL- 29
Page 31

Menutaal
TAALINST
OSD TAAL
AUDIO TAA
ONDERTIT.TAAL
MENUTAAL
INST.VERLATEN
FRENCH
ENGELS
SPANISH
DUITS
DUTCH
SPAANS
GERMAN
FRANS
ITALIAN
ITALIAANS
DUTCH
UIT
- Gebruik de pijltoetsen om MENU LANG te
kiezen en druk op VOER om te bevestigen.
Gebruik om te kiezen tussen Engels,
Frans, Spaans, Nederlands, Duits, Italiaans;
Druk VOER om te bevestigen.
/
Audio instelmenu's
Audio uitgang
AUDIOINST.
UIT
AUDIO-UITGANG
TOON
INST.VERLATEN
- SPDIF/OFF: coaxiale uitgang is afgesloten.
- SPDIF/original code: weergave van disks met Dolby, MPEG worden via coaxiale weg doorgestuurd naar
de versterker, die wel met een gepaste decoder moet uitgerust zijn.
F/PCM: weergave van disks met Dolby of MPEG worden via coaxiale weg doorgestuurd naar een
- SPDI
stereo versterker voor stereo weergave.
Tonaliteit
Gebruik om de tonaliteit in te stellen.
/
UIT
RAW
PCM
Gebruik de pijltoetsen om te
kiezen en druk op om te bevestigen.
Er zijn drie mogelijkheden om uit te kiezen via
de pijltoetsen en druk dan op VOER om te
bevestigen (SPDIF/OFF SPDIF/original code
SPDIF/PCM)
VOER
AUDIO OUT
AUDIOINST.
AUDIO-UITGANG
TOON
INST.VERLATEN
NL- 30
Page 32

Dynamies ch bereik
Dolby Digital instelmenu
DIGITALE INST.
DYNAMIEK
INST.VERLATEN
MAX.
UIT
- Om de compressieverhouding van de audio
uitgang te regelen.Wanneer FULL gekozen
wordt is de piekwaarde het kleinst.Wanneer OFF
wordt gekozen is de piekwaarde het grootst.
Dual Mono
DIGITALE INST.
DYNAMIEK
INST.VERLATEN
- U kan kiezen uit vier verschillende
mogelijkheden: STEREO, MONO L, MONO R,
MONO MIX.
De selectie wordt in onderstaande tabel
weergegeven.
Modus Linkse luidspreker Rechtse luidspreker
STEREO Stereo links Stereo rechts
sknil onoMsknil onoML ONOM
MONO R Mono rechts Mono rechts
MONO MIX Mono links + mono rechts Mono links + monorechts
NL- 31
Page 33

Hulp in geval van problemen
Indien u problemen heeft, consulteer eerst onderstaande tabel, alvorens externe hulp te
raadplegen.
Probleem Mogelijke oorzaak
LED gaat niet aan
LED brandt, maar toetsen op toestel
werken niet
Geen beeld, blauwe LE D
Geen beeld, blauw scherm
Slecht beeld (analoge TV ) of brekend
beeld (digital eTV )
Teletekst breekt op
Heldere of donkere plekken in het beeld
Geen geluid
Vergeten paswoord
Display toont Geen Signaal
Beeldruis
Beeld niet in het midden
Geen geluid van PC
Niet aangesloten aan netstroom
.
Toetsen vergrendeling
TV i n verkeerde ingangsmodus.
Fout backlight systeem
Geen ingangssignaal
Zenders niet afgestemd
TV i n verkeerde modus
Slech t ontvangstsignaal
.
Slecht ontvangstsignaal
LCD scherm beschadigd
Mute in ingeschakeld
Slechte aansluiting
PC bediening
Slechte aansluiting
TV niet correct op PC afgesteld
Verkeerde positie
Audio instellingen
Oplossing
ChektA C aansluiting naarTV
Chekt aansluiting met het hoofd stopcontact en het
toevoer moet aanzetten.
Refereert naar pagina 16-17.
Zet TVaan met de afstandbediening.
Zet de TV in TV modus
Contacteer service
Antenne aangesloten ?
Zi e pag 1 6-17
AV of PC geselecteerd ?
Controleer antenne-aanslutingen. Vervang
binnenantenne door buitenantenne
Al s hierboven
Niet gedekt door garantie
Controleer mute toets
Controleer de externe versterker
Voer '0000' in
Controleer VGA aansluiting
Selecteer PC menu en vervolgensAuto Configuration
Selecteer PC menu en gebruik H en V Position
Controleer de audio instellingen van de PC
Disk speelt niet
Beeld bevriest of breekt op
Disk wordt niet uitgeworpen
Paswoord vergeten
Geen reactie
DV D bediening
Niet juist geplaatst
Vuil of beschadigd
Verkeerde regio
Vuil of beschadigde disk
DVD niet geslecteerd
Afst andsbedienin
Batterijen leeg
g
NL- 32
Bedrukte zijde moet van u weg zij n
Reinig of vervang disk
Kan niet weergegeven worden
Renig of vervang disk
Selecteer DVD modus
Haal externe hulp. Probeer niet zelf de disk eruit te halen
Breng '0000' in
Vervang de batterijen om de zes maanden
Page 34

Montage aan de muur beugel
Deze TV i s geschikt v oor montage met een beugel aan de muur.
Gebrui k al ti j d een V ESA muurbevesti ging. Zi e daarvoor l ogo op
verpakking.
Om de voet te verw i jderen, verwi j der de vier schroeven zoals getoond
op de foto.
Om de schr oeven niet te verl i ezen , schroef ze terug i n de openingen.
Lees aandachti g de instructi es van de fabri kant van de
muurbevestigi ng.
Gebruik geen schroeven die langer zijn dan 15 mm.
De TV-f abri kant aanvaardt geen enkele verantwoordeli j kheid voor
slecht aangebrachte muurbevestiging of schade veroorzaakt door
verk eer de inst al lati e.
Zorg voor de disks
Disks behandelen
Raak het oppervlak van de disk niet aan. Hou de disk vast bij de rand,
zodat er geen vingerafdrukken op de disk kunnen komen. Kl eef nee oi t
i et s op de di sk .
Disks bewaren
Steek de di sk na de weergave in zij n doosje. Stel de disk ni et bloot aan
di rect zonl icht of andere warmtebronnen en laat hem nooit i n een auto
di e in de zon staat.
Disks reinigen
Vingeraf drukken en stof k unnen een invl oed hebben op de beeld- en
gelui dkw al iteit. Reini g de disk voor de weergave met een droog
doekje. Reini g vanui t het mi dden naar de rand toe.
Gebruik geen solventen zoals alcohol , benzine, thinner, commerciële
reinigi ngsmiddelen of anti -statische producten.
NL- 33
Page 35

TV
Technische specificaties
Beeldverhouding 16:9
Scher m react i eti jd 5 m/ s
Voorkeuzezenders (analoog) 200
DVD
ksiD
kstemperatuur 5°C – 35° C
Gebrui
Af standbediening 74 g (zonder batteri j en)
1:0001:tsartnoC
Band 3 Ch5-Ch12
Band UHF Ch21-Ch69
,IMDHnegnagnI
mc 21taamrof
%09 - %5diehgithcoV
x 2nejirettaB
slexip 867 x 6631eitinifeD
²m/dc0/35052diehredleH
4hC-2hC 1 dnaBgnagni FR
K/D ,G/B,InemetyssdiuleG
maceS ,laPnemetsysruelK
)mho 4( 2 x SMR W3gnagtiu oiduA
GEPJ ,DC ,-/+ DVDevagreeW
zH 06/05 ,CA V 042-022gnideoV
)xam w84(
SBVC ,AGV ,OEDIV-S ,TRACS
)IMCP( FIDPS ,tracS ,noofeletdfooHnegnagtiU
)drevelegeem tein( enilakla AAA
laacitreVeitarepO
De fabrikant heeft het recht w i jzi gi ngen aan te brengen zonder voorafgaande verwi tti gi ng.
NL- 34
Page 36

Sommaire
egap ed orémuN.metI
Information de sécurité
Instructions de sécurité
Eléments et accessoires
Commandes
Connexions panneau arrière
Télécommande
Boutons DVD
Utilisation de la télécommande
Sélection source d'entrée
Opération de base
Menu image
Menu son
Menu fonctions
Menu TV
Menu HDMI/YPBPR
1.1
2.2
3.3
4.4
5.5
6.6
7.7
8.8
9.9
9.01
01.11
11.21
51-21.31
81-61.41
91-81.51
Menu PC
Porte USB et lecteur cartes
Regarder le télétexte
Utilisation lecteur DVD
Fonctions spéciales DVD
Réglages fonctions DVD
Aide en cas de problèmes
Montage au mur
Utilisation des disques
Spécifications techniques
91.61
02.71
12.81
22
-12.91
42-22.02
25-31.12
23.22
33.32
33.42
43.52
Page 37

Rayonnement
de laser
Information de sécurité
ATT ENT I ON
RISQUE DES CHOCS
ELECTRIQUES
NE PAS OUVRIR
ATTENTION : POUR EVITER LE RISQUE D'UN CHOC
ELECTRIQUE
NE PAS OUVRIR L'APPAREIL
PAS DE FONCTIONS D'UTILISATION A L'INTERIEUR.
CONSULTEZ UN SPECIALISTE POUR SERVICE
Le triangle avec l'éclair sert à prévenir l'utilisateur qu'à l'intérieur de ce produit
se trouvent des voltages dangereux non isolés avec une puissance suffisante
pour donner des risques de chocs électriques aux êtres humains.
Le triangle avec le point d'exclamation sert à prévenir l'utilisateur que
l'appareil est accompagné d'instructions importantes d'opération et d'entretien.
Enlèvement correct de ce produit
(Déchets d'Equipement Electrique et Electronique – DEEE).
La poubelle avec le croix est pour avertir que ce produit, arrivé à la fin de sa
vie, ne peut pas être disposé avec les autres déchets domestiques. Pour éviter
l'endommagement de l'environnement et la santé humaine par des déchets non
contrôlés, ne pas mélanger ce produit avec les déchets domestiques, mais
utilisez le système de recyclage pour promouvoir la réutilisation des matériaux.
Les consommateurs doivent contacter le revendeur où ils ont acheté le produit
ou les autorités locaux pour obtenir des informations où ils pe
pour un recyclage correct.
Les utilisateurs professionnels doivent contacter leur fournisseur pour
contrôler les conditions mentionnées dans le contrat. Ce produit ne peut pas
être mélangé avec d'autres déchets industriels.
Ce produit est un produit 'CLASS 1 laser'. Ce produit utilise un rayon laser qui
peut causer une radiation dangereuse. Faites attention que l'appareil est utilisé
comme marqué dans les instructions. N'ouvrez pas l'appareil et ne regardez pas
dans l'ouverture du tiroir DVD pendant l'opération. Ne changez pas les
contrôles qui peuvent avoir un effet sur les émissions du laser. Consultez un
spécialiste quand l'appareil est défectueux.
uvent s'adresser
Cet appareil est conforme aux directives européennes de sécurité et
d'électricité.
FR- 1
Page 38

Instructions de sécurité
ATTENTION. LISEZ BIEN ETTENEZ COMPTE DES INSTRUCTIONS DONNEES DANS
LE MANUELD'INSTRUCTION ET LES MARQUAGES SUR L'APPAREIL. GARDEZ LE
MANUEL D'INSTRUCTION POUR CONSULTATION ULTERIEURE. Cet appareil a été
conçu et fabriqué en tenant compte de votre sécurité. Une mauvaise utilisation peut causer des
chocs électriques ou du feu. Les instructions de sécurité vous protègent quand vous suivez les
instructions d'installation, d'entretien et d'opération. Il n'y a pas des fonctions d'utilisation à
l'intérieure de l'appareil. NE PAS OUVRIR L'APPAREIL CAR VOUS POUVEZ ETRE
EXPOSE AUX VOLTAGES DANGEREUX ET A LA RADIATION LASER. L'OUVERTURE
DE L'APPAREIL ANNULE LA GARANTIE. POUR ENTRETIEN, COLSULTEZ DES
SPECIALISTES.
Déballer.
prudemment le TV et placez le sur un fond stable. Enlevez le sac plastique et gardez toutes les
pièces d'emballage pour utilisation ultérieure. Faites attention que les enfants ou des animaux ne
peuvent pas venir en contact avec l'emballage.
Emplacement TV.
dans un cabinet au moins qu'il existe assez d'espace pour ventilation et pour opération du lecteur
DVD.
Connexions.
attention que vous ne pouvez pas marcher sur les câbles. Ne placez pas des objets lourds sur les
câbles.
Dessus du TV.
Ventilation et sources chaudes.
ventilation, car ceci peut causer une sur chauffage. Ne pas placer le TV dans la lumière directe du
soleil ou à côté des sources de chaleur comme des radiateurs ou des feux.
Humidité.
d'autres endroits humides. Faites attention que l'eau ou d'autres liquides ne peuvent pas pénétrer
l'appareil. Ne touchez pas la prise courant ou l'adaptateur avec les mains humides. En cas qu'une
liquide est pénétré dans l'appareil enlevez la prise courant secteur et consultez un spécialiste.
Nettoyage.
plus dures utilisez un chiffo
pétrole.
Abandon de votre TV.
recommandé de mettre l'appareil hors fonction quand vous quittez. Pour conserver de l'énergie,
ne pas laisser trop longtemps l'appareil en mode stand-by. Quand vous n'utilisez pas le TV
pendant un certain temps, ou en cas d'orage, enlevez l'antenne et la prise courant secteur.
Ouvrez soigneusement l'emballage et enlevez le polystyrène supérieur. Soulevez
Le TVdoit être installé sur une table ou une planche stable
En connectant l'appareil au courant secteur et d'autres appareils externes, faites
Ne placez pas des objets, tels que vase ou bougies au-dessus duTV.
Ne placez pas du matériel au-dessus des ouvertures de
Ne pas placer le TVdans des environnements humides, tels que cuisines, caves ou
Déconnectez le courant secteur. Utilisez un chiffon doux. Pour enlever des saletés
n avec un détergent doux. Ne pas utiliser des produits sur base de
Ne laissez pas votre TVen fonction sans votre présence. Il est
. Ne pas placer
FR- 2
Page 39

Eléments et accessoires
Déballage.
Enlevez prudemment le téléviseur de l'emballage.
Contrôlez les accessoires. Si quelque chose manque, consultez votre revendeur.
Ne jetez pas l'emballage avant que vous êtes certain que le téléviseur fonctionne bien.
Dans l'emballage
TV
Télécommande
READY LCD/DVD TELEVISION
Câble courant secteur
FR-3
Page 40

Commandes
POWER MENU VOL- VOL+ CH- CH+ INPUT
Description des commandes
POWER.
INPUT.
CH+ / CH-.
VOL+ / VOL -
MENU.
Pour mettre leTV en fonction du stand-by et pour remettre en stand-by
Pour sélectionner la source d'entrée.
Pour sélectionner l'émetteur et pour bouger verticalement le curseur dans le menu.
Pour sélectionner l'émetteur et pour bouger verticalement le curseur dans le menu.
Pour entrer dans le mode menu.
Description des commandes DVD
STOP. Pour arrêter la lecture.
Commande DVD
Arrêt
Lecture/pause
Ejection
SD/MMC/MS
Récepteur infrarouges
Led stand-by
CARD
USB
PLAY/
PAUSE.
EJECT.
SD/MMC/MS CARD Lecteur de carte pour SD,MMC,MS carte media
Porte USB Porte USB (enregistrement de programmes DTV par cette porte)
Pour commencer la lecture. Repousser pour pauser la lecture.
Repoussez pour continuer la lecture.
Pour éjecter le disque.
FR-4
Page 41

Connexions panneau arrière
Vous pouvez connecter une large gamme d'appareils externes au téléviseur. Consultez le
manuel d'utilisation de vos autres appareils.
Voir tableau ci-dessous pour description des connexions.
Source
d'alimentation
HD M I
V GA
PÉR I TEL
S-V I D ÉO
Y CVBS
Pb
R
Pr
L
PC A U D IO I N
RF
CO A X
ceva noixennocruoPesirP
HDMI HD haute qualité. Récepteur satellite, DVD, console jeux vidéo
VGA Sortie VGAdu PC
SCART Signaux composites du DVD, VCR ou récepteur satellite.
S-VIDEO Sortie S-vidéo du caméscope, console jeux ou lecteur DVD
VIDEO (CVBS) Sortie vidéo du caméscope, console jeux, etc
L(AV)/R (AV) Son d'un caméscope, console jeux, lecteur DVD, VCR, etc
PC AUDIO IN Son du PC
HEADPHONES Casque d'écoute
TUNER Entrée tunerTV
AUDIO COAXIAL Pour connecter sortie audio DVD à l'amplificateur hifi
YPBPRL/R
POWER SOCKET
Sortie du DVD (Y PB PR)
Connexion courant secteur
FR- 5
Page 42

POWER. pour mettre le TVen
.
1
fonction à partir de stand-by et le
remettre en stand-by
0-9. Boutons numériques pour
.
3
choix direct des émetteurs ou
numéros du DVD
Pour entrer des numéros d'un ou
.-/- .
5
de deux chiffres
. ASPECT.
7
d'écran
. VOL+/- .
9
pour ajuster dans le menu
. DISPLAY.
11
disponible
MENU LCD. Pour entrer dans le
.
13
menu TVprincipal. Pour naviguer
dans le menu : voir 12
INPUT. Pour sélectionner l'entrée
.
15
PMODE. Pour entrer dans le menu
.
17
images
TEXT. Pour sélectionner le
.
23
télétexte ; repoussez pour télétexte
mixte avec image ; repoussez pour
quitter le télétexte.
. HOLD.
25
télétexte
.INDEX.
27
index.
. SIZE.
29
lettre
ROUGE. Sélection fasttext.
.
35
VERT. Sélection fasttext
37
Pour choisir le format
Pour régler le volume,
Pour voir l'information
.
.
Pour fixer une page
.
Pour aller vers la page
Pour choisir la grandeur des
s
.
..
Télécommande
Boutons généraux
1
3
5
7
9
11
13
15
17
23
25
27
29
35
37
2
.
AUTO. Pour ajuster le Tv au PC.
2
Pour liste préférée en mode TV.
4
4
.
MUTE. Pour couper le son et pour
remettre le son
6
.
</>.
Pour changer ent re les deux
derniers émetteurs
8
.
NICAM. Pour son Nicam/mono
(mode analogique seulement)
10
. CH+/CH-.
6
l'émetteur, pour navig
8
menus
12
.
NAVIGATE. Pour naviguer dans les
10
menus. Enter. pour confirmer
14
.
EXIT. Pour quitter le menu.
16
.
SLEEP. Pour mettre en fonction le
12
sleep timer.
18
.
SMODE. Pour entrer dans le menu
.
son
19
.
PGUP/PFDN. Pour aller vers la
page précédente ou suivante en
14
télétexte.
28
.
SUBPAGE. pour aller dans un sous-
16
page en télétexte
18
19
30
.
REVEAL. Pour afficher du texte
caché
36
.
BLEU. Sélection fasttext
28
38
JAUNE. Sélection fasttext
30
36
38
.
.
Pour sélectionner
e.
.
.
.
uer d ans les
.
.
..
FR- 6
Page 43

Boutons numériques pour
3
. 0-9.
choisir directement les numéros
dans les disques DVD, CD,
Mpeg
.
7
. ASPECT. Sélectionner le ratio
pour disque matériel
15
.
INPUT. Pour sélectionner
.
l'entrée
PLAY/PAUSE. Pour
..
19
II
commencer la lecture,
repoussez pour pauser la
lecture, repoussez pour
continuer la lecture
STOP. Poussez une fois pour
.
21
arrêter provisoirement, poussez
deux fois pour arrêt complet.
Pour choisir le chapitre ou
.
23
numéro précédent
Pour choisir le chapitre ou
.
25
numéro suivant
Pour retour rapide.
.
27
Pour avancement rapide.
.
29
DMENU. Pour entrer dans le
.
31
menu disque
TITLE. Pour voir les titres
33
PROG. Pour programmer
.
35
l'ordre de lecture.
INTRO. Pour afficher 9
.
37
.
.
.
.
segment du contenu du disque
(dépendant du disque)
Boutons DVD
2
1
3
7
15
17
19
21
23
25
27
..
29
31
33
35
37
2
EJECT. Pour éjecter le disque.
.
NAVIGATE. Pour naviguer dans les
12
.
menus. Enter. pour confirmer
DVD SETUP. Pour entrer dans le
14
.
menu DVD
I
20
.
image par image
SLOW. Pour obtenir une
22
.
reproduction au ralenti.
D.SUB. Pour afficher les sous-titres
24
.
disponibles
12
ZOOM. Pour agrandir l'image
26
AUDIO. Pour choisir la langue
28
.
parlée
ANGLE. Pour voir l'image sous
30
.
14
différents angles (dépendant du
disque)
GOTO. Pour aller directement vers
32
.
en certain endroit (dépendant du
disque)
20
22
D.DISP. Pour voir information
34
.
disque
26
28
A-B. Pour répéter une section du
36
.
24
disque
30
REPEAT. Pour répéter des chapitres
38
.
32
et numéros
34
36
38
.
STEP. Pour obtenir une lecture
.
.
.
.
.
..
FR- 7
Page 44

Utilisation de la télécommande
Afin de pouvoir utiliser la télécommande,il faut insérerles piles. Assurez-vous que le TVest
mis en marche. Dirigez la télécommande vers le récepteur infrarouges du TV et poussez le
bouton STANDBY. Le TVsort du mode stand-by et l'écran s'allume.
La rangée de la télécommande est environ 5 mètres sous un angle maximum de 30°.
Installation des piles (non livrées)
Ouvrez le compartiment à piles sur le dos de la télécommande.
Insérez deux piles alkalineAAA 1.5 dans le compartiment. Faites attention à la polarité (+/-).
Remarque:
Déposez les anciennes piles chez un système de recyclage.
.
Ne jetez pas les piles dans du feu, car elles peuvent exploder.
.
Utilisez uniquement les piles AAA 1.5V.
.
Utilisez les piles du même type. Ne mélanger pas différents
.
-
types.
N'utilisez pas des anciennes et des nouvelles piles. Remplacez
.
toujours les deux piles.
N'essayez pas de démonter les piles, ceci peut causer des
.
blessures.
Enlevez les piles si vous n'utilisez pas la télécommande
.
pendant un certain temps.
Couverture de
batterie de
télécommande
2 XAAA batteries
FR- 8
Page 45

Sélection source d'entrée
SOURCE
TV
DVD
AV
S-VIDÉO
PÉRITEL
YPBPR
HDMI
PC
Poussez pour afficher la liste source d'entrée.
Utilisez pour sélectionner la source que vous voulez regarder.
Poussez pour confirmer la source.
INPUT
/
ENTER
OPERATION DE BASE
IMAGE
MODE IMAGE
LUMINOSITÉ
CONTRASTE
COULEUR
NETTETÉ
TEINTE
COULEUR TEMPÉRATURE
FILM RÉGLAGE SORTIE
Poussez pour afficher le menu principal.
LCD-MENU
Utilisez pour sélectionner le menu que vous voulez.
/
PERSONNEL
NORMAL
MENU
OSD
50
50
50
5
50
/
Vous pouvez pousser ou pour mémoriser et retourner au menu précédent.
LCD-MENU EXIT
FR-9
Page 46

Menu qui apparaît quand vous n'avez pas encore mémorisé des émetteurs.
!
TV
001
PAL
DK
Menu image
Poussez le bouton sur l'appareil ou de la télécommande pour afficher le menu principal.MENU LCD-MENU
Utilisez pour sélectionner/ Picture
IMAGE
MODE IMAGE
LUMINOSITÉ
CONTRASTE
COULEUR
NETTETÉ
TEINTE
COULEUR TEMPÉRATURE
FILM RÉGLAGE SORTIE
1. Utilisez pour sélectionner l'option que vous voulez régler.
2.
3.
Mode image
Uti l i sez pour sél ecti onner et utilisez pour sél ecti onner entre personnel , standard, f i lm,
doux,jeu.
Luminosité
Contraste
Utilisez pour sélectionner
Couleurs
Utilisez pour sélectionner
Netteté
Utilisez pour sélectionner
Teinte
Température couleurs
Utilisez pour sélectionner et utilisez pour sél ecti onner entre normal ,
chaud, froid.
/
Après le réglage, poussez ou pour mémoriser et revenir au menu précédent.LCD-MENU EXIT
/
Utilisez pour sél ecti onner et utilisez / pour faire le réglage
/
/
CONTRASTE
/
/
/
/
Picture mode (Mode image)
Brightness (luminosité)
Contrast et
Color (couleurs)
Sharpness (netteté)
Tint et
Colour Temperature (température couleurs)
FR-10
PERSONNEL
50
50
50
5
50
NORMAL
MENU
/
50
/
Page 47

Menu son
Poussez le bouton sur l'appareil ou de la télécommande pour afficher le menu principal.
Utilisez pour sélectionner
MENU
LCD-MENU
Sound (son)/
et poussez pour entrer dans le menu.
AUDIO
MODE AUDIO
PERSONNEL
BASS
TREBLE
AIGUS
BALANCE
BALANCE
AVL
FILM RÉGLAGE
1. Utilisez pour sélectionner l'option que vous voulez régler.
2.
3.
Mode son
théâtre.
Graves
Utilisez pour sélectionner
Aiguës
Utilisez pour sélectionner
Balance
Utilisez pour sélectionner
Avl
Utilisez pour sélectionner
/
Après le réglage, poussez ou pour mémoriser et revenir au menu précédent.LCD-MENU EXIT
/
/
/
/
/
Sound mode(mode son)
Bass (graves)
Treble (aiguës)
Balance
Avl
ARRÊT
SORTIE
MENU
/zesilituterennoitcelésruopzesilitU
50
05SEVARG
50
0
,xiov,euqisum,dradnats,lennosrepertnerennoitcelésruop
FR-11
Page 48

Menu fonctions
Poussez le bouton sur l'appareil ou de la télécommande pour afficher le menu principal.
Utilisez pour sélectionner
MENU
/
LCD-MENU
Function (fonctions)
FONCTION
LANGUE
FORMAT VIDÉO
LANGAGE TT
MINUTERIE SOMMEIL
DURÉE OSD
ÉCRAN BLEU
FRANCAIS
PLEIN
EURO OUEST
ARRÊT
30 SECONDS
MARCHE
RÉINITIALISER
MENU
FILM RÉGLAGE
1. Utilisez pour sélectionner l'option que vous voulez régler.
2. Utilisez pour faire le réglage.
3. Après le réglage, poussez ou pour mémoriser et revenir au menu précédent.
Langue
Utilisez pour sélectionner
néerlandais).
Format vidéo
Langue télétexte
russe, arabique, grecque, hébraique.
Sleep Timer
Utilisez pour sélectionner
min, 120 min, hors fonction
Durée OSD
Utilisez pour sélectionner
Ecran bleu
Remise sur valeurs d'usine
/
/
/
/
/
/
/
/
/
tU
LCD-MENU
Language (langue)
Video Size (format vidéo)
TT Language (langue télétexte)
Sleep Timer
OSD timer
Blue Screen (écran bleu)
celés ruopzesilitU
Reset (remise valeurs d'usine)
EXIT
/zesilitu terennoitcelés ruopzesilitU
/zesilitu terennoit
EXIT
SORTIE
.otua ,mooz ,9: 41 ,3: 4 ,telpmoc ertne rennoitcelés ruop
,tse'd eporuE ,tseuo'd eporuE ertne rennoitcelés ruop/zesilitu terennoitcelés ruopzesilitU
.noitcnof sroh uo ne ertne rennoitcelés ruop
.unem el snad rertne ruop RETNE zessuop terennoitcelés ruopzesili
Remarque: Langue Télétexte n'est pas disponible dans le
Fonction
menu et apparaît en gris. Les autres descriptions
sont identiques au mode TV.
Remarque: Format Vidéo et Langue Télétexte n'est pas
disponible dans le menu Fonction et apparaît en gris. Les
autres descriptions sont identiques au mode TV.
FR-12
Page 49

FONCTION
OUI
FILM
NON
aller vers le menu précédent quand vous avez répondu NON.
OUI
ENTER
FONCTION
VERROU ENFANT
INSTALLATION
FILM ENTRÉE
Protection enfants
NON
ENTRÉE ARRIÈRE
MENU
MENU
ENTER
SORTIE
.unem el snad rertne ruopzessuop te )rennoitcelés ruopzesilit Child Lock (protection enfants
FR-13
Page 50

FONCTION
VERROU ENFANT
VERROU ENFANT
VERROU CLÉ
ARRÊT
MARCHE
CHANGE CODE
FILM RÉGLAGE
Protection enfants
/
fonction.
Entrez le mot de passe quand vous avez choisi en fonction. Le mot de passe standard est '0000'.
Blockage
/
Changer le mot de passe
/
Child Lock (protection enfants)
Key Lock (blockage)
Change Code (changerle mot de passe)
/zesilitu terennoitcelés ruopzesilitU
MENU
ENTER
CHANGE CODE
ENTRER ANCIEN MOT DE PASSE
SORTIE
EXIT
.noitcnof sroh uo ne ertne risiohc ruop
srohuonoitcnofneertnerisiohcruop/zesilituterennoitcelésruopzesilitU
.unem el snad rertne ruopzessuop terennoitcelés ruopzesilitU
ENTRER NOUV. MOT DE PASSE
ENTRER MOT DE PASSE ENCORE
ENTRÉE
Entrez l'ancien mot de passe (le mot de passe standard est '0000').
Entrez le nouveau mot de passe.
Confirmez le nouveau mot de passe.
0-9
NOMBRE
FR-14
MENU
ARRIÈRE
Page 51

Installation
/
ENTERUtilisez pour sélectionner Installation et poussez pour entrer dans le menu.
PREMIÈRE INSTALLATION
PAYS
LANGUE
PROGRAMME EFFACÉ
PROGR RECHERCHE
OUI
FILM
Pays
Utilisez pour sélectionner
Langue
Utilisez pour sélectionner
Annulation émetteurs
émetteurs.
Syntonisation
Choisissez pour continuer la première syntonisation, choisissez pour quitter le menu.
Si vous annulez la première syntonisation, l'appareil vous rappellera ultérieurement.
/
/
/
/
Country (pays)
Language (langue)
Delete Program (annulation des émetteurs)
Search programm (syntonisation)
AUTRES
FRANCAIS
OUI
OUI
NON
RÉGLAGE
MENU
NONIUO
SORTIE
/zesilituterennoitcelésruopzesilitU
PREMIÈRE INSTALLATION
/zesilituterennoitcelésruopzesilitU
selrelunnaruop
noiuorerramédruop
PREMIÈRE INSTALLATION NON TERMINÉE.
ÊTES-VOUS SUR DE VOULOIR QUITTER?
OUI
FAITE-LE PLUS TARD NON
ENTRÉE
FR-15
MENU
EITROSMLIF
Page 52

Menu TV
Poussez le bouton sur l'appareil ou de la télécommande pour afficher le menu principal.MENU
/
LCD-MENU
TV
PAYS
RECHERCHE AUTO
RECHERCHE MANUELLE
ÉDITER CHAINE
FILM RÉGLAGE
1. Utilisez pour sélectionner l'option que vous voulez régler.
2.
3.
Pays
Utilisez pour sélectionner
Syntonisation automatique
/
Après le réglage, poussez ou pour mémoriser et revenir au menu précédent.LCD-MENU EXIT
/
/
Country (pays)
Auto tuning (syntonisation automatique)
TV
ROYAUME-UNI
SORTIE
MENU
.unem el snad rertne ruop RETNE zessuop terennoitcelés ruopzesilitU
START TO SEARCH?
OUI
FILM ENTRÉE
OUI, poussez pour aller vers le menu précédent quand vous avez répondu NON.
Syntonisation manuelle
ENTER
OUI NON
NON
MENU
FR-16
ENTER
ARRIÈRE
.unem el snad rertne ruopzessuop terennoitcelés ruopzesilit / manual tuning (syntonisation manuelle)
Page 53

TV
TV
RECHERCHE MANUELLE
CHAINE
SYSTÈME SON
SYSTÈME COULEUR
AFT
RECHERCHE MANUELLE
001
DK
PA L
ARRÊT
49.7 MHz
FILM RÉGLAGE ARRIÈRE
Présélection
/
Système son
/
Système couleurs
/
AFT
/
Syntonisation manuelle
/
plus longtemps pour démarrer la syntonisation.
Réglage émetteur
pzesilitU
/
Channel (présélection)
Sound System (système son)
Color System (système couleurs)
AFT
Manual tuning (syntonisation manuelle)
Channel Edit (réglage émetteur)
ÉDI TER CHA INE
001 _______
002 _______
003 _______
004 _______
005 _______
006 _______
TV
MENU
.noitcelésérp al risiohc ruop/zesilitu terennoitcelés ruopzesilitU
/zesilitu terennoitcelés ruopzesilitU
suop terennoitcelés ruo
.KD uoL ,I ,GB ertne risiohc ruop
.MACES uoLAP ,OTUAertne risiohc ruop/zesilitu terennoitcelés ruopzesilitU
zessuop,ecneuqérfalregnahcruop/tnemevèrbzessuopterennoitcelésruopzesilitU
.unem el snad rertne ruop RETNE zes
VTNOITPO
MENU
FAV
SAUT
Cette option possède quatre fonctions.
Poussez lebouton vert pour mémoriserl'émetteur dans un numéro deprésélection. Si le numérode présélection est déjà occupé,repoussez le
1.
bouton vert pour en faire une présélection normale.
Poussez le bouton bleu pour bloquer la présélection. Si la présélection était déjà bloquée, repoussez le bouton pour libérer le blocage.
2.
Poussez le bouton jaune pour annuler l'émetteur actuel.
3.
VERR
PERMUT
ARRIÈRE
FR-17
ENTRÉE
Page 54

1. Utilisez pour sélectionner l'émetteur dans la liste et poussez pour voir l'image suivant ./ ENTER
TV
ÉDI TER NOM
_______
1 2 3 4 5 6 7 8 9
1 2 3 4 5 6 7 8
ABCDEFGH IJKLMNOPQRSTUVWXYZ
abcde fghIjklmnopqrstuvwxyz
0
1 2 3 4 5 6 7 8 9 0 _ ( )
VIDE BAK SPC OK ANNULÉ
0~9
RACCOURCIS
revenir au menu précédent.
Utilisez pour sélectionner l'émetteur dans la liste et poussez .
/
Utilisez pour sélectionner l'endroit où vous voulez mémoriser l'émetteur.
/
Poussez pour effectuer votre sélection.
ENTER
FILM
ENTRÉE
MENU
ARRIÈRE
MENU HDMI/YPBPR
Poussez le bouton sur l'appareil ou de la télécommande pour afficher le menu principal.
Utilisez pour sélectionner
MENU
/
H position 50
POSITION H 50
POSITION V 50
V position 50
REMISE AZÉRO POSITI
HDM I/YPBPR
O
FILM
LCD-MENU
et poussez pour entrer dans le menu.
HDMI/YPBPR
RÉGLAGE SORTIE
MENU
FR-18
Page 55

1. Utilisez pour sélectionner l'option que vous voulez régler.
2.
3.
Position H
Utilisez pour sélectionner
Position V
Utilisez pour sélectionner .
Remise sur valeurs d'usine
/
Après le réglage, poussez ou pour mémoriser et revenir au menu précédent.LCD-MENU EXIT
/
/
/
H Position
V Position
Reset (remise valeurs d'usine)
Menu PC
Poussez le bouton sur l'appareil ou de la télécommande pour afficher le menu principal.
Utilisez pour sélectionner et poussez pour entrerdans le menu.
MENU
/
LCD-MENU
PC
PC
.esimer al reutceffe ruop RETNE zessuop terennoitcelés ruopzesilitU
POSITION H
O
POSITION V
PHASE
HORLOGE
SYNCHRO AUTO
FILM RÉGLAGE
1. Utilisez pour sélectionner l'option que vous voulez régler.
2.
3. .
Position H
Utilisez pour sélectionner
Position V
Utilisez pour sélectionner
Phase
Utilisez pour sélectionner
Clock
Utilisez pour sélectionner
Synchronisation automatique
Utilisez pour sélectionner
/
Après le réglage, poussez ou pour mémoriser et revenir au menu précédentLCD-MENU EXIT
/
/
/
/
/
H Position
V Position
Phase
Clock
et poussez ENTER pour effectuer la synchronisation automatique.
Auto Sync
MENU
SORTIE
0
-2
0
0
FR-19
Page 56

Porte USB et lecteur cartes
Poussez le bouton SOURCE de la télécommande et choisissez DVD pour utilisation du
lecteur DVD interne.
Connectez un stick USB ou une carte média à la porte USB ou le lecteur cartes sur le côté droit de
l’appareil. Insérez la carte avec la face non imprimée vers vous.
Démarrez la porte USB ou le lecteur cartes en poussant DVD SETUP, entrez dans les réglages
système et choisissez SOURCE pour sélectionner USB ou CARTE.
Mémoire data avec musique, JPEG ou documents vidéo
Insérez le disque ou le stick USB ou la carte mémoire (SD, MMC ou MS) et le lecteur cherche
automatiquement les documents mémorisés vidéo/musique/JPEG. Après la recherche le lecteur va
automatiquement vers la première liste musique (pour le disque ayant des documents musique et
JPEG. Pour les disques qui ne contiennent qu’un seul type de documents, le lecteur va
automatiquement vers la première liste) et reproduit le premier numéro de la liste (le nom est affiché).
L’écran s’affiche comme montré ci-dessous :
Si le lecteur DVD interne ne lit pas le stick USB ou la carte mémoire, poussez DVD SETUP et
sélectionnez dans les réglages système SOURCE. Ensuite activez porte USB ou Lecteur cartes.
Nom du document actuel
Numéro ou liste
Label de la liste
Remarques :
catalogue et l’écran avec les numéros et le format du document.
Format des documents : musiques (notes), photos (caméra),
vidéo (flèche).
USB.
poussez STOP pour revenir à la liste JPEG.
choisir le numéro 15, poussez une fois le bouton 10+ et puis le bouton 5. La lecture du numéro
15 commence.
la vidéo simultanément.
Musique
JPEG
FR-20
Document vidéo
Page 57

Regarder le télétexte
TV analogue
Poussez INPUTpour sélectionner TV avec et poussez ENTER pour confirmer.
Choisissez l'émetteur que vous voulez regarder.
Poussez TEXT une fois pour voir l'index télétexte sur l'écran.
Poussez TEXT une deuxième fois pour voir le texte mélangé avec l'image.
Poussez TEXT une troisième fois pour quitter le télétexte.
Utilisez les boutons numériques pour choisir directement le numéro de la page que vous voulez regarder ou
utilisez les boutons colorés en bas pour aller directement à la page correspondante (Fasttext).
Pour agrandir les lettres, poussez SIZE. La partie supérieure de la page est affiché. Repoussez le boutons SIZE
et la partie inférieure de la page est affichée. Repoussez le bouton ou poussez EXIT pour revenir au format
normal.
Pour fixer une page télétexte, poussez le bouton HOLD. Repoussez pour libérer la page.
Pour montrer le texte caché (p.e. réponse à des questions quiz), poussez REVEAL. Repoussez le bouton pour
cacher le texte.
Pour regarder une sous-page, poussez le bouton SUBPAGE. Une bande
pour quitter cette option.
Pour revenir à la page index, poussez INDEX.
Pour voir les sous titres sur l'écran, poussez '888' en mode télétexte. Si l'émetteur utilise les sous-titres elles
seront affichées en bas de l'écran.
Pour quitter les sous-titre, poussez EXIT.
/
apparaît sur l'écra
n. Repoussez le bouton
Utilisation du lecteur DVD
REMARQUE: cet appareil ne supporte pas la fonction AUTO DVD.
Disques compatibles
Votre lecteur peut lire les disques pourvus des logos suivants:
Disques DVDVidéo 12 cm Disques compactes enregistrables 12 cm
Disques compactes réenregistrables 12 cm. Disques compactes audio 12 cm
Disques compactes photos 12 cm
Code régional
Si le code régional du disque ne correspond pas avec celui de ce lecteur, le disque ne
peut pas être reproduit.
Le code régional de ce lecteur est 2 (voir symbole).
Insérer le disque
Afin de pouvoir opérer le lecteur DVD il faut d'abord choisir la fonction DVD avecle
bouton INPUT. N'essayez PAS d'insérer un disque avant d'avoir sélectionné DVD.
Poussez doucement le disque dans la fente sur le côté droit du TV, en tenant la fac
imprimée éloigné de vous. Le mécanisme prend le disque. .
Après quelques secondes l'indication 'READ' apparaît sur l'écran et plusieurs
secondes plus tard la lecture commence automatiquement ou le menu disque est
affiché sur l'écran.
FR-21
e
Page 58

Lecture disques DVD
Dépendant la façon que le disque a été enregistré la lecture commence automatiquement ou un menu apparaît
sur l'écran.
Utilisez ENTER pour commencer la lecture ou utilisez pour naviguer dans le menu.
Pause
Poussez pour pauser la lecture. Le symbole pause apparaît sur l'écran.
Repoussez pour continuer la lecture.
Arrêt
Poussez pour arrêter la lecture.
Poussez pour continuer la lecture à partir du point où vous avez arrêté.
éjecté le disque ou quand vous avez poussez deux fois .
Arrêter pour éjecter le disque
Poussez deux fois ; le symbole apparaît sur l'écran.
Si vous poussez la lecture commence avec le début du premier chapitre.
Avancement rapide en avant/en arrière
Pour chercher rapidement pendant la lecture.
Poussez pour chercher rapidement en avant ou poussez pour chercher rapidement en arrière.
Chaque fois que vous poussez ou la vitesse de recherche change à 2x, 4x, 8x et 20x la vitesse normale.
La vitesse sélectionnée est affiché sur l'écran comme x2, x4, x8 ou x20 pour la recherche en avant et
comm
Poussez pour revenir à la vitesse de lecture normale.
Aller vers le chapitre suivant/précédent
Pour aller vers le chapitre suivant ou précédent pendant la lecture.
Poussez et la lecture commence au début du chapitre suivant.
Poussez et la lecture commence au début du chapitre précédent.
Image par image
Poussez pour arrêter l'action et repoussez pour avancer chaque fois avec un image.
Poussez pour revenir à la vitesse de lecture normale.
II
II
II
Remarque
e x2, x4, x8 ou x20 pour la recherche an arrière.
I
: la lecture recommence exactement au point ou vous avez arrêté, sauf quand vous avez
II
II
II
Fonctions DVD spéciales
Lecture titre
Avec le bouton D.TITLE vous pouvez voir, sélectionner et lire les différents titres du DVD.
Poussez D.TITLE et naviguer vers le titre désiré.
Poussez ENTER .
FR-22
Page 59

Lecture programmée
Poussez PROGRAM pour entrer dans le menu de programmation.
Utilisez pour faire votre sélection.
Utilisez les boutons numériques pour sélectionner le titre et les chapitres.
Utilisez pour aller vers 'Play'.
Poussez ENTER.
Utilisez pour aller vers 'Clear' pour effacer la programmation.
Répétition
Poussez REPEAT pour voir les différentes possibilités.
Chapter : pour répéter le chapitre actuel. Title : pourrépéter le titre actuel. Repeat all : pour répéter le disque
entier.
Repoussez le bouton REPEATpour annuler la répétition.
Display
Le display affiche les informations concernant le titre actuel.
'Type disque' 'Titre' ) 'Chapitre' ) 'Temps écoulé'
Repoussez le bouton D.DISP pour voir le suivant :
Audio s fonction)
Langue, type audio, sous-titre )
Langue sous-titres
Angle caméra
Poussez D.DISPune troisième fois pour annuler l'affichage.
Goto
Le bouton GOTO vous permet d'alle
r directement vers un certain point sur le disque.
Poussez GOTO pour afficher le menu.
Utilisez pour aller vers l'item que vous voulez utiliser.
Utilisez les boutons numériques pour introduire la valeur voulue.
Poussez ENTER pour commencer la lecture au point déterminé.
Sous-titres
Certains disques DVD contiennent plusieurs langues pour les sous-titres.
Poussez plusieurs fois le bouton SOUS-TITRE pour naviguer dans les langues disponibles jusqu'au moment où
vous avez trouvé la langue désirée.
Les sous-titres dans la langue sélectionnée apparaissent après quelques secondes. Pour annuler les sous-titres
poussez SOUS-TITRE jusqu'au moment ou vous arrivez à 'Sous-titresARRÊT'.
Remarque: regarder le boîtier du DVD pour voir les langues disponibles.
Audio (langue parlée)
Poussez le bouton AUDIO pour voir la langue actuelle. Poussez AUDIO plusieurs fois pour découvrir les autre
langues.
Zoom
Vous pouvez choisir entre trois possibilités préprogrammées.
P
oussez ZOOM pour agrandir l'image. Repoussez le bouton ZOOM pour choisir entre x2, x3 et x4.
Utilisez pour bouger l'image agrandi.
FR-23
Page 60

Lecture disques CD Audio
Insérez le disque CD Audio. La lecture commence automatiquement avec le premier numéro. Le numéro
actuel, le nombre total des numéros, le mode de répétition et le temps écoulé sont affichés en haut de
l'écran.
Fonctions pendant la lecture
Les fonctions suivantes sont disponibles pendant la lecture :
Lecture, pause, arrêt, avancement rapide en avant, avancement rapide en arrière, sauter en avant, sauter
en arrière, répétition A-B, Goto, programmation et audio.
Preview
Poussez le bouton PREVIEW pour écouter les 15 premières secondes de chaque numéro du CD.
Lecture disques JPEG
Insérez le disque JPEG dans le lecteur. Le contenu du disque JPEG est affiché. Remarque : uniquement
les documents jusqu'à 3MB peuvent être reproduits.
Utilisez pour naviguer dans les documents.
Poussez ENTER pour sélectionner un document.
Vous pouvez utiliser les boutons numériques pour sélectionner directement un document.
Les fonctions suivantes sont disponibles :
Lecture, pause, arrêt, sauter en avant, sauter en arrière, D.Disp, Goto, Zoom.
Répétition
Vous pouvez répéter le numéro actuel, le document ou le disque entier.
Poussez
REPEAT pour naviguer dans les trois possibilités :
Répétition un numéro, répétition document, répétition tout.
Repoussez REPEAT pour annuler la répétition.
Effets de transition
Quand le contenu JPEG est affiche, utilisez le bouton PROGRAM pour programmer l'ordre de lecture.
Quand les images JPEG sont affichés, poussez PROGRAM pour voir les effets de transition entre les
images. Il existe 16 possibilités:
ertnec ud tnemelatnoziroh rigralEtuah ud recaffE
igralEsab ud recaffE
ertnec ud tnemelacitrev r
ertnec ud tnemelacitrev resserpmoCehcuag ud recaffE
Ef
erpmoCetiord ud recaffE
facer diagonalement du gauche haut Fenêtre horizontale
ertnec ud tnemelatnoziroh ress
Effacer diagonalement du gauche bas Fenêtre verticale
Effacer diagonalement du droit haut Effacer des bord vers le centre
Effacer diagonalement du droit bas Aléatoire
Tourner les images JPEG
Pendant
la lecture JPEG, utilisez les boutons flèches pour tourner les images.
Quand l'image est affiché :
Pousse pour tourner l'image 90° vers la droite. Utilisez pour tourner l'image verticalement.
Pousse pour tourner l'image 90° vers la gauche. Utilisez pour tourner l'image horizontalement.
Répétition A-B
Vous pouvez, dans un chapitre, répéter n'importe quelle section.
Poussez A-B pour déterminer le début de la section.
Repoussez A-B pour déterminer la fin de la section. La répétition entre les pointsA et B commence.
Poussez A-B une troisième fois pour annuler la répétition.
FR-24
Page 61

Réglages fonctions DVD
Réglages fonctions DVD générales
CONFIG. SYST.
SOURCE
SYSTEME TV
FORMAT AFFICH
CODE PIN
NIVEAU
POWER RESUME
PAR DEFAUT
QUITTER MENU
-
-
-
Remarque:Dans le mode Setup, les fonctions suivantes ne sont pas disponibles :
TITRE, SOUS-TITRE, DISPLAY, LECTURE, SETUP, ARRET, RALLENT, STEP, NICAM,
AUDIO, FF, FR, PRECEDENT, SUIVANT, GOTO, ZOOM, ANGLE, PROGRAMMATION,
PREVIEW, REPETITION, REPETITIONA-B.
SETUP
Poussez pour activer le menu OSD du lecteur
DVD
Poussez ou ENTER pour entrer dans le sous-
/
menu.
SETUP
Poussez pour quitter le menu OSD ou allez
vers et poussez .
EXITSETUP ENTER
FR-25
Page 62

Menus réglages système
SOURCE
CONFIG. SYST.
SOURCE
SYSTEME TV
FORMAT AFFICH
CODE PIN
NIVEAU
POWER RESUME
PAR DEFAUT
QUITTER MENU
Système couleurs TV
Ce menu vous permet de sélectionner le format écran de votre TV/DVD
NTSC
Ce format est util isé en USA et au Japon.
PAL
Ce format est utilisé en Europe.
AUTO
Utilisez cette sélection quand leTV/DVD est prévu pour PALet NTSC.
CONFIG. SYST.
SOURCE
SYSTEME TV
FORMAT AFFICH
CODE PIN
NIVEAU
POWER RESUME
PAR DEFAUT
QUITTER MENU
AUTO
DISQUE
USB
CARTE
Avec cette option vous pouvez activer le lecteur
DVD, la porte USB ou le lecteur cartes. Choisissez
la source et confirmez avec OK. Quand vous
choisissez AUTO, le lecteur commence
automatiquement avec le medium inséré.
REMARQUE: le format PALest utilisé en Europe.
Si NTSC est sélectionné avec un
téléviseur non compatible, l'image
peut montrer des interférences ou
peut tourner.
FR-26
Page 63

Format affich
Les disques DVD peuventêtre enregistrés sous différentsformats d'écran. Ce menu vous permet de choisir entre
les trois formats.
CONFIG. SYST.
SOURCE
SYSTEME TV
FORMAT AFFICH
CODE PIN
NIVEAU
POWER RESUME
PAR DEFAUT
QUITTER MENU
4 : 3 PS (normal)
4 : 3 LB (normal)
16 : 9 (écran larg e)
Sélectionnez le format le plus approprié.-
4 : 3 PS (normal)
PanScan est le format le plus utilisé pour les émissions normales et
est le format standard. Le rapport est 4:3. Avec ce format l'écran est
entièrement rempli, mais vous manquez des parties au bords gauche
et droite de l'écran.
4:3 LB (normal)
LetterBox est un format qui permet de montrer l'image total dans son rapport
original, mais sur un TVnormal vous aurez des bandes noires en haut et en bas
de l'écran.
16: 9 (
Ecran large)
Sélectionnez cette option si vous possédez un téléviseur écran large.
REMARQUE
Le format écran dépend du contenu du disque.
-
Les disques enregistrés sous format 4:3 ne peuvent être reproduits que dans le
-
format 4:3.
La sélection du format écran doit se faire en fonction du téléviseur utilisé.
-
:
Mot de passe
-
D'origine le mot de passe est bloqué. Le contrôle parental et le changement de mot de passe ne sont pas
possibles. Pour changer le contrôle parental, introduisez le mot de passe standard '0000'et poussez ENTER
pour confirmer.
-
Pour changer le mot de passe introduisez un nombre de quatre chiffres. Ceci devient votre nouveau mot de
passe.
CONFIG. SYST.
SOURCE
SYSTEME TV
FORMAT AFFICH
CODE PIN
NIVEAU
POWER RESUME
PAR DEFAUT
QUITTER MENU
FR-27
Page 64

Niveau parental
-
Vous pouvez vous-même déterminer le niveau parental. Vous pouvez choisir entre huit différents
niveaux allant du ENFANTSAUTORISES jusqu'àADULTES.
CONFIG. SYST.
SOURCE
SYSTEME TV
FORMAT AFFICH
CODE PIN
NIVEAU
POWER RESUME
PAR DEFAUT
QUITTER MENU
1ENFANT
2G
3PG
4PG13
5 PG-R
6 R
7 NC-17
8ADULTE
REMARQUE : le changement du niveau parental est
uniquement possible quand le mot de passe
est débloqué. Le contrôle parental peut
uniquement fonctionner quand le mot de
passe est bloqué.
POWER RESUME
Dernière mémoire. Reprend la lecture du disque au dernier arrêt de la dernière lecture.
CONFIG. SYST.
SOURCE
SYSTEME TV
FORMAT AFFICH
CODE PIN
NIVEAU
POWER RESUME
PAR DEFAUT
QUITTER MENU
ACTIVE
DÉSA.
Réglages standards
-
Poussez ENTER pour revenir aux réglages d'usine.
CONFIG. SYST.
SOURCE
SYSTEME TV
FORMAT AFFICH
CODE PIN
NIVEAU
POWER RESUME
PAR DEFAUT
QUITTER MENU
RETABLIR
FR-28
Page 65

Menus réglages langues
Poussez pour entrer dans le menu OSD du lecteur DVD.
SETUP
CONFIG. LANGUE
LANGUE OSD
LANGUE AUDIO
LANG SS-TITRES
LANGUE MENU
QUITTER MENU
ANGLAIS
ALLEMAND
ESPAGNOL
FRAN
çAIS
ITALIEN
DUTCH
HOLLANDAIS
ITALIAN
-/Langue parlée
Utilisez les boutons flèches pour sélectionner et poussez pour confirmer. Il existe six
langues que vous pouvez choisir avec les boutons : anglais, français, espagnol, néerlandais, allemand,
italien. Poussez pour confirmer.
ENTER
CONFIG. LANGUE
LANGUE OSD
LANGUE AUDIO
LANG SS-TITRES
LANGUE MENU
QUITTER MENU
ANGLAIS
ALLEMAND
FRENCH
ESPAGNOL
SPANISH
FRAN
çAIS
DUTCH
ITALIEN
ITALIAN
GERMAN
HOLLANDAIS
-/Langue OSD.
Utilisez les boutons flèches pour sélectionner OSD
LANGUAGE et poussez ENTER pour confirmer. Il existe
deux langues que vous pouvez choisir avec les boutons
anglais et néerlandais. Poussez ENTER pour
confirmer.
REMARQUE
: si la langue choisie n'est pas disponible
sur le disque DVD, la langue standard du
disque est sélectionnée
automatiquement. La langue standard est
anglais.
AUDIOLANG
ENTER
REMARQUE
: si la langue choisie n'est pas disponible sur le disque DVD, la langue standard du disque est
sélectionnée automatiquement. La langue standard est anglais.
-
Langue sous-titres
SOUS-TITRELANG
six langues que vous pouvez choisir avec les boutons : anglais, français, espagnol, néerlandais, allemand,
/
ENTER
emrifnocruopzessuopterennoitcelésruopsehcèlfsnotuobselzesilitU
italien, hors fonction. Poussez ENTER pour confirmer.
CONFIG. LANGUE
LANGUE OSD
LANGUE AUDIO
LANG SS-TITRES
LANGUE MENU
QUITTER MENU
REMARQUE : Si la langue choisien'est pas disponible sur le disque DVD, la langue standard
ANGLAIS
ITALIAN
ALLEMAND
ESPAGNOL
FRAN
çAIS
DUTCH
ITALIEN
HOLLANDAIS
OFF
DÉSA.
du disque
est sélectionnée automatiquement. La langue standard est anglais.
FR-29
etsixelI.r
Page 66

Langue menu
CONFIG. LANGUE
LANGUE OSD
LANGUE AUDIO
LANG SS-TITRES
LANGUE MENU
QUITTER MENU
ITALIAN
ANGLAIS
ALLEMAND
DUTCH
ESPAGNOL
FRAN
OFF
ITALIEN
HOLLANDAIS
çAIS
- Utilisez les boutons flèches pour sélectionner MENU
LANG et poussez ENTER pour confirmer. Il existe six
langues que vous pouvez choisir avec les boutons :
anglais, français, espagnol, néerlandais, allemand,
italien. Poussez pour confirmer.
ENTER
M en u s r égl ages audio
Sortie audio
CONFIG. AUDIO
SORTIE AUDIO
TONALITÉ
QUITTER MENU
-
SPDIF/ARRÊT: pas de sortie coaxiale
-
SPDIF/code original: quand la sortie coaxiale est connecté à l'amplificateur il es possible de
reproduire le son Dolby ou MPEG. L'amplificateur doit être équipé d'un décodeur approprié.
SPDIF/PCM: quand la sortie coaxiale est connecté à l'amplificateur stéré digital, le son Dolby
-
ou MPEG est transformé en son stéreo 2 chaines.
SPDIF/DÉSACT.
SPDIF/RAW
SPDIF/PCM
-
Utilisez les boutons flèches pour sélectionner
et poussez pour confirmer.
OUT
-
Il existe trois modes que vous pouvez choisir avec les
boutons : SPDIF/ARRÊT SPDIF/code original
ENTER
/
SPDIF/PCM. Poussez ENTER pour confirmer.
/
AUDIO
Tonalité
/- Utilisez les boutons pour régler la tonalité.
CONFIG. AUDIO
SORTIE AUDIO
TONALITÉ
QUITTER MENU
FR-30
Page 67

Plage dynamique
M enu r égl age Dol b y D i gi t al
CONFIG. NUMÉR.
DYNAMIQUE
DUAL MONO
MAX
- Pour ajuster la plage dynamique. Quand vous
sélectionnez FULL, les valeurs crêtes sont au minimum.
QUITTER MENU
DÉSA.
Quand vous sélectionnez ARRÊT, les valeurs crêtes
sont au maximum.
Dual mono
CONFIG. NUMÉR.
DYNAMIQUE
DUAL MONO
QUITTER MENU
STÉRÉO
MONO GAUCHE
MONO DROITE
MONO MIXTE
- Vous pouvez choisir entre quatre types de sortie audio :
STEREO, MONO G, MONO D, MONO MIXTE. Le
tableau ci-dessous montre les effets.
SELECTION HAUT-PARLEUR GAUCHE HAUT-PARLEUR DROITE
STEREO Stéreo gauche Stéreo droite
MONO G Mono gauche Mono gauche
etiord onoMetiord onoMD ONOM
MONO MIXTE Mono gauche + mono droite Mono gauche + mono droite
FR-31
Page 68

Aide en cas de problèmes
Si vous avez des problèmes, consultez le tableau ci-dessous avant de contacter le service après-vente.
noituloSesuaCemèlborP
Pas de réaction, pas de LED
Pas de courant secteur
Contrôlez la connexion au courant secteur.
Contrôlez la prise courant secteur.
LED allume, boutons appareils ne
fonctionnent pas
Pas d'image, LED bleu
Pas d'image, écran bleu
Pauvre image (analogique) ou image
bloqué (digitale)
Télétexte bloqué
Taches dans l'écran
Pa de son
Mot de passe oublié
Ecran n'affiche pas de signal
Image avec souffle
Image non central
Pas de son PC
Disque ne joue pas
Image bloqué
Disque ne j'éjecte pas
Défaut boutons
Mauvais sélection d'entrée
Défaut de la lampe
Pas de signal d'entrée
Pas d'émetteurs en mémoire
TV enmauvais mode
Pauvre signalTV
Pauvre signalTV
Pauvre signalTV
Bouton mute en fonction
Mauvaise connexion
Opération PC
Mauvaise connexion
TV pas bien réglé sur PC
Ajuster la position
Réglages audio
Opération DVD
Disque pas bien inséré
Disque sale ou abimé
Disque avec mauvais code
régional
Disque sale ou abimé
DVD non sélectionné
Référer la page 16-17
Mettez le Tv en fonction avec la télécommande.
Mettez l'appareil en mode TV
Consultez le service après-vente
Antenne connectée ?
Voir pages 16-17
AV ou PC selecté ?
Vérifiez connexion antenne. Remplacez l'antenne
intérieure
par une antenne extérieure.
Comme ci-dessus.
Ne pas couvert par la garantie.
Vérifiez le bouton mute
Contrôlez la connexion à l'amplificateur externe.
Entrez '0000'.
Contrôlez la connexionVGA
Dans le menu PC, sélectionnez auto configuration
Dans le menu PC, utilisez position H ou V
ntrôlez les réglages audio du PC
Co
Disque doit être inséré avec la face imprimé éloigné
de vous
Nettoyez ou remplacez disque
Utilisez disque avec code correct
Nettoyez ou remplacez disque
Sélectionnez mode DVD
N'essayez pas d'enlever vous-même le disque
Mot de passe oublié
Ne fonctionne pas
Piles usés
Utilisez '0000'
Télécommande
Remplacez les piles tous les 6 mois.
FR-32
Page 69

Montage au mur
Ce TV est pré prévu pour montage au mur.Utilisez toujours un systeème de
'
montage Vesa:vérifiez le logo sur l
Pour enlever le pied,dévissez les quatre vis,comme montré dans la photo.
Pour ne pas perdre les vis,vissez les dans les trous.
Lisez attentivement les instructions du fabricant du syst
'
utilisez PAS des vis plus long de 15mm.
N
'
Le fabricant du TV n
mur ou pour l
accepte aucune responsabilité quant au mauvais montage au
'
endommagement résultant d'une mauvaise installation.
emballage.
è
me mural.
Attention pour les disques
Manipuler les disques
Ne jamais toucher la surface du disque.Tenez le disque par le bord pour éviter des empruntes sur le disque.
Ne jamais coller quelque chose sur le disque.
Protéger les disques
Apr
è
s la lecture,gardez le disque dans son boôtier.N'exposez pas le disque à la lumière directe du soleil ou autre
source de chaleur.Ne laissez pas le disque dans un voiture stationnée dans le soleil.
Nettoyage des disques
'
Les empruntes ou la poussière peuvent donner mauvaise qualité d
Nettoyz le disque avant l
N
'
utilisez pas des solvants tels que alcool,essence,produits de nettoyage commerciaux ou des aérosols
antistatiques.
'
utilisation avec un chiffon doux.Nettoyez du centre vers le bord.
image ou du son.
FR-33
Page 70

TV
Alimentation
Rapport écran
Définition
Luminosité
Contraste
Temps de réponse
Sp
écifications téchniques
220 -
240 V AC 50/60 Hz
16 : 9
250/350cd/m
2
1: 0001
5 m/S
slexip 867 x 6631
Nomdre de présélections
Entrée signal RF.
Syst
è
mes son
Sys
è
mes couleurs
Entrées
Sorties
Sortie audio
DVD
Format disque
Disques compatibles
Température d'opération
humidité
Télécommande
Piles
Position d
'
opération
200
Band 1 Ch 2 - Ch 4
Band 3 Ch 5 - Ch 12
Band UHF Ch 21 - Ch 69
I,B/G,D/K
Pal, Secam
HDMI, SCART, S-VIDEO, VGA, CVBS
'
Casque d
écoute,Scart,SPDIF(PCMI)
3W Rms x 2 (4 ohms)
uniquement 12 cm
DVD +/-, CD, J PEG
5 C-35 C
5%-90%
74g(sans piles)
2xAAAA1 kaline(non livrés)
Verticale
Le fabricant a le droit de changer les spécifications sans préavis.
FR-34
Page 71

USB port and Card Reader
22-24
25-31
33
33
34
Page 72

Safety Information
The lightning flash with arrowhead symbol, within an equilateral triangle, is intended to
alert the user to the presence of un-insulated
enclosure that may
the persons.
The exclamation point within an equilateral triangle is intend to alert the user to the
presence of important operating and maintenance (servicing) instructions in the
literature accompanying the appliance
Correct disposal of this Product
(Waste Electrical & Electronic Equipment (WEEE)
The crossed out
placed with ordinary household waste at the end of its useful life. To prevent possible
harm to the environment or human health from uncontrolled waste disposal, please
keep separate from other household waste and recycle it responsibly to promote the
sustainable reuse of material resources.
Household users should contact either the retailer where you purchased the product, or
their local government office for details of where and how you can take this item for
environmentally safe re-cycling.
Business users should contact their supplier and check the terms and conditions of the
purchase contract. This product must not be mixed with other commercial wastes for
disposal
This unit is a
could cause hazardous radiation exposure. Ensure the recorder is operated as
instructed. Do not remove any covers or look into the DVD drawer opening whilst power
is applied. Do NOT modify or adjust any controls that may affect laser emissions.
Should the appliance become faulty consult a qualified technician.
be of sufficient magnitude to constitute
Wheelie bin is intended to show that this appliance must not be
CLASS 1 laser product. This product uses a visible laser beam which
angerous voltage within the products
a risk of electric shock to
.
This appliance complies with European Safety and Electrical directives
GB-1
Page 73

Safety Instructions
CAUTION. PLEASE READ AND OBSERVE ALL WARNINGS AND INSTRUCTIONS GIVEN IN THIS
USER MANUAL AND MARKED ON THE APPLIANCE. RETAIN THIS BOOKLET FOR FUTURE USE.
This set has been designed and manufactured to assure your personal safety. Improper use can
result in Electric shock or Fire hazard. The safeguards in this appliance will protect you if you
observe the correct procedures for installation, servicing and operation. There are NO user parts
inside. DO NOT REMOVE THE CASE OR OTHER COVERS OR YOU MAY BE EXPOSED TO
DANGEROUS VOLTAGES OR LASER RADIATION AND WILL INVALIDATE YOUR WARRANTY.
REFER ALL SERVICING TO QUALIFIED SERVICE PERSONNEL.
Unpacking and Handling. Open the carton carefully and remove the top polyfoam packing.
Carefully lift the TV and place onto a firm stable surface. Lift off the Poly bag and retain all
packaging for future use. Keep all packaging away from small children and animals.
Placing TV. The TV should be placed on a firm table or shelf. Do not place in a cabinet unless
there is sufficient spacing for air flow and access for the DVD player opening.
Connections. When connecting the TV to external sources and the mains supply, do not place wires
that can be tripped over. Do not place heavy objects, bend or trap the mains lead or mains adaptor.
Top of TV. Do not place objects such as vases, candles or other objects which may spill into the TV.
Ventilation and Heat Sources. Do not place material over the ventilation slots, this will cause the
TV to overheat and fail. Do not place the TV in direct sunlight or near heat sources such as radiators
or fires.
Moisture. Do not place the TV in wet or damp conditions, such as steamy kitchens, basements or
other damp places. Do not allow water or other fluids to enter the TV. Do not touch the Mains plug
or Mains adaptor with wet hands. Should moisture enter the TV , disconnect from the supply and call
the customer help line.
Cleaning. Disconnect the TV from the mains supply. Use a soft dry cloth, for stubborn stains use a
soft moist cloth with a dilute mild detergent.. Do NOT use petrol based fluids
Leaving your TV. Do not leave your TV operating whilst un attended. It is wise to switch off at
the Power switch. To conserve power do not leave the TV in standby for long periods
When leaving the TV for long periods holidays and when local thunderstorms occur, disconnect
the aerial
if external and mains supply.
GB-2
vernight .
Page 74

Parts and Accessories
Unpacking
Remove the TV carefully from carton.
Please check accessories.Should any item be missing,please contact your point of purchase.
Do not dispose of your packing until you are confident the TV is working normall
y.
In the box
TV
Remote
Control
READY LCD/DVD TELEVISION
User Manual
GB-3
Page 75

User Controls
POWER CH- CH+ INPUTMENU VOL- VOL+
DVD Controls
Stop
Play/Pause
Eject
SD/MMC/MS
CARD
USB
Remote Control Sensor
Standby Led
User Control Description
POWER.
Switches the TV on from standby. Also switches TV back to standby.
INPUT. Selects the required input
CH+ / CH-. Channel select buttons. Also moves the cursor up and down in the Menu mode.
VOL+ / VOL - Adjusts the volume level. Also adjusts the levels in Menu mode.
MENU. Enters the Menu mode
DVD Control Description.
STOP. Stops DVD or CD disc from playing.
PLAY/
PAUSE.
Play/Pause. Press to play disc. Press again to pause playback.
Press again to continue.
EJECT. DVD disc eject.
SD/MMC/MS CARD.
USB port.
The card reader for SD,MMC,MS media card.
USB port(record DTV programmes through this port).
GB-4
Page 76

Rear View Connections
You can connect a wide range of external equipment to this product. Please refer to your equipment
manufacturers guide for further information.
See table below for descriptions of the available connections
HDMI
VGA
SCART
S-VID EO
Y CVB S
Pb R
Pr L
POWER
PC A UDIO I N
RF
COAX
Socket Connect to
HDMI High Quality HD. Connect to Satellite, DVD, Games console
VGA Computer Video Graphics Array output.
SCART Composite signals from DVD or VCR player/recorder or Satellite receiver
S-VIDEO Picture information from Camcorder, Games console or DVD player
VIDEO (CVBS) Picture information of Camcorder, Games console etc.
L(AV)/R (AV) Sound of Camcorder, Games console, DVD player, VCR etc.
PC AUDIO IN Computer Audio output
HEADPHONES Headphones output
TUNER TV Tuner input
AUDIO COAXIAL Connect audio output from the DVD player to suitable HiFi amplifier
Y PB PR L/R
POWER SOCKET Disconnects TV from mains supply
Connect them to the video output termind of DVD.(used in Y PB PR source)
GB-5
Page 77

Remote Control
General buttons
1. POWER.Press to bring the
TV out of standby. Press again
to revert to standby.
3. 0 - 9 Numeric buttons allows
direct TV channel and direct
DVD track selection.
5. -/--. Allows single or dual digit
entry when used with numeric
buttons.
7. ASPECT. Selects the screen
aspect ratio of your choice.
9. VOL + / -. Adjusts volume level,
and in menu mode adjusts the
levels.
11. DISPLAY. Press to display the
various features of the item
viewed.
13. LCD Menu. Press to enter the
Main TV setup menu. To
navigate the menu use the
navigation buttons (12)
15. INPUT. Press to select all the
various input features.
17. PMODE. Press to select
various picture brightness
modes
23. TEXT. Press to select
Teletext, press again to select
Mixed mode, press again to exit.
25. HOLD. In text mode, holds the
page being viewed
27. INDEX. In text mode selects
the main index page.
29. SIZE. In text mode, selects the
text font size.
35. .nottub noitceles txet tsaF .DER
2. AUTO. Adjusts the PC to the TV
screen in PC mode.start the “Favorite
List”in TV mode.
4. MUTE. Press to mute the
sound. Press again to restore
sound.
6. </>. Swap. Selects previous
program viewed.
8. NICAM. Selects Nicam/Mono
sound (analog tv mode only).
10. CH +/CH- Selects next or
previous TV channel. Also
navigates selections in Menu
mode.
12. NAVIGATE.Allows movement in the
menu mode.Enter,
selects the item in the menu.
14. EXIT. Exits from the menu
feature.
16. SLEEP. Sets the sleep timer
feature.
18. SMODE. Press to select
various sound modes.
19
. PGUP\PGDN.Can be used to select
the preceding or following page in text
mode.
28. SUBPAGE. Selects subpage
items in text mode.
30. REVEAL. Press to reveal
hidden answers in text mode.
36. BLUE. Fast text selection
button.
38. YELLOW. Fast text selection
button.
37. GREEN. Fast text selection
button.
GB-6
Page 78

DVD buttons
3. wolla snottub ciremuN .9 - 0
direct track selection in DVD,
CD and Mpeg modes.
7. ASPECT. Selects aspect ratio to
suit disc material.
15. INPUTt. Press to select DVD
and all the various input
features.
19. II. Play/Pause. Press to play
disc. Press again to pause
playback. Press again to
continue.
21. Stop. Press once to Prestop, press again to stop fully.
23. Press to select previous
chapter or track.
25. Press to select next
chapter or track.
27. Press to fast reverse.
29. Press to fast forward.
31. DMENU. Press to see disc
contents.
33. TITLE. Press to see disc titles.
35. PROG. Press to select track
playing order.
37
. INTRO. Displays 9 segments
of disc contents. (disc dependant).
2. EJECT. Ejects disc from player.
12. NAVIGATE.Allows you to select
disc menu mode.Enter,items in the
item in the menu.selects the
14. DVD Setup. Enters the DVD
player setup menu. Press again to
exit.
. I Step. Press to freeze the
20
action and each press
action one step. To resume play
press play button.
. SLOW Press to slow forward
22
24
. D.SUB.Press to display the
subtitles available.
26. ZOOM. Each press of the button
will magnify the picture centre area.
28. AUDIO. Press to select different
sound tracks (media dependant).
30. ANGLE. You may select
different viewing angles, (disc
dependant).
32. GOTO. Enables you to select a
chapter to view. (disc dependant)
34. D DISP. Displays the disc
status.
36. A-B. Enables you to select a
segment of programme to replay.
38
. REPEAT. Enables you to repeat
chapters/tracks.
steps the
.
GB-7
Page 79

Remote Control Use
To use the remote control, insert the batteries into the battery compartment. Ensure the POWER button of
the TV is switched on. Point the remote control towards the remote control sensor on the TV and press the
STANDBY button. The TV will now come out of standby and the screen will light.
The range of the remote control is approx 5 metres at an angle of no more than 30
To install the batteries: (not supplied)
Open the battery compartment cover on the rear of the remote control.
Insert 2 x” AAA” 1.5V alkaline cells in accordance with the diagram in the
battery compartment. Take care to observe the polarity (+/-) and refit the
cover.
Note :-
. Dispose of exhausted batteries responsibly at a local household waste
recycling facility.
... DO NOT dispose of batteries in a fire as they may explode and cause
injury.
. Only use AAA
. Use batteries of the same type. Do not mix battery types.
. Do not mix old and new cells. Replace both at same time.
. Do not try to dismantle cells, they may cause injury.
. Always remove cells if not using the remote control for some time.
1.5V cells in this appliance.
GB-8
Page 80

Press button to display the input source listINPUT
Press
Press button to enter the input sourceENTER
button to select the input source you want to watch
SELECT INPUT SOURCE
SOURCE
TV
DVD
AV
S-VIDEO
SCART
YPBPR
HDMI
PC
BASIC OPERATION
PICTURE
PICTURE MODE
BRIGHTNESS
CONTRAST
COLOUR
SHARPNESS
TINT
COLOUR TEMPERATURE
ONLY RE
MOVE ADJUST EXIT
Press button to display theLCD-MENU MAIN OSD MENU
Press
Press button to enter the sub menu
Press button to select the option and then press to adjust the value in the sub menu
button to select the MENU you want
nnacuoYottubsser unemsuoiverpehtotkcabnruterdnaevasotp LCD-MENU or EXIT
PERSONAL
50
50
5
NORMAL
MENU
GB-9
Page 81

Show topics when you enter TV mode without scan program
Please Scan Channels
TV
Auto
BG
Picture Menu
Press button on the front of panel or on the remote control to display the main menuUNEM-DCLUNEM
Press button to select in the main menu then press button to enterPicture
PICTURE
PICTURE MODE
BRIGHTNESS
CONTRAST
COLOUR
SHARPNESS
TINT
COLOUR TEMPERATURE
MOVE ADJUST EXIT
1. Press
2. Press
3. After finishing your adjustment Press or button to save and return back to the previous menuLCD-MENU EXIT
P
Press button to select then press button to selectPicture Mode
Mild Game
Brightness
Press button to select then press button to adjustBrightness
C
Press
C
Press button to select , then press button to adjust
S
Press
TINT
Press
Colour Temperature
Press button to select
button to select the option that you want to adjust in the menuPicture
button to adjust
icture Mode
ontrast
button to select then press button to adjustContrast
olour
Colour
harpness
button to select , then press button to adjust
button to select
Sharpness
then press
TINT,
Colour Temperature,
then press button to select normal,warm or cold.
button to adjust used in ntsc operatino only.
PERSONAL
50
50
5
NORMAL
FERE N
MENU
Available Picture mode Personal Standard Movie
GB-10
Page 82

Press button on the front of panel or on the remote control to display the main menuUNEM-DCLUNEM
Press button to select in the main menu then press button to enterSound
SOUND MENU
SOUND
SOUND MODE
BASS
TREBLE
BALANCE
AVC
MOVE ADJUST EXIT
1. Press
2. Press
3. After finishing your adjustment Press or button to save and return back to the previous menuLCD-MENU EXIT
S
Press button to select then press button to selectSound Mode
Voice Theatre
Bass
Press
Treb
Press
Balance
Press
Avc
Press button to select then press button to adjustBalance
button to select the option that you want to adjust in the menuSound
button to adjust
ound
Mode
button to select then press button to adjustBass
le
button to select then press button to adjustTreble
button to select then press button to adjustBalance
PERSONAL
50
50
5
OFF
MENU
Available Sound mode Personal Standard Music
GB-11
Page 83

FUNCTION MENU
Press button on the front of panel or on the remote control to display the main menu
Press button to select in the main menu then press button to enterFunction
FUNCTION
UNEM-DCLUNEM
LANGUAGE
VIDEO SIZE
TT LANGUAGE
SLEEP TIMER
OSD TIMER
BLUE SCREEN
RESET
MOVE ADJUST
1. Press
2. Press
3. After finishing your adjustment Press or button to save and return back to the previous menuLCD-MENU EXIT
Language
Press button to select then press button to select different language Available language:english italian Language
espanol french german dutch)
Video Size
Press
TT Language
Press
evro,east evro,russian,arabic,farsi greek,cyrillic,hebrew)
Sleep Timer
Press button to select then press button to select different Sleep Timer.(Available Sleep Timer: 15Min,30MinSleep Timer
45Min,60Min, 75Min, 90Min,105Min, 120Min
OSD Timer
Press button to select then press button to select. (Available OSD Timer: 5 Seconds,10SecondsOSD Timer
30Seconds,60Seconds
Blue Screen
Press button to select then press button to select ON or OFFBlue Screen
Reset
Press button to select then press button to enterReset ENTER
button to select the option that you want to adjust in the menuFunction
button to adjust
button to select then press button to select Available Video Size Full, 4:3, 14:9, Zoom AutoVideo Size
button to select then press button to select different TT language AvailableTT language:west TT Language
Off
Off
ENGLISH
FULL
WEST EURO
OFF
SECONDS
ON
MENU
EXIT
EXIT
Note TT Language is invalid in menu and it will beFunction
shown in gray
Other menu and description are the same as
that for TV mode
Note Video Size and TT Language are invalid in F unction
menu
and it will be shown in gray Other menu and description
are the same as that for TV mode
GB-12
Page 84

FUNCTION
YES
MOVE ENTER BACK
Press button to select press button to reset when select YES press ENTER button to return back to
the previous menu when select NO
Child Lock
Press button to select then press button to enterChild Lock ENTER
,
YES or NO ENTER
FUNCTION
CHILD LOCK
INSTALLATION
MOVE ENTER EXIT
LY REFERE
NO
MENU
MENU
GB-13
Page 85

FUNCTION
CHILD LOCK
CHILD LOCK
KEY LOCKED
CHANGE CODE
MOVE ADJUST
Child Lock
Press button to select then press button to select ON or OFFChild Lock
Input password to enter when Child Lock at “ON”, default password is “0000”
Key Locked
Press button to select then press button to select ON or OFFKey Locked
CHANGE CODE
Press button to select then press button to enterChange Code ENTER
CHANGE CODE
ENTER OLD PASSWORD
OFF
OFF
MENU
EXIT
EXIT
ENTER NEW PASSWORD
ENTER PASSWORD AGAIN
ONLY REF
NUMBER
Input old password at “ENTER OLD PASSWORD”, default password is“0000”.
Input new password at “ENTER NEW PASSWORD”.
Input new password again at “ENTER PASSWORD AGAIN”.
GB-14
MENU
BACKRETNE
Page 86

INSTALLATION
Press button to select Installation then press button to enterENTER
FIRST TIME INSTALLATION
COUNTRY
LANGUAGE
DELETE PROGRAM
SEARCH PROGRAM
YES
MOVE ADJUST EXIT
ountry
C
Press button to select then press button to select different countryCountry
Language
Press button to select then press button to select different languageLanguage
Delete Program
Press button to select then press button to select whether to delete all programsDelete Program
earch Program
S
Press button to select then press button to select whether to start searching programsSearch Program
After setting the items
If you cancelled the first time installation it will remind you whether to set the first time installation next time
select YES to finish the first time installation or select NO to exit this menu
OTHER
ENGLISH
YES
YES
NO
MENU
FIRST TIME INSTALLATION
FIRST TIME INSTALLATION IS NOT FINISHED
ARE YOU SURE TO EXIT
YES
DO IT NEXT TIME NO
ENTER
GB-15
MENU
TIXEEVOM
Page 87

Press button on the front of panel or on the remote control to display the main menuUNEM-DCLUNEM
button to select in the main menu then press button to enter
Press
TV
TV Menu
COUNTRY
AUTO TUNING
MANUAL TUNING
CHANNEL EDIT
MOVE ADJUST EXIT
1. Press
2. Press
3. After finishing your adjustment Press or button to save and return back to the previous menuLCD-MENU EXIT
Country
Press button to select then press button to select different countryCountry
Auto Tuning
Press button to select then press button to enterAuto Tuning ENTER
button to select the option that you want to adjust in the menu
button to adjust
TV
START TO SEARCH?
YES
OTHER
MENU
TV
NO
ONLY R
MOVE ENTER BACK
Press
button to select press button to auto tuning when select YES
to the previous menu when select NO
Manual Tuning
Press
button to select then press button to enterManual Tuning ENTER
YES or NO ENTER
MENU
press ENTER button to return back
GB-16
Page 88

TV
MANUAL TUNING
CHANNEL
SOUND SYSTEM
COLOUR SYSTEM
AFT
MANUAL TUNING
001
DK
PA L
OFF
49.7MHz
MOVE ADJUST BACK
Channel
Press button to select then press button to select different channelChannel
Sound System
Press
button to select then press button to select BG I LorDKSound System
Color System
Press
button to select then press button to select AUTO PAL or SECAMColor System
AFT
Press
button to select then press button to select ON or OFFAFT
Manual Tuning
button to select
Press
to begin searching
Channel Edit
Press button to select then press button to enterChannel Edit ENTER
then press button shortly to adjust channel frequency and press for a long timeManual uning
TV
CHANNEL EDIT
ONLY R
MENU
VTNOITPO
MENU
FAV SKIP LOCK
This option has four functions
1.Press Green button to set the current channel to your favorite channel if the current channel already be one of your favorite
press Green button again will set it to a normal channel
channel
2.Press blue button to set the current channel to lock if the current channel already lock press blue button again will unlock
3.Press yellow button to skip the current channel
SWAP
BACK
GB-17
ENTER
Page 89

4.Press
Input channel name at “_______”, Press button to select OK save and return back to the previous menu
Press
Press button to select the location you would like to place the channel
Press button to perform your selectionENTER
button to select the channel in the list press button to display as followsENTER
TV
EDIT NAME
ABCDEFGH IJ K LMNOPQRSTUVWXYZ
abcdefghIjklmnopqrstuvwxyz
1 2 3 4 5 6 7 8 9 0 _ ( )
EMPTY BAK SPC OK CANCEL
SHORTCUT KEY
button to select the channel in the list press button
MOVE
ENTER BACK
MENU
HDMI/YPBPR MENU
In HDMI/YPBPR mode,Press button on the front of panel or on the remote control to display the main menu
Press
button to select inthe main menu then press button to enterHDMI/YPBPR
HDMI/YPBPR
H POSITION
O
V POSITION
POSITION RESET
MOVE ADJUST EXIT
UNEM-DCLUNEM
50
50
MENU
GB-18
Page 90

1. Press
2. Press
3. After finishing your adjustment Press or button to save and return back to the previous menuLCD-MENU EXIT
H Position
Press button to select then press button to adjustH Position
V Position
Press button to select then press button to adjust
Reset
Press button to select then press button to resetReset ENTER
button to select the option that you want to adjust in the menu.HDMI/YPBPR
button to adjust
V Position
PC Menu
In PC mode,Press button on the front of panel or on the remote control to display the main menuUNEM-DCLUNEM
Press
button to select in the main menu then press button to enterPC
PC
H POSITION
O
V POSITION
PHASE
CLOCK
AUTO SYNC
MOVE ADJUST EXIT
1. Press button to select the option that you want to adjust in the menuPC
2. Press
3. After finishing your adjustment Press or button to save and return back to the previous menuLCD-MENU EXIT
H
Press button to select then press button to adjustH Position
V Positon
Press
Phase
Press
Clock
Press
Auto Sync
Press
button to adjust
Position
button to select then press button to adjustV Position
button to select then press button to adjustPhase
button to select then press button to adjustClock
button to select then press button to auto syncAuto Sync ENTER
GB-19
MENU
Page 91

USB port and Card Reader
Press the SOURCE button on the remote control and choose DVD for using the
internal DVD Player.
Please connect the USB Stick or the Card media in order to the description by the USB Port
and Card Reader on the right side of the device. Normally, the printed side of the memory
shall be show to the rear side.
Start the USB Port or Card Reader by pressing the DVD SETUP and go to the System
Setting and choose by the option SOURCE the USB or CARD.
Data memory with Music, JPEG or Video files
Insert the a disc or connect a USB-Stick or connect a card memory (SD, MMC or MS card) and the
player will auto search the directories saved Video/Music/JPEG files. After searching, it will auto go to
the first directory saved Music files (to the disc containing both Music and JPEG files. To the disc
containing single type of files, it will go to the first directory) and play the first song in the directory
(File name is highlighted). The screen displays as the picture below:
If the internal DVD-player does not read the
DVD SETUP button and choose in the system setting the option SOURCE. There you can activate
the USB port or Card Reader.
Label of the
folder
USB-Stick or read the Card media, please press the
Current file name
Track or file list.
Music
Notes:
With the arrow key to the right you can change between the
catalogue window, the Chops and Track window and to the file
format. File formats are of the order: music (mark (note)), pic-
tures (camera) and video (arrow).
The DVD player starts with the playback of Music files.
Due to legal requirements of CE-conformity, the customer is asked to only connect USB-
Sticks to the USB port.
When playing a JPEG picture on discs containing Music and JPEG files, press the STOP
button to return to JPEG list.
You can press the Numeric buttons to select the file you want to play. For example, if you
desire the 15
playback.
When playing a disc with Music files, no video can be displayed at the same time.
th
track in current list, press the 10+ Button once, then press “5”, the 15th starts
JPEG
GB-20
Video file
Page 92

Viewing Teletext
Analog TV.
Press the INPUT button and highlight TV using the
Chose the TV channel you wish to view as normal
Press the TEXT button once to display the Teletext (Text) index on the screen.
Press the TEXT button twice to see a mixed image of TV picture and TEXT.
Press the TEXT button again or EXIT button to exit text mode.
Use the number keys to select the page you wish to view, or the quick access coloured buttons
(Fast Text) to select the subject corresponding coloured text at the bottom of the screen.
To increase the size of text, press the SIZE button. This will show the top half of the screen. Press
again too display the lower half of the screen. Press again or the EXIT button to revert to normal
size.
To freeze the page you are viewing, press t he HOLD button. Press again to un-freeze.
To reveal any hidden text (eg quiz answers) on the page being viewed, press the REVEAL button.
Press again to exit the feature.
To access any sub-page of the page being viewed, press the SUBP
displayed at the bottom of the text page. Press again to exit the feature.
To access or return to the main TV text index, press the INDEX button.
To view subtitles on the screen, press 888"" in text mode. If the station is transmitting sub titles
these will be viewed at the bottom of the screen.
To turn off the subtitle feature, press EXIT.
buttons and press ENTER to select.
/
AGE button. A bar will be
Using the DVD Player
NOTE:T
he product no AUTO DVD function.
Compatible Discs.
Your DVD player can play discs that are marked with the following logos :-
12cm DVD Video Disc. 12cm Compact Recordable Discs
12cm Compact Re-Writable Disc. 12cm Compact Audio Discs
12cm Photo Compact Discs.
Region Code.
If the region code of the disc you wish to play does not match the region code of this
DVD player, the disc will not be played
The region code for this player is region 2 ( see symbol opposite)
Inserting a disc.
To operate the DVD player you must select DVD using the INPUT button, do NOT
attempt to place a disc into the player before selecting DVD.
Gently push the disc into the slot on the right side of the TV, with the DISC LABEL
facing AWAY from you. The mechanism will take the disc into the player.
After a few seconds “READ” will be displayed on the screen, and after another few
seconds the disc will either start to play automatically, or show the disc menu or
contents.
GB-21
Page 93

Playing DVD’s.
The film may start automatically or you may be presented with a menu screen, this is dependant on the
way the DVD is authored by the movie company.
Press the ENTER button to begin playback or use the
Pause Play.
Press the button to pause play. The pause symbol will be displayed on the screen.
To resume normal play press the button again.
Stop Play.
Press the button to stop play.
Press the button to resume play from where it was stopped.
Note :- Play will commence from the exact position where the DVD was stopped, unless either
the DVD disc was removed from the player or the stop button is pressed a second time.
To stop play to remove the disc.
Press the button twice, the stop symbol is displayed.
If you press the button, play will start from the beginning of the first chapter.
Fast Forward/Reverse.
To fast search the contents of the disc during play.
Press either the button to fast forward through the disc or the button to search backw
h press of the or buttons steps through four available speeds. These are X2, X4, X8 and X20
Eac
of normal play speed. The selected speed will be displayed on screen after each press of the button as
X2, X4, X8 and X20 for fast forward and X2, X4, X8, and X20 for fast backwards.
Press the button at any time during fast mode operation to return to normal playing speed.
Skip to the Next/Previous Chapter.
To skip to the next/previous chapter during play.
Press the button. Play re-starts at the start of the next chapter each time this button is pressed.
Press the button. Play re-starts at the start of the previous chapter.
buttons to navigate the menu.
ards.
Freeze / Step.
Press the button to freeze the action, then press repeatedly to step the action forward.
Press the button at any time to revert to normal playing speed.
Special DVD Functions.
Title Playback.
The D.TITLE button allows you to view, select and play the different titles on the DVD.
Press the D.TITLE button and navigate to your required title.
Press ENTER.
GB-22
Page 94

Sequential Playback.
Press the PROGRAM button to open the sequential menu screen.
Use the buttons to navigate to each sequence.
Use the number buttons to input the title and chapters to view.
Use the buttons to navigate to
Press ENTER.
If required use the buttons to navigate to
lay .
lear to clear all entries.
Repeat.
Press the REPEAT button to scroll through the three repeat options.
Chapter. Repeats the current chapter. Title. Repeats the current title. Repeat All. Repeats the entire disc.
Press the REPEAT button again to cancel the repeat function.
Display.
The display function shows an on-screen display of the current title.
“Title”“Disc type” (CTotal) “Chapter” (CuTotal) “Time elapsed”
Press the D.DISP button a second time to show :ATOff).
Language, Audio type, Subtitle (Cal) .
Subtitle Language
Camera angle.
Press the D.DISP button a third time to switch the display off.
Goto
The GOTO button can be used to skip to your favourite title, chapter or track.
Press the GOTO button to show the on-screen display
Press the buttons to move to each editable value.
Press the numeric buttons to change the value
Press ENTER to goto the selected title, chapter or track.
Subtitles.
Some DVD discs contain several subtitles in several languages.
Press the SUBTITLE button repeatedly to skip through the available
languages displayed on the screen until
the required language is found.
The subtitle in the selected language appears shortly after selection. To turn the subtitles off, press the
SUBTITLE button until Subtitles OFF
is shown.
Note: See DVD disc cover for the supported languages.
Audio.
Press the AUDIO button to display the current audio mode. Repeatedly pressing the AUDIO button will scr
through the available languages.
Zoom.
You have three preset zoom options to choose from.
Press the ZOOM button to zoom in or out on the display. Repeatedly press the ZOOM button to scroll
through the available options. The options are :- Zoom in : X2, X3 and X4.
When in zoom mode press the buttons to pan around the display.
GB-23
oll
Page 95

Playing Audio CD’s
Insert an audio CD. Playback will automatically start at the first track. The track number, total number
of tracks, repeat mode and elapsed time will be displayed at the top of the screen.
Control During Playback.
The following controls are available during playback as described for playing DVD’s.
Play, Pause, Stop, Fast forward, Fast backwards, Skip forwards, Skip backwards, Repeat A-B, Goto,
Program, Audio.
Preview.
Press the PREVIEW button to playback a 15 second preview of each track on the CD.
Playing JPEG CD’s.
Insert a JPEG CD into the player. The JPEG contents screen will be displayed. Note:- Only JPEG files
of up to 3MB in size can be played.
Press the buttons to navigate through the available files and folders.
Press ENTER to select a file or folder.
You can also use the numeric buttons to input directly the desired file required.
The following controls are available as described previously.
Play, Pause ,Stop, Skip forwards, Skip backwards, D.Disp, Goto, Zoom functions.
Repeat.
You can replay either the current track, directory or the entire disc.
Press the REPEAT button to scroll through the three repeat options.
Repeat 1, Repeat Directory, Repeat All.
Press the REPEAT button again to cancel repeat.
Program Effects.
When the JPEG contents screen is displayed, the PROGRAM button allows you to preselect the order
When the JPEG images are displayed, press the PROGRAM button to display the different effects
available. There are 16 to chose from :-
H ertneC morf dnetxEpoT epiW
Wipe Bottom Extend from Centre V
Wi V ertneC ot sserpmoCtfeL ep
Wipe Right Compress to Centre H
Diagonal Wipe Left Top Window H
Diagonal Wipe Left Bottom Window V
Diagonal Wipe Right Top Wipe from Edge to Centre
Diagonal Wipe Right Bottom Random
Rotating JPEGs.
When playing JPEGs, press the ARROW buttons to flip or rotate the picture.
When the image is displayed :Use the
Use the button to rotate the image anticlockwise by 90 degrees. Use the button to flip horizontally.
Repeat A - B.
You can repeat a section of DVD, of any length, within a chapter.
Press the A-B button once at the point you want the repeat to start.
Press the A-B button again at the point you want the repeat to end. The selected segment will now repeat.
Press the A-B button a third time to cancel the repeat.
button to rotate the image clockwise by 90 degrees. Use the button to flip vertically.
GB-24
Page 96

SOURCE
TV SYSTEM
TV TYPE
PASSWORD
RATING
POWER RESUME
DEFAULT
EXIT SETUP
DVD Function Settings
GB-25
Page 97

source
SOURCE
TV SYSTEM
TV TYPE
PASSWORD
RATING
POWER RESUME
DEFAULT
EXIT SETUP
SOURCE
TV SYSTEM
TV TYPE
PASSWORD
RATING
POWER RESUME
DEFAULT
EXIT SETUP
System Setup Menus
With this option you can activate the DVD loader, USB
port or Card Reader. Choose one of the source and
AUTO
DISC
USB
CARD
confirm by pressing the OK button. If you uses the
AUTO setting, the player starts every time the source
which has insert a media.
GB-26
Page 98

SOURCE
TV SYSTEM
TV TYPE
PASSWORD
RATING
POWER RESUME
DEFAULT
EXIT SETUP
SOURCE
TV SYSTEM
TV TYPE
PASSWORD
RATING
POWER RESUME
DEFAULT
EXIT SETUP
GB-27
Page 99

SOURCE
TV SYSTEM 2G
TV TYPE 3PG
PASSWORD 4PG13
RATING 5 PG-R
POWER RESUME
DEFAULT
EXIT SETUP
1KID SAFE
6 R
7 NC-17
8ADULT
POWER RESUME
Last memory. Dudie time, half-way for another disc, when read the original disc, you can read from the last
place to start.
SOURCE
TV SYSTEM
TV TY PE
PASSWORD
RATING
POWER RESUME
DEFAULT
EXIT SETUP
ON
OFF
SOURCE
TV SYSTEM
TV TYPE
PASSWORD
RATING
POWER RESUME
DEFAULT RESTORE
EXIT SETUP
GB-28
Page 100

Language Setup Menus
DUTCH
ITALIAN
DUTCH/GERMAN/ITALIAN).Press button to confirm. E
NTE R
FRENCH
SPANISH
DUTCH
ITALIAN
GERMAN
DUTCH/GERMAN/ITALIAN/OFF).Press button to confirm. ENT ER
DUTCH
6
6
ITALIAN
DUTCH
OFF
GB-29
 Loading...