

Page 1
SYNERGY SYSTEM
!
!
Model: SLC20
BEFORE YOU BEGIN:
TM
• Unpackallpartsandreadinstructionscarefullybeforebeginning.
•Shelfpegsanddoorhingesmustslideintothechannelsofthepostinthecorrectorder.
They cannot be removed individually without disassembly.
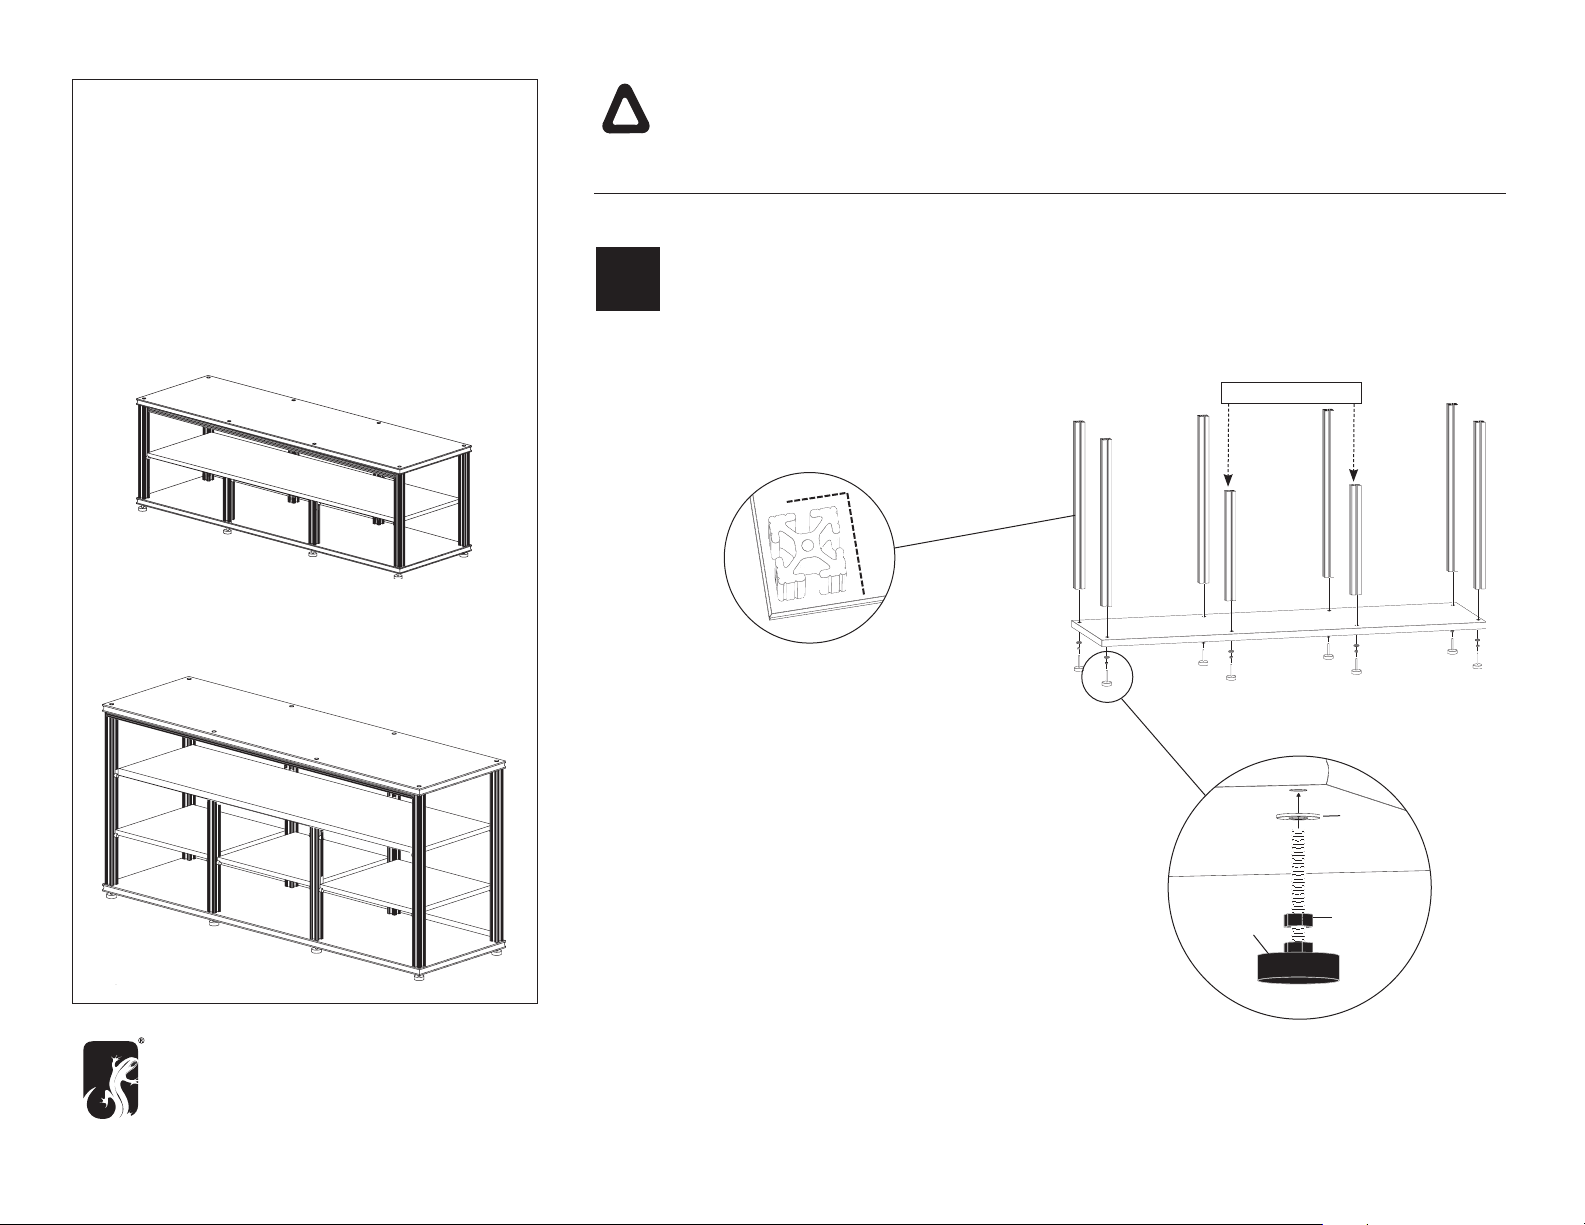
Connect Posts to Bottom Shelf
1
Model: SLC30
A. Square Post
Square the post to the bottom shelf.
O
90
B. Connect Post
Screw foot with metal washer through bottom
shelf and into the end of each extruded post.
Hand tighten fully and use wrench to tighten
nut onto underside of shelf.
WARNING: Tighten by screwing the leveler foot NOT the post.
Leveler Foot
Short Post
Washer
Hex Nut
Limited Warranty
Five full years Salamander Designs Ltd will repair or replace, at our option, any product defective in materials or craftsmanship. Salamander Designs Ltd. will not be responsible for any damage to or destruction of other
equipment consequential to our equipment failure. Defective product must be given Return Authorization and is to be returned to the factory prepaid, in the original carton and packing material. Any damage incurred in
a shipment not in original packaging shall be the responsibility of the owner. Warranty repairs will be returned prepaid, via UPS within the continental U.S.A. only.
Salamander Designs Ltd. • 800-535-5659 • www.SalamanderDesigns.com ©2006 Salamander Designs Ltd. Synergy System, Patented.
TM
Doc No. 500-982/v4.08 SLC -1/5
Page 2
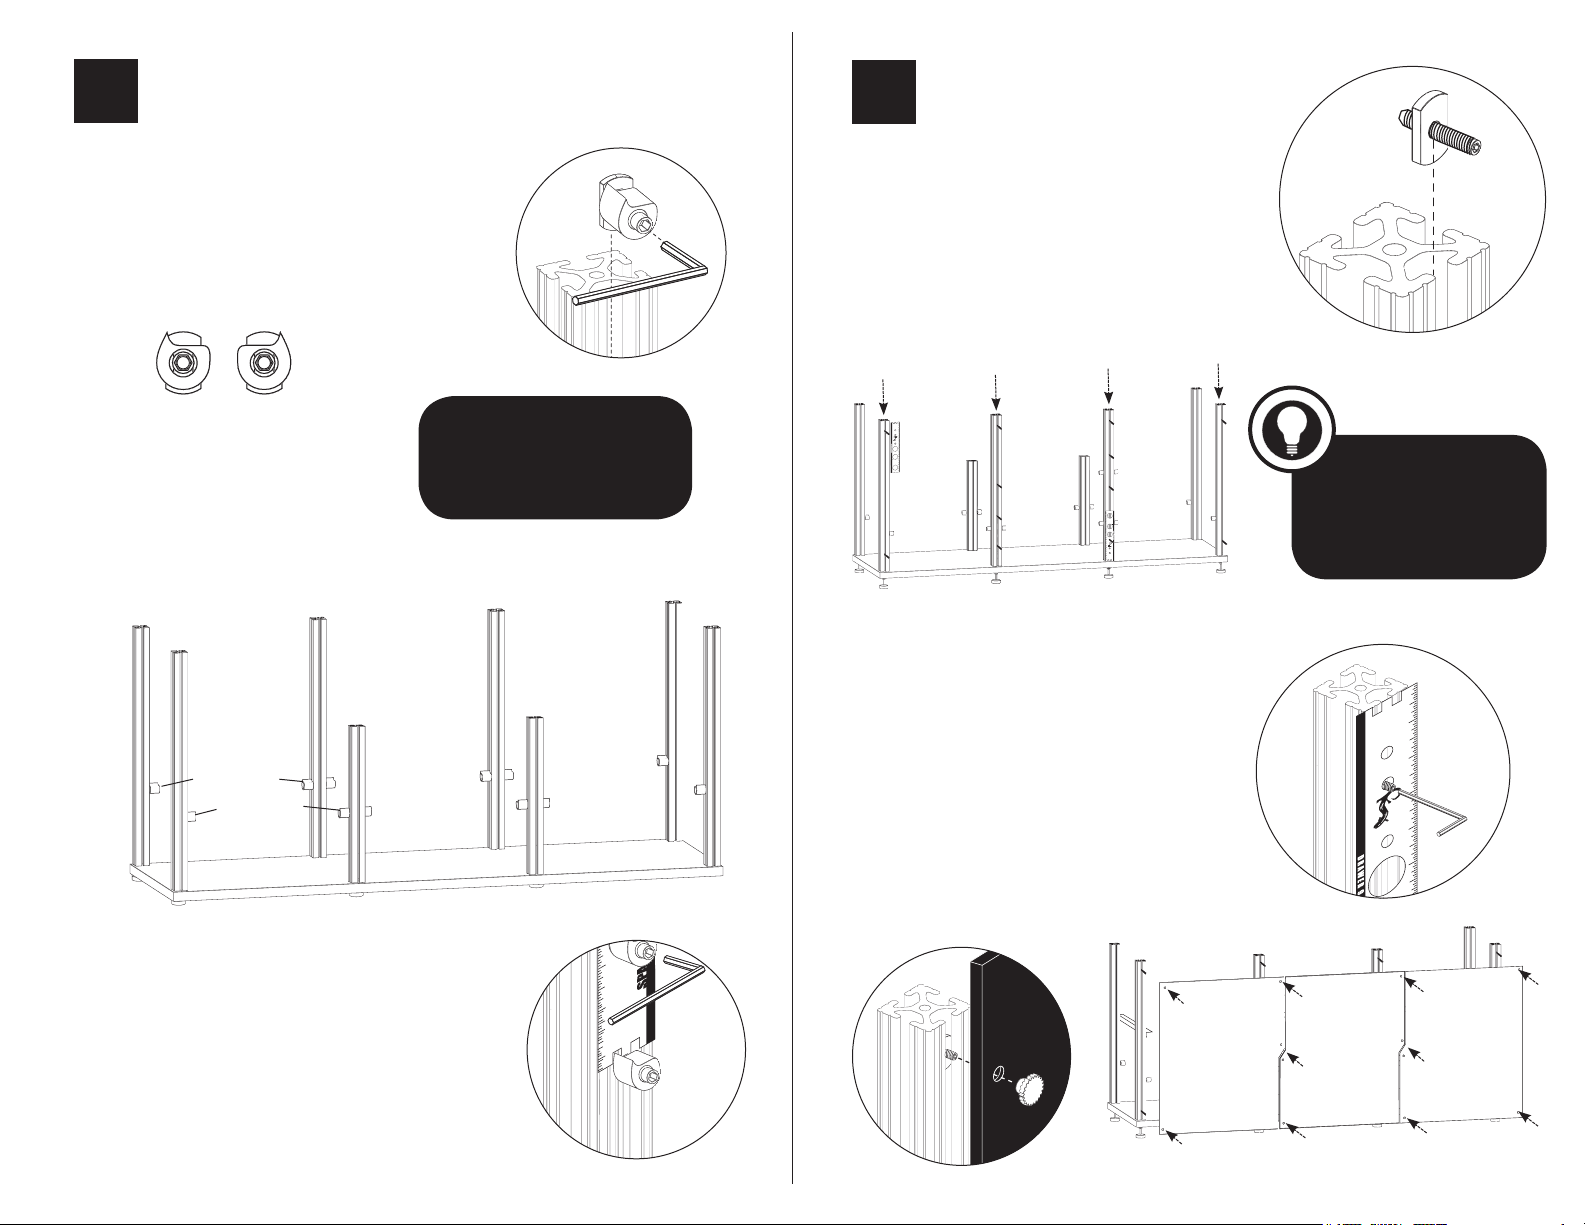
Add Shelf Pegs
SPACER
SPACER
1 2 3 4 5 6 7 8 9
S2 0 / S V D O
RE A R P A N E L
4
1 / 2
ww w.s ala man de rde sig ns. co m
E X T E N D E D
RE A R P A N E L
S3 0 / S 4 0
RE A R P A N E L
2
3
Attach Rear Panels
A. Pegs for Shelves
Insert one shelf peg down each post.
NOTE: There are two varieties of shelf pegs
(A and B). They are designed to cradle the
shelf in place. Refer to drawing.
A B
B
A
A
B
Note:
If installing 10” door(s), use 2
sets of shelf pegs at the top of
short posts to act as door stops.
A. Insert Hardware
Combine the 1” threaded studs with flat nuts.
Slide 2 sets of hardware down the two outside
posts and 4 sets down the center post. Allow
studs to remain loose at bottom of post.
2X
4X
4X
2X
B. Position & Secure Studs
Align the Spacer Tool at the top of each post,
then position top studs through the small “Rear
Panel” hole. Repeat this step with the bottom
studs aligning the Tool along the bottom of post
to set spacing for cable passage. Use the hex key
to secure the top and bottom studs to the posts.
TIP
To ease installation of rear
panels gently place the unit face
down on the floor to improve
alignment of panels.
B. Adjust Peg Height
Position the shelf peg through the Spacer Tool
and tighten at desired height. See step 4 for
fine tuning the shelves.
C. Place Rear Panels
Secure each panel in place with thumb nuts.
Doc No. 500-982/v4.08 SLC - 2/5
Page 3
4
"
6"
8"
SPACER
TOOL
4
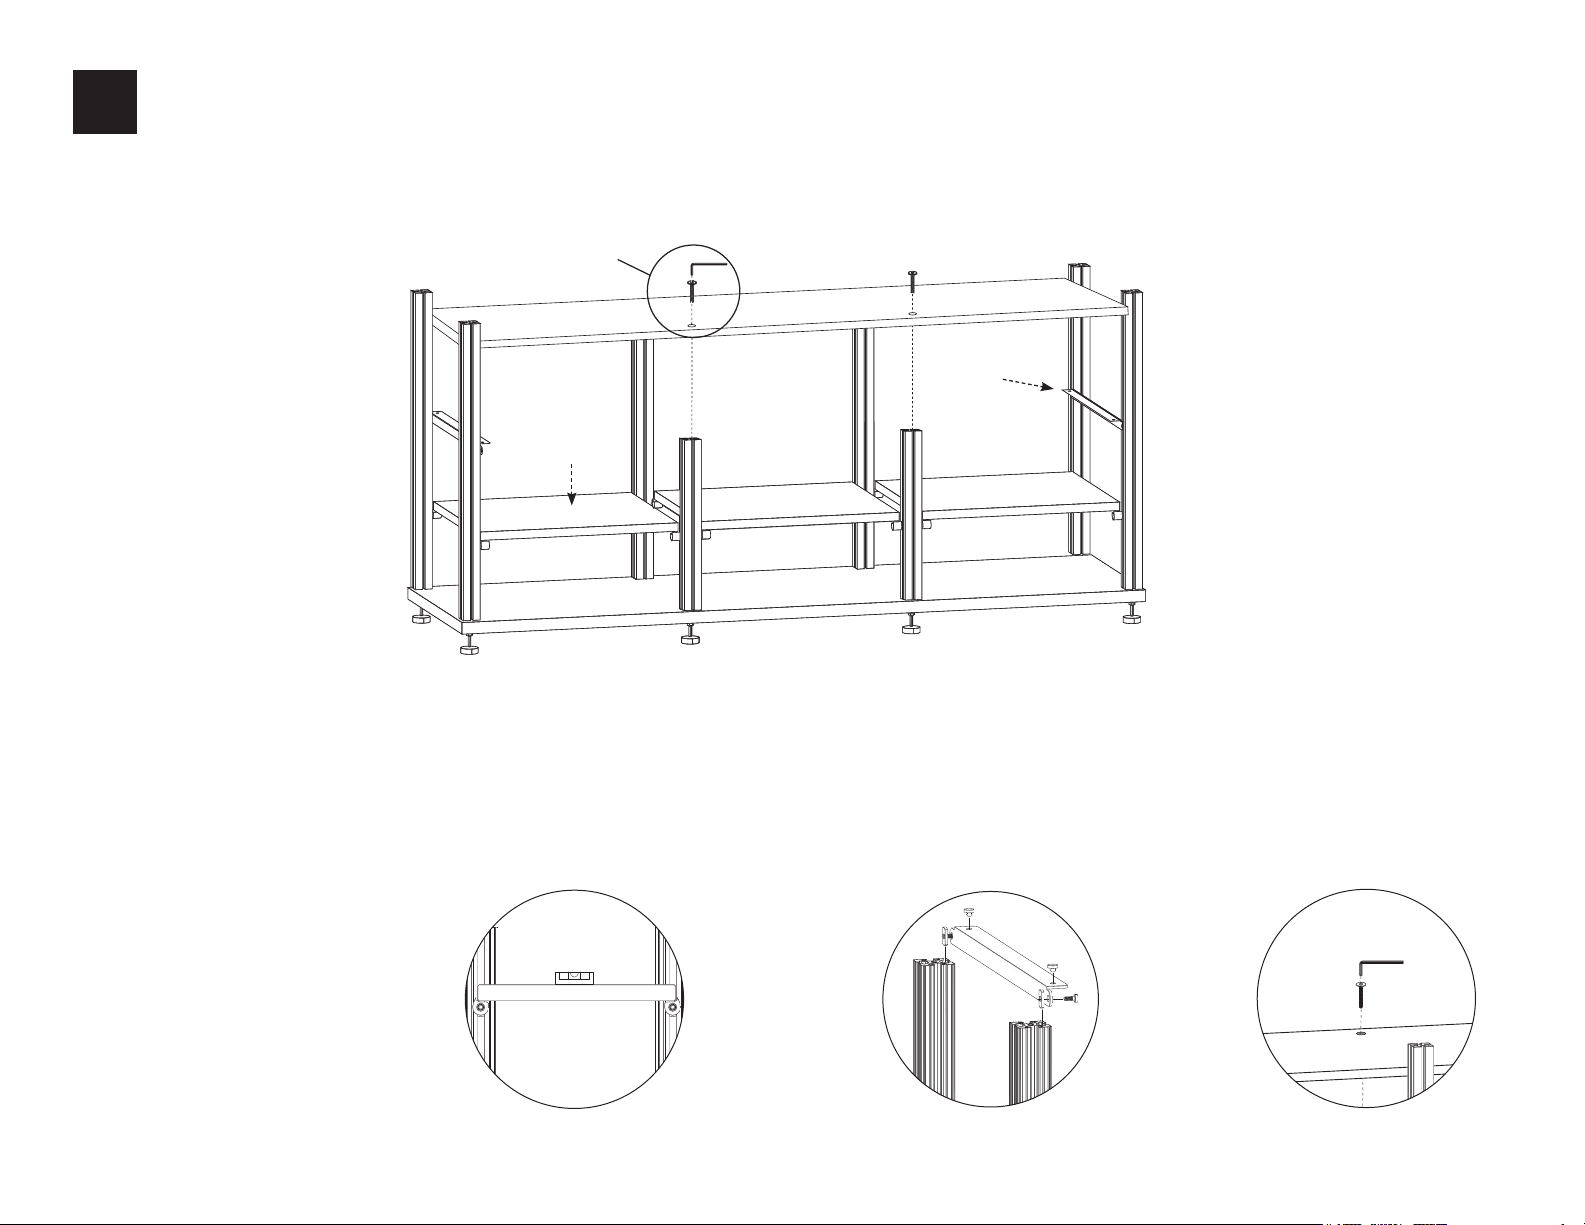
Placing Shelves
If assembling model SLC20, skip to step C.
D
C
A
Place shelves from the bottom up. Angle
the shelf in between the front post and
set on top of shelf pegs.
B. Fine Tuning
Use the bubble level to precisely adjust
the adjustable shelves. Be sure to level
both sides as well as front to back. Use
the hex key to tighten each peg.
C. Bracket A. Adjustable Shelves
Loosely install brackets down outer posts.
Place rubber shelf tabs through bracket.
D. Triple-Width Shelf
Place shelf on center posts and
secure with bolts. Note: Raise
brackets to bottom of shelf and
tighten in place.
Doc No. 500-982 /v4.08 SLC - 3/5
Page 4
5
SPACER
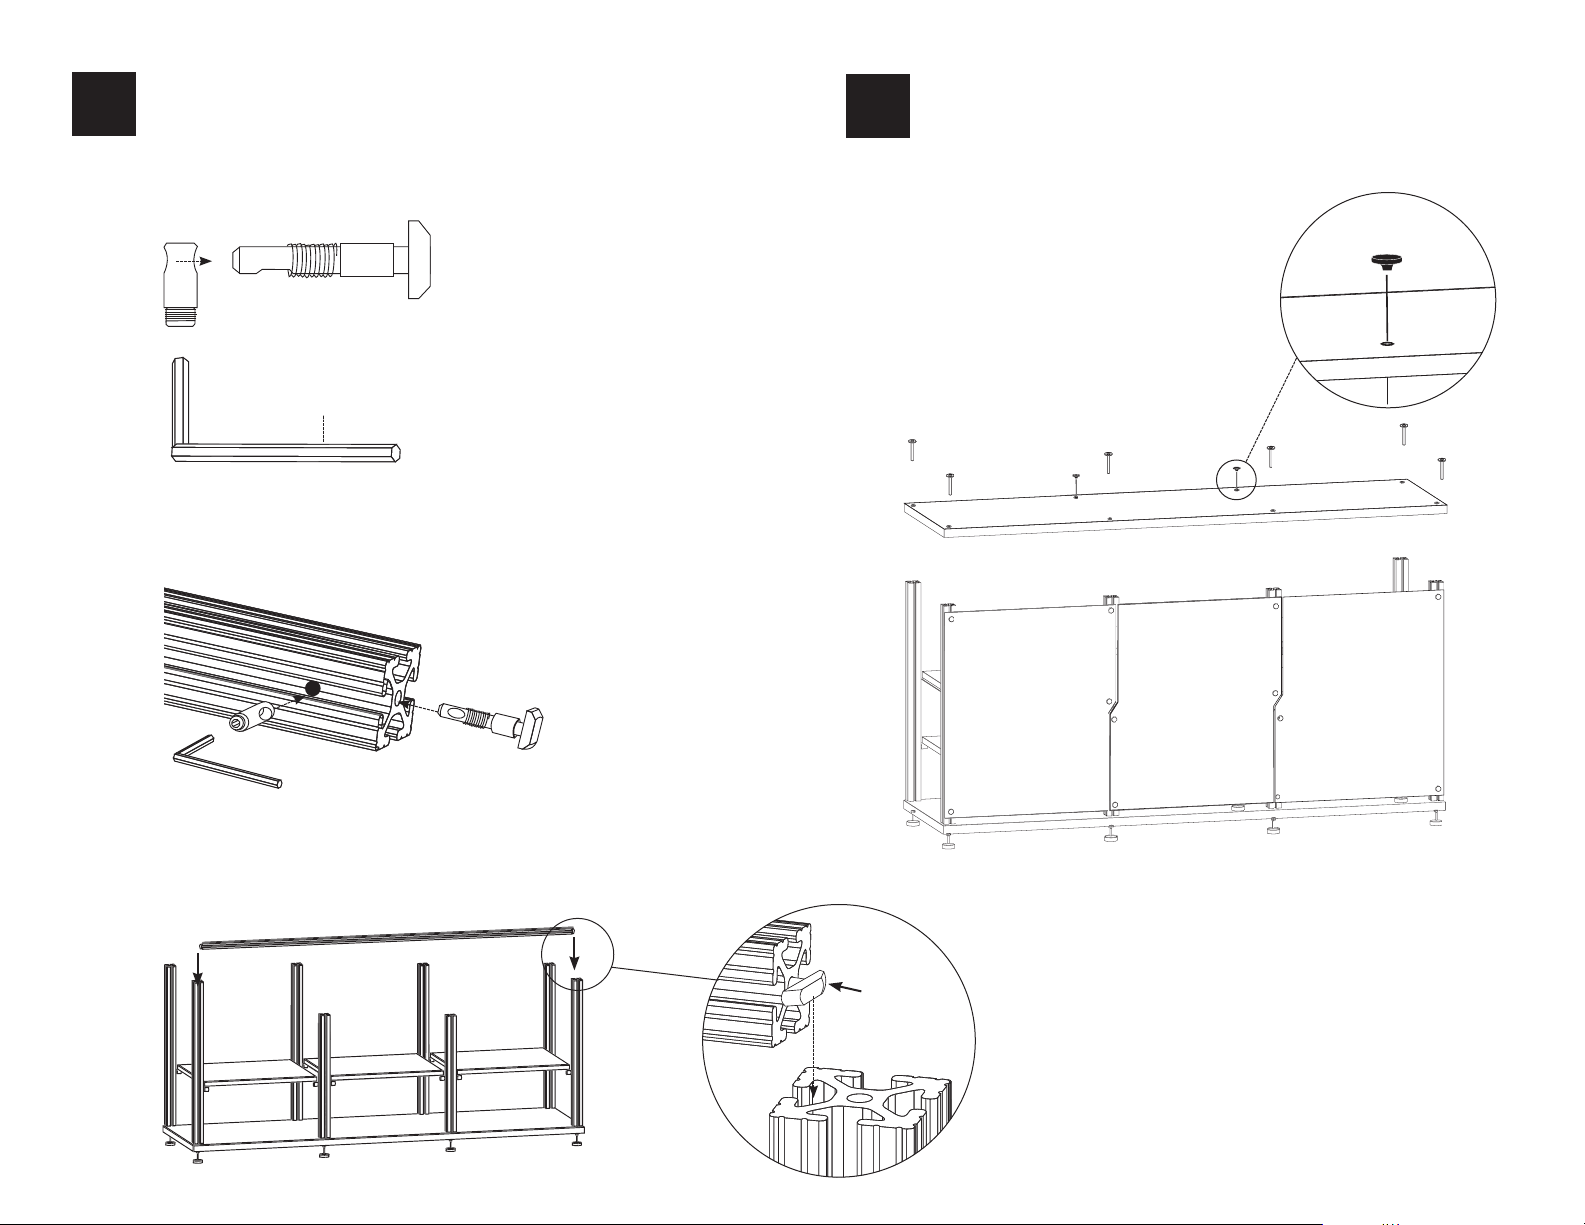
Install Spanner
6
Top Assembly
A. Disassemble cross dowel using the hex key as shown.
400-080
B. Install the cross dowels into both ends of the spanner
as shown. Gently tighten the set screw in place with the hex key.
(Adjust set screw to move dowel fastener in and out as needed.)
A . Secure Top
Secure top with the connector bolts.
Place the plastic plugs in the front center holes.
C. Slide the spanner post into the front two riser posts.
Adjust screw
to move in
and out.
Doc No. 500-982 /v4.08 SLC - 4/5
Page 5
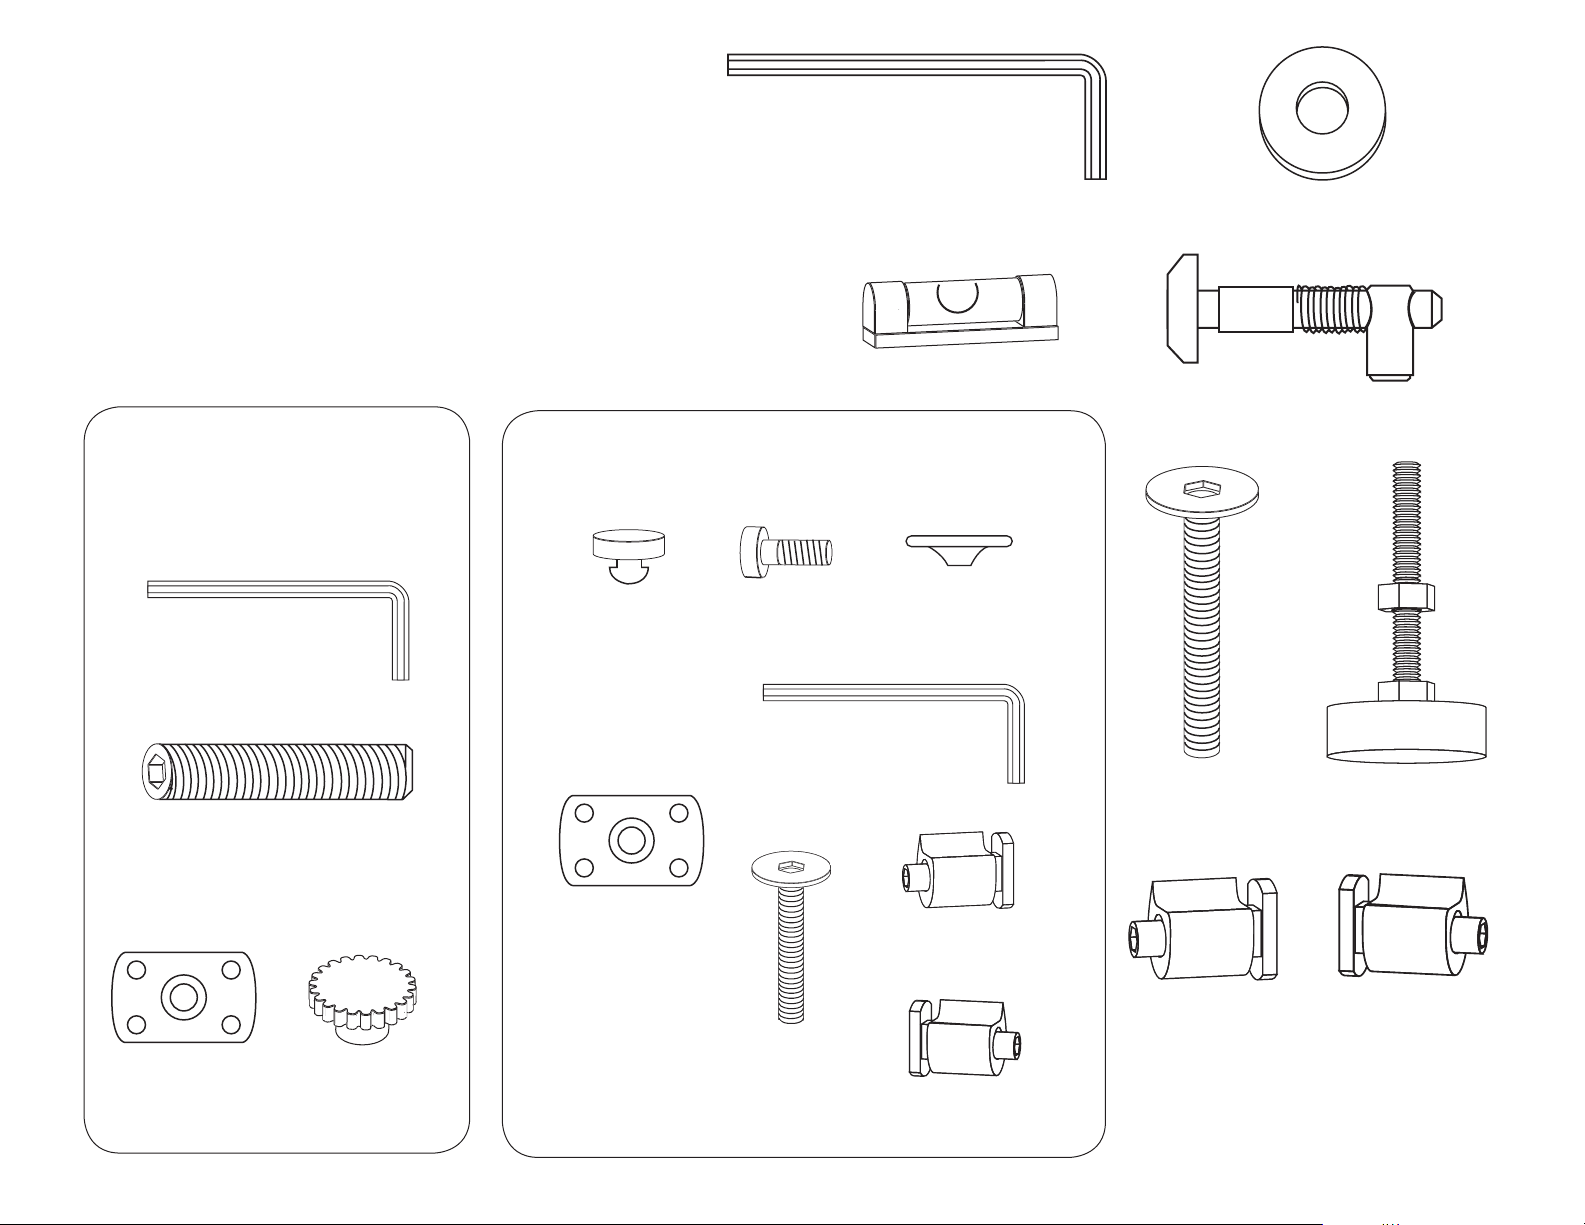
Parts
8 - Aluminum Posts 3 - Adjustable Shelf (SLC30 only)
1 - Top Shelf 1 - Spacer Tool
(400-060) - 3/16” Hex Key
1x
8x
(300-470)
Washer
1 - Bottom Shelf 2 - Heavy Duty Shelf Bracket
3 - Rear Panels 1 - Triple Width Shelf
1 - Wrench 1 - Spanner
Rear Panel Hardware
Triple-Width Shelf Hardware - (PHK-505)
(PHK-240)
1x
(400-070) - 1/8” Hex Key
12x
(300-510) - Stud
4x
(300-610)
Rubber Tab
4x
4x
(300-490)
Low Head Screw
2x
(P-400-040) - Level
(301-280)
Cap Plugs
1x
(400-070)
Hex Key
1x
3x
2x
2x
6x
(300-540)
Connector Bolt
6x
(301-725) - Cross Dowel Assembly
8x
(P-300-320) - Leveler Foot
6x
12x
(300-560) - Flat Nut
12x
(300-530) - ThumbNut
(300-560) - Flat Nut
(300-550)
Connector Bolt
(PHK-380)
Shelf Peg “A” -Left
2x
(PHK-370)
Shelf Peg “B” -Right
(PHK-380)
Shelf Peg “A” -Left
SLC30 Only
(PHK-370)
Shelf Peg “B” -Right
SLC30 Only
Doc No. 500-982/v4.08 SLC 5/5
 Loading...