

Page 1
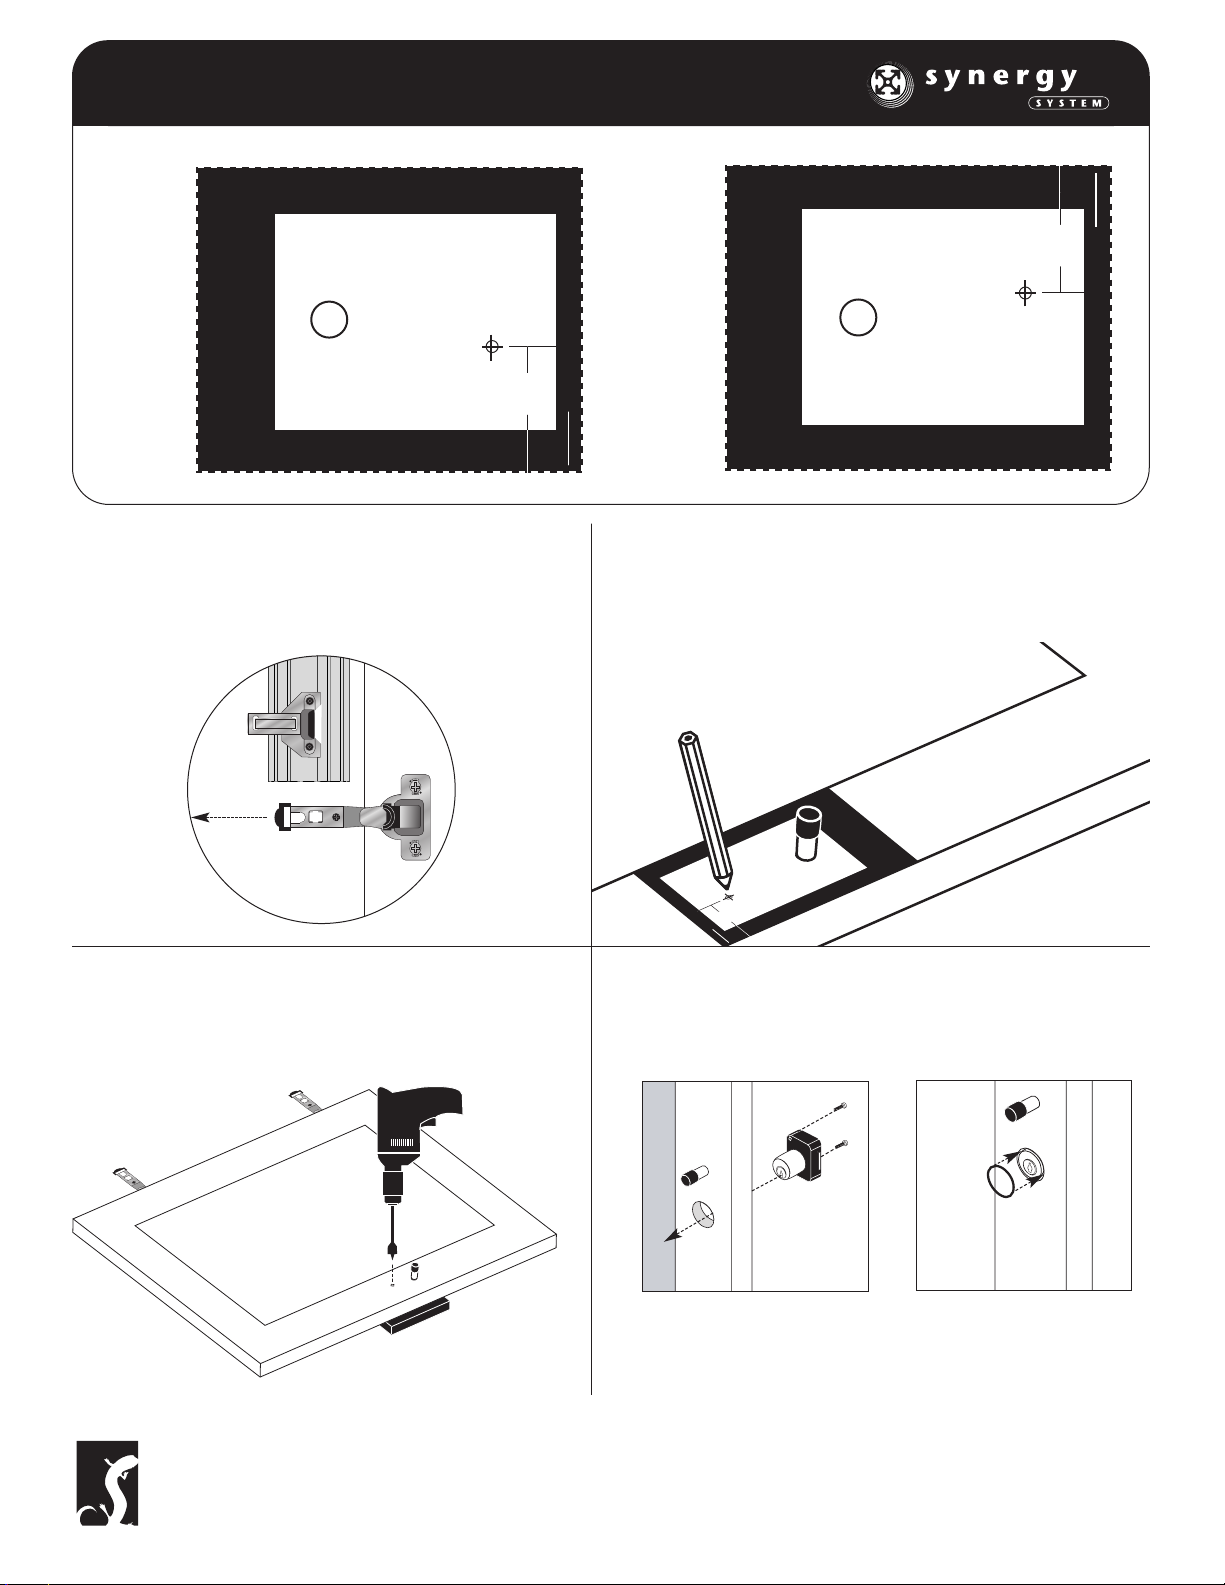
A. Remove the Door from your unit by
pulling apart the black plastic release.
B. Unscrew Door Pull
®
DOOR LOCK
>
Cut-out Lock Guide (above) and place over the Door Pull hole
and screw Pull back in place. With a pencil mark the lock guide.
The mark must be 7/8” from the door frame.
Remove Guide and place block behind lock
mark and drill through Door Frame.
Salamander Designs Ltd. 800-535-5659 • www.SalamanderDesigns.com
Doc No. 500-393/v2 ©2003 Salamander Designs Ltd. Synergy System®
Limited Warranty
For five full years Salamander Designs Ltd will repair or replace, at our option, any product defective in materials or craftsmanship. Salamander Designs Ltd. will not be responsible for any damage to or destruction of other equipment
consequential to our equipment failure. Defective product must be given Return Authorization and is to be returned to the factory prepaid, in the original carton and packing material. Any damage incurred in a shipment not in original
packaging shall be the responsibility of the owner. Warranty repairs will be returned prepaid, via UPS within the continental U.S.A. only.
PULL
1. Detach Door & Pull
2. Mark Drill Hole
3. Drilling
4. Screw Lock in Place
5. Press on Trim
H
I
N
G
E
>
P
O
S
T
S
I
D
S
I
D
E
E
>
Door
Pull
P
O
S
T
LOCK GUIDE
*Note: Select Template for Left or Right Opening
✁
&
Drill
Mark
<
>
Door
Align to Door Frame Edge
7/8"
S
I
D
E
>
LOCK GUIDE
Pull
H
I
N
G
E
S
I
Mark
& >Drill
D
7/8"
Align to Door Frame Edge
E
✁
FRONT
TOP
LOCK GUIDE
H
I
N
G
Door
E
Pull
S
I
D
E
&
Drill
Align to Door Frame
Edge
Mark
>
7/8"
>
P
O
S
T
S
I
D
E
TOP
FRONT
--FRONT---
--FRONT---
 Loading...