

Sakar 98379 User Manual
98379
Digital Camera
User‟s Manual
© 2009 Sakar International, Inc. All rights reserved.
Windows and the Windows logo are registered trademarks of Microsoft Corporation.
All other trademarks are the property of their respective companies.

2
Table of Contents
Table of Contents ...........................................................................................2
Introduction ................................ ................................ .................................... 3
Key Features ..................................................................................................3
What your camera includes ............................................................................4
Computer System Requirements for Windows XP ..........................................4
Computer System Requirements for Windows Vista .......................................5
Computer System Requirements for Macintosh ..............................................5
A Quick Look at Your Camera ................................................................ ........6
Inserting Batteries ..........................................................................................7
Camera Modes...............................................................................................7
Capturing Photos .........................................................................................15
Capturing Video ...........................................................................................20
Install the Vivitar Experience Image Manager Software.................................22
Connect your camera to the computer ..........................................................23
Get photos and videos from your camera to your computer ..........................24
Get started! ................................ ................................ ..................................25
Using Your Camera as a Webcam ................................................................26
Maintenance of Your Digital Camera ............................................................28
Sakar Warranty Card .................................................................................... 28
Technical Support ........................................................................................29
Appendix A: Technical Specifications ...........................................................30
Appendix B: Troubleshooting ................................................................ .......31

3
Introduction
Thank you for purchasing the 98379 Digital Camera. Everything you need to take
digital photos and videos is included with your device. Please read this manual
carefully FIRST in order to get the most out of your digital camera.
Important Notice:
Please do not plug the camera into the USB port of your computer until you
have installed the Vivitar Experience Image Manager software and the
cameras driver (included in the CD-ROM packaged with this camera).
Plugging in your camera at this stage will cause the device to not be
recognized by the computer.
Key Features
300 K Pixel Dual Mode Digital Photo and Video Camera
2 photo resolutions - VGA (640x480)and QVGA (320x240)
1.1 Inch Color LCD monitor
Vivitar Experience Image Manager software for uploading and managing photos
and videos to or from the most popular photo sharing and social network
websites.

4
What your camera includes
Digital Camera
Vivitar Experience Image Manager software and driver installation CD
USB cable
Quick Start Guide
Neck strap
Warranty card
Computer System Requirements for Windows XP
To be able to download photos and videos to your PC, you will need the following
minimum configuration:
Pentium 4 processor or above with Windows XP service pack 2
512 MB RAM, with 100MB of free disk space
1024 x 768 Recommended screen resolution
16-bit color or higher display adaptor
CD-ROM Drive
QuickTime 6 or higher
Microsoft Internet Explorer 7 or higher
Windows Media Player 10 or higher
Internet connection needed to access and use the social network sites

5
Computer System Requirements for Windows Vista
To be able to download photos and videos to your PC your will need the following
minimum configuration:
Windows Vista
800MHz processor and 512 MB of system memory
20GB hard drive with at least 15GB of available space
Support for Super VGA graphics
Available USB Interface
CD-ROM drive
QuickTime 6 or higher
Microsoft Internet Explorer 7 or higher
Internet connection needed to access and use the social network sites
Computer System Requirements for Macintosh
Macintosh with Intel processor running Mac OS X v10.4.6 or later
256 MB RAM, 100 MB free disk space
Display: 1024 x 768 or higher-resolution monitor
QuickTime 6 or higher
Internet connection needed to access and use the social network sites
6
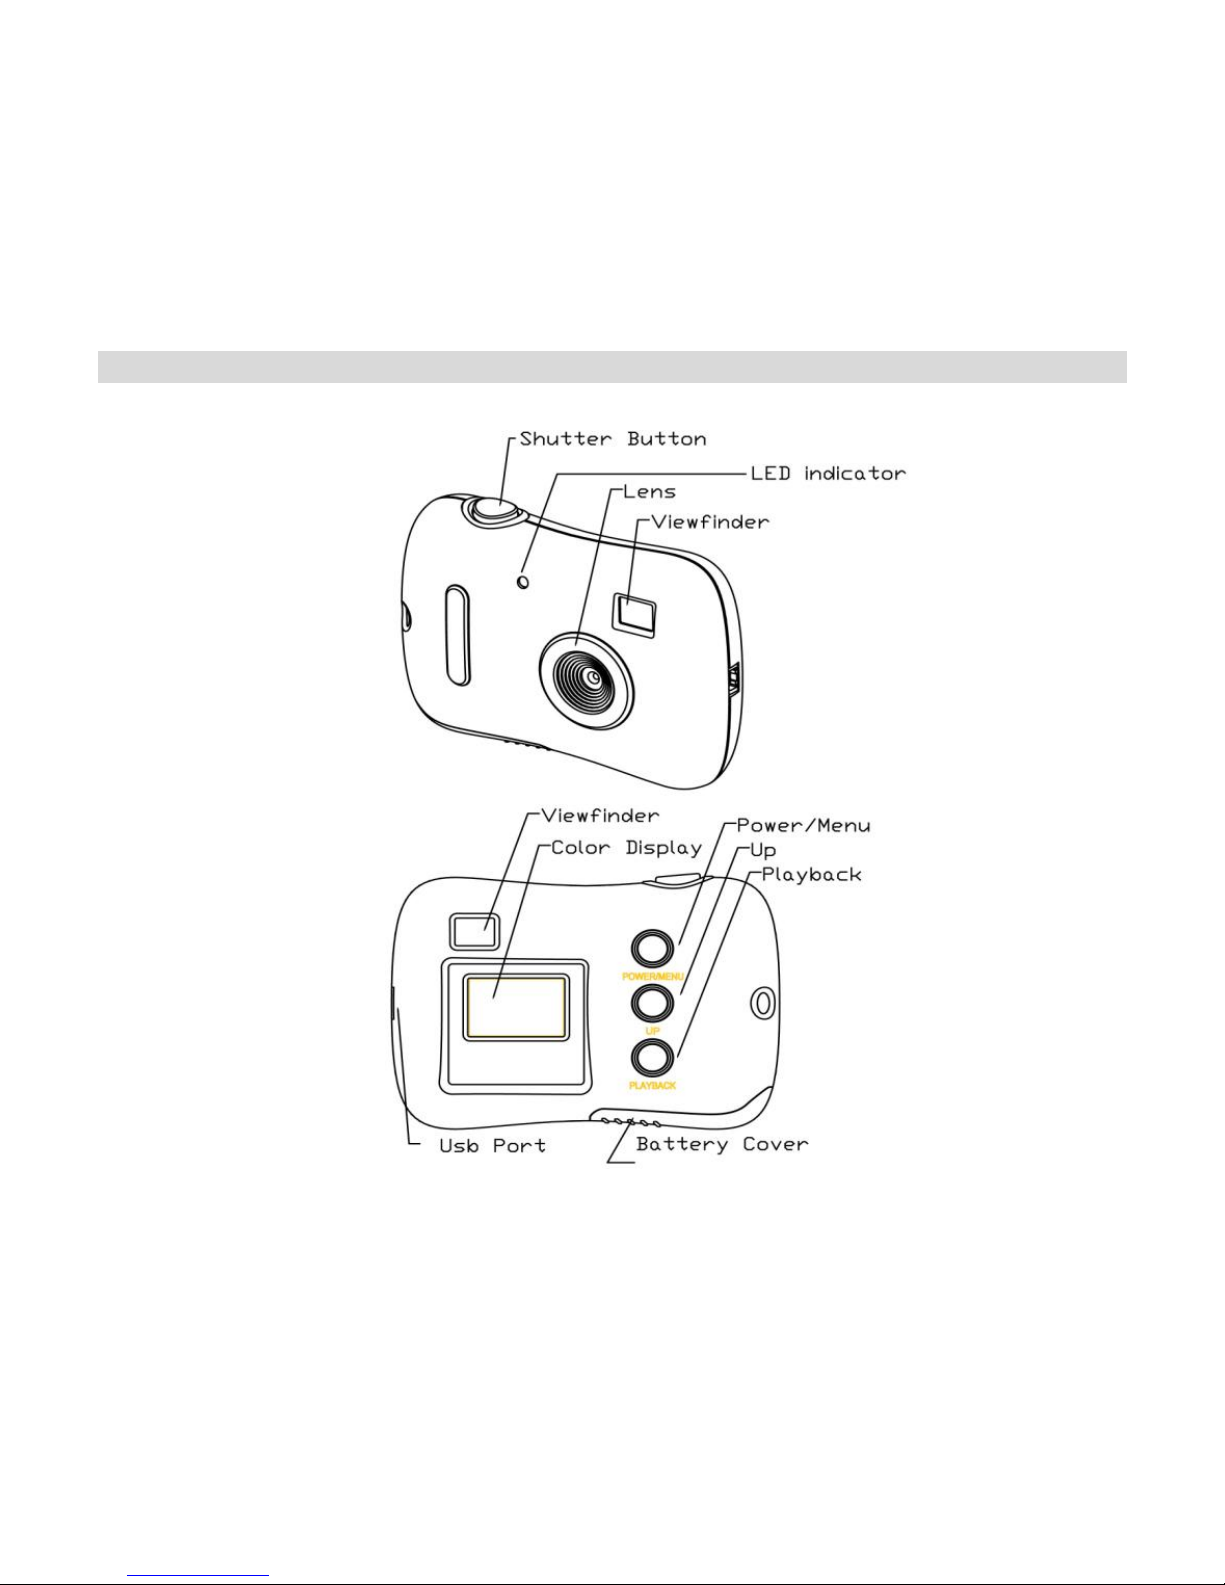
A Quick Look at Your Camera
7
Inserting Batteries
1. Open the camera‟s battery compartment cover on the bottom of the camera.
2. Insert 2 new AAA alkaline batteries according to the polarity shown.
3. 3. Close the battery cover.
4.
5. Warning: Removing the batteries before downloading photos and videos
from the camera will erase everything in the camera`s memory.
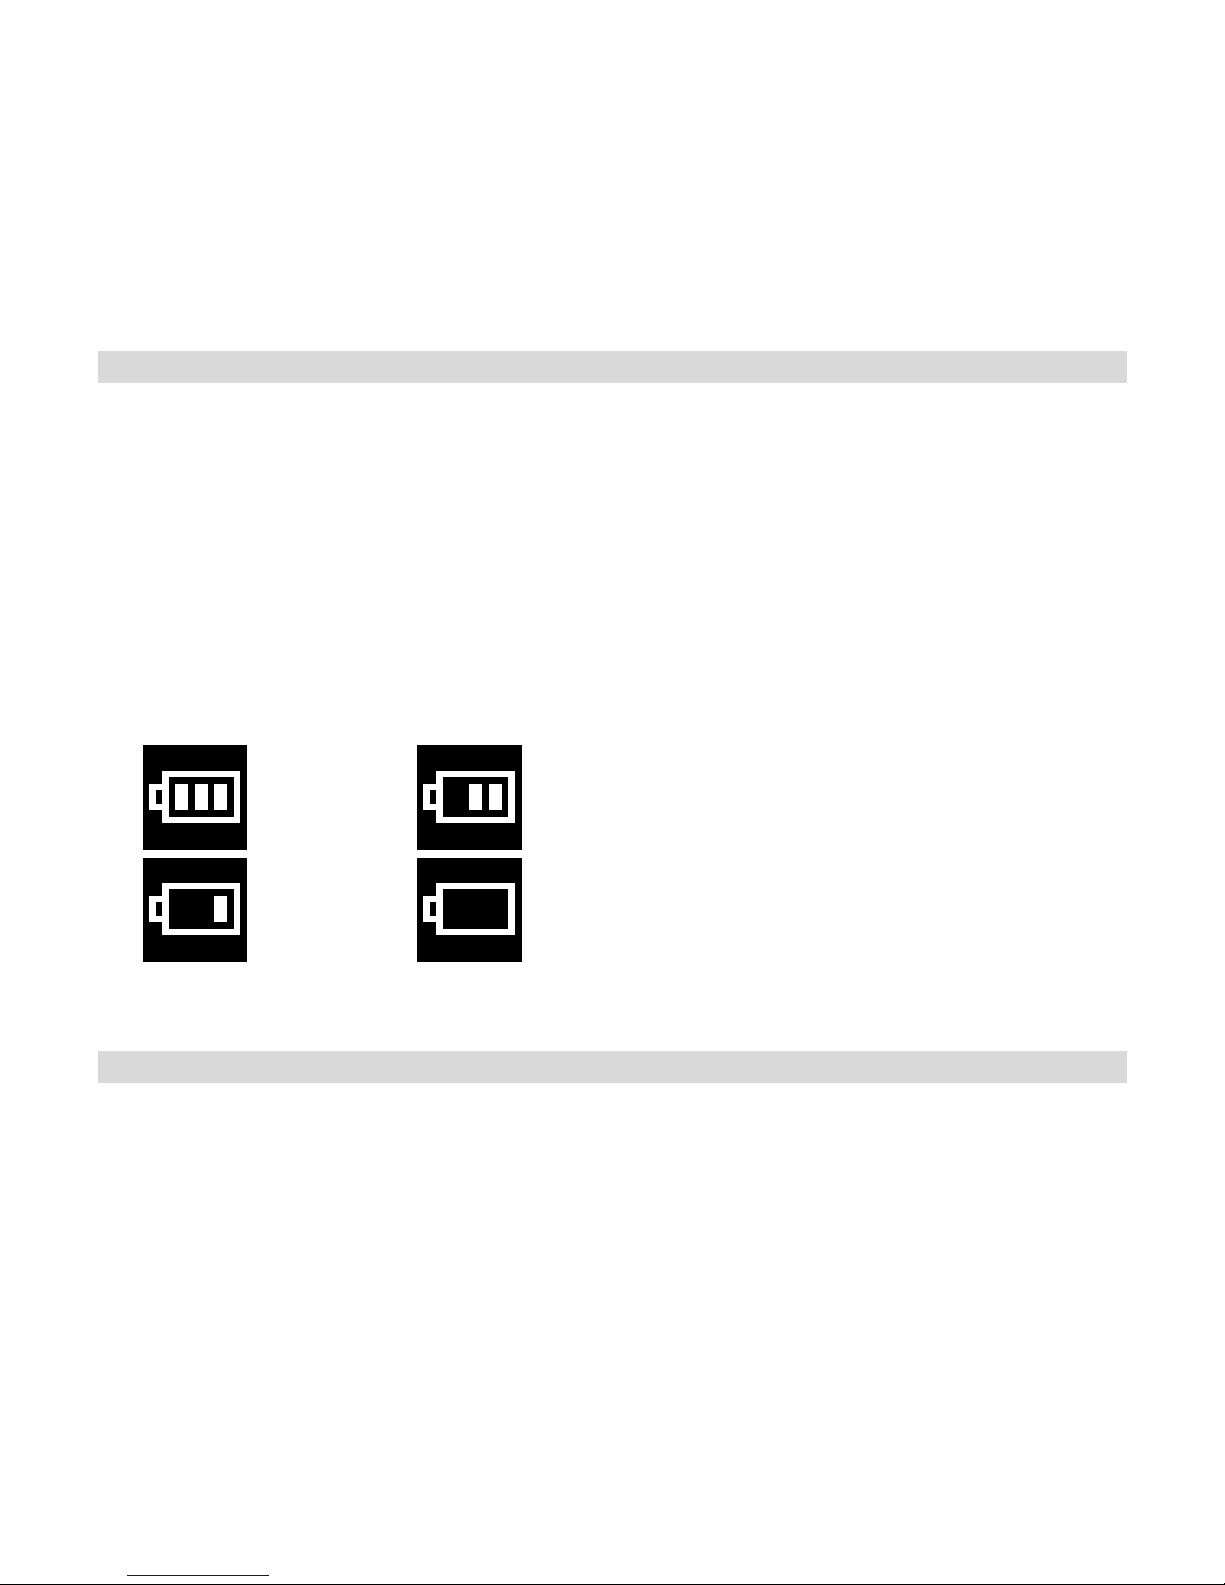
Note: We recommend to download and save your photos and videos often
so as not to lose them if the battery power becomes too low < 5%.
more than
70% power
35%-70%
power
5%-35%
power
less than
5% power
Camera Modes
In order to download the photos and videos captured with this camera
you need to install the Vivitar Experience Image Manager and camera
specific driver for this device. The instructions to install this software are
explained further on in this manual.

8
Power on or Off
To Power the camera On or Off, press the Power/Menu button.
The camera is now ready to take photos (see the Capturing Photo section of this
manual for more details).
After the camera is powered on, if you want to make changes to the camera‟s default
settings, please read the instructions of this manual.
Now that your device is powered on you can enter the Main Menu by pressing
the Power/Menu button. You can navigate this menu by pressing the
Power/Menu button briefly.
Pressing the Power/Menu button leads you to this Main Menu screen:
Below is an explanation for each of the Submenus on the Main Menu.

9
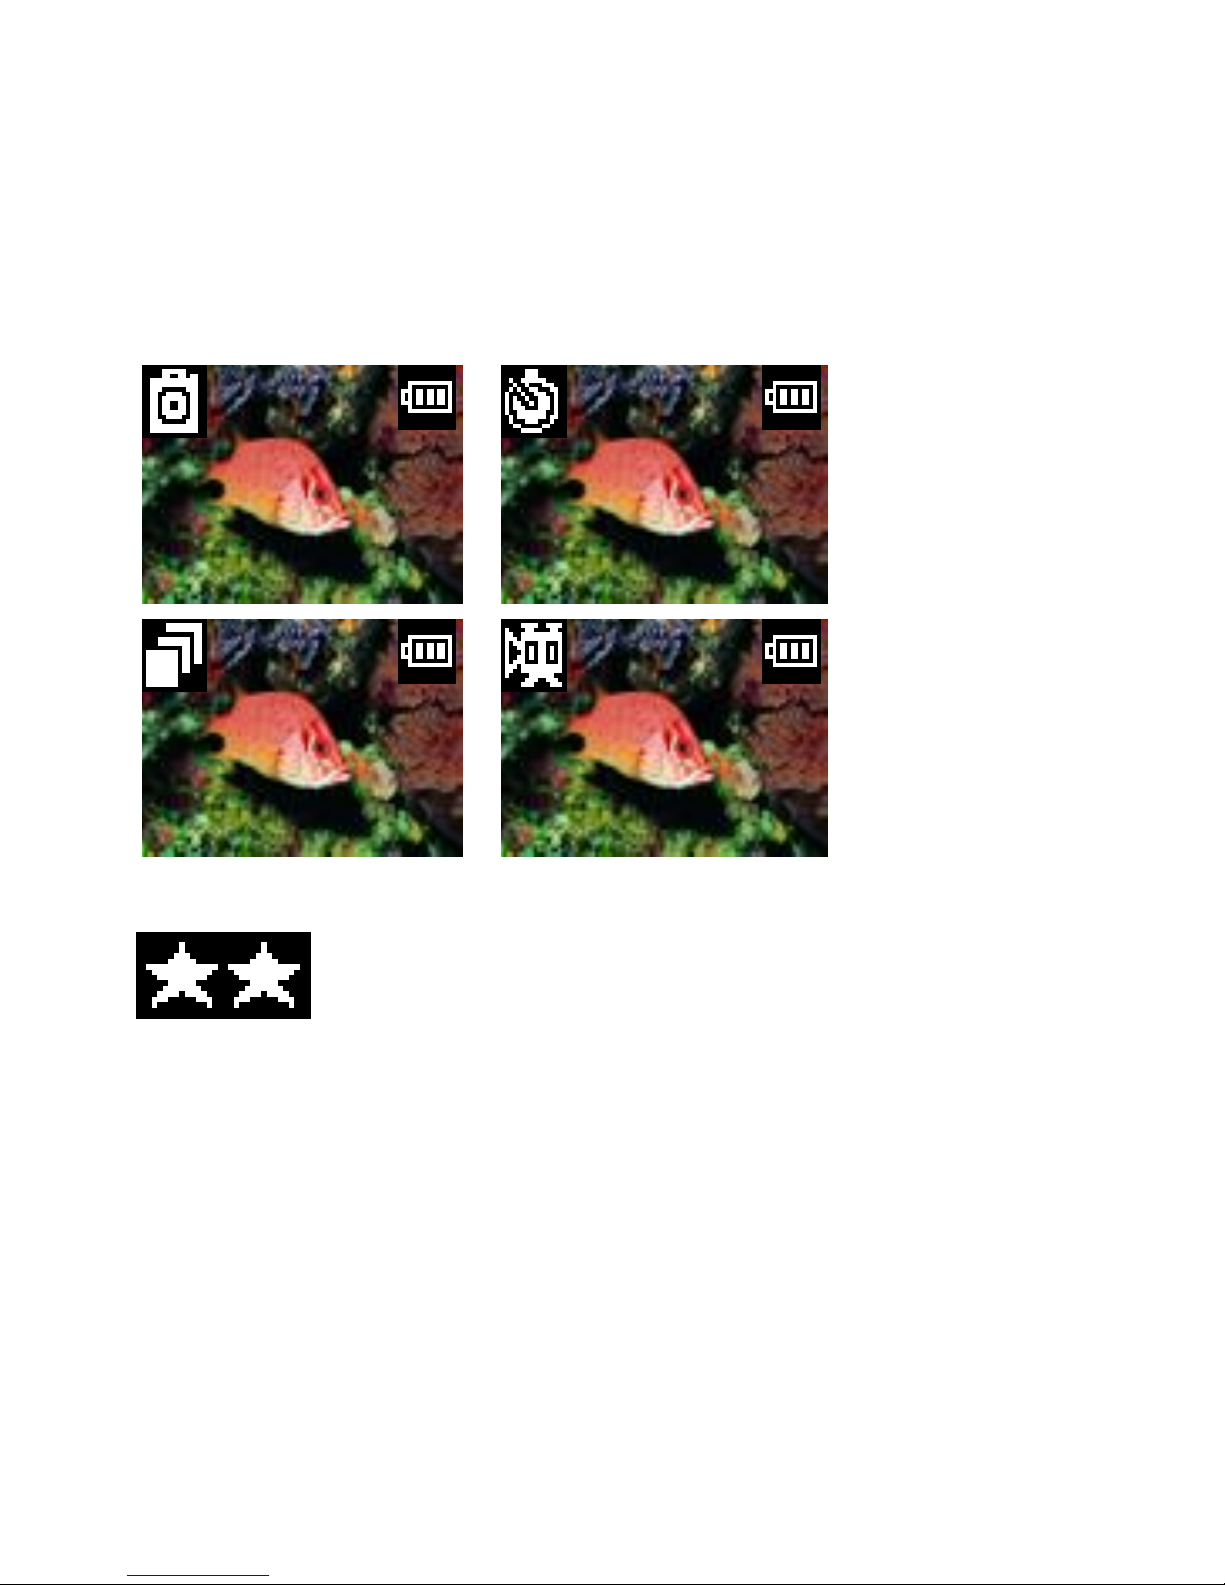
Camera Submenu
1. Press the Power/Menu button to enter the Main Menu. By default the camera
icon is automatically selected.
2. Press the Shutter button to toggle through the following various options
within the camera submenu.
3. Press the Power/Menu button to select and save the mode of your choice. The
LCD screen will show your choice with a symbol in the upper left corner.
Take Photo
Self-Timer
AVI(Video)
Continuous Capture
10
Resolution Modification Submenu
1. Press the Power/Menu button to enter the Main Menu
2. Press the Up button until the Resolution Modification icon is selected.
3. Press the Shutter button to toggle between the 2 resolution options.
4. Press the Power/Menu button again to select and save the desired resolution.
 Loading...