

Sakar 15490 Owner's Manual
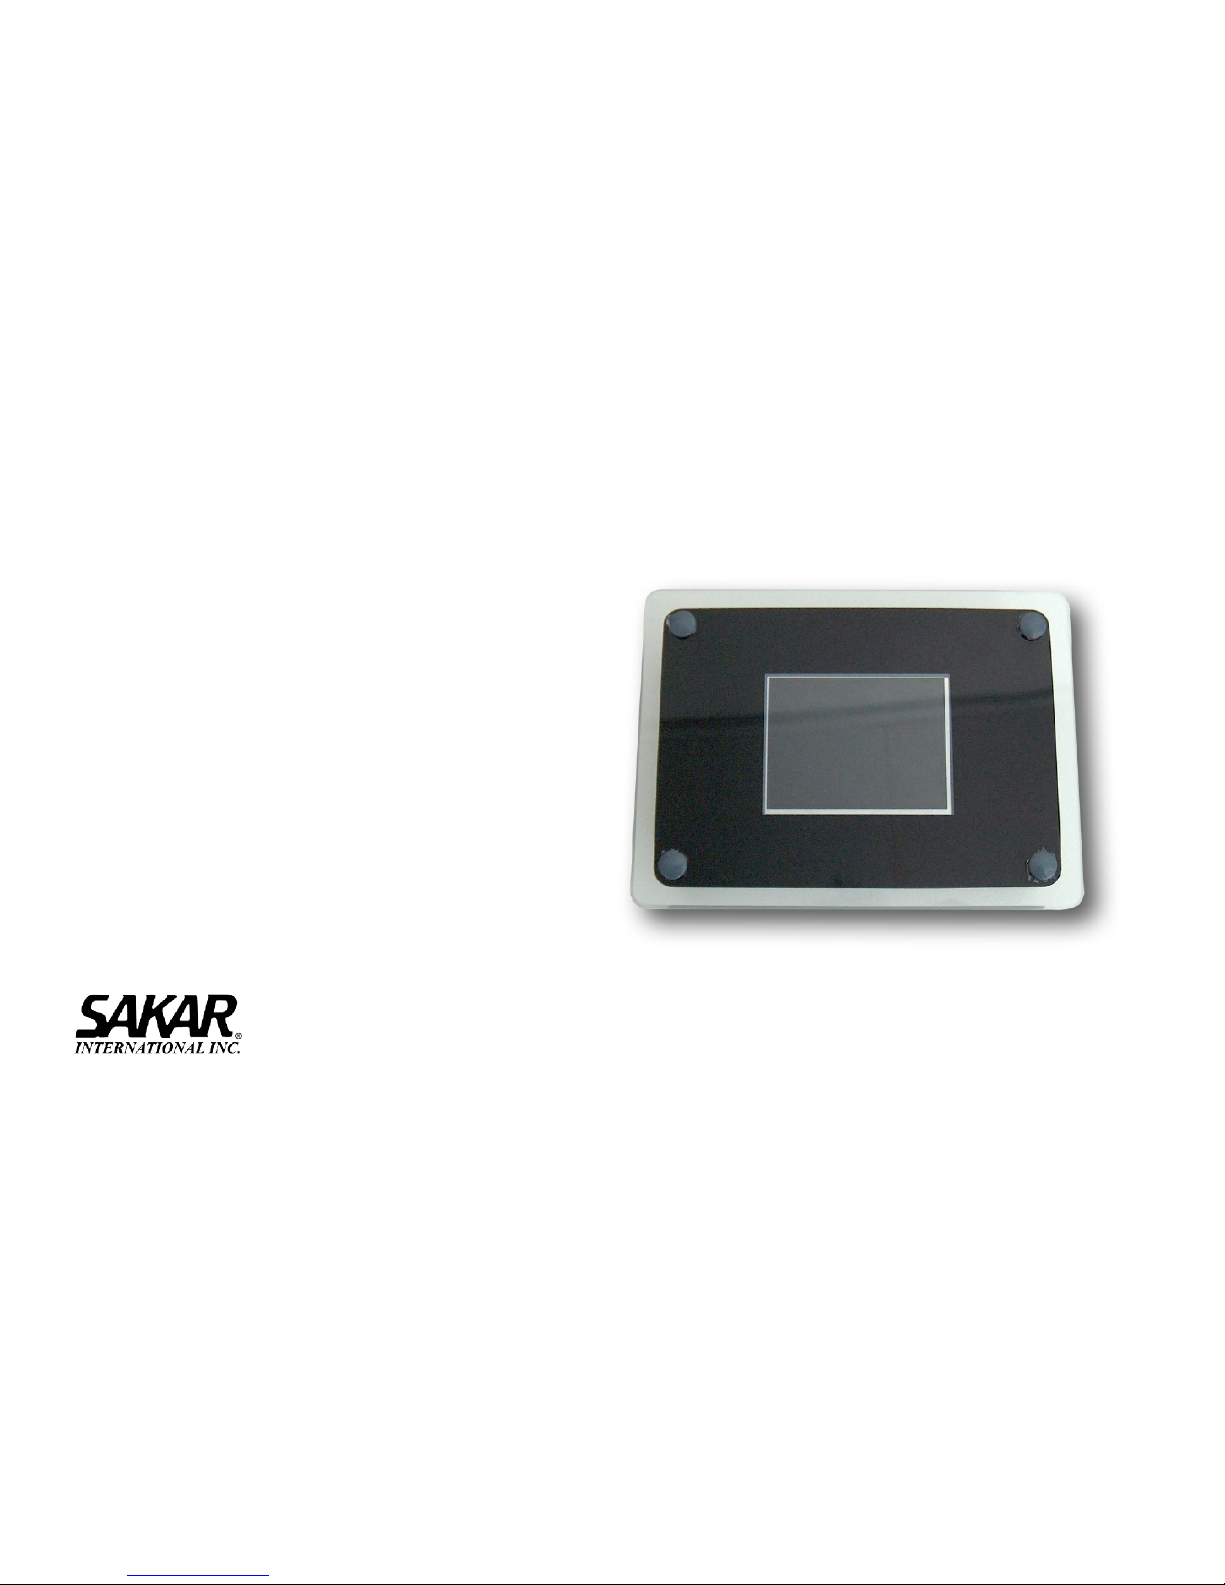
2.4” Digital Photo Frame
Owner’s Manual
© 2007 Sakar International, Inc. All rights reserved.
Windows and the Windows logo are registered trademarks of Microsoft Corporation.
All other trademarks are the property of their respective companies.
- 1 -

Table of Contents
Introduction ....................................................................................................3
What your Digital Photo Frame includes: .......................................................3
Computer System Requirements.....................................................................3
A Quick Look at Your Photo Frame ................................................................4
Preparing Your Photo Frame for Use..............................................................5
Software & Device Driver Installation ............................................................... 6
Send Photos to Frame.....................................................................................9
Everything you need to get the most of your photos and MORE...................17
Safely Removing Your Photo Frame Device ..............................................18
Installing a SD Memory Card.........................................................................20
Attaching Stand to Digital Photo Frame.........................................................21
Starting Your Digital Photo Frame.................................................................22
Digital Photo Frame Maintenance ...............................................................26
Technical Support..........................................................................................26
Sakar Warranty Card.....................................................................................26
Appendix A: Technical Specifications............................................................28
Appendix B: Troubleshooting........................................................................28
- 2 -

Introduction
Thank you for purchasing the Digital Photo Frame. Please read this manual carefully FIRST in order to get
the most out of your digital photo frame.
What your Digital Photo Frame includes:
Photo Frame
My Digital Brag Book Photags Express Software
USB cable
User’s Manual
Stand
AC adaptor
Computer System Requirements
To be able to upload photos from your PC you will need the following minimum configuration:
Windows 2000/XP
Pentium-based PC (or equivalent)
80 MB hard disk free space and 128 MB or more RAM
Available USB Interface
CD-ROM Drive
Color display (16 bit or higher recommended)
Screen resolution 1024 X 768
- 3 -
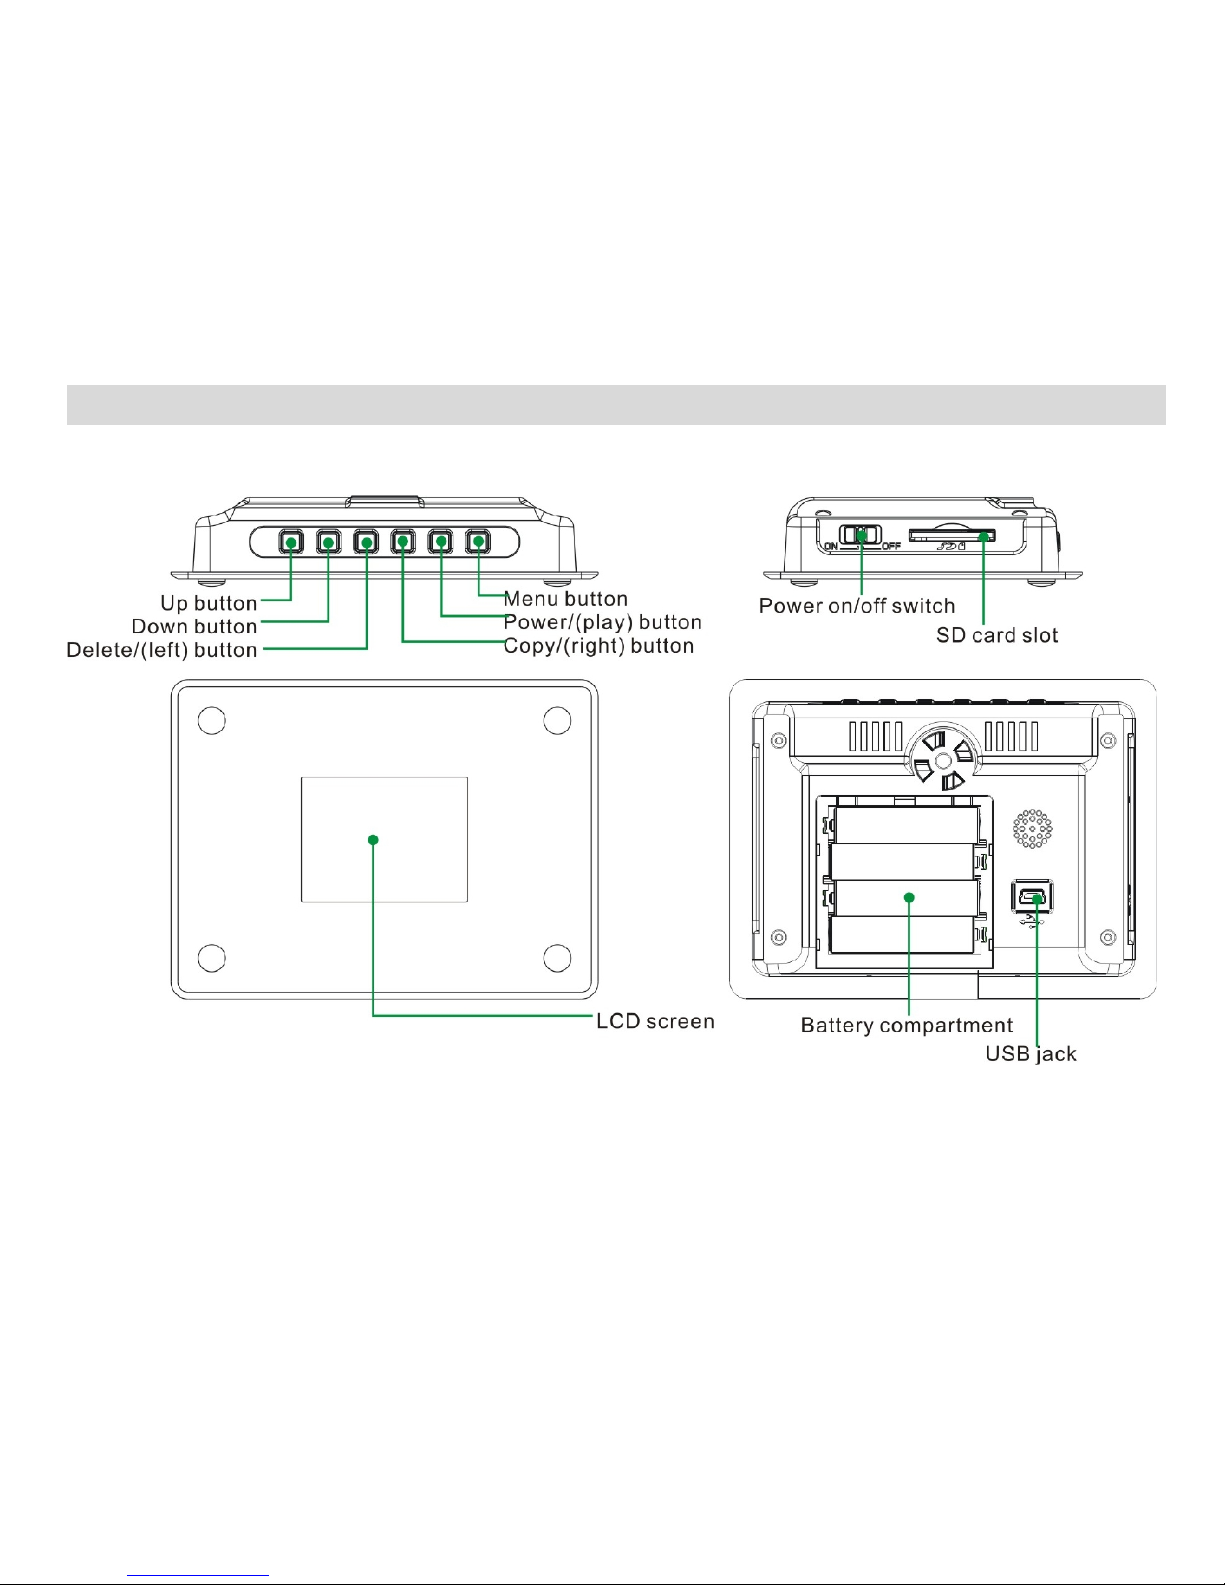
A Quick Look at Your Photo Frame
- 4 -
Preparing Your Photo Frame for Use
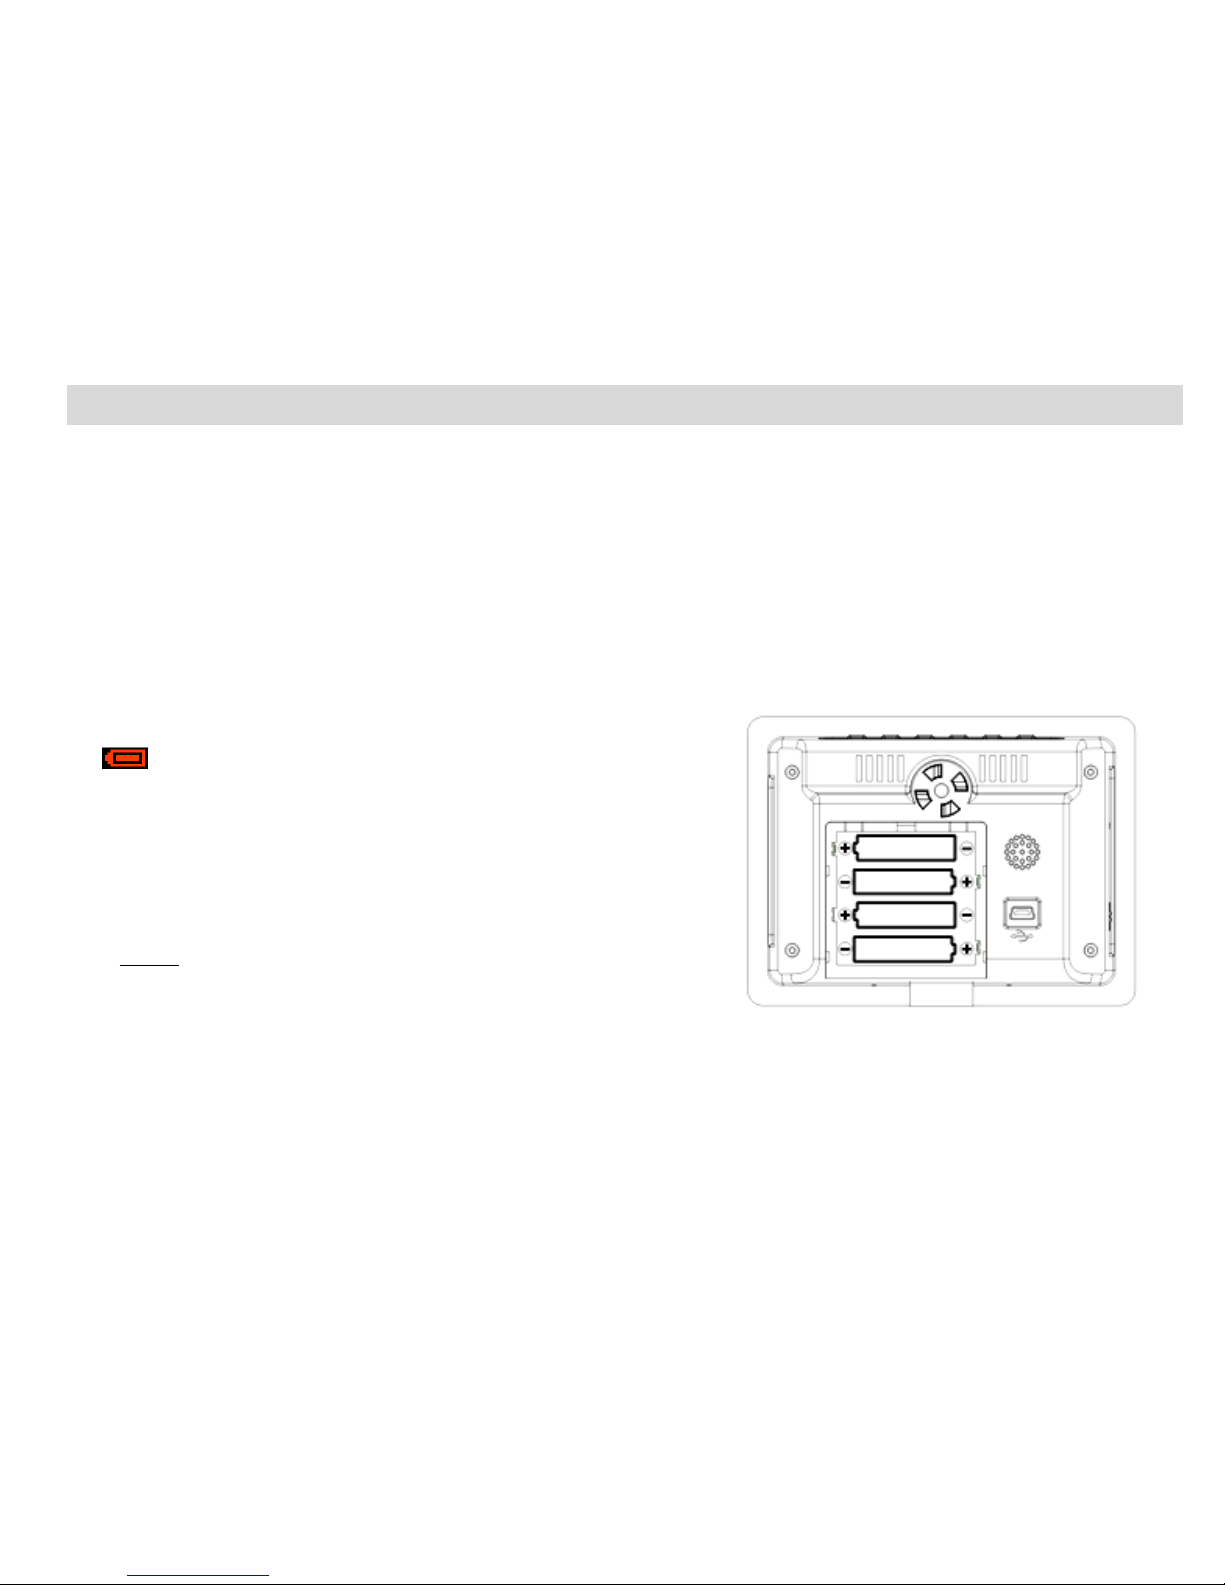
Battery Installation
Your Photo Frame requires four AAA alkaline batteries, which must be inserted as follows:
1. Slide the battery compartment open on the back of the photo frame in the direction
indicated by the arrow.
2. Insert the batteries in accordance with the polarity (+/-) shown inside the compartment.
3. Close the battery compartment.
When the battery power is low, the LCD display will show the
red icon and flash. When a flashing “Low Battery”
message appears the device will automatically switch off after
15 seconds. You need to change the batteries in order to
continue using the Photo Frame. You also can draw power
from the power adaptor by USB cable.
Note: If you do not intend to use your Photo Frame
for an extended period, remove the batteries to avoid
leakage and corrosion.
Noted: The photo frame can not power off automatically
on Slide Show Mode/Clock Mode/System Set up.
- 5 -
Installing “My Digital Brag Book PhoTags Express” Software
Before attempting to install the software, make sure that you do not have the device or the USB
cable attached to your computer. This may cause your installation to fail. Do not connect the cable
to the computer until the entire installation process has been completed. We suggest you follow the
step by step instructions that will appear on your screen during the installation process.
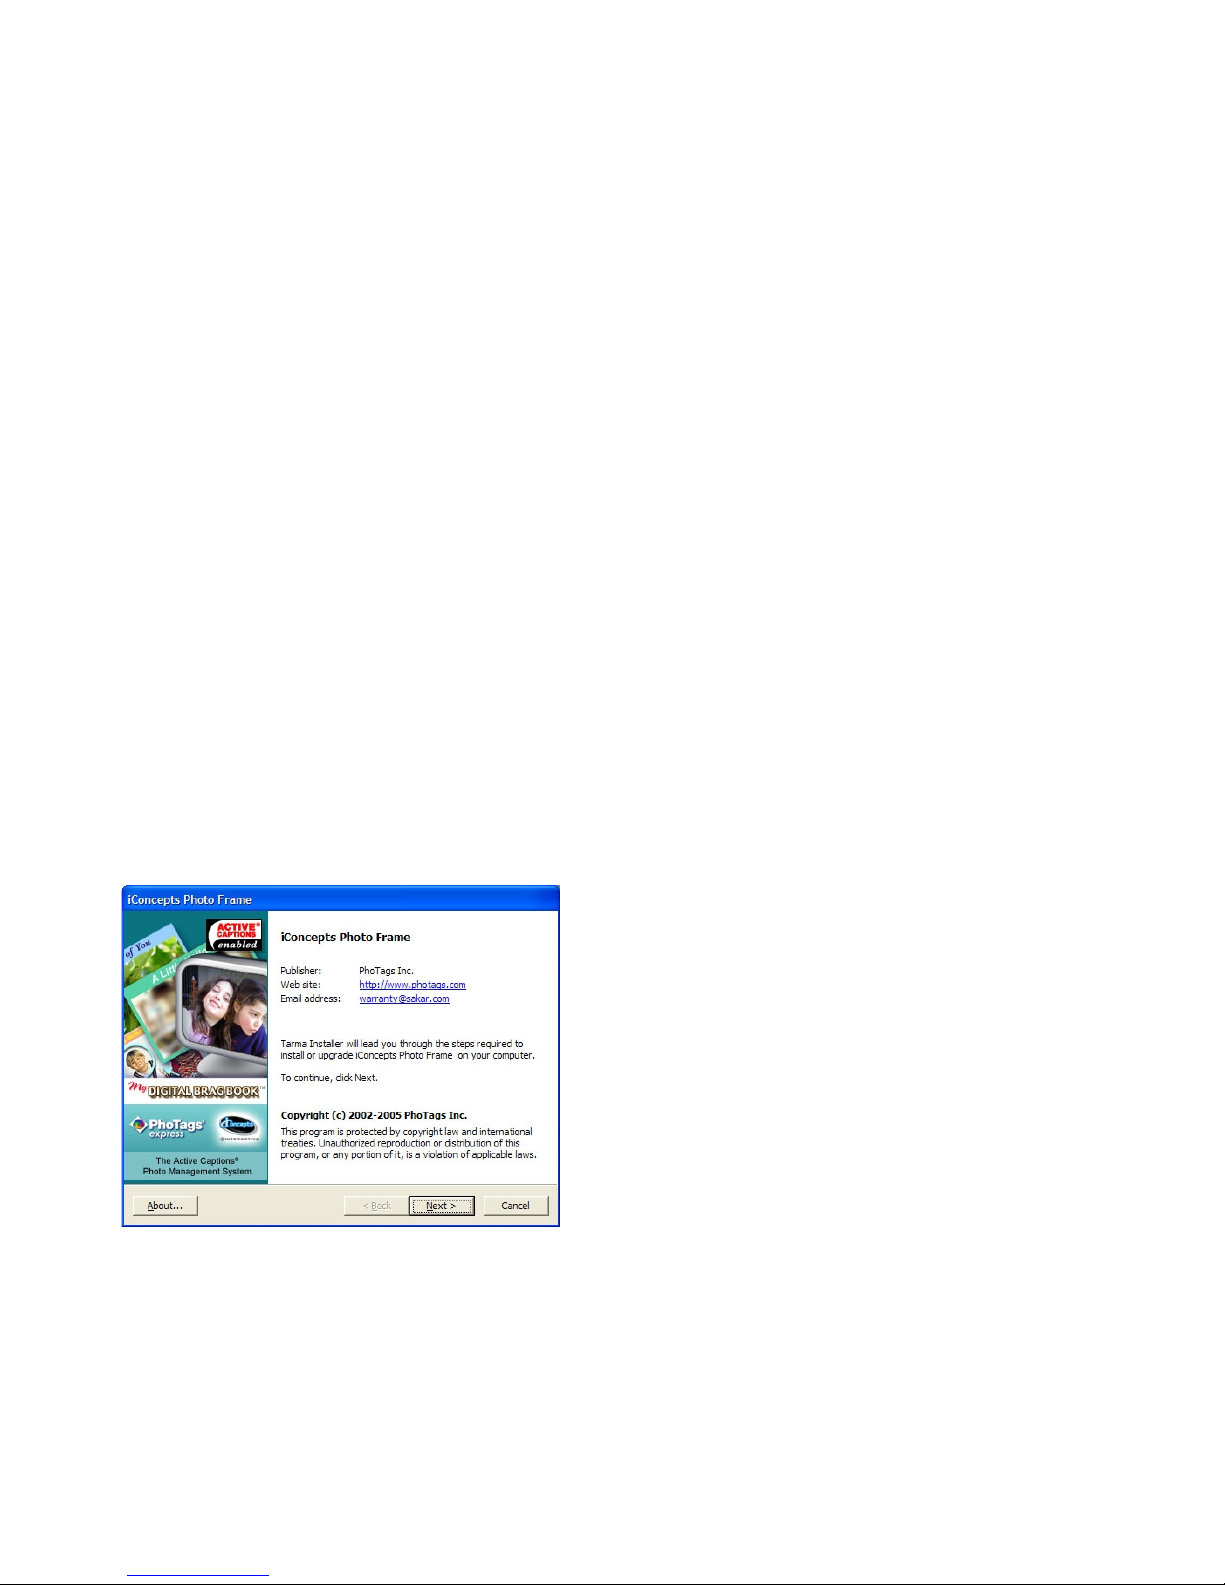
Software & Device Driver Installation
1. Insert the CD into your CD-ROM drive. Make sure that your device is not connected to the
computer.
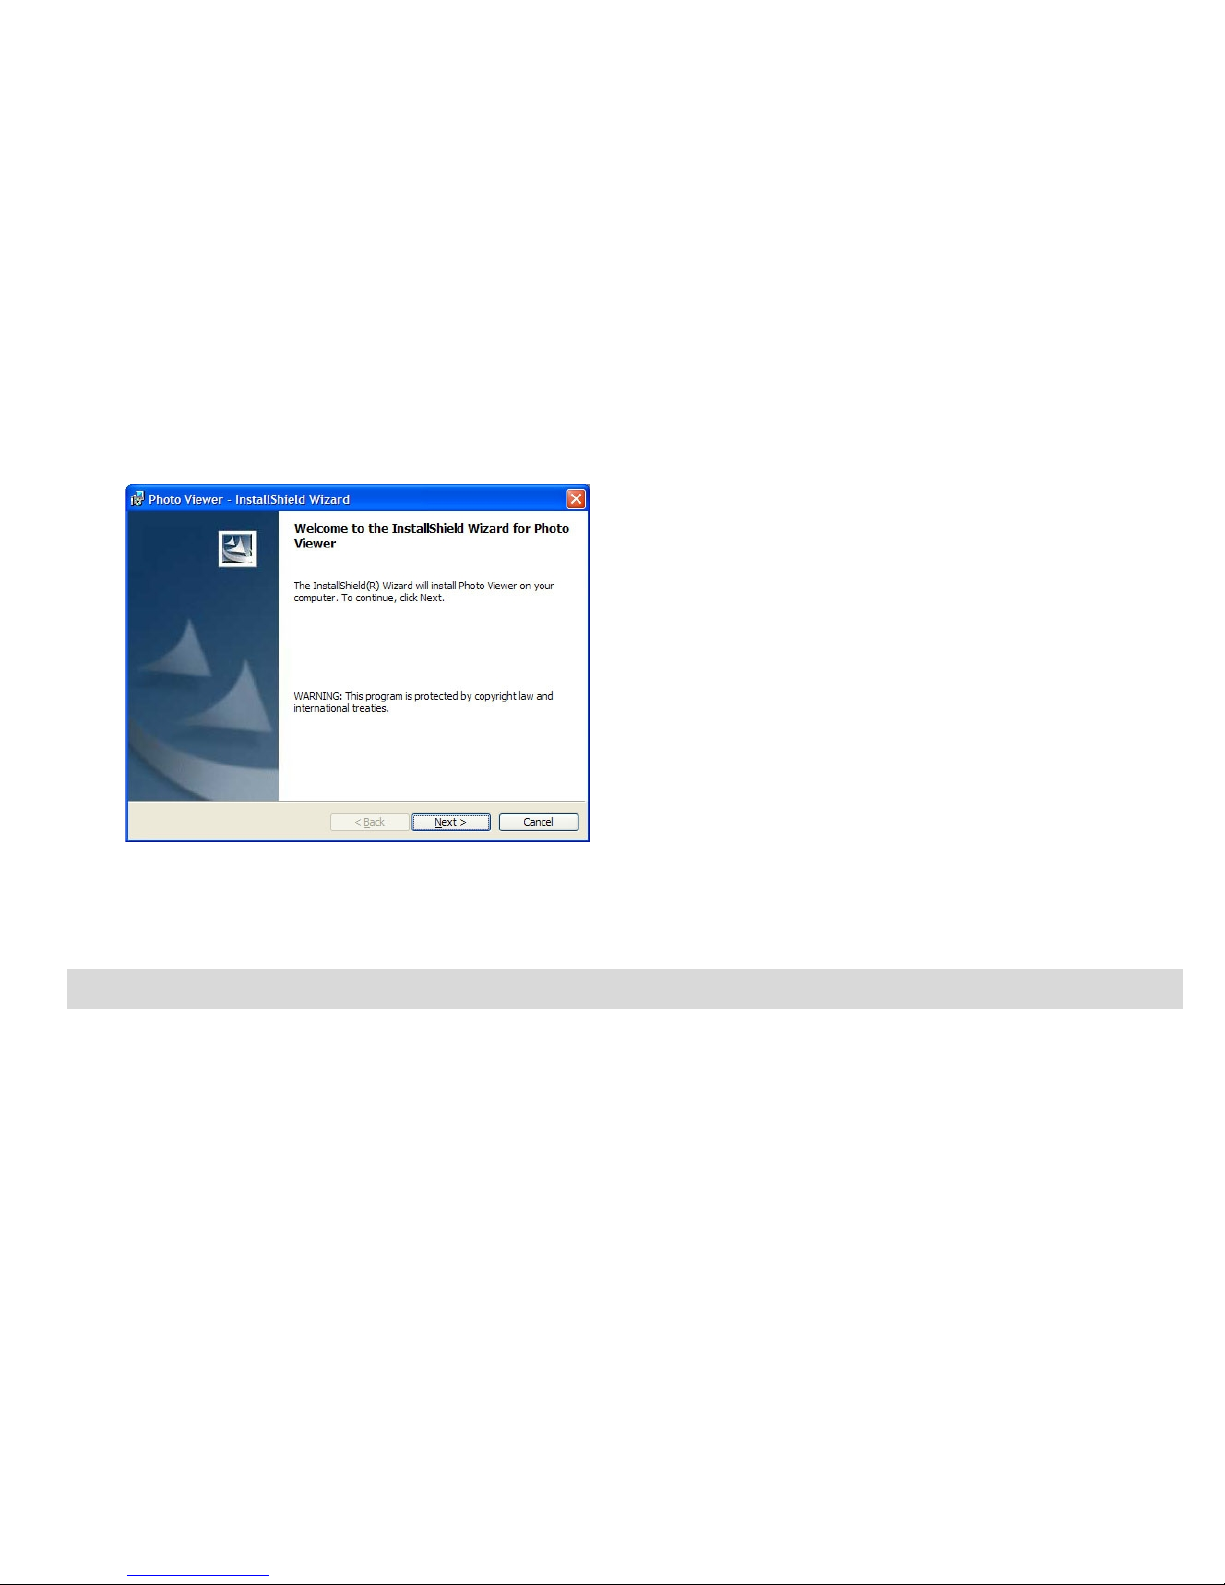
2. On the “Photo Frame" screen that appears, click the “Next” button.
- 6 -
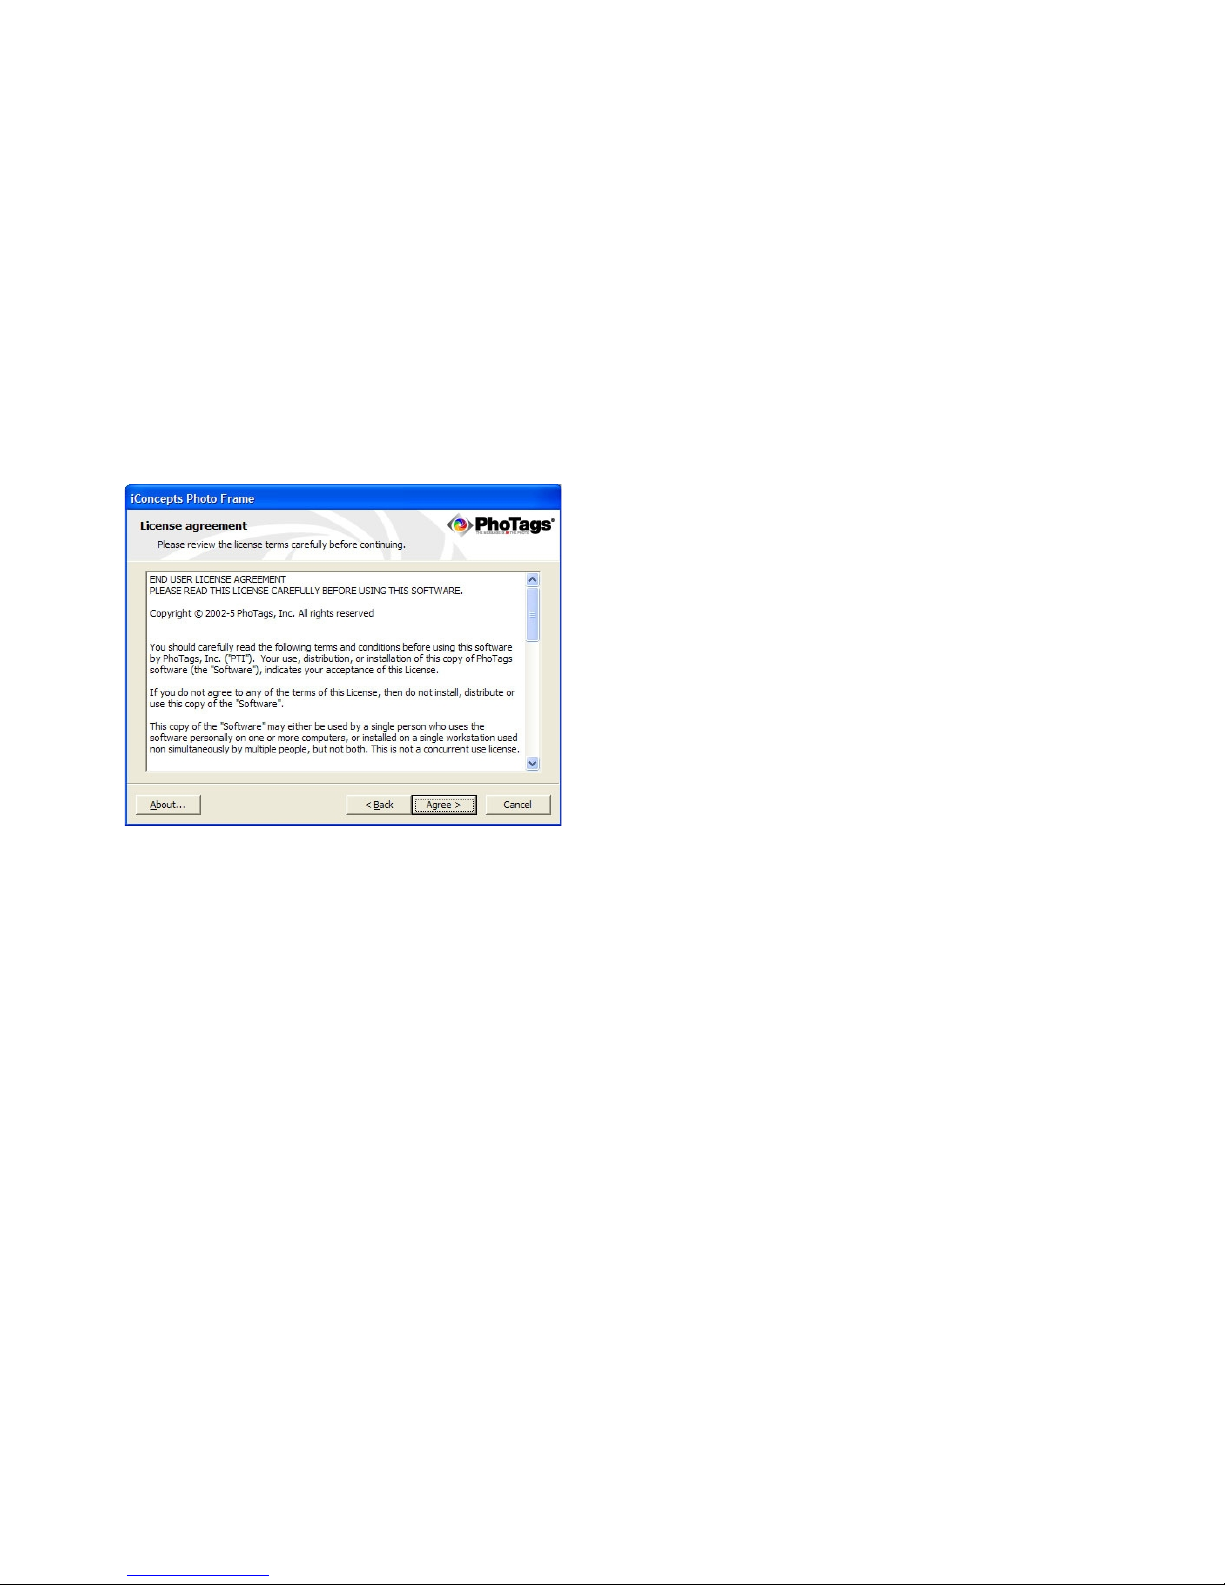
3. Please review the license terms and click the “Agree” button to continue.
4. Let the installer create the folder where the program will be installed to, and then click “Install”.
- 7 -

5. Click “Finish” to let the installer finish the installation program.
- 8 -
6. This will automatically launch the Install shield for the device driver. Click “Next” to continue.
7. Once the device driver has finished installing it is recommended to restart your computer.
Congratulations!! You have successfully installed the software and the Device driver.
Send Photos to Frame
In order to send photos from your computer to the Photo Frame, you are required to connect the Digital
Photo Frame to your computer with the USB cable provided.
Note: 1. Please make sure that your Digital Photo Frame is connected to the computer.
2. This kind of Photo Frame can only support photo files in “JPEG” format.
- 9 -
3. Your Digital Photo Frame supports 128MB flash memory to store photos. You can download photos
where the total capacity does not exceed 128MB.
After you have connected the USB cable, the LCD screen will show “Please don’t disconnect the USB
cable when the unit is working.” It indicates that your Digital Photo Frame is connected and ready for
downloading. You cannot operate the Photo Frame at this moment.
1. Make sure that your Photo Frame is turned on.
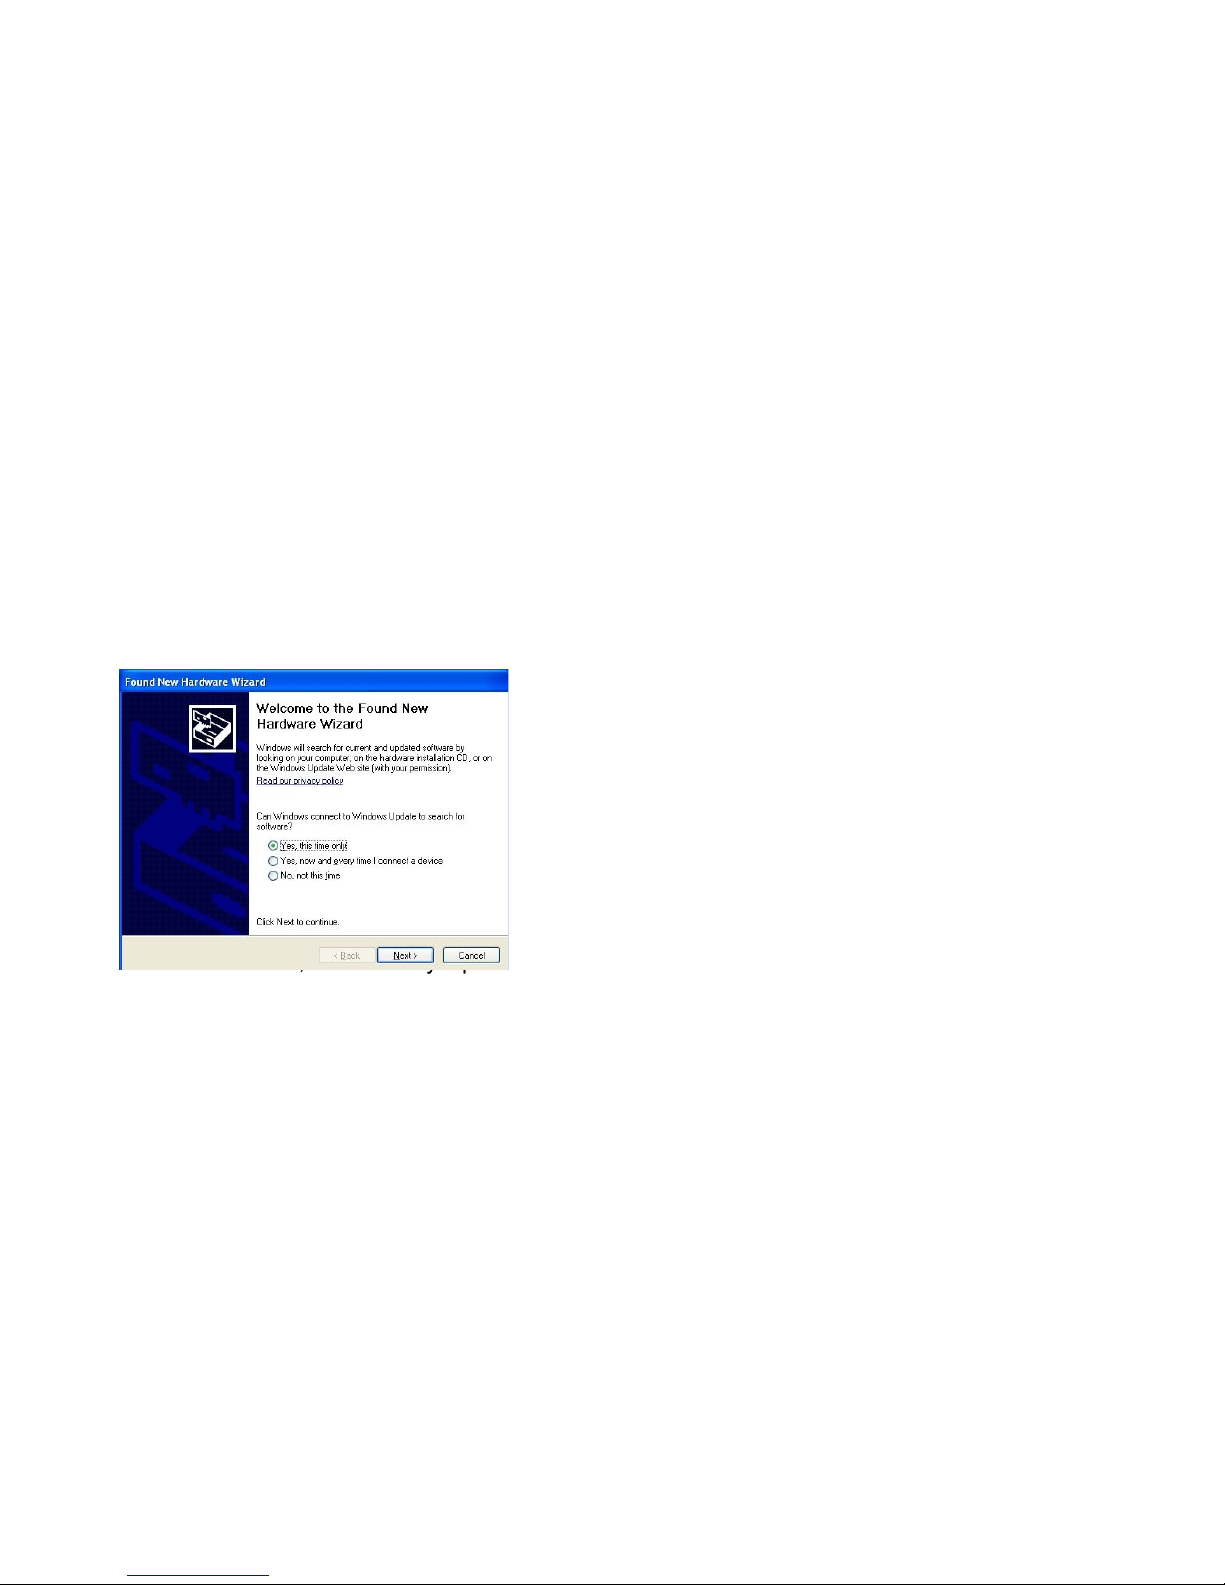
2. In Windows XP the following activation screens may appear:
Select the “Yes, this time only” option and then click “Next”.
- 10 -
 Loading...