

SainSmart CR-10 Series User Manual

CR-10 SERIES 3D PRINTER
USER MANUAL

PREFACE
Dear consumers,
Thank you for choosing SainSmart CR-10 series 3D printers. For your best experience, please
read this instruction before operation. Our 3D team is always ready to provide you with assistance.
Please contact us via e-mail ( support@sainsmart.com ) if you encounter any problem with the
printer.
For better 3D printing experience, you may learn how to use the printer in the following ways:
1. Read the attached instruction and watch videos on the SD card.
2. Visit sainsmart.com for relevant software/hardware information, operation and maintenance
instructions and contact details.
Sincerely,
SainSmart Team
NOTES
1. Do not use the printer in any way other than described herein to avoid personal injury or
property damage.
2. Do not place the printer near flammables, explosives or heat sources. It is best to place it in a
well-ventilated, low-dust environment.
3. Do not expose the printer to violent vibration or any unstable environment. This will cause poor
printing quality.
4. The filaments recommended by the manufacturer are preferred as to avoid clogging in the hot
end and/or printer damage.
5. Do not use any other power cable than the one supplied. Use a grounded three-prong power
outlet.
6. Do not touch the nozzle or hot bed during printing. Keep hands away from machine while in use
to avoid burns or personal injury.
7. Do not wear gloves or loose clothing when operating the printer. Loose articles can be caught in
moving parts and cause personal injury or printer damage.
8. Clean off filament from the nozzle tip with the provided plier before the nozzle cools. Do not
touch the nozzle directly. It can cause personal injury due to high temperature.
9. Clean the printer frequently. Please power of the printer before cleaning. Clean the printer body
with a dry cloth to remove dust, adhered printing materials and other objects on guide rails. Use
glass cleaner or isopropyl alcohol to clean the print surface before every print for consistent
results.
10. Children under 10 years of age should not use the printer without supervision.
11. Software/hardware upgrade, model differences and new revisions may not be listed in this
manual.

CONTENTS
Introduction
Package Contents
Assembly
LCD Menu
Loading Filament
Bed Leveling
Software Installation
Preparing to Print
Trouble-shooting
After-Sales Services
1
2
3
6
8
9
10
11
12
14

I. Introduction
11
13
14 15 16 17
12
18
19
20
1 2
3 4
678910
1. Control Unit
2. Spool Holder
3. Nozzle Assembly
4. Gantry Frame
5. Print Surface
5
6. Base Frame
7. SD Slot and USB Port
8. Voltage Selection
9. Control Knob
10. Display
12
13
14 15 16 17
11
18
19
20
1
11. X - Motor
12. X Limit Switch
13. Extruder (E) - Motor
14. Y- Motor
15. Y Limit Switch
16. Z - Motor
17. Z Limit Switch
18. Nozzle Assembly Connection
19. Heat Bed Connection
20. Power Cable Connection
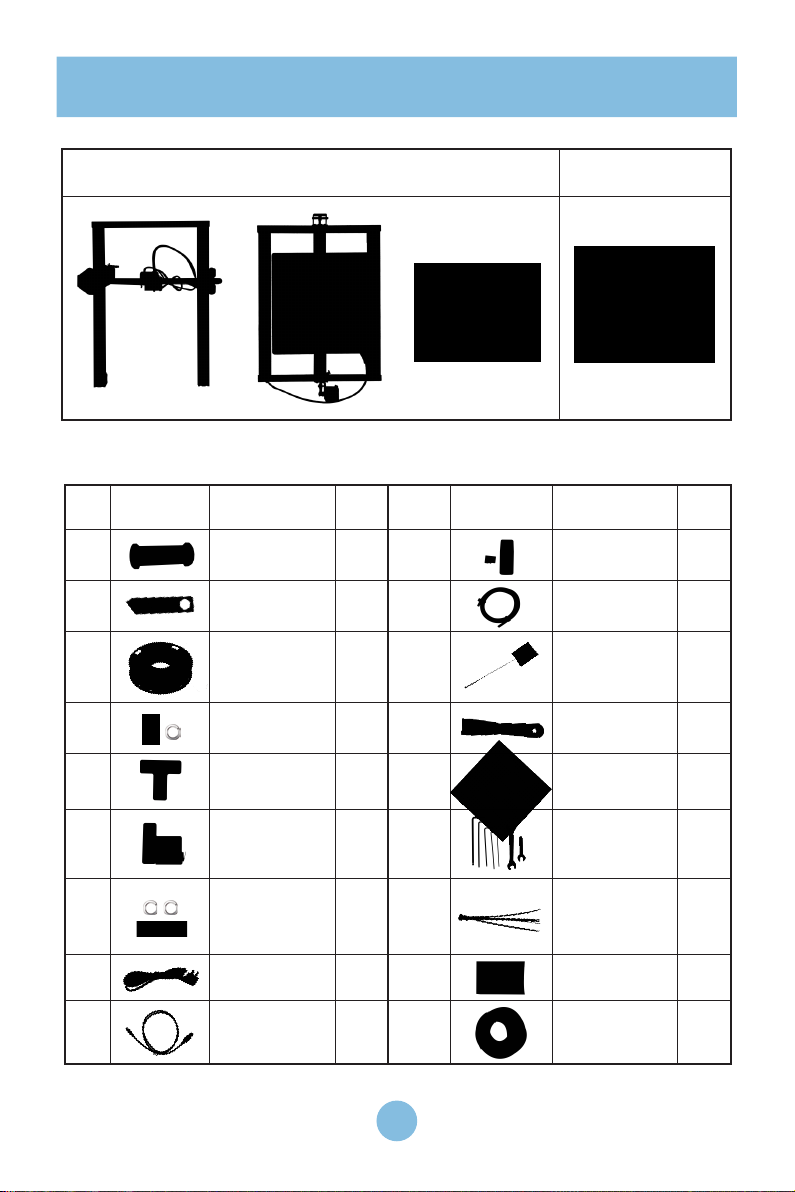
II. Package Contents
3 Pre-built Main Parts
Tool Kit
What’s in the tool kit
No. Image Name Qty No. Image Name Qty
1
2
3
4
5
6
7
Spool Holder
w/ Nuts
Spool Holder
Bracket
Sample
Filament
(200g)
Thumb
Screws
T-Bracket
(Right)
T-Bracket and
Z Limit Switch
(Left)
M5X25 Bolt
and Lock
Washer
1
1
1
3
1
1
4
sets
10
11
12
13
14
15
16
SD Card and
Card Reader
PTFE Tubing
(spare part)
Nozzle
Cleaner
Scraper
Diagonal
Pliers
Hex keys,
Wrench and
Srcrewdrive
Cable Ties
1
1
1
1
1
1 set
1
bundle
8
9
Power Cable
USB Cable
17
1
18
1
Spare Parts
Decorative
Trim
1
1
2
III. Assembly
1. Install the Gantry Frame
5
3
1
1
Screw in and fasten two
M5X25 Bolts
4
6
Note: Make sure that the
4
2
2
Screw in and fasten two
M5X25 Bolts
nut for profile has been
turned by 90° before
fastening the T-shaped
fixing block.
3
Install left sid T-Bracket,
making sure T-Nuts are
properly installed
X
5 6
Install right side
T-Bracket
Attach the Z
Couplers
Insert the Teflon pipe
into the quick connector
3
 Loading...