

Page 1
ENGLISH
Page 2

Page 3

You have just purchased a SAGEM phone. We congratulate you! In order to use your phone efficiently and safely, we
recommend that you read this handbook carefully.
Your phone can be used internationally in the various networks ((GSM 850 MHz and PCS 1900 MHz) or (GSM 900 MHz,
DCS 1800 MHz or PCS 1900 MHz)) depending on the roaming arrangements with your operator.
Some services described in this guide may not be available from the network or when roaming, or may require a specific
subscription.
Remember to back up your data and programs frequently, and before sending the mobile phone for repair.
This phone, like any other wireless phone, operates using radio signals and networks. Connection in all locations and
conditions cannot be guaranteed. Therefore you should never rely solely on any wireless phone for essential communications
(for example, medical emergencies).
In some jurisdictions it may be unlawful to take a picture without notice to or the consent of all participants.
WARNING
Depending on the model, network configuration and associated subscription cards, certain functions may not be available.
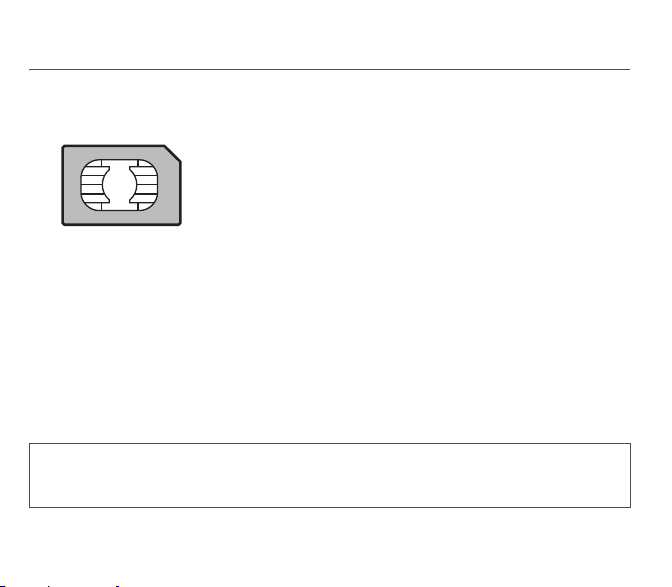
Ensure that your SIM card is a 3 V SIM type that is compatible with your phone. Inserting an incompatible card will be
indicated by a message when your phone is switched on. Contact your operator.
Your phone is identified by its IMEI number. Write this number down, and do not keep it with your phone, because you may
be asked for it in the event of your phone being stolen, in order to prevent it from being used, even with a different SIM card.
In order to display the IMEI on your phone's screen, type: *#06#.
SAGEM™ is a trademark of Sagem Communication SAFRAN Group.
AT® is a registered trademark of Hayes Microcomputer Products Inc.
Hayes® is a registered trademark of Hayes Microcomputer Products Inc.
T9 is protected by one or more of the following US patents: 5,818,437,
5,953,541, 5,187,480, 5,945,928, 6,011,554 and other patents are being applied for worldwide.
Java™ and all Java™ based trademarks and logos are trademarks or registered trademarks of Sun Microsystems, Inc. in the
U.S. and other countries.
The WAP navigator and the softwares included are the exclusive property of Openwave. For this reason, it is forbidden to
modify, translate, disassemble or even decompile all or part of these softwares.
© 2003 GAMELOFT® - All rights reserved - GAMELOFT® is a registered trademark of GAMELOFT S.A. - All rights reserved.
Wellphone™ and SmartCom™ are registered trademarks owned by SmartCom SARL France.
The Bluetooth word mark and logos are owned by the Bluetooth SIG, Inc.
3
Page 4

Contents
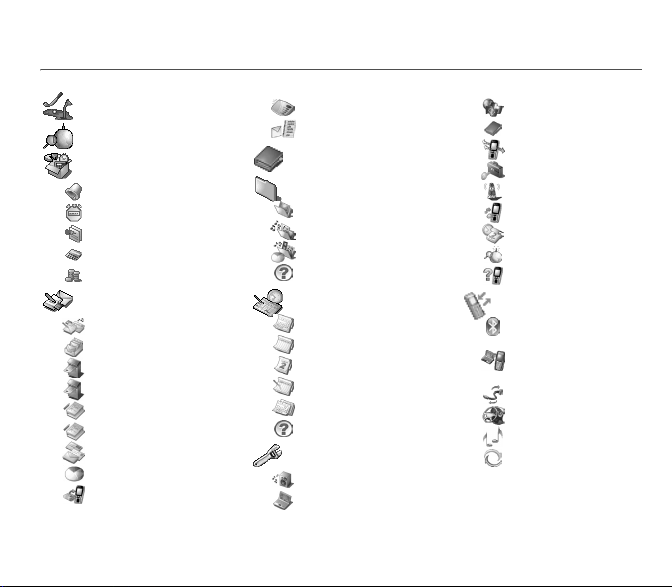
Menus ........................................................... 6
Your phone package - Accessories........... 7
Description (depending on model) ............ 8
Navigation principles .................................. 9
Initial screen .............................................. 10
Activating your phone .............................. 11
Information on the SIM card .........................11
First use: installing the SIM card and
the battery.....................................................12
Removing the back cover .............................12
Getting started ..............................................13
PIN number................................................... 13
Setting time and date....................................14
Network......................................................... 14
First call ........................................................14
Receiving a call............................................. 15
Switching off .................................................15
Using your phone...................................... 16
Freeing the antenna...................................... 16
Increase the efficiency of your phone ........... 16
Charging the battery .....................................17
Phonebook................................................. 18
Using the phonebook.................................... 18
Storing a new contact ...................................18
Calling a contact ...........................................18
Contact options.............................................19
4 Contents
Messages ................................................... 21
Compose SMS ............................................. 21
Compose MMS............................................. 24
Receiving messages .................................... 25
Inbox............................................................. 25
Outbox .......................................................... 25
Sentbox ........................................................ 26
Drafts............................................................ 26
Templates..................................................... 26
Options .........................................................26
Memory......................................................... 27
Local information .......................................... 27
Calling Voice Mail ......................................... 28
Mailing list..................................................... 28
Multimedia.................................................. 29
My Pictures................................................... 29
My Sounds.................................................... 30
Memory......................................................... 30
WAP ............................................................ 31
The WAP Menu ............................................ 31
Configuring WAP parameters....................... 32
WAP Logging on........................................... 33
Downloading objects .................................... 33
WAP Logging off........................................... 34
GPRS ........................................................... 34
Games ........................................................ 35
Page 5

Applications............................................... 36
Services ........................................................36
Alarm.............................................................36
Timer............................................................. 36
ToDo .............................................................37
Sending a vCal..............................................38
Receiving a vCal ...........................................38
Data exchange with a PC .............................38
Calculator...................................................... 39
Converter ......................................................39
Organizer ................................................... 40
Calendar menu .............................................40
Sending a vCal..............................................41
Receiving a vCal ...........................................41
Settings ...................................................... 42
Sounds.......................................................... 42
Display ..........................................................43
Languages ....................................................45
Contacts........................................................ 45
Calls ..............................................................45
Security .........................................................48
Networks .......................................................51
Shortcuts....................................................... 51
Date / Time ...................................................51
WAP settings ................................................53
Help...............................................................53
Connectivity............................................... 54
Bluetooth (depending on model)................... 54
IrDA (depending on model)........................... 54
Serial speed ..................................................55
Car kit - Headset ...........................................55
SyncML (depending on model) .....................55
Contents 5
Technical features..................................... 56
Certification and safety information for the
United States and countries using FCC
standards ................................................... 57
FCC Part 15 statement ................................. 57
FCC SAR information ................................... 58
Safety Information ........................................ 59
Distance of operation.................................... 60
FDA consumer information on wireless
phones.......................................................... 60
Driving safety tips .........................................63
Certification and safety information for
Europe and countries using CE
standards ................................................... 64
CE conformance statement ..........................64
CE SAR information ..................................... 65
Safety information......................................... 66
Distance of operation.................................... 67
CE Environment ........................................... 67
For Customers in the United States ........ 68
Limited Warranty .......................................... 69
For customers outside the United States 72
Warranty ....................................................... 72
End User Licence Agreement (EULA), for
the software ............................................... 75
Java™......................................................... 79
Troubleshooting ........................................ 84
Index........................................................... 89
Page 6
Menus
Games
WAP
Applications
Alarm
Timer
ToDo
Calculator
Converter
Messages
Compose
Inbox
Outbox
Sentbox
Drafts
Templates
Options
Memory
Local info.
6 Menus
Call Voice Mail
Mailing list
Phonebook
Multimedia
My Pictures
My Sounds
Memory
Help
Organizer
See month
See week
See today
See date
Calendar menu
Help
Settings
Sounds
Display
Languages
Contacts
Calls
Security
Networks
Shortcuts
Date/Time
WAP settings
Help
Connectivity
Bluetooth
(depending on model)
IrDA
(depending on model)
Serial Speed
Car kit
Headset
SyncML
(depending on model)
Page 7
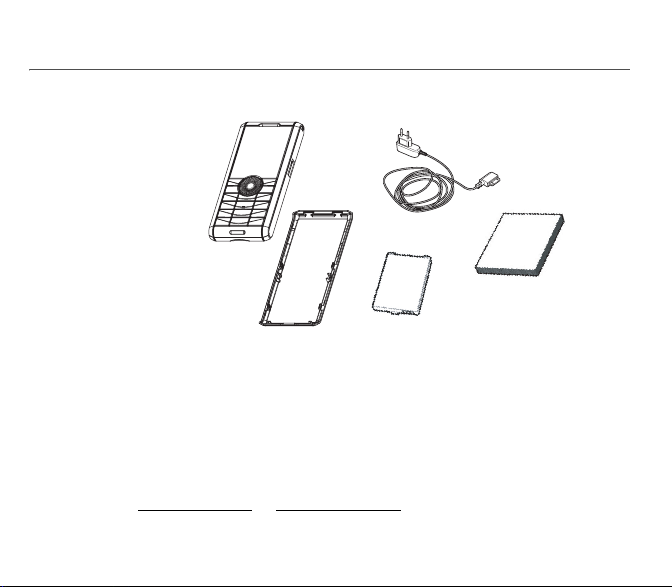
Your phone package - Accessories
When you open the box, check that all items are present:
1 - Phone
2 - Charger
3 - Battery
4 - User guide
1
Accessories
We advise you the use of SAGEM brand accessories for an optimal operating of your phone and of your accessories. You
can also find (as an option) or order the following accessories:
- Pedestrian kit
- Bluetooth pedestrian kit (depending on model)
- Additional battery
- Additional charger
- USB cable (with associated drivers) to connect your phone to a PC
- Cigar lighter charger
- Wellphone CD (depending on model)
Note:
The front and back covers are not interchangeable.
For more information: www.planetsagem.com
Your phone package - Accessories 7
and www.sagem.com/mobiles.
2
4
3
Page 8

Description (depending on model)
Long press: Add Vocal ToDo
(depending on model)
IrDA (Infrared)
(depending on model)
Hold down: Switch on/off
In a call context: Reject a call - hang up
In menus: Return to initial screen
Long press
: Activate/Deactivate hands-free mode
WARNING:
do not use the phone in hands-free mode near to your ear, or you may
suffer hearing loss (at least 3.9 inches (10 cm))
In call context: Call - receiving a call
Right programmable key:
In initial screen: two short presses: access to Inbox; long press: access to network
settings (depending on model)
In menus: Access to the selection shown on screen in the tab (*)
Left programmable key:
In initial screen: two short presses: access to Phonebook (depending on model),
access to Bluetooth (depending on model), long press: activate/deactivate the
alarm (depending on model)
In menus: Access to the selection shown on screen in the tab (*)
The four-directional navigation stick allows you to:
- Move the cursor on the screen by pushing the stick toward the corresponding
direction
- Confirm your selection by pressing the stick
- In initial screen: depending on model, long press leftwards/rightwards: access
to Phonebook
Note
: when the T S icons appear on the screen, the function is related to the
navigation stick
Press briefly and [
When composing a message:
Short press: switches from one input mode to another (T9, ABC, 123)
Long press: upper case/lower case
Hold down: In initial screen: Silent mode
In call reception mode: Short press stops ring tone
In ring tone setting mode: Activate / deactivate ring tone
Zoom mode (see
2 to 9
A long press on the keys 2 to 9 directly displays the phonebook.
(*) In this manual, when a function is chosen by pressing on this key, square brackets are
used (e.g.: [
Save
OK
]: activate or deactivate keypad locking
Messages
and
WAP
]).
menus)
8 Description (depending on model)
Page 9
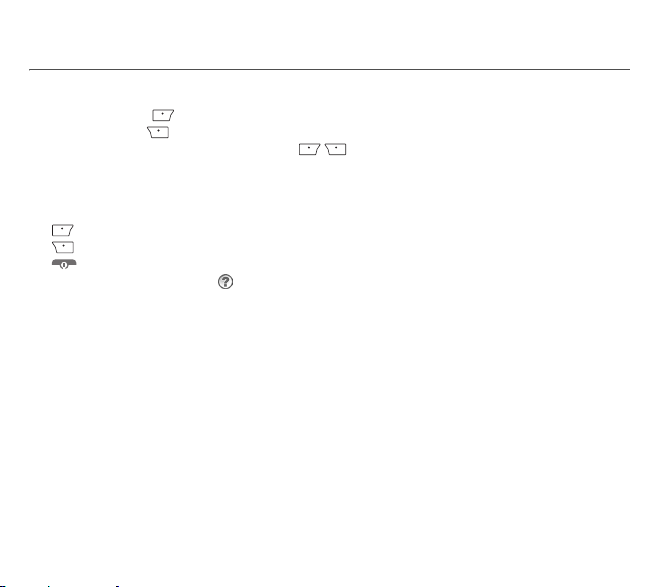
Navigation principles
These basic principles bring a great intuitiveness to your phone.
Val idat e
by pressing the key or the navigation stick.
Cancel
by pressing the key.
The thumbnails at the bottom of the screen refer to the
In the menus, a title bar reminds you of the previous level.
From the home page, pressing the navigation stick displays the icons of the main menus.
When pressing the navigation stick followed by a figure, you can display a menu directly. For instance, pressing the navigation
5
displays the Phonebook.
stick then
The
key is used to go from a menu to a sub-menu.
The key is used to go from a sub-menu to a menu.
The key (press briefly) is used to go back to the initial screen (current function is abandoned).
In some menus there is a
Navigation principles 9
Help
menu ( icon) which informs you on the various functions of the sub-menus.
keys.
Page 10

Initial screen
The initial screen may contain the following information:
1 - The title bar icons:
2 - Date and time, in digital or analog mode
3 - Network provider
4 - Thumbnail centred on bottom line:
The main « Menu » thumbnail shows that the menu can be accessed by pressing the navigation stick. The following
information may also be displayed: « 1 message received » or « 1 call ».
It can be deleted by pressing key briefly.
10 Initial screen
Battery
Calls forwarded
Call (establishing the call)
Call (hands free)
Message (reception of a message, message memory full)
FAX communication
DATA communication
Silent mode
Message in answering machine
WAP (@) communication
GPRS
Home zone
Roaming
Only emergency call is possible
Keypad locking
Protected WAP logon
Protected WAP logon icon with certificate
Signal strength level (5 bars).
Page 11
Activating your phone
Information on the SIM card
To use your phone, you need a card called SIM card. It contains personal
information that you can modify:
- Secret codes (PIN(s): Personal Identification Numbers), these codes allow
you to protect access to your SIM card and phone
- Phonebook
- Messages
- How special services work.
Your phone is compatible with the SIM 3V cards.
WARNING
This card must be handled and stored with care in order not to be damaged. If you should lose your SIM card, contact
your network provider or your SMC (Services Marketing Company) immediately.
Please keep your SIM card out of reach of young children.
Activating your phone 11
Page 12
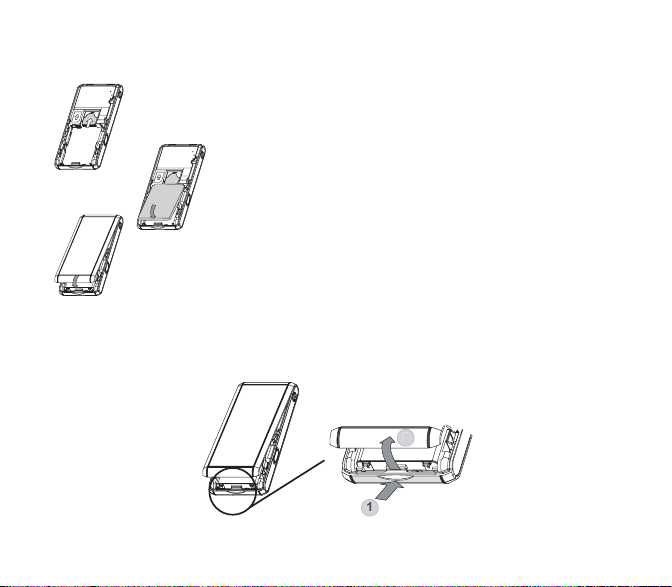
First use: installing the SIM card and the battery
123
Slide the SIM card, with cut corner as shown on the phone, into the card holder
1
with fold face down.
Place the battery by positioning first the top of it, as shown on the battery.
Place the back cover, clicking in first the upper part then the lower.
2
3
Removing the back cover
Proceed as follows to remove the back cover (in case of replacement of the battery or the SIM card, for instance):
- Turn the phone back. Press on the centre part at the level of the notch (1) and lift the cover (2).
12 Activating your phone
Page 13

Getting started
You are now ready to use your phone for the first time.
Switch on the phone by pressing the key. A short display appears.
When you switch on your phone for the first time, you must configure it with various settings that will remain by default until
you choose to modify them (depending on model).
After entering your PIN code and the date and time, make your choice for the following settings: time zone, daylight savings,
skin, wallpaper, screensaver, ring tone, volume, vibrate and voicemail number.
If there are contacts saved in your SIM card, you are invited, if you wish, to copy them in the phone contacts memory.
PIN number
This is your SIM's secret code.
If access to the SIM card is protected, the device prompts you to enter the PIN number:
Enter the code
for security reasons.
Press [
If your phone indicates that the SIM is missing, press the key to switch off your phone and check that the SIM card is
correctly installed.
Activating your phone 13
between 4 and 8 digits given to you when the SIM card was issued. These digits do not appear on the screen
OK
] or the navigation stick to validate.
WARNING
If a wrong PIN number is entered three times in succession, your SIM card is blocked. You must then:
- Enter the PUK (Personal Unblocking Key) code provided by your operator, and validate.
- Enter your PIN number and validate.
- Enter your PIN number again and validate.
After 5 or 10 failed attempts (depending on the type of SIM card), the SIM card is definitely locked. You must then
contact your operator or your SMC to obtain a new card.
Page 14

Setting time and date
When you use your phone for the first time, you need to set the date and time.
In due course, when the battery is completely discharged, or if it has been removed, you will be prompted systematically to
confirm date and time.
Setting the date:
Set the date by entering it directly in numerical form or by using the navigation stick to increase or decrease the default values.
Use the navigation stick to access the next (or last) data input field.
Once the date is correct, press the key to validate.
Setting the time:
Same procedure as for setting the date.
Network
From now on the phone hunts for a network on which it can make calls. If it finds one, it displays the name of the network on
the screen. You are then ready to send or receive a call.
If the network icon appears, calls are possible on your operator's network.
If the letter R and a network name are displayed, calls are possible on the network of a different operator.
If the letter E is displayed without any network name, only the emergency services are accessible (ambulance, police,
fire brigade).
If the network icon flashes, the phone is in permanent search mode. There is no network available. The signal strength
indicator received allows you to display the quality of reception. If it indicates less than three bars, search for better
reception in order to call in good conditions.
First call
Dial the number of your correspondent.
Press the key.
During the call, the call in progress icon flashes on screen and tones may indicate the establishment of the call.
Once communication has been established, the call icon stops flashing.
You can adjust the sound level (volume) using the navigation stick.
At the end of the conversation press the key to hang up.
14 Activating your phone
Page 15
Calling voicemail
In the initial screen, press and hold down the 1key.
International call
Press 0 (hold down) to display « + », then dial the country code without waiting for the dial tone, then the number of the
called party.
Emergency services
Depending on the operators you can obtain the emergency service with or without SIM card or when the keypad is
locked. It is enough to be in an area served by a network.
To obtain the international emergency service, dial
112
then press the key.
Receiving a call
When you receive a call, the number of your correspondent is displayed when it is presented by the network.
Press the key or the key to answer, and speak.
To refuse the call, press the key or the key.
To stop the ring tone or the vibrate, without refusing the call, press the key.
Hands-free mode
During a call, press and hold the key to switch into hands-free mode.
WARNING:
in this mode do not bring the phone up to your ear.
All the numbers corresponding to incoming and outgoing calls are logged in the list of recent calls.
When a call is on hand, pressing [
holding a call, switching to mute mode, ending the call, displaying menus.
Pressing [
Mute ON
you want to speak to other people.
] allows you to switch off the sound temporarily when you do not want that your correspondent listens when
Options
] allows you to have access to different functions: switching to hands-free mode,
Switching off
Press the key (long press).
The end message is displayed. The phone switches off.
Activating your phone 15
Page 16
Using your phone
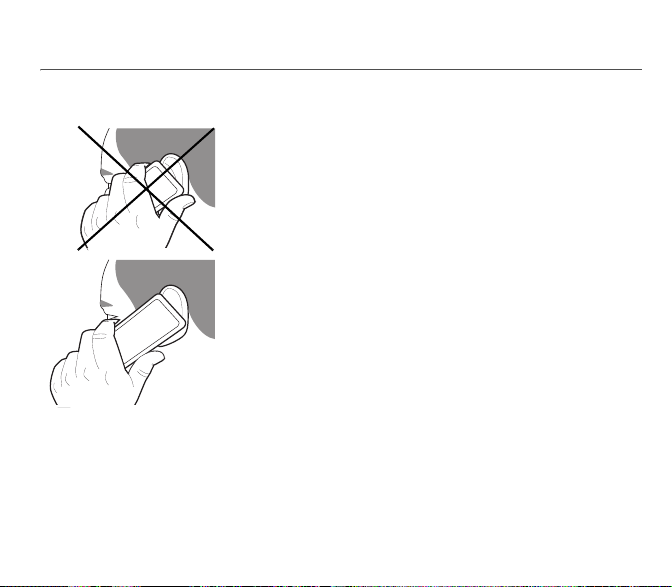
Freeing the antenna
The antenna is integrated in your phone, under the back cover at the top.
Avoid putting your fingers on this area when the phone is switched ON.
If your fingers obstruct the antenna, the phone may have to operate with a higher
power level than usual; decreasing its efficiency quickly. It could also affect the
quality of your communications.
Non ionising radiation
To obtain maximum satisfaction from your phone, use it in a vertical position.
Your personal safety can only be improved by doing so.
Increase the efficiency of your phone
- Don't press the keys when not necessary: each keypress activates the backlight, and uses much power.
- Don't obstruct the antenna with your fingers.
16 Using your phone
Page 17

Charging the battery
Your phone is powered by a rechargeable battery. A new battery must be
charged for 4 hours at least before being used for the first time. It reaches its
optimum capacity after a few cycles of use.
When your battery has been discharged, the phone displays the state (empty
battery icon flashes). In this case recharge your battery for at least 15 minutes
before making any calls in order not to be cut off in the middle of a call.
To recharge the battery:
Connect the charger to a socket.
Plug the end of the cable into the side connector of the phone.
The phone is then charging up. The battery icon is scrolling up and down to
indicate that it is charging. When the battery is fully charged, the charging stops
on its own. Disconnect the cable.
When charging, the battery may warm up, this phenomenon is normal.
WARNING
There is danger of explosion if the battery is placed in an incorrectly way or if it is exposed to fire.
Do not short circuit it.
The battery does not have any part that you can change.
Do not try to open the battery casing.
Use only the appropriate chargers and batteries as shown in the phone manufacturer's catalogue.
The use of other types of chargers or batteries may be dangerous or invalidate the warranty.
Used batteries must be disposed of in the appropriate places.
We advise you to take the battery out if you plan not to use the phone for extended periods.
You are strongly advised not to connect your phone to the charger if it doesn’t contain a battery.
The charger is a safety step-down transformer, it is forbidden to modify, alter or replace it by another component (power
supply plug, etc).
If the battery has entirely discharged, the phone cannot start. Plug the phone to the charger. The phone will switch on
after a few minutes of charge. You can use the phone again when the Start option is displayed on the screen.
Using your phone 17
Page 18
Phonebook
Using the phonebook
Enter the
Phonebook
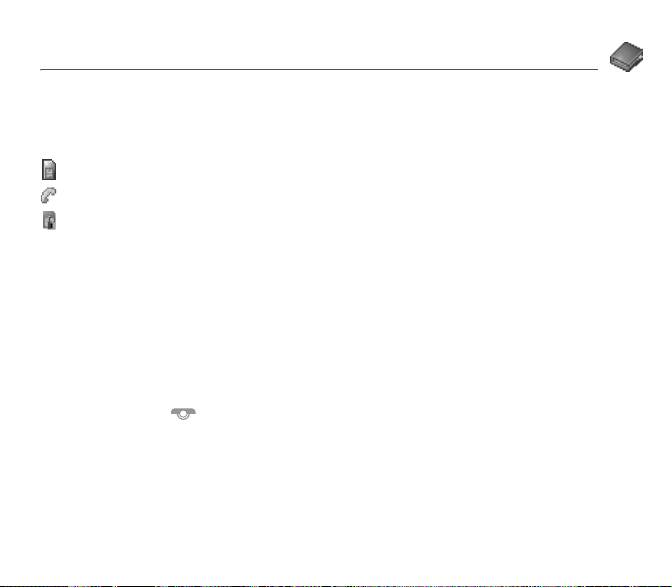
When a contact is selected, an icon is displayed in the title bar:
contact stored in the SIM card
contact stored in the phone
contact stored in the Fixed Dialling. See
activation.
You can search for a contact quiclky by typing the first letters (up to three). You can display it by pressing OK.
menu, the contacts list is displayed if you already get some (otherwise, go to
PIN2 number
and
Fixed dialling
in
Security
Storing a new contact
- Display the Phonebook, press [
- Enter the last name and press the navigator.
- Enter the number and press the navigator (
Note:
you can fill other fields if you store the contact in the phone memory (email, address, ringtone, photo, etc.).
- Press [
Save
] to store it.
Options
] then select
OK
).
Add phone contact
or
Add SIM contact
Calling a contact
Several ways:
- Select a contact. Press to start the call.
- Select a contact, press
- Direct call from the idle screen (only for the contacts stored in the SIM card memory): type the number with which the
contact was saved then
18 Phonebook
OK
, his number is displayed, press [
∗
(example : 21∗) or the number then #, the number is displayed, confirm.
Call
] to start the call.
Storing a new contact
Menu for more details about this
.
).
Page 19

Contact options
To display the various options, select a contact and press [
Modifying a contact
Modify what you want and validate then select
Sending a message
To send a SMS or a MMS to a contact (see chapter
Sending by
To send a contact details by MMS, SMS, IrDA (depending on model) or Bluetooth (depending on model) (see chapters
Messages
and
Connectivity
).
Copy to SIM / Copy to mobile
This allows you to copy your phonebook contacts from one memory to the other. Only the name and the first phone number
will be copied.
My numbers
You can create the entries corresponding to your own numbers in order to consult them when necessary.
Select
My numbers
and validate. Enter the different details and validate.
Mailing lists
A mailing list allows you to send a same message to several recipients at the same time.
- Select
Mailing Lists
- Select the list type (SMS or MMS) and press the navigation stick.
- Enter a name and press the navigation stick.
- Then, on a list press [
Phonebook 19
and press the navigation stick. The phone asks you to confirm the creation of a new list.
Options
]. Select
Add contact
Options
].
Save
once the modifications completed.
Messages
).
each time you want to add a contact in the list.
Page 20

Memory
Select
SIM
or
Telephone
Telephone: the screen displays the amount of memory used. The memory capacity is shared between the phonebook and
various other features. If you lack memory, check if you can free some space.
SIM: available memory only for contacts.
and validate.
Delete/Delete all
This allows you to delet the contact selected or all the contacts.
Set as my card/Business card
The details of a contact stored in the phone memory can be saved in a business card.
- Select a contact and press [
- Select
Set as my card
SMS, MMS or IrDA (depending on model).
Options
and [OK]. The details are saved as
].
Business card
. Then you can read it, modify it or send it by
Synchronize (depending on model)
You can synchronize your phonebook with your archives stored in your operator’s network depending on the options offered
by your operator.
The local synchronisation with your computer is only computer originated, from Wellphone software; you have only to activate
infrared, Bluetooth, or configure your USB connection in your phone.
Contacts synchronisation with a computer (depending on model)
Install Wellphone, software provided on CD (depending on model), and click on DIRECTSYNC: you can synchronise your
contacts stored in the phone memory with those of your Lotus Notes™ or Microsoft Outlook™ bases
.
List choice
This menu allows you to select the default phonebook (phone, SIM and Phone or SIM) displayed when the phone switches on.
20 Phonebook
Page 21

Messages
From this menu, you are able to send SMS and MMS. MMS is a Multimedia Message Service, which allows you to enclose
audio files, images and others rich contents to your messages; these messages can even be composed of several slides.
MMS are differently invoiced than SMS are. Please contact your network provider to get more information on their cost.
This menu has been compiled in collaboration with magic4™.
Compose SMS
On the
Messages
The language used is the one selected on the display of the phone (if the language selected is not compatible with the Easy
Message T9™, the English language will be automatically selected).
When typing a text, a counter showing the number of characters deducted is displayed at the top of the screen (depending
on model). This counter is not displayed if an icon or sound is inserted into the SMS.
When the text has been entered, [
-
Send
-
ABC mode
-
123 mode
-
T9 mode
-
Save
-
Save as Template
-
Cancel
-
Activate/Deactivate Zoom
-
Activate/Deactivate Silent
-
Formatting
-
Insert
Messages 21
menu, please select the
is used to send the message by entering the correspondent's number or selecting it in the phonebook
(see page 23)
(see page 23)
(see page 22)
is used to save a draft in memory
to insert an image or sound into your message (see page 24).
: allows you to keep as a template a message in order to use it again.
is used to delete all text entered and quit
is used to enrich a text
is used to modify size of characters
is used to activate or not the keypad beep when typing the text
Compose
menu and validate. Choose the
Options
] is used to access the functions offered:
SMS
option.
Page 22

The Easy Message T9™ mode helps you to easily write your short messages.
Using T9 Mode
Press once the key corresponding to the letter chosen and compose the word by continuing to press the keys corresponding
to the various letters without paying attention to the display: the word is highlighted.
If you agree on the word proposed on the screen, press the
the next word.
However, the same sequence of keys pressed can correspond to several words, existing on the dictionary. If the word that
appears is not the word you expected, press the navigation stick to scroll through the words corresponding to this key
sequence.
Once you agree on the word proposed on the screen, press the
writing the next word.
If the word you are expected is not proposed, please add characters until you get the message
validate if the word displayed suits you or modify this word before adding it in the dictionary.
22 Messages
0
key to validate it (the 0key inserts a space), and go on writing
0
key to validate it (the 0key inserts a space), and go on
Add a word
? Press
Yes
and
Page 23
Input modes
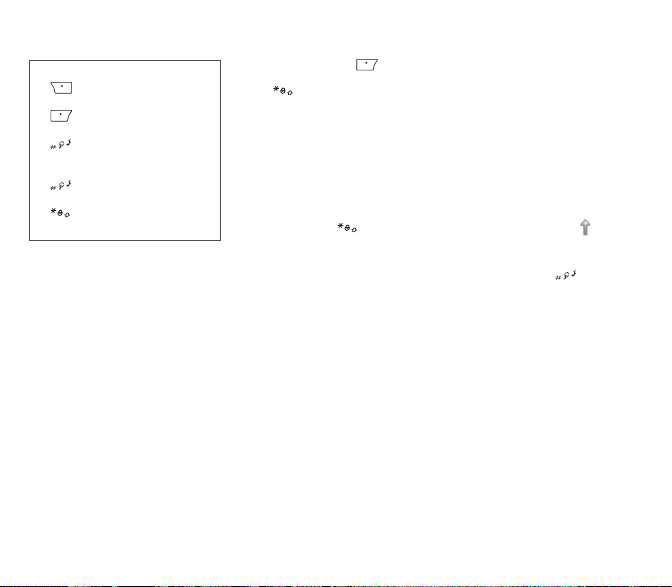
When composing a message:
-
key:
Deletes last letter
-
key:
Message options
-
key (long press):
Zoom mode (changes size of
characters)
key (short press):
-
Access to symbol table
-
key (long press):
Upper case
In the input screen, the key is used to access other input modes. The mode
in which you type the text is displayed at the right top of the screen. A short press
of the key switches from one mode to another.
ABC mode
The
a particular character, please press the corresponding key several times: the
characters will scroll down on your screen.
Mode 123
Insert mode
Images and sounds can be of two types: pre-defined or customized. Pre-defined
images and sounds are smaller, especially suited to exchanging messages.
is used to write words that do not exist in the dictionary. To get
is used to add numbers.
is used to add symbols, animations, call group icons and tunes.
Upper case
A long press of the key will display the next letter in upper case ( icon).
Punctuation characters
Punctuation characters are obtained thanks to key1 (except in
with the help of
Insert
mode (fast access by briefly pressing the key).
123
mode), or
Accented characters
Accented characters are generated automatically in T9 mode.
In ABC mode accented characters are available by pressing the key supporting
the non-accented character in succession.
Messages 23
Page 24

Compose MMS
On the
Messages
When the text has been entered, [
-
Insert
-
ABC mode
-
T9 mode
-
123 mode
-
Cancel
-
Slide
-
Preview
Saving the message
Select
Select
Sending the message
- Once the text entered, press the navigation stick or press [
- Enter the receiver’s number (or take it in your phonebook pressing
You can enter an e-mail address.
Note:
It is possible that the voice message format (.amr) is not supported by some PC. See your PC provider.
WARNING:
In the recipient screen, before typing the recipient’s number, the following options are available:
Editor
-
-
Contacts
-
ABC/123
-
Add mailing list
Once the number typed, other options are available.
24 Messages
menu, please choose the
to insert multimedia objects such as images, animations, sounds into your message.
(see page 23)
(see page 22)
(see page 23)
is used to delete all text entered and quit
to compose a slideshow of the multimedia objects.
… to see a presentation of the multimedia objects.
Save
. It is saved in the
Save as Template
some message sendings may fail if the message content is too big.
: this option allows you to modify the text before sending the message.
: to access the phonebook.
: to type either letters or figures.
Drafts
. It is saved in the
: this option allows you to select a mailing list to which the message is sent (see chapter
Compose
Options
] is used to access the functions offered:
menu.
menu and validate. Select the
Templates
menu.
Options
MMS
] and select
Send
Contacts
.
) and press the navigation stick.
option.
Phonebook
).
Page 25

Receiving messages
When you receive a message, the phone plays the ring tone that you selected, and the message icon comes on the
screen of your phone.
If you do not read the messages, this icon remains displayed on the screen. When it flashes, the memory is full.
Receiving icons, backgrounds or tunes can take several seconds. An icon is blinking when the download of your message is
in progress.
Note that you have two different possibilities for receiving MMS: automatically or manually; if « manual mode » is activated,
then you will receive only a notification in your Inbox, meaning that a MMS is available on the MMS Server; select Retrieve
in the options when you want to retrieve the MMS from the server.
For more details about automatic and retrieval modes, see « Options » on page 26.
Please contact your network provider to get more information on icons, backgrounds or tunes downloading.
Received messages are stored in the SIM card or in the phone until you choose to delete them.
Inbox
On the
Messages
Each message shows the presence of any attachments, the time and date the message was received and its size.
menu, please choose the
Messages are listed in chronological order, the latest one being displayed first.
The quantity of Not Read and Not Retrieved messages is shown. Not Retrieved and Not Read messages are shown in bold.
Select a message and press the navigation stick. Choose one of the options given.
Enclosures (pictures or sounds), which you receive, can be extracted in order to be used later on (stored…).
You can consult them in the corresponding menus (WAP bookmarks in
Inbox
menu and [
Select
].
WAP
, ring tones in
Sounds
, wallpapers in
Display
).
Outbox
This menu displays the messages that have not been sent. You can therefore send them again.
Messages 25
Page 26

Sentbox
The
Sentbox
menu (see page 26).
Too many messages saved will quickly fill up the available memory and no further messages will be received.
For each message, its characteristics (shown with an icon) and the time (or date) of sending are displayed on the screen.
Select a message and press the navigation stick.
Choose one of the options given: Read, Modify, Forward, Delete, Delete all.
menu is used to store all your sent messages if you activated the option
Store sent messages
in the
Options
Drafts
When you store a composed message, it is stored among the drafts.
Messages
On the
Select a message and press [
If you select a message and press the navigation stick, you can modify it.
If you want to send it, select
menu, please choose the
Options
Modify
Drafts
]. The options are: Delete, Read, Modify, Details.
then press [
menu and press the navigation stick.
Options
] and select
Send
.
Templates
When composing a message, if you selected the
The same options as for the drafts are available for the templates.
Save as Template
option, the template is saved in this menu.
Options
Several sending options are offered.
On the
Messages
Choose one of the options given: SMS or MMS.
The SMS sending options are: message centre number, store sent message, acknowledgment, period of validity (during that
period, the network provider will try to send the message), message format.
26 Messages
menu, please choose
Options
and [
Select
].
Page 27

The MMS options are:
-
Store sent messages
-
Retrieval mode
gives you the retrieve later option.
Priority
: selection of a priority to send a message.
-
-
Request delivery report
-
Period af validity
Advanced settings
-
Send delivery report
-
MMS ignore
-
MMS server
-
Display Bcc
-
Sender visibility
-
Maximal Size
: (it is highly recommended that you keep this function deactivated, in order to avoid a full memory),
: if you are in a poor coverage area, it may be more convenient to choose the manual retrieval mode which
: request of a delivery report when sending a message.
: during that period, the network provider will try to send the message.
: sending a delivery report when receiving a message.
: if you want to deactivate the reception of any MMS in your phone.
: to select another MMS provider, or set the parameters of a new MMS provider.
: if you want to activate/deactivate this display.
: you choose to display or not your phone number on the receiver’s phone screen, with that message.
: if you want to activate/deactivate the option of maximum size supported for the MMS.
Memory
You may know the memory available for saving messages.
On the
Messages
Choose one of the options given: SMS or MMS.
menu, please select the
The SMS screen displays the memory available either on the SIM card or on the phone.
The MMS screen displays how much memory is used in Kbytes.
Memory
option and [
Select
].
Local information
This menu is used to activate reception of local information broadcast by the network.
You can choose whether you want to receive this information or not (please contact your network provider).
Messages
On the
Messages 27
menu, please select the
Local info.
menu and [
Select
].
Page 28

Calling Voice Mail
This function allows you to call your voicemail.
Messages
On the
Note:
if your voicemail number has not been entered yet, you must enter it in the menu
This number depends on the operator.
menu, please select the
Call Voice Mail
option and [
Select
].
Settings/Calls/Voicemail
.
Mailing list
This menu displays the mailing lists created in the phonebook.
To display the different options, press [
-
Add mailing list
-
Modify name
-
Add contact
-
Properties
-
Delete
-
Send message
28 Messages
: allows you to create a new mailing list.
: allows you to modify the mailing list name.
: allows you to add a contact to the mailing list.
: allows you to see the type of mailing list and the number of contacts.
: allows you to delete the mailing list.
: allows you to compose and send a message to the contacts of the mailing list.
Options
].
Page 29

Multimedia
All downloaded objects are stored in the
Multimedia
menu.
My Pictures
This menu gives you access to the pictures you have downloaded.
Multimedia
On the
PlanetSagem
On a picture selected, you can press [
-
Send By
-
Use as
-
Rename
-
Properties
-
Delete
-
Delete all
You can import or export pictures to or from a computer using My Pictures And Sounds (MPAS), available from
www.planetsagem.com.
Multimedia 29
menu, please select the
: to have access to the web site to download pictures. Select [
: makes it possible to transmit a picture (NB: you may not send any copyrighted picture).
: allows you to use the picture as a wallpaper or screen saver.
: allows you to rename a picture.
: properties of the picture selected.
: allows you to delete a picture.
: allows you to delete all pictures.
My Pictures
Options
menu and [
] to have access to these various options:
Select
].
Options]
allows you to delete all the pictures.
Page 30

My Sounds
This menu gives you access to the sounds you have downloaded or recorded.
Multimedia
On the
PlanetSagem
to record a new sound.
To display the different options, press [
-
New Sound
-
Send By
-
Use as
-
Rename
-
Properties
-
Delete
-
Delete all
You can import or export sounds to or from a computer using My Pictures And Sounds (MPAS), available from
www.planetsagem.com.
menu, please select the
: to have access to the web site to download sounds. Select [
: allows you to record a new sound.
: allows you to send a sound by MMS, IrDA (depending on model) or Bluetooth (depending on model).
: allows you to add a sound to the ring tones list.
: allows you to rename a sound.
: properties of the sound selected.
: allows you to delete a sound.
: to delete all the sounds.
My Sounds
Options
menu and [
Select
].
Options]
allows you to delete all the sounds or
].
Memory
This menu indicates the memory size used by the different features of your phone.
On the
Multimedia
Use the navigation stick to select the different features using memory. You can see the memory capacity used by each
individual feature.
30 Multimedia
menu, please select the
Memory
menu and [
Select
].
Page 31

WAP
f
r
WAP (Wireless Application Protocol): a protocol that translates the Internet language into WML and HTML languages that
can be read by a phone. The WAP function allows you to log onto certain Internet sites. You can log onto sites that allow you
to download ringtones, icons, animated screensavers, Java™ applications to your phone.
The WAP Menu
The WAP navigator is under licence:
The WAP navigator and the softwares
included are the exclusive property o
Openwave. For this reason, it is
forbidden to modify, translate,
disassemble or even decompile all o
part of these softwares.
You can activate the magnifying
glass to increase the size of the
characters by holding down the
key.
WAP 31
The
Services
navigating through WAP pages pressing the key.
It contains the following sub menus:
Previous
Welcome
Bookmarks
Internet sites in order to make the access easy.
You can receive bookmarks from messages and add them to this list (see chapter
on SMS).
You can also send messages by SMS: select a bookmark, press [
select
Go to URL
Inbox
Save objects
Snapshots
Save Page
History
memory.
Reload
Reset cache
menu, a dropdown menu, can be accessed at all times when
: this menu allows you to come back to the previous screen.
: logs onto the home page (carries the name of your access provider)
: is used to save in a phonebook the names and addresses of
Options
Send by message
: this menu allows you to input an Internet address directly.
: this menu allows you to check the messages sent by the Internet site.
: takes a snapshot of the currently displayed page.
: saves the currently displayed page.
: backward and forward navigation of the pages displayed are kept in
: refreshes the current page.
.
: is used to save a WAP site items.
: clears the stored information on previous connections.
], then
Page 32

Advanced…
- Settings
- Show URL
- Disconnect
- Security (is used to access information on making WAP connections secure).
- Delete Cookies
- View Title Region
About…:
Exit
: choose one of the following advanced settings
information on the browser.
: returns to the phone's home page.
Configuring WAP parameters
Select the
Advanced…
Profiles
is used to select or modify your access provider's logon parameters or configure the parameters of other access
providers.
The active profile is preceded with a star.
Menu
is used to add a new profile or to display the memory size available.
The
Configuration of GSM and GPRS parameters:
All information to be entered in the parameters are provided by your operator or access provider.
On a profile in the list, press [
connections (see next page), GSM parameters and GPRS parameters (see next page).
Preferred connections:
- GSM if not GPRS (by default): the logon to WAP services uses the GPRS as a priority. However, in the event of
unavailability of the GPRS network, the GSM network is used to establish the link.
: the logon to WAP services uses the GPRS network exclusively.
- GPRS
- GSM
: the logon to WAP services uses the GSM network exclusively.
32 WAP
menu, then the
Options
Settings
], select
menu.
Modify
. The different parameters are: Provider title, Home page, Preferred
Page 33

GSM parameters
- Login
- Password
- IP address of WAP gateway
- Port type (secure or insecure)
- Dial-up number
- Mode (digital, analog or automatic)
GPRS parameters
- Login
- Password
- IP address of WAP gateway
- Port type (secure or insecure)
- APN: if no APN has been defined, press [
Once all the settings have been entered, you can activate the chosen access provider. Select him from the list. Validate your
choice.
Linger timer
a service.
:
:
Options
] then the APN menu. Select or add an APN.
is used to choose the time after which the call is automatically disconnected if you have forgotten to log off from
WAP Logging on
The connection to a WAP service on the GPRS network is not cut if an incoming call is received. You can answer the call.
Using the
Welcome
If you are logging onto the GSM or GPRS network, the @ symbol flashes, the metering of the cost of the call starts as soon
as it stops flashing.
menu, you can log onto your access provider's WAP site by pressing the key.
Downloading objects
Some WAP sites allow you to download ringtones, icons, animated screensavers, games or Java™ applications. Once
downloaded, they are stored in your phone's memory. You can then save them in your phone (same operation as used for
downloading using messages).
WAP 33
Page 34

WAP Logging off
To log off, press the key. The logoff happens automatically after a few seconds of inactivity if you forget to log off. This
period is defined by the linger time setting.
GPRS
A flashing icon indicates that the phone is logging onto a GPRS network.
A non-flashing icon indicates that the GPRS network is available; if the icon is dark, it indicates that the phone is logged onto
the GPRS network: see page 32 for the attachment options.
This icon is not displayed if the GPRS network is not available or if the SIM card inserted in your phone does not include the
GPRS service. It may also disappear when accessing WAP services if the connection uses the GSM network instead of the
GPRS network.
34 WAP
Page 35

Games
Your phone contains one or several games, depending on model. You can
download more. You are the owner of a SAGEM mobile phone which gives you
the ability to download applications and games to be executed on your phone
thanks to the built-in Java™ engine.
However, receiving applications from everywhere implies some basic knowledge
of the possible effects of such download.
We advise you to dwonload certified games or applications from your operator
sites or from www.planetsagem.com.
By default, the connection URL of your operator or of PlanetSagem is configured
in your phone.
If no connection URL is configured, by selecting the
display the WAP function to configure new profiles which allow you to download
games or applications.
When you select a game or an application, the
menu (displayed with [
be used by the game or application to connect to the network (to exchange
scores for example) but is not used to download new games or applications.
Games 35
Options
] key) allows you to configure a profile which only
More games
General Settings/Connection
menu, you
Page 36

Applications
Services
This item may not be present on your phone’s menu, as it depends on your SIM.
Alarm
This menu allows you to set and activate the alarm.
On the
Applications
Activate
or
Set the wake-up time by entering the numbers directly and validate.
The alarm icon appears on the initial screen.
The alarm works even when the phone is switched off.
Timer
This menu is used to set and activate the timer.
On the
Applications
Activate
or
Set the duration (hours/minutes) by entering the numbers directly and validate.
The alarm icon appears on the initial screen.
36 Applications
menu, please select the
Deactivate
the alarm and validate.
menu, please select the
Deactivate
the alarm and validate.
Alarm
menu and [OK].
Timer
menu and [OK].
Page 37

ToDo
ToD o menu
This menu allows you to add ToDo’s, access category-based Todo management and delete all the ToDo’s.
On the
Applications
Select one of the actions in the list with the navigation stick and validate.
-
Add Written ToDo/Add Vocal ToDo
ToDo.
-
Categories
number of ToDo’s in each category and see them.
-
Memory
-
Synchronize
ToDo actions menu
This menu allows you to do all the actions possible on any ToDo.
Applications
On the
To display a ToDo, select it in the list and press the navigation stick.
To display the different options, press [
-
Modify ToDo
-
Delete
-
Send By
(depending on model).
Applications 37
menu, please select
: allows you to see the different ToDo categories, assign a specific ring tone to each individual ToDo, know the
: allows you to view the memory used by the different functions of your ToDo.
(depending on model): allows you to synchronise a ToDo with a computer.
menu, please select
: allows you to modify the ToDo properties.
: allows you to delete the ToDo.
: allows you to send the Vcalendar corresponding to the task by MMS, IrDA (depending on model), Bluetooth
ToDo
and press [OK].
: allows you to add ToDo of the text or voice type. Fill in the different items. Save the
ToDo.
Options
].
Page 38

Sending a vCal
A Todo task contains a task of your timetable that can be sent through a vCalendar. Yet, this function is available only on
certain models of phone.
You can send vCals to another phone using MMS.
On the task list (Todo main menu), please select a task and in the Todo task actions menu list select
Please select your contact information (phone number or Email address) before confirming.
If you receive a call while you are sending a vCal, the call will have precedence.
Send By
.
Receiving a vCal
By MMS, you receive a message you have to open to extract the vCal. You cannot add the event to your diary until you have
saved it.
You can assign a different beep to each Todo task.
You can also assign a different ring tone to each Todo task category.
Data exchange with a PC
Working from a PC, you can save/edit contacts, events and tasks stored in your phone.
To do this, you will need to connect your phone to the PC by means of a suitable data cable.
Next, you will have to install the Wellphone software supplied with your phone (depending on model) or available from
http://www.wellphone.com. This software will also enable you to save your contacts, events and tasks by means of
copy/paste.
Working from a PC, you can save/edit pictures and ring tones not copyrighted stored in your phone.
To do this, you will need to connect your phone to the PC by means of a suitable data cable.
Next, you will have to install the "My Pictures and Sounds" software (available from www.planetsagem.com site).
Note:
If a call comes in during an exchange of data with your PC, the link will be interrupted and will have to be manually re-
started.
38 Applications
Page 39

Calculator
This menu allows you to use your phone as a calculator.
Applications
On the
Use the navigation stick to make calculations:
-
Upwards
-
Downwards
-
Rightwards
-
Leftwards
The following keys are used for:
- : Equals or convert
- : Delete
- : Decimal point.
If no calculations are being run, pressing [
menu, please select the
: Add
: Subtract
: Multiply
: Divide
Calculator
menu and [OK].
Convert
] allows you to use the value in the
converter
directly.
Converter
This menu allows you to convert one currency to another.
On the
Applications
Enter a value and move the navigation stick upwards to convert from one currency to another, or downwards to convert back.
Pressing [
Rapid exchange
If the Rapid exchange is activated, the converter will work in the initial screen by entering the desired numbers and pressing
the navigation stick to convert.
Exchange rate
Enter the exchange rate corresponding to the chosen currency.
Currency
Enter the two types of currency to be converted.
Go to calculator
This option allows you to use immediately the value converted in the
Applications 39
menu, please select the
Options
] allows you to use the following options:
Converter
menu and [OK].
calculator
.
Page 40

Organizer
This menu gives you access to your diary and get to a day, week, month or specific date. It lets you add events, access the
global actions for all the events and manage them by event category.
Calendar menu
This menu lets you add events, manage events by category, see the available memory and delete all the events.
From the
Organizer
-
Add Written Event/Add Vocal Event
the event.
-
Delete
-
Memory
-
Delete all
-
Categories
the number of events in each category and see them.
Synchronize
-
network depending on the options offered by your operator.
The local synchronisation with your computer is only computer originated, from Wellphone software; you have only to
activate infrared, Bluetooth, or configure your USB connection in your phone.
The other menus are:
See month
-
-
See week
-
See today
and send).
See date
-
40 Organizer
menu, select the
: allows you to schedule the deletion of events that took place more than one day, week or month ago.
: allows you to view the memory capacity used by the different functions of your diary.
: allows you to delete all the events from your diary.
: allows you to see the different event categories, assign a specific ring tone to each individual category, know
(depending on model): you can synchronize your organizer with your archives stored in your operator’s
: allows you to access events on a month-by-month basis.
: allows you to access events on a week-by-week basis.
: allows you to access the events for the current day and the actions possible on any event (see, modify, delete
: allows you to access events at a specific date.
Calendar menu
: allows you to add events of the text or voice type. Fill in the different items. Save
.
Page 41

Sending a vCal
An event of your diary can be sent through a vCalendar. Yet, this function is available only on certain models of phone.
You can send vCals to another phone using MMS.
On the See today list, please select an event and in theTodo event actions menu list, select
For MMS deliveries, you should select your contact information (phone number or Email address) before confirming.
If you receive a call while you are sending a vCal, the call will have precedence.
Send By
.
Receiving a vCal
By MMS, you receive a message you have to open to extract the vCal. You cannot add the event to your diary until you have
saved it.
You can assign a different beep to each diary event.
You can also assign a different ring tone to each diary event category.
Organizer 41
Page 42

Settings
Sounds
Volume and ring tone
This menu allows you to allocate a ring tone to different functions.
Sounds
On the
Select the function on which you want to choose a ring tone.
Select the ring tone from the proposed list and validate.
PlanetSagem
Note:
Adjust the volume using the navigation stick and validate.
You can deactivate the sound by pressing the key.
menu, please select the
: to have access to the web site to download sounds.
in the list, there are the phone default ring tones and also the ring tones downloaded in
Vibrate
This menu allows you to activate the vibrate mode for calls.
Sounds
On the
Select the vibrate mode from the proposed choices and validate.
menu, please select the
Silent mode
This menu allows you to switch to Silent mode.
On the
Sounds
Activate
Silent mode can also be accessed via the initial screen by holding down the key.
When the phone is in silent mode, the relevant icon appears on the initial screen.
In this mode, the ring tone will not function, except for the alarm clock.
Note:
42 Settings
menu, please select
or
deactivate
Silent mode and validate.
if you have activated the silent mode, it does not remain after switching off your phone.
Ring tones
Vibrate
Silent mode
menu and [
menu and [
and [
Select
Select
].
Select
].
].
Multimedia/My Sounds
.
Page 43

Beeps
This menu allows you to activate a beep for the battery, the keypad or the network.
On the
Sounds
Select the type of beep you want to allocate from the proposed choices and validate. Activate or deactivate the beep and
validate.
If you select keypad beeps, different options are given.
menu, please select the
Beeps
menu and [
Select
].
Recorder
These menu allows you to record you own melody.
On the
Sounds
Pressing [
Give it a name and validate. The new tone is saved in the list of ringtones and in
If you select the recorder by means of a programmable key, the sound is saved in the
menu, please select the
Start
] record your melody or your voice by means of the microphone then save it.
Recorder
menu and [
Select
].
Multimedia/My Sounds
Applications/ToDo
.
menu.
Display
This menu allows you to customize your screen by choosing a different presentation.
Skins
This menu allows you to choose the skin of your phone, i.e. define its look (text font, colors, default animation, background
image…).
On the
Display
Select the desired skin and validate.
Skins are not downloadable but you can download screensavers and boot mode animations without changing those included
by default with the skin.
Settings 43
menu, please select
Skins
.
Page 44

Wallpaper
This menu allows you to display the background picture you want on your phone.
On the
Display
Select the wallpaper and [
PlanetSagem
Note:
Press [
Note:
menu, please select the
View
: to have access to the web site to download pictures.
there are the phone default wallpapers and also the pictures downloaded in
OK
] to validate this choice, or [
the
Random
option allows you to display a wallpaper scrolling different pictures in a random way.
Wallpaper
menu and [
Select
]. The picture appears in the background of the screen.
Back
] to go back to choice.
].
Multimedia/My Pictures
.
Screensaver
This menu allows you to display an animation when the phone is in standby mode.
On the
Display
Select one of the screensavers given and [
- No screensaver: select
- Several wallpapers in a random way: select
PlanetSagem
Note:
The chosen screensaver appears on the screen, validate it.
menu, please select the
Normal screen
: to have access to the web site to download pictures.
there are the phone default screensavers and also the pictures downloaded in
Screensaver
View
].
.
Slide show
menu and [
.
Select
].
Multimedia/My Pictures
.
Operator logo
This menu allows you to display your operator's logo on the initial screen.
On the
Display
Select
menu, please select the
Activate
or
Deactivate
Operator logo
and press [OK].
menu and [
Select
].
Contrast
This menu is used to adjust screen contrast.
On the
Display
Adjust the contrast using the navigation stick.
menu, please select the
44 Settings
Contrast
menu and [
Select
].
Page 45

Energy saving
On the
Display
Two options are available to choose from for the backlight:
- Screen only: only the screen is lit up.
- Full backlight: both the screen and the keypad are lit up.
Note:
After a longer period of inactivity, the screen will enter an economy mode where the time is displayed. To quit this sleep mode
and resume backlight, press the key.
menu, please select the
in any case, after a certain time of inactivity, the backlight will be automatically turned off to save battery life.
Energy saving
menu and [
Select
].
Languages
This menu allows you to choose your phone's display language.
On the
Settings
Select your language and validate.
If you select
menu, please select the
Automatic
, the language used will be the one relative to your SIM card.
Languages
menu and [
Select
].
Contacts
This menu allows you to select the way to sort contacts in the phonebook (by name or first name) and the filter applied on the
contacts list display (SIM contacts, phone memory or both).
Calls
The Calls menu allows you to manage all the calls functions (call forward, displaying numbers, call waiting, voicemail number,
etc.).
Call forward
Depending on your subscription, this service allows you to forward incoming calls to a different number or to the voice mailbox.
On the
Calls
Choose the type of forwarding you want from the options available.
menu, please select the
Settings 45
Call forward
menu and [
Select
].
Page 46

View last calls
This menu allows you to access the list of last numbers used.
On the
Calls
For every phone call are displayed on the screen:
- its characteristics (shown with an icon),
- the time (or date),
- its duration.
Select a call from the list and validate.
Select one of the options given: Call, Store in your phonebook, Send a message, Delete, Delete all.
You can also make the call by pressing the key.
Fast access to the list of calls from the initial screen: press the key.
menu, please select the
View last calls
menu and [
Select
].
Counters
This menu allows you to consult the duration of the up calls.
It can also be used to check the volume of data exchanged in GPRS.
Calls
On the
Select one of the options given.
menu, please select the
Counters
menu and [
Select
].
Display number
This menu allows you to modify the status of the display number function.
On the
Calls
Select one of the options given: Anonymous mode, My number, Callers’ number.
Anonymous mode
You have the facility to mask your number on the phone of the person you are calling.
-
-
-
46 Settings
menu, please select the
Preset:
network default mode.
Yes:
you choose to active anonymous mode and then not to display your number.
No:
you choose not to activate anonymous mode and then to display your number.
Display number
menu and
[Select
].
Page 47

Call waiting
(Operator-dependent service) During a call, you may be informed that a caller is trying to reach you: you hear a special tone.
The caller's identity is displayed on the screen (name or number).
On the
Calls
You can
During a call, if a second caller tries to contact you, the screen displays the call warning.
menu, please select the
activate, deactivate, or
Call waiting
consult the
menu and [
Select
status
of the call waiting service in order to check if it is active or not.
].
Automatic redial
This menu allows you to call back a caller you have not managed to reach.
Calls
On the
You can set the redial function to inactive, on request or systematic.
If you choose
menu, please select the
On request
Auto redial
menu and [
Select
].
, your phone will offer to redial your caller automatically if his number is busy.
Blacklist
The blacklist is used to limit failures on automatic calls (calls generated by the automatic redial function or by applications:
data, fax for example).
On the
Calls
When several automatic calls failed with a number (number busy or unknown), this number is put in the blacklist and no
automatic call will be done with this number any more until you delete it from the blacklist.
Note
menu, please select the
: this function does not apply to the calls performed manually.
Blacklist
menu and [
Select
].
Voicemail
This function is used to record your answer phone number.
This number will be used during a call to the voice mailbox using the programmable keys.
Calls
On the
Enter your answer phone number and validate.
menu, please select the
Voicemail
menu and [
Select
].
ALS
The ALS (Alternate Line Service) function allows you, depending on your subscription, to have two phone lines.
The number of the line selected (1 or 2) for the calls appears on the initial screen.
Settings 47
Page 48

Security
This menu allows you to configure your phone's security settings.
Keypad locking
This menu allows you to lock the keypad to avoid unwanted key presses.
On the
Security
Select
The lock icon appears on the initial screen.
This function is also available in the initial screen pressing the key and the navigation stick.
menu, please select the
Activate
or
deactivate
PIN number
This menu allows you to activate and modify your phone's PIN.
On the
Security
To modify the PIN, select
Enter old PIN and validate.
Enter new PIN twice and validate.
To activate or deactivate the PIN, select the
Enter PIN and validate.
Select
menu, please select the
Activate
or
Deactivate
Modify PIN
PIN2 number
You have a second PIN number to allow you to access certain functions*.
* These functions may or may not be available depending on your SIM card.
Proceed as above in order to activate, deactivate or modify PIN number 2 of your phone.
48 Settings
and validate.
and [
and validate.
Keypad locking
PIN number
Select
].
Control PIN
menu and [
menu and [
menu and
Select
Select
[Select].
].
].
Page 49

Phone code
The Phone code menu allows you to activate the phone code so that it is requested and checked whenever the phone is
switched on if a different SIM card is used. This code is automatically linked to the SIM card installed when the phone is
activated, for example to protect the phone if stolen.
To activate or deactivate the phone code, select the
Enter 0000 (the factory code, by default) and validate.
Activate
or
Deactivate
Select
To modify the phone code, select
Enter old phone code and validate.
Enter new phone code and validate.
Enter phone code again to confirm it and validate.
and validate.
Modify
and validate.
Phone code
menu and validate.
Confidentiality
The Confidentiality function is used to delete last call numbers, messages or organiser events when a new SIM card is
inserted into the phone.
This menu allows the activation of automatic deletion, after power off/on, for messages and/or calls stored in the phone.
Security
On the
Select
menu, please select the
Activate
or
Deactivate
and validate.
Confidentiality
menu and [
Select
].
Operator
This menu allows you to modify the call barring.
On the
Security
Access to this service depends on your type of subscription.
menu, please select the
Settings 49
Operator
menu and [
Select
].
Page 50

Call barring
Call barring can be applied to ALL calls (incoming and outgoing), to all incoming calls when you are away from your home
country (if roaming available).
This menu allows you to block the sending or reception of certain calls.
Before you can use this service, a password will be provided by your operator when you take out your subscription.
Security
On the
Select
Access to this service depends on your subscription type.
menu, please select the
Activate
or
Deactivate
and validate.
Call barring
menu and [
Select].
Fixed dialling
This menu allows you to restrict the outgoing calls. The availability of this menu depends on your SIM.
Security
On the
Enter PIN2 number and validate.
Select
Proceed as for any other phonebook.
When activating this function, only the numbers stored in the phonebook can be called.
This phonebook is linked to the SIM card, and its size depends on the card's capacity.
menu, please select the
Activate
or
Deactivate
and validate.
Fixed dialling
menu and [
Select
].
Cost
This menu allows you to control the cost of your calls (*). (Operator-dependent service).
Security
On the
The
The
(*) WARNING
Depending on how the networks and associated subscription cards are configured, some functions may be unavailable (these
are marked out with *).
50 Settings
menu, please select the
Cost
menu (*) lets you check the cost of the last call you made and of all the calls you made since you last deleted them.
Delete costs
menu (*) lets you delete the cost of your last call and reset the cost counter after entering your PIN 2 code.
Cost
menu and validate.
Page 51

Networks
This menu allows you to configure network preferences.
Settings
On the
Choose
Choose
Choose
Choose
launching a data connection).
menu, please select the
Selection
to activate (automatically or manually) one of t he networks accessible in the area in which your are located.
Preferred
to view all the pre-registered networks.
Network type
GPRS
to select your network: GSM-DCS or PCS (depending on model).
to select the way you want to be attached on the GPRS network: always, or only when needed (when
Networks
menu and [
Select
].
Shortcuts
This menu allows you to customize the settings of your phone to make it as convenient as possible for you to use.
(Function available depending on model)
This menu allows you to allocate functions to the programmable keys:
On the
Settings
Select the key that you wish to modify and validate.
menu, please select the
Choose the function that you want to allocate to this key and validate.
Shortcuts
menu and [
Select
.
].
Date / Time
Set Date/Time
This menu allows you to set the date and time of your phone.
Date / Time
On the
Date:
set the date by entering it directly in digital form or by using the navigation stick.
Use the navigation stick to access the next (or previous) entry field.
Once the date is correct, validate it.
Time:
same procedure as for setting the date.
Settings 51
menu, please select
Set Date/Time
and [
Select
].
Page 52

Automatic update
This menu allows you to choose manual or automatic updating of date and time (after switch off of your phone or when going
abroad for instance) (service depending on the operator).
Date / Time
From the
Please select Automatic, Manual or On demand and press [
menu, please select
Automatic upd.
and [
Select
Select
].
].
Display
This menu allows you to select the date and time display type.
Date / Time
On the
In the list that appears, select the desired display type between:
- Digital,
- None,
- Analog,
by using the navigation stick and validate.
menu, please select
Display
and [
Select
].
Time zone
This menu allows you to change time in relation to the GMT time.
On the
Date / Time
Choose the time of the country desired by calculating the time from the GMT time.
menu, please select
Time zone
and [
Select
].
Daylight savings
This menu allows you to set your phone to the summer/winter time.
On the
Date / Time
depending on the season, and validate.
52 Settings
menu, please select
Daylight savings
and [
Select
]. Select 1 h, 2 h
Summer time
or
Winter time
Page 53

WAP settings
This menu allows you to set various parameters needed for WAP connection.
Settings
On the
You can add or modify URL addresses.
menu, please select
WAP settings
and [
Select
].
Help
This menu allows you to activate or deactivate the display of the help in the phone.
Settings 53
Page 54

Connectivity
You can exchange with other devices (PC, mobile phones, personal assistants, printers, etc.) various data: pictures, sounds,
photos, To Do tasks, organiser events, contacts, etc.
Data exchange can be done through:
- USB cable,
- an infrared connection (depending on model),
- a Bluetooth connection (depending on model).
If you want to exchange objects between the phone memory and a PC, you must install the Wellphone software provided on
CD (depending on model): select Multimedia to open, from the PC, the phone files explorer.
To save contacts, events or tasks, the Wellphone software, provided on the CD with your phone (depending on model) or
available from http:/www.wellphone.com
You can read more details about Phonebook or Calendar in chapters
Note
: If a call comes in during an exchange of data with your PC, the link will be interrupted and will have to be manually re-
started.
Bluetooth (depending on model)
This menu allows you to set your phone Bluetooth connection in order to communicate with other devices equipped with
Bluetooth: for example, an audio connection with a pedestrian kit, a car kit or a data connection with a PC.
Bluetooth is a free wireless connection, with a 10 metre maximum range.
My Bluetooth name
devices connected.
Paired devices
headset).
Mode
: allows you to activate the phone Bluetooth connection.
- Off: Bluetooth connection impossible.
- On and hidden: your phone is not detected by the other devices but the phone detects the other devices.
- On and visible: your phone can be detected by another device.
: allows you to assign a name to your phone for the Bluetooth connection. This name is displayed on the
: allows you to search for devices which may connect with Bluetooth link with your phone (for instance:
IrDA (depending on model)
This menu allows you to activate or deactivate the infrared connection.
54 Connectivity
, must be installed on a PC.
Phonebook
and
Organizer
.
Page 55

Serial speed
This menu enables you to select the speed to be used for data exchanges via your phone's serial port. Except for specific
requirements, it is advisable to stick to the default setting:
Automatic
.
Car kit - Headset
This menu allows you to configure the options of the phone with a pedestrian kit or a car kit (Automatic response, Switch off,
Kit volume).
SyncML (depending on model)
You can synchronize your phonebook, your organizer or your ToDos with your archives stored in your operator’s network
depending on the options offered by your operator.
The local synchronisation with your computer is only computer originated, from Wellphone software; you have only to activate
infrared, Bluetooth, or configure your USB connection in your phone.
Connectivity 55
Page 56

Technical features
Weight: 88 g
Size: 105 x 46 x 14 mm
Original battery: Lithium ion 850 mAh
Battery life calls/standby: up to 4 h/350 h (these values are theoretical ones and given for information only)
Multimedia objects supported:
- Audio formats: iMelody, Midi, wave, AMR, MP3 (depending on model), AAC (depending on model)
- Graphic formats: wbmp, bmp, png, gif, animated gif, jpeg
Size of memory available for messages: up to 200 SMS
Size of memory available for the phonenook and the multimedia objects: 3.0 MB
Maximum size of each message:
- SMS < 160 characters
- MMS < 100 kB for outgoing, 100 kB for incoming messages (depends on the phone configuration and on the operator
reservations)
Using temperature: from - 10°C to + 55°C
56 Technical features
Page 57

Certification and safety information for the United States and countries using FCC standards
FCC Part 15 statement
This device complies with part 15, part 22 and part 24 of the FCC rules. Operation is subject to the following two conditions:
(1) this device may not cause harmful interference, and (2) this device must accept any interference, including interference
that may cause undesired operation.
This equipment has been tested and found to comply with the limits for a Class B digital device, pursuant to Part 15 of the
FCC Rules. These limits are designed to provide reasonable protection against harmful interference in a residential
installation. This equipment generates, uses and can radiate radio frequency energy and, if not installed and used in
accordance with the instructions, may cause harmful interference to radio communications. However, there is no guarantee
that interference will not occur in a particular installation. If this equipment does cause harmful interference to radio or
television reception, which can be determined by turning the equipment off and on, the user is encouraged to try to correct
the interference by one or more of the following measures:
- Reorient or relocate the receiving antenna.
- Increase the separation between the equipment and receiver.
- Connect the equipment into an outlet on a circuit different from that to which the receiver is connected.
Consult the dealer or an experienced radio/TV technician for help.
WARNING
Changes or modifications made to this equipment not expressly approved by Sagem Communication for compliance could
void the user's authority to operate the equipment.
Certification and safety information for the United States and countries using FCC standards 57
Page 58

FCC SAR information
THIS MODEL PHONE MEETS THE FCC'S REQUIREMENTS FOR EXPOSURE TO RADIO WAVES
Your wireless phone is a radio transmitter and receiver. It is designed and manufactured not to exceed the limits for exposure
to radiofrequency (RF) energy set by the United States Federal Communications Commission (FCC). These limits are part
of comprehensive guidelines and establish permitted levels of RF energy for the general population. The guidelines are based
on standards that were developed by independent scientific organizations through periodic and thorough evaluation of
scientific studies. The standards include a substantial safety margin designed to assure the safety of all persons, regardless
of age and health.
The exposure standard for wireless mobile phones employs a unit of measurement known as the Specific Absorption Rate,
or SAR. The SAR limit set by the FCC and Health Canada is 1.6 W/kg (*). Tests for SAR are conducted using standard
operating positions accepted by the FCC with the phone transmitting at its highest certified power level in all tested frequency
bands. Although the SAR is determined at the highest certified power level, the actual SAR level of the phone while operating
can be well below the maximum value. This is because the phone is designed to operate at multiple power levels so as to
use only the power required to reach the network. In general, the closer you are to a wireless base station antenna, the lower
the power output.
Before a phone model is available for sale to the public, it must be tested and certified to the FCC that it does not exceed the
RF limit established by the government-adopted requirement for safe exposure. The tests are performed in positions and
locations (i.e., at the ear and worn on the body) as required by the FCC for each model.
The highest SAR value for these model phones as reported to the FCC when tested for use at the ear and when worn on the
body are (measured at a distance of 0.98 inches (2.5 cm)):
SAR at the ear (W/kg) SAR worn of the body (W/kg)
Version GSM 850 PCS 1900 GSM 850 PCS 1900
my300L B2005a 0.791 0.898 0.432 0.427
my301L B2005a+ 1.140 1.090 0.934 0.597
(*) In the United States and Canada, the SAR limit for mobile phones used by the public is 1.6 watts/kilogram (W/kg)
averaged over one gram of tissue. The standard incorporates a substantial margin of safety to give additional protection
for the public and to account for any variations in measurements.
58 Certification and safety information for the United States and countries using FCC standards
Page 59

While there may be differences between the SAR levels of various phones and at various positions, they all meet the FCC
requirement. The FCC has granted an Equipment Authorization for this model phone with all reported SAR levels evaluated
as in compliance with the FCC RF exposure guidelines. SAR information on this model phone is on file with the FCC and can
be found under the Display Grant section of http://www.fcc.gov/oet/fccid
FCC ID M9HB2005P (my301L).
Additional Information can be found on the website of the World Health Organization (http://www.who.int/emf
after searching on FCC ID M9HB2005 (my300L),
).
Safety Information
Aircraft:
Switch off your wireless device whenever you are instructed to do so by airport or airline staff. If your device offers
a “flight mode” or similar feature, consult airline staff as to its use in flight.
Driving:
Full attention should be given to driving at all times, and regulations restricting the use of wireless devices while
driving must be observed. For further driving safety tips, please refer to
Hospitals:
Mobile phones should be switched off whenever you are requested to do so in hospitals, clinics or health care
facilities. These requests are designed to prevent possible interference with sensitive medical instruments.
Gas stations:
flammable material and chemicals. Switch of your wireless device whenever you are instructed to do so by authorized staff.
Interference with personal medical devices:
manufacturer's instructions to determine if operation of your phone may interfere with the operation of your medical device.
As a general rule:
-
-
The ring tone, info tones, and handsfree talking are reproduced through the loudspeaker. Do not hold the phone to your ear
when it rings or when you have switched on the handsfree function (at least 3.9 inches (10 cm)).
Use only batteries and charging devices designed for your phone. Otherwise you risk serious damage to health and property
and may void any warranty.
CAUTION!
Do NOT open the phone. Only the battery and the SIM card may be removed. Do NOT open the battery.
Keep the battery out of chidren’s reach. Do not allow the battery to be put into the mouth.
Certification and safety information for the United States and countries using FCC standards 59
Obey all posted signs with respect to the use of wireless devices or other radio equipment in locations with
You should always consult your physician and review the device
For pacemakers:
between a mobile phone and a pacemaker to avoid potential interference with the pacemaker. To achieve this, use the
phone on the opposite ear to your pace maker and do not carry it in a breast pocket.
For hearing aids:
you may want to consult your hearing aid manufacturer to discuss alternatives.
Pacemaker manufacturers recommend that a minimum separation of 6 inches (15 cm) be maintained
Some digital wireless phones may interfere with some hearing aids. In the event of such interference,
Small parts like the SIM card could be swallowed by young children.
Driving safety tips
at page 70.
Page 60

Distance of operation
This phone is designed to comply with the FCC radio frequency (RF) exposure guidelines when used as follows:
-
Against the ear:
-
Body worn:
a minimum of 0.98 inches (2.5 cm) from your body. Use of other accessories may not ensure compliance with exposure
guidelines. If you do not use a body worn accessory and are not holding the phone at the ear, position the phone a
minimum of 0.98 inches (2.5 cm) from your body.
Data operation:
-
whole duration of the data transmission.
Place or receive a phone call and hold the phone as you would a wireline telephone.
When transmitting, place the phone in a carrying accessory that contains no metal and positions the phone
When using a data feature, position the phone a minimum of 0.98 inches (2.5 cm) from your body for the
FDA consumer information on wireless phones
FDA consumer information on wireless phones
The US Food and Drug Administration (FDA) provides consumer information on wireless phones
at:http://www.fda.gov/cellphones/qa.html.
Following are safety related questions and answers discussed at this web site:
Do wireless phones pose a health hazard?
The available scientific evidence does not show that any health problems are associated with using wireless phones. There
is no proof, however, that wireless phones are absolutely safe. Wireless phones emit low levels of radiofrequency energy
(RF) in the microwave range while being used. They also emit very low levels of RF when in the stand-by mode. Whereas
high levels of RF can produce health effects (by heating tissue), exposure to low level RF that does not produce heating
effects causes no known adverse health effects. Many studies of low level RF exposures have not found any biological
effects. Some studies have suggested that some biological effects may occur, but such findings have not been confirmed by
additional research. In some cases, other researchers have had difficulty in reproducing those studies, or in determining the
reasons for inconsistent results.
What is FDA's role concerning the safety of wireless phones?
Under the law, FDA does not review the safety of radiation-emitting consumer products such as wireless phones before they
can be sold, as it does with new drugs or medical devices. However, the agency has authority to take action if wireless phones
are shown to emit radiofrequency energy (RF) at a level that is hazardous to the user. In such a case, FDA could require the
manufacturers of wireless phones to notify users of the health hazard and to repair, replace or recall the phones so that the
hazard no longer exists.
60 Certification and safety information for the United States and countries using FCC standards
Page 61

Although the existing scientific data do not justify FDA regulatory actions, FDA has urged the wireless phone industry to take
a number of steps, including the following:
- Support needed research into possible biological effects of RF of the type emitted by wireless phones;
- Design wireless phones in a way that minimizes any RF exposure to the user that is not necessary for device function; and
- Cooperate in providing users of wireless phones with the best possible information on possible effects of wireless phone
use on human health.
FDA belongs to an interagency working group of the federal agenci es that have responsibility for different aspects of RF safety
to ensure coordinated efforts at the federal level. The following agencies belong to this working group:
- National Institute for Occupational Safety and Health
- Environmental Protection Agency
- Federal Communications Commission
- Occupational Safety and Health Administration
- National Telecommunications and Information Administration
The National Institutes of Health participates in some interagency working group activities, as well.
FDA shares regulatory responsibilities for wireless phones with the Federal Communications Commission (FCC). All phones
that are sold in the United States must comply with FCC safety guidelines that limit RF exposure. FCC relies on FDA and
other health agencies for safety questions about wireless phones.
FCC also regulates the base stations that the wireless phone networks rely upon. While these base stations operate at higher
power than do the wireless phones themselves, the RF exposures that people get from these base stations are typically
thousands of times lower than those they can get from wireless phones. Base stations are thus not the primary subject of the
safety questions discussed in this document.
What is FDA doing to find out more about the possible health effects of wireless phone RF?
FDA is working with the U.S. National Toxicology Program and with groups of investigators around the world to ensure that
high priority animal studies are conducted to address important questions about the effects of exposure to radiofrequency
energy (RF).
FDA has been a leading participant in the World Health Organization International Electromagnetic Fields (EMF) Project since
its inception in 1996. An influential result of this work has been the development of a detailed agenda of research needs that
has driven the establishment of new research programs around the world. The Project has also helped develop a series of
public information documents on EMF issues.
Certification and safety information for the United States and countries using FCC standards 61
Page 62

FDA and the Cellular Telecommunications & Internet Association (CTIA) have a formal Cooperative Research and
Development Agreement (CRADA) to do research on wireless phone safety. FDA provides the scientific oversight, obtaining
input from experts in government, industry, and academic organizations. CTIA-funded research is conducted through
contracts to independent investigators. The initial research will include both laboratory studies and studies of wireless phone
users. The CRADA will also include a broad assessment of additional research needs in the context of the latest research
developments around the world.
What steps can I take to reduce my exposure to radiofrequency energy from my wireless phone?
If there is a risk from these products--and at this point we do not know that there is--it is probably very small. But if you are
concerned about avoiding even potential risks, you can take a few simple steps to minimize your exposure to radiofrequency
energy (RF). Since time is a key factor in how much exposure a person receives, reducing the amount of time spent using a
wireless phone will reduce RF exposure.
If you must conduct extended conversations by wireless phone every day, you could place more distance between your body
and the source of the RF, since the exposure level drops off dramatically with distance. For example, you could use a headset
and carry the wireless phone away from your body or use a wireless phone connected to a remote antenna.
Again, the scientific data
exposure from these products, you can use measures like those described above to reduce your RF exposure from wireless
phone use.
What about children using wireless phones?
The scientific evidence does not show a danger to users of wireless phones, including children and teenagers. If you want to
take steps to lower exposure to radiofrequency energy (RF), the measures described above would apply to children and
teenagers using wireless phones. Reducing the time of wireless phone use and increasing the distance between the user and
the RF source will reduce RF exposure.
Some groups sponsored by other national governments have advised that children be discouraged from using wireless
phones at all.
Do hands-free kits for wireless phones reduce risks from exposure to RF emissions?
Since there are no known risks from exposure to RF emissions from wireless phones, there is no reason to believe that
handsfree kits reduce risks. Hands-free kits can be used with wireless phones for convenience and comfort. These systems
reduce the absorption of RF energy in the head because the phone, which is the source of the RF emissions, will not be placed
against the head. On the other hand, if the phone is mounted against the waist or other part of the body during use, then that
part of the body will absorb more RF energy. Wireless phones marketed in the U.S. are required to meet safety requirements
regardless of whether they are used against the head or against the body. Either configuration should result in compliance
with the safety limit.
62 Certification and safety information for the United States and countries using FCC standards
do not
demonstrate that wireless phones are harmful. But if you are concerned about the RF
Page 63

Do wireless phone accessories that claim to shield the head from RF radiation work?
Since there are no known risks from exposure to RF emissions from wireless phones, there is no reason to believe that
accessories that claim to shield the head from those emissions reduce risks. Some products that claim to shield the user from
RF absorption use special phone cases, while others involve nothing more than a metallic accessory attached to the phone.
Studies have shown that these products generally do not work as advertised. Unlike "hand-free" kits, these so-called "shields"
may interfere with proper operation of the phone. The phone may be forced to boost its power to compensate, leading to an
increase in RF absorption.
Driving safety tips
Wireless phones give people the ability to communicate almost anywhere, anytime. But an important responsibility
accompanies those benefits, one that every wireless phone user must uphold. When driving a car, driving is your first
responsibility.
Below are safety tips to follow while driving and using a wireless phone that should be easy to remember.
Get to know your wireless phone and its features such as speed dial and redial.
When available, use a hands free device.
Position your wireless phone within easy reach and where you can grab it without removing your eyes from the road. If you
get an incoming call at an inconvenient time, if possible, let your voice mail answer it for you.
Let the person you are speaking with know you are driving; if necessary, suspend the call in heavy traffic or hazardous
weather conditions.
Do not take notes or look up phone numbers while driving.
Dial sensibly and assess the traffic; if possible, place calls when you are not moving or before pulling into traffic. Try to plan
your calls before you begin your trip. But if you need to dial while driving, follow this simple tip--dial only a few numbers, check
the road and your mirrors, then continue.
Do not engage in stressful or emotional conversations that may be distracting.
Use your wireless phone to call for help. Dial 9-1-1 or other local emergency number in the case of fire, traffic accident, road
hazard or medical emergency.
Use your wireless phone to help others in emergencies. If you see an auto accident, crime in progress or other serious
emergency where lives are in danger, call 9-1-1 or other local emergency number.
Call roadside assistance or a special wireless non-emergency assistance number when necessary. If you see a broken-down
vehicle posing no serious hazard, a broken traffic signal, a minor traffic accident where no one appears injured or a vehicle
you know to be stolen, call roadside assistance or other special non-emergency wireless number.
Certification and safety information for the United States and countries using FCC standards 63
Page 64

Certification and safety information for Europe and countries using CE standards
CE conformance statement
64 Certification and safety information for Europe and countries using CE standards
Page 65

CE SAR information
THIS MODEL MEETS INTERNATIONAL GUIDELINES FOR EXPOSURE TO RADIO WAVES
Your mobile device is a radio transmitter and receiver. It is designed not to exceed the limits for exposure to radio waves
recommended by international guidelines. These guidelines were developed by the independent scientific organization
ICNIRP and include safety margins designed to assure the protection of all persons, regardless of age and health.
The guidelines use a unit of measurement known as the Specific Absorption Rate, or SAR. The SAR limit for mobile devices
is 2 W/kg and the highest SAR value for this device when tested at the ear was 1.25 W/kg (*). As mobile devices offer a range
of functions, they can be used in other positions, such as on the body as described in this user guide (**).
As SAR is measured utilizing the devices highest transmitting power the actual SAR of this device while operating is typically
below that indicated above. This is due to automatic changes to the power level of the device to ensure it only uses the
minimum level required to reach the network.
The World Health Organization has stated that present scientific information does not indicate the need for any special
precautions for the use of mobile devices. They note that if you want to reduce your exposure then you can do so by limiting
the length of calls or using a 'hands-free' device to keep the mobile phone away from the head and body. Additional
Information can be found on the websites of the World Health Organization (http://www.who.int/emf
Advice for limiting exposure to radiofrequency (RF) fields
For individuals concerned about limiting their exposure to RF fields, the World Health Organization (WHO) provides the
following advice:
Precautionary measures: Present scientific information does not indicate the need for any special precautions for the use of
mobile phones. If individuals are concerned, they might choose to limit their own or their children’s’ RF exposure by limiting
the length of calls, or using "hands-free" devices to keep mobile phones away from the head and body.
Further information on this subject can be obtained from the WHO home page http://www.who.int/peh-emf
sheet 193: June 2000.
(*) The tests are carried out in accordance with international guidelines for testing.
(**) Please see the Distance of operation section.
Certification and safety information for Europe and countries using CE standards 65
).
WHO Fact
Page 66

Safety information
Never attempt to disassemble your phone. You alone are responsible for how you use your phone and any consequences of
its use.
As a general rule, always switch off your phone wherever the use of a phone is prohibited.
Use of your phone is subject to safety measures designed to protect users and their environment.
Do not use your phone in damp areas (bathroom, swimming pool…). Protect it from liquids and other moisture.
Do not expose your phone to extreme temperatures lower than - 10°C and higher than + 55°C.
The physicochemical processes created by chargers impose temperature limits when charging the battery. Your phone
automatically protects the batteries in extreme temperatures.
Do not leave your phone within the reach of small children (certain removable parts may be accidentally ingested).
Electrical safety
Only use the chargers listed in the manufacturer’s catalogue. Using any other charger may be dangerous; it would also
invalidate your warranty. Line voltage must be exactly the one indicated on the charger’s serial plate.
Aircraft safety
When travelling by plane, you will need to switch your phone off when so instructed by the cabin crew or the warning signs.
Using a mobile phone may be dangerous to the operation of the aircraft and may disrupt the phone network.
Its use is illegal and you could be prosecuted or banned from using cellular networks in the future if you do not abide by these
regulations.
Explosive materials
Please comply with warning signs at petrol station asking you to switch your phone off. You will need to comply with radio
equipment usage restrictions in places such as chemical plants, fuel depots and at any location where blasting operations
are under way.
Electronic equipment
To avoid the risk of demagnetisation, do not let electronic devices close to your phone for a long time.
Electronic medical equipment
Your phone is a radio transmitter which may interfere with electronic medical equipment or implants, such as hearing aids,
pacemakers, insulin pumps, etc. It is recommended that a minimum separation of 15 cm be maintained between the phone
and an implant. Your doctor or the manufacturers of such equipment will be able to give you any advice you may need in this
area.
Hospitals
Always make sure that your phone is switched off in hospitals when so instructed by warning signs or by medical staff.
66 Certification and safety information for Europe and countries using CE standards
Page 67

Road safety
Do not use your phone when driving. In order to give your full attention to driving, stop and park safely before making a call.
You must comply with any current legislation.
Distance of operation
This phone model has been tested and meets radiofrequency exposure guidelines when used as follows:
- against the ear: place or receive a phone call and hold the phone as you would a wireline telephone,
- body worn: when transmitting, place the phone in a carry accessory that contains no metal and positions the phone a
minimum of 2.5 cm form your body. Use of other accessories may not ensure compliance with radiofrequency exposure
guidelines. If you do not use a body worn accessory and are not holding the phone at the ear, position the phone a
minimum of 2.5 cm from your body,
- data operation: when using a data feature, position the phone a minimum of 2.5 cm from your body for the whole duration
of the data transmission.
CE Environment
Packaging
To facilitate the recycling of packaging materials, please obey the sorting rules instituted locally for this type of waste.
Batteries
Spent batteries must be deposited at the designated collection points.
The product
The crossed-out waste bin mark affixed to the product means that it belongs to the family of electrical and electronic
equipment.
To promote the recycling and recovery of waste electrical and electronic equipment (WEEE) and at the same time
safeguard the environment, European regulations require you to obey the sorting rules instituted locally for this type
of waste.
Certification and safety information for Europe and countries using CE standards 67
Page 68

For Customers in the United States
LIMITED WARRANTY
Brightstar US, Inc. (Brightstar) warrants this product including any accessories sold for use with the products against defects
in materials or workmanship under normal usage for the periods outlined in the warranty provided with the product, as follows:
DEAD ON ARRIVAL / OUT OF BOX FAILURE (DOA):
This product is for standard consumer use only and is guaranteed to be in proper working order as is determined upon initial
removal from the package and subsequent power up and test call. If this product is determined to be defective, Brightstar will
repair or replace the product, at its option, at no charge.
OUT OF WARRANTY REPAIR
Any unit requiring repair not covered by the warranty requires authorization from your service provider and Brightstar. Contact
your service provider to obtain this authorization.
This warranty is valid only in the United States.
OTHER CONDITIONS
If Brightstar chooses to replace the equipment, Brightstar may replace it with reconditioned equipment. Parts used in repairing
or replacing the equipment will be warranted for 90 days from the date the equipment is returned to you. This warranty is not
transferable.
LIMITATIONS AND EXCLUSIONS
TO THE EXTENT PERMITTED BY APPLICABLE LAW, BRIGHTSTAR WILL NOT BE RESPONSIBLE FOR ANY IMPLIED
WARRANTIES, INCLUDING WITHOUT LIMITATION, THE IMPLIED WARRANTIES OF MERCHANTIBILITY OR FITNESS
FOR A PARTICULAR PURPOSE. BRIGHTSTAR WILL NOT, IN ANY EVENT, BE LIABLE IN CONTRACT OR TORT FOR
DAMAGES IN EXCESS OF THE PURCHASE PRICE OF THE PRODUCT OR ACCESSORY, OR FOR ANY INCIDENTAL,
INDIRECT, SPECIAL OR CONSEQUENTIAL DAMAGES OF ANY KIND, INCLUDING TRAVEL EXPENSE, TELEPHONE
CHARGES, LOSS OF REVENUE, LOSS OF TIME, INCONVENIENCE LOSS OF USE OF EQUIPMENT, LOSS OF
INFORMATION OR DATA, OR OTHER DAMAGE OR LOSS CAUSED BY OR IN CONNETION WITH THE PRODUCTS,
ACCESSORIES, SOFTWARE OR EQUIIPMENT FAILING TO FUNCTION PROPERLY. THIS WARRANTY SETS FORTH
ALL OF BRIGHTSTAR’S REPONSIBILITIES REGARDING THIS PRODUCT AND ITS ACCESSORIES.
Some states and jurisdictions do not allow the exclusion or limitation of incidental or consequential damages, or allow
limitations on how long an implied warranty lasts, so the above limitations or exclusions may not apply to you.
68 For Customers in the United States
Page 69

Limited Warranty
The mobile phone and software program developed by Sagem Communication (SAGEM) remains the exclusive property of
Sagem. YOU ARE STRICTLY PROHIBITED FROM MODIFYING, TRANSLATING, DE-COMPILING OR DISASSEMBLING
THIS SOFTWARE PROGRAM OR ANY PART THEREOF.
Brightstar US, Inc. (Brightstar) is the exclusive distributor for Sagem in the United States and is responsible for all warranties
for SAGEM phones and accessories sold in the United States. Please DO NOT contact Sagem directly regarding any
warranty claims; doing so will only delay the processing of your claim.
THE LIMITED WARRANTY AND REMEDIES SET FORTH IN THIS WARRANTY CARD ARE THE EXCLUSIVE
WARRANTIES AND REMEDIES PROVIDED BY BRIGHTSTAR AND ARE IN LIEU OF ALL OTHER WARRANTIES,
TERMS, OR CONDITIONS, EXPRESS OR I MPLIED, EITHER IN FACT OR BY OPERATION OF LAW. BRIGHTSTAR OR
SAGEM MAKES NO OTHER WARRANTY, EXPRESS OR IMPLIED, AND EXPRESSLY DISCLAIMS ALL IMPLIED
WARRANTIES, INCLUDING ALL WARRANTIES OF MERCHANTABILITY OR FITNESS FOR A PARTI CULAR
PURPOSE. THE REMEDIES SET FO RTH HEREIN ARE YOUR EXCLUSIVE REMEDIES FOR BREACH OF WARRANTY .
Usage precautions
Your phone allows you to download ring tones, icons and animated screensavers. Some of these items may contain data that
may cause malfunction of your phone or data losses (a computer virus, for example). For this reason, Brightstar disclaims all
responsibility concerning (1) the reception of downloaded data or losses of such data, (2) such data's impact on the operation
of the phone, and (3) damages resulting from receiving any downloaded data or loss of such data. In addition, any failure
caused by receiving downloaded data that do not comply with the phone's specifications is excluded from the warranty. The
diagnosis and repair of a phone infected by downloaded data will be at the expense of the customer.
Warranty conditions
Whenever you wish to make a warranty claim, please contact Brightstar at the address given below and present the
purchasing paperwork that was given to you.
1.
Brightstar warrants that the new phone (excluding consumablesbut including new accessories bundled with the phone), is
free from defects in materials and workmanship under normal usage for a period of twelve (12) months effective from the date
you purchased the phone, to be evidenced by presentation of the paperwork stating the purchase date of the phone. Phones
that have been repaired or replaced as standard during the warranty period stated above are warranted (parts and labor) until
the later of these two dates: Expiry of the original warranty period of twelve (12) months stated above; or three (3) months
from the repair or replacement under warranty.
2.
All faulty phones under warranty will be replaced or repaired free of charge at Brightstar’s option.
For Customers in the United States 69
Page 70

3.
You are responsible for sending the phone to the repair center. In order to repair or replace a phone under warranty,
Brightstar also requires that a legible and unmodified purchase document, stating vendor's name and address, date and place
of purchase, type of phone and IMEI (to display the IMEI on your phone's screen, type: *#06#), be attached to the warranty,
and that the information on the phone identification label be legible and that such label or any other seal have not been
tampered with. The warranty applies under normal usage for the period outlined above. Prior to sending the phone for repair,
it is your responsibility to backup at your expense any customized data stored in the phone (such as phonebook, settings,
wallpapers, and previously downloaded data). BRIGHTSTAR IS NOT RESPONSIBLE FOR DAMAGE TO CUSTOMER
FILES, PROGRAMS OR DATA. The information or operating elements and the contents of files will not be re-installed in any
case in the event of loss. Brightstar may decide, at its option, to repair the phone with new or reconditioned parts, or replace
the phone with a new phone or with a phone in good working condition. During its repair work Brightstar may make, where
necessary, any technical modifications to the phone where these modifications do not adversely affect functionality. Faulty
parts to be replaced during a repair under warranty become the property of Brightstar.
subject to the full payment of the sums due for the phone when the request for support is made.
4.
Breakdowns, damage or malfunctions due to the following are excluded from the limited warranty: (i) non-compliance with
the installation and use instructions, (ii) an external cause (such as shock, lightning, fire, vandalism, malice, water damage of
any type, contact with various liquids or any harmful agent, unsuitable electric current, extreme humidity or heat, improper
storage, etc.), (iii) modifications of the phone made without the written consent of Brightstar, (iv) a servicing fault, as described
in the documentation supplied with the phone, (v) lack of supervision or care, (vi) poor environmental conditions of the phone
(including temperature and hygrometry, effects of variations in electric voltage, interference from the mains network or earth),
(vii) repair, including opening or trying to open the phone or servicing done by personnel not approved by Brightstar, (viii)
inadequate packaging and/or poor packing of the phone that is sent back to Brightstar, (ix) the use of products or accessories
not sold by Brightstar as compatible with the phone, or (x) the opening or closing of a SIM Lock done without the agreement
of the original operator.
5.
In addition, the warranty does not cover: (i) normal wear and tear of the phone and accessories, (ii) change of parameters
of the cellular network made after the phone was sold, (iii) supply of new software versions, (iv) delivery of consumables and
installation or replacement of these consumables, (v) phone or software modified or added without the written consent of
Brightstar, (vi) phones returned to Brightstar without having complied with the return procedure specific to the phone covered
by this warranty, or (vii) communication problems linked with a poor environment, including problems accessing and/or
logging onto the Internet, breakdowns of the access network, the failure of the subscriber's or his correspondent's line,
transmission fault (such as poor geographic coverage by radio transmitters, interference, disturbance, failure or poor quality
of phone lines, etc.), a fault inherent to the local network (such as cabling, file server, user phone) and/or transmission netwo rk
fault (such as interference, disturbance, failure or poor quality of the network, etc.).
70 For Customers in the United States
The application of the warranty is
Page 71

6.
In the event a customer submits a product for repair or replacement and such product is excluded from warranty coverage
or the warranty period has expired, Brightstar will draw up an estimate to be given to the customer for acceptance before any
repair commences. The repair and freight costs (to and from the repair center) given in an estimate accepted by the customer
will be charged to the customer.
7
. Any questions or correspondence regarding this limited warranty should be addressed to:
Brightstar US, Inc.
Attn: SAGEM Warranty & Repair Services
1001 Technology Way
Libertyville, IL 60048
These provisions are valid unless Brightstar has made a special written agreement with the customer. If one of the
provisions turns out to infringe a requirement under applicable law that consumers could have the benefit of under the
national legislation, such provision will not be applied, but all other provisions will remain valid.
For Customers in the United States 71
Page 72

For customers outside the United States
Warranty
You must always use your phone for the purpose for which it was designed, under normal operating conditions. Sagem
Communication declines all responsibility for any use outside of the scope of its designed purpose and for any consequences
of this use.
The software program developed by SAGEM remains the exclusive property of Sagem Communication. It is therefore highly
prohibited to modify, translate, de-compile or disassemble this software program or any part thereof.
Usage precautions
Your phone allows you to download ring tones, icons and animated screensavers. Some of these items may contain data that
may cause malfunctions of your phone or data losses (virus for example).
For this reason, Sagem Communication rejects all responsibility concerning (1) the reception of downloaded data or losses
of the said data, (2) the impact on the operation of the phone and (3) damages resulting from receiving the said downloaded
data or loss of said data. In addition, Sagem Communication states that a failure caused by receiving downloaded data that
do not comply with the specifications set by Sagem Communication is excluded from the warranty. Consequently, the
diagnosis and repair of a phone infected by the said downloaded data will be at the expense of the customer.
Any content that you download to your phone may be protected by copyright belonging to third parties and consequently you
may not have the right to use this content or its use may be restricted. Consequently it is up to you to ensure that you have
permission, such as under the terms of a license agreement, to use any content that you download. Furthermore, Sagem
Communication does not guarantee the accuracy nor the quality of any content that you download. You alone are responsible
for the content that you download to your mobile phone and how you use it. Sagem Communication cannot be held
responsible for this content nor for its use.
It is your responsibility to ensure compliance, at your own expense, with the laws and regulations applicable in the country
where you use your phone.
Warranty conditions
Whenever you wish to make use of the warranty, please contact your vendor and present him with the purchasing paperwork
that he gave you.
If a fault occurs, he will advise you.
1.
The new phone (excluding consumables), including new accessories bundled with the phone, are guaranteed by Sagem
Communication, parts and labour (apart from travel) against any manufacturing fault for a period of twelve (12) months with
effect from the sale of the phone to the customer, on presentation of the paperwork stating the purchase date of the phone.
72 For customers outside the United States
Page 73

Phones that have been repaired or replaced as standard during the warranty period stated above are guaranteed (parts and
labour) until the later of these two dates:
Expiry of the guarantee period of twelve (12) months stated above or three (3) months with effect from the date of support
provided by Sagem Communication.
Your legal rights under the terms of applicable national law as well as your rights in relation to your retailer, as set out in the
sales contract, remain applicable and are not in any way affected by this guarantee.
In any disputes, the phone is covered by the legal warranty against the consequences of faults or hidden defects in
compliance with articles 1641 and subsequent of the French civil code.
2.
All faulty phones under warranty will be replaced or repaired free of charge at Sagem Communication's option (with the
exclusion of repair of any other damage), once it has been specified that the work required for the application of the warranty
will be done in a workshop and that the return costs (transport and insurance) of the phone to the address to be indicated to
it by the Sagem Communication after-sales service, whose phone number will appear on the delivery note, will be charged
to the customer.
Subject to essential legal provisions, Sagem Communication does not accept any warranty, explicit or implicit, other than the
warranty provided expressly in this chapter, nor shall Sagem Communication accept responsibility for any immaterial and/or
indirect damages (such as loss of orders, loss of profit or any other financial or commercial damage) under the warranty or not
3.
The acceptance of a phone under warranty demands that a purchase document that is legible and without modi-fication,
stating vendor's name and address, date and place of purchase, type of phone and IMEI, are attached to the warranty, and
that the information on the phone identification label is legible and that this label or any other seal has not been tampered with.
The warranty applies in normal conditions of use.
Prior to sending the phone for repair, it is the customer's responsibility to backup at his expense the customized data stored
in the phone (phonebook, settings, wallpapers). A list of backup facilities can be provided by Sagem Communication on
request. The responsibility of Sagem Communication cannot be invoked if damage occurs to customer files, programs or
data. The information or operating elements and the contents of files will not be re-installed in any case in the event of loss.
Sagem Communication may decide, at its option, to repair the phone with new or reconditioned parts, replace the phone with
a new phone or, in any dispute, a phone in good working condition. During its work Sagem Communication reserves the
facility to make, where necessary, any technical modifications to the phone where these modifications doe not adversely
affect its initial purpose.
Faulty parts to be replaced during a repair under warranty will become the property of Sagem Communication.
The phone repair and standstill time during the warranty period may not lead to an extension of the warranty period as stated
in article 1 above, provided no other vital provisions have been agreed.
The application of the warranty is subject to the full payment of the sums due for the phone when the request for support is
made.
For customers outside the United States 73
Page 74

4.
The following are excluded from the warranty:
Breakdowns or malfunctions due to non-compliance with the installation and use instructions, to an external cause of the
phone (shock, lightning, fire, vandalism, malice, water damage of any type, contact with various liquids or any harmful agent,
unsuitable electric current...), to modifications of the phone made without the written consent of Sagem Communication, to a
servicing fault, as described in the documentation supplied with the phone, to lack of supervision or care, to poor
environmental conditions of the phone (especially temperature and hygrometry, effects of variations in electric voltage,
interference from the mains network or earth) or even due to a repair, a call-out (opening or trying to open the phone) or to
servicing done by personnel not approved by Sagem Communication.
Damage resulting from inadequate packaging and/or poor packing of the phone sent back to Sagem Communication.
Normal wear and tear of the phone and accessories.
Communication problems linked with a poor environment, especially:
Problems accessing and/or logging onto the Internet, such as breakdowns of the access network, the failure of the
subscriber's or his correspondent's line, transmission fault (poor geographic coverage by radio transmitters, interference,
disturbance, fai-lure or poor quality of phone lines...), a fault inherent to the local network (cabling, file server, user phone)
and/or transmission network fault (interference, disturbance, failure or poor quality of the network...).
Change of parameters of the cellular network made after the phone was sold.
Supply of new software versions.
Current servicing work: delivery of consumables, installation or replacement of these consumables…
Call-outs for phone or software modified or added without the written consent of Sagem Communication.
Faults or disruptions resulting from the use of products or accessories not compatible with the phone.
Phones returned to Sagem Communication without having complied with the return procedure specific to the phone cove-red
by this warranty.
The opening or closing of a SIM operator key and call-outs resulting in the non-operation of the phone resulting from the
opening or closing of SIM operator key done without the agreement of the original operator.
5.
In the cases of warranty exclusion and of expiry of the warranty period, Sagem Communication shall draw up an estimate
to be given to the customer for acceptance before any call-out. The repair and carriage costs (there and back) given in the
accepted estimate will be charged to the customer.
These provisions are valid unless a special written agreement has been made with the customer. If one of the provisions turns
out to infringe a legally essential rule that consumers could have the benefit of under the national legislation, this provision
will not be applied, but all other provisions will remain valid.
6
. Any questions or correspondence regarding this limited warranty should be addressed to:
www.planetsagem.com.
74 For customers outside the United States
Page 75

End User Licence Agreement (EULA), for the software
CONTEXT AND ACCEPTATION OF THE AGREEMENT
You have acquired a Mobile Phone device ("DEVICE"), manufactured by Sagem Communication (SAGEM), that includes
software either developed by SAGEM itself or licensed third party Software suppliers ("SOFTWARE COMPANIES") to
SAGEM with the rights to sub-license it to the purchaser of the device. Those installed software products whatever their
company of origin, and wherever the name of the company of origin is indicated of not in the DEVICE documentation, as well
as associated media, printed materials, and "online" or electronic documentation ("SOFTWARE") are protected by United
States and international intellectual property laws and treaties. The SOFTWARE is licensed, not sold. The owner of the
Software expressly reserves all rights.
IF YOU DO NOT AGREE TO THIS END USER LICENSE AGREEMENT ("EULA"), DO NOT USE THE DEVICE OR COPY
THE SOFTWARE. INSTEAD, PROMPTLY CONTACT SAGEM FOR INSTRUCTIONS ON RETURN OF THE UNUSED
DEVICE(S) FOR A REFUND. ANY USE OF THE SOFTWARE, INCLUDING BUT NOT LIMITED TO USE ON THE DEVICE,
WILL CONSTITUTE YOUR AGREEMENT TO THIS EULA (OR RATIFICATION OF ANY PREVIOUS CONSENT).
SOFTWARE includes software already installed on the DEVICE ("DEVICE Software") and Software contained on the
CDROM disk ("Companion CD"), if any is supplied with the product.
GRANT OF SOFTWARE LICENCE
This EULA grants you the following licence:
DEVICE Software.
Software may be inoperable if you do not have and maintain a service account with an appropriate Mobile Operator, or if the
Mobile Operator's network facilities are not operating or configured to operate with the DEVICE software.
COMPANION CD.
install and use the software component(s) contained in the Companion CD only in accordance with the terms of the printed
or online end user license agreement(s) provided with such component(s). In the absence of an end user license agreement
for particular component(s) of the Companion CD, you may install and use only one (1) copy of such component(s) on the
DEVICE or a single computer with which you use the DEVICE.
End User Licence Agreement (EULA), for the software 75
You may use the DEVICE Software as installed on the DEVICE. All or certain portions of the DEVICE
If any is supplied, additional software for your personal computer is included with your DEVICE. You may
Page 76

Security Updates.
rights management technology, content providers are using the digital rights management technology ("DRM") contained in
the SOFTWARE to protect the integrity of their content ("Secure Content") so that their intellectual property, including
copyright, in such content is not misappropriated. Owners of such Secure Content ("Secure Content Owners") may, from time
to time, request manufacturers or SOFTWARE SUPPLIERS to provide security related updates to the DRM components of
the SOFTWARE ("Security Updates") that may affect your ability to copy, display and/or play Secure Content through the
SOFTWARE or third party applications that utilise the DRM.
You therefore agree that, if you elect to download a licence from the Internet that enables your use of Secure Content,
Suppliers may, in conjunction with such licence, also downl oad onto your DEVICE such Security Updates that a Secure
Content Owner has requested that SOFTWARE SUPPLIERS distribute. SAGEM and SOFTWARE SUPPLIERS will NOT
retrieve any personally identifiable information, or any other information, from your DEVICE by downloading such Security
Updates.
DESCRIPTION OF OTHER RIGHTS AND LIMITATIONS COPYRIGHT.
All title and intellectual property rights in and to the SOFTWARE (including but not limited to any images, photographs,
animations, video, audio, music, text and "applets," incorporated into the SOFTWARE), the accompanying printed materials,
and any copies of the SOFTWARE, are owned by SAGEM or the SOFTWARE SUPPLIERS. You may NOT copy the printed
materials accompanying the SOFTWARE. All title and in tellectual property rights in and to the content which may be accessed
through use of the SOFTWARE is the property of the respective content owner and may be protected by applicable copyright
or other intellectual property laws and treaties. THIS EULA GRANTS YOU NO RIGHTS TO USE SUCH CONTENT. All rights
not specifically granted under this EULA are reserved by SAGEM and the SOFTWARE SUPPLIERS.
Limitations on Reverse Engineering, Decompilation and Disassembly. You may not reverse engineer, decompile, or
disassemble the SOFTWARE.
Single DEVICE.
installed in the memory of the DEVICE may only be used as part of the DEVICE.
Single EULA.
multiple media versions (e.g., in the user documentation and in the software). Even if you receive multiple versions of the
EULA, you are licensed to use only one (1) copy of the DEVICE Software.
Software Transfer.
Companion CD, except as permitted by the applicable Mobile Operator. In the event that the Mobile Operator permits such
transfer, you may transfer all of your rights under this EULA only as part of a sale or transfer of the DEVICE, provided you
retain no copies, you transfer all of the SOFTWARE (including all component parts, the media and printed materials, any
upgrades , this EULA and, if applicable, the Certificate(s) of Authenticity), and the recipient agrees to the terms of this EULA.
If the SOFTWARE is an upgrade, any transfer must include all prior versions of the SOFTWARE.
Software Rental.
76 End User Licence Agreement (EULA), for the software
The SOFTWARE may include digital rights management technology. If SOFTWARE does contain digital
The DEVICE Software is licensed with the DEVICE as a single integrated product. The DEVICE Software
The package for the DEVICE may contain multiple versions of this EULA, such as multiple translations and/or
You may NOT transfer any of your rights under this EULA with regard to the DEVICE Software or
You may not rent or lease the SOFTWARE.
Page 77

Speech/Handwriting Recognition.
should understand that speech and handwriting recognition are inherently statistical processes; that recognition errors are
inherent in the processes; and that errors can occur in the component's recognition of your handwriting or speech, and the
final conversion into text. Neither SAGEM nor its suppliers shall be liable for any damages arising out of errors in the speech
and handwriting recognition processes.
NOTICE REGARDING THE MPEG-4 VISUAL STANDARD.
technology. MPEG LA, L.L.C. requires the following notice:
USE OF THIS SOFTWARE IN ANY MANNER THAT COMPLIES WITH THE MPEG-4 VISUAL STANDARD IS PROHIBITED,
EXCEPT FOR USE DIRECTLY RELATED TO (A) DATA OR INFORMATION (i) GENERATED BY AND OBTAINED
WITHOUT CHARGE FROM A CONSUMER NOT THEREBY ENGAGED IN A BUSINESS ENTERPRISE, AND (ii) FOR
PERSONAL USE ONLY; AND (B) OTHER USES SPECIFICALLY AND SEPARATELY LICENSED BY MPEG LA, L.L.C.
If you have questions regarding this Notice, please contact MPEG LA, L.L.C., 250 Steele Street, Suite 300, Denver,
Colorado 80206; Telephone 303 331.1880; FAX 303 331.1879.
Termination. Without prejudice to any other rights, SAGEM may terminate this EULA if you fail to comply with the terms and
conditions of this EULA. In such event, you must destroy all copies of the SOFTWARE and all of its component parts.
Consent to Use of Data.
any manner as part of product support services related to the SOFTWARE. SOFTWARE SUPPLIERS may use this
information solely to improve their products or to provide customised services or technologies to you. SOFTWARE
SUPPLIERS may disclose this information to others, but only in a form that does not personally identifies you.
Internet Gaming/Update Features.
features within the SOFTWARE, it is necessary to use certain computer system, hardware, and software information to
implement the features. By using these features, you explicitly authorise SOFTWARE SUPPLIERS to use this information
solely to improve their products or to provide customized services or technologies to you. SOFTWARE SUPPLIERS may
disclose this information to others, but only in a form that does not personally identifies you.
Internet-Based Services Components.
certain Internet-based services. You acknowledge and agree that SOFTWARE SUPPLIERS may automatically check the
version of the SOFTWARE and/or its components that you are utilising and may provide upgrades or supplements to the
SOFTWARE that may be automatically downloaded to your Device.
Links to Third Party Sites.
the SOFTWARE. The third party sites are not under the control of SAGEM. Neither SAGEM nor its affiliates are responsible
for (i) the contents of any third party sites, any links contained in third party sites, or any changes or updates to third party
sites, or (ii) webcasting or any other form of transmission received from any third party sites. If the SOFTWARE provides links
to third party sites, those links are provided to you only as a convenience, and the inclusion of any link does not imply an
endorsement of the third party site by SAGEM or its affiliates.
End User Licence Agreement (EULA), for the software 77
If the SOFTWARE includes speech and/or handwriting recognition component(s), you
The SOFTWARE may include MPEG-4 visual decoding
You agree that SOFTWARE SUPPLIERS may collect and use technical information gathered in
If the SOFTWARE provides, and you choose to utilize, the Internet gaming or update
The SOFTWARE may contain components that enable and facilitate the use of
The SOFTWARE may provide you with the ability to link to third party sites through the use of
Page 78

Additional Software/Services.
updates, supplements, add-on components, or Internet-based services components of the SOFTWARE after the date you
obtain your initial copy of the SOFTWARE ("Supplemental Components").
If SAGEM provides or makes available to you Supplemental Components and no other EULA terms are provided along with
the Supplemental Components, then the terms of this EULA shall apply.
SAGEM reserves the right to discontinue any Internet-based services provided to you or made available to you through the
use of the SOFTWARE.
EXPORT RESTRICTIONS.
with all applicable international and national laws that apply to the SOFTWARE, including the U.S. Export Administration
Regulations, as well as end-user, end-use and destination restrictions issued by U.S. and other governments.
UPGRADES AND RECOVERY MEDIA
- DEVICE Software. If the DEVICE Software is provided by SAGEM separate from the DEVICE on media such as a ROM
chip, CD ROM disk(s) or via web download or other means, and is labeled "For Upgrade Purposes Only", you may install
one copy of such DEVICE Software onto the DEVICE as a replacement copy for the existing DEVICE Software and use it
in accordance with this EULA, including any additional EULA terms accompanying the upgrade DEVICE Software.
- COMPANION CD. If any Companion CD component(s) is provided by SAGEM separate from the DEVICE on CD ROM
disk(s) or via web download or other means, and labelled "For Upgrade Purposes Only" , you may (i) install and use one
copy of such component(s) on the computer(s) you use to exchange data with the DEVICE as a replacement copy for the
existing Companion CD component(s).
RESPONSIBILITIES
SUPPORT AND INFORMATION Should you have any questions concerning this EULA, or if you desire to contact SAGEM
for any other reason, please refer to the address provided in the documentation for the DEVICE.
SAGEM SHALL HAVE NO LIABILITY FOR ANY INDIRECT, SPECIAL, CONSEQUENTIAL OR INCI DENTAL DAMAGES
ARISING FROM OR IN CONNECTION WITH THE USE OR PERFORMANCE OF THE SOFTWARE. THIS LIMITATION
SHALL APPLY EVEN IF ANY REMEDY FAILS OF ITS ESSENTIAL PURPOSE.
FOR APPLICABLE LIMITED WARRANTIES AND SPECIAL PROVISIONS PERTAINING TO YOUR PARTICULAR
JURISDICTION, PLEASE REFER TO YOUR WARRANTY BOOKLET INCLUDED WITH THIS PACKAGE OR PROVIDED
WITH THE SOFTWARE PRINTED MATERIALS.
78 End User Licence Agreement (EULA), for the software
The SOFTWARE may permit SAGEM to provide or make available to you SOFTWARE
You acknowledge that SOFTWARE is subject to U.S. export jurisdiction. You agree to comply
Page 79

Java™
You are the owner of a SAGEM mobile phone that gives you the ability to download applications and games to be
executed on your phone thanks to the built-in Java™ engine.
However, receiving applications from everywhere implies some basic knowledge of the possible effects of such
download.
Thank you for spending a few minutes reading these pages: this will prevent you from doing something that may
cause you unexpected consequences.
WARNING:
When running a Java™ application, you may be prompted to grant access to protected features. These
features are protected because using them could incur you cost, or involve your personal data. Read the security popup
message carefully, to understand what feature is requested, and decide whether it is legitimate for the application to
perform it. In case of doubt, don't hesitate to refuse access by selecting the "No" button! The security configuration menu
is an expert feature! You must know exactly what you are doing before attempting to change security parameters of a
MIDlet. Misunderstanding changes may render MIDlet non functional and/or lead to higher risks for your private data or
impact your airtime consumption. Any changes in the security configuration are done under your responsibility. In no
case shall Sagem Communication and/or your network provider be liable for any damages deriving from or arising out
of such changes in the security configuration.
You must be aware that applications downloaded to your phone could cause the phone to perform actions for which you
will be billed, like making calls and sending SMS. Depending on your operator's billing policy, you may also be charged
to download the application because of airtime consumption.
Security considerations
Java™ MIDP technology is an efficient way to provide powerful applications in mobile phones. It allows use, by "over the air"
downloaded applications or games, of the great features built-in in a mobile phone (SMS sending and receiving, multimedia
playback and recording, network access…).
All these MIDP 2.0 features cannot be simply exposed to any MIDlet installed in the handset: a careful access control system
is implemented in the device to protect your private data and airtime consumption.
Access controls are gathered in 9 security groups:
- Network access (GPRS/GSM data airtime consumption, HTTP/web connections…)
- Auto invocation (MIDlet can wake up at a given time or when receiving a SMS)
Java™ 79
Page 80

- Phone call (ability to initiate a phone call)
- Local connectivity (IrDA or serial interfaces use by the MIDlet)
- Messaging receive (SMS,SMS-CB interception by a MIDlet)
- Messaging sending (SMS sending by a MIDlet)
- Read User data (Subscriber identity, Phonebook, Agenda read access from a MIDlet)
- Write User data (New phonebook or agenda entry)
- Multimedia recording (ability to control camera or microphone from a MIDlet)
According to the security status of an installed MIDlet (see below), each of these security groups has one among 5 possible
authorizations levels (listed from the more restrictive to the more permissive):
- Never
The security group completely prevents access to the protected features.
- Per use
Each time MIDlet tries to use protected feature, user is prompted to grant access.
- Per session
- Single confirmation
- Always
A MIDlet has a security status which is either "uncertified", or else "certified".
An "uncertified" status means that the source of the MIDlet could not be verified by the mobile phone at installation time. As
far as the phone knows, the MIDlet could have been written by anyone.
A "certified" status means that the MIDlet was digitally signed by a known party, whose name is displayed by the mobile
phone. This means that the mobile phone successfully authenticated the named party as the source of the MIDlet.
Security permissions are different for "uncertified" or "certified" MIDlets, and may be different for different sorts of named
parties. Usually "uncertified" security permisions are more restrictive than "certified" ones.
Security configuration menu
When a MIDlet is installed in the mobile phone, default security authorizations are applied.
This default security configuration may be altered through the "Settings/Security" menu of an installed MIDlet.
Once in the "Security" menu, the security status of the MIDlet is displayed (see "Security considerations" paragraph above).
80 Java™
First time a MIDlet uses a protected function, user is prompted to grant access like in "Per use" authorization but access
is granted until the MIDlet terminates.
The first time in the whole MIDlet life a MIDlet uses a protected feature, user is prompted to grant access. It remains valid
until the MIDlet is removed from the handset.
The security group unconditionally grants access to protected features.
Page 81

If you do not want to enter the security menu, simply select "Back" button.
You can proceed by selecting "Ok" button.
The menu displayed allows you to increase or decrease permissions currently applied to the current MIDlet for each of the
security groups.
When you set a more permissive authorization to a security group than the current value, mobile phone asks you to
confirm your increased risk exposure.
The maximum risk exposure increase is limited by the security status. Depending of the manufacturing configuration, it
means, for example, that "Net Access" security group authorization cannot be set to a permissive value higher that "Session"
for an "uncertified" MIDlet ("Single confirmation" and "Always" are unavailable in the security configuration menu) but an
operator "certified" MIDlet may have all permission values available without any limitations.
What is Java™?
Java™ is a new technology enabling use of powerful applications in the mobile phone area. Business
applications and games are easily downloadable by the end-user on a Java™ featured handset.
Your mobile phone is a MIDP 2.0 compliant Java™ platform which implements WMA (SMS support)
and MMAPI (Multimedia support) options, providing an exciting environment to run highly graphical,
networked and intuitive MIDP applications.
Such applications may be, for example, a wide range of games and appealing applications like action
and logic games, agenda, e-Mail reader, Web browser…
What is a MIDlet?
A Java™ application or a game designed to run in a mobile phone is named a MIDlet (MIDP applet).
A MIDlet is usually made of 2 files:
- The JAD file
- The JAR file
J
JAD file stands for
size…) and displayed by the mobile phone.
JAR file stands for Java™ Archive. It refers to the application data themselves (program, images, sound).
up to 200 kilo-bytes large.
In rare circumstances, MIDlet vendors may provide no JAD file and the MIDlet is the JAR file alone. In such a case it
Note:
is your only responsibility to evaluate the risk to download the JAR file without possibility of consulting the JAD file.
Java™ 81
ava™ Application Descriptor. It is a small file describing the content of a JAR file (version, vendor name,
JAD file size is usually less than 2 kilo-bytes large.
A JAR file may be
Page 82

Downloading a MIDlet (Java™ game or application)
MIDlets are easily downloaded in the mobile phone through the Games or Applications menus or through the WAP browser.
In almost all cases, you will first receive a JAD file which will be displayed on the screen.
Much care must be given in examining the content of the file as explained further.
When you select a JAD file, your mobile phone downloads it, displays data contained and prompts you to acknowledge the
JAR file download.
The popup displays information below:
- Name of the MIDlet
- Version
- Size (JAR file size)
- Vendor name
- Security status (
- JAR file URL.
If you do not want to download the main data (JAR file), you shall refuse to acknowledge further airtime consumption by
selecting "Cancel" (JAR file is not downloaded).
If you agree on the MIDlet installation, just select "Ok". The MIDlet is installed with security levels set to default values
associated with its security status.
Before downloading an application, such a message may appear: "Your handset cannot identify the application, please be
sure of the source of the application before installing the application".
You shall read carefully the next two paragraphs to fully understand Java™ MIDP security concerns.
Trademarks
Java™ and all other Java-based marks are trademarks or registered trademarks of Sun Microsystems, Inc. in the U.S. and
other countries.
82 Java™
IMPORTANT:
see "Security considerations" paragraph below)
Page 83

Disclaimer
As explained above, some downloaded items may contain data or may induce actions which may cause malfunctioning of
your mobile phone or loss or corruption of data or abnormal increase of your airtime consumption.
YOU EXPRESSLY ACKNOWLEDGE THAT THE DOWNLOAD OF ANY APPLICATIONS INCLUDING JAVA
APPLICATIONS OR GAMES IS DONE UNDER YOUR EXCLUSIVE RESPONSIBILITY. IN NO EVENT SHALL SAGEM
COMMUNICATION, YOUR NETWORK SERVICE PROVIDER OR THEIR AFFILIATES BE LIABLE FOR ANY LOST
PROFITS OR COSTS OF PROCUREMENT OF SUBSTITUTE GOODS OR SERVICES, LOSS OF PROFITS,
INTERRUPTION OF BUSINESS, LOSS OF DATA OR FOR ANY SPECIAL, INDIRECT, INCIDENTAL, ECONOMIC, OR
CONSEQUENTIAL DAMAGES ARISING UNDER CONTRACT, TORT, NEGLIGENCE, OR OTHER THEORY OF
LIABILITY RELATING TO THE DOWNLOAD OF ANY APPLICATION BY ANY MEANS, INCLUDING JAVA
APPLICATIONS OR GAMES IN SAGEM COMMUNICATION DEVICES. YOU EXPRESSLY ACKNOWLEDGE THAT ANY
APPLICATIONS INCLUDING JAVA APPLICATIONS OR GAMES ARE PROVIDED STRICTLY "AS IS". SAGEM
COMMUNICATION AND/OR YOUR NETWORK SERVI CE PROVIDER EXTEND NO WARRANTY WHATSOEVER
THERETO. SAGEM COMMUNICATION AND/OR YOUR NETWORK SERVICE PROVIDER DISCLAIM ANY EXPRESS,
IMPLIED OR STATUTORY WARRANTY OF MERCHANTABILITY, FITNESS OF ANY APPLICATIONS INCLUDING JAVA
APPLICATIONS OR GAMES FOR A SPECIFIC PURPOSE, SATISFACTORY QUALITY, SECURITY OR OTHERWISE.
Java™ 83
Page 84

Troubleshooting
P
ROBLEM
- S
ITUATION
It is impossible to switch the phone on
Battery status unknown
LOW BATTERY
SIM not present
Incorrect PIN code
84 Troubleshooting
Remove and replace the battery.
If you still cannot switch the phone on, charge the battery:
- Put it on charge for at least 15 minutes before switching it back on again.
- Check if the battery icon is scrolling up and down.
- If so, the phone is charging.
- If not, please take the charger out and put it back on again. Please check that
the charging icon is scrolling up and down.
- If you still cannot switch the phone on, please disconnect the charger, put it
back on again and please repeat that manipulation several times.
- If the charging icon is still not scrolling up and down, please contact your after-
sales services.
- When the charging icon has stopped scrolling up and down, the battery is
charged.
The phone does not recognize the battery. Please check the position of the
battery.
This message is displayed when the battery becomes too weak. The phone
switches itself off automatically. Put the phone on charge.
Check if the SIM card is present and properly positioned / inserted.
Check the condition of the SIM card. If damaged, please go back to the operator's
shop for advice. Contact your after-sales service if the message persists.
An incorrect PIN code has been entered. Be careful! Three incorrect PIN codes
will block the SIM Card.
A
CTIONS
Page 85

P
ROBLEM
- S
ITUATION
SIM BLOCKED
SIM LOCKED-OUT
No call connection
Troubleshooting 85
If a wrong PIN number is entered three times in succession, your SIM card is
blocked. You must then:
- Enter the PUK (Personal Unblocking Key) code provided by your operator,
and validate.
- Enter your PIN number and validate.
- Enter your PIN number again and validate.
After 5 or 10 failed attempts (depending on the type of SIM card), the SIM card is
definitely locked. You must then contact your operator or your SMC to obtain a
new card.
On network providers’ request, the handset can only be used with some types of
SIM cards. This message means that the SIM card you are using does not fit with
the phone. Take the SIM card out, and switch it back on. If the message
present
appears on the screen, you will need to check its compatibility next to
the place where you bought it. If not, please contact your after-sales service.
Check that the number you have dialled is correct.
If the letter R is displayed on the top right corner of the screen, without any
network name displayed, only emergency services can be called.
Check the status of your credit.
Check that the SIM Card you are using offers the service you are requesting;
check if its validity has not expired.
Check and deactivate the outgoing calls restriction when necessary.
The network could be saturated. Try later.
If the problem persists, please contact your Technical Helpdesk.
A
CTIONS
SIM not
Page 86

P
ROBLEM
- S
ITUATION
No receiving calls
Quality reception when calling
Impossible to send message
No answer phonebox
If answer phone icon flashing
In WAP context:
SERVER NOT ANSWERING message
Logon to home page impossible
86 Troubleshooting
Try to make a call in order to check that the phone and the networks are
operational.
Check and deactivate the permanent call forwarding (permanent call forwarding
icon displayed on the screen).
Check and deactivate the incoming calls restriction when necessary.
If the problem persists, please contact your Technical Helpdesk.
Avoid placing your fingers on the top of the phone, where the aerial is integrated:
the phone will have to use full strength to establish a quality transmission.
Check that the message centre number is correctly entered.
To do so, please select the menu
n°
and check the number entered. Please contact your network provider to get
this number.
Check that the SIM card does offer this service.
Program the call to be forwarded to answer phone using the information provided
by the operator.
Check that the SIM card used offers this service. Try to make a call to check that
phone and network are operational.
Check if the answer phone number is properly configured. To do so, go to the
Settings/Calls
your operator’s answer phone centre number.
Call the answer phone and listen to the new messages to make it disappear.
Switch off and then switch phone back on.
In the
WAP
menu, select
menu,
Clear the cache
A
CTIONS
Messages
, select
Options
Voicemail
and check the number. Otherwise, enter
.
, select
MSG centre
Page 87

P
ROBLEM
- S
ITUATION
Operator name does not appear on
screen
How do I (un)lock the keypad?
How do I switch to silent mode?
How do I activate zoom?
How do I delete the envelop that
appears on the screen?
How do I delete the answer phone that
appears on the screen?
How do I remove the written message
in the initial screen (1 call)?
How do I download ring tones?
How do I free up memory to download
my objects (sounds, images)
How do I free up memory to receive
new messages?
Troubleshooting 87
Go into the
operator appears, select it and validate.
If the Operator logo is present (depending on model), activate the display
(
Press the key, then the navigation stick.
Hold the key down unless ring tone sounds, when a short touch is enough.
Can be activated only in SMS, MMS and WAP screens; hold down the key.
If you have received a voice mail, please call your voice mailbox and follow the
instructions given.
This answer phone means that you have received a voice mail: please call your
voice mailbox and listen to it. Please follow the instructions given.
Press the key to go back to the initial page without messages.
Logon to one of the following site via your computer: www.planetsagem.com.
These site offer to send ring tones to your phone in the form of an SMS. You can
also logon to your operator's site. Once the SMS has been received, all you have
to do is save it: validate the option « Save messages », the tune will then be
added to your list. In addition, you can logon to some sites by phone.
Go into the
some objects.
Manage your Outbox carefully. It is recommended not saving them automatically:
too many messages saved will quickly fill up the available memory and no further
messages will be received. To delete them, please go into the
select
Settings
menu, select
Settings/Display/Operator logo
Multimedia
Outbox
then delete some messages. Manage your
A
).
menu, select
CTIONS
Networks
, then
Selection
My Pictures or My Sounds
Inbox
. Wait until the
then delete
Messages
carefully also.
menu,
Page 88

P
ROBLEM
- S
ITUATION
How do I free up memory to store new
contacts in my Phonebook?
How can I increase the efficiency of
my phone?
88 Troubleshooting
It is highly recommended to manage your Phonebook carefully.
If you have received pictures enclosed to a Vcard, please save or delete them.
The most efficient actions are as follows:
Please keep your phone safely in order to avoid pressing the keys unnecessarily:
every time a key is pressed the screen lights up.
Make sure that you don’t obstruct the antenna with your fingers when using the
phone (see page 16).
A
CTIONS
Page 89

Index
Contact
A
Accessories 7
Activating your phone 11
Alarm 36
Anonymous mode
46
B
Battery
Charging the battery
Installing the battery
Beeps
43
Bluetooth 54
Business card 20
17
12
C
Calculator 39
Calendar 40
Call barring
Calls 14
Calls (menu)
Car kit
Charger 7
Confidentiality 49
Connectivity
Index 89
50
Automatic redial
Call forward
Call waiting
Counters
Display number
View last calls
55
47
45
47
46
46
46
54
18
18
Call
Delete
20
Mailing list
Modify
Contacts
Contrast 44
Converter 39
Cost
Currencies 39
19
19
13, 54
50
D
Date / Time 51
Date and time 14
Display 43
E
Energy saving 45
F
Fixed dialling 50
G
Games 35
Getting started
GPRS 32, 33, 34
GSM 33
13
Page 90

H
Hands-free mode 15
Help 9, 53
I
Icon 10
Infrared 54
Initial screen 10
Input modes
IP address 33
IrDA 54
23
K
Keypad locking 8, 48
L
Languages 45
Local information 27
M
Memory 27, 30
Menus 6
Messages
Compose MMS
Compose SMS
Drafts
Inbox
Outbox
Receiving messages
Sending options
90 Index
24
21
26
25
25
25
26
N
Navigation principles 9
Network 14
Networks 51
O
Operator 49
Operator logo 44
26
Options
Organiser 54
P
Phone code 49
Phonebook
Memory 19
New contact
Using the phonebook
Photo
Picture
PIN number 48
PIN2 number 48
18
54
29, 54
18
R
Recorder 43
Ring tones 42
S
Safety information 64
Screensaver 44
48
Security
Sentbox 26
Serial speed 55
Page 91

Shortcut keys
Silent mode
SIM card 11, 12
Skins 43
SMS
Sound 54
Sounds 30, 42
51
42
21
Y
Your phone package 7
T
T9 22
Timer 36
37
ToDo
Troubleshooting 84, 85, 86, 87, 88
U
USB cable 54
V
vCal 38, 41
42
Vibrate
Voicemail 47
Volume 42
W
Wallpaper 44
WAP 31, 34
Configuring WAP parameters
Downloading objects
Services menu
WAP logging off
WAP logging on
WAP settings
Warranty
Wellphone 54
Index 91
31
34
33
53
69, 72
32
33
Page 92

Mobile Communication Business Group
Le Ponant de Paris - 27, rue Leblanc - 75512 PARIS CEDEX 15 - FRANCE
www.sagem.com/mobiles
Société Anonyme
Capital 300 272 000 € - 480 108 158 RCS PARIS
05/2006
 Loading...