


Livre du MD+.book Page 1 Mercredi, 31. mars 2004 1:57 13
Livre du MD+.book Page i Mercredi, 31. mars 2004 1:57 13
INTRODUCTION
Dear customer:
Thank you for purchasing a SAGEM DECT telephone; we appreciate your trust in us.
This product was manufactured with the u t most care, s hould you enc ounter a ny di fficul ties dur ing its us e,
we recommend that you refer to this user guide. You can also find information on the following site:
For your comfort and safety, we ask that you read the following paragraph carefully:
Recommendations and safety instructions
Your DECT telephone must not be installed in a humid room (wash room, bathroom, laundry
room, kitchen, etc.) unless it is 1.50 m away from a water point, or outside. Your telephone
must be operated at temperatures ranging from 5°C to 45°C.
Only use the supplied power adapter, connect it to the base socket according to the
installation instructions provided in this booklet and the indications on the identification label
affixed to it (voltage, current, electric network frequency)
mains outlet located nearby, the mains outlet must remain easily accessible.
This telephone was designed for use on the public switched telephone network (PSTN). In
case of a problem you must first contact your reseller. Only use the supplied telephone cord.
To avoid damaging your handset, only use certified rechargeable AAA batteries NiMH 1.2 V
600 mAH, never use non rechargeable batteries. Insert the batteries in the handset battery
compartment respecting polarity.
For your personal safety, never place your handset on the base without the batteries, or
without the battery cover, you could get an electric shock.
At the end of their useful life, batteries must be disposed of according to the recycling
instructions presented in this booklet.
Your DECT telephone has an inside radio range of about 50 metres and up to 300 metres in
open space. The immediate presence of metal parts (of a television for example), or of any
electric appliance may result in range reduction.
Some sensitive medical equipment and safety equipment may be affected by the radiofrequency transmissions of your telephone. In all cases, we ask that you respect the safety
recommendations.
In areas where storms are frequ ent, we recommend that you protect your telephone line usi ng
a surge protection device.
This equipment does not function in the case of an electric network shutdown: for
emergency calls, it is recommended to use another unit during power cuts
The CE marking certifies that the p roduct meets the essentia l requi rements of Dir ective 1 999/
5/CE of the European Parliame nt and of the Counc il pertaini ng to mic rowave radio equipm ent
and telecommunication terminal equipment, for the safety and health of users, for
electromagnetic interference. Furthermore, it efficiently uses the frequency spectrum
attributed to ground and spatial communication to prevent damaging interference.
(1) : With the exception of IT scheme installations defined in the EN60950 standard.
(2) : In that case, use a self-contained cord telephone.
http://www.sagem.com/faq
(1)
. Your unit must be connected to a
(2)
.

Livre du MD+.book Page I Mercredi, 31. mars 2004 1:57 13
CONTENTS
Your telephone 1
Unpacking 1
Your base 1
Your handset 2
Connection 4
Getting started 6
Installation guide 6
Making a call 6
Receiving a call 6
During a call 7
Handsfree 7
Call transfer 7
During communication 8
Accessing the phonebook or call log 10
Recording a conversation (model with
answering machine) 10
Secret mode 11
Ending a call 11
Entering a number in the phonebook 12
Sending an SMS 13
Choosing a ring tone 14
Menu structure 15
Your phonebook 17
Viewing the phonebook 17
Creating an entry 18
Using a phonebook entry to place a call 19
Searching for a contact 19
Performing a quick search 19
Performing a refined search 20
Editing an entry 20
Deleting an entry 21
SMS service 22
Sending a text message 22
Writing a text message 22
Sending an SMS 24
Reading a message 27
Activating or deactivating the magnifier 28
Viewing the memory status 28
Emptying an SMS folder 29
Sending SMS text messages from mobile
phones 30
When replying to an telephone from
a mobile phone 30
When sending a new message to an
telephone from a mobile phone 30
SMS settings 32
Modifying the SMS centre number 32
Terminal number 32
Modifying the terminal number 33
SMS boxes (depending on the service
provider) 34
Sub-Addressing 34
Creating a personal box 35
Viewing a message from a personal box 36
Modifying or removing a personal box 36
Call log 37
Viewing the received and dialled call log 37
Calling the last number dialled (Redial) 38
Calling a number listed in the dialled and
received call log 38
Viewing the events log 38
Accessories 40
Alarm clock 40
Setting the alarm clock 40
Activating or deactivating the alarm
clock 41
Modifying the alarm clock time 41
Changing the alarm clock ring tone 41
Timer 42
Changing the programmed time of
the timer 42
Changing the timer ring tone 43
Displaying or hiding the programmed
time of the timer. 43
Birthday or organiser alarms 43
Adding a new birthday (organiser) alarm 44
Viewing a birthday (or organiser) alarm 44
Modifying or deleting a birthday
(or organiser) alarm 45
Intercommunication 46
Communication between two handsets 46
Transferring a part of or the entire
phonebook to another handset 47
Monitoring a room 48
Security 50
Locking/unlocking the keypad 50
Programming an emergency number 50
Modifying the base code 52
Defining the call time limit 52
Defining forbidden prefixes - Call barring 53
Creating, modifying or deleting a
forbidden prefix 54
Authorising three-way calling 55
Confidential 55
Your ring tones 57
Activating/deactivating the silent mode 57
Modifying the ringer 57
Activating or deactivating the beeps 58
I

Livre du MD+.book Page II Mercredi, 31. mars 2004 1:57 13
CONTENTS
The downloaded melodies 59
Viewing the downloaded melodies. 59
Adding a downloaded melody 59
Deleting a downloaded melody 60
Settings 62
Accessing the Settings menu 62
Modifying the language 63
Programming a key 63
Modifying the date and time 64
Adjusting the contrast 65
Using the auto hang up and pick up
features 65
Installation guide 66
Advanced settings /
Handset settings 67
Registering a new handset to a base 67
Modifying the base preference 68
Resetting the handset 69
Personal registering to a base 69
Renaming the handset 71
Advanced settings /
Base settings 72
Using a handset to put the base in
registration mode 72
Re-initialising the base 73
De-registering a handset 73
Renaming the base 74
Advances settings /
Line settings 75
Modifying the network type 75
Modifying the dialling mode 75
Modifying the flash duration (R key) 76
Setting a PABX prefix 77
Modifying the confidential prefix 78
Answering machine
(depending on model) 79
Enabling/disabling the answering machine 79
Modifying the OGM 80
Recording a personal outgoing message 80
Using a pre-recorded anonymous OGM 81
Deleting all your personal OGMs 81
Playing messages 82
Playing messages using the base 82
Playing messages using the handset 83
Remote access to answering machine 83
Deleting all the old messages 84
Recording a memo 84
TAM setting 86
Activating and deactivating call screening 86
Modifying the remote access code 86
Setting the message duration 87
Privileged access 88
Record mode 89
Number of rings 89
Appendix 91
Care and Maintenance 91
Problems 91
Features 92
Environment 93
Warranty 94
II
Livre du MD+.book Page 1 Mercredi, 31. mars 2004 1:57 13
YOUR TELEPHONE
Unpacking
Place the box in front of you, open it and make sure it contains the following items:
• one base,
• one handset,
• one battery compartment cover,
• one equipped power adapter,
• one telephone line cord,
• three rechargeable batteries,
• this user guide.
If you have purchased a DUO pack, you will find in addition:
• a second handset,
• a handset charger,
• an additional battery flap,
• three additional rechargeable batteries.
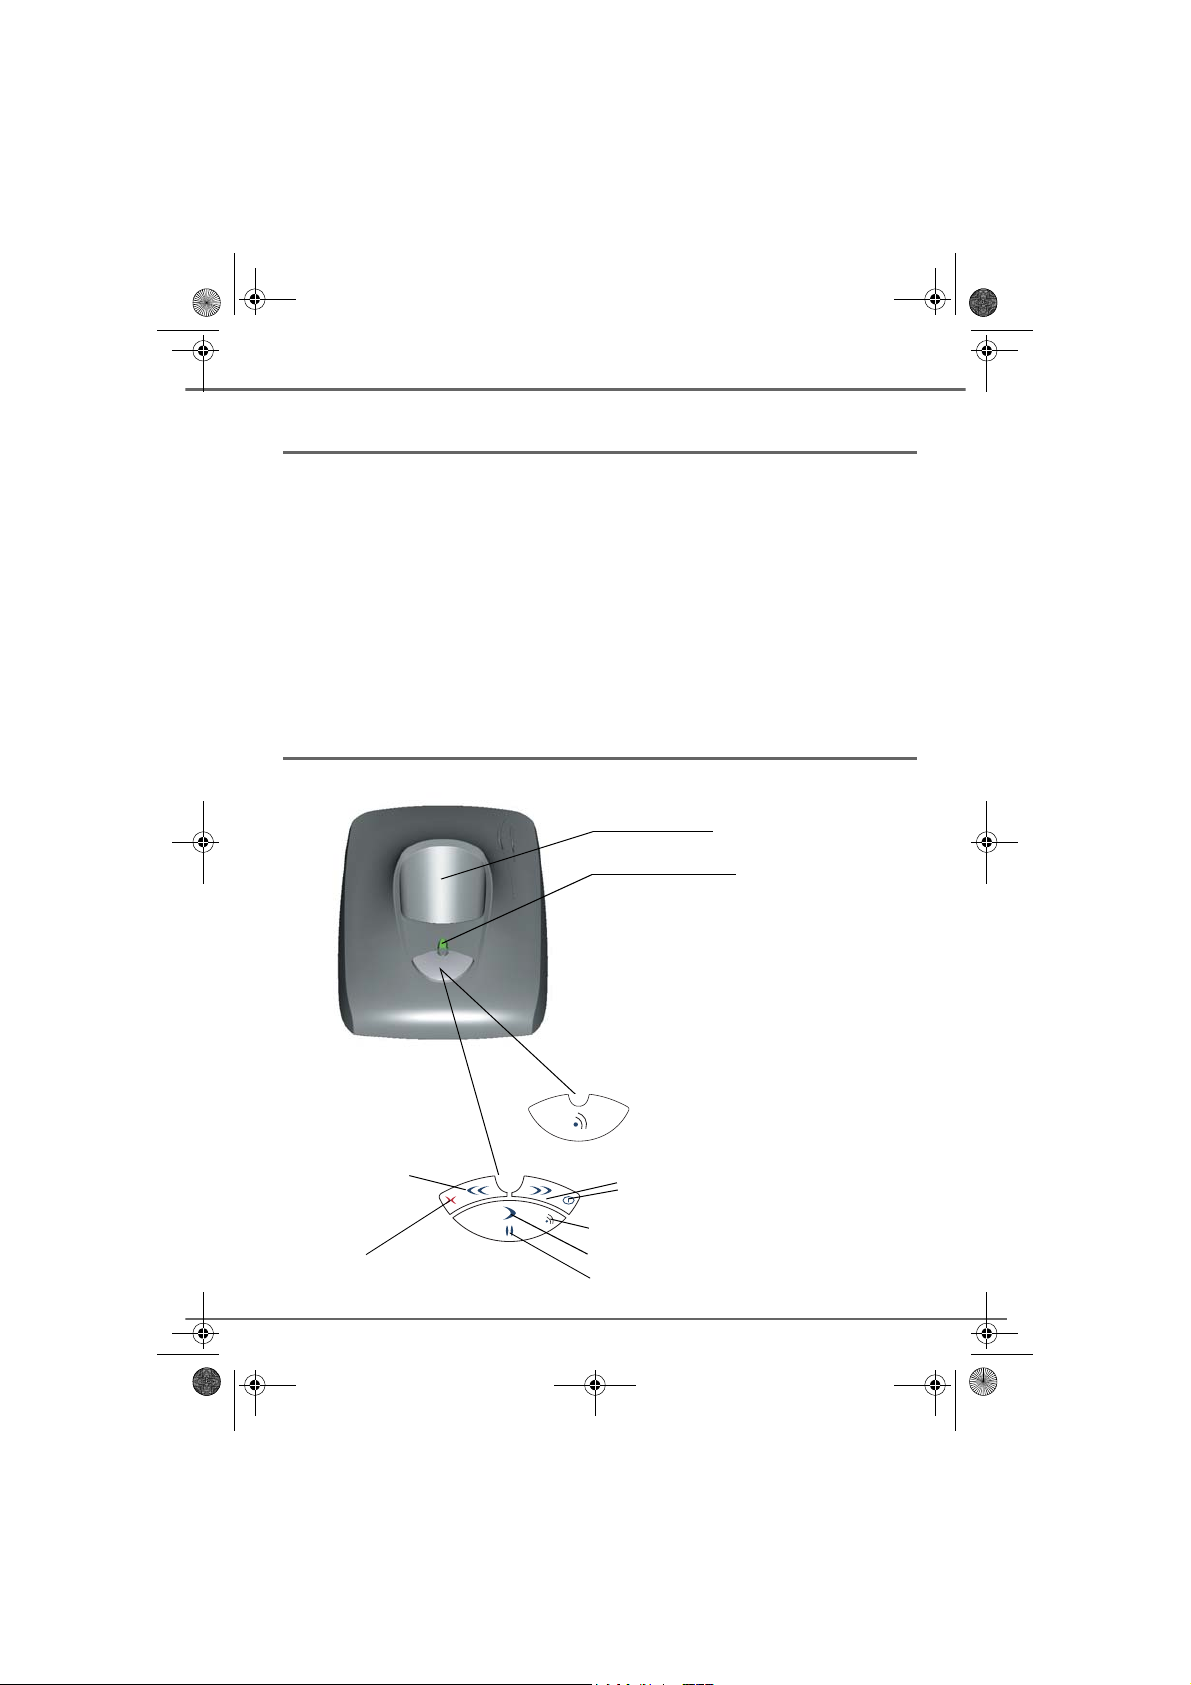
Your base
With its prismatic design, it fits well into your family and professional environment.
Handset location
Power indicator light
Model without answering machine:
Fixed green indicator: Powered
Flashing green indicator: Searching, handset
registering or in use
Model with answering machine:
Fixed green indicator: On - Answering machine off
Fixed red indicator: On - Answering machine o n, no
messages
Slow flashing red light: Messages played
Rhythmic flashing red light: The number of flashes
corresponds to the number of new messages
received
Model without answering machine:
Model with answering
machine:
Previous message
Deleting a message
(long press)
Handset search (paging)
Next message
Switching the answering machine ON/Off
(long press)
Paging (long press)
Message playback
Pause during playback
1
Livre du MD+.book Page 2 Mercredi, 31. mars 2004 1:57 13
YOUR TELEPHONE
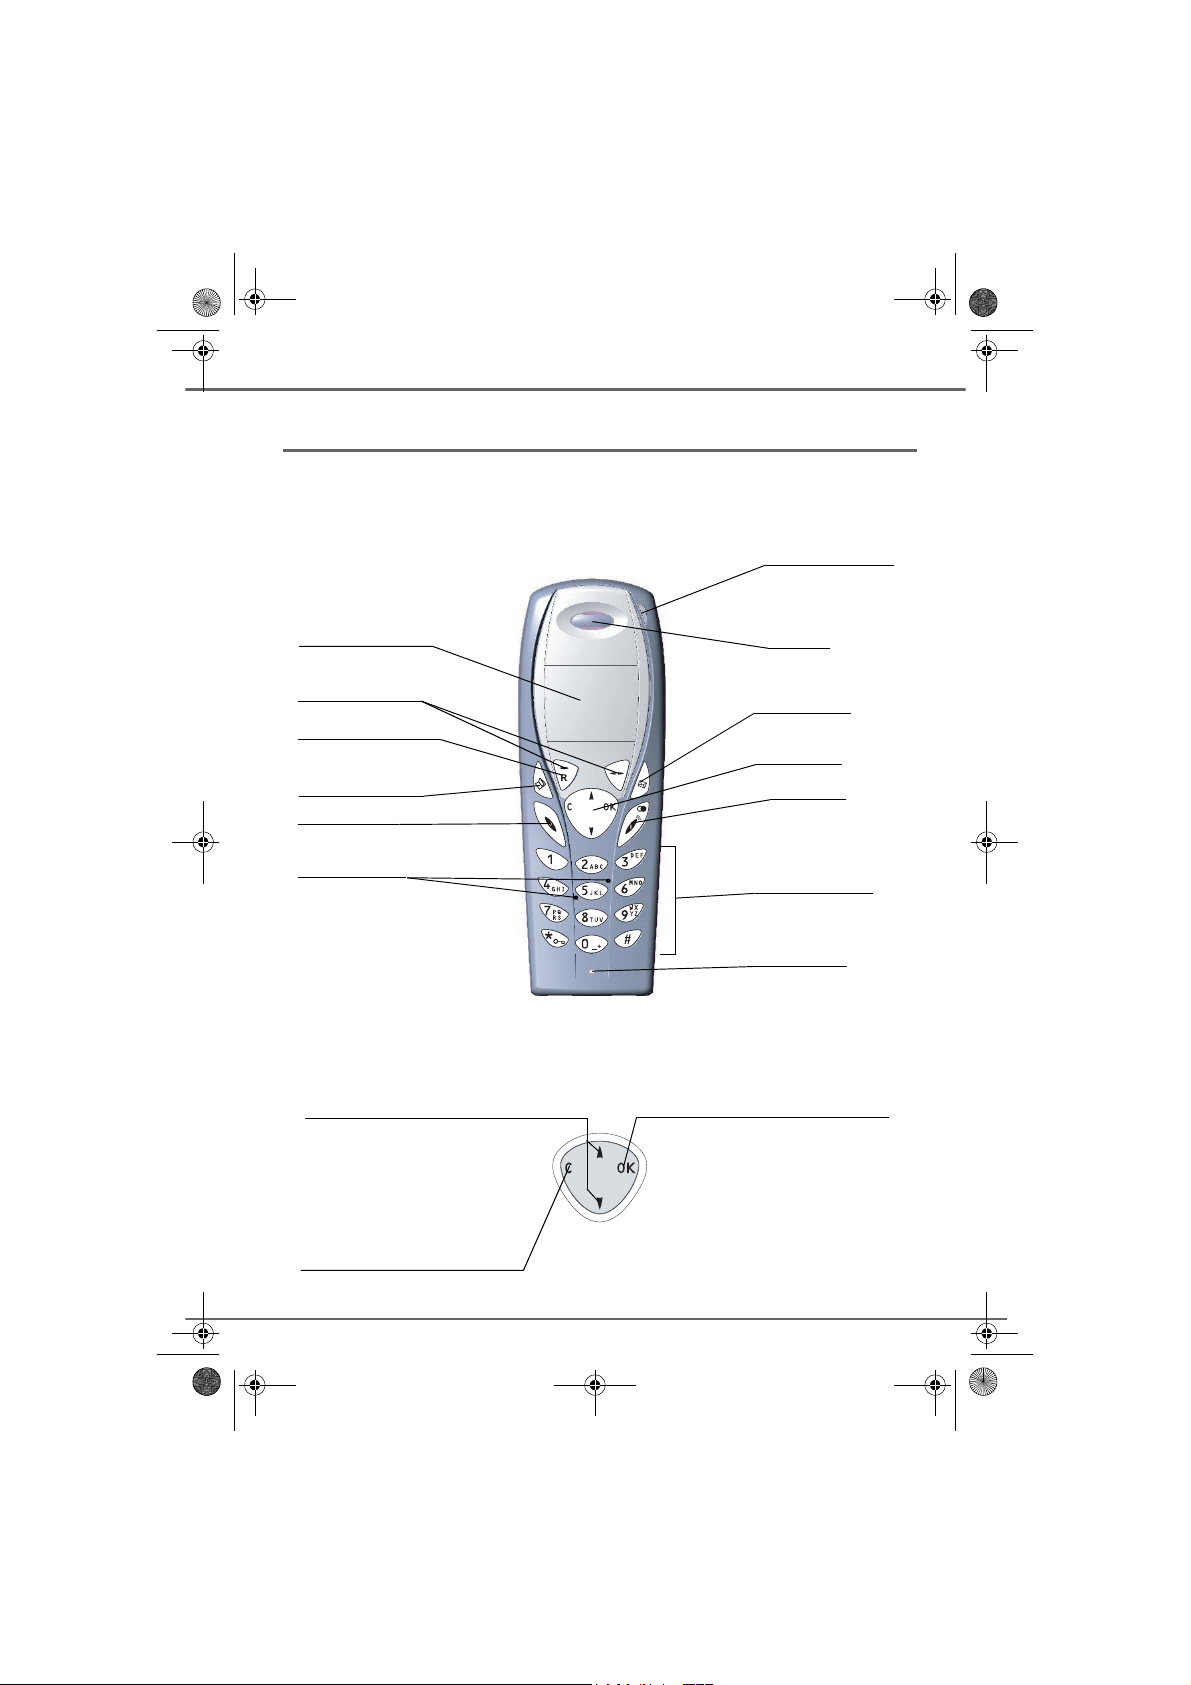
Your handset
With its user-friendly design, you will appreciate how easy it is to hold and its quality during
conversations.
LED
Incoming message
warning beeps
Graphics display
Program keys
R key
Phonebook key
Hang up
Mark for the
visually impaired
The navigator key, a rapid selection tool.
Navigating
Speaker
Direct SMS
access
Navigator
Pick up
Handsfree
Redial (long press)
Alphanumeric
keypad
Microphone
To confirm or to access a sub-menu
To cancel, delete or go to the
previous menu
2
Livre du MD+.book Page 3 Mercredi, 31. mars 2004 1:57 13
YOUR TELEPHONE
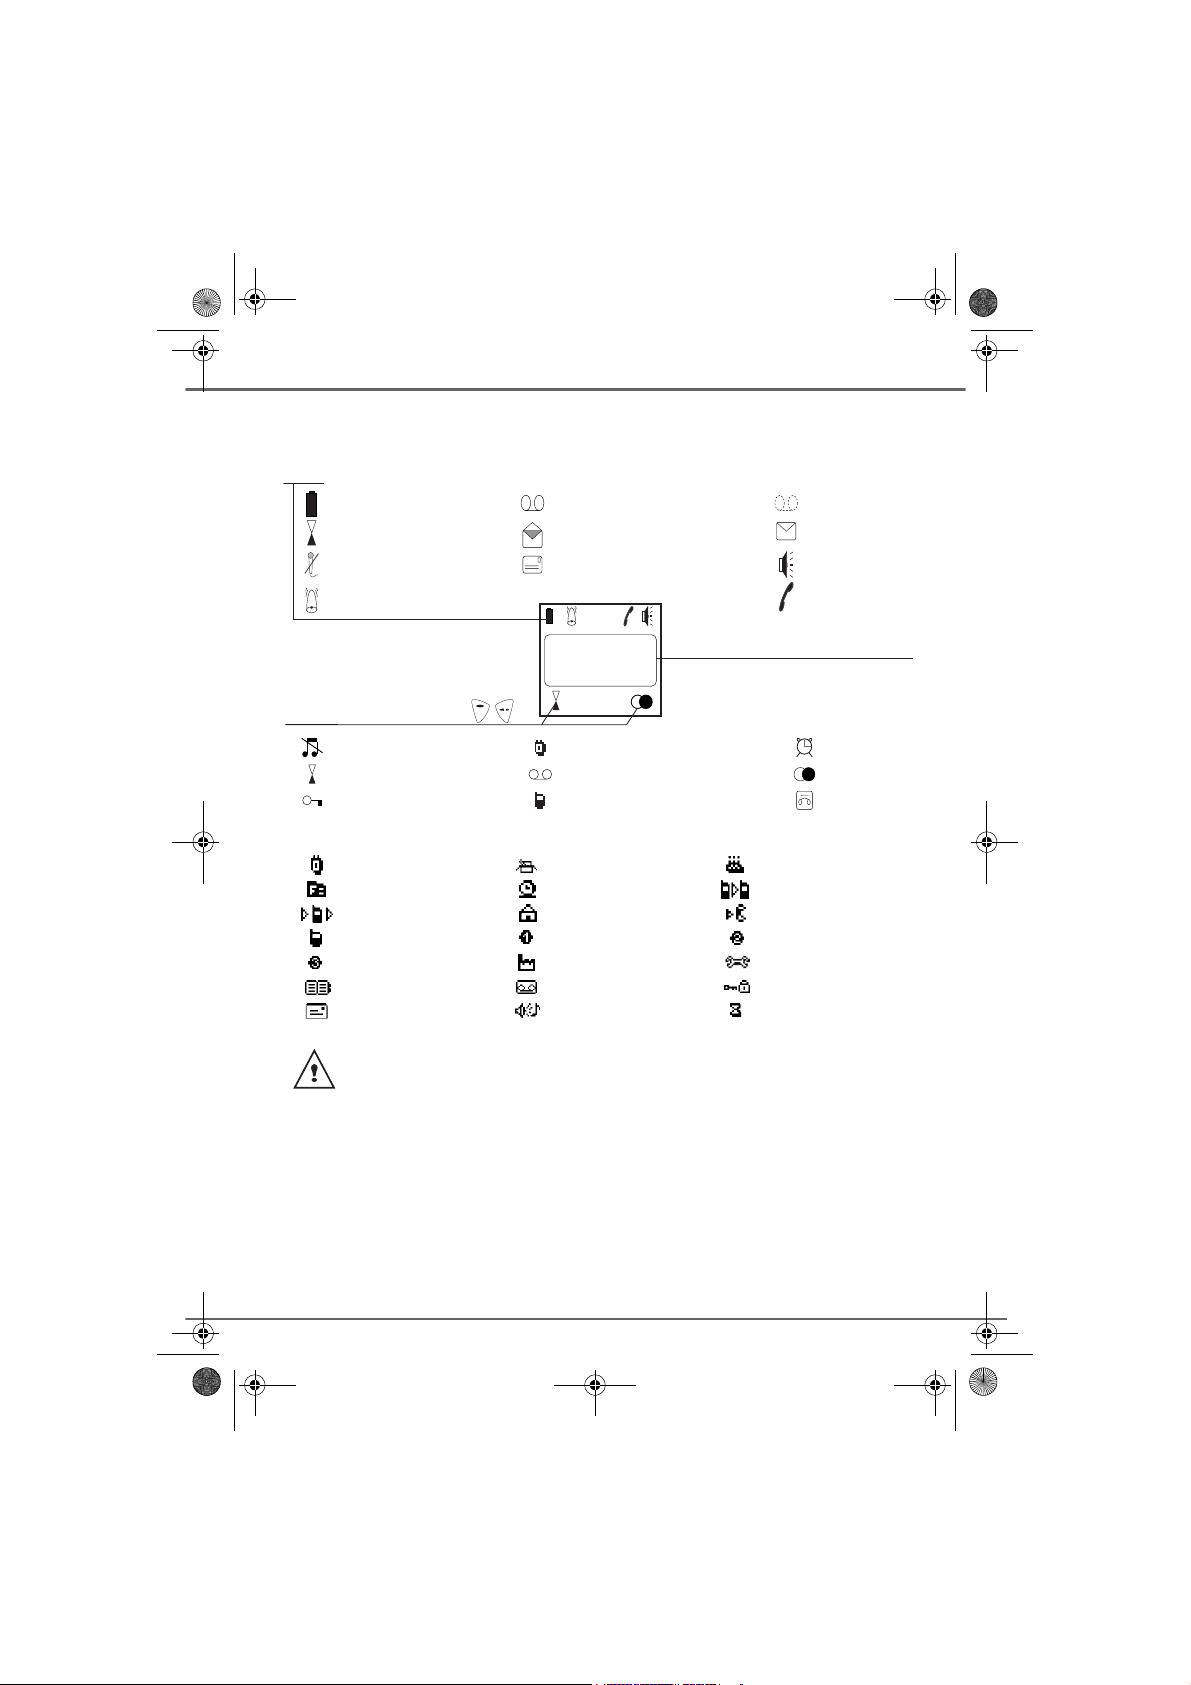
The visual display of your handset
Icons
Battery indicator
Timer On
Secret mode
Alarm clock On
Answer and record On
Answering machine
message read
SMS reception
Answer only On
New answering
machine message
Handsfree
In use
Function icons
Silent mode
Timer
Keypad lock
HANDSET -1-
16:44
11 Mar
R
Organiser
Answering machine On
Number
Name of the base or handset
Other icons
Organiser Accessory Birthday
Fax Clock Intercommunication
Call log Home Memo
Mobile Digit 1 Digit 2
Digit 3 Work Settings
Phonebook Answering machine Security
SMS Ring tone Timer
When the battery charge icon is at mi nimum, your screen will not be lit and the volume
level of the hands-free function will be decreased until the battery is recharged.
Alarm clock
Redial
Ans.Mach
3
Livre du MD+.book Page 4 Mercredi, 31. mars 2004 1:57 13
YOUR TELEPHONE
Connection
Before making any connections, please refer to the safety instructions presented at
the beginning of this user guide.
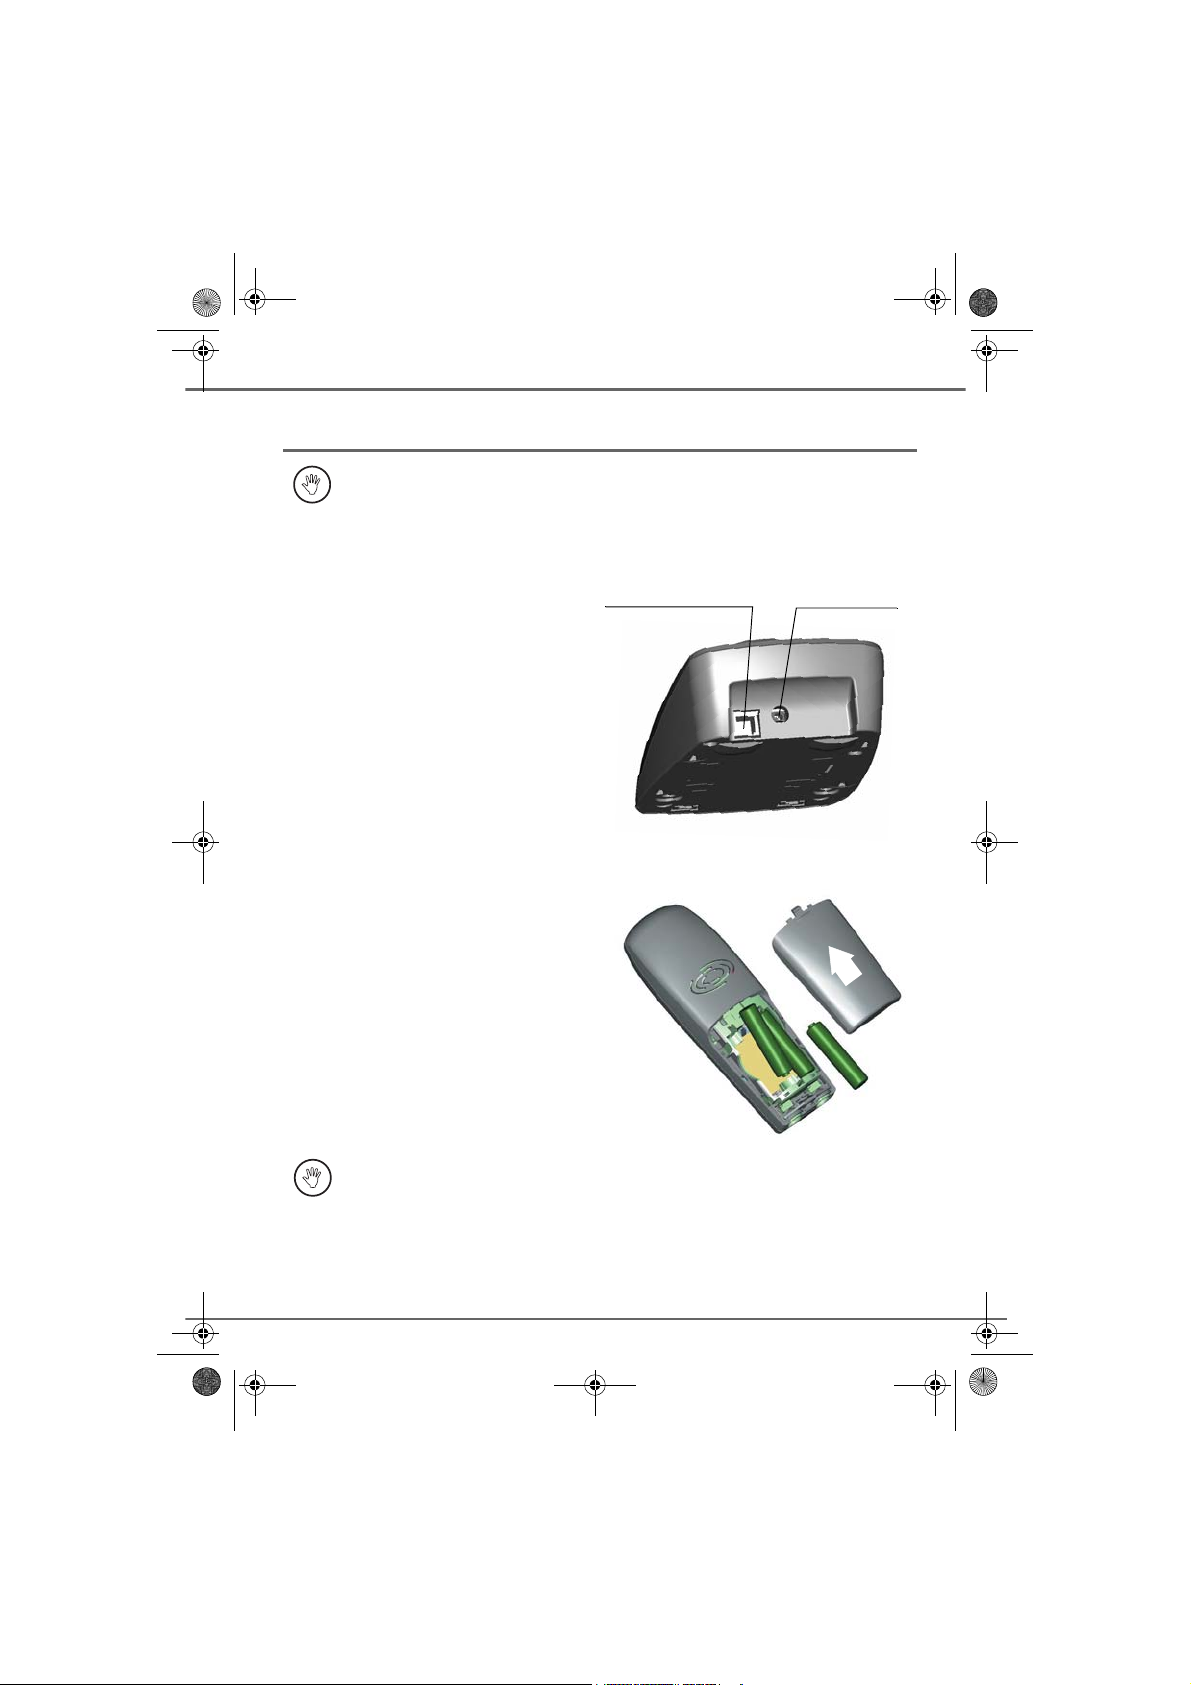
Connecting the base
Place the base where it should be located.
Plug the telephone line connector (as shown
in the illustration) into the telephone socket
on the underside of the base and conne ct the
other end to the telephone wall socket.
Connect the power connector on the
underside of the base and the other end of
the cord to the power socket.
The power supply indicator located on the
base is green. Place the base in its final
location.
Handset set-up
Insert the batteries making sure to respect
the polarity. Place the cover back on the
handset by pushing upwards until it is
completely closed.
Remove the protective film on the screen,
place the handset on the base to fully charge
the batteries.
The charging icon appears on the screen, it
indicates the charging status. Once the icon
is full, your batteries are charged.
Only use certified rechargeable batteries. For optimal battery charge, leave the
handset on the base for at least 12 hours during initial use. During charging, the
batteries may heat up, this is quite normal and without risk.
Telephone socket
Power socket
4
Livre du MD+.book Page 5 Mercredi, 31. mars 2004 1:57 13
YOUR TELEPHONE
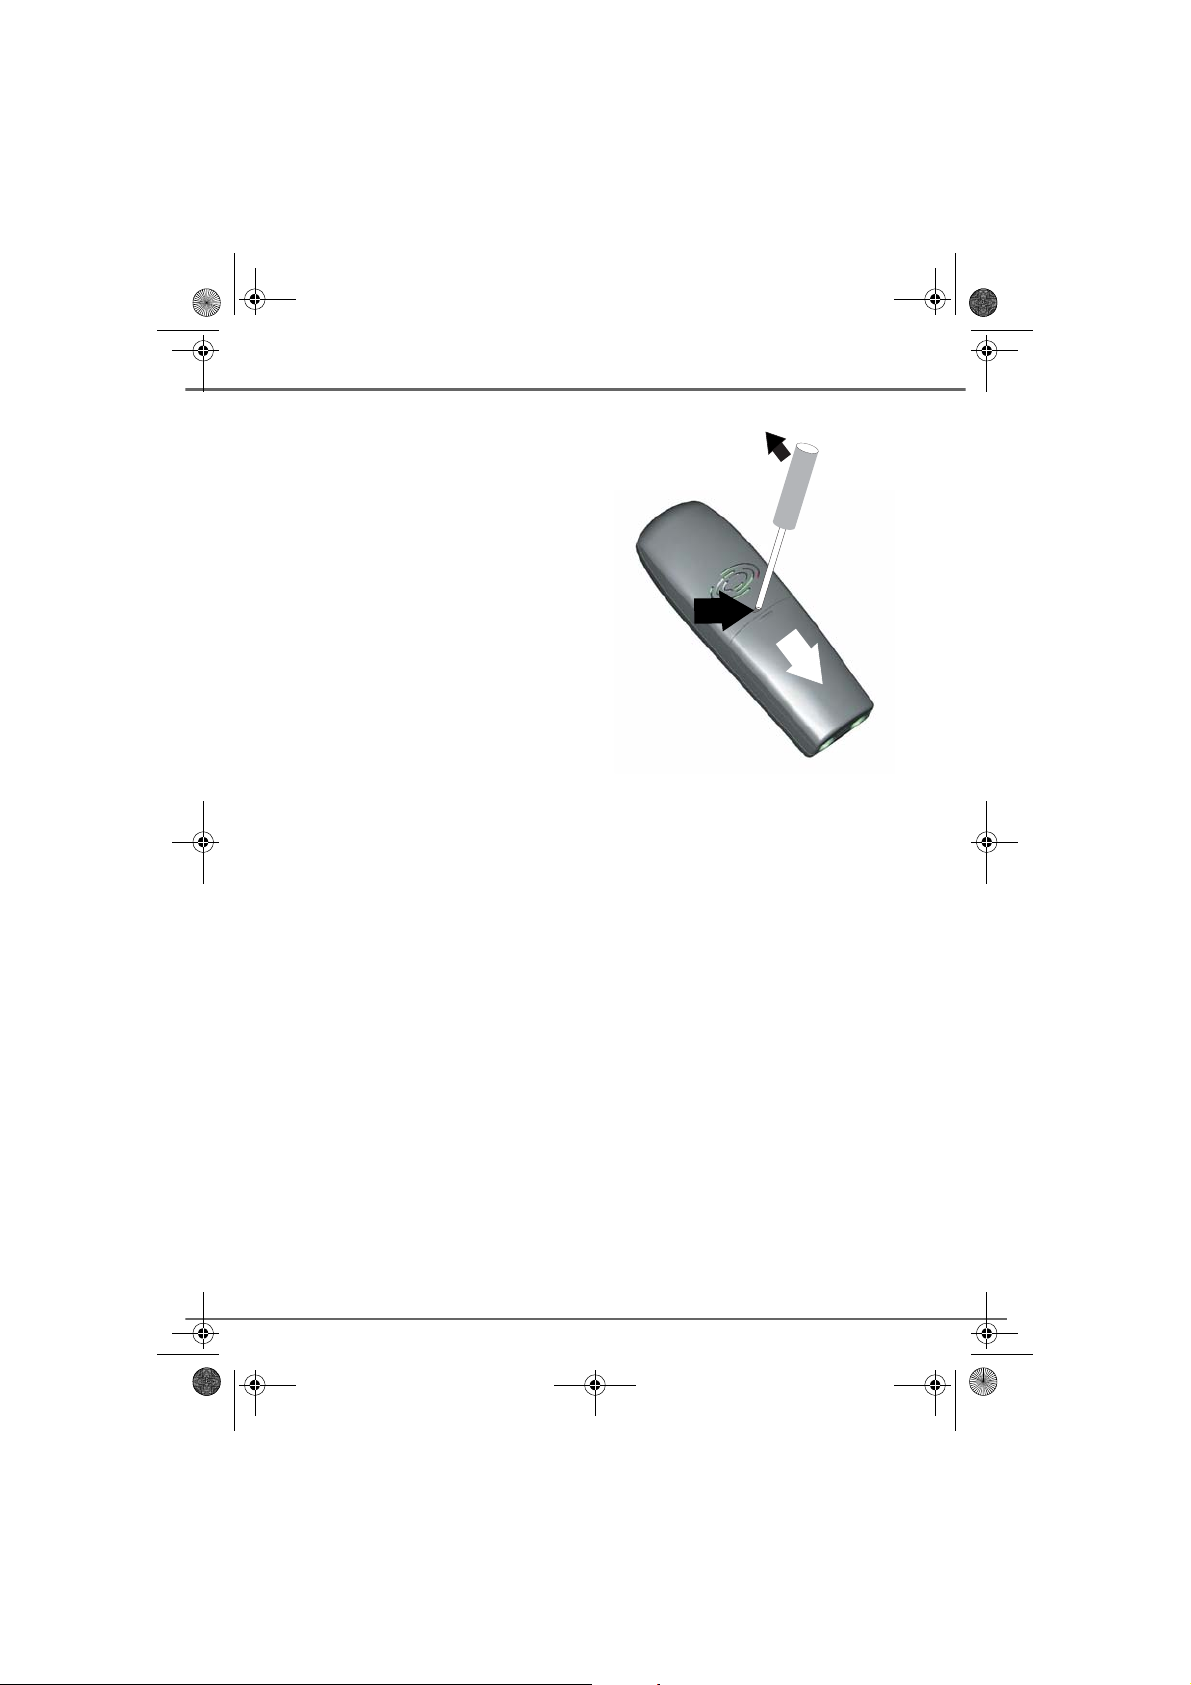
Replacing the batteries
Rechargeable batteries must be used with
your handset. Proceed as follows:
Take the handset and turn it around so that
the battery compartment is accessible.
Insert a sharp object (pen, paper clip...)
perpendicularly in hole 1 as shown in the
illustration and lift it upwards, the battery
cover opens, slide it downwards as shown in
2 and insert the batteries making sure to
respect the polarity. Place the cover back on
the handset by pushing upwards until it is
completely closed.
1
2
5
Livre du MD+.book Page 6 Mercredi, 31. mars 2004 1:57 13
GETTING STARTED
GETTING STARTED
Installation guide
After installing the batteries, telephone set up assistance is automatically
provided. It helps you set certain parameters for your telephone.
The parameters are:
• date and time,
• name of the handset,
• external ringer,
• language,
• answering machine (depending on model).
Contact your service provider to find out which services are
available (caller display service, SMS, etc.) and the charges
involved.
Making a call
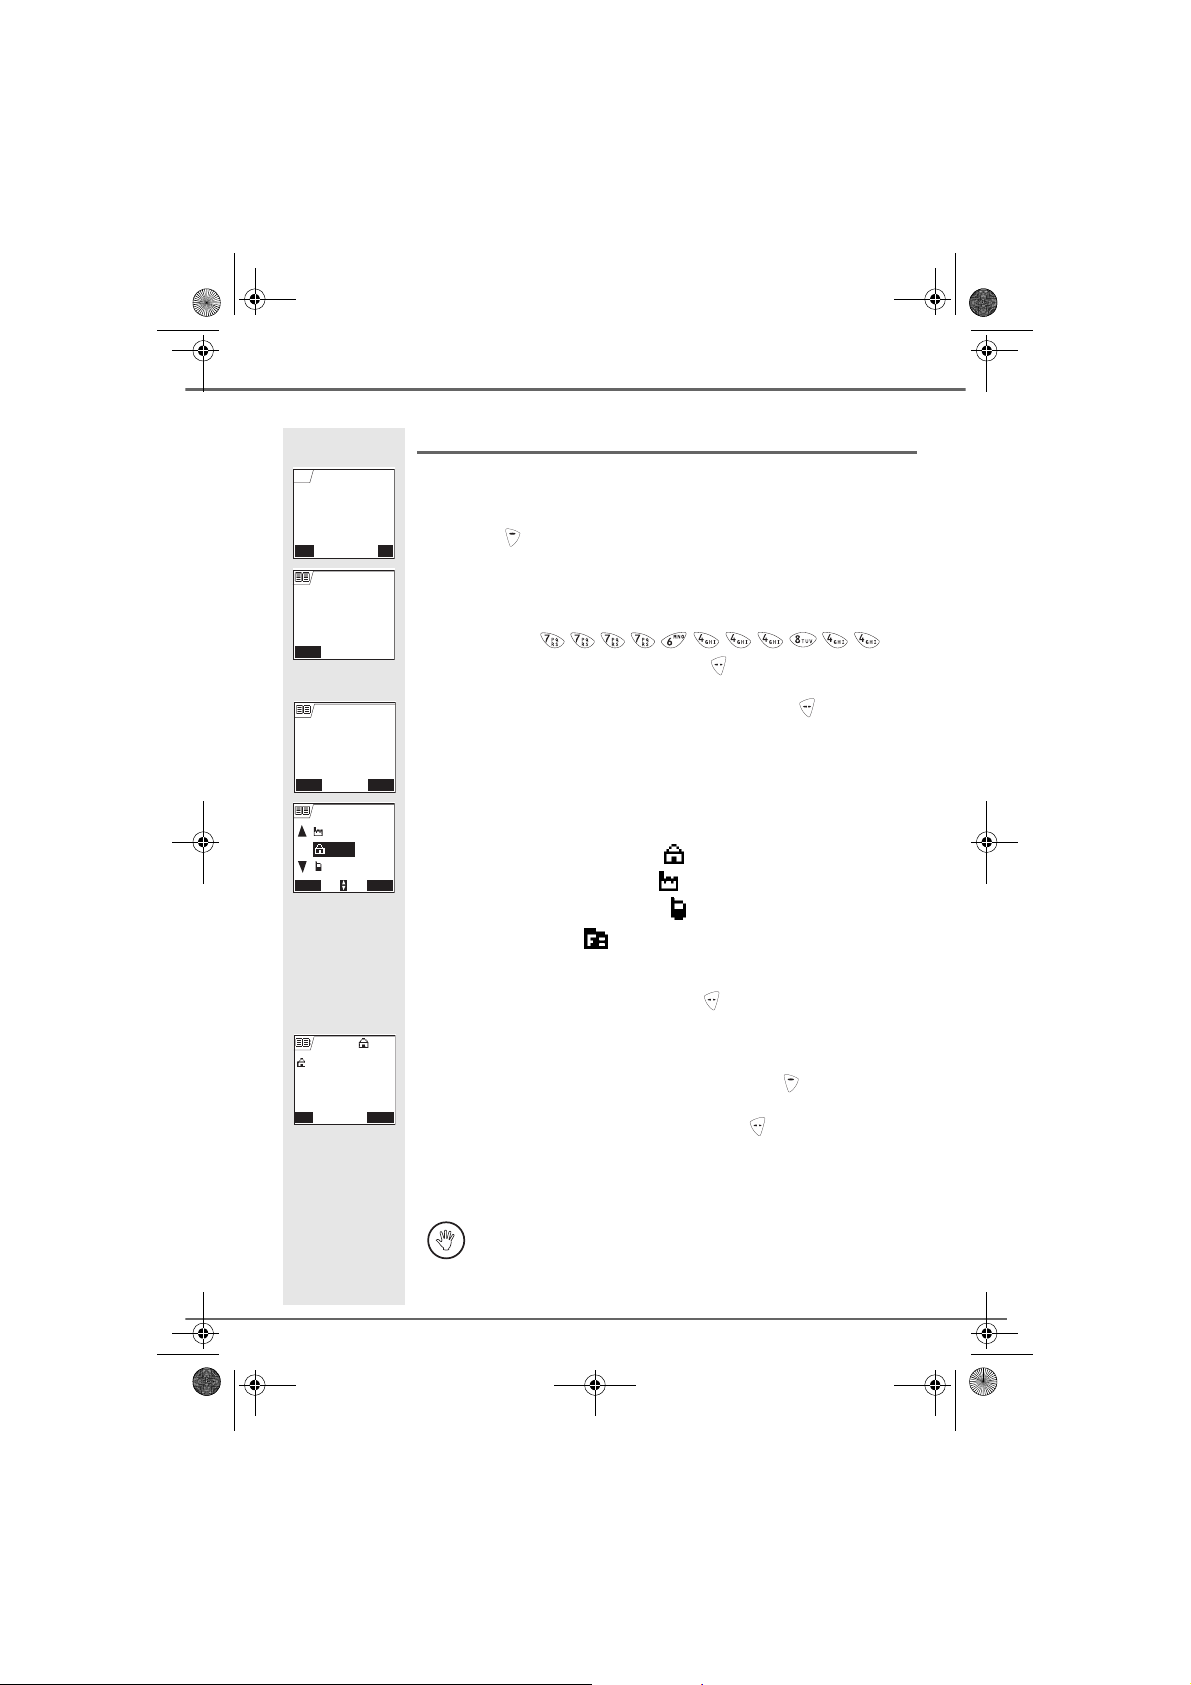
Enter the name of your contact using the keypad keys.
Call
0123456789|
Store Call
If you enter an inval id digit, pres s C on the navigator key to erase the
incorrect digit. Press the green key on your handset to make the call.
You can also make a call by:
- Pressing the green key
- Dialling your contact's number.
to access the line.
Brown
Call
0123456789
Silence Accept
During communication, you can inc rease or d ecrease th e audio vol ume of
your handset by pressing the or key on th e navigator.
Receiving a call
When you receive a call your telephone rings. If you have subscr ib ed to a
"Caller display" service, the caller's information appears on the screen
(unless your caller has enabled the anonymous mode), otherwise the
"Caller unknown" screen is displayed.
Pick up by pressing the green key or . To turn off the ringer, press
the red key or .
At the end of the conversation, press the red key .
R
6
Livre du MD+.book Page 7 Mercredi, 31. mars 2004 1:57 13
GETTING STARTED
During a call
During a call, numerous options are accessible by pressing Option .
0123456789
12:40
R Option
Vol
Com Menu
Base loudsp.
OK
Handsfree
Internal call
Return Activate
Handsfree
on
Vol
Select the desired option in the following list:
- Handsfree: to activate the handset speaker.
- Internal call: to transfer the call to another handset.
- Make 2nd Call: to make a second call.
- Secret mode: to mute the handset microphone.
- Phonebook: to access the phonebook.
- Calls: to access the call log.
- Record conv.:
to record the conversation in progress (depending
on model).
- Base loudsp.: to activate the base loudspeaker (
answering machine
).
model with
Handsfree
While having a conversation with your contact, you can enable the
handset or base loudspeaker. Press Option .
Select Handsfree or Base loudsp. (model with answering machine) and
press Activate .
When pressing the green key while engaged in a conversation
you automatically activate the handsfr ee mode of the handset, by
pressing it again you deactivate the handsfree mode.
The message Handsfree on appears on the screen. Increase or decrease
the audio volume using or .
Call transfer
This function is only access ible w hen two handsets or m ore are r egist ered
to the same base. During communication, you can transfer the call to
another handset.
During communication, press Option .
7
Livre du MD+.book Page 8 Mercredi, 31. mars 2004 1:57 13
GETTING STARTED
Com Menu
Handsfree
OK
Internal call
Make 2nd Call
Return Confirm
Internal call
OK
Handset 2
Handset 3
Return
Answ. 2nd Call
Brown
0123456789
R Accept
Vol
Using the or arrow, select Internal call. Press Confirm .
The list of handsets registered to the base appears.
Select the handset you want to call using or . Press Call .
The handset called rings, once someone picks up transfer the call by
Call
pressing the red key .
To retake the call before it is picked up by the handset called, press
Option .
Select Hanging up using or . Press Activate .
During communication
During communication, yo u can r ec eive a se cond i ncom ing c all or pl ace a
call to a second contact. You can then switch from one contact to the other,
or have a conference (depending on your service provider and
subscription).
Receiving a second call whilst on line.
During communication, a beep is transmitted to your telephone by your
service provider to let you know that you have a second call waiting. The
information regarding the caller on hold is displayed on the screen.
Press Accept to take this new call.
HS1:
Brown
HS2:
0123456789
R Option
Vol
Com Menu
Internal call
OK
Make 2nd Call
Secret mode
Return Confirm
Your other caller is then put on hold and you can talk with your second
caller.
Making a second call whilst on line.
During communication, you can put your contact on ho ld and call a second
one by pressing Option .
Select Make 2nd Call using or . Press Confirm
8
Livre du MD+.book Page 9 Mercredi, 31. mars 2004 1:57 13
GETTING STARTED
Make 2nd Call
< Enter number >
Return
HS1:
Brown
HS2:
0123456789
R Option
Vol
Make 2nd Call
Hanging up
OK
Switch
3-party conf.
Return Activate
Make 2nd Call
Record conv.
OK
Hanging up
Switch
Return Activate
Select your contact's telephone number in the phonebook by pressing
or dial the number using the keypad.
Once the number is entered, press Call .
The second call is then launched, with the first call still on hold.
To alternate from one call to the other
Press Option .
Select Switch using or .
Press Activate . The call in progress is put on hold, and you can then
take the second call.
To end one of the calls and continue the other one
Press Option .
Select Hanging up using or . Press Activate .
The call in progress is definitely terminated, and you can then take the
second call.
To set up a conference (the two parties and yourself)
Press Option .
Make 2nd Call
Switch
OK
3-party conf.
Handsfree
Return Activate
3-party conf.
R Option
Vol
Select 3-party conf. using or . Press Activate .
You can then talk to both parties simultaneously.
To end the conference, press the red key .
9
Livre du MD+.book Page 10 Mercredi, 31. mars 2004 1:57 13
GETTING STARTED
Com Menu
Secret mode
OK
Phonebook
Calls
Return Confirm
Dual incoming call management can also be done via the R key .
- Accepting a second incoming call: + .
- Making a second call during communication: + recipient number.
- Alternating from one call to the other: + .
- Ending a call and switching to the call on hold: + .
-Setting up a conference: + .
R
R
R
R
R
R
Accessing the phonebook or call log
During communication, you can access your phonebook to look up a
telephone number, a name contained in an entry or information on calls
stored in your call log.
During communication, press Option .
Using or , select Phonebook or Calls and press Confirm .
Return to the communication menu using .
R
Recording a conversation (model with answering machine)
During communication, you can record an entire conversation or just a
portion of it.
Tell the people you are speaking to that you are recording the
conversation.
Com Menu
Calls
OK
Record conv.
Base loudsp.
Return Start
Record conv.
Press Ok to record
Return
During communication, press Option .
Using or , select R ecord. conv. and press Start .
To start recording press OK.
10
Livre du MD+.book Page 11 Mercredi, 31. mars 2004 1:57 13
GETTING STARTED
Record conv.
Recording in
progress
Cancel End
Vol
Com menu
Make 2nd call
OK
Secret mode
Phonebook
Return Activate
Com menu
Make 2nd call
OK
Secret mode
Phonebook
Return
Deactivate
The message "Recording in progress" appears on the screen.
• To cancel the recording press Cancel .
R
• To end the recording press End .
Return to the communication menu using .
R
Secret mode
You can switch to pri vate mode at any time during you r conversation. Your
handset microphone will be switched off and the other person will not be
able to hear you.
To activate secret mode:
During communication, press Option .
Select Secret mode using or . Press Activate .
The Microphone muted message will appear on the screen and the
flashing icon will be displayed on the communication screen.
To deactivate secret mode:
Press Option .
Select Secret mode using or . Press Deactivate .
The Microphone activated message will appear on the screen and the
flashing icon will disappear.
Your correspondent will be able to hear you again.
You can also choose to activate or deactivate the secret mode by
continuously pressing the C key on the navigator panel.
Ending a call
At the end of the conversation, press the red key .
11
Livre du MD+.book Page 12 Mercredi, 31. mars 2004 1:57 13
GETTING STARTED
Entering a number in the phonebook
Dial the number you want to enter in the phonebook.
Call
0123456789|
Store Call
New entry
Name :
< Enter name >
Return
Number:
0123456789
Return Confirm
WORK
OK
HOME
MOBILE
Return Confirm
If you make an error while ente ring the number, press C to delete the error.
Press Store .
R
The name input screen appears.
Using the keypad keys, enter the name of your contact by pressing
successively on the keypad keys.
Example "Smith": .
Once the name is entered. Press Confirm .
The number is displayed on the screen. Press Confirm .
Smith
Select the icon according to the type of number entered using the or
Smith
arrow:
- For a home telephone number .
- For a work telephone number .
- For a mobile telephone number .
- For a FAX number .
You can also use a number icon (1, 2, 3) to identify the entry.
Smith
Smith
0123456789
Edit Confirm
Once the icon is selected, press Confirm .
All of the information that you entered appears on the screen in the form
of an entry.
• To change the information in the entry, press Edit . You can now
R
modify the name, number and/or icon type.
• If the information is accurate, press Confirm .
Your entry is created and is now in the phonebook list. You can see the
beginning of your contact's name which is preceded by a number type
icon.
The various phonebook functionali ties are described in the menu
Your phoneb o ok, page 17.
12
Livre du MD+.book Page 13 Mercredi, 31. mars 2004 1:57 13
GETTING STARTED
Sending an SMS
You must first subscribe to an SMS service through your service provider
in order to be able to take advantage of this feature.
Press the SMS key, a screen appears with the Edit SMS option
SMS
Settings
OK
Edit SMS
Read SMS
Return Confirm
Your text
highlighted. Press Confirm .
Enter the text of your SMS using the keypad.
9/160
Press several times on a key to scroll through the letters (see table
page 22).
Cancel SMS
OK
Return Confirm
To (phone No.) :
< Enter number >
Return
To (phone No.) :
0123456789
Return Confirm
0123456789
Edit
Transmission OK,
No
Option
Insert char.
Send
Store
SMS
SMS
0123456789
Send sms to
Confirm
store SMS?
Once you have written your message, press Option .
On the navigator key , press or until Send is displayed. Press
Confirm .
Enter your recipient's number.
• If the number is listed in your phonebook, you can access it by
pressing . Then select your contact's number using or , and
press Confirm .
• Otherwise, enter the number using the numeric keypad. Once the
number is entered, press Confirm .
A confirmation screen appears. It indicates the type of transmission and
the number to which your message will be sent.
• If the information is accurate. Press Confirm . A message appears
on the screen indicating that the transmission of your SMS is in
progress.
• To change the phone number or modify the text message press
Edit . A screen allows you to choose the items you want to modify.
R
Once you are done making your changes, press Confirm .
Once the message has been s ent, yo u can sa ve a c op y of y our m essa ge.
It will be stored in the Sent SMS box.
Press Yes to save a copy of the message.
Yes
13
Livre du MD+.book Page 14 Mercredi, 31. mars 2004 1:57 13
GETTING STARTED
Choosing a ring tone
N
Ringer
Return Confirm
Ringer
Silence
OK
External ringer
Internal ringer
Return Confirm
External call
Downl. melody
OK
Actualités
Boathorn
Return Volume
External call
Vol
Return Confirm
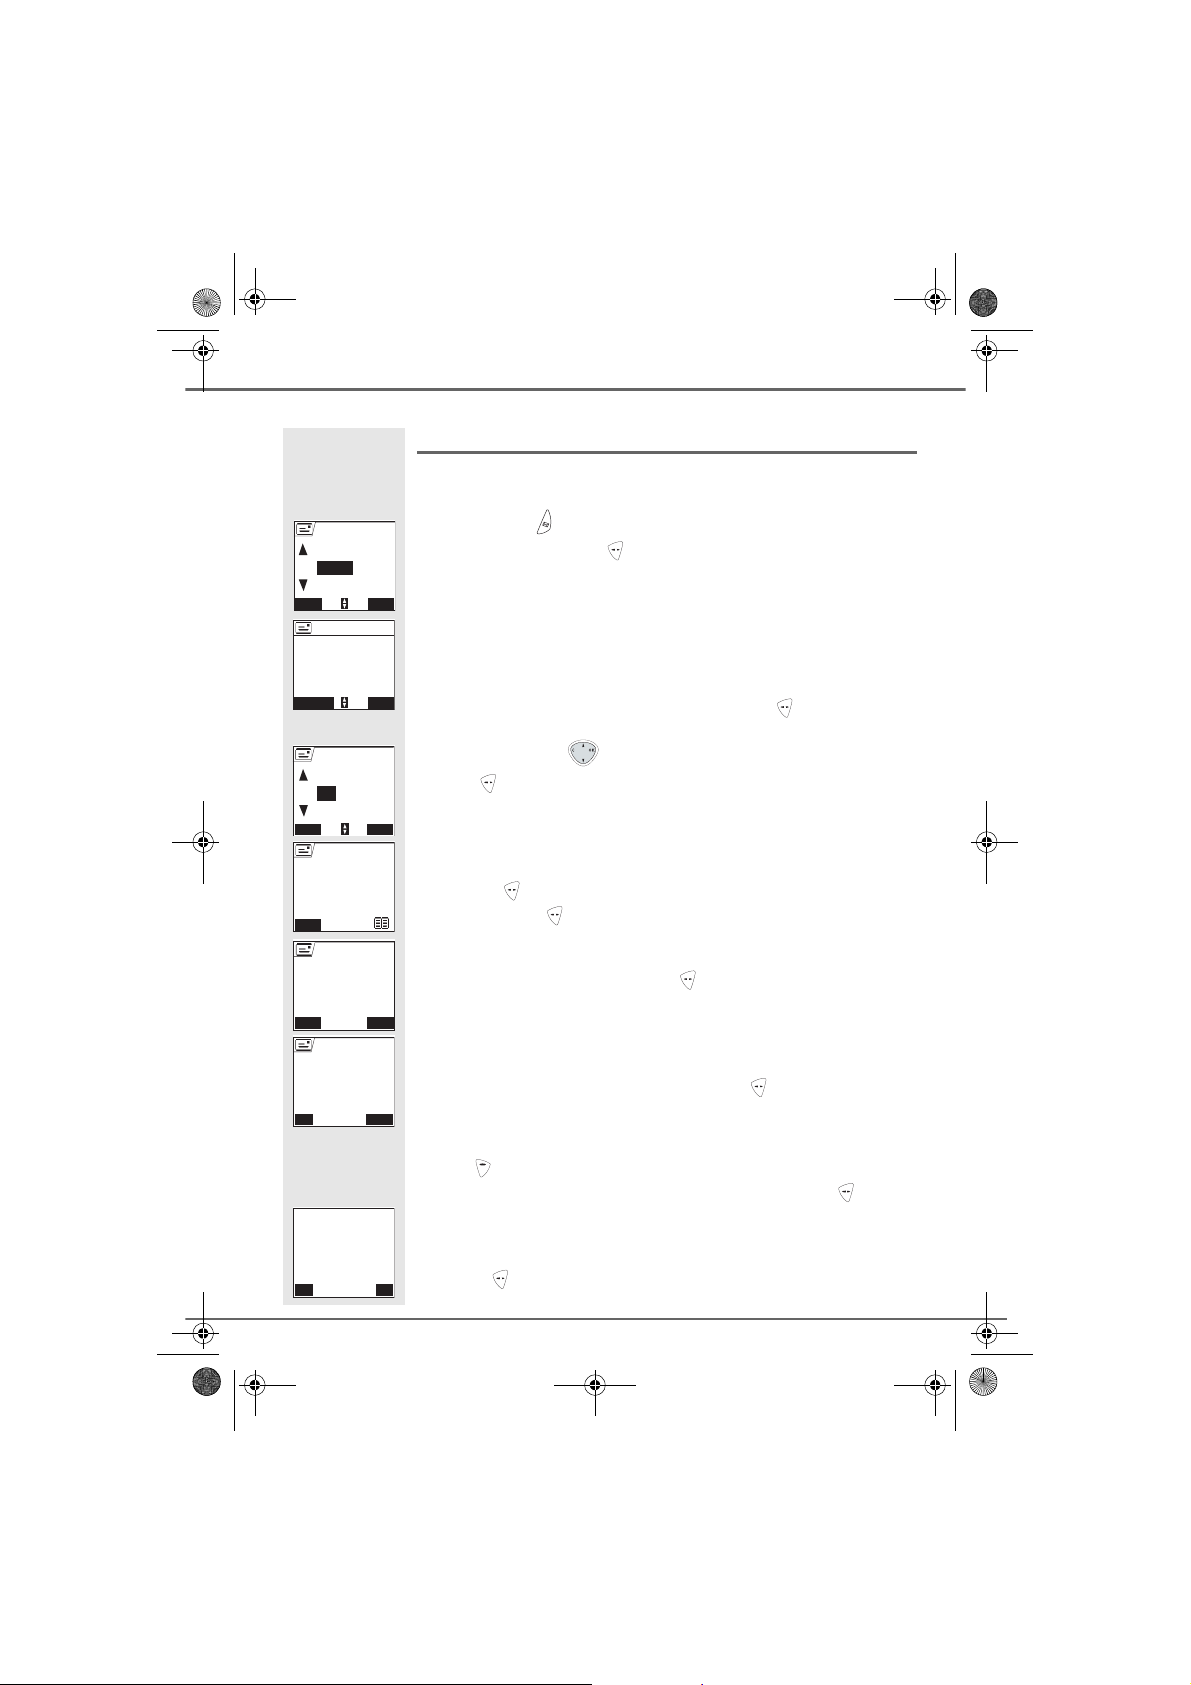
On the navigator key , press or until the Ringer menu is
displayed, press OK to confirm.
Select External ringer using or . Press Confirm .
The active melody is played, select the new melody in the proposed list.
Press Volume .
Set the ringer volume using or to increase or decrease the volum e.
Press Confirm .
14
Y
Livre du MD+.book Page 15 Mercredi, 31. mars 2004 1:57 13
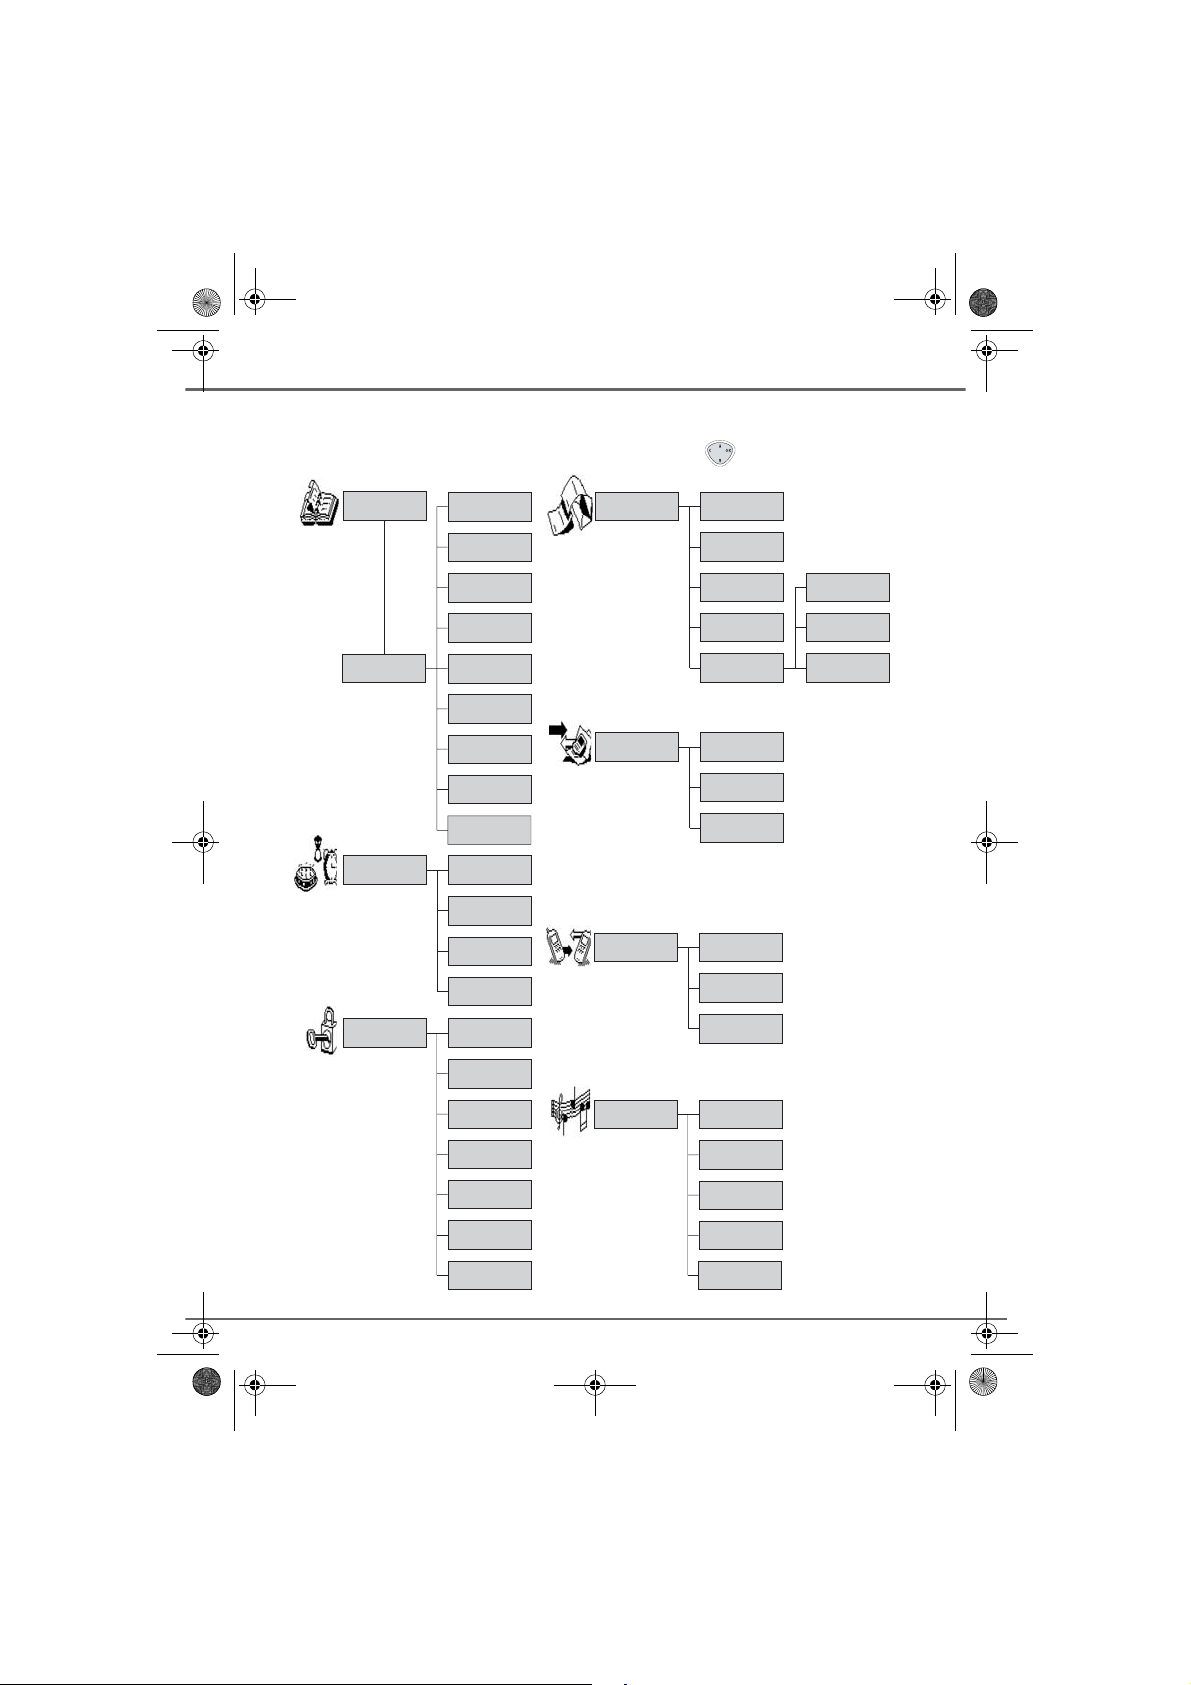
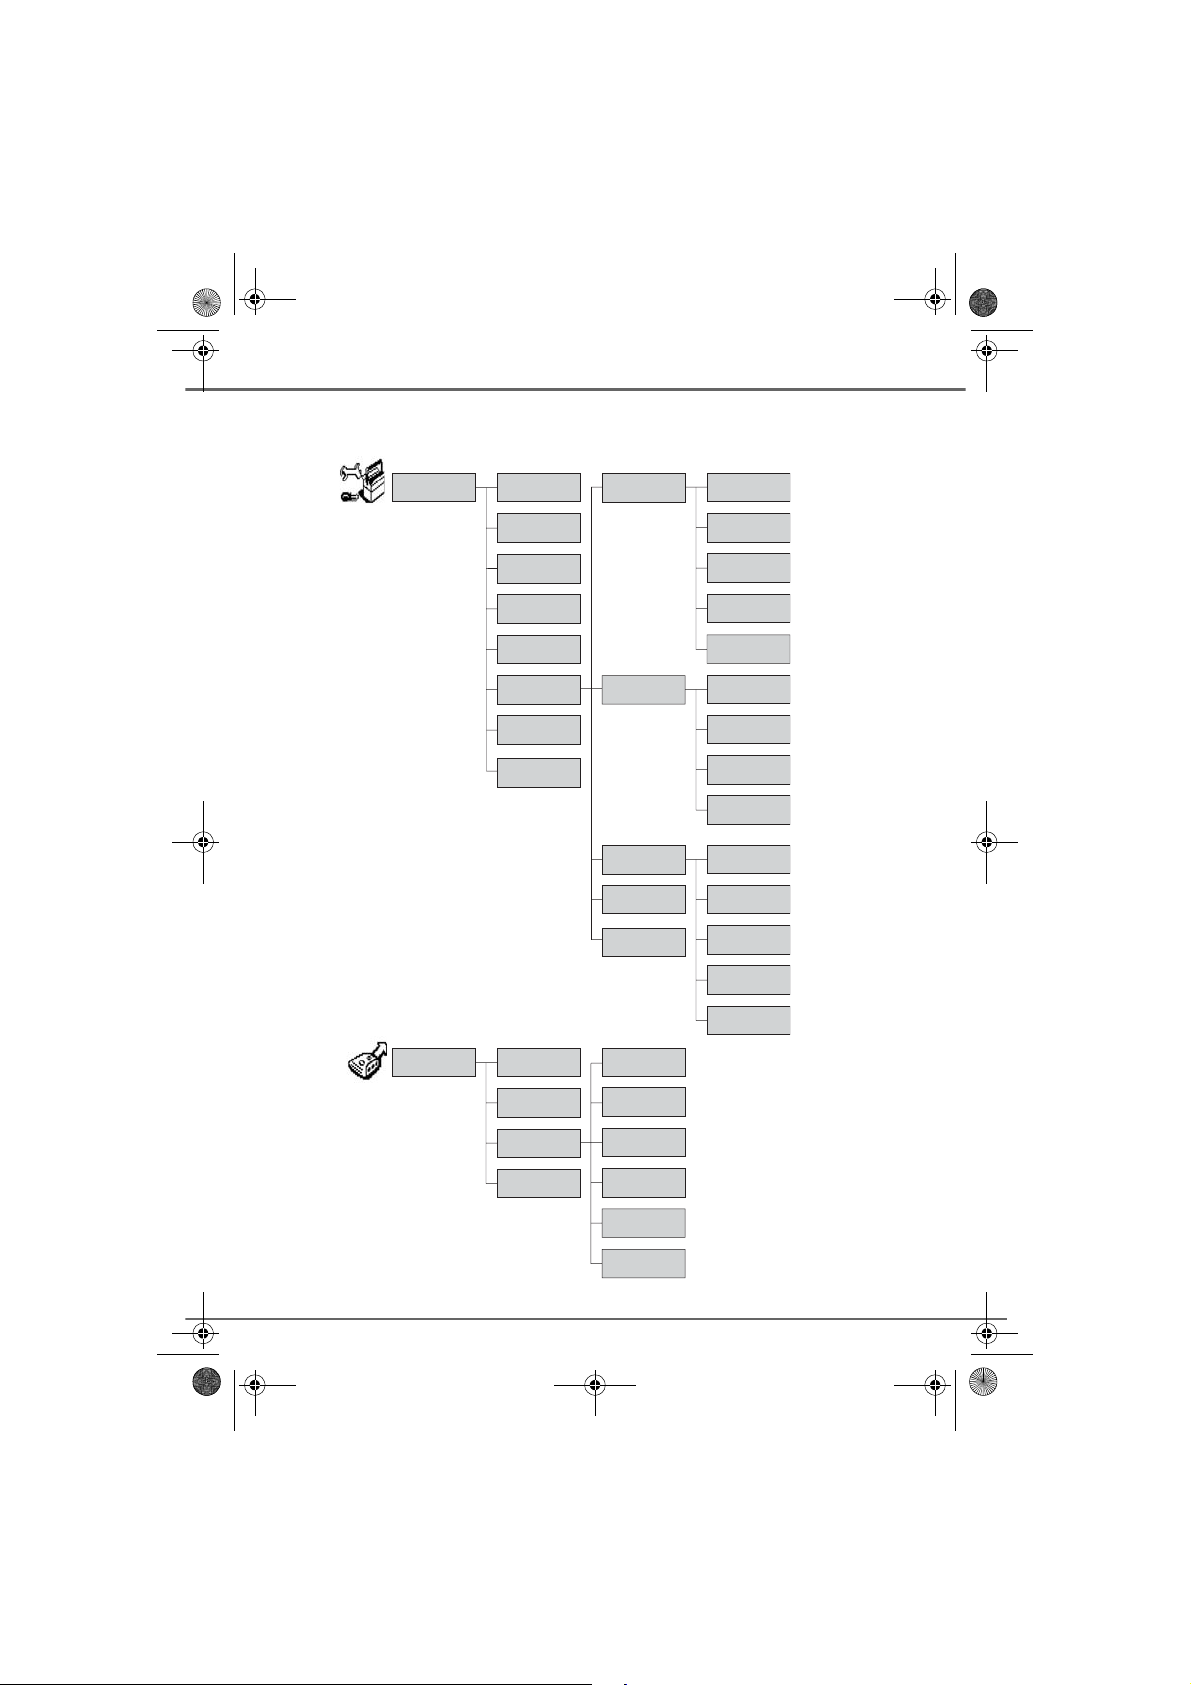
MENU STRUCTURE
ou can navigate through the menus using the navigator key .
Phonebook
Option
View
Call
Edit
Search
Send SMS
Edit SMSSMS
Read SMS
Memory
Empty SMS Box
Settings
SMS centre
Sub-Address
Private box
Ring tone
Add number
Calls
New entry
Delete
Incoming calls
Outgoing calls
Events
Alarm clockAccessories
Organiser
Birthday
Timer
Keypad lockSecurity
Internal call
Internal call
Transm. PhBk
Room monitor
Emergency
Change Code
Time limit
Restriction
Intrusion
Confidential
SilenceRinger
External ringer
Internal ringer
Downl. melody
Beeps
15
Livre du MD+.book Page 16 Mercredi, 31. mars 2004 1:57 13
MENU STRUCTURE
Program keysSettings
Date/time
Contrast
Auto Hang up
Auto Pick up
Adv. Settings
Help
Language
MessagesAns.Mach
HS Settings
Base Settings
Line Settings
TAM Settings
SMS Settings
Call screening
Registration
PreferredBase
Reset HS
Custom
Handset name
Registr. Mode
Reset Base
Delete Handset
Base name
Network type
Dial
Flashing
PABX prefix
Confid. Pref.
Outgoing msgs
TAM settings
On/Off
16
Remote Code
Mess.Duration
Priv. Access
Record. Mode
No. of rings
Livre du MD+.book Page 17 Mercredi, 31. mars 2004 1:57 13
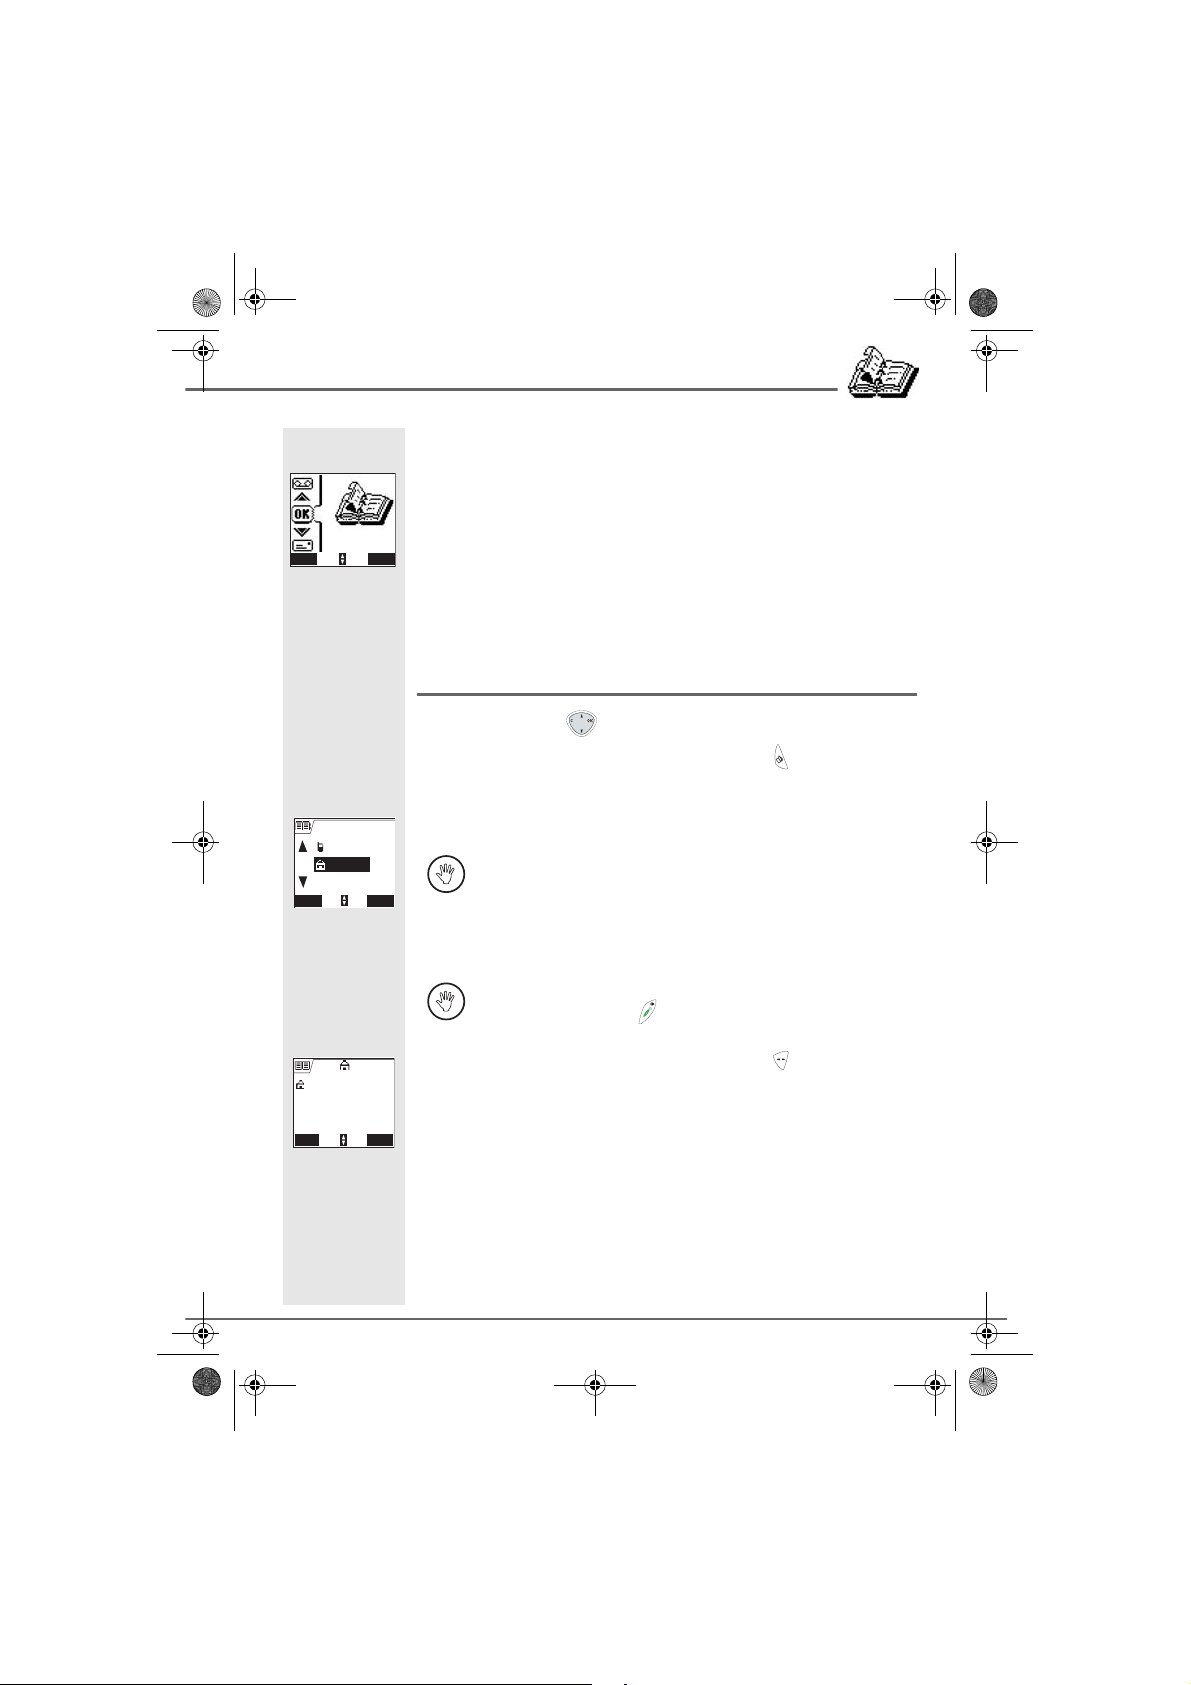
YOUR PHONEBOOK
YOUR PHONEBOOK
N
Phonebook
Return Confirm
02/150
Brown James
OK
Smith Tom
< New entry >
Return Option
You can store 150 phonebook entries in your phonebook.
Each phonebook entry can contain the name of your c ontact which can be
a maximum of 16 characters long (spaces included), your contact's
telephone number up to 24 digits and an icon identifying the type of
number (work, home, mobile...).
You can associate a unique ring tone to each entry and thus create your
own call groups. (To do so, you must activate the call display service on
your handset; contact your service provider to fin d out abo ut thi s service.)
Viewing the phonebook
On the navigator key , press or until the Phonebook screen is
displayed, press OK to confirm (you can also use to directly access
your phonebook).
The list of phonebook entries organised in alphabetical order appears.
The first time you access your phonebook, only the New entry
element appears in the list.
Select the entry you want to view using or . Once you have selected
it, press OK to confirm.
You can call the number that is as sociated to the en try direct ly by
pressing the green key .
Smith Tom
Smith Tom
0123456789
Return Option
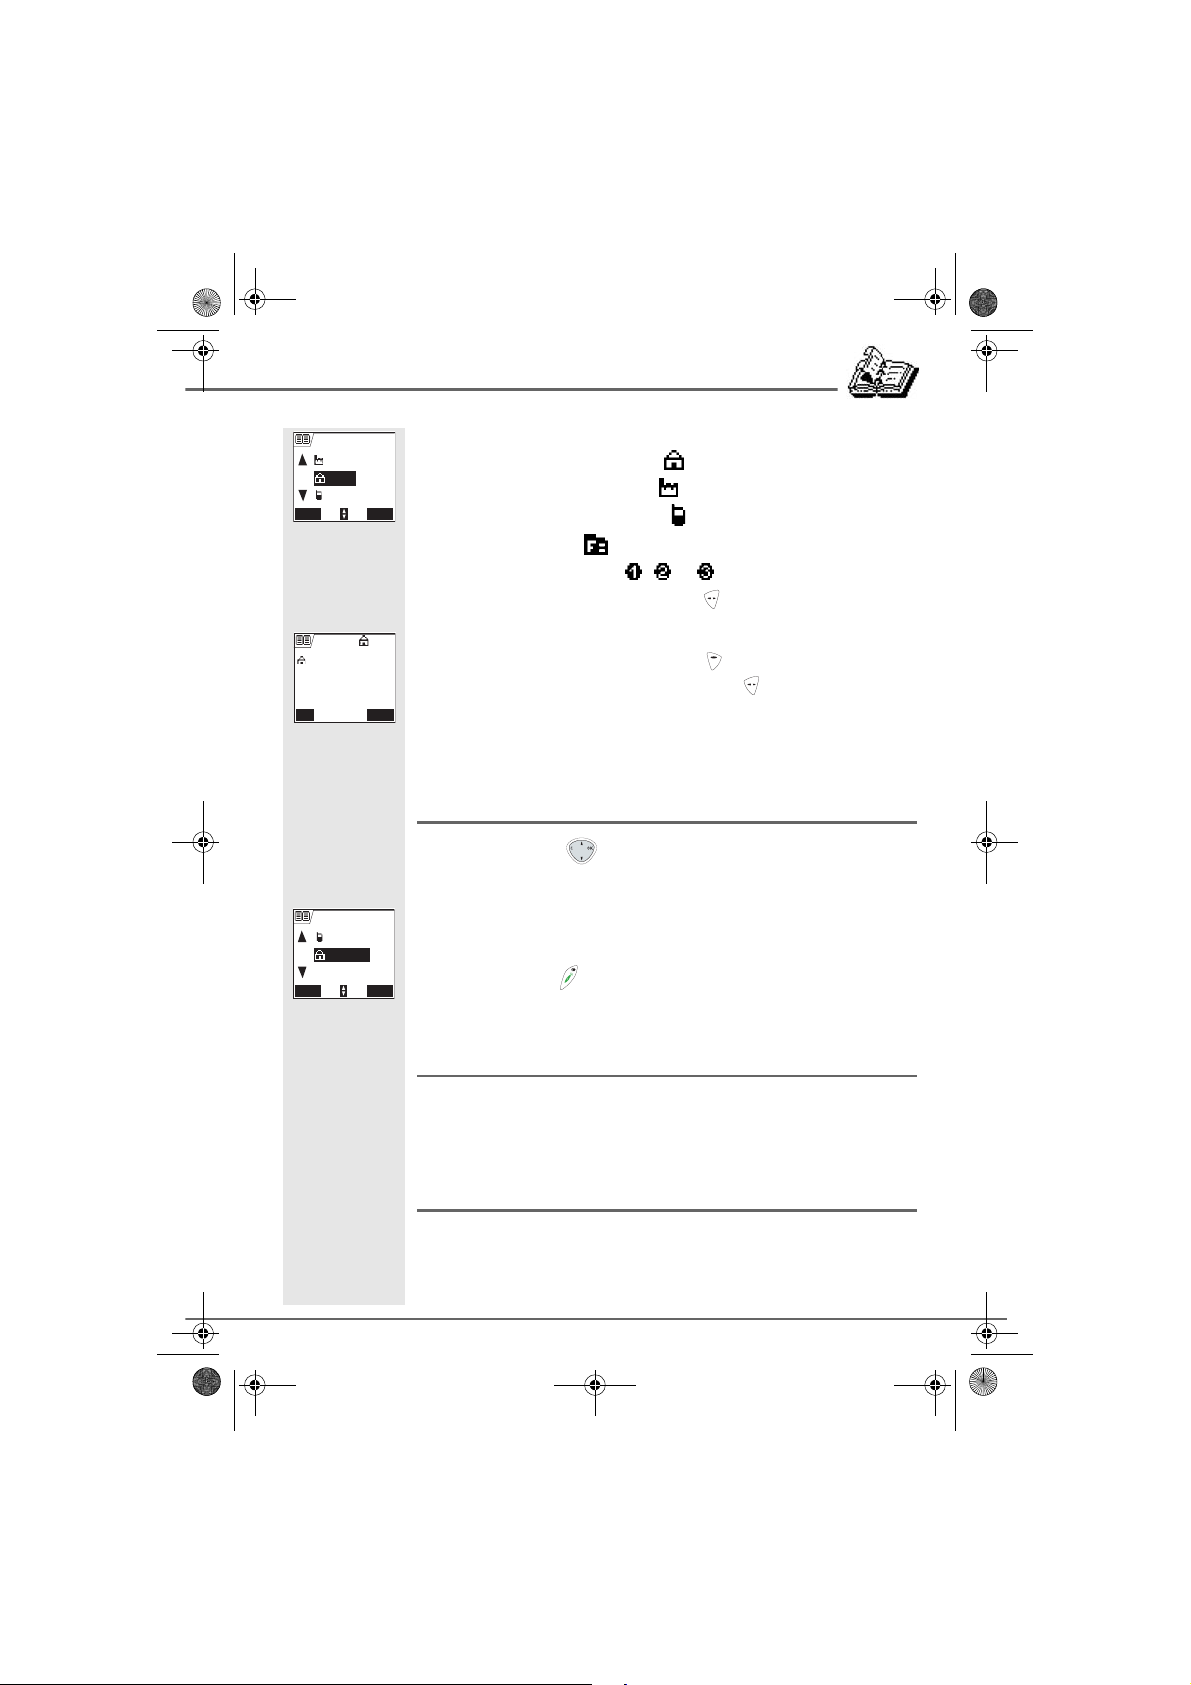
Once the entry appears on the screen, pre ss Option to display all of the
available actions that can be executed via the phonebook entry:
- View: to view the entry data.
- Call: to call the number associated to the entry.
- Edit: to edit the entry (name, number, icon).
- Search: to search for another entry.
- Send SMS: to send an SMS to a number associated to the
entry.
- Ring tone: to assign a unique ring tone to your handset that
will be used each time this num ber calls you (call er
display service mandatory)
- Add number: to enter a new number for the same name.
17

Livre du MD+.book Page 18 Mercredi, 31. mars 2004 1:57 13
YOUR PHONEBOOK
- New entry: to create a new entry in the phonebook.
- Delete: to delete the entry from your phonebook.
Select the action you wish to perform using or . Press Confirm .
To exit the phonebook, press the red key .
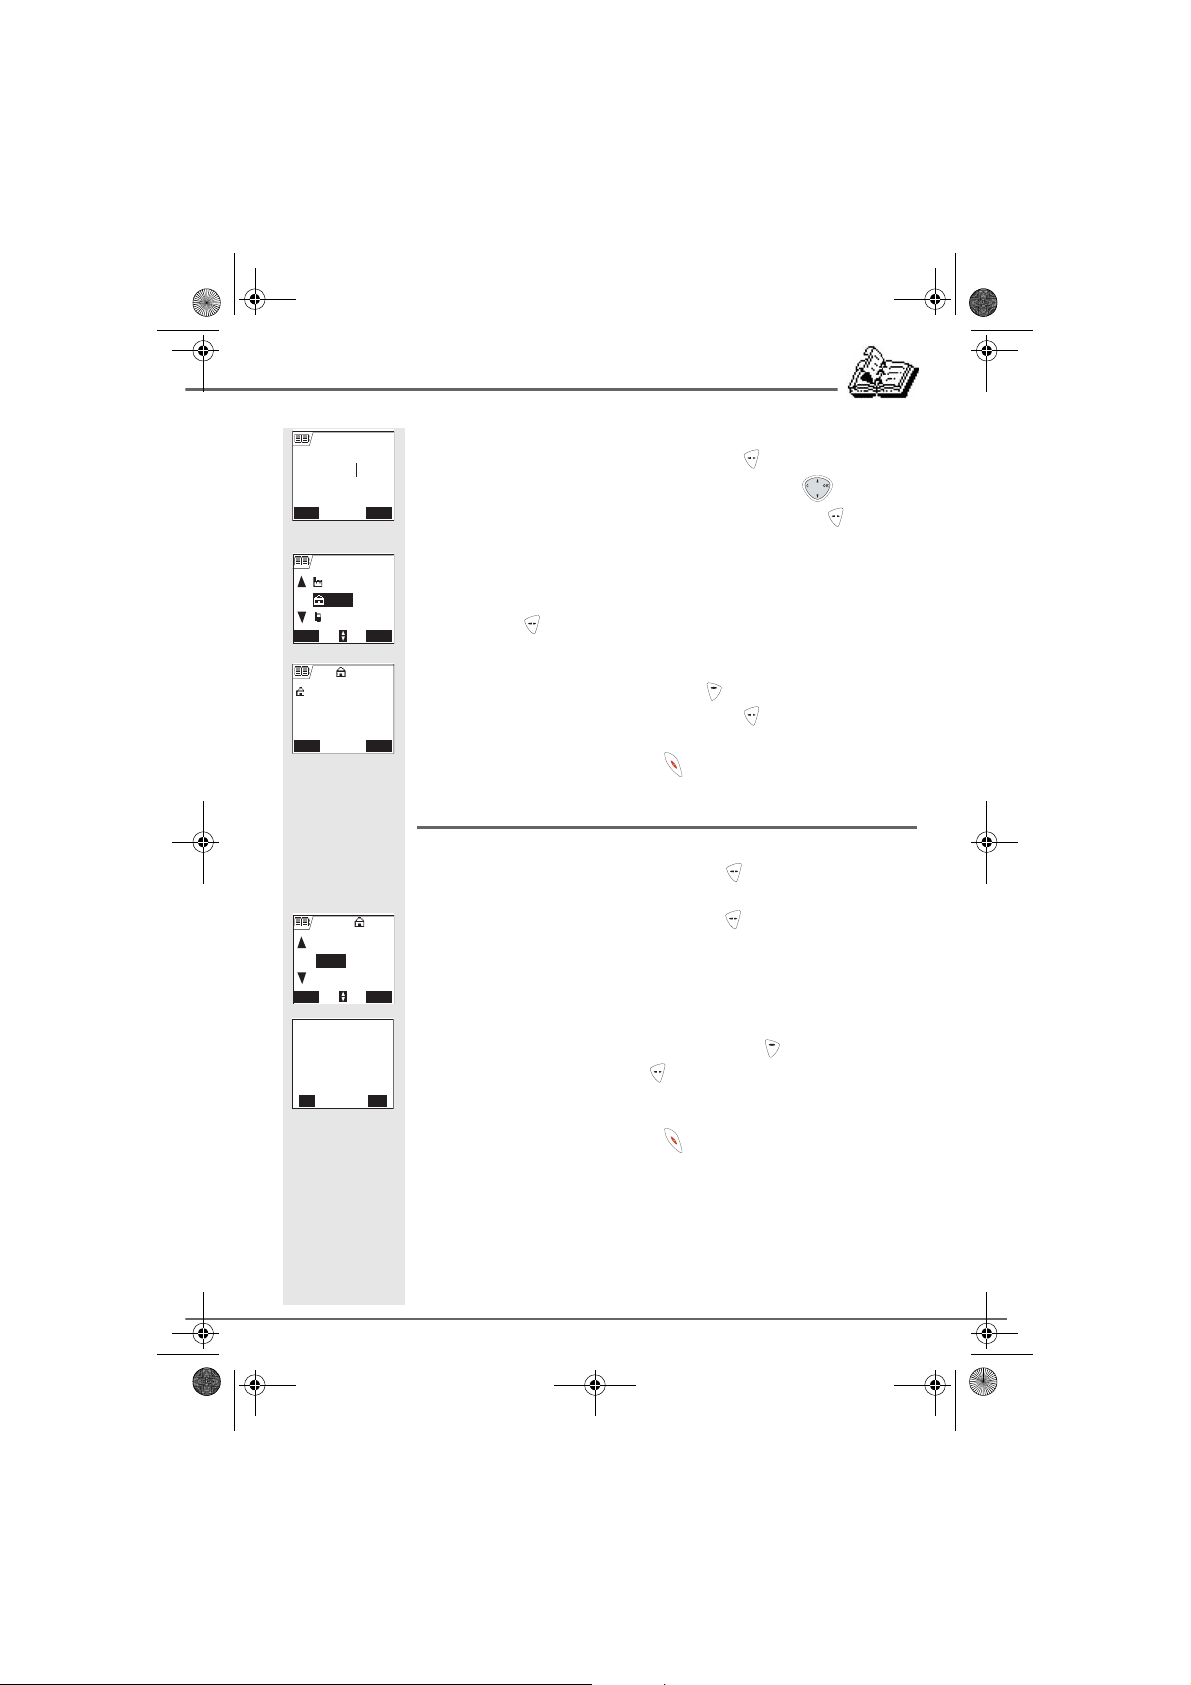
Creating an entry
Alphanumeric keypad key correspondence.
1 A, B, C, a, b, c, 2
D, E, F, d, e, f, 3 G, H, I, g, h, i, 4
J, K, L, j, k, l, 5 M, N, O, m, n, o, 6
P, Q, R, S, p, q, r, s, 7 T, U, V, t, u, v, 8
W, X, Y, Z, w, x, y, z, 9 special characters
space, 0, /, +, @, -, $, &, % # , " . : ; ! ? ’ ( ) _
To enter text press successively on the desired key until the letter is
displayed on the screen.
On the navigator key , press or until the Phonebook screen is
displayed, press OK to confirm.
02/150
Brown James
OK
< New entry >
Smith Tom
Return Confirm
New entry
Name :
< Enter name >
Return
Number:
< Enter number >
Return
Smith
Select New entry. Press Confirm .
The name input screen appears.
Using the keypad keys, enter the name of your contact by pressing
successively on the corresponding keys. In case of a mistake, press C to
erase one character at a time.
Once you are done making your changes, press Confirm .
The number input screen appears.
Now, enter the name of your contact using the keypad keys. In case of a
mistake, press C to delete one character at a time.
Once you are done making your changes, press Confirm .
18
Livre du MD+.book Page 19 Mercredi, 31. mars 2004 1:57 13
YOUR PHONEBOOK
Select an icon for this n umber, using or to specify t he type of number :
Smith
WORK
OK
HOME
MOBILE
Return Confirm
Smith
Edit Confirm
Smith
0123456789
- For a home telephone number .
- For a work telephone number .
- For a mobile telephone number ,
- For a FAX number .
- To differentiate numbers , or .
Once the icon is selected, press Confirm .
The information entered appears on your screen.
• To change this information, press Edit .
• The information is accurate. Press Confirm .
A new entry is created. It appears in the phonebook list. The name of this
entry corresponds to the beginning of your contact's name which is
preceded by a number type icon.
Using a phonebook entry to place a call
On the navigator key , press or until the Phonebook screen is
displayed, press OK to confirm.
R
02/150
Brown James
OK
Smith Tom
< New entry >
Return Option
The list of alphabetical phonebook entries appears.
Select your contact using or .
Press the green key to make the call.
Your telephone displays the number called and automatically dials it.
Searching for a contact
When referring to your phonebook, you can search for a contact by:
,
• navigating through the list using
,
• using quick search,
• using refined search.
Performing a quick search
Access your phonebook list, press successively on the keypad key which
corresponds to the first letter of the name you are searching for so as to
make it appear at the top of the screen.
19

Livre du MD+.book Page 20 Mercredi, 31. mars 2004 1:57 13
YOUR PHONEBOOK
Once the first letter of the name is displayed, wait a moment.
02/150
S
Brown James
OK
Smith Tom
< New entry >
Return Option
Edit
OK
Search
Send SMS
Return Confirm
Alpha. Search
Search
< Enter name >
Return
The phonebook selects the first name in the list that starts with the
selected letter.
Press or to select the specific entry that you wish to view or call,
press OK to confirm.
Performing a refined search
In the phonebook menu, press Option .
Select Search. Press Confirm .
Harris
Using the keypad, enter the first two letters of the contact you are
searching for.
The phonebook positions itself to the entry which comes closest to those
two characters.
Press or to select the specific entry that you wish to view or call,
press OK to confirm.
Harris
Call
OK
Edit
Search
Return Confirm
Name :
Harris Peter
Return Confirm
Editing an entry
To edit a phonebook entry (change the name, the number and/or the
number type icon), enter the phonebook, select the entry you want to edit
and confirm using OK to display it on the screen.
Once the entry is displayed on the screen, press Option .
Select Edit using or . Press Confirm .
You enter the name input screen. The cursor is at the end of the name.
Edit
• The information is accurate. Press Confirm .
• To correct the name, press C on the navigator key to delete
characters. Make your correction s u sing th e key p ad k eys by press ing
successively on the corresponding keys. Once you are finished , press
Confirm .
20
Livre du MD+.book Page 21 Mercredi, 31. mars 2004 1:57 13
YOUR PHONEBOOK
Harris Peter
Number:
0123456789
Return Confirm
Harris Peter
WORK
OK
HOME
MOBILE
Return Confirm
Harris Peter
Harris Peter
0123456789
Edit Confirm
Brown
New entry
OK
Delete
View
Return Confirm
Delete ?
No Yes
You enter the name input screen. The cursor is at the end of the number.
• The information is accurate. Press Confirm .
• To correct the number, press C on the navigator key to delete
the numbers. Enter the new number and press Confirm .
You enter the number type icon selection screen.
Select the icon according to the type of number entered using or .
Press Confirm .
The edited entry appears on the screen.
• To change this information, press Edit .
R
• The information is accurate. Press Confirm .
To exit the menu, press the red key .
Deleting an entry
To delete an entry, enter the phonebook, select the entry, confirm using
OK to display it on the screen. Press Option .
Select Delete using or . Press Confirm .
A confirmation screen asks you if you wish to delete the entry.
• If you do not wish to delete the entry, press No .
• To delete the entry, press Yes . The entry is deleted from the
phonebook.
R
To exit the menu, press the red key .
21
Livre du MD+.book Page 22 Mercredi, 31. mars 2004 1:57 13
SMS SERVICE
SMS SERVICE
N
Sms
Return Confirm
SMS
Settings
OK
Edit SMS
Read SMS
Return Confirm
Your text
Cancel SMS
9/160
Option
You can use your DECT telephone to send, receive and track SMS
messages (called text messages) that will be sent to either another fixed
SMS-capable telephone or a mobile telephone.
The SMS sending and receiving functions of your telephone are only
functional if your service provider offers the corresponding service to its
subscribers.
To send and receive SMS text messages, you need the
telephone numbers of your Network’s SMS Centre.
Sending a text message
On the navigator key , press or until the SMS screen is
displayed, press OK to confirm ( can al so be used to directly access the
SMS menu ).
Writing a text message
Once in the SMS menu, press or until the Edit SMS. Press
Confirm .
A text input screen appears.
Using the keypad keys, enter the text message by pressing successively
on the corresponding keys . The capital l etters are accessi ble by long p ress
on .
Alphanumeric keypad key correspondence depending on the activated
mode (capital letters or small letters).
’, 1, #, ,, ., :, ?, _,* a, b, c, 2
d, e, f, 3 g, h, i, 4
j, k, l, 5 m, n, o, 6
p, q, r, s, 7 t, u, v, 8
w, x, y, z, 9 s pe c ial characters
espace, 0, /, +, @, -, $, &, % #
To enter text press successively on the desired key until the letter is
displayed on the screen.
22
Livre du MD+.book Page 23 Mercredi, 31. mars 2004 1:57 13
SMS SERVICE
Making a correction
If you enter the wrong letter, press C on the navigator key to delete
one character at a time.
You can also move through the text to delete characters or insert new
ones.
Use or to move through the text. Once you have reach ed the location
where you want to insert or delete a character. Press Option .
Select Insert char. or Delete char. using or , depending on the
Delete char.
Insert char.
OK
Send
Return Confirm
operation you want to carry out. Press Confirm .
Capital letters/Small letters
When writing your message, you can enter capital letters or small letters.
During the SMS input, press Option . Select Capital letters or Small
letters. Press OK.
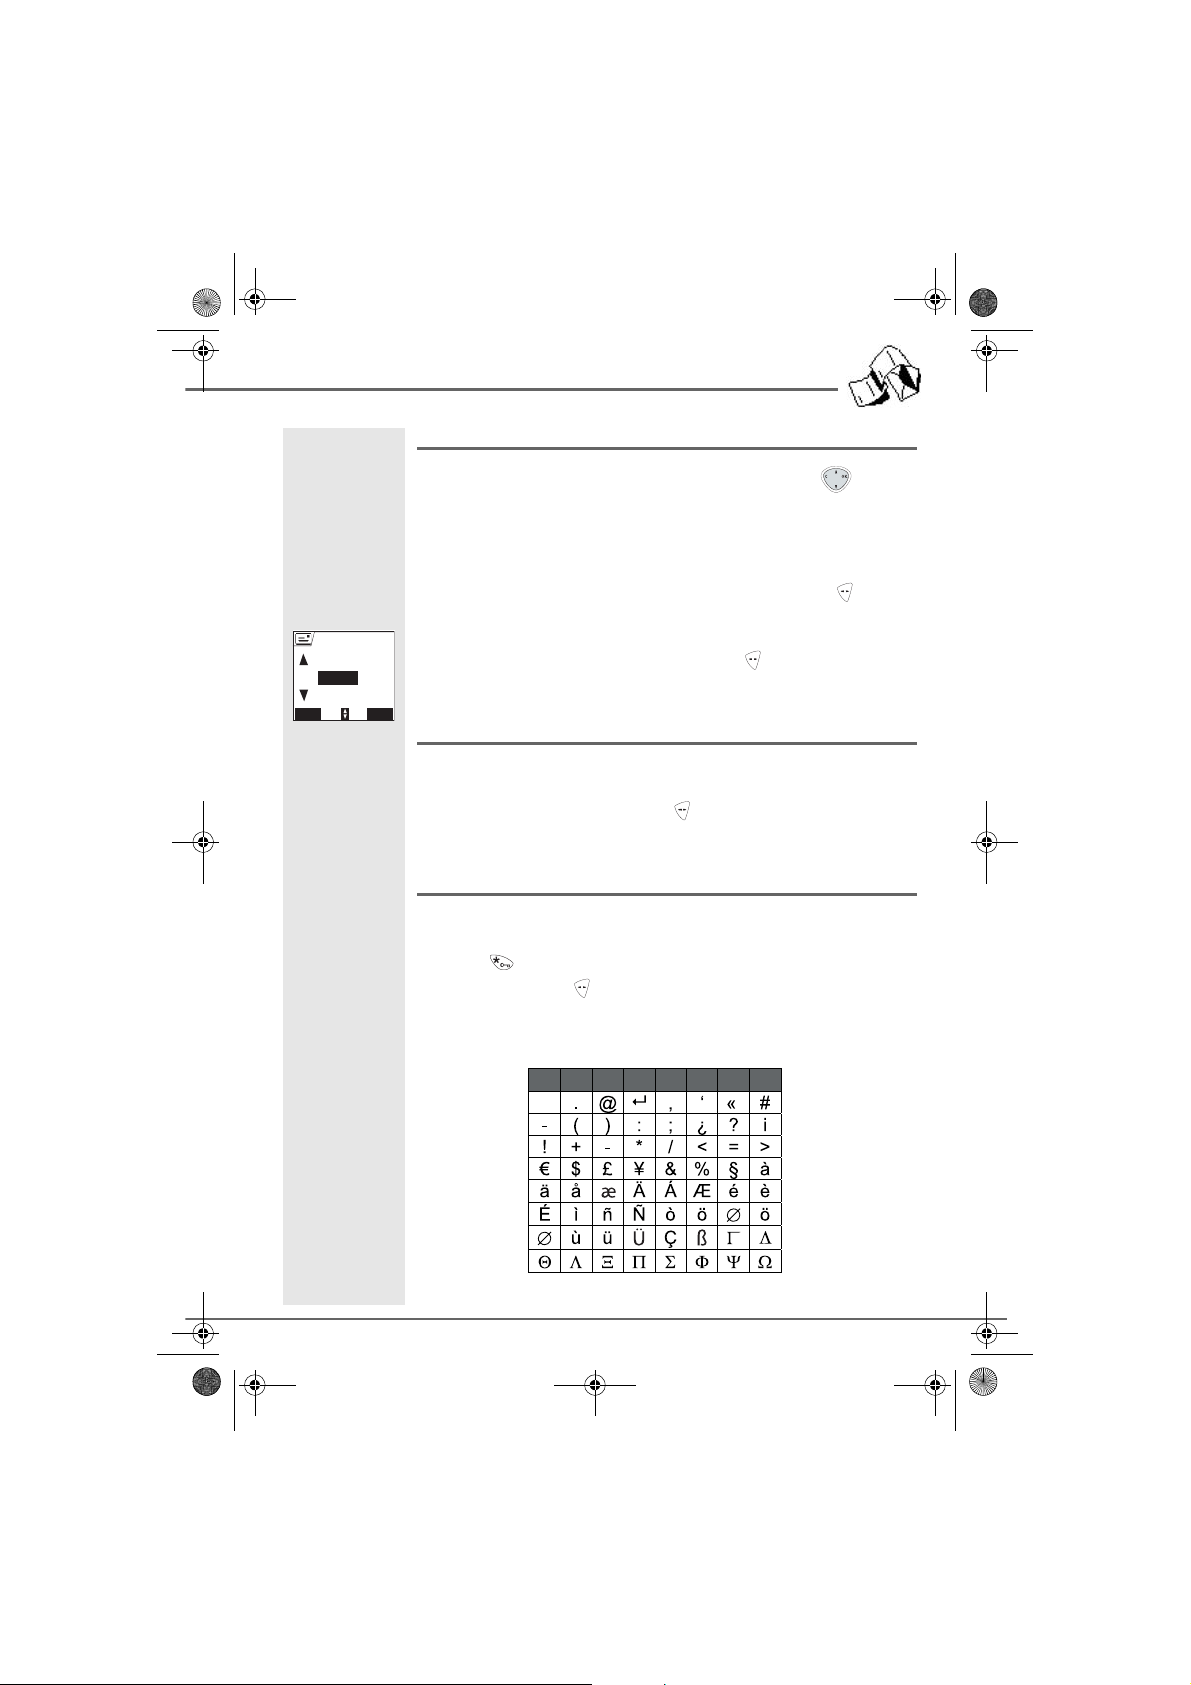
Special characters
During the writing process, certain special characters are accessible by
doing the following.
Press the button, using or and the keypad numbers, select the
desired character, use to validate.
(Example: "<" = 3 times on and once on the keypad number "6").
List of special characters:
1 2 3 4 5 6 7 8
23
Livre du MD+.book Page 24 Mercredi, 31. mars 2004 1:57 13
SMS SERVICE
EATONI predictive text entry assistance
For text input assistance, you can activate the EATONI predictive textentry help. It works with an entry probability algorithm. When pressing a
key on the numeric keypad, EATONI offers you as its first c hoice the letter
(among all those corresponding to the key pressed) that, statistically
speaking, will most likely be wanted (depending on the previous
characters entered).
To enable or disable EATONI, press Option whilst in the text input
Send +
Activate Eatoni
OK
Capital letters
Return Confirm
omnn6(
bo
Cancel SMS Option
screen and then select Activate Eatoni or Deact. Eatoni using or .
Press Confirm .
Writing SMS with EATONI:
Press the alphanumeric keypa d k ey c or respo ndi ng to the des ired le tter . A
2/160
blinking letter appears.
• If the letter corresponds t o the des ired letter, continue writing the SMS
by pressing the keypad ke y corres ponding to the next l etter (or to
insert a space or option to send the SMS).
• If the letter does not correspond to the desired letter, press
successively on to modify it until you get the desired letter.
The letters corresponding to the alphanumeric keypad key are
displayed on the top left side of the screen (in the order
respecting the successive presses on the key ).
Sending an SMS
Once you are done writing your text message, press Option to select
the type of delivery.
You can choose between the following options:
- Send: to transmit message.
- Store: to save your text as a draft. It can be sent at a later
time. The draft message is archived in the "Draft"
box.
- Cancel SMS: to permanently delete the text message that you
just entered.
- Send+: to sen d the te xt mes sage s peci fy ing opti ons (r efer
to paragraph Editing before transmitting,
page 25).
24
Livre du MD+.book Page 25 Mercredi, 31. mars 2004 1:57 13
SMS SERVICE
To transmit message
Select Send using or . Press Confirm .
Insert char.
OK
Send
Store
Return Confirm
To (phone No.) :
< Enter number >
Return
0123456789
Send sms to
0123456789
Edit
Transmission OK,
store SMS?
No
Enter or search for the receiver's number.
• Enter the number using the keypad. Press Confirm .
SMS
or
• If the receiver is listed in the phonebook as one of your contacts,
press (refer to paragraph Searching for a contact,
page 19). Press Confirm . Your contact's number appears. Press
Confirm .
A confirmation screen appears. It indicates the type of transmission and
the number to which your message will be sent.
• If the information is accurate. Press Confirm . A message appears
Confirm
on the screen indicating that the transmission of your SMS is in
progress.
• To change the phone number, edit or modify your text message, press
Modify . Press Edit .
At the end of the transmission, you can save a copy of your message. It
will be stored in the Sent SMS folder.
• To save the message, press Yes .
• If you do not want to save the message, press No .
Yes
R
R
Cancel SMS
OK
Send +
Activate Eatoni
Return Confirm
Editing before transmitting
You can modify the following options, depending on the services offered
by your service provider.
• Specify a transmitter personal box.
Select Send+ usi ng or . Press Confirm .
Enter the number of your recipient just like you do for the straightforward
transmission (see previous paragraph). Press Confirm . Answer the
questions that are asked regarding the functions.
The transmitter personal box (page 34) selection menu only
appears when at least one personal box is created.
25
Livre du MD+.book Page 26 Mercredi, 31. mars 2004 1:57 13
SMS SERVICE
0123456789
Do you want to
specify a user?
No Yes
0123456789
SMS box 3
OK
SMS box 1
SMS box 2
Return Confirm
Transmission OK,
store SMS?
No
Fail XXXX
Continue
0123456789
Edit SMS
OK
Save
Try again
Return Confirm
Press Yes to select a transmitter box.
Select the transmitter box from the list that appears. Press Confirm .
Enter the code associated to the box. Press Confirm .
Once you are done, a screen displays your receiver's number.
• To make a correction, press Edit . Make the desired corrections
R
and press Confirm .
• The information is accurate. Press Confirm . A message appears
on the screen indicating that the transmission of your SMS is in
progress.
At the end of the transmission, you can save a copy of your message. It
will be stored in the Sent SMS folder.
• To save the message, press Yes .
• If you do not want to save the message, press No .
Yes
R
In the event of a delivery failure
An information screen appears indicating that your service provider was
unable to deliver your message.
Press Continue .
Different options come up on the screen:
- Save: to save your text in draft form. Once it is saved, you
will be able to resolve the potential problems and
send your message at a later time without having
to enter it again.
- Try again: to attempt a new delivery.
- Delete SMS: to permanently delete your SMS.
- See receiver: to check the phone number or send the SMS
again.
- Edit SMS: to change the delivery type and number or your
text.
Choose an action using or . Press Confirm .
26

Livre du MD+.book Page 27 Mercredi, 31. mars 2004 1:57 13
SMS SERVICE
Reading a message
Your telephone has 5 different folders in which your SMS messages are
stored.
- New: contains the unread messages.
- Inbox: contains the read messages that you have chos en
- Sent: contains the copies of sent messages that you
- Draft: contains the messages that you wrote and that
- Melodies: contains the SMS melodies that you received.
On the navigator key , press or until the SMS menu is displayed,
press OK to confirm.
Select Read SMS using or . Press Confirm .
SMS
Edit SMS
OK
Read SMS
Memory
Return Confirm
SMS boxes
Melodies (00)
OK
New (02)
Inbox (05)
Return Confirm
Inbox 1/20
31/10 SMITH
10:01 0123456789
OK
17:30 Unknown
Return Option
A list of the different fol der s appear s. The n umber of messages contained
in each folder is displayed in brackets.
Using or , select the folder containing the message you would like to
view. Press Confirm .
The list of messages conta ined in the folder is then displ ayed, starting with
the most recent message to the oldest one.
The first 4 numbers indicate:
• the arrival time ( in 12 :00 form at) for the mes sage s receiv ed dur ing the
current day,
• the arrival date (in 30/01format) for messages received previously or
prior to the current day.
to keep.
saved.
have not been sent out.
Their use is described in the Ringer (refer to
paragraph The downloaded melodies, page 59)
menu.
The following characters indicate the sender of the message if he/she is
known.
Select the message you would like to view using or , press OK to
confirm.
27

Livre du MD+.book Page 28 Mercredi, 31. mars 2004 1:57 13
SMS SERVICE
The written message is displayed on the screen.
Smith
Hello, i come back
today.
Transferred
Activate magnif.
OK
Delete
Return Confirm
To return to the beginning of the message press .
To return to the list of messages, move to the beginning of the message
OptionReturn
and press .
R
Activating or deactivating the magnifier
You can also read your message in full screen mode thanks to the
magnifying function. In that case, the text message is displayed using
smaller characters and on 6 lines.
To activate the magnifying function, press Option .
Select Activate magnif. or Deact. magnif. using or . Press
Smith
Confirm .
Move the text display using or .
You can also activate or deactivate the magnifier by holding down
(long press)
Managing read messages
R
.
Smith
Delete
Answer
OK
Archive
Return Confirm
Once the message has been read, press Option and select:
- Answer: to write an SMS in response to the message
received (the receiv er number of the n ew SMS will
automatically be entered).
- Archive: to keep this message. It will be stored in the
"Inbox" message folder.
- Delete: to permanently delete this SMS.
- Transfer: to forward this message to a new recipient. You
will be able to modify the original message.
- Call: to call the SMS sender number.
- No. to Phonebk: to save the SMS sender number in your
phonebook.
Select the desired option using or . Press Confirm .
Viewing the memory status
You can store 30 different SMS mess ages. T hese c an be indi s cri minatel y
distributed between the various folders.
28

Livre du MD+.book Page 29 Mercredi, 31. mars 2004 1:57 13
SMS SERVICE
Once the number of stored SMS has reached 30, an information message
will indicate that no new messages can be stored.
Once the maximum storage capacity is reached, you cannot
receive new SMS. To receive new message, p lease delete some
of the stored messages.
On the navigator key , press or until the SMS screen is
displayed, confirm using OK.
Select Memory using or . Press Confirm .
SMS
Read SMS
OK
Memory
Empty SMS Box
Return Confirm
A screen informs you as to the number of messages contained in each
Memory
Avail.
---------
New
Return
Draft
Melodies
All
Return
24/30
02
06
00
06/30
folder (new, inbox, sent, draft and melodies). It also indicates the total
number of messages stored and the amount of space available.
Use or to view all of the information.
Memory
To exit the memory information screen, press Return .
Emptying an SMS folder
R
SMS
Memory
OK
Empty SMS Box
Settings
Return Confirm
This function is used to delete all the messages contained in a folder. To
delete the messages one by one refer to paragraph Managing read
messages, page 28.
When you empty an SMS folder, no message linked to
personal box will be erased.
On the navigator key , press or until the SMS screen is
displayed, confirm using OK.
Select Empty SMS Box using or . Press Confirm .
29

Livre du MD+.book Page 30 Mercredi, 31. mars 2004 1:57 13
SMS SERVICE
Empty box
Melodies (00)
OK
New (02)
Inbox (05)
Return Confirm
Empty box ?
No
Select the folder you want to empty by pressing or (New in the
current screen). Press Confirm to delete all messages in the selected
folder.
A delete confirmation screen appears.
•Press No if you do not want to empty the folder.
R
•Press Yes to empty the folder.
Yes
To exit the menu, press the red key .
Sending SMS text messages from mobile phones
Your telephone can receive messages from ANY mobile phone (both
national and internationa l) provided the following i nstructions are followed.
When replying to an telephone from a mobile phone
Mobile users should select REPLY on their mobile phone and anywhere
within the text of their message they must insert the fixed line telephone
number with a # symbol before and after it.
This will ensure the message is successfully received by your telephone.
For example, when replyi ng to telephone number 0212 121212 anyw here
within the text of the message the sender should add #0212 121212#.
When replying using the subaddressing feature
Please ensure that you enter the handset number at the end of the
telephone number and before the # if you wish to send a private SMS
which will be received privately on the telephone.
For example, if you wish to send an SMS text message privately to
handset number 3 you would need to enter #0212 1212123#.
When sending a new message to an telephone from a
mobile phone
When mobile users compose an SMS text message they must insert,
anywhere within the message, the fixed line telephone number with a #
symbol before and after it.
30

Livre du MD+.book Page 31 Mercredi, 31. mars 2004 1:57 13
SMS SERVICE
For example, when sending a message to telephone numbe r 0212 121212
anywhere within the text of the message the sender would have to add
#0212 121212#. The SMS te xt message should then be se nt to 07786 2 01
010.
When sending using the subaddressing feature
Please ensure that you enter the handset number at the end of the
telephone number and before the # if you wish to send a private SMS
which will be received privately on the telephone.
For example, if you wish to send an SMS text message privately to
handset number 3 you would need to enter #0212 1212123#.
Mobile users are advised to st o re th e text ser ve r number ( 07786
201 010) in their mobile phone directory.
New SMS text messages sent from mobile phones are sent to
07786 201 010 (SMS server) who forward the mess age onto the
recipient.
31

Livre du MD+.book Page 32 Mercredi, 31. mars 2004 1:57 13
SMS SETTINGS
SMS SETTINGS
You can access the SMS settings menu via the SMS menu or the Adv.
SMS
Empty SMS Box
OK
Settings
Edit SMS
Return Confirm
SMS Settings
Private box
OK
SMS centre
Sub-Address
Return Confirm
SMS centre
Sending centre :
>
Edit Confirm
Settings submenu in the Settings menu.
Modifying the SMS centre number
This function enables you to modif y the number s of the SMS send ing and
reception centres (depending on the service provider).
On the navigator key , press or until the SMS screen is
displayed, press OK to confirm.
Select
Settings
Select
SMS Centre
An information screen provides the number of the SMS sending centre.
• To change the number, press Edit . Enter the new number in the
input screen and press Confirm .
• To keep the number, press Confirm .
using or . Press
using or . Press
Confirm
Confirm
R
.
.
SMS centre
Reception centre:
>
Edit Confirm
An second information screen shows the number of the SMS sending
centre.
• To change the number, press Edit . Enter the new number in the
R
input screen and press Confirm .
• To keep the number, press Confirm .
To exit the menu, press the red key .
Terminal number
This number is configured at the factory and you do not usually need to
modify it. However, if several SMS terminals are installed on you r line, they
must have different terminal numbers. You must modify the terminal
number for one of them.
32

Livre du MD+.book Page 33 Mercredi, 31. mars 2004 1:57 13
SMS SETTINGS
Modifying the terminal number
If you have several SMS-type devices connected to the same telephone
, you must assign a different number ranging from 0 to 9 to each
line
device.
Remember to give you r contac ts th e te rmi na l numb er on which you would
like to receive your messages.
SMS Settings
SMS Centre
Sub-Address
OK
Private box
Return Confirm
SMS terminal
Terminal no. :
9
Edit Confirm
Telephone line
MOTHER
FATHER3SISTER4BROTHER
COLLECTIVE
0123456789
Sub-Address
1
2
For example, in the case of an SMS message addressed to the device
FATHER your contact will send his SMS to:
0123456789 2
(Telephone number followed by the terminal number)
If your contact forgets to include the terminal number, the SMS
message will be sent to terminal 0 by default.
If no device is parameterised with the terminal number 0, the
message will be sent to you in the form of a voice message.
If you do not assign a different number to each SMS-type
device connected on the same lin e, you will not be able to
receive SMS.
On the navigator key , press
or until the SMS screen is
displayed, press OK to confirm.
Select Settings using or . Press Confirm .
Select Sub-Address using or . Press Confirm .
An information screen shows the current number of the telephone SMS
terminal.
• To change the number, press Edit . Then enter the new number
R
(included between 0 and 9). Press Confirm .
• To keep the terminal number, press Confirm .
0
To exit the menu, press the red key .
33
Livre du MD+.book Page 34 Mercredi, 31. mars 2004 1:57 13
SMS SETTINGS
SMS boxes (depending on the service provider)
"Personal boxes" allow you to receive personal SMS. These SMS will
arrive in the New folder, the box owner will be able to view them by
entering the user code that he will have defined when creating his SMS
box.
You can create up to 9 "per sonal b ox es" w hi ch al l ow the di ffer ent us ers to
manage their private SMS (transmission, reception, archive).
Each box is protected by a code and identified by a number representing
the corresponding sub-address.
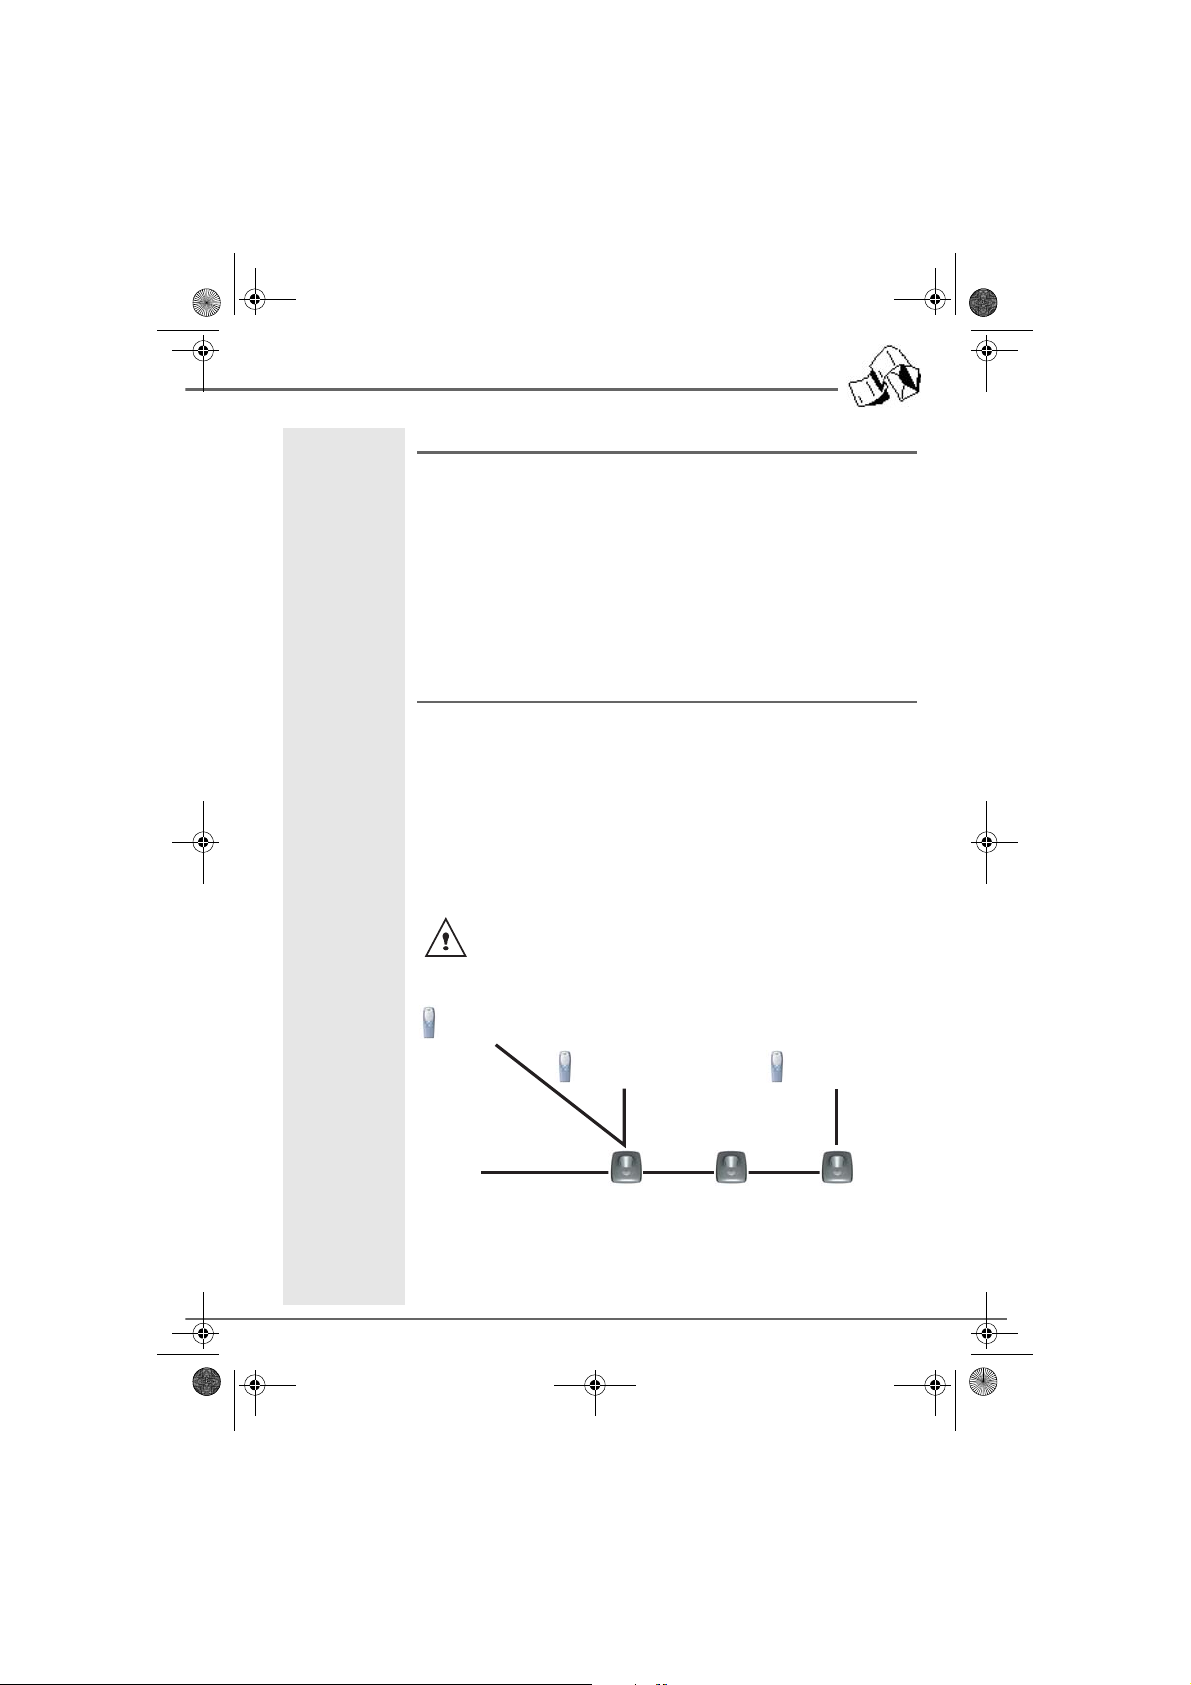
Sub-Addressing
You have 10 sub-addresses (9 personal and 1 collecti ve) assigne d to your
telephone line (telephone number). You can assign each one of these subaddresses:
• to a terminal (the SMS for this sub-address arrive in the DECT base
collective box)
• or to a personal box (the SMS received for this sub-address arrive in
the private password protected SMS box)
The sub-address is a number that must be added at the end of your
telephone number (11th digit) by those who wish to send you SMS.
If you use the same sub-address twice for the same telephone
line, your units may not receive the SMS for this sub-address.
Example:
MOTHER: Box 6
SMS sent to 0123456789 6
Telephone line
0123456789
Sub-Address
Bertrand : Box 5
SMS sent to 0123456789 5
0
Collective box
0123456789 0
34
1
Collective box
0123456789 1
PAPA : Box 7
SMS sent to 0123456789 7
2
Collective box
0123456789 2

Livre du MD+.book Page 35 Mercredi, 31. mars 2004 1:57 13
SMS SETTINGS
Creating a personal box
On the navigator key , press or until the SMS screen is
displayed, press OK to confirm.
Select Settings. Press Confirm .
SMS Settings
Sub-adress
Private box
OK
SMS centre
Return Confirm
Private box
BoxN
< New >
OK
Box1
Return Confirm
Private box
SMS box name:
< Enter name >
Return
Name
SMS box code:
<Enter code>
Return
Name
Confirm code:
< Enter code >
Return
Select Private box using or . Press Confirm .
Select New using or . Press Confirm .
Enter the box name. Press Confirm .
If you enter a name that already exists, a mess age te lls you that
the name already exists. The box name can have no more than
10 characters.
Enter the code associated to the box. Press Confirm .
The user code must contain 4 digits.
Enter the code associated to the box again. Press Confirm .
The telephone provides you with a ter minal nu mber a ssociated to the box.
Press Confirm to keep this terminal number.
Press Edit to change the terminal number. Select one of the terminal
R
numbers available in the list. Press Confirm .
The name is added to the personal box list.
35

Livre du MD+.book Page 36 Mercredi, 31. mars 2004 1:57 13
SMS SETTINGS
Viewing a message from a personal box
On the navigator key , press or until the SMS screen is
displayed, press OK to confirm.
Select Read SMS using or . Press Confirm .
Select New or Inbox using or . Press Confirm .
New 2/20
31/10 Harris
OK
10:01 => Father
17:30 Unknown
Return Option
Private box
Cancel
Change code
OK
Edit name
Return Confirm
The list of new messages is displayed, the messages addressed to a
specific user are displayed in the following fashion: an arrow + "the name
of the personal box".
Select the message using or . Press Confirm .
Enter the box code. Press Confirm .
The message is displayed on the screen. For more details regarding the
operations you can perform, refer to paragraph Reading a message,
page 27.
Modifying or removing a personal box
On the navigator key , press or until the SMS screen is
displayed, press OK to confirm.
Select Settings. Press Confirm .
Select Private box. Press Confirm .
Select the name of the personal b ox you want to mod ify or del ete using
or . Press Confirm .
The following options are available:
- Change code: to modify the code associated to the user.
- Edit name: to change the user name.
- Modify terminal: to change the terminal number.
- Cancel: to remove the user.
If an SMS is sent to a personal box not listed on your telephone
(or if this box was removed), the SMS will not be delivered.
To delete a user at the end of a procedure, you must confirm
deletion by entering the base's code.
36

Livre du MD+.book Page 37 Mercredi, 31. mars 2004 1:57 13
CALL LOG
CALL LOG
This menu enables you to view the call or event lists of your telephone.
The dialled call log presents the calls you made.
Calls
Return Confirm
The received call log presents the calls you received.
The event log groups together all the new events that took place in your
absence:
• reception of an SMS,
• new messages on the answering machine (depending on the model),
• calls received during your absence.
Viewing the received and dialled call log
On the navigator key , press or until the Calls screen is
displayed, press OK to confirm.
Calls log
Events
OK
Incoming calls
Outgoing calls
Return Confirm
Marie
Marie
01 23 45 67 89
01/11 - 10:44 (12 min)
Return
Option
Select Incoming calls or Outgoing calls, using or . Press
Confirm .
The presentation screen for the last call received or dialled appears.
This screen presents the following information (depending on the service
provider and subscription):
• the full name of your contact,
• the telephone number, date, time and duration of the call.
To view the previous calls, use or . The calls are organized in
chronological order, from the most recent call to the oldest call.
By pressing Option , a list of various executable actions appears:
- Call: To call the number.
- No.>PhBook: To store the name and number in the
phonebook.
- Send SMS: To send an SMS to your contact.
- Delete all: To delete all calls.
- Delete: To delete the call currently viewed.
- View: To view the selected call again.
To return to the call view screen, press Return .
R
To exit the menu, press the red key .
37

Livre du MD+.book Page 38 Mercredi, 31. mars 2004 1:57 13
CALL LOG
Calling the last number dialled (Redial)
Your telephone has a shortcut key that can be used to automatic ally redial
the last number dialled.
From the idle screen, press and hold the green key until the C all log
screen appears. Release , the last dialled number appears. Press the
green key again. The number is dialled automatically.
You can view the other dialled calls by pressing or on the
navigator key .
Calling a number listed in the dialled and received call
log
On the navigator key , press or until the Calls screen is
displayed, press OK to confirm.
Select Outgoing calls or Incoming calls, using or . Press
Confirm .
Marie
01 23 45 67 89
01/11 - 10:44 (12 min)
Return
NEW EVENTS
View?
No
The presentation screen for the last call received or dialled appears.
Marie
Use or to locate the contact you wish to call. The calls are organi zed
in chronological order, from the most recent call to the oldest call.
Option
Once the call is displayed on the screen, press the green key .
The number is dialled automatically.
Viewing the events log
If one or more new events occurred during your absence, the information
screen "NEW EVENTS View?" appears.
• If you do not wish to view the event log at this time, press No .
Yes
• To view the event log, press Yes .
Once the event log has been viewed, the information screen
disappears. You can however view it again via the "Calls" menu
38
R

Livre du MD+.book Page 39 Mercredi, 31. mars 2004 1:57 13
CALL LOG
A summary screen appears. It informs you as to the various events that
took place during your absence:
• the new SMS received,
• the new messages on the answering machine (depending on the
model),
• the calls received during your absence.
Choose the event using or . Press Confirm .
Events
1 Missed call
OK
2 New Mess.
1 New SMS
Return Confirm
The event appears on the screen.
39

Livre du MD+.book Page 40 Mercredi, 31. mars 2004 1:57 13
ACCESSORIES
ACCESSORIES
This menu offers you numerous additional functionalities:
• Alarm clock: to use your handset as an alarm clock.
Accessories
Return Confirm
• Organiser: the handset will ring at the set date and time to remind
you of an appointment (by displaying the scheduled appointment on
the screen).
• Birthday: the handset will ring at the set date and time to remind you
of the name of the person to whom you would like to wish happy
birthday.
• Timer: to remind you of an event (programmed to s ou nd a t the end of
a few minutes or a few hours).
Alarm clock
The alarm function enables you to ac tivate the handset r inger every day at
a set time.
When the alarm is triggered the selec ted r ing t one sounds for 60 sec onds
through the handset speaker and an alert screen is displayed. To turn off
the alarm press any key on the handset.
Setting the alarm clock
Accessories
Timer
OK
Alarm clock
Organiser
Return Confirm
Alarm clock
00:00
Alarm deactivated
Edit Confirm
On the navigator key , press or until the Accessories screen is
displayed, press OK to confirm.
Select Alarm clock using or . Press Confirm .
An information screen shows the alarm clock status.
- the time at which the handset will ring,
- if the alarm is on or off.
• To keep these settings, press Confirm .
• To change the alarm time or status (on or off), press Edit .
R
A list showing the different settings appears.
40

Livre du MD+.book Page 41 Mercredi, 31. mars 2004 1:57 13
ACCESSORIES
Activating or deactivating the alarm clock
Alarm clock
Ring tone
OK
Activate
Set Time
Return Confirm
Alarm clock
00:00
Alarm activated
Edit Confirm
Alarm clock
Activate
OK
Set Time
Ring tone
Return Confirm
Alarm clock
Time
0
0:00
Return Confirm
Alarm clock
12:00
Alarm activated
Edit Confirm
To activate or deactivate the alarm clock without changing the time.
Select Activate or Deactivate in the list using or . Press Confirm .
The alarm settings information screen appears showing the new status.
Press Confirm .
Modifying the alarm clock time
Select Set Time in the list using or . Press Confirm .
Enter the time at which you would like the alarm clock to sound. Press
Confirm .
The information screen displays the new setting. Press Confirm .
Once the time has been set, the alarm is automatically
activated.
Changing the alarm clock ring tone
Alarm clock
Set Time
OK
Ring tone
Activate
Return Confirm
Alarm clock
Dring
OK
Flute
Atto
Return Volume
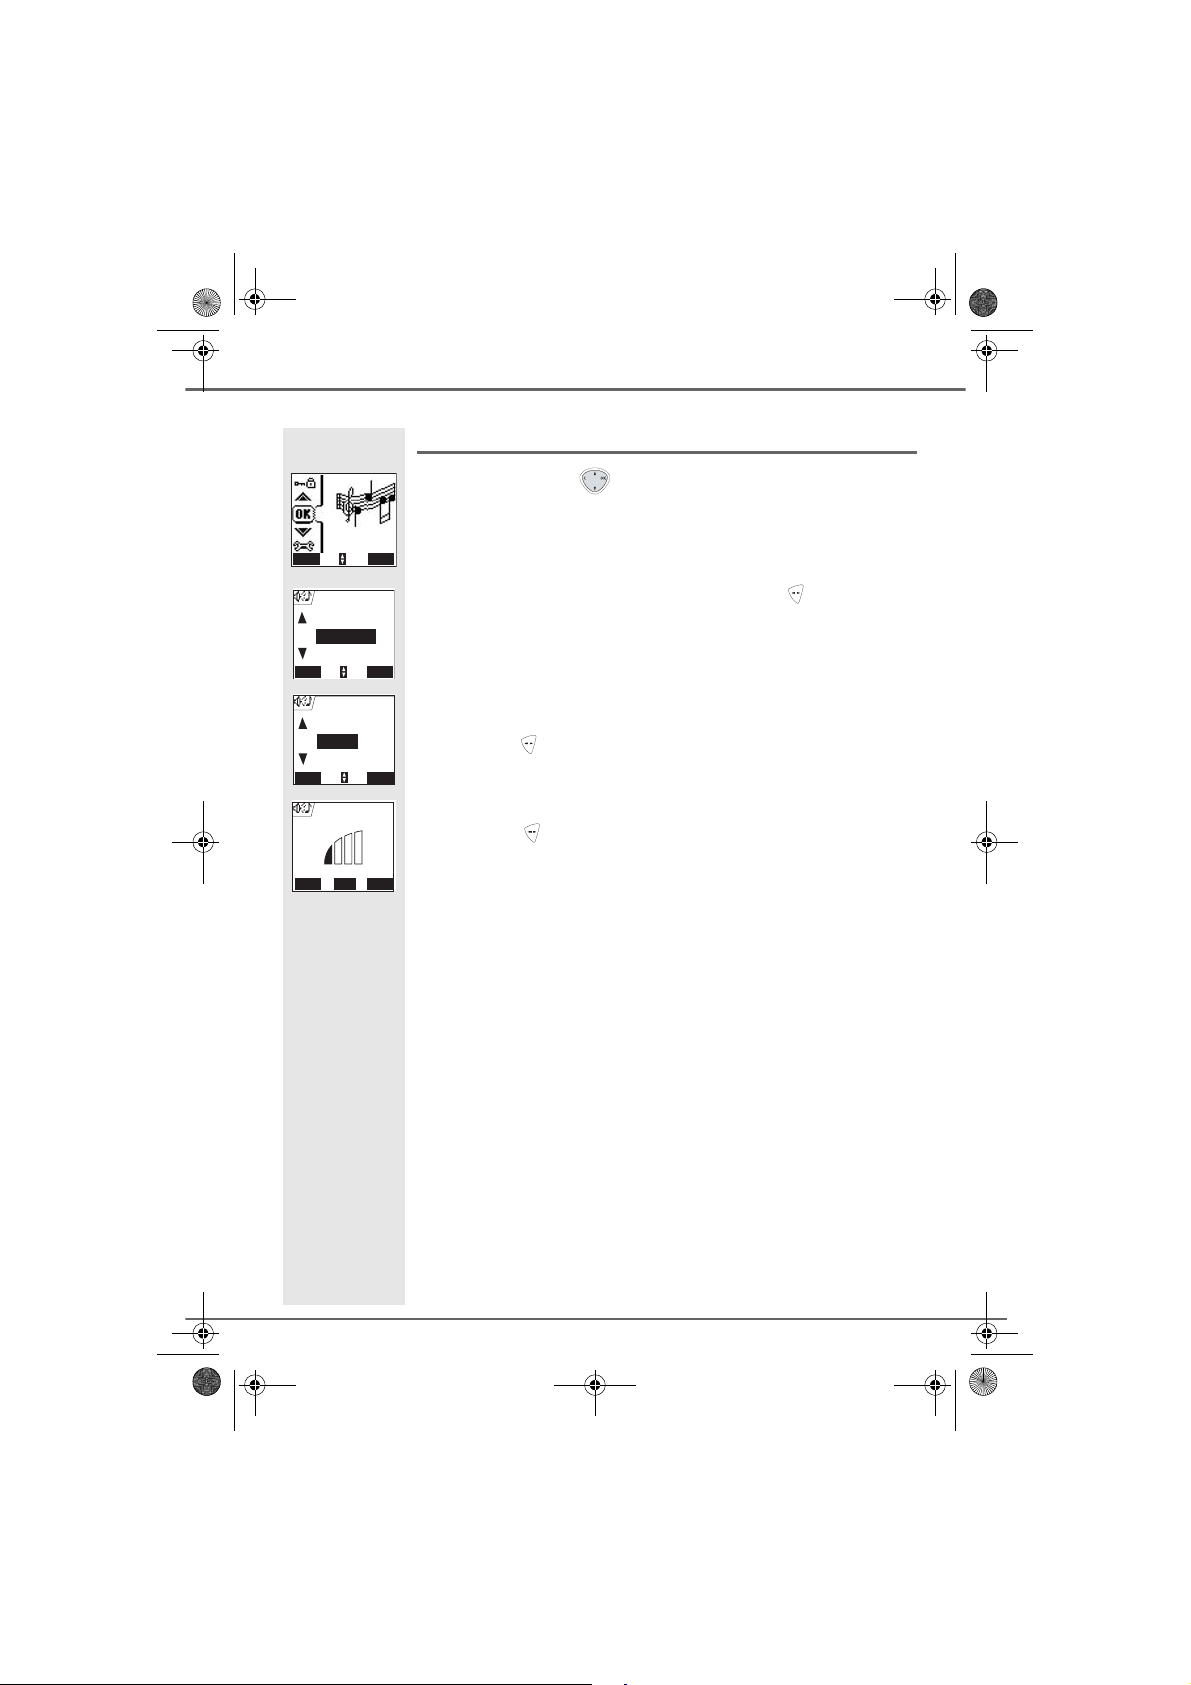
To modify the alarm clock ring tone, select Ring Tone in the alarm clock
menu using or . Press Confirm .
The list of ring tones appears.
Select the desired ring tone using or .
Press Volume to acce ss the volume setting screen.
41

Livre du MD+.book Page 42 Mercredi, 31. mars 2004 1:57 13
ACCESSORIES
Alarm clock
Return
Vol
Confirm
Accessories
Birthday
OK
Timer
Alarm clock
Return Confirm
Timer
00 min
Press OK
to start
Return Option
Press or to increase or decrease the volume.
Once the volume is set, press Confirm .
The alarm clock settings information screen appears. Press Confirm .
To exit the menu, press the red key .
Timer
The timer function activates the hand set ringer at a progra mmed time. You
can view the programmed time on the screen.
Once the specified time has elapsed, the hand set rings for 60 seconds and
the alarm screen is acti vated. Tur n off the a larm by pressing Stop . The
handset stops ringing.
Incoming calls are presented directly without interrupting the
timer. If the programmed time ends during a call, the handset
rings as soon as the call ends.
For access to the timer’s settings (Set time, ring tone and view),
you must stop it when started.
On the navigator key , press or until the Accessories screen is
displayed, press OK to confirm.
Select Timer using keys or . Press Confirm .
• To launch the timer without changing the displayed delay, press OK.
• To change the programmed time, press Option .
A list showing the different settings appears.
R
Timer
Ring tone
OK
Set Time
View
Return Confirm
Changing the programmed time of the timer
Select Set Time in the list. Press Confirm .
42

Livre du MD+.book Page 43 Mercredi, 31. mars 2004 1:57 13
ACCESSORIES
Enter the desired time. Press Confirm .
Timer
Time in minutes
99
Return Confirm
View
OK
Ring tone
Set Time
Return Confirm
Actualités
OK
Boathorn
Boing
Return Volume
The timer activation screen appears with the modification. Press the OK
key to start the timer.
Changing the timer ring tone
To modify the timer ring tone, select Ring Tone using keys or . Press
Timer
Confirm .
The list of ring tones appears, the handset plays the ring tone.
Select the ring tone using keys or .
Timer
Press Volume to acce ss the volume setting screen.
Press or to increase or decrease the volume.
Timer
Once the volume is set, press Confirm .
Return
OK
Return Confirm
Edit Confirm
Vol
Set Time
View
Ring tone
lapsed time
Confirm
Timer
Timer
View
The timer activation screen appears.
Launch the timer by pressing OK.
Displaying or hiding the programmed time of the timer.
To display (or hide) the time on the screen during its countdown, select
View in the Timer menu using or . Press Confirm .
A screen appears indicating whether or not the lapsed time of the timer is
visible.
Press
Edit
to change the current status. Press
R
Confirm
.
To exit the menu, press the red key .
Birthday or organiser alarms
You can programme birthday and organiser alarms (20 alarms) on your
DECT telephone. Birthday and appointment reminders will be presented
at the set time and day. Your telephone will ring for 60 seconds and an
alarm screen will appear to remind you of such events. The alarm screen
will remain displayed until one of the keypad keys is pressed.
43

Livre du MD+.book Page 44 Mercredi, 31. mars 2004 1:57 13
ACCESSORIES
Adding a new birthday (organiser) alarm
On the navigator key , press or until the Accessories screen is
displayed, press OK to confirm.
Accessories
Organiser
OK
Birthday
Timer
Return Confirm
Julia
OK
< New entry>
James
Return Confirm
New entry
Name :
< Enter name >
Date : 00/00
Return Confirm
New entry
Name :
Mother
Date :
Return Confirm
Time
Return Confirm
Mother
Edit Confirm
OK
Return Option
1
0:00
10/03
Alarm at 10:00
J
< New entry >
James
Julia
[10/00]
Mother
Mother
Select Birthday (or Organiser) using or . Press Confirm .
In the birthday (organiser) alarm list, select New entry using or .
2/10
Press Confirm .
Enter the name of the person concerned (or the appointment) using the
keypad keys. To delete a character, press the C key. Press Confirm .
Enter the birth date (or appointment date) using the keypad keys. Press
Confirm .
Enter the alarm activation time. Press Confirm .
A confirmation screen appears.
• To make a correction, press Edit .
R
• To keep the information press Confirm .
Viewing a birthday (or organiser) alarm
In the birthday (organiser) alarm list screen, select the alarm you would
2/10
like to view using or , and press OK to confirm.
44

Livre du MD+.book Page 45 Mercredi, 31. mars 2004 1:57 13
ACCESSORIES
The birthday (or organiser) alarm entry appears on the screen. This entry
Didier
Didier
22/10
Alarm at 12:25
Return Option
consists of:
• the name of the person concerned (or the appointment),
• the birth date (or appointment date),
• the time at which you would like to be notified by the alarm.
Modifying or deleting a birthday (or organiser) alarm
J
< New entry >
OK
James
Julia
Return Option
View
OK
Edit
Delete
Return Confirm
In the birthday (or organiser) alarm list screen, select the alarm you wish
2/10
to edit using or . Press Option .
The following options are available:
James
- View: to view the alarm data.
- Edit: to change the alarm name or date.
- Delete: to remove a birthday or organiser alarm.
- Ring tone: to set the ring tone that will sound when the alarm
goes off.
- New entry: to set up a new alarm.
To exit the menu, press the red key .
45

Livre du MD+.book Page 46 Mercredi, 31. mars 2004 1:57 13
INTERCOMMUNICATION
INTERCOMMUNICATION
This menu is used for handset management and is only visible when two
or more handsets are registered to the same base. You can then:
Internal call
Return Confirm
• communicate between handsets free of charge,
• transfer a portion or the entire phonebook from one handset to
another,
• use a handset to monitor a room.
Communication between two handsets
To be able to communicate with each other, the two handsets
must be registered to the same base and be within the base
range.
To call another handset,
On the navigator key , press or until the Inter n al cal l screen is
displayed, press OK to confirm.
Internal call
Room monitor
OK
Internal call
Transm.PhBk
Return Confirm
Internal call
OK
Handset 2
Handset 3
Return
Select Internal call using or . Press Confirm .
The list of handsets registered to the base appears.
Select the handset you want to call using or . Press Call .
The handset selected rings. Press the green key to answer the call with
Call
the second handset.
To end the call, press the red key .
You can easily call another handset if you know the number.
From the idle screen, enter the handset number. Then press the
green key .
46

Livre du MD+.book Page 47 Mercredi, 31. mars 2004 1:57 13
INTERCOMMUNICATION
Transferring a part of or the entire phonebook
to another handset
Each one of your handsets has its own pho nebook. Howev er, if you do not
wish to enter the same contact list s everal ti mes, y ou can us e the trans fer
function to easily make handset-to-handset phonebook transfers.
On the navigator key , press or until the Inter n al cal l screen is
displayed, press OK to confirm.
Internal call
Internal call
OK
Transm.PhBk
Room monitor
Return Confirm
Transm.PhBk
Total Phoneb.
OK
One number
Several numbers
Return Confirm
Transm.PhBk
OK
Handset 2
Handset 3
Return Call
Transmission
Mode ON?
- Receiver -
No
03/150
Candy
OK
Smith
Harris
Return
Transfer
Select Transm.PhBk using or . Press Confirm .
You can choose to transfer:
• the entire phonebook,
• a number in the phonebook,
• or numerous numbers,
using or . Press Confirm .
Press or , select the handset to which you would like to transfer the
phonebook. Press Call .
The target handset rings. Pick up by pressing the green key .
A screen appears prompting you to accept the transfer mode. Press
Yes .
Depending on the type of transfer you selected, follow one of the
Yes
procedures below:
• To transfer the entire phonebook, wait a few seconds. Once the
operation is done, a screen indicating the end of the transfer will
appear.
• To transfer a single number, take the sender handset and proceed as
follows:
- Select the number to be transferred using or .
- Press Transfer to send the data to the target handset.
Wait until the transfer is done. Once it is done, a screen indicating
the end of the transfer will appear.
47

Livre du MD+.book Page 48 Mercredi, 31. mars 2004 1:57 13
INTERCOMMUNICATION
• If you have elected to transfer numerous numbers, take the sender
handset and proceed as follows:
- Select one of the numbers to be transferred in the phonebook
OK
Return
03/150
Candy
Smith
Harris
Transfer
using or .
- Press Transfer to send the data to the target handset.
Wait for the transfer to be exec uted. Once i t i s done, you are taken
back to the list of numbers in the phonebook.
- Select the next number to be transferred using or and press
Transfer .
Repeat the procedure until all desired numbers have been
transferred. Press Return
Monitoring a room
You can use your handset to monitor a ro om. This allows you, for example,
to monitor a baby's room.
To do so, place one of the handsets in the room to be monit ored. This unit
will be in "sender" mode.
The other handset will remain with you, it is in "receiver" mode.
On the receiver handset:
On the navigator key , press or until the Inter n al cal l screen is
displayed, press OK to confirm.
to exit.
R
Internal call
Transm.PhBk
OK
Room monitor
Internal call
Return Confirm
Room monitor
OK
Handset 2
Handset 3
Return Call
Select Room monitor using or . Press Confirm .
Select the sender handset using or . Press Call .
The sender handset rings, pick up using the green key .
48

Livre du MD+.book Page 49 Mercredi, 31. mars 2004 1:57 13
INTERCOMMUNICATION
On the receiver handset:
A screen invites you to activate the monitor mode (sender mode). Press
Monitor
activation?
-Sender-
No
Monitor mode
-Sender -
Stop
Monitor mode
-Receiver-
Stop Call
Yes .
Yes
Both handsets are now in monitor mode.
• Place the sender handset in the room to be monitored.
The handset in sender mode does not ring to notify you of
incoming calls. It can therefore be placed in a room where
someone is sleeping.
• Keep the receiver handset with you.
When in monitor mode, the receiver handset can be used to
make calls.
To make a call: press Call and dial the number.
To answer a call, press the green key .
At the end of the call, the handset will automatically return in
monitor mode.
To stop monitoring
- Press Stop on the transmitter set. The receiver set will automatically
:
R
return to the standby screen.
- Press Stop on the receiver set and confirm by pressing Yes and
Stop on the transmitter handset at the same time.
R
R
49

Livre du MD+.book Page 50 Mercredi, 31. mars 2004 1:57 13
SECURITY
SECURITY
This menu enables you to change or customise the sec urity paramete rs of
your telephone. You can:
• lock the keypad,
Security
Return Confirm
• programme an emergency number,
• modify the base code,
• define the call time limit,
• define forbidden prefixes,
• authorise or deny communication to a number of handsets,
• hide your telephone number.
Locking/unlocking the keypad
To lock/unlock the keypad, press and hold the keypad key for
some time.
Security
Confidential
OK
Keypad lock
Emergency
Return Confirm
Keypad locked
Long press on *
for unlock
You can also lock your keypad via the
Security
menu.
On the navigator key , press Confirm or until the Security
screen is displayed, press OK to confirm.
Select Keypad lock using or .
Press Confirm to lock the keypad.
A screen indicates that the keypad is locked.
Programming an emergency number
This function allows you to define an emergency number which can be
enabled or disabled.
Once it is activated, the emergency number will be automatically dialled
when the green key is pressed from the idle screen.
• Once activated, you can however call a different number with predialling by dialling a number and pressing .
50

Livre du MD+.book Page 51 Mercredi, 31. mars 2004 1:57 13
SECURITY
The following types of numbers should not be programm ed: Fire,
emergency and police rescue services...
On the navigator key , press or until the Security screen is
displayed, press OK to confirm.
Select Emergency using or . Press Confirm .
Security
Keypad lock
OK
Emergency
Change Code
Return Confirm
Emergency
Phone No:
Off
Edit Confirm
An information screen displ ays the curr ent stored emer gency num ber and
indicates whether it is enabled or disabled.
• To modify the setting, press Edit .
• To keep the setting, press Confirm .
R
Emergency
Activate
Enter number
OK
Deactivate
Return Confirm
Emergency
Emergency no. :
< Enter number >
Return
A list offers you to either change the status (on/off) or modify the
emergency number.
To modify the emergency number, select Enter number. Press
Confirm .
Enter the new number using the keypad. You can pick a number from the
phonebook. Press - , make your selection and Confirm .
To activate/deactivate the emergency number, select the corresponding
option. Press Confirm , the active mode is set automatically.
An information screen presents the new emergency number.
• To modify the setting, press Edit .
R
• To keep the setting, press Confirm .
To exit the menu, press the red key .
51

Livre du MD+.book Page 52 Mercredi, 31. mars 2004 1:57 13
SECURITY
Modifying the base code
The base code (0000 being the default setting) is required to access
certain security functions. It must be composed of 4 digits.
On the navigator key , press or until the Security screen is
displayed, press OK to confirm.
Select Change Code using or . Press Confirm .
Secutity
Emergency
OK
Change Code
Time limit
Return Confirm
Base code
Old code :
<Enter code>
Return
Base code
New Code :
<Enter code>
Return
Enter the old base code using the keypad. Press Confirm .
Enter the new base code using the keypad. Press Confirm .
Enter the new code again. Press Confirm .
To exit the menu, press the red key .
Carefully note down the base code number. You will need this
code to change certain settings.
Defining the call time limit
You can set your telephone's operating time. Once the call time limit is
used up, it is no longer possible to make calls or send SMS.
To be able to call again, you will have to dea ctivate the call ti me limit or set
a new limit.
If the time limit ends during a telephone conversation,
communication will not be cut off. Once you have hung up, it will
not be possible to make a new call. Calls between handsets
(internal calls) are not affected by the call time limit.
On the navigator key , press or until the Security screen is
displayed, press OK to confirm.
52

Livre du MD+.book Page 53 Mercredi, 31. mars 2004 1:57 13
SECURITY
Select Time limit using or . Press Confirm .
Security
Change Code
OK
Time limit
Restriction
Return Confirm
Time limit
Time remaining
000 min
Off
Edit Confirm
An information screen displays the remaining time limit and its status.
• To modify the setting, press Edit .
• To keep the setting, press Confirm .
R
Base code
Base code :
<Enter code>
Return
Time limit
Deactivate
OK
Edit time
Activate
Return Confirm
Time limit
Enter new time limit in
minutes :
<Enter time>
Return
Enter the base code (default is 0000). Press Confirm .
You can change the status (on/off) or modify the time limit.
Select Edit time using or . Press Confirm .
Enter the new time limit (maximum 999 minutes) using the keypad. Press
Confirm , the active mode is set automatically.
Once the modifications have been made, the information screen shows
the new call time limit.
• To modify the setting, press Edit .
R
• To keep the setting, press Confirm .
To exit the menu, press the red key .
Defining forbidden prefixes - Call barring
You can prohibit the use of certain prefixes on your telephone. When a
prefix is forbidden, it becomes impossible to call numbers that begin by
this prefix.
Depending on the programmed prefixes, cer tain numbers will no
longer be accessible. For example, if you programmed 06 as a
forbidden prefix, it will not be possi ble to call a number that begins
by 06.
53

Livre du MD+.book Page 54 Mercredi, 31. mars 2004 1:57 13
SECURITY
On the navigator key , press or until the Security screen is
displayed, press OK to confirm.
Select Restriction using or . Press Confirm .
Security
Time limit
OK
Restriction
Intrusion
Return Confirm
Restriction
2 forbidden prefixes
Off
Edit Confirm
Restriction
Base code :
<Enter code>
Return
Restriction
Edit prefix
OK
Activate
Deactivate
Return Confirm
A screen indicating the number of programmed prefixes as well as their
status appears.
• To modify the displayed data, press Edit .
• To keep the displayed data or view the prefixes, press Confirm .
A base code input screen appears.
Enter the code. Press Confirm .
A list appears:
- Activate: The activate the forbidden prefixes.
- Deactivate: To deactivate the forbidden prefixes.
- Edit Prefi : To modify or create a prefix (see below).
Select the desired option using or . Press Confirm .
R
Restriction
--------------
OK
---------------
08
Return Confirm
Creating, modifying or deleting a forbidden prefix
Access the selection screen for the Edit prefix option (see above).
Select Edit Prefix using or . Press Confirm .
A screen showing the forbidden prefixes appears.
You can programme up to 5 forbidden prefixes.
Select an empty location (dashes) or a prefix to modify using or .
Press Confirm .
54

Livre du MD+.book Page 55 Mercredi, 31. mars 2004 1:57 13
SECURITY
Restriction
Forbidden prefix :
<Enter prefix>
Return Confirm
Security
Restriction
OK
Intrusion
Confidential
Return Confirm
Intrusion
Intercom intrusion
On
Edit Confirm
The prefix input screen appears.
Enter the prefix using the keypad. Press Confirm .
In the case of a modification, the prefix appears. Clear the prefix
using C and enter the new one.
To exit the menu, press the red key .
Authorising three-way calling
The intrusion function aut horis es or pr events a second h andset regi stered
on the same base from joining a current conversation. If the intrusion
mode is active, it is then possible to join a conversation in progress using
another handset.
On the navigator key , press or until the Security screen is
displayed, press OK to confirm.
Select Intrusion using or . Press Confirm .
A screen displays the current status (on or off).
• To change the status, press Edit .
• To keep the status, press Confirm .
To exit the menu, press the red key .
R
Security
Intrusion
OK
Confidential
Keypad lock
Return Confirm
Confidential
This function enables you to hide your number when c alling someone that
subscribes to a caller display service (depending on the service provider)
On the navigator key , press or until the Security screen is
displayed, press OK to confirm.
Select Confidential using or . Press Confirm .
55

Livre du MD+.book Page 56 Mercredi, 31. mars 2004 1:57 13
SECURITY
Confidential
Confidential call
Off
Edit Confirm
A screen displays the current status (on or off).
• To change the status, press Edit .
R
• To keep the status, press Confirm .
To exit the menu, press the red key .
To programme a confidential prefix correspond ing to your service
provider, Refer to paragraph Modifying the confidential prefix,
page 78.
56

Livre du MD+.book Page 57 Mercredi, 31. mars 2004 1:57 13
YOUR RING TONES
YOUR RING TONES
N
Ringer
Return Confirm
Ringer
Beeps
OK
Silence
External ringer
Return Confirm
Silence
Silent mode
On
Edit Confirm
This menu enables you to modify the ring tones for your handset and to
manage the downloaded ring tones. You can also:
• activate or deactivate the silent mode,
• assign unique ring tones to incoming and internal calls,
• activate or deactivate the beeps that sound when an action is
performed using the keypad keys or when validating setting
information for your handset.
Activating/deactivating the silent mode
When in silent mode, the telephone ring er and keypad beeps are in hibited.
On the navigator key , press or until the Ringer screen is
displayed, use OK to confirm.
Select Silence using or . Press Confirm .
When you activate the silent mode, your handset is muted for all
timer, organiser-type functions...
The status is displayed on the screen.
Press Edit to enable or disable the silent mode.
R
The status is modified on the screen instantaneously, press Confirm .
To exit the menu, press the red key .
Modifying the ringer
Ringer
External ringer
OK
Internal ringer
Beeps
Return Confirm
This menu enables you to associate a unique ring tone to incoming calls
or internal calls (intercom).
On the navigator key , press or until the Ringer screen is
displayed, press OK to confirm.
Select External ringer or Internal ringer using or . Press
Confirm .
57

Livre du MD+.book Page 58 Mercredi, 31. mars 2004 1:57 13
YOUR RING TONES
Internal call
Carillon
OK
Carmen
Chat
Return Volume
Internal call
Vol
Return Confirm
Ringer
Downl.melody
OK
Beeps
Silence
Return Confirm
Beeps
Charger
OK
Keypad
Battery
Return Confirm
Keytone
Edit Confirm
Keypad
On
Select the desired ring tone using or .
Press Volume .
Adjust the ringer volume using or , press Confirm .
To exit the menu, press the red key .
Activating or deactivating the beeps
On the navigator key , press or until the Ringer screen is
displayed, press OK to confirm.
Select Beeps using or . Press Confirm .
Select the beep type using or . Press
Keypad: the handset beeps when a key is pressed.
Battery: the handset beeps when the battery is too low.
Charger: the handset beeps when you hang up the handset.
An information screen displays the beep status (active or inactive)
for the selected item.
• To change the status, press Edit .
• To keep the status, press Confirm . The status is modified on the
screen.
Press Confirm .
R
Confirm
.
To exit the menu, press the red key .
58

Livre du MD+.book Page 59 Mercredi, 31. mars 2004 1:57 13
YOUR RING TONES
The downloaded melodies
This service enables you to customise the ring tones of your telephone.
The maximum storage capacity of your handset is 5
downloaded ring tones.
To obtain new melodies, you must connect to a melody server.
Viewing the downloaded melodies.
On the navigator key , press or until the Ringer screen is
displayed, use OK to confirm.
Select Downl.melody using or . Press Confirm .
Ringer
Internal ringer
OK
Downl.melody
Beeps
Return Confirm
Downl.melody
Add
OK
View List
Memory
Return Confirm
Downl.melody
< New entry>
OK
M. Jackson
Kylie Minogue
Return Confirm
Select View List using or . Press Confirm .
Select the melody you want to hear using or .
The <New entry> option allows you to add a melody.
(see next chapter)
Once you have made your selection, you can choose one of the
operations mentioned above by pressing Confirm :
- Rename: to modify the name of the melody.
- Volume: to modify the audio volume.
- Delete: to delete the melody.
Adding a downloaded melody
You can keep or delete a melody SMS and transform it into a
downloaded melody.
59

Livre du MD+.book Page 60 Mercredi, 31. mars 2004 1:57 13
YOUR RING TONES
On the navigator key , press or until the Ringer screen is
displayed, use OK to confirm.
Select Downl.melody using or . Press Confirm .
Ringer
Internal ringer
OK
Downl.melody
Beeps
Return Confirm
Downl.melody
Delete
OK
Add
View List
Return Confirm
Melodies 01/02
Select Add using or . Press Confirm .
A screen displays the list of melodies stored in the SMS mélodies folder
presented in chronological order.
Select the melody you want to add using or . Press Add .
OK
09/02 Box1
09/02 Box1
Return Add
Melody added
in ringer list
Ringer
Internal ringer
OK
Downl.melody
Beeps
Return Confirm
Mel. Download
Memory
OK
Delete
Add
Return Confirm
The melody is added to the list of melodies of your handset.
A screen indicating that the melody was added in the ring tones appears.
If the memory space has reached its maximum capacity, a message
appears indicating that the memory used for the downloaded melodies is
full. You must delete one or more downloaded melodies.
To exit the menu, press the red key .
Deleting a downloaded melody
On the navigator key , press or until the Ringer screen is
displayed, use OK to confirm.
Select Downl.melody using or . Press Confirm .
Select Delete using or . Press Confirm .
60

Livre du MD+.book Page 61 Mercredi, 31. mars 2004 1:57 13
YOUR RING TONES
Select the melody you want to delete using or .
Delete
OK
Melody 1
Melody 2
Return Confirm
Press Confirm to erase the melody.
After freeing up some m emor y spac e by deleting a melody,
you can transfer the new melodies to your handset.
To exit the menu, press the red key .
61

Livre du MD+.book Page 62 Mercredi, 31. mars 2004 1:57 13
SETTINGS
SETTINGS
This menu enables you to change or customise the handset and base
parameters.
Settings
Return Confirm
Accessing the Settings menu
On the navigator key , press or until the Settings screen is
displayed, press OK to confirm.
Using the following flowc hart, selec t the setting you woul d like to modi fy or
view.
Use or to select an option and the Confirm key to enter the menu
or access the desired function.
Program keysSettings
Date/time
Contrast
Auto Hang up
Auto Pick up
Adv. Settings
Help
Language
HS Settings
Base Settings
Registration
PreferredBase
Reset HS
Custom
Handset name
Registr. Mode
Reset Base
Delete Handset
Base name
62
Line Settings
TAM Settings
SMS Settings
Network type
Dial
Flashing
PABX prefix
Confid. Pref.

Livre du MD+.book Page 63 Mercredi, 31. mars 2004 1:57 13
SETTINGS
Modifying the language
This function enables you to change the screen display language.
On the navigator key , press or until the Settings screen is
displayed, press OK to confirm.
Select Language using or . Press Confirm .
Settings
Help
OK
Language
Program keys
Return Confirm
Language
Language used
English
Edit
Language
Français
OK
English
Deutsch
Return Confirm
An information screen presents the current language used.
• To keep the setting, press Confirm .
• To change the setting, press Edit .
Confirm
Choose the desired language from the language list. Press or to
select the language. Press Confirm .
The screen shows the new language used. Press Confirm .
R
Settings
Language
OK
Program keys
Date/time
Return Confirm
To exit the menu, press the red key .
Programming a key
This function enables you to programme the and keys on your
handset giving you direct access to certain functions right from the idle
screen.
On the navigator key , press or until the Settings screen is
displayed, press OK to confirm.
Select Program keys. using or . Press Confirm .
63
R

Livre du MD+.book Page 64 Mercredi, 31. mars 2004 1:57 13
SETTINGS
Program keys
Key
Silence
Edit
OK
Return Confirm
Key
Edit
Confirm
Key
Ans.Mach
Silence
Timer
Program keys
Ans.Mach
Confirm
A screen presents the function currently assigned the key.
R
• To keep the function, press Confirm .
• To modify the function, press Edit .
R
Choose from the function list the function you want to assign to the key. Press
or to select one of the following functions:
• Silence • Organiser • Alarm clo c k
• Timer • Ans.mach. activ. • Redial
• Keypad lock • Number • Ans.Mach
Press Confirm .
With the number function, you ass ociate a telephone num ber to a
program key. You can thus quickly call your contact.
Once the key is programmed, a screen invites you to programme the
R
key .
• To keep the function, press Confirm .
• To modify the function, press Edit .
R
Once the key is programmed, you return to the Settings menu.
To exit the menu, press the red key .
You can go from progr amming the key to programming the
key by pressing
or on the navigator key.
R
Settings
Program keys
OK
Date/time
Contrast
Return Confirm
Modifying the date and time
On the navigator key , press or until the Settings screen is
displayed, press OK to confirm.
Select Date/time using or . Press Confirm .
64

Livre du MD+.book Page 65 Mercredi, 31. mars 2004 1:57 13
SETTINGS
Date/time
Date
Time
Edit Confirm
OK
Return Confirm
OK
Return Confirm
12/10/02
15:10
Settings
Date/time
Contrast
Auto Hang up
Contrast
Level 2
Level 3
Level 4
A screen displays the current date and time.
• To keep the date and time settings, press Confirm .
• To modify the date and/or time settings, press Edit .
R
You can enter the date in DD/MM/YY format. Once the date is modified,
press Confirm .
Enter the time in HH/ MM format and press Confirm .
To exit the menu, press the red key .
Adjusting the contrast
On the navigator key , press or until the Settings screen is
displayed, press OK to confirm.
Select Contrast using or . Press Confirm .
A list presenting five contrast levels appears.
Select the desired level using or . The contrast is directly visible on
the screen.
Press Confirm . Adjust the contrast until you have obtained a
satisfactory level.
To exit the menu, press the red key .
Using the auto hang up and pick up features
The auto hang up feature enables you to auto matic ally hang up by simply
putting the handset back on its base.
If the auto hang up feature is on, communication ends when the
handset is put back on its base.
When active, the auto pick up feature enabl es you to automatic ally pick up
as soon as you remove the handset from its base.
65

Livre du MD+.book Page 66 Mercredi, 31. mars 2004 1:57 13
SETTINGS
On the navigator key , press or until the Settings screen is
displayed, press OK to confirm.
Select Auto Hang up (or Auto Pick u p) using or . Press Confirm .
Hang up
Auto Hang up
Off
Edit
Auto Pick up
Edit
Confirm
A screen displays the current status (on or off).
Pick up
• To change the status, press Edit .
Off
• To keep the status, press Confirm .
Confirm
The status is modified on the screen, press Confirm .
To exit the menu, press the red key .
Installation guide
You can start up the install guide, which allows you to reset:
• the date and time,
• the handset name,
• the tones for external calls.
• the answering machine (depending on model)
R
Settings
Adv. Settings
OK
Help
Language
Return Confirm
On the navigator key , press or until the Settings screen is
displayed, press OK to confirm.
Selection Help using or keys. Press Confirm.
Answer the questions displayed on the screen and confirm using key.
At the end of the process, you will return to the welcome screen.
66

Livre du MD+.book Page 67 Mercredi, 31. mars 2004 1:57 13
SETTINGS
ADVANCED SETTINGS / HANDSET SETTINGS
Registering a new handset to a base
To register a new handset to a base you must:
• put the handset in registration mode,
• put the base in registration mode.
Once this is done, the registr ati on ( mutual r ecogni ti on o f the b as e and the
new handset) will be done automatically (registration can take a few
seconds).
Take the handset to be registered:
On the navigator key , press or until the Settings screen is
displayed, press OK to confirm.
Select Adv. Settings using or . Press Confirm .
Adv. Settings
SMS Settings
OK
HS Settings
Base Settings
Return Confirm
HS Settings
Handset name
Registration
OK
PreferredBase
Return Confirm
Select HS Settings using or . Press Confirm .
Select Registration using or . Press Confirm .
The handset enters the registration mode.
On the base:
Put the base to which you want to register the handset in registration
mode:
• If your base is equipped with an answering machine: Press
simultaneously on the two top buttons on the base for a few seconds
.
• If your base is not equipped with an answering machi ne: Press on the
button on the base for a few seconds.
The green light blinks rapidly, the base is in registration mode.
The new handset and the base are mutually searching for each other. The
registration may take several seconds.
67

Livre du MD+.book Page 68 Mercredi, 31. mars 2004 1:57 13
SETTINGS
Once the handset is registered, the handset automatically exits the
registration mode and lets you know that the registration is done.
You can also set your base to the registration mode using a
handset already regist ered by s elec tin g th e R egi stration function
in the menu Settings/Adv. Settings/Base setting
Modifying the base preference
This function enables you to specify which base will be used by your
handset to make calls (if your handset is registered to several bases).
On the navigator key , press or until the Settings screen is
displayed, press OK to confirm.
Select Adv. Settings. Press Confirm .
Select HS Settings. Press Confirm .
HS Settings
Registration
PreferredBase
OK
Reset HS
Return Confirm
PreferredBase
Preferred base
Automatically
Edit
OK
Return Confirm
Confirm
PreferredBase
4 --------------
5 Automatically
1 Base 1
Select PreferredBase using or . Press Confirm .
An information screen presents the current base preference for your
handset.
• To keep the preference, press Confirm .
• To modify the preference, press Edit .
R
A list provides the bases among which you can choo se the preferr ed base
to which you want your handset to be regi stered. With the automatic mode
you are not required to specify the preference.
Once the preferred base is selected, press Confirm .
An information screen presents the new preference list.
• To keep the preference, press Confirm .
• To modify the preference, press Edit .
R
To exit the menu, press the red key .
68

Livre du MD+.book Page 69 Mercredi, 31. mars 2004 1:57 13
SETTINGS
Resetting the handset
When you reinitialise your handset, all the parameters are reset to their
initial value (factory setti ngs ) wit h the ex cepti on of the phonebook, alarms
(birthdays and organiser) and SMS parameters.
When resetting the handset, the security functions (forbidden
prefixes and time limit duration) are not set back to their initial
value.
On the navigator key , press or until the Settings screen is
displayed, press OK to confirm.
Select Adv. Settings. Press Confirm .
Select HS Settings. Press Confirm .
HS Settings
PreferredBase
Reset HS
OK
Custom
Return Confirm
Do you want to
Reset Handset?
No Yes
Select Reset HS using or . Press Confirm .
A confirmation screen will prompt you to confirm your request:
• To re-initialise your handset, press Yes .
• If you do not wish to re-initialise your handset, press No .
R
To exit the menu, press the red key .
Personal registering to a base
To register a handset in the following cases:
• the base’s code is no longer 0000 (you have customised the code),
• you own several bases,
• you want to choose a name for your base (name displayed on the
welcome screen),
• you want to choose the handset registration number.
Take the handset to be registered:
On the navigator key , press or until the Settings screen is
displayed, press OK to confirm.
Select Adv. Settings. Press Confirm .
69

Livre du MD+.book Page 70 Mercredi, 31. mars 2004 1:57 13
SETTINGS
Select HS Settings. Press Confirm .
HS Settings
Reset HS
Custom
OK
Handset name
Return Confirm
Registration
4 ------------
1 ----------
OK
2 -----------
Return Confirm
Base name
Base name :
Base 1
Return Confirm
System code
Code :
< Enter code >
Return Confirm
HANDSET 6
HANDSET 1
OK
HANDSET 2
Return Confirm
Select Custom. Press Confirm .
Select the number of the base. Press Confirm .
Delete the current name of the bas e b y p ressi ng C on the n avig ator panel
(if necessary).
Enter the new name of the base. Press Confirm .
Enter the base's code. Press Confirm .
The handset will enter registr ation mode and the "Handset in registrat ion
mode" message will appear on the screen.
Switch your base to pairing mode by following the process described in
”On the base:” below.
When the handset is registered, select the number of the handset. Press
Confirm .
On the base:
Put the base to which you want to register the handset in registration
mode:
• If your base is equipped with an answering machine: Press
simultaneously on the two top buttons on the base for a few seconds
.
• If your base is not equipped with an answering machi ne: Press on the
button on the base for a few seconds.
The green light blinks rapidly, the base is in registration mode.
The new handset and the base are mutually searching for each other. The
registration may take several seconds.
70

Livre du MD+.book Page 71 Mercredi, 31. mars 2004 1:57 13
SETTINGS
Once the handset is registered, the handset automatically exits the
registration mode and lets you know that the registration is done.
You can also set your base to the registration mode using a
handset already regist ered by s elec tin g th e R egi stration function
in the menu Settings/Adv. Settings/Base setting
Renaming the handset
This option enables you to modify the name of your handset.
On the navigator key , press or until the Settings screen is
displayed, press OK to confirm.
Select Adv. Settings. Press Confirm .
Select HS Settings. Press Confirm .
HS Setting
Custom
OK
Handset name
Registration
Return Confirm
Handset
Handset name
Edit Confirm
Select Handset name using or . Press Confirm .
A screen presents the current handset name
• To keep the name, press Confirm .
• To change the name, press Edit .
R
Use the keypad keys to enter the new name. Press Confirm .
An information screen presents the new handset name
• To keep this name, press Confirm .
• To modify this name, press Edit .
R
To exit the menu, press the red key .
71

Livre du MD+.book Page 72 Mercredi, 31. mars 2004 1:57 13
SETTINGS
ADVANCED SETTINGS / BASE SETTINGS
Using a handset to put the base in registration mode
This function enables you to put the base in registration mode so you can
register a new handset. To do so, the handset to be regist ered mus t be i n
registration mode (Refer to paragraph Registering a new handset to a
base, page 67).
On a handset that is already registered the base in question, press or
until the Settings screen is displayed, press OK to confirm.
Select Adv. Settings using or . Press Confirm .
Adv. Settings
HS Settings
OK
Base Settings
Line Settings
Return Confirm
Base Settings
Base name
OK
Registr. Mode
Reset Base
Return Confirm
Select Base Settings using or . Press Confirm .
Select Registr. Mode using or . Press Confirm .
A screen prompts you to confir m the setting of the base to the registrati on
mode. Press Yes to enter the registration mode. The indicator light on
your base starts to quickly blink green.
Your base will remain in registration mode for about 1 minute.
You can also use the base buttons to put the base in registration
mode:
• If your base is equipped with an answering machine: Press
simultaneously on the two top buttons on the base for a few
seconds
• If your base is not equipped with an answering machine:
Press on the button on the base for a few seconds.
72

Livre du MD+.book Page 73 Mercredi, 31. mars 2004 1:57 13
SETTINGS
Re-initialising the base
When you re-initialise your base, all the base par ameters are reset to their
initial values (factory settings), your SMS are not deleted.
On the navigator key , press or until the Settings screen is
displayed, press OK to confirm.
Select Adv. Settings. Press Confirm .
Select Base Settings. Press Confirm .
Base Settings
Registr. Mode
OK
Reset Base
Delete Handset
Return Confirm
Base 1
Do you want to
reset the base ?
No Yes
Base code
Base code :
<Enter code>
Return
Select Reset Base using or . Press Confirm .
A confirmation screen will prompt you to confirm your request:
• To re-initialise the base, press Yes .
• If you do not wish to re-initialise the base, press No .
R
Enter the base code using the keypad. Press Confirm .
To exit the menu, press the red key .
When re-initialising the base, the base code becomes 0000
again.
De-registering a handset
This function enables you to de-register a handset from your base. This
may be necessary if you have lost a handset or if you already have 6
handsets registered to the same base.
On the navigator key , press or until the Settings screen is
displayed, press OK to confirm.
Select Adv. Settings. Press Confirm .
Select Base Settings. Press Confirm .
73

Livre du MD+.book Page 74 Mercredi, 31. mars 2004 1:57 13
SETTINGS
Base Settings
Reset Base
OK
Delete Hanset
Base name
Return Confirm
Del. Handset
OK
Handset 1
Handset 2
Return Confirm
Del. Handset
Do you want to
unregister this
handset?
No Yes
Base Settings
Delete Handset
Base name
OK
Registr. Mode
Return Confirm
Edit name
4------------------
OK
1 Base 1
2 Base 2
Return
New name
Base 1|
Return Confirm
Confirm
Base 1
Select Delete Handset using or . Press Confirm .
Select the handset you wish to unregister in the list by pressing or .
Press Confirm .
A screen prompts you to confirm the unregistration. Press Yes to
unregister the handset.
To exit the menu, press the red key .
Renaming the base
On the navigator key , press or until the Settings screen is
displayed, press OK to confirm.
Select Adv. Settings. Press Confirm .
Select Base Settings. Press Confirm .
Select
Base name
Select the base for w hich you w ant to modi fy the name. Press Confirm .
Use the C button to make corrections and re-enter the new name u sing the
keypad. Press Confirm .
To exit the menu, press the red key .
using or . Press
Confirm
.
74

Livre du MD+.book Page 75 Mercredi, 31. mars 2004 1:57 13
SETTINGS
ADVANCES SETTINGS / LINE SETTINGS
Modifying the network type
Your DECT telephone can be installed on a public or private network
(when using a PABX)
This function enables you to configure your telephone according to the
type of network.
On the navigator key , press or until the Settings screen is
displayed, press OK to confirm.
Select Adv. Settings using or . Press Confirm .
Adv. Settings
Base Settings
OK
Line Settings
TAM Settings
Return Confirm
Line sett.
Confid. Pref.
OK
Network type
Dial
Return Confirm
Network
Network type
Public
Edit
Confirm
Select Line Settings using or . Press Confirm .
Select Network type using or . Press Confirm .
A screen presents the current status (public or private).
• To keep the status, press Confirm .
• To change the status, press Edit .
R
The status is modified on the screen, press Confirm .
To exit the menu, press the red key .
Modifying the dialling mode
Depending on the type of network your tel ephon e is li nked to, it uses tone
or pulse dialling.
This function enables you to configure your telephone according to the
type of dialling used by your network.
The default dialling mode is tone.
75

Livre du MD+.book Page 76 Mercredi, 31. mars 2004 1:57 13
SETTINGS
On the navigator key , press or until the Settings screen is
displayed, press OK to confirm.
Select Adv. Settings. Press Confirm .
Select Line Settings. Press Confirm .
Line sett.
Network type
OK
Dial
Flashing
Return Confirm
Dialing type
Tone
Edit
Confirm
Select Dial using or . Press Confirm .
A screen displays the current status (pulse or tone).
Dial
• To keep the status, press Confirm .
• To modify the status, press Edit , the status is modified on the
R
screen, press Confirm .
To exit the menu, press the red key .
Modifying the flash duration (R key)
If you connect your telephone to a private automatic branch exchange or
use it in a foreign country, you may need to modify the flash duration in
order to use your telephone correctly with regard to the following
functionalities: outgoing 2nd call, incoming 2nd call, conference call.
Contact your service pro vider to obtain the correct flash d ura tion and then
modify it by doing the following.
On the navigator key , press or until the Settings screen is
displayed, press OK to confirm.
Select Adv. Settings. Press Confirm .
Select Line Settings. Press Confirm .
Line sett.
Dial
OK
Flashing
PABX prefix
Return Confirm
Select Flashing using or . Press Confirm .
76

Livre du MD+.book Page 77 Mercredi, 31. mars 2004 1:57 13
SETTINGS
Flashing
Flash time
080 ms
Edit
OK
Return Confirm
Confirm
Flashing
600 ms
080 ms
100 ms
An information screen presents the current flash duration.
• To keep the duration, press Confirm .
• To modify the duration, press Edit .
R
A list presenting the various flash durations appears, select the new
duration using or . Press Confirm .
The screen presents the new flash duration. Press Confirm .
To exit the menu, press the red key .
Setting a PABX prefix
If a private automatic branch exchange is used, you can programme the
external call prefi x.
With this function you can set the:
• PABX prefix number,
• dialled number length at which point the PABX will be automatically
dialled (this length is called "digit before prefix")
• prefix status (on or off).
On the navigator key , press or until the Settings screen is
displayed, press OK to confirm.
Select Adv. Settings. Press Confirm .
Select Line Settings. Press Confirm .
Line sett.
Flashing
OK
PABX prefix
Confid. Pref.
Return Confirm
PABX prefix
Pref.: [ 0]
Dig. bef. pref.: 06
Off
Edit Confirm
Select PABX prefix using or . Press Confirm .
An information screen presents the PABX setting in progress.
• To keep this setting, press Confirm .
• To modify this setting, press Edit .
R
77

Livre du MD+.book Page 78 Mercredi, 31. mars 2004 1:57 13
SETTINGS
PABX prefix
Dig. bef. pref.
OK
Activate
Prefix
Return Confirm
PABX prefix
Pref.: [ 2]
Dig. bef. pref.: 08
on
Edit Confirm
Line sett.
PABX prefix
OK
Confid. Pref.
Network type
Return Confirm
Confid. Pref.
Confident. Pref.
141
Edit Confirm
Select the desired option:
- Activate or Deactivate: to select a status.
- Prefix: to enter the number giving you access to
the outside line.
- Dig. bef. pref.: to specify the «digits before prefix».
Set the settings and press Confirm .
The information screen presents the new PABX settings.
• To keep these settings, press Confirm .
• To modify these settings, press Edit .
R
To exit the menu, press the red key .
Modifying the confidential prefix
This option enables you to modify the confidential code that will
automatically be taken into account during a call if you have activated the
Confidential option in the Security menu.
On the navigator key , press or until the Settings screen is
displayed, press OK to confirm.
Select Adv. Settings. Press Confirm .
Select Line Settings. Press Confirm .
Select Confid. Pref. using or . Press Confirm .
A screen presents the confidential prefix used.
• To keep the prefix, press Confirm .
• To modify the prefix, press Edit .
Use the keypad keys to enter the new prefix. Press Confirm .
An information screen presents the new confidential prefix. Press
Confirm .
R
To exit the menu, press the red key .
78

Livre du MD+.book Page 79 Mercredi, 31. mars 2004 1:57 13
ANSWERING MACHINE
ANSWERING MACHINE (DEPENDING ON
MODEL)
N
Ans.Mach
Return Confirm
Ans. Mach
TAM Settings
On/Off
OK
Messages
Return Confirm
Status TAM
Ans. Mach
Answ.&record
Edit Confirm
Activate
TAM off
Ans&rec.
OK
Answ.only
Return Confirm
Your telephone's answering machine comes with two answering modes:
- Answer only: callers cannot leave you a message and an
OGM informs them of your unavailability.
- Answer and record: an OGM invites your callers to leave
messages.
The telephone answering machine models also offer the following
functionalities:
- Anonymous mode with pre-recorded OGMs.
- Call screening.
- Remote message retrieval.
- VIP access
Enabling/disabling the answering machine
When your answering machine is off, the base indicator is green.
When it is on, the indicato r turns red. An icon als o appear s on the ha ndset
display according to the answering machine mode used:
- Answer only
- Answer and record
On the navigator key , press or until the Ans. Mach screen is
displayed. Press OK to confirm.
Select On/Off using or . Press Confirm .
A screen displays the current status of the answering machine (answer
only, answer and record or off)
• To keep the displayed status, press Confirm .
• To change the status, press Edit .
• To activate the answer and record mode, select Ans&rec..
• To activate the answer only mode, select Ans only.
• To turn off the answering machine, select TAM off.
Press Confirm .
R
79

Livre du MD+.book Page 80 Mercredi, 31. mars 2004 1:57 13
ANSWERING MACHINE
The OGM that will be used is played. At the end of the playback, confirm
the new status of the answering machine by pressing Confirm .
If you have not recorded a personal OGM, the answering
machine will automatically use the pre-recorded OGM.
You can turn your answering machine on or off using the base
buttons. Press on the button until the base indicator light
changes colour. The last mode used and its OGM are activated.
Modifying the OGM
In order to modify an OGM, you must first turn on the answering
machine. The OGM that will be modified will be that of the
answering machine acti vated (answer only or a nswer and r ecord)
Recording a personal outgoing message
On the navigator key , press or until the Ans. Mach screen is
displayed. Press OK to confirm.
Ans. Mach
Messages
Outgoing msgs
OK
TAM Settings
Return Confirm
Outgoing msgs
Play
Modify
OK
Delete all
Return Confirm
Outgoing msgs
Press Ok to record
then speak after
beeptone
Return
Outgoing msgs
Answ.&record
Recording
OGM in progress
Cancel End
Select Outgoing msgs using or . Press Confirm .
Select Modify using or . Press Confirm .
Press OK to start recording your OGM.
At the sound of the beep transmitted through the handset, start talking in
the handset microphone.
To stop recording press End .
Your outgoing message is automatically played back.
80

Livre du MD+.book Page 81 Mercredi, 31. mars 2004 1:57 13
ANSWERING MACHINE
Outgoing msgs
Answ.&record
You want to
keep OGM?
No Yes
Outgoing msgs
Delete all
Anonymous
OK
Play
Return Confirm
Anonymous
Do you want the
anonymous OGM?
No Yes
At the end of the playback, a confirmation screen asks you if you want to
keep this new outgoing message. Press Yes to keep your OGM or
No to record it again.
R
Using a pre-recorded anonymous OGM
If you select the anonymous mode, your personal outgoing
message will be definitely replac ed by the pre-record ed outgoing
message. You will however be able to record a new personal
outgoing message (see previous paragraph).
On the navigator key , press or until the Ans. Mach screen is
displayed. Press OK to confirm.
Select Outgoing msgs. Press Confirm .
Select Anonymous using or . Press Confirm .
Press Yes to replace your personal outgoing message with the
anonymous outgoing message.
The anonymous outgoing message fo r the answering machi ne mode used
(answer only/answer and record) is automatically played back.
Deleting all your personal OGMs
If you delete all your personal outgoi ng messages, the answeri ng
machine will automatically be deactivated.
On the navigator key , press or until the Ans. Mach screen is
displayed. Press OK to confirm.
Select Outgoing msgs. Press Confirm .
81

Livre du MD+.book Page 82 Mercredi, 31. mars 2004 1:57 13
ANSWERING MACHINE
Outgoing msgs
Modify
Delete all
OK
Anonymous
Return Confirm
Delete ?
No Yes
Select Delete all using or . Press Confirm .
Press Yes to delete all the personal outgoing messages.
Playing messages
When there are messages on your answeri ng machi ne, the base indi cator
light blinks. The rhythm of the flash informs you as to the number of
messages received (ex.: 4 short flashes correspond to 4 received
messages)
The new messages are played back first. Afterwards, the messages that
have already been taken are played back in chronol ogic al order (fro m the
oldest messages to the most recent messages).
The icon on the handset screen notifies you that there are
messages that have not been played.
If you saved one or more played messages, the icon appears
on the welcome screen.
Playing messages using the base
Press the button to start the playback.
Your messages are played back through the base loudspeaker.
During playback, you can use the base buttons to execute the following
actions:
• Go to the next message:
• Go back to the beginning of the message:
• Return to the previous message: twice
• Pause playback:
• Start playback after pause:
• Delete the message being played back:long press on
The answering machine will automatically stop at the end of the last
message.
82

Livre du MD+.book Page 83 Mercredi, 31. mars 2004 1:57 13
ANSWERING MACHINE
Playing messages using the handset
On the navigator key , press or until the Ans. Mach screen is
displayed. Press OK to confirm.
Ans. Mach
On/Off
Messages
OK
Outgoing msgs
Return Confirm
Messages
Delete old
Play
OK
Record memo
Return Confirm
Select Messages using or . Press Confirm .
Select Play using or . Press Confirm .
The messages are played through the handset speaker.
Depending on your service provider and your subscription, the name and
number of your contact will be displayed on the screen (except for
confidential calls)
During playback, you can use the handset buttons to execute the followi ng
actions:
- : delete the message being played
- : return to the previous message.
- : momentarily stop the playback (pause).
- : go to the next message.
Remote access to answering machine
You can access your answering machine remotely. This function enables
you to retrieve your messages and access your answering machine from
any other telephone located outside your home.
To remotely access your a nswerin g machine : Dial y our teleph one n umber
and wait for the answering machine to come on.
When your outgoing message is played, press # and enter your remote
access code.
The remote access code is 0000 by defaul t. However, i t ca n only
be used once it is customised, refer to paragraph Modifying the
remote access code, page 86.
83

Livre du MD+.book Page 84 Mercredi, 31. mars 2004 1:57 13
ANSWERING MACHINE
A beep will indicate access to the ans wer machine. Any unread messages
will be automatically played back. At the end of playback, a new beep will
sound to let you know that the answer machi ne is ready. Yo u can carry out
the following operations:
0 : delete the message being played
1 : go back to the beginning of the message
1 (x2) : previous message
2 : pause/play
3 : next message
5 : message read
7 : Answer machine/recor der oper ati ng
8 : record
9 : answering machine off
Deleting all the old messages
To delete the old messages one message at a time, refer to the
previous paragraph and delete the unwanted messages during
their play back.
On the navigator key , press or until the Ans. Mach screen is
displayed. Press OK to confirm.
Messages
Record memo
Delete old
OK
Play
Return Confirm
Delete ?
No Yes
Select Messages. Press Confirm .
Select Delete old using or . Press Confirm .
To confirm the deletion of all the old messages, press Yes .
To exit the menu, press the red key .
Recording a memo
This function enables yo u to leave a pers onal message on your answering
machine. Until the time it is played, it will be considered like a new
message by the answering machine.
On the navigator key , press or until the Ans. Mach screen is
displayed. Press OK to confirm.
84

Livre du MD+.book Page 85 Mercredi, 31. mars 2004 1:57 13
ANSWERING MACHINE
Select Messages. Press Confirm .
Messages
Play
Record memo
OK
Delete old
Return Confirm
then speak after
beeptone
Recording
in progress
Store
memo?
Ok play again
Memo
Memo
Memo
Press Ok to record
Return
Cancel End
No Yes
Select Record memo using or . Press Confirm .
Press OK to start recording.
At the sound of the beep transmitted thr ough the handset, start talking into
the handset microphone.
To stop recording press End .
You can listen again your memo by pressing OK key on the navigator.
At the end of listen, you come back to the previous menu.
To validate the memo, press Yes .
To cancel the memo or restart the recording, press No .
R
Once validated, your answering machine considers the memo as a new
message until it is played.
The message NEW EVENTS is diplayed and replace the idle screen.
85
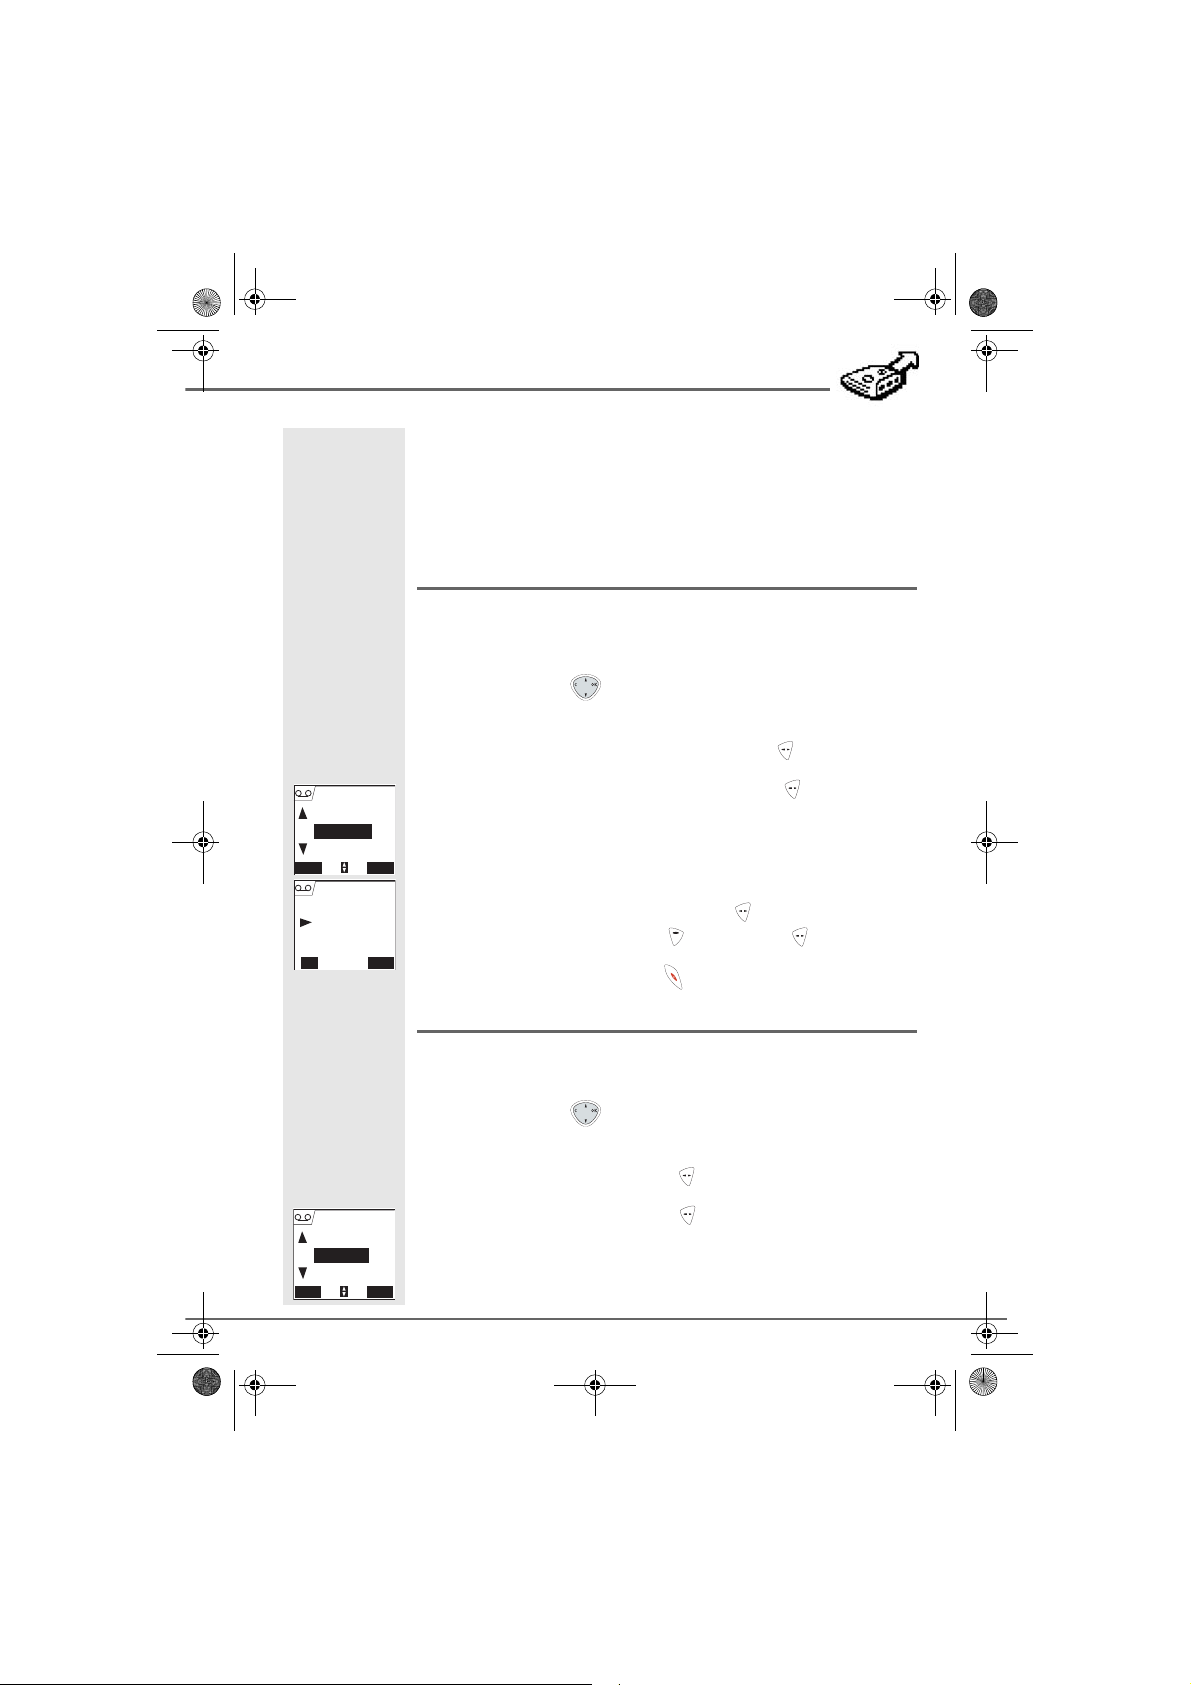
Livre du MD+.book Page 86 Mercredi, 31. mars 2004 1:57 13
TAM SETTING
TAM SETTING
This menu enables you to modi fy the advanced s ettings of your answering
machine (depending on the model) You can access the TAM setting
menu through the Ans. Mach. menu or through the Adv. Settings
submenu of the Settings menu.
Activating and deactivating call screening
When activated, the call screening function enables you to listen to the
message left by your cal l er as i t i s be ing r ec orde d. You c an pick u p at any
time.
On the navigator key , press or until t he Ans. Mach menu is
displayed, press OK to confirm.
Select TAM Settings using or . Press Confirm .
Set ans.mach
No. of rings
Call screening
OK
Remote Code
Return Confirm
Call screening
Screening Mode
Off
Edit Confirm
Set ans.mach
Call screening
Remote Code
OK
Mess.Duration
Return Confirm
Select Call screening using or . Press Confirm .
A screen indicating the function status (on or off) appears.
• To keep the current status, press Confirm .
• To change the status, press Edit , then Confirm .
R
To exit the menu, press the red key .
Modifying the remote access code
The remote access code en ables you to listen to the messages l eft on your
answering machine via another telephone.
On the navigator key , press or until t he Ans. Mach menu is
displayed, press OK to confirm.
Select TAM Settings. Press Confirm .
Select Remote Code. Press Confirm .
86

Livre du MD+.book Page 87 Mercredi, 31. mars 2004 1:57 13
TAM SETTING
Remote Code
Do you want
to modify
remote code?
No Yes
Base code
Base code :
<Enter code>
Return
Remote Code
Access code:
<Enter code>
Return
Set ans.mach
Remote Code
Mess.Duration
OK
Priv. Access
Return Confirm
Mess.Duration
Max mess.durat.
30 seconds
Edit Confirm
Mess.Duration
Unlimited
30 seconds
OK
1 minute
Return Confirm
Press Yes to modify the remote access code.
Enter your Base code (default setting is 0000). Press Confirm .
Enter the new remote access code (4 digits mandatory). Press
Confirm .
To exit the menu, press the red key .
Setting the message duration
This duration corresponds to the r ecor din g time that the c all er w ill hav e to
leave you his message.
On the navigator key , press or until t he Ans. Mach menu is
displayed, press OK to confirm.
Select TAM Settings. Press Confirm .
Select Mess. Duration using or . Press Confirm .
A screen indicating the maximum authorised recording time for each
message appears.
• To keep the current duration, press Confirm .
• To modify the current duration, press Edit .
During the duration modification, a list of the message durations appears
on the screen.
Select the desired duration using or . Press Confirm .
To exit the menu, press the red key .
R
87

Livre du MD+.book Page 88 Mercredi, 31. mars 2004 1:57 13
TAM SETTING
Privileged access
This service enables you to switch off the handset ringer for all incoming
calls when you do not want to be disturbed, except for privileged calls.
During the reception of a call, the answering machine will switch on after
a certain number of (muted) rings that you will have set and the caller will
be able to leave you a message.
You can programme your telephone in such a way that it will only ring
when specific callers call. To achieve this, they will need to dial
key and a privileged code when they hear the outgoing message. Once
the code has been entered, your telephone rings.
On the navigator key , press or until t he Ans. Mach menu is
displayed, press OK to confirm.
Select TAM Settings. Press Confirm .
(star)
Set ans.mach
Mess.Duration
Priv. Access
OK
Record. Mode
Return Confirm
Priv. Access
Code : 0000
Off
Edit Confirm
Priv. Access
Code :
0
000
Return Confirm
Priv. Access
Do you want to
activate VIP
Access?
No
Select Priv. Access using or . Press Confirm .
The following information is displayed on the screen:
• the privileged access code,
• the service status.
Press Edit to modify the information displayed on the screen.
R
Enter the privileged access code.
Give the privileged access code to your privileged callers. When
calling you, they can dial
(star) key and a privil eged code wh en
they hear the outgoing message.
Press Confirm .
Press Yes to activate the privileged access mode.
To exit the menu, press the red key .
Yes
88

Livre du MD+.book Page 89 Mercredi, 31. mars 2004 1:57 13
TAM SETTING
Record mode
The record mode enables you to modify the re cording ti me capaci ty of the
answering machine.
Two quality levels are available:
• Superior quality: for a 15 minute high-quality capacity.
• Standard quality: for a 25 minute normal-quality capacity.
Modifying the message recording quality does not affect the
quality of the outgoing message.
On the navigator key , press or until t he Ans. Mach menu is
displayed, press OK to confirm.
Select TAM Settings. Press Confirm .
Set ans.mach
Priv. Access
Record. Mode
OK
No. of rings
Return Confirm
Record. Mode
Quality
Superior
Edit
Confirm
Select Record. Mode using or . Press Confirm .
Press Edit to modify the recording quality level displayed on the
R
screen. Press Confirm .
To exit the menu, press the red key .
Number of rings
This parameter enables you to set the number of times your telephone
rings before the answering machine answers a call. The number of rings
can be set between 2 and 7. You can also select the Time saver mode.
The Time saver mode au tomatically deter mines the numb er of rings b ased
on the number of messages left on the answering machine.
If there are no new messages o n the answerin g machine, the number of
rings will be 4, otherwise the number of rings will be 2.
On the navigator key , press or until t he Ans. Mach menu is
displayed, press OK to confirm.
Select TAM Settings. Press Confirm .
89

Livre du MD+.book Page 90 Mercredi, 31. mars 2004 1:57 13
TAM SETTING
Set ans.mach
Record. Mode
No. of rings
OK
Call screening
Return Confirm
No. of rings
Number of rings
4
Edit
OK
Return Confirm
Confirm
No. of rings
3
4
5
Select No. of rings using or . Press Confirm .
The programmed number of rings is displayed on the screen.
Press Edit to modify the current number.
R
In the list, select the desired number of rings (between 2 and 7) using
or or the Time saver mode, and press Confirm .
To exit the menu, press the red key .
90

Livre du MD+.book Page 91 Mercredi, 31. mars 2004 1:57 13
APPENDIX
Care and Maintenance
Use a slightly damp cloth to wipe the base and handset, do not use a dry cloth as this may
cause electrostatic charges.
Problems
Refer to the table presented below in case of an operational malfunction:
Problems Remedies
The base indicator light is not lit Make sure that :
The handset display is blank Make sure the batteries are properly installed.
The handset does not ring
during an incoming call
No radio link between the
handset and b ase
The network indicator icon
flashes
You obtain a "busy" dial tone for
each dialled number
You cannot send or receive
SMSs
• the power adapter is properly connected to a power socket.
• the power connector is properly plugged into the base.
• your fuse and circuit-breaker are in working order and that the power
socket is powered.
Place the handset on the base and fully charge the batteries.
To increase the life of your batteries, you can perform this operation about every
two months.
If these precautionary measures do not resolve this issue, replacement
batteries are available through your reseller.
As time goes by, you may notice a slight decrease in battery performance. Use
your handset until the battery is fully discharged, and then charge it for at least
6 hours.
Make sure that the telephone is properly connected and that you have a dial
tone.
Make sure your telephone is not set to silent mode (see chapter entitled Ring
Tones).
Make sure you are not in the privileged access mode.
Make sure the handset is registered by moving closer to the base, if it is
registered correctly, the handset screen should display its own handset numb er.
Otherwise, register the handset to the base. See “R egister ing a new han dset to
a base”, page 67.
Make sure no one else is using another handset (if the intrusion mode is
deactived).
Make sure that the dial mode (tone or pulse dialling) is compatible with your
telephone line or your automatic branch exchange.
Make sure your time limit has not run out (if activated).
Make sure you are not on call restriction (if activated)
Make sure you have subscribed to a caller display service.
Find out if the SMS service is in fact activated on your line.
Obtain the server numbers from your service provider and make sure they are
identical to the numbers on your handset.
Have you provided your contacts with the right terminal number?
91

Livre du MD+.book Page 92 Mercredi, 31. mars 2004 1:57 13
FEATURES
Functions Default settings Functions Default settings
SMS Silent mode Off
SMS sending centre
SMS reception centre Depending on the
ACCESSORIES Program keys Silence/answering
Alarm clock Off Date/Time 00:00 // 01/01/03
Timer Off Auto Hang up On
INTERCOMMUNICATION Auto Pick up Off
Room monitor Off Language Depending on the
Keypad lock Off •Line settings
Emergency Off Network type Public
Base code 0000 Dial Tone
Time limit Off Flashing Depending on the
Restriction Off PABX prefix Off
Intrusion Off •HS se tting
Confidential Off Handset name Handset -1-
Ringer (Ext/Int) Actualités / Carmen Base name Base 1
Depending on the
service provider
service provider
SECURITY Advanced settings
RING TONES •Base settings
Beeps All active
SETTINGS
country
service provider
Telephone features
Number of channels 120 Autonomy
Radio frequency band 1,88 - 1,90 GHz standby time 240 hours
Duplex mode TDMA talk time 15 hours
Spacing between 1,728 MHz Handset range
Bit rate 1152 Kbit/s open space up to 300 m
Modulation GFSK inside building up to 50 m
Vocoding ADPCM B ase dimensions 167 x 113 x 65 mm
Transmitting power 250 mW Base weight 193 g
Base operating voltage 230 V , 50/60 Hz Handset dimensions 140 x 51 x 30 mm
Charging time 6 hours Handset weight 152 g
All of this data is provided to you for inform ation purpo ses only. Sagem SA reserves the r ight to make any changes without
notice.
92

Livre du MD+.book Page 93 Mercredi, 31. mars 2004 1:57 13
ENVIRONMENT
Preserving the environment in a durable developmental logic is a primary concern for
SAGEM SA.
SAGEM SA industrial sites comply with the environmental standards for emissions produced
by all of its activities.
Design guidelines for this product were put into place to minimize the environmental impact
during its life cycle.
The improvement axes defined in the eco-design program during the development of the
D70T/V product were as follows:
Defining environmentally friendly packaging:
• Optimizing the packaging size in order to use a minimum of raw
material.
• Using recycled and recyclable materials.
Improving the recyclable character of the product at the end of life:
• Reducing the number of materials used in making the product.
• Taking into account, during the design phase, the dismantling of the
used product for recycling.
• Avoiding the use of PBDE flame retardants.
This user guide is printed on recycled pa per.
The presence of this logo on the packaging indicates that SAGEM SA pays a
contribution to the ECO-EMBALLAGES company. This contribution allows
ECO-EMBALLAGES to develop infrastructures working with lo cal author i ties to
improve package recovery and recycling.
The batteries found in the product must never be discarded in the environment
or in refuse containers used for other waste. Waste collection points are made
available in town halls, retails stores, and large surface stores for the disposal
of such products.
93

Garantie.fm Page 94 Jeudi, 1. avril 2004 10:06 10
WARRANTY
Warranty Conditions for the SAGEM D10/50/70 Dectphones
The new equipment attached hereto (the "Equipment") is warranted (spare-parts and maintenance) by
SAGEM Communication UK Ltd ("SAGEM" ), su bject always to the following conditions, against all manufacturing defects for a period of twelv e (12) months from t he date o f purchase of the equipment (the " Warranty"). The Warranty is subject always to proof of purchase being provided to SAGEM's reasonable
satisfaction. Therefore, we would recommend that you keep your purchase invoice or proof of purchase
in a safe place in order to avoid any future problems. To avoid any doubt any accessories intended for
use with the Equipment (such as batteri es, line co rds etc.) shall be warranted fo r the sho rter of (i) the w arranty period stipulated in documentati on accompan ying such access ories or (ii ) three (3) months from the
date of purchase (as identified by valid proof of purchase).
Any and all Equipment which has required to be repaired during the above Warranty is thereinafter warranted (spare-parts and labour only) * by SAGEM until the later of (i) Expiry of the above warranty period
set out above or (ii) three (3) months from the date on which SAGEM carried out the intervention.
This Warranty applies only if the Equipment has been used in normal conditions, in accordance with all
relevant instructions and provided that the Equipment is used properly for its intended purpose and has
not been subject to misuse or abuse.
In the unlikely event that you suffer any technical problems during the Warranty period, you must come
back to your reseller who will organise an intervention for the repair of your equipment via the Sagem's
Authorised Service Centre. Alternatively, please send your machine for repair directly at the Sagem's
Authorised Service Centre placing your product in a suitable packaging with the following indications:
Please state the following licence number on the right end top of your packaging for the transpor tati on to
be at Sagem's expenses: SEA9898
Under this Warranty, provided that we have received notification of any warranty claim during the period
of the Warranty set out above, your Equipment will be sent by yourself via the process described above,
repaired and shipped back to your address in the mainland UK at no expense to you. No replacement
equipment will be provided during the repair process.
Prior to any repair of the faulty Equipment, please ensure that the following are performed:
• Save all the details/ information/ data in your DECT directory as they maybe erased. SAGEM shall
be under no liability in the event of damage caused to your data and shall not under any circumstances reinstall the data in the Equipment.
• Remove all personal data from the Equipment. SAGEM shall perform its obligations hereunder in
accordance with the Data Protection Act 1984 and 1998 and all other relevant regulations.
• Include in the packing your name, address and telephone number.
• Make sure that all the accessories are included with the Equipment and, if possible, into the original
package.
• Include also a copy of the proof of purchase of your Equipment or the warranty card duly completed
by your retailer.
The statutory rights of consumers under mandatory provisions of law remain in force and are not in any way
affected by thi s g ua ran te e. Without prejudic e to the foregoing, If y ou ar e a c on su m er a s d efined in Section
12 of the Unfair Contract Ter m s Act 1977 nothing in these conditions shall affect your statutory rights.
Without prejudice to any other limitation state d in this respect the abov e Warranty shal l not cover and SAGEM shall have no obligation with respect to the following: -
Sagem Service Centre
FREEPOST SEA9898
Caldicot
NP26 5BR
94

Garantie.fm Page 95 Jeudi, 1. avril 2004 10:06 10
WARRANTY
1) Defects breakdown or malfunctions due to:
• failure to properly follow the install ation p rocess , the op er ating m anual and/or the instr uc tions for
use; or
• an external cause to the Equipment (including but not limited to, shock, lightening, fire, vanda-
lism, malevolent action, contacts with various liquids or vermin or water damage of any nature,
inappropriate electric voltage); or
• modifications to the Equipment made without the written approval of SAGEM; or
• a lack of every day maintenance (as described in the documentation supplied with the Equip-
ment) or to a lack of supervision or care; or
• bad storage or environmental conditions, particularly those related to temperature and hygro-
metry, effects of variations of electric voltage, parasites from the electric network or from the
earth; or
• repair, work (opening or att empt to open the E quipment), altera tion, t ampering or mai ntenance of
the Equipment by persons not authorised by SAGEM.
2) Damage due to insufficient or bad packaging of Equipment when returned to the Authorised Repair
Centre.
3) Wear and tear from normal daily use of the Equipment and its accessories.
4) Communication problems related to an unsuitable environment, including in particular:
• problems related to access to the telephone network such as interruptions by access networks or
malfunction of the line used by the subscriber or his correspondent, poor line telephone quality,
• transmission faults (for example, poor geographical coverage by radio transmitter line quality, or
any interference between the environment and the radio transmitter),
• modifications of parameters of telephone network carried out after the sale of the Equipment.
5) Supply of new versions of software.
6) Work in connection with normal use: delivery, installation or exchange of consumable supplies,…
7) Work on any Equipment or software modified or added without the consent of SAGEM.
8) Malfunction due to the use of products, consumables or accessories, which are not compatible with
the Equipment and which have not been approved by SAGEM.
9) Equipment returned to the Call Centre or the Authorised Service Centre without its prior consent.
To avoid any doubt, Charges (repair and delivery costs) will apply - which will be advised in advance by
SAGEM - for service requested by you where the Equipment is excl uded as above from the Warranty and
for service provided after expiry of the 12 month warranty period (3 months for accessories) and must be
paid in advance of the Equipment arriving at the Authorised Service Centre.
WARNING:
1. Defective spare-parts will become property of SAGEM. You hereby agree to SAGEM retaining any
and all defective spare parts.
2. Subject to legal mandatory provisions, the express warranties set fort h in this document are in lieu of
all other warranties express or implied to the fullest extent permitted by law. Especially, SAGEM makes no representations or warranty as to quality or fitness of the Equipment f or any particular purpos e.
SAGEM's liability in respe ct o f any c laim by the C ustome r or any third party for direct loss o r dam age,
whether arising in contract, tort or otherwise or from SAGEM's negligence or otherwise in respect of
its supply or services shall not exceed the price paid by the Customer for the Equipment . In no event
shall SAGEM be liable for indirect, special or consequential damage of any kind to you or any third
party (including but not limited to loss of orders, loss of profits, damage to goodwill or reputation, interruption of service and any other financial or commerci al damage ) whether bas ed on warranty contract or tort.
95

Garantie.fm Page 96 Jeudi, 1. avril 2004 10:06 10
WARRANTY
The foregoing shall apply only for the UK. If any provision of this warranty shall be held to be in whole or
in part invalid or illegal due to an obligatory rule applicable to consumers pursuant to English legislation,
such invalidity or illegality shall not impair or affect the remaining provisions or parts of this warranty.
Any dispute arising from the terms of these Warranty Conditions shall be governed by English law.
The operation of the provisions of the Con tracts (Rights of Third Parties) Act 19 99 sh all be excluded from
this Warranty.
To avoid any doubt, this warranty is not assignable to third parties.
96
 Loading...