

Safire SF-TESTER-ARM-5N1-4K Instruction Manual
SF-TESTER-ARM-5N1-4K
INSTRUCTIONMANUAL

Thank you for purchasing the IP camera tester. Please read the manual before
using the IP camera tester and use properly.
For using the IP camera tester safely, please first read the「Safety Information
」
The manual should be kept well in case of reference.
Keep the S/N label for after-sale service within warranty period. Product without
If there is any question or problem while using the IP camera tester, or damages
carefully in the manual.
S/N label will be charged for repair service.
occurred on the product, please contact our technical Department.

CCTV TESTER User Manual
Content
1 .Safety information........................................................................................................................................1
2. IP Camera Tester Introduction.....................................................................................................................2
2.1 General................................................................................................................................................2
3. Operation.......................................................................................................................................................2
3.1 Installing the Battery..........................................................................................................................2
4. IP Camera Testing........................................................................................................................................3
4.1 Power Camera....................................................................................................................................3
4.2 IP discovery........................................................................................................................................3
4.3 Rapid ONVIF test.............................................................................................................................. 4
4.4 Non-Onvif IP camera test..................................................................................................................9
5. Analog & HD Camera Testing..................................................................................................................11
5.1 Analog camera test...........................................................................................................................11
5.2 CVI camera test................................................................................................................................11
5.3 TVI camera test................................................................................................................................14
5.4 AHD camera test..............................................................................................................................15
6. Other function.............................................................................................................................................16
6.1 TesterPlay.........................................................................................................................................16
6.2 Network tool.....................................................................................................................................17
6.3 RJ45 cable TDR test........................................................................................................................18
6.4 PoE power / DC12V 3A power output...........................................................................................20
6.5 Update...............................................................................................................................................21
6.6 File explorer..................................................................................................................................... 21
6.7 System Setting..................................................................................................................................23
6.8.Tools and Apps................................................................................................................................ 26
7. Specifications..............................................................................................................................................27
7.1 General Specifications.....................................................................................................................27

CCTV TESTER User Manual
1 .Safety information
The tester is intended to use in compliance with the local rules of the electrical
◆
usage and avoid to apply at the places which are inapplicable for the use of electrics
such as hospital, gas station etc.
To prevent the functional decline or failure, the product should not be sprinkled or
◆
damped.
The exposed part of the tester should not be touched by the dust and liquid.
◆
During transportation and use, it is highly recommended to avoid the violent
◆
collision and vibration of the tester, lest damaging components and causing failure.
Don’t leave the tester alone while charging and recharging. If the battery is found
◆
severely hot, the tester should be powered off from the electric source at once. The
tester should not be charged over 6 hours.
Don’t use the tester where the humidity is high. Once the tester is damp, power off
◆
immediately and move away other connected cables.
The tester should not be used in the environment with the flammable gas.
◆
Do not disassemble the instrument since no component inside can be repaired by
◆
the user. If the disassembly is necessary indeed, please contact with the technician
of our company.
The instrument should not be used under the environment with strong
◆
electromagnetic interference.
Don’t touch the tester with wet hands or waterish things.
◆
Don’t use the detergent to clean and the dry cloth is suggested to use. If the dirt is
◆
not easy to remove, the soft cloth with water or neutral detergent can be used. But
the cloth should be tweaked sufficiently.
1

CCTV TESTER User Manual
The IPS touch screen IP camera monitor is designed for maintenance and installation
of IP cameras, analog cameras, TVI, CVI, AHD cameras, as well as testing 4K H.264
/4K H.265 camera by mainstream, The tester enables it to display network HD
cameras and analog cameras in high resolution. The unit supports many ONVIF PTZ
and analog PTZ control. The combination of touch screen and key buttons make the IP
camera tester very user- friendly.
The tester has built-in lithium ion polymer rechargeable battery. The battery cable
inside battery cabin should be disconnected for safety during transportation!
Prior to the use of the instrument, the battery cables inside the battery cabin should be
well connected. Pressing the key continuously can power on or off the tester.
Notice: Please use the original adaptor and connected cable of the device!
When the battery icon is full or the charge indicator turns off automatically,
indicate the battery charging is completed.
Notice: When the Charge Indicator turns off, the battery is approximately
90% charged. The charging time can be extended for about 1 hour and
the charging time within 12 hours will not damage the battery.
Notice: Press the key several seconds to restore the default settings when the
instrument works abnormally.
Notice: While Charging, someone must be present.
2. IP Camera Tester Introduction
2.1 General
3. Operation
3.1 Installing the Battery
2

CCTV TESTER User Manual
4.1 Power Camera
Press IP discovery , tester auto-scan the whole network segment IP, as well as
auto-modify the tester’s IP to the same network segment with the scanned camera's IP.
The meter auto-search whole network segment IP, and auto- add the IP of different
network segments. Detect unactivated Dahua and Hikvision cameras, then click “OK”,
go to Dahua and Hikvision Test Tool.
4. IP Camera Testing
Camera can be powered from the DC 12V/3A output or by Power over Ethernet.
4.2 IP discovery
3

CCTV TESTER User Manual
Local IP: Tester’s IP address, Tester can auto-modify the tester’s IP to the same
network segment with the scanned camera's IP.
Discovery IP: Connected tester equipment’s IP address. If the camera connected to
the tester directly, tester will display the camera’s IP address, if tester connects to
Local Area Network, it displays the current IP address.
Start: PING function, Click "Start", can PING camera’s IP.
ONVIF: Rapid ONVIF Quick link.
IPC TEST: IPC TEST Quick link, Non-Onvif IP camera test.
4.3 Rapid ONVIF test
Rapid ONVIF can display 4K H.265/H.264 camera image by tester’s mainstream.
The meter auto scan all ONVIF cameras in different network segments. It lists
cameras name and IP address on the Left of screen. Tester can auto login camera and
display camera image. Factory default use admin password to auto login, if you
modified the password, then default use the modified password to login.
Click the button “Refresh”, tester will scan the ONVIF camera again. Click the newly
displayed ONVIF camera on the “Device List”. The tester will show the IP camera’s
relative information and settings.
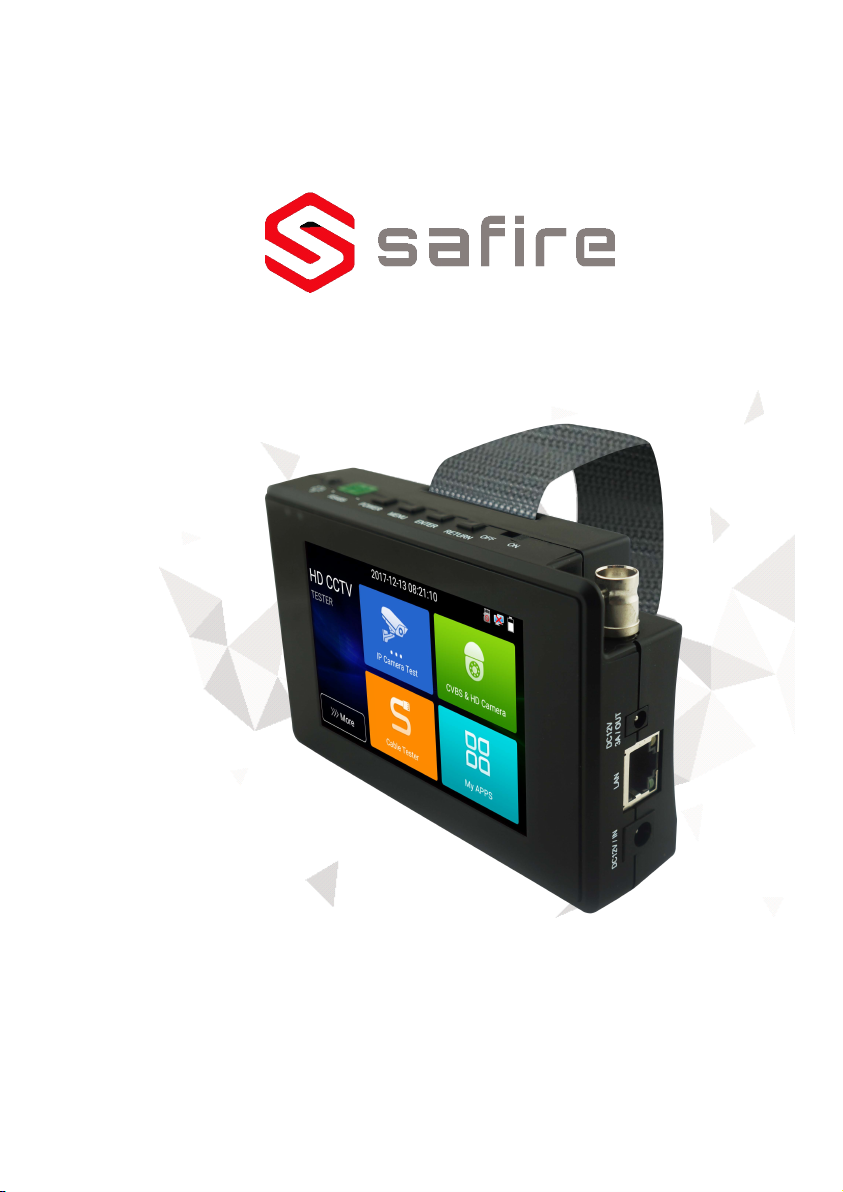
Pop-up settings menu when click the “setting ” icon in the upper left corner.
4
CCTV TESTER User Manual
Across network segments scan: After open this function , Rapid ONVIF function can
across network segments to scan camera’s IP.
Auto Login: After open this function, tester can auto login camera and display camera
image (The login password is the same with last time, the first time using password is
the default password "admin")
Video transmission protocol: UTP and TCP protocol.
Show focusInfo: Focus Information.
View manual: Open Manual.
Restore Defaults: Revert “Rapid ONVIF” to default settings.
Confirm: Save the modified parameters.
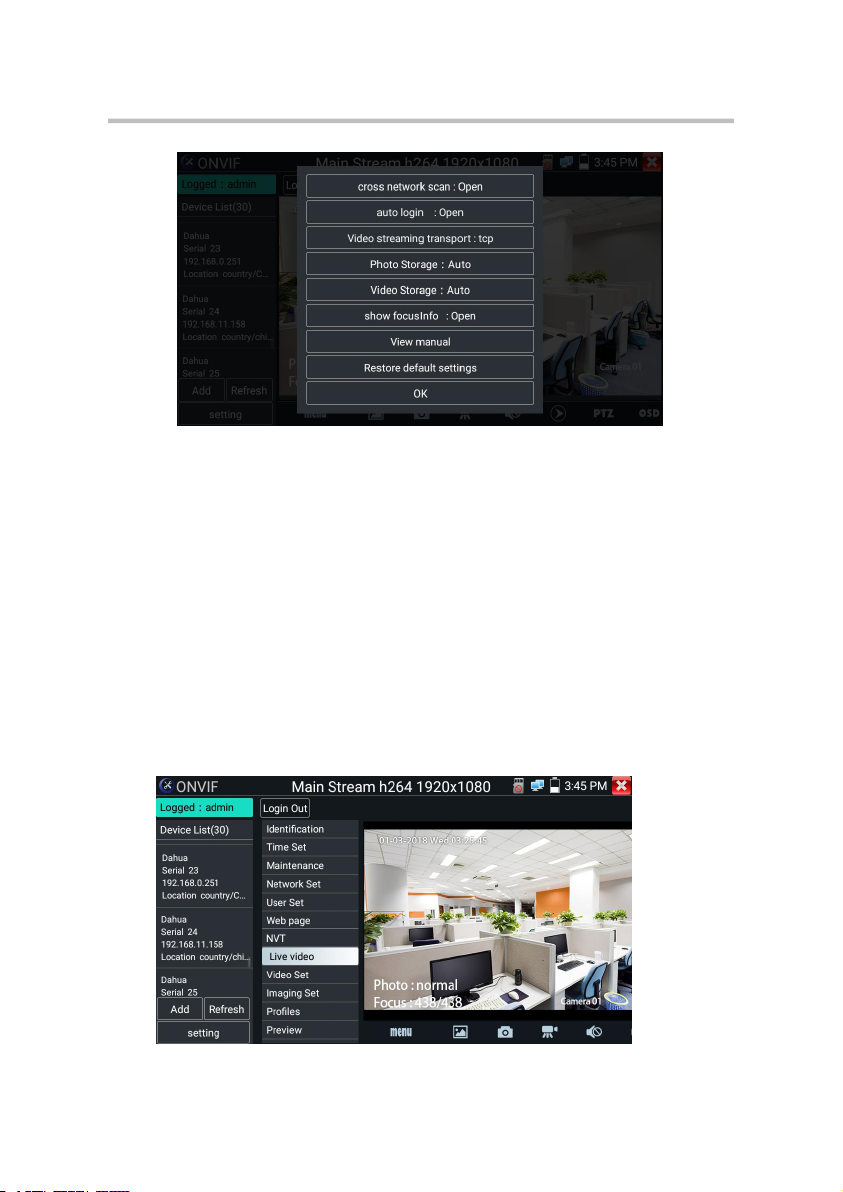
Click “MENU” icon to open camera setting.
5
CCTV TESTER User Manual
While in the “Live video” menu, click “Video Menu” at the top right of the image to
access the following tools: Snapshot, Record, Photo, Playback, Lens simulation, PTZ
and Settings.
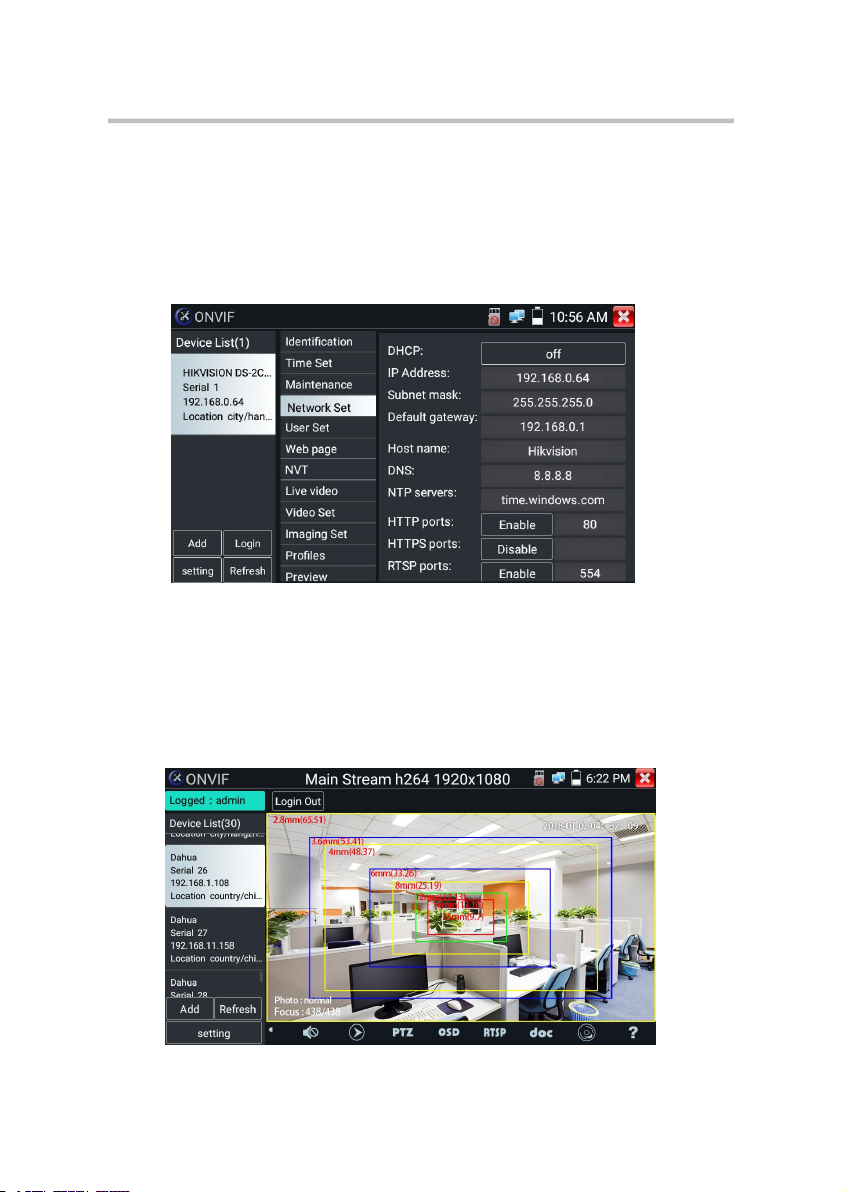
Network setting: Click “Network Set” to change the IP address. Some cameras
cannot support change IP address, so there is no change after saving.
If it is network video input to the tester, as the tester supports resolution up to 1080p,
the input image will be very clear after it is enlarged. This is greatly helpful for the
installers to ensure the IP camera’s video coverage and decide the IP camera’s install
site.
Lens simulation: Simulate different lenses display area, supported lens:
“2.8/3.6/4/6/8/12/16/25mm", for choosing the suitable camera lens.
6
CCTV TESTER User Manual
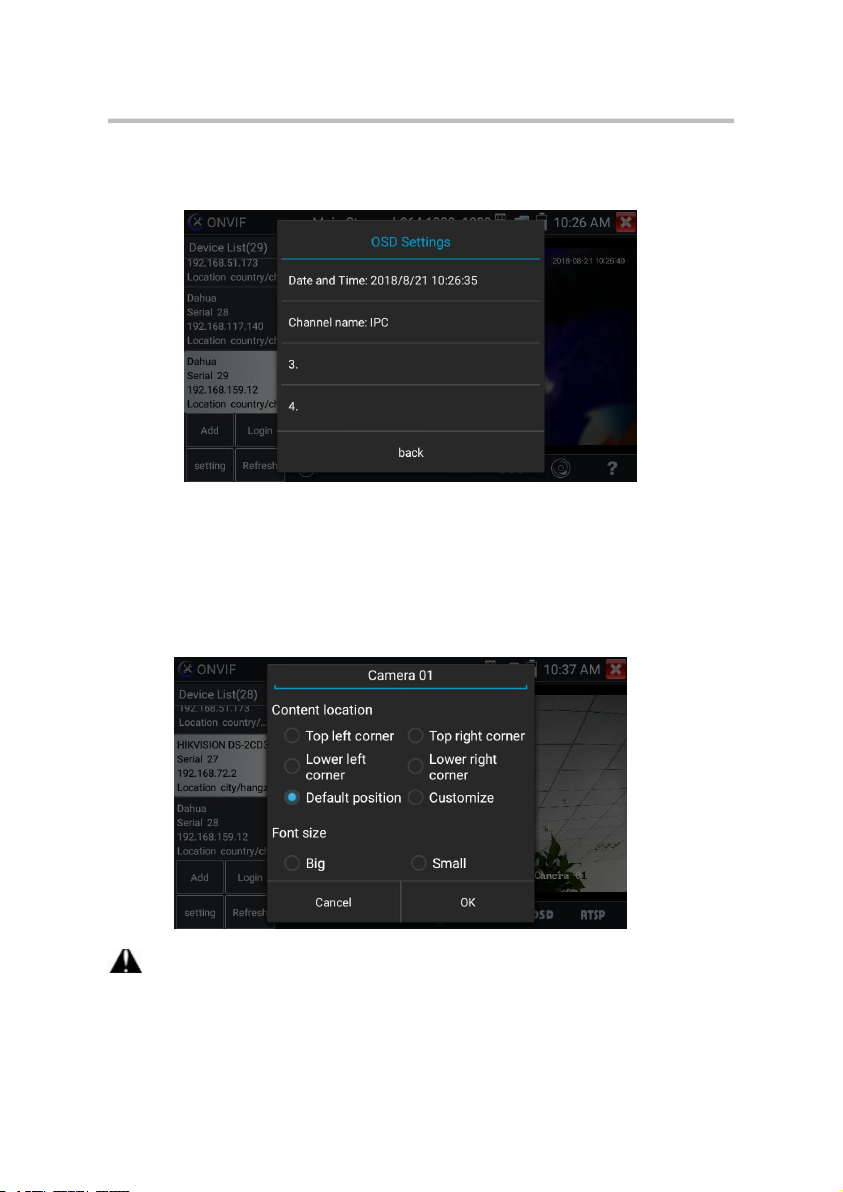
After channel selecting, you can edit the channel name, modify the display position,
and switch the font size. Select “default location” in “content location” is without
modification. Select “Customization” to arbitrarily adjust the channel name and
display location. Click “OK” and the effects will appear. Press return key or click any
area of the screen to return to the upper layer of the interface.
Video files can play in the Video player on the main menu.
OSD Menu: Select OSD and popup the OSD menu. include time, channel name and
other optional items.
7
 Loading...