

Safety Technology International Wireless Driveway Monitor, 30078 Installation Instructions Manual
v5-3
Installation Instructions
TM
Wireless Driveway Monitor
Model # 30078
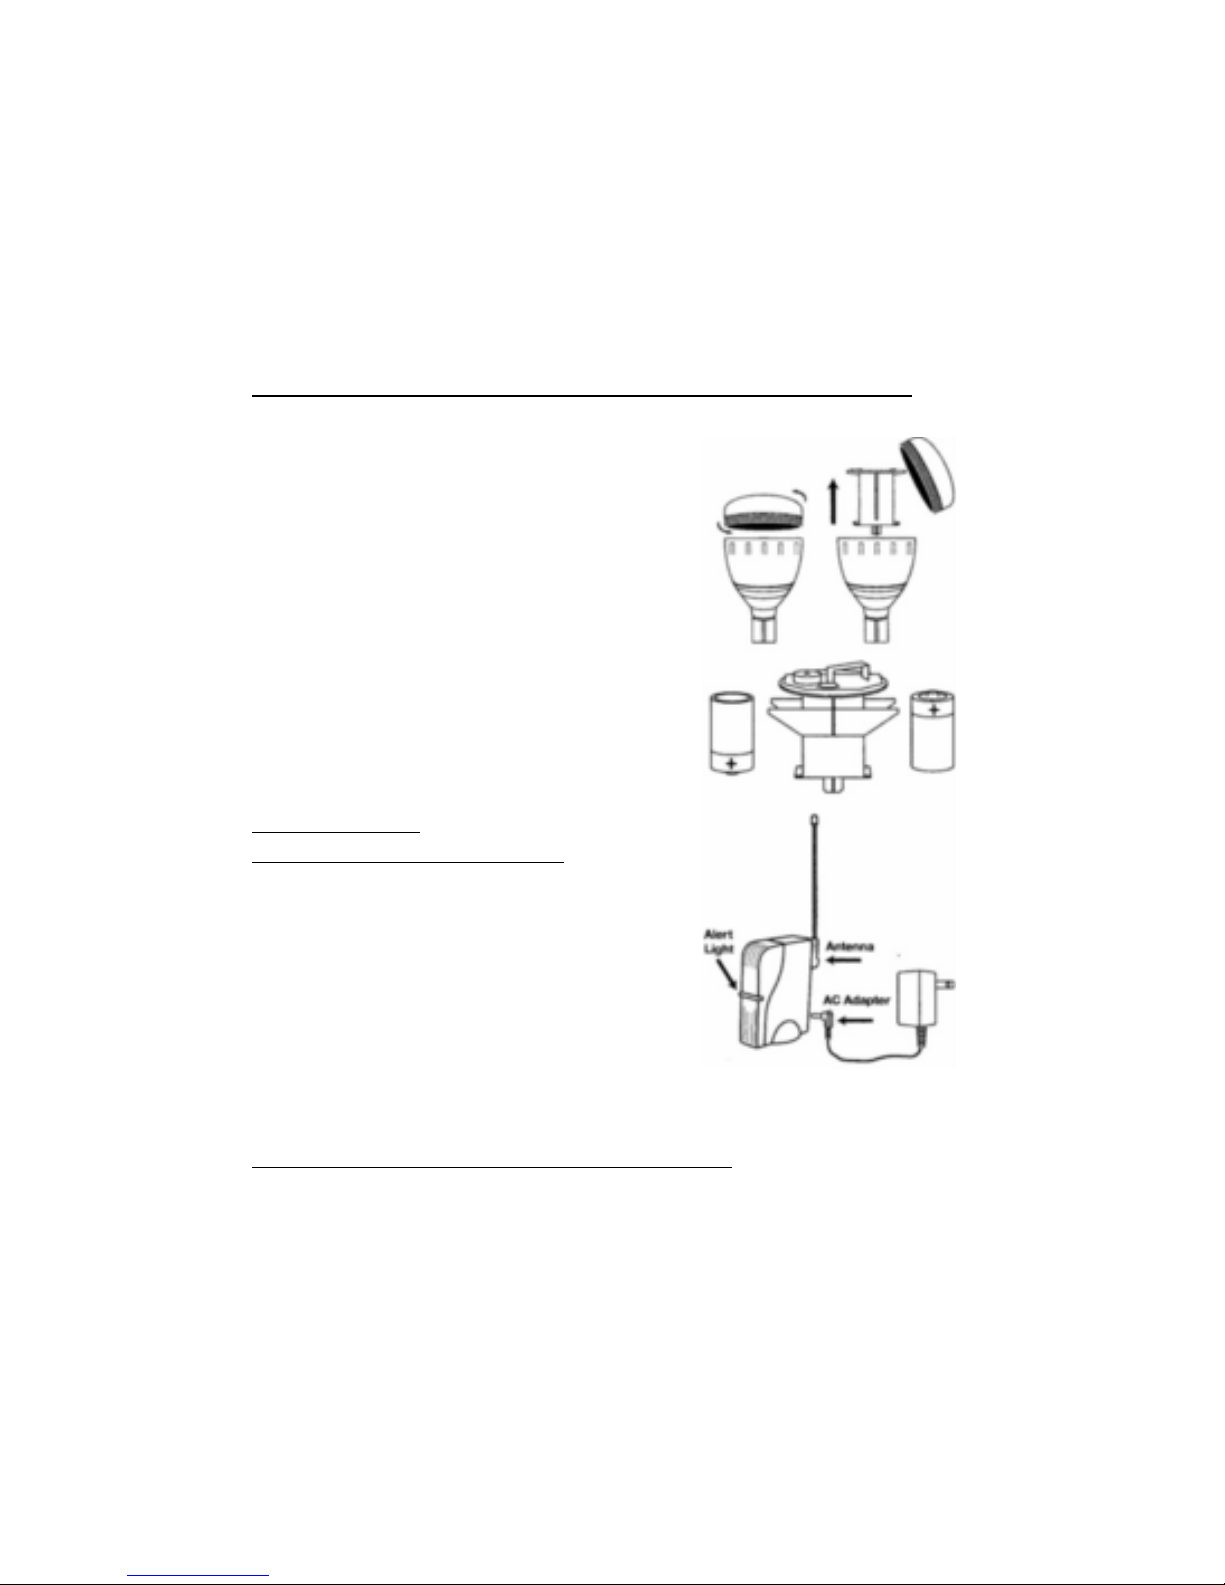
Installing Batteries in the Driveway Sensor:
1. Open the case of the driveway sensor by
unscrewing the top in a counterclockwise
direction.
2. Remove the battery holder from inside the
sensor case by lifting up. Insert two "C"
alkaline batteries (not included). Note the
positive and negative battery orientation.
The sensor will make a faint cricket sound
when activated.
3. If needed, lubricate the o-ring with a thin
coating of V aseline. (Recommended every
time the batteries are changed.)
4. Close the case back together tightly. The
O-ring should provide a water resistant
seal.
Setting Up the
Driveway Monitor Receiver:
Plug the antenna into the red RCA jack on the
back of the receiver (the top jack). The antenna should be vertical.
Plug the AC adapter into the power jack on
the back of the receiver (the bottom jack).
The receiver will beep and the alert light will
turn on red for 5 seconds - then come on
green.
Testing the System Prior to Installation
The sensor and receiver are factory set to a unique code. Before installing
the sensor outside, test the unit by rotating the driveway sensor (rotate the
sensor more than 5 feet away from the receiver). (If you listen carefully, you
will hear the sensor softly chirp like a cricket when the unit is transmitting a
signal.) The receiver will chime 2 times and the ALERT light will flash RED for
15 minutes.
Page 1 Driveway Monitor 30078
If the receiver does not chime or the red ALERT light does not come on
during this test - refer to the Trouble Shooting section of the Reference
Guide.
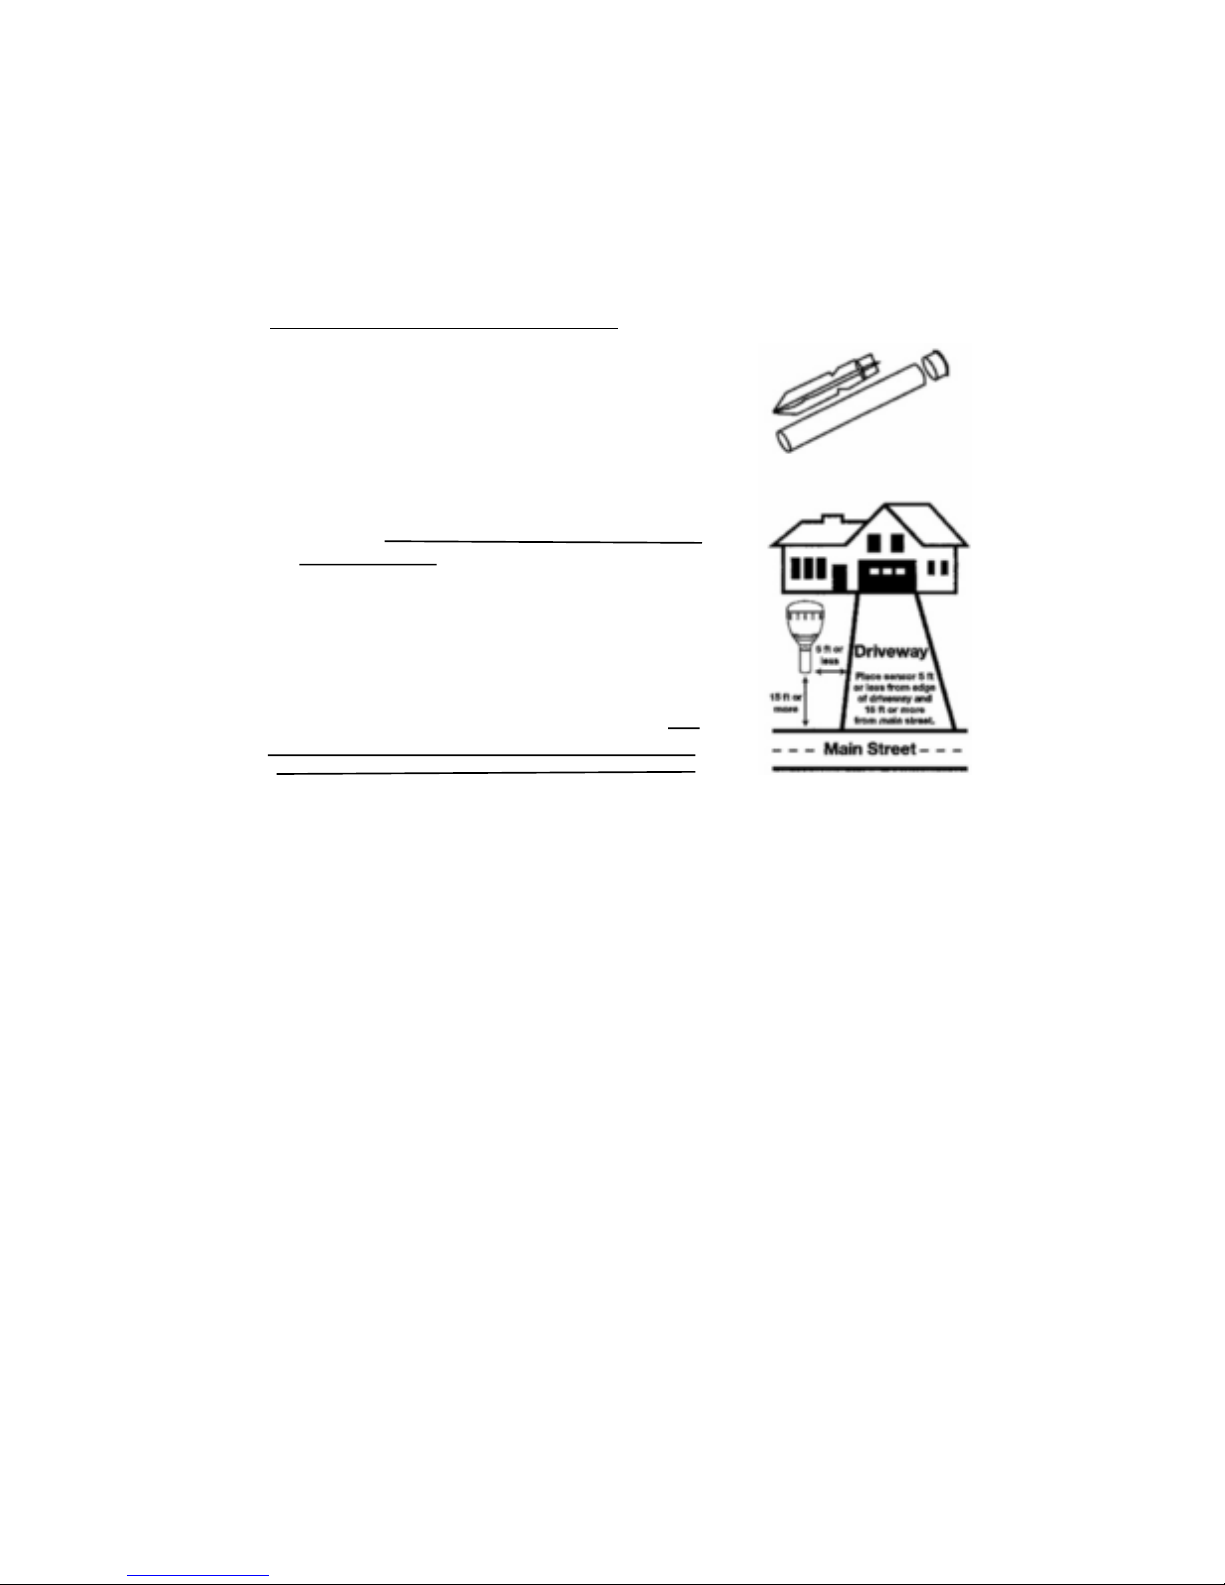
Mounting the Driveway Sensor:
1. The stake comes in three parts. Assemble the parts
by pressing the cap onto the tube and pressing the
tube onto the stake. The cap protects the top of the
tube during hammering.
2. Pound the assembled stake into the ground on the
side of the driveway using a regular hammer. Never
hammer the stake with the sensor attached.
3. Once the stake and tube are firmly in the ground,
remove the cap and mount the sensor onto the tube.
Another option is to mount the sensor to a fence, tree,
or post using the included wall bracket. The higher the
sensor is mounted off the ground, the better the transmitting distance is to the home. The object to which
you mount the driveway sensor must not move in the
wind to avoid false triggers on windy days. Do not mount
the sensor to iron or steel objects. Whenever a vehicle
drives by , you will be notified in the house.
If you have any problems with:
• Getting the system to function,
• Getting the system to work from the end of your driveway ,
• Using 2 or more sensors or receivers with your system,
• Buying additional accessories, then
Please refer to the separate TROUBLESHOOTING GUIDE.
This device complies with Part 15 of the FCC Rules. Operation is subject to the following two conditions: (1) this device may not cause
harmful interference, and (2) this device must accept any interference received, including interference that may cause undesired
operation.
User is cautioned that changes or modifications not expressly approved by Safety Technology
International could void the user's authority to operate this equipment.
Covered under US Patent Numbers: 4,851,775 & 5,239,264
Safety Technology International, Inc
2306 Airport Rd • Waterford, Michigan 48327 USA
Driveway Monitor 30078 Page 2
FCC ID:
www.STI-USA.com
©2006 Safety Technology International, Inc
 Loading...