

Safety 1st TechTouch MO140 User Manual
User Guide
MO140
20
Please read the following instructions and warnings carefully.
Keep these instructions for future reference.
Tool needed: Flathead Screwdriver (not included)
Thank you for purchasing a Safety 1st product. We are not only about safety,
we're also about your satisfaction. If you have any questions or comments,
please call our Consumer Relations department at 1-800-544-1108 or
e-mail us at consumer@safety1st.com
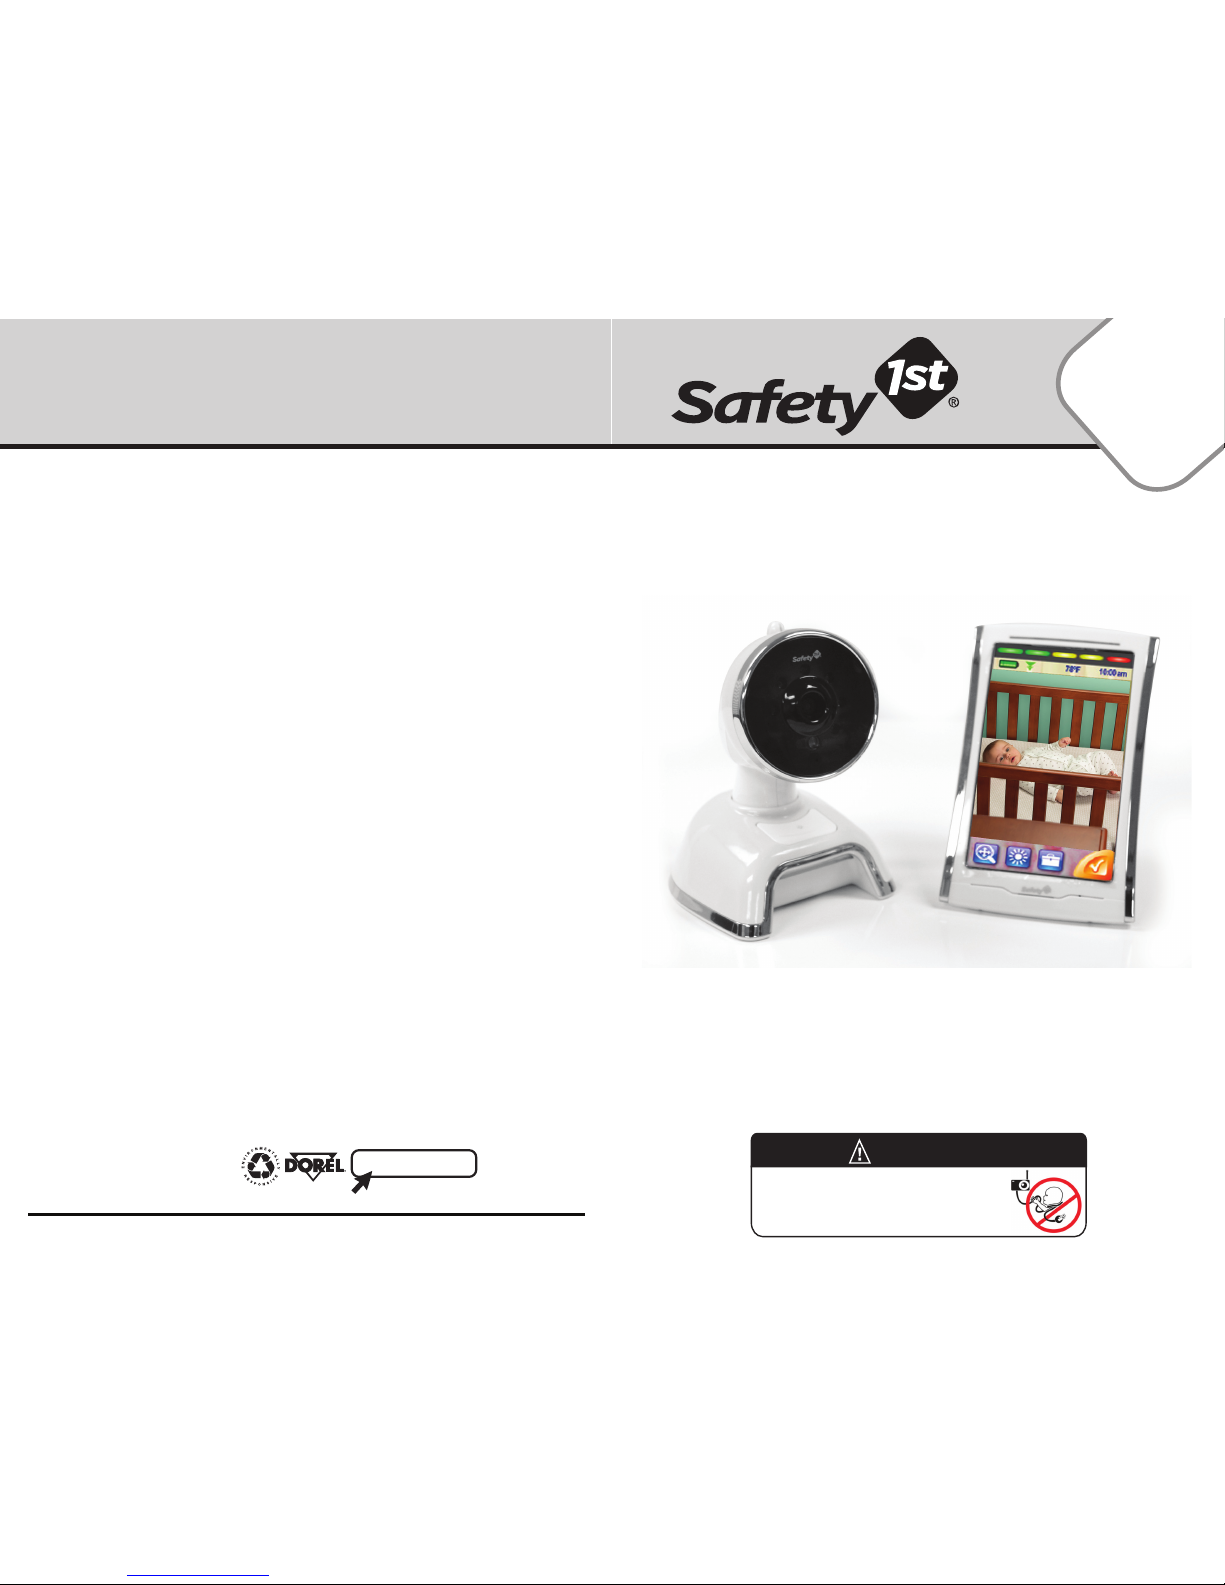
Strangulation Hazard - Children have STRANGLED
in cords. Keep cords out of reach of children more
than 3 feet (0.9 m) away.
WARNING!
TechTouch
Digital Color Video Monitor
4358-6519
Register for our eNewsletter and
watch our experts on Safety 1
st
TV
safety1st.com
©2014 Dorel Juvenile.
www.djgusa.com (800) 544-1108
www.safety1st.com
Made in CHINA. Hecho en CHINA.
Styles and colors may vary. Los estilos y los colores pueden variar.
Distributed by (distribuido por) Dorel Juvenile Group, Inc., 2525 State St., Columbus, IN 47201-7494
Dorel Distribution Canada, 873 Hodge, St. Laurent, QC H4N 2B1
2/27/14
For more help and resources, call 1-800-544-1108 or visit www.safety1st.com 32
Important Warnings. . . . . . . . . . . . . . . . . . . . . . . . . . . . . . . . . . 2
Features & Components . . . . . . . . . . . . . . . . . . . . . . . . . . . . . . 4
Icon Description/Features . . . . . . . . . . . . . . . . . . . . . . . . . . . . 4
Installing & Charging Batteries. . . . . . . . . . . . . . . . . . . . . . . . . 5
Quick Start Guide . . . . . . . . . . . . . . . . . . . . . . . . . . . . . . . . 6 & 7
Using Your Monitor:
Parent Unit (Receiver)
• Power On/off Button . . . . . . . . . . . . . . . . . . . . . . . . . . . . 8
• Lock Screen/Unlock Screen . . . . . . . . . . . . . . . . . . . . . . 8
• Tri-Color Sound Lights (5 LEDs) . . . . . . . . . . . . . . . . . . 8
• Auto-Rotation Screen . . . . . . . . . . . . . . . . . . . . . . . . . . . 8
• Zoom Control . . . . . . . . . . . . . . . . . . . . . . . . . . . . . . . . . . 8
• Pan/Tilt Control . . . . . . . . . . . . . . . . . . . . . . . . . . . . . . . . 9
• Brightness Control . . . . . . . . . . . . . . . . . . . . . . . . . . . . . . 9
• Status Bar . . . . . . . . . . . . . . . . . . . . . . . . . . . . . . . . . . . . . 9
• Volume Control . . . . . . . . . . . . . . . . . . . . . . . . . . . . . . . 10
• Talk to Baby Button . . . . . . . . . . . . . . . . . . . . . . . . . . . . 10
• Quick View - Video On/Off Button . . . . . . . . . . . . . . . 10
• Belt Clip & Stand . . . . . . . . . . . . . . . . . . . . . . . . . . . . . . 10
• Toolbox . . . . . . . . . . . . . . . . . . . . . . . . . . . . . . . . . . . . . . 10
• Secondary Touchscreen Menu . . . . . . . . . . . . . . . . . . . 10
• Clock Menu . . . . . . . . . . . . . . . . . . . . . . . . . . . . . . . . . . . 11
• Temperature Display . . . . . . . . . . . . . . . . . . . . . . . . . . . 11
• Help Button . . . . . . . . . . . . . . . . . . . . . . . . . . . . . . . . . . . 11
Camera (Baby Unit)
• Adding Additional Cameras . . . . . . . . . . . . . . . . . . . . . 12
• Camera Button . . . . . . . . . . . . . . . . . . . . . . . . . . . . . . . . 12
• To Add a Camera . . . . . . . . . . . . . . . . . . . . . . . . . . . . . . 12
• To Disable/Recativate a Previously Added Camera. 13
• Auto-Scan on/Off Toggle Button . . . . . . . . . . . . . . . . 13
• Nightlight Button . . . . . . . . . . . . . . . . . . . . . . . . . . . . . . 13
Use & Care . . . . . . . . . . . . . . . . . . . . . . . . . . . . . . . . . . . . . . . . 14
• Proper Positioning . . . . . . . . . . . . . . . . . . . . . . . . . . . . . 14
• Check Reception . . . . . . . . . . . . . . . . . . . . . . . . . . . . . . 14
• Wall Mounting the Camera . . . . . . . . . . . . . . . . . . . . . . 14
• Care and Cleaning . . . . . . . . . . . . . . . . . . . . . . . . . . . . . 14
Safety Instructions . . . . . . . . . . . . . . . . . . . . . . . . . . . . . . . . . . 15
Troubleshooting . . . . . . . . . . . . . . . . . . . . . . . . . . . . . . . . 16 & 17
FCC Statement . . . . . . . . . . . . . . . . . . . . . . . . . . . . . . . . . . . . . 18
Warranty . . . . . . . . . . . . . . . . . . . . . . . . . . . . . . . . . . . . . . . . . . 19
Important Warnings
Table of Contents
This monitor is not intended to be used as a medical monitor and
its use should not replace proper adult supervision. You should
check your child’s activity at regular intervals as this monitor will
not alert parents to the silent activities of a child.
CAUTION!
To protect your privacy, always turn the monitor off when not in use.
Although encryption makes it less likely that sound and video can be
decoded by other devices outside your home, it is not a guarantee.
CAUTION!
For indoor use only. To reduce the risk of fire or electrical shock,
do not expose this product to water or moisture. NEVER attempt
to disassemble the product. This is dangerous and will void
the warranty.
WARNING!
Important!
• Please read all warnings and assembly instructions carefully before using the video monitor. Parent Unit is a Receiver. Baby Unit is a Transmitter.
• Check your child’s activity at regular intervals, as this monitor will not alert parents to the silent activities of a child.
• To prevent entanglement with the adapter cord, NEVER PLACE THE CORD IN OR NEAR A CRIB OR PLAYPEN.
DO NOT place the Receiver anywhere its AC adapter cord is near children.
• ALWAYS KEEP TRANSMITTER, RECEIVER AND AC ADAPTERS OUT OF REACH OF CHILDREN
• This product is not a medical monitor and its use should not replace adult supervision.
• Check the reception regularly.
• NEVER use the Transmitter or Receiver near water. For example, do not use near a bath tub, bathroom sink, laundry tub, kitchen sink,
in a wet basement, etc.
• Always unplug the AC adapters from wall outlets during long periods of non-use.
• Check to make sure outlet plates are not unusually hot to the touch. If they are, immediately unplug cords from these outlets.
Check that all outlet connections are in good condition so that adapter is not loose or that no wiring is exposed.
Have a qualified, licensed electrician check the wiring as soon as possible.
• Position the Transmitter, Receiver and AC adapters to allow adequate ventilation and prevent these components from overheating.
• To prevent overheating, keep the Transmitter, Receiver and AC adapters away from heat sources such as radiators, heat registers, stoves
or other appliances (including amplifiers) that produce heat. Also keep these components out of direct sunlight.
• Certain electronic devices are sensitive to magnetic fields and may be damaged permanently or temporarily disabled if exposed to a
magnetic field that is too strong. Video screen will become distorted and/or discolored if exposed to a strong magnetic field.
• Use only the AC adapters provided. Use of any other adapters may damage the Transmitter and/or Receiver. Plug AC adapters
into standard household current only! (120V AC) To prevent entanglement and overheating, DO NOT use extension cords.
• The AC adapters may become slightly warm to the touch during operation. This is normal.
• Position the AC adapter cords so that they are not walked on or pinched by items placed upon or against them, paying particular attention
to cords at AC adapter plugs, wall plugs and the point where the cords attach to the Transmitter and Receiver.
• To remove AC adapter from the outlet, firmly grasp the adapter "brick." DO NOT pull on the cord, as this could damage it.
• The LEDs emit IR (infra red) light that is not harmful.
• This product should be serviced only by qualified service personnel at Dorel Juvenile Group when:
- An AC Adapter or its plug is damaged
- The Transmitter or Receiver has fallen
- Liquid has spilled into the Transmitter or Receiver, or
- The Transmitter or Receiver do not appear to operate normally or exhibit a marked change in performance.
• DO NOT attempt to service this product beyond that described in the Troubleshooting section.
All other servicing should be referred to qualified personnel at Dorel Juvenile Group.
For more help and resources, call 1-800-544-1108 or visit www.safety1st.com 54
Parent Unit/Receiver
Baby Unit/Transmitter
U
AC Adapters (2)
T
Rechargeable
Battery Pack (1)
A
B
C
D
E
F
G
H
I
J
K
N
M
O
P
Q
R
S
L
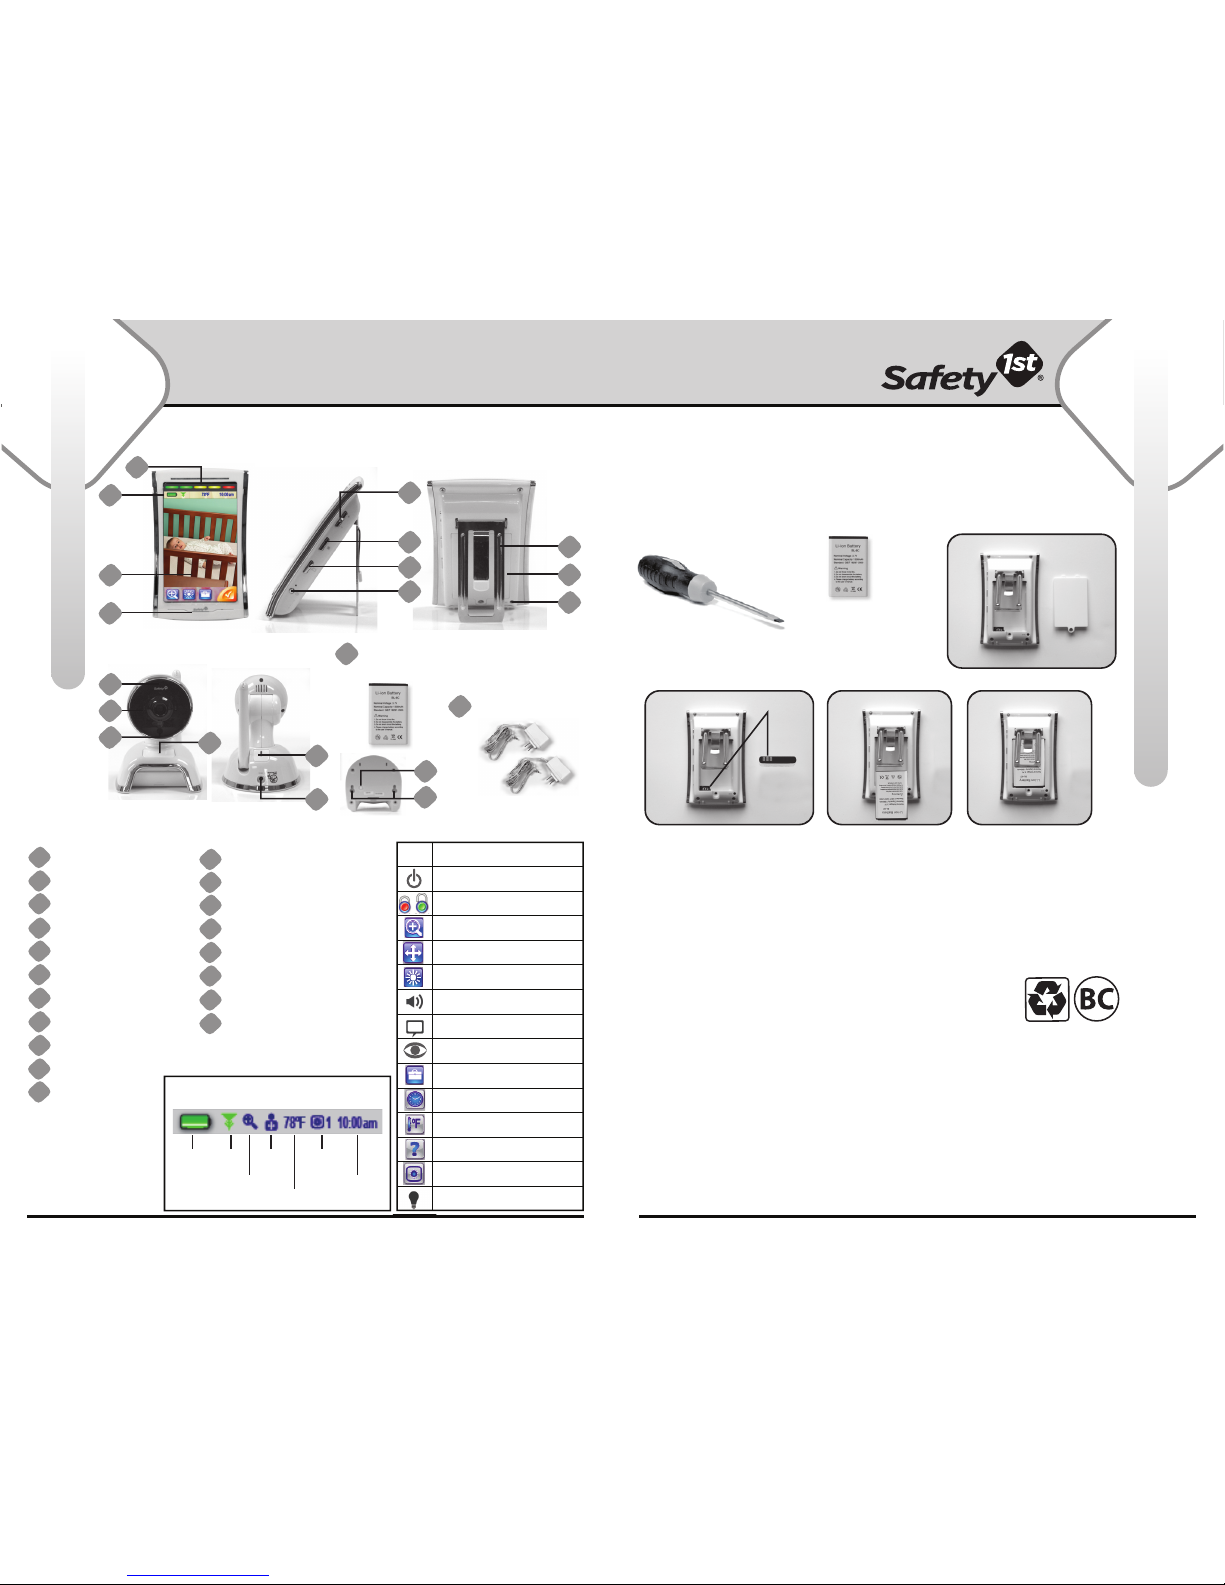
Parent Unit (Receiver)
Sound Lights (LEDs)
Status Bar
4.3 inch Touchscreen
Speaker
Volume Control Button
Quick View Button
Talk to Baby Button
Power On/Off Button
Belt Clip/Stand
Battery Compartment
AC Adapter Jack
Baby Unit (Transmitter)
Motorized Camera (Pan/Tilt)
Nighttime Viewing Lights
Microphone
Nightlight Button
Power On/Off Button
AC Adapter Jack
Pairing Button
Wall Mount Attachment
Features & Components
Installing & Charging Batteries
CAUTION!
• DO NOT mix old and new batteries.
• DO NOT mix alkaline, standard (carbon zinc), or rechargeable (lithium-ion) batteries.
• Only batteries of the same or equivalent type as recommended are to be used.
• Exhausted batteries are to be removed from the unit.
• Keep batteries out of child’s reach. Swallowing a battery could be fatal.
• Used batteries should be disposed of properly.
Do not dispose of batteries in fire - they may explode or leak and cause injury.
• Remove batteries when stored for long periods of non-use.
• DO NOT use monitor system in portable mode when batteries are low.
• Ensure that the battery compartment is completely secure after replacing batteries.
• Check that all contact surfaces are clean and bright before installing batteries.
• Remove batteries when stored for long periods of non-use.
Battery Installation & Use:
(Rechargeable Battery for Parent Unit)
IMPORTANT:
Parent Unit will not operate unless rechargeable battery pack is installed first.
To maximize battery life, charge a new rechargeable battery pack in Parent Unit for 12+ hours
before first use. You may operate Parent Unit with an AC adapter while charging batteries.
PARENT UNIT BATTERY INSTALLATION:
• Lift Belt Clip/Stand.
• Unscrew battery cover and remove from Parent Unit (Figure 1).
• Align connectors of the Parent Unit and rechargeable battery pack (Figure 2).
• Place rechargeable battery pack inside Parent Unit (Figures 3 & 4).
• Secure battery cover with its screw.
To order a new rechargeable battery pack, contact Consumer Relations at 1-800-544-1108.
Use reference code number MO140.
Tool Required:
Flathead Screwdriver
(not included)
Figure 1
Component Required:
Rechargeable
Battery Pack
Figure 2 Figure 3 Figure 4
B
L
M
N
A
D
C
E
F
G
H
I
J
K
O
P
Q
Align
Icon Icon Description/Feature
Power On/Off
Lock Screen/Unlock Screen
Zoom
Pan & Tilt
Brightness
Volume
Talk to Baby
Quick View - Video On/Off
Toolbox
Clock
Temperature
Help
Camera
Nightlight
S
R
Battery Link
Zoom
Add
Camera
Temperature
Camera
Scan Status
Time
Status Bar Icons
 Loading...