

Safety 1st MO070 User Manual
Sound Moments™
Audio Monitor
2 Receiver Set
FREQUENCY RANGE
Features & Components
Quick Start Guide Using Your Monitor (continued)
Use and Care
Helpful Hints
Using Your Monitor
One (1) Year Limited Warranty
Troubleshooting
IF YOU ARE STILL HAVING PROBLEMS, PLEASE CALL TOLL FREE FOR HELP! (800) 544-1108.
©2012 Cosco Management, Inc. All Rights Reserved. Todos derechos reservados.
www.djgusa.com (800) 544-1108 www.safety1st.com Made in CHINA.
Hecho en CHINA. Styles and colors may vary. Los estilos y los colores pueden variar.
Distributed by (distribuido por) Dorel Juvenile Group, Inc., 2525 State St., Columbus,
IN 47201-7494 Dorel Distribution
Canada, 873 Hodge, St. Laurent, 5/2/12
QC H4N 2B1 4358-5852
Registerfor our eNewsletter and
watch our experts on Safety1
st
TV
safety1st.com
IMPORTANT:
Safety Instructions
Battery Installation & Use
CAUTION!
THE USER SHOULD NOT ATTEMPT TO
SERVICE OR REPAIR THE MONITOR.
ALL SERVICING SHOULD BE REFERRED
TO SAFETY 1ST CUSTOMER SERVICE
DEPARTMENT: (800) 544-1108.
Please read the following instructions and warnings carefully.
Keep these instructions for future reference.
Tool needed: Phillips Head Screwdriver (not included)
Thank you for purchasing a Safety 1st product. We are not only about safety,
we're also about your satisfaction. If you have any questions or comments,
please cal l our Consumer Relations department at 1-800-544-1108 or
e-mail us at consumer@safety1st.com
User Guide
MO070
• DO NOT mix old and new batteries.
• DO NOT mix alkaline, standard (carbon zinc), or rechargeable
(nickel-cadmium) batteries.
• Only batteries of the same or equivalent type as recommended are to be used.
• Exhausted batteries are to be removed from the unit.
• Keep batteries out of child’s reach. Swallowing a battery could be fatal.
• Used batteries should be disposed of properly.
Do not dispose of batteries in fire - they may explode or leak and cause injury.
• Remove batteries when stored for long periods of non-use.
• DO NOT use audio monitor system in portable mode when batteries are low.
• Ensure that the battery compartment is completely secure after replacing batteries.
BATTERY INSTALLATION:
1. Move belt clip out of way. Unscrew battery
compartment cover as shown.
2. Insert 3 AAA batteries.
3. Replace the battery compartment cover
and tighten screw. To obtain maximum
performance, ALWAYS use alkaline type
batteries in this monitor.
• Parent Unit is a Receiver. Baby Unit is a Transmitter.
• Check the reception regularly.
• Certain electronic devices are sensitive to magnetic
fields and may be damaged permanently or temporarily
disabled if exposed to a magnetic field that is too strong.
• To remove AC adapter from the outlet, firmly grasp the
adapter "brick." DO NOT pull on the cord, as this could damage it.
• The LEDs emit IR (infra red) light that is not harmful.
This monitor is not intended to be used as a medical monitor and
its use should not replace proper adult supervision. You should
check your child’s activity at regular intervals as this monitor will
not alert parents to the silent activities of a child.
CAUTION!
For indoor use only. To reduce the risk of fire or electrical shock,
do not expose this product to water or moisture. NEVER attempt
to disassemble the product. This is dangerous and will void
the warranty.
WARNING!
DO NOT PLACE UNITS IN CRIB OR MOUNT ON CRIB.
KEEP OUT OF REACH OF CHILDREN.
AC ADAPTER
The Parent Unit operates on household electricity with the AC Adapter or
with 3 AAA batteries (not included). The Baby Unit operates on household electricity
with the AC Adapter only. The Parent Unit will automatically convert to AC operation
when used with the AC Adapter. It is not necessary to remove the battery during AC
operation. The Parent Unit will automatically switch back to battery power when plug
is disconnected from the AC Adapter.
The AC Adapter should be used whenever possible on the Parent Unit to save battery
life. This is done by inserting the AC Adapter into the AC Adapter Jack. Then simply
plug the AC Adapter into a nearby standard household outlet (120V AC outlet). The AC
Adapters may become slightly warm to the touch during operation. This is normal.
This AC Adapter is a low voltage power source which allows you to use your household electricity to run the Baby and Parent Units when it connects to the AC Adapter
Jack in the Parent Unit and in the Baby Unit, and plugs into any standard electrical
outlet in your home.
To remove AC adapter from the outlet, firmly grasp the adapter "brick."
DO NOT pull on the cord, as this could damage it.
CAUTION: This AC Adapter was made with a specific design for the Safety 1st
Monitor. It cannot be used with any other appliance, and never use a different type
of adapter with this Monitor.
Belt Clip
(down)
Carry Loop
(up)
Baby Unit (Transmitter):
PROPER POSITIONING
IMPORTANT: When choosing locations to set up the Baby Unit and Parent Unit, follow
these guidelines:
• For best sound quality, place Baby Unit 6 feet (2 meters) away from the baby.
• Adjust volume dial on Parent Unit to appropriate level to minimize feedback.
• During use of the monitor, sound quality deteriorates as you reach the
limits of the monitor's range. If this happens, you will need to move the
Parent Unit in closer proximity to the Baby Unit.
• Adjust the volume to a comfortable level for your environment.
The first time you use your monitoring system, two adults should test it in the
following way:
• Place Parent Unit at least 20 ft. (6m) away from Baby Unit.
• Have an adult speak into Baby Unit at various levels (soft to loud)
while another adult checks Parent Unit for the proper sound reception.
Try Parent Unit in every location that it will be used.
Care and Cleaning:
Use a soft, dry cloth to keep your monitor free from dust.
DO NOT immerse product in water.
IMPORTANT:
Use household electricity whenever possible. When the AC Adapter is used with your
household electricity, you will find that the power is stronger and more consistent than
when you rely solely on the battery. Range and sound quality also depends on the
construction of your house. Steel reinforced wall, for example, reduces the effective
range of the monitor. Conserve the battery so you will have power when you don’t
have easy access to AC outlets.
Make sure that both Units are on the same channel.
Even though you may hear you baby’s sounds, proper use of this system requires that
both Units must be on the same channel. If the Units are on different channels, the
signals from the Baby Unit may still be strong enough to be picked up by the Parent
Unit, but there will be a lot of static.
When not using the Unit, remove AC Adapter
and be sure the power button is “OFF”.
When you are not using the AC Adapter, remove it from the Unit and store it in a safe,
dry place until you need it again. If the AC Adapter is plugged into the Parent Unit but
not being used in an electrical outlet, the AC Adapter will prevent battery operation
of the Unit.
When using the AC Adapter with household electricity,
make sure the outlet is “ON”.
Some electrical outlets are powered through a switch in the room. If the Baby Unit is
plugged in and turned “ON”, the power indicator light should be lit. If it is not, try
turning the light switch in the room “ON”.
Dorel Juvenile Group, Inc. warrants to the original purchaser that this Sound Moments™ Audio
Monitor 2 Receiver Set, is free from material and workmanship defects when used under normal
conditions for a period of one (1) year from the date of purchase. Should the product contain
defects in material or workmanship Dorel Juvenile Group, Inc., will repair or replace the product,
at our option, free of charge. Purchaser will be responsible for all costs associated with
packaging and shipping the product to Dorel Juvenile Group Consumer Relations Department at
the address noted below and all other freight or insurance costs associated with the return.
Dorel Juvenile group will bear the cost of shipping the repaired or replaced product to the
purchaser. Product should be returned in its original package accompanied by a proof of
purchase, either a sales receipt or other proof that the product is within the warranty period.
This warranty is void if the owner repairs or modifies the product or the product has been
damaged as a result of misuse.
This warranty excludes any liability other than that express stated previously, including but not
limited to, and incidental or inconsequential damages.
SOME STATES DO NOT ALLOW THE EXCLUSION OR LIMITATION OF INCIDENTAL OR
CONSEQUENTIAL DAMAGES, SO THE ABOVE LIMITATION OR EXCLUSION MAY NOT APPLY TO YOU.
THIS WARRANTY GIVES YOU SPECIFIC LEGAL RIGHTS, AND YOU MAY ALSO HAVE OTHER RIGHTS
THAT MAY VARY FROM STATE TO STATE.
Thank you again for purchasing a Safety 1st product. We are not only about safety, we’re also
about your satisfaction. If you have any questions or comments, please call our Consumer
Relations department at 1-800-544-1108 or e-mail us at consumer@safety1st.com.
FCC Statement
Radio and Television Interference
Note: This equipment has been tested and found to comply with the limits for a class B digital
device, pursuant to part 15 of the FCC Rules and applicable Industry Canada specifications.
These Limits are designed to provide reasonable protection against harmful interference in a
residential installation. For body worn operation, this product has been tested and meets the
FCC RF exposure guidelines when used with the belt clip supplied or designed with this product.
Use of other accessories may not ensure compliance with the FCC exposure guidelines.
This device complies with part 15 of the FCC Rules. Operation is subject to the following two
conditions: (1) this device may not cause harmful interference, and (2) this device must accept
any interference received, including interference that may cause undesired operation.
This equipment generates, uses and can radiate radio frequency energy and, if not installed and
used in accordance with the instructions, may cause harmful interference to radio
communications. However, there is no guarantee that interference will not occur in a particular
installation. If this equipment does not cause harmful interference to radio or television
reception, which can be determined by turning this equipment off and on, the user is
encouraged to try to correct the interference by one or more of the following measures:
• Reorient or relocate the receiving antenna
• Increase the separation between the equipment and the receiver
• Connect the equipment into an outlet on a circuit different from
that to which the receiver is connected.
• Consult the dealer or an experienced radio/TV technician for help.
To operate this equipment under the Federal Communications Commission rules.
WARNING: Changes or modifications not expressively approved by Dorel Juvenile Group can void
your authority to operate this equipment.
This Category II radiocommunication device complies with Industry Canada Standard RSS-310.
Parent Unit/
Receiver (2)
Baby Unit/
Transmitter
A
B
C
D
M
N
O
F
E
K
L
G
H
J
T
U
V
AC Adapters (3)
R
Q
S
I
P
A
B
C
D
E
F
G
H
I
J
K
L
M
N
O
P
Q
R
S
T
U
V
Parent Unit (2 Receivers)
Speaker
Power/1 & 2 Channel Switch
Low Battery Indicator
Power On Indicator
Mute Button
Sound Lights (5 LEDs)
Channel Select Button (A/B)
AC Adapter Jack
Volume Dial
External Earphone Jack
Belt Clip & Carry Loop
Battery Compartment
(3 AAA batteries)
Baby Unit (Transmitter)
Microphone
Power/1 & 2 Channel Switch
Power On Indicator
Pager Button
Night Light Activation
Digital Clock Display
Channel Select Button (A/B)
AC Adapter Jack
Battery Compartment
(1 AAA battery)
AC Adapter
AC Adapter (3)
Plug in here
1 Remove protective cling from Baby Unit.
Open battery compartment and install included
AAA battery to turn on clock.
2 Connect AC adapter to the side
of Baby Unit.
4 Plug Parent Unit and plug Baby Unit
into wall to operate AC power.
3 Connect AC adapter to the side of
Parent Unit.
5 Turn Parent Unit on. Slide Power/
Channel switch to desired channel
selection on front and side A/B button.
Power On Indicator will illuminate.
Make sure volume is turned down
to avoid squealing.
6 Turn Baby Unit on. Slide Power/
Channel switch to desired
channel selection on front
and side A/B button. Refer to
Channel Selection section.
Power On Indicator will illuminate.
Plug in here
Power On &
Channel Select
here
Channel 1
Channel 2
Channel
Select
A/B
Channel
Select
A/B
Power On &
Channel Select
here
Channel 1
Channel 2
Parent Unit (Receiver):
CHANNEL SELECTION
The Monitor can broadcast over four preset factory frequencies or channels. Use setting “1A”
making sure that both units are set to “1A”. If you experience static or noise interference, simply
switch both units to channel “1B”, “2A” or “2B”, whichever channel option provides the best
reception.
POWER INDICATOR
The power indicator is a green LED that indicates that the unit is on and functioning.
VOLUME DIAL
Volume can be easily adjusted to any desired listening level by rotating the Volume
Dial, so you can be sure to hear your baby at all times. The sounds are transmitted through the wide
range speaker. It is essential to check reception regularly. Refer to Use and Care section.
SOUND LIGHTS
As baby’s voice gets louder, the sound light LEDs will illuminate from left to right. Low sound is one
LED illuminated and rises incrementally as baby’s noise level increases until all 5 LEDs are
illuminated.
LOW BATTERY INDICATOR
Low battery power is indicated by the red LED, which signals when the battery needs to be replaced.
EARPHONE JACK
Earphones (not included) can be plugged into earphone jack on side of Parent Unit.
When earphones are in place, it will mute the speaker.
LINK INDICATOR - OUT OF RANGE
Static noise will be heard if both units are not set
to the same channels or if they are too far apart.
MUTE BUTTON
Press the Mute Button on top of the Parent Unit. The Mute Button will
illuminate top of unit indicating this feature is activated. The Parent Unit
will be quiet, but the sound lights will continue to illuminate.
Need to press again to unmute.
BELT CLIP
The Belt Clip is convenient for portability. You can clip
the Parent Unit to your belt or waistband after a
battery has been installed. The Belt Clip also
easily converts to a carry loop.
Channel 1A Frequency: 49.890 Channel 1B Frequency: 49.870
Channel 2A Frequency: 49.830 Channel 2B Frequency: 49.850
Carrier Frequency: 49.830 to 49.890
Field Strength is 80 dB Micro-volts per meter at 3 meters.
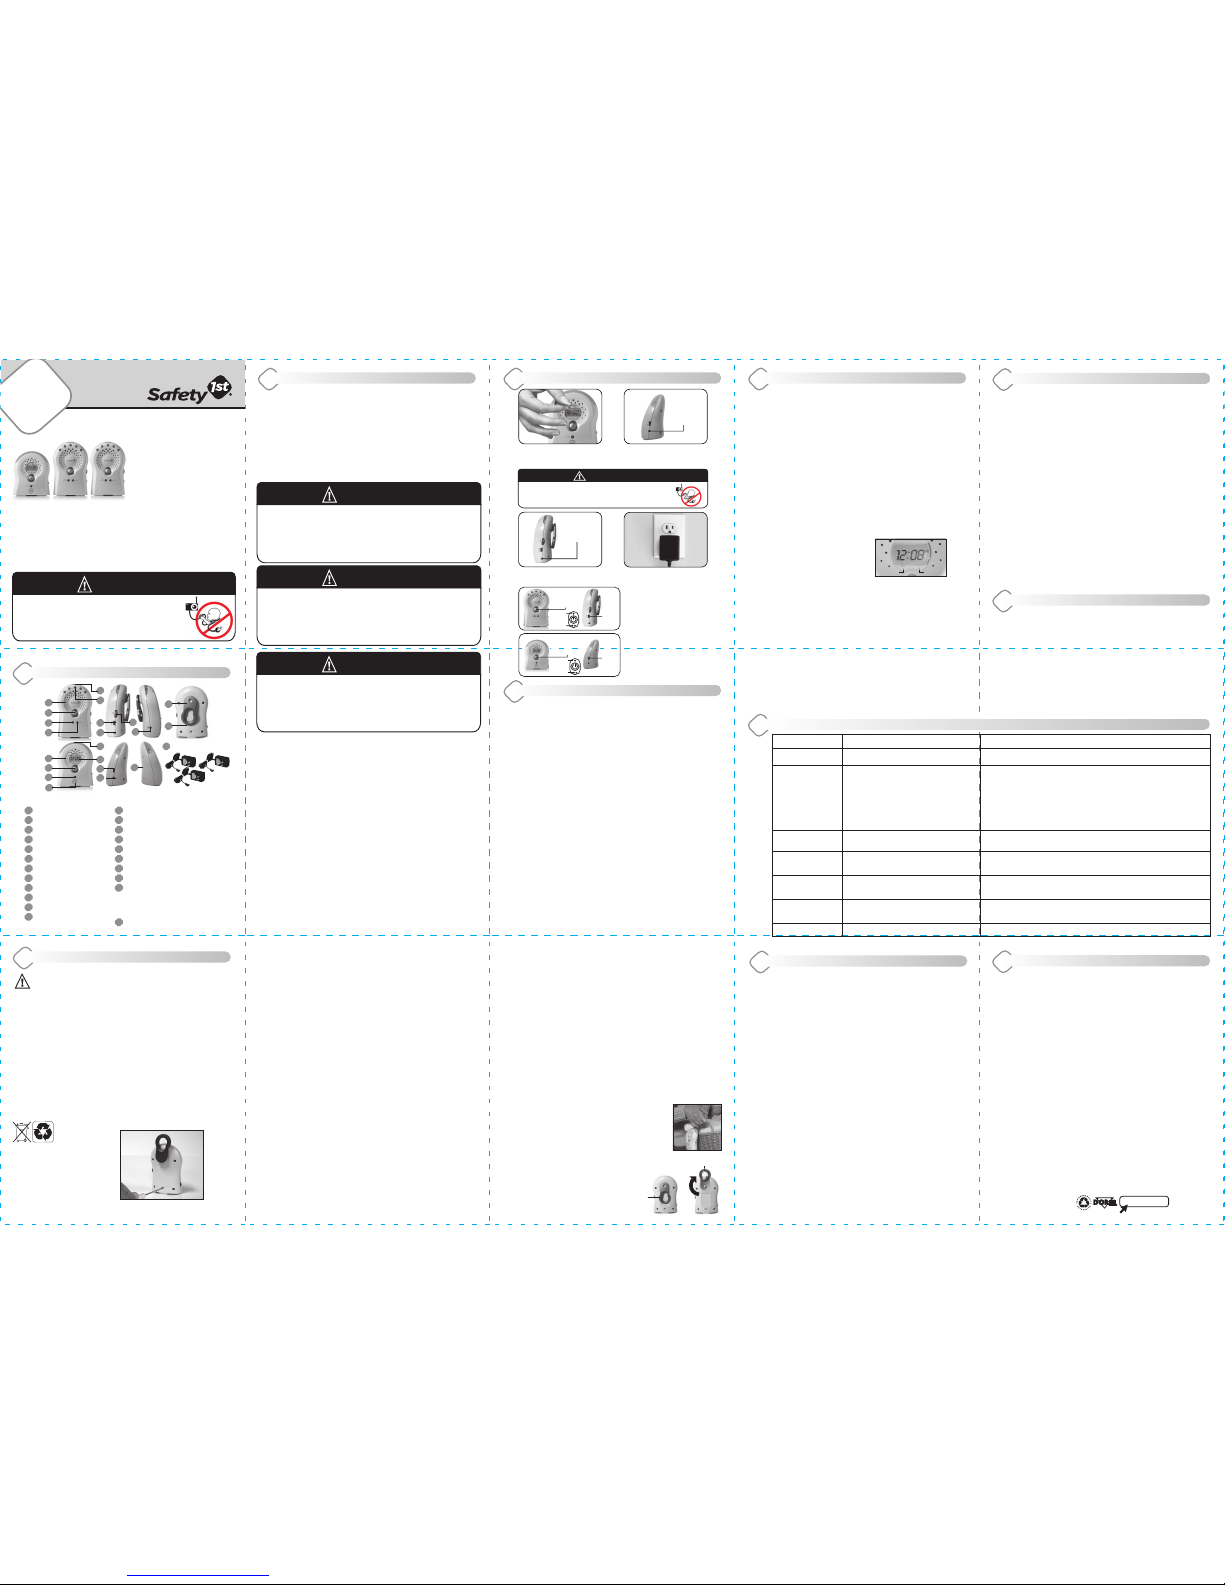
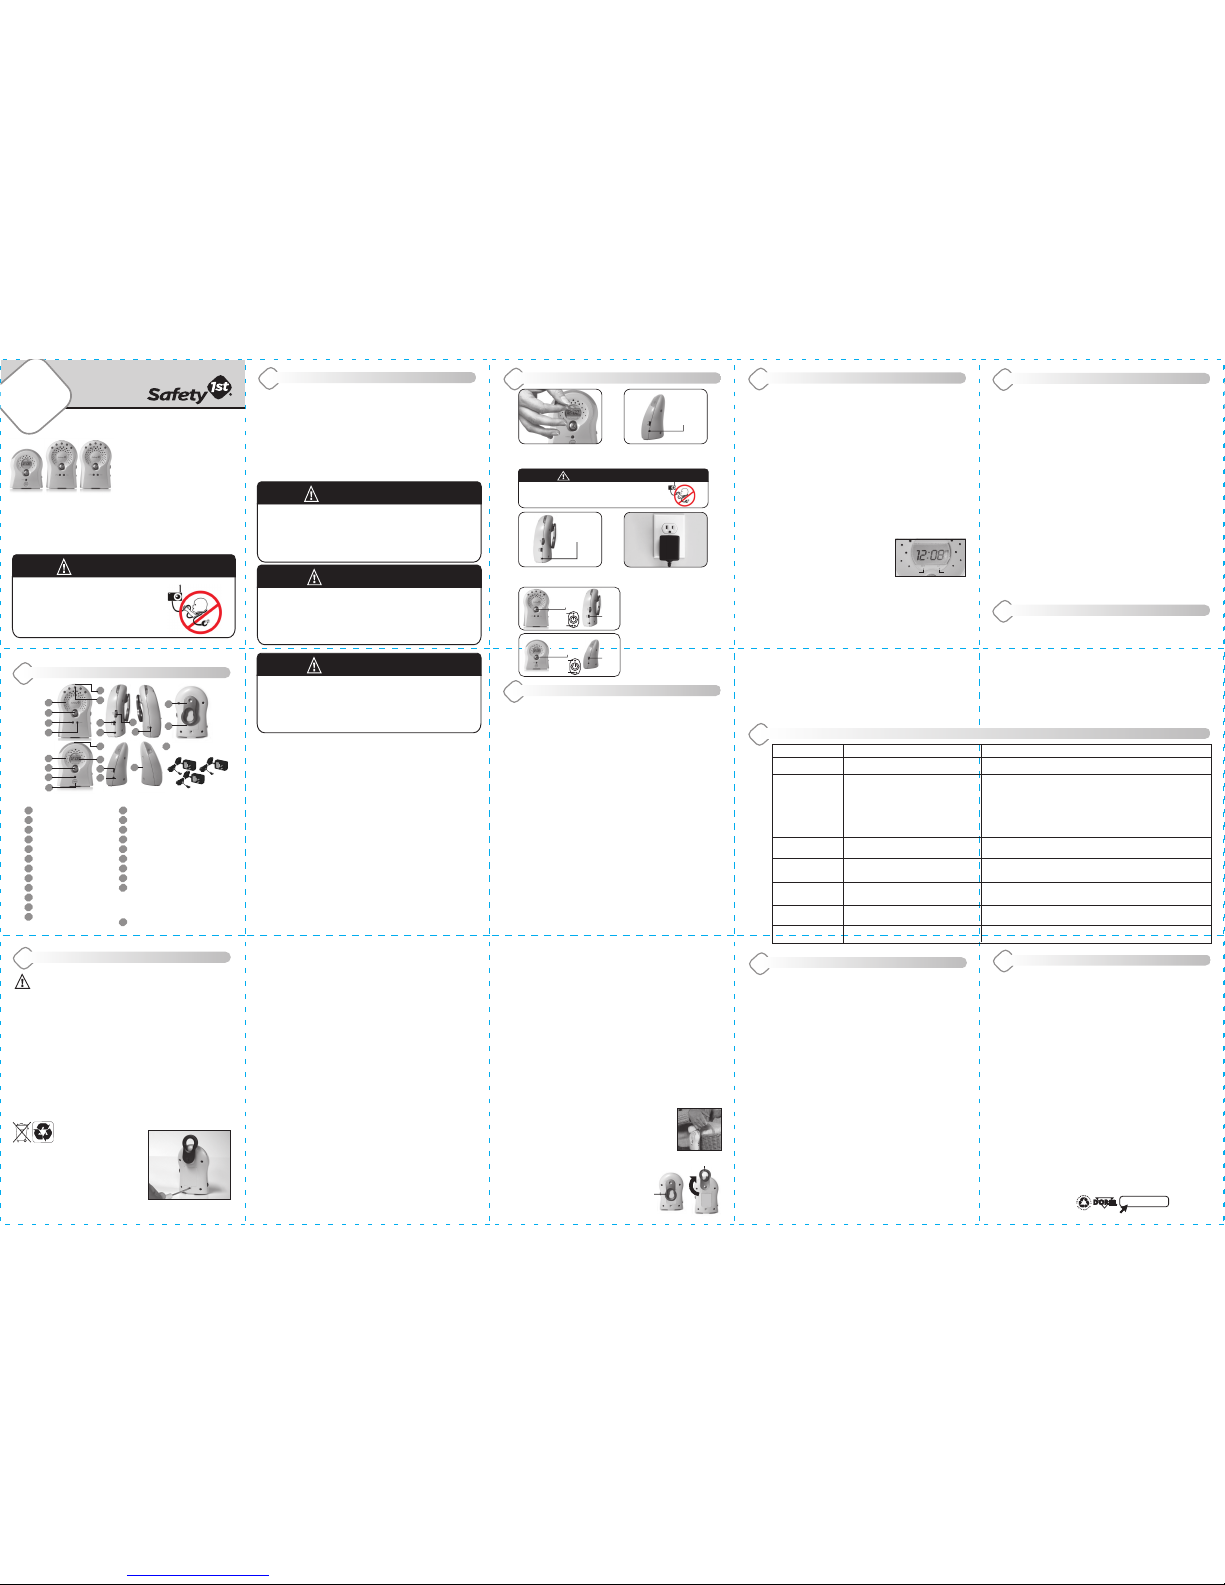
MODE SET
CLOCK DISPLAY
Before first use, open battery compartment and install
battery to turn on clock. Set clock using a small tool or
paperclip to press recessed buttons located on front of
Baby Unit. (Left button is MODE, Right button is SET).
To Set the Time:
1. Press the “MODE” switch to select the
Month, Date, Hour and Minute.
2. Press the “SET” switch to adjust the Time, Month and Date you desired.
3. Press the “SET” switch once, the display shows the Month and Date.
Press the “SET” switch twice, it shows the Second.
4. After displaying Month and Date for two seconds,
it returns to Hour and Minute (Normal Time).
NIGHT LIGHT
Activate the night light by pressing on the top of the Baby Unit, which will activate a switch located on
the bottom of Baby Unit. Night light will remain on until you press the top of the Baby Unit again.
PAGER
The Pager Button is helpful to locate a misplaced Parent Unit. With the Baby Unit on, press the pager
button on the front of the Baby Unit. Parent Unit must be on and volume must be elevated to hear
pager beep. Pager will send out a beep to the Parent Unit for 60 seconds. NOTE: The Parent Unit will
only beep if it is powered on.
Strangulation Hazard - Children have STRANGLED
in cords. Keep cords out of reach of children more
than 3 feet (0.9 m) away.
WARNING!
Strangulation Hazard - Children have STRANGLED
in cords. Keep cords out of reach of children more
than 3 feet (0.9 m) away.
WARNING!
PROBLEM
Power indicator light
not working
Static or interference in the
signal transmission
Parent Unit is making
loud noises
Parent Unit is picking up
noises from outside
your home
Weak sound coming
from Parent Unit
Can’t hear baby’s sounds
POSSIBLE CAUSE
Power is not getting to the Unit
Baby and Parent Units may be
on different channels
Appliances with loud fans near Units
may be blocking transmission
Unit may be under fluorescent lights
Local interference from electrical or radio frequency
appliance near your location
Units are too close together
Volume dial on Parent Unit may be too high
Neighbors may have a baby monitor or cordless phone
Battery may be weak
Units may be too far away from each other
Mute Button may be activated
Speaker or microphone could be blocked
SOLUTION
Make sure wall outlet is working; may possibly need to be turned on by a switch
Make sure AC adapter is plugged into wall and the Unit
Make sure both Units are on the same channel
(4 channel options: 1A, 1B, 2A or 2B)
Turn off the appliances that may be causing interference
Reduce the distance between the two Units or turn off lights
Switch channel setting on both Parent and Baby Units
Parent Unit needs to be at least 10 feet / 3 meters away from the Baby Unit
Turn down volume on the Parent Unit
Change both Units to the alternative channel
(4 channel options: 1A, 1B, 2A or 2B)
Check battery; replace if necessary
Battery life is short Battery life in the parent unit will last approximately 24hrs Use unit cautiously during battery operation to conserve your battery life
Move the Units closer to each other
Press the Mute Button on top of the Parent Unit to unmute
Keep speaker/microphone clear from obstructions
It is essential to check reception regularly.
Please see Use and Care section.
VENTILATION: The Monitor should not be situated on a bed, sofa, rug, or
similar surface that may block the ventilation openings, or placed in an
enclosed installation, such as a book case or cabinet that may impede
the flow of air through the ventilation openings.
• Position the Transmitter, Receiver and AC adapters to allow adequate
ventilation and prevent these components from overheating.
HEAT: The Monitor should be situated away from heat sources such as
radiators, heat registers, stoves, or other appliances that produce heat.
Also keep these components out of direct sunlight.
POWER SOURCE: The Monitor should be connected to a power supply
only of the type described in these operating instructions.
POWER CORD PROTECTION: The power supply cord should be routed so
that it is not likely to be walked on or pinched by items placed upon or
against it. Pay particular attention to the cord at the plug, convenience
receptacle, and at the point it exits from the Monitor. NOTE: Do not
place adapter under a window where a child might use it to step
on and reach something that might be dangerous.
• Check to make sure outlet plates are not unusually hot to the touch.
If they are, immediately unplug cords from these outlets. Check that
all outlet connections are in good condition so that adapter is not loose
or that no wiring is exposed. Have a qualified, licensed electrician
check the wiring as soon as possible.
OBJECT AND LIQUID ENTRY: Care should be taken so that objects
do not fall onto, and liquids are not spilled into the enclosure through
the openings.
DAMAGE REQUIRING SERVICE: The Monitor should be serviced by
qualified service personnel when:
A. The power supply cord has been damaged; or
B. Objects have fallen or liquid has been spilled into the product; or
C. The Monitor has been exposed to rain; or
D. The Monitor does not appear to operate normally or exhibits
a marked change in its performance; or
E. The Monitor has been dropped or the enclosure damaged.
To protect your privacy, always turn the monitor off when not in use.
Always remember that you are using public airwaves. Sound
may be broadcast to other receiving devices outside your home.
Conversations, even from rooms nearby, may be broadcast.
CAUTION!
Monitor de Audio
Sound Moments™
Juego de 2 Receptores
FREQUENCY RANGE
Características y Componentes
Guía de Inicio Rápido Uso de su Monitor (continuación)
Uso y Cuidados
Consejos útiles
©2012 Cosco Management, Inc. All Rights Reserved. Todos derechos reservados.
www.djgusa.com (800) 544-1108 www.safety1st.com Made in CHINA.
Hecho en CHINA. Styles and colors may vary. Los estilos y los colores pueden variar.
Distributed by (distribuido por) Dorel Juvenile Group, Inc., 2525 State St., Columbus,
IN 47201-7494 Dorel Distribution
Canada, 873 Hodge, St. Laurent, 5/2/12
QC H4N 2B1 4358-5852
Registerfor our eNewsletter and
watch our experts on Safety1
st
TV
safety1st.com
Guía
del Usuario
MO070
Broche para
Cinturón
(Bajo)
Arillo de Transporte
(Arriba)
Unidad (transmisora) para el bebé:
POSICIÓN CORRECTA
IMPORTANTE: Cuando escoja ubicaciones para instalar la unidad para el bebé, sigua este método:
• Para obtener la mejor calidad de sonido, coloque la unidad para el bebé a 6 pies (2 metros) de
distancia del bebé.
• Ajuste el disco de control de volumen de la unidad para los padres al nivel apropiado para reducir
retroalimentación.
• Durante el uso del monitor, la calidad de sonido se deteriora a medida que se alcanza el límite del
rango del monitor. Si esto sucede, tendrá que mover la unidad para los padres a un lugar más
cercano a la unidad para el bebé.
• Ajuste el volumen a un nivel cómodo para su entorno.
La primera vez que utilice su sistema de vigilancia, dos adultos deben probarlo
de la manera siguiente:
• Coloque la unidad para padres al menos a 20 pies (6m) de distancia de la unidad para bebé.
• Uno de los adultos debe hablar hacia la unidad para bebé en varios niveles de intensidad
(de voz baja a voz alta) mientras que el otro adulto comprueba que la recepción de sonido
de la unidad para padres es correcta.
Pruebe la unidad para padres en cada lugar en el que será utilizada.
Mantenimiento y Limpieza:
Utilice un paño suave y seco para quitar el polvo a su monitor.
NO sumerja el producto en agua.
IMPORTANTE:
Use la electricidad de su casa siempre que sea posible. Cuando utilice el adaptador de
corriente CA con la electricidad de su casa, descubrirá que habrá potencia máxima y
más constante que cuando solamente utiliza la batería. El alcance y la calidad del
sonido dependen también de cómo esté construida su casa. Las paredes reforzadas
con acero, por ejemplo, reducen la efectividad del alcance del monitor. Conserve la
batería, a fin de tener energía cuando no haya acceso a las tomas de corriente de CA.
Cerciórese de que ambas unidades se han ajustado en el mismo canal.
Si bien podrá escuchar los sonidos que haga su bebé, el uso adecuado de este sistema
requiere que ambas unidades se ajusten en el mismo canal. Si las unidades tienen
canales diferentes, las señales provenientes de la unidad para bebé pueden ser aún lo
suficientemente fuertes como para que las reciba la unidad para padres, pero habrá
mucha estática.
Cuando no utilice la unidad, quite el adaptador de corriente CA y
compruebe que el botón de encendido indique “OFF” (apagado).
Si no va a utilizar el adaptador de corriente CA, quítelo de la unidad y guárdelo en un
lugar seco y seguro hasta que lo necesite usar otra vez. Si el adaptador de corriente
CA está conectado a la unidad para padres pero no se utiliza en una toma de corriente,
el adaptador impedirá que funcione la batería de la unidad.
Cuando utilice el adaptador de corriente CA con electricidad doméstica,
compruebe que la toma de corriente está “activa”.
Ciertas tomas de corriente eléctrica se energizan mediante un interruptor que está
en la habitación. Si la unidad para bebé está conectada y se ha activado, la luz
indicadora de encendido debe estar encendida. Si no es así, intente activar el
interruptor de la habitación.
Unidad receptora
para los
padres (2)
Unidad
transmisora
para el bebé
A
B
C
D
M
N
O
F
E
K
L
G
H
J
T
U
V
Adaptadores de
corriente CA (3)
R
Q
S
I
P
A
B
C
D
E
F
G
H
I
J
K
L
M
N
O
P
Q
R
S
T
U
V
Unidad receptora para los padres (2)
Altavoz
Interruptor de encendido/canales 1 y 2
Indicador de batería baja
Indicador de encendido
Botón de silencio
Luces de intensidad de sonido (5 luces LED)
Botón de selección de canales (A/B)
Conductor de adaptador de corriente CA
Disco de control de volumen
Conductor exterior para audífono
Broche para cinturón y aro de transporte
Compartimiento para baterías
(3 baterías tipo AAA)
Unidad transmisora para el bebé
Micrófono
Interruptor de encendido/canales 1 y 2
Indicador de encendido
Botón del localizador
Activación de luz nocturna
Pantalla de reloj digital
Botón de selección de canales (A/B)
Conductor de adaptador de corriente CA
Compartimiento para batería
(1 batería tipo AAA)
Adaptador de corriente CA
Adaptador de corriente CA (3)
Conecte aquí
1 Retire la lámina protectora de la unidad para el
bebé. Abra el compartimiento de la batería y inserte
la batería AAA (incluido) para encender el reloj.
2 Conecte el adaptador de corriente CA
al lado de la unidad para el bebé.
4 Conecte la unidad para los padres y la
unidad para el bebé a la pared para
operar la alimentación de corriente CA.
3 Conecte el adaptador de corriente CA
en al lado de la unidad para los padres.
5 Encienda la unidad para los padres.
Active el interruptor de encendido/canal
a la selección de canal que desea en los
botones frontal y lateral de canales A/B.
Se iluminará el indicador de encendido.
Cerciórese de haber bajado el volumen
para evitar pitidos.
6 Encienda la unidad para el bebé. Active el
interruptor de encendido/canal a la selección
de canal que desea en los botones frontal y
lateral de canales A/B. Consulte la sección
de Selección de canales. Se iluminará el
indicador de encendido
Conecte aquí
Encienda y
seleccione el
canal aquí
Canal 1
Canal 2
Selección
de Canal
A/B
Selección
de Canal
A/B
Encienda y
seleccione el
canal aquí
Canal 1
Canal 2
Unidad para los Padres (Receptor):
SELECCIÓN DE CANALES
El monitor puede transmitir hasta cuatro canales o frecuencias predefinidas en fábrica. Utilice la
configuración “1A”, comprobando que el ajuste en ambas unidades es “1A”. Si hay presencia de estática o
interferencia de ruido eléctrico, simplemente cambie ambas unidades al canal “1B”, “2A” o “2B”, cualquier
opción de canal que tenga la mejor recepción.
INDICADOR DE ENCENDIDO
El indicador de encendido es un LED de color verde que indica que la unidad se ha activado y está
funcionando.
DISCO DE CONTROL DE VOLUMEN
El volumen se puede ajustar fácilmente a cualquier nivel de sonido si se gira el Disco de control de volumen,
para que se cerciore de poder escuchar a su bebé en todo momento. El sonido se transmite a través de un
altavoz de amplio alcance. Es esencial revisar el nivel de recepción con periodicidad. Consulte la sección de
Uso y cuidados.
LUCES DE INTENSIDAD DE SONIDO
A medida que aumenta la intensidad de la voz del bebé, las luces LED se iluminan de izquierda a derecha. El
sonido más bajo ilumina un LED y aumenta gradualmente a medida que se intensifica el nivel del sonido,
hasta iluminar las 5 luces LED.
INDICADOR DE BATERÍA BAJA
El LED de color rojo indica baja potencia de la batería, lo cual significa que es necesario cambiar las baterías.
CONDUCTOR EXTERIOR PARA AUDÍFONO
Se pueden conectar audífonos (no vienen incluidos) al conductor para audífonos de la unidad para los padres.
El altavoz no suena una vez que se conecten los audífonos.
INDICADOR DE ENLACE – FUERA DE ALCANCE
Se escuchará ruido de estática si no se han ajustado en los mismos canales ambas
unidades o si hay demasiada distancia entre ellas.
BOTÓN DE SILENCIO
Oprima el Botón de silencio que se encuentra en la parte superior de la unidad para
los padres. El botón de silencio se enciende en la parte superior de la unidad para
indicar que se ha activado esta función. La unidad para los padres tendrá sonido,
pero las luces de intensidad de sonido se seguirán iluminando. Para quitar esta
función vuelva a presionar el mismo botón.
BROCHE PARA CINTURÓN
El broche para cinturón es una conveniencia para el uso
portátil. Usted puede colocar la unidad para los padres en
su cinturón o banda de cintura una vez que se haya instalado
la batería. El broche para cinturón se convierte en arillo de transporte.
Frecuencia del Canal 1A: 49.890 Frecuencia del Canal 1B: 49.870
Frecuencia del Canal 2A: 49.830 Frecuencia del Canal 2B: 49.850
Frecuencia del portador: 49.830 to 49.890
La intensidad de campo es de 80 micro-voltios decibel por metro a 3 metros de distancia.
MODO AJUSTE
PANTALLA DE RELOJ
Antes del primer uso, abra el compartimento de la batería e instale
la batería para encender el reloj. Ajuste la hora del reloj utilizando
una herramienta pequeña o un broche de papel para pulsar los
botones embutidos en el frente de la unidad del bebé. (el botón
izquierdo corresponde al MODO y el botón derecho al AJUSTE).
Para Ajustar la Hora:
1. Presione el interruptor “MODE” (modo) para seleccionar el mes, la fecha, la hora y los minutos.
2. Presione el interruptor "SET" (ajuste) para ajustar la hora, mes y fecha que desea.
3. Presione una vez el interruptor “SET” (ajuste), la pantalla muestra el mes y la fecha.
Presione dos veces el interruptor “SET” (ajuste), aparece el segundero.
4. Luego de mostrar el mes y la fecha durante dos segundos, regresa a horas y minutos (hora normal).
LUZ NOCTURNA
Active la luz nocturna presionando la parte superior de la unidad para bebé, con lo que se activará un
interruptor situado en la parte inferior de la unidad para bebé. La luz nocturna permanecerá encendida
hasta que usted presione nuevamente la parte superior de la unidad para bebé.
LOCALIZADOR
El botón del localizador es útil para localizar una unidad para padres que se ha extraviado. Con la
unidad para bebé encendida, presione el botón del localizador que se encuentra al frente de la unidad
para bebé. La unidad para padres debe estar encendida y subir el volumen para escuchar el pitido del
localizador. El localizador emitirá un pitido a la unidad para padres, durante 60 segundos. NOTA: La
unidad para padres emite el pitido sólo si está encendida.
Lea con atención las instrucciones y advertencias que se
indican a continuación.
Conserve estas instrucciones para consultas posteriores.
Herramienta necesaria: Destornillador Phillips (no viene incluido)
Gracias por comprar un producto Safety 1st No sólo nos preocupa su seguridad,
sino también su satisfacción. Si tiene cualquier pregunta o comentario, llame a
nuestro departamento de Relaciones con los consumidores al 1-800-544-1108
o envíe un mensaje de correo electrónico a consumer@safety1st.com
Instalación y uso de las baterías
¡PRECAUCIÓN!
• NO combine baterías viejas con baterías nuevas.
• NO combine baterías alcalinas, estándar (zinc-carbono) o recargables (níquel-cadmio).
• Únicamente se deben utilizar las baterías del mismo tipo o equivalentes que se recomiendan.
• Se deben quitar de la unidad las baterías descargadas.
• Mantenga las baterías lejos del alcance de los niños. Si se ingiere una batería
el resultado podría ser mortal.
• Las baterías usadas se deben eliminar de manera apropiada. No arroje baterías
al fuego, pueden explotar o tener filtraciones que pueden producir lesiones.
• Quite las baterías que se hayan almacenado durante largo tiempo sin haberlas utilizado.
• NO utilice el sistema monitor de audio en el modo portátil si las baterías tienen poca carga.
• Cerciórese de que el compartimiento de las baterías se ha fijado completamente
luego de cambiar las baterías.
INSTALACIÓN DE LAS BATERÍAS:
1. Quite el broche para cinturón. Destornille la tapa del
compartimiento de la batería como se muestra.
2. Inserte las 3 baterías AAA.
3. Vuelva a colocar la tapa del compartimiento de las
baterías y apriete el tornillo. Para obtener el
máximo rendimiento de este monitor, utilice
SIEMPRE baterías alcalinas.
IMPORTANTE:
Instrucciones de Seguridad
• La unidad para los padres es un receptor. La unidad para el bebé es un transmisor.
• Verifique periódicamente el nivel de recepción.
• Ciertos dispositivos electrónicos son sensibles a los campos magnéticos y pueden
sufrir daños permanentes o quedar temporalmente inhabilitados si se exponen a
un campo magnético demasiado intenso.
• Para quitar el adaptador de corriente CA de la toma de corriente, sujete
firmemente el "cubo" del adaptador. NO jale el cable, si lo hace se puede dañar.
• Las luces LED emiten luz IR (infrarroja) que no es perjudicial.
Este monitor no está diseñado para utilizarse como monitor médico y su
uso no sustituye la vigilancia adecuada de un adulto. Usted debe vigilar
periódicamente la actividad de su hijo(a) porque este monitor no avisará
a los padres sobre las actividades silenciosas de un niño o una niña.
¡PRECAUCIÓN!
Sólo para uso en interiores. Para reducir el riesgo de incendio o
descarga eléctrica, no exponga este producto al agua o la humedad.
NUNCA intente desarmar el producto. Esto es peligroso y anulará
la garantía.
¡ADVERTENCIA!
Uso de su Monitor
NO COLOQUE NI MONTE LAS UNIDADES EN LA CUNA.
MANTÉNGALA LEJOS DEL ALCANCE DE LOS NIÑOS.
ADAPTADOR DE CORRIENTE CA
La unidad para los padres funciona con electricidad doméstica, utilizando el adaptador
de corriente CA o 3 baterías tipo AAA (no vienen incluidas). La unidad para el bebé
funciona únicamente con la electricidad doméstica y el adaptador de corriente CA. La
unidad para los padres pasa automáticamente al modo de funcionamiento de CA si se
utiliza con el adaptador de corriente CA. No es necesario quitar las baterías durante el
funcionamiento con CA. La unidad para los padres pasará automáticamente al modo
de alimentación por baterías si se desconecta el adaptador de corriente CA.
El adaptador de corriente CA de la unidad para los padres se debe utilizar siempre que
sea posible, para ahorrar vida útil a las baterías. Esto se hace insertando el adaptador
de corriente CA al conductor del adaptador de corriente CA. Luego, simplemente
enchufe el adaptador de corriente CA a una toma de corriente doméstica estándar
(toma de corriente de 120V CA). Los adaptadores de corriente CA pueden sentirse
levemente calientes al tacto durante el funcionamiento. Esto es normal.
Este adaptador de corriente AC es una fuente de bajo voltaje que le permite utilizar su
electricidad doméstica para poner en funcionamiento las unidades para los padres y
para el bebé si se conecta al conductor para el adaptador CA en la unidad para los
padres y en la unidad para el bebé, y se enchufa a cualquier toma de corriente
estándar de su casa.
Para quitar el adaptador de corriente CA de la toma de corriente, sujete firmemente el
"cubo" del adaptador. NO jale el cable, si lo hace se puede dañar.
PRECAUCIÓN: Este adaptador de corriente CA se fabricó con un diseño especial
para el monitor Safety 1st. No lo podrá utilizar con ningún otro aparato, y nunca
utilice otro tipo de adaptador con este monitor.
Localización y Solución de Problemas
¡SI SIGUE TENIENDO PROBLEMAS, LLAME AL NÚMERO SIN COSTO PARA OBTENER AYUDA! (800) 544-1108.
Declaración de la FCC
Interferencias de radio y televisión
Nota: Este equipo se ha sometido a pruebas cuyo resultado demuestra el cumplimiento con los límites establecidos para
aparatos digitales tipo B, de conformidad con el inciso 15 del Reglamento de la FCC y las especificaciones Industriales de
Canadá correspondientes. Estos límites están diseñados para proporcionar una protección razonable contra
interferencias perjudiciales en una instalación residencial. En cuanto a su funcionamiento al llevarlo puesto en el cuerpo,
este producto se ha sometido a pruebas cuyos resultados cumplen con los lineamientos de exposición RF de la FCC si se
utiliza con el broche para cinturón que viene incluido o que se ha diseñado para este producto. El uso de otros accesorios
podría no garantizar el cumplimiento con los lineamientos de exposición que establece la FCC.
Este producto cumple con el inciso 15 del Reglamento de la FCC. Su funcionamiento está sujeto a las dos condiciones
siguientes: (1) este dispositivo no puede producir interferencia nociva, y (2) este dispositivo debe aceptar cualquier
interferencia que reciba, incluyendo interferencias que puedan provocar un funcionamiento no deseado.
Este equipo genera, utiliza y puede irradiar energía de radio frecuencia y, si no se instala y utiliza de acuerdo a las
instrucciones, puede producir interferencia nociva a las radio comunicaciones. Sin embargo, no hay garantía de que no se
produzcan interferencias en una instalación en particular. Si este equipo no produce interferencia nociva en la recepción
de señales de radio o televisión, lo cual se puede establecer encendiendo y apagando el equipo, se sugiere al usuario que
trate de corregir la interferencia mediante uno de los métodos siguientes:
• Reoriente o reubique la antena receptora
• Aumente la distancia entre el equipo y el receptor
• Conecte el equipo a una toma de corriente o a un circuito diferente al que está conectado el receptor.
• Solicite ayuda al distribuidor o a un técnico experto en radio y televisión.
Para operar este equipo conforme al reglamento de la Comisión Federal de Comunicaciones.
ADVERTENCIA: Todo cambio o modificación que se haga sin autorización expresa de Dorel Juvenile Group puede anular su
autoridad para operar este equipo.
Este dispositivo de radio comunicación de Categoría II cumple con las Normas Industriales de Canadá RSS-310.
Garantía Limitada de un (1) Año
Dorel Juvenile Group, Inc. garantiza al comprador original que este monitor de audio no tiene defectos
materiales y de mano de obra si se utiliza en condiciones normales durante el período de un (1) año a partir
de la fecha de compra. Si el producto llega a tener defectos materiales o de mano de obra, Dorel Juvenile
Group, Inc., repondrá o reparará el producto, a su criterio, sin cargo alguno. El comprador será responsable
de todos los costos relacionados con el empaque y el envío del producto al departamento de Relaciones
con los consumidores de Dorel Juvenile Group a la dirección que se indica a continuación, así como todos
los costos de flete o seguro relacionados con la devolución. Dorel Juvenile asumirá el costo de envío del
producto que se ha reparado o repuesto al comprador. El producto se deberá entregar en su paquete
original, junto con una prueba de compra, ya sea un comprobante de ventas o de otra evidencia que
demuestre que el producto está cubierto por el período de garantía. Esta garantía es nula si el propietario
repara o modifica el producto o bien, si el producto se ha dañado a consecuencia del mal uso.
Esta garantía se exime de toda responsabilidad que no sea la que se expresó con antelación, incluyendo
sin limitaciones, cualquier daño incidental o indirecto.
ALGUNOS ESTADOS NO PERMITE LA EXENCIÓN O LIMITACIÓN DE DAÑOS INCIDENTALES O INDIRECTOS, POR
LO QUE LA LIMITACIÓN O EXENCIÓN ANTES CITADA PODRÍA NO PROCEDER EN SU CASO.
ESTA GARANTÍA LE OTORGA DERECHOS LEGALES ESPECÍFICOS, Y TAMBIÉN PODRÍA TENER OTROS
DERECHOS QUE PUEDEN VARIAR DE ESTADO A ESTADO.
Gracias nuevamente por comprar un producto Safety 1st. No sólo nos preocupa su seguridad, sino también
su satisfacción. Si tiene cualquier pregunta o comentario, llame a nuestro departamento de Relaciones con
los consumidores al 1-800-544-1108 o envíe un mensaje de correo electrónico a consumer@safety1st.com
PROBLEMA CAUSA POSIBLE SOLUCIÓN
No funciona la luz indicadora de
encendido
Hay estática o interferencia en la
transmisión de la señal
La unidad para padrea
hacer ruidos fuertes
La unidad para padres capta sonidos
que se producen fuera
de la casa
Sonido débil proveniente de la
unidad para padres
No se escuchan los sonidos del bebé
La carga de la batería dura
poco tiempo
No llega alimentación eléctrica a la unidad
Las unidades para bebe y para padres pueden estar ajustadas en canales
diferentes
Los aparatos con ventiladores ruidosos cerca de las unidades podrían estar
bloqueando la transmisión
La unidad podría estar debajo de luces fluorescentes
Se trata de interferencia local proveniente de aparatos eléctricos o de
radiofrecuencia cerca de su casa
La distancia entre las unidades es muy corta
El disco de control de volumen de la unidad para padres es demasiado alto
Los vecinos podrían tener un monitor para bebé o un teléfono inalámbrico
Pudo haberse agotado la batería
Puede haber mucha distancia entre las unidades
Podría haberse activado el botón de silencio
El altavoz o el micrófono podrían tener una obstrucción
La carga de la batería en la unidad de los padres dura
aproximadamente 24 horas
Compruebe el funcionamiento de la toma de corriente de la pared; posiblemente es necesario activarla mediante un interruptor
Compruebe que el adaptador de corriente CA está conectado a la pared y a la unidad
Compruebe que ambas unidades están ajustadas en el mismo canal (4 opciones de canales: 1A, 1B, 2A o 2B)
Apague los aparatos que puedan estar produciendo interferencia
Reduzca la distancia entre las unidades o apague las luces
Cambie el ajuste de canal en ambas unidades
La unidad para padres debe estar al menos a 10 pies (3 metros) de distancia de la unidad para bebé
Baje el volumen de la unidad para padres
Cambie ambas unidades a otro canal alternativo (4 opciones de canales: 1A, 1B, 2A o 2B)
Revise la batería, cámbiela si es necesario
Acorte la distancia entre las dos unidades
Oprima el Botón de silencio que se encuentra en la parte superior de la unidad quitar el sonido
Mantenga el altavoz/micrófono libre de obstrucciones
Para conservar la carga de la batería, utilice la unidad lo menos posible durante la operación a batería
Peligro de Estrangulamiento - ! Se han ESTRANGULADO
niños con cables. Mantenga este cable másde 3 pies
(0.9 m) de distancia de los niños.
¡ADVERTENCIA!
Peligro de Estrangulamiento - ! Se han
ESTRANGULADO niños con cables.
Mantenga este cable másde 3 pies
(0.9 m) de distancia de los niños.
¡ADVERTENCIA!
EL USUARIO NO DEBE INTENTAR REPARAR O DAR SERVICIO
AL MONITOR. TODO REQUERIMIENTO DE SERVICIO DEBE SER
REFERIDO AL DEPARTAMENTO DE SERVICIO AL CLIENTE DE
SAFETY 1ST LLAMANDO AL: (800) 544-1108.
Es esencial revisar el nivel de recepción con periodicidad.
Por favor consulte la sección de Uso y cuidados.
VENTILACIÓN: No se debe colocar el Monitor sobre una cama, sofá, tapete o
superficie similar que pueda obstruir los huecos de ventilación, ni colocarlo en
una instalación cerrada, como un librero o gabinete que pueda impedir el flujo
de aire a través de los huecos de ventilación.
• Coloque el Transmisor, el Receptor y los adaptadores de corriente CA de
manera que el aire puede circular y se evite que estos componentes se
calienten demasiado.
CALOR: El Monitor debe encontrarse alejado de fuentes de calor tales como
radiadores, rejillas de calefacción, estufas y otros aparatos que producen calor.
También mantenga estos componentes fuera de los rayos directos del sol.
FUENTE DE ENERGÍA: El Monitor se debe conectar directamente a una
alimentación de energía sólo para el tipo que se describe en estas instrucciones
de operación.
PROTECCIÓN DEL CABLE DE ALIMENTACIÓN: El cable de alimentación de
energía se debe encauzar de modo que no haya probabilidad de que se camine
sobre él o lo pellizquen objetos que se coloquen sobre o contra él. Ponga
particular atención en las áreas del cable en el enchufe, el receptáculo y el
punto por donde sale del Monitor. NOTA: No coloque el adaptador debajo de
una ventana a la que un niño se pueda trepar y logre alcanzar algo que pueda
ser peligroso.
• Revise para comprobar que la tapa de la toma de corriente no esté
inusualmente caliente al tacto. Si está caliente, desenchufe de inmediato el
cable de esa toma de corriente. Revise que todas las conexiones de la toma
de corriente estén en buen estado y el adaptador no quede suelto ni quede
expuesto el cableado. Pida a un técnico electricista competente que revise el
cableado tan pronto como sea posible.
OBJETOS Y ENTRADA DE LÍQUIDOS: Se debe tener cuidado para que no le
caigan objetos, ni derramar líquidos en el recinto a través de los huecos.
DAÑOS QUE REQUIEREN SERVICIO: El Monitor debe recibir
el servicio de personal de servicio competente cuando:
A. El cable de alimentación de energía se haya dañado; o
B. Hayan caído objetos o se haya derramado líquido en el producto; o
C. El Monitor se haya expuesto a la lluvia; o
D. El Monitor no funcione de manera normal o muestre un cambio
significativo en su rendimiento; o
E. El Monitor se haya dejado caer o se haya dañado el recinto.
Para proteger su privacidad, apague siempre el monitor cuando no lo utilice.
Recuerde siempre que está usando ondas públicas. El sonido se pueden
transmitir a otros dispositivos receptores fuera de su hogar. También pueden
transmitirse las conversaciones, incluso las de habitaciones cercanas.
¡PRECAUCIÓN!
 Loading...