

Safety 1st Alpha Omega Elite User Manual
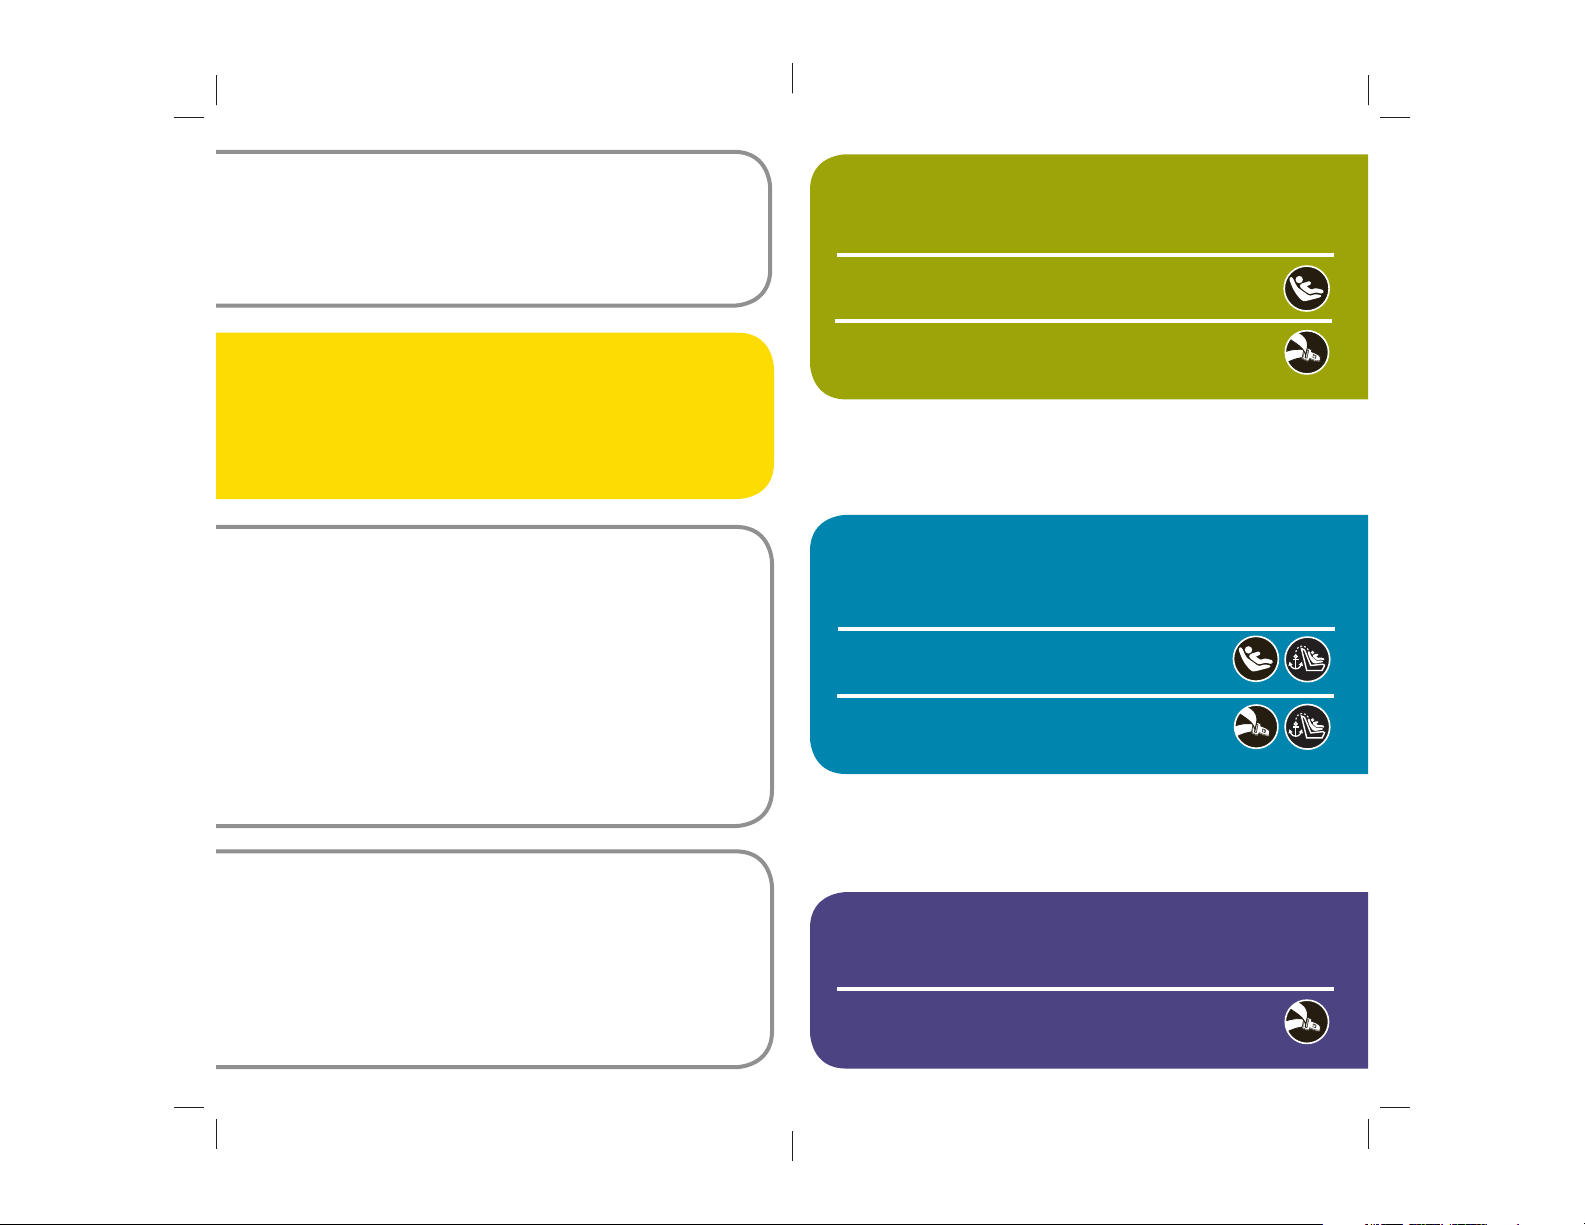
A. Before You Begin .................................Pages 3-8
A-1 Thank You...
A-2 Registration and Safety Notices
A-3 Understanding Your Child Restraint
B. Safety Information ........................... Pages 9-10
B-1 Vehicle Seating Position
B-2 Installation in Vehicle
B-3 Child Restraint Use
E. Installing Rear-Facing ....................... Pages 38-46
E-1 Preparing to Install Rear-Facing
E-2 Preparing to Install LATCH Rear-Facing
E-3 Install Rear-Facing with LATCH
E-4 Install Rear-Facing with Vehicle Belts
C. Basic Use .............................................Pages 11-28
C-1 Choose Position for Your Child
C-2 Preparing Child Restraint to Fit Your Child
C-3 Securing Child in Child Restraint
C-4 Removing Child From Child Restraint
C-5 Accessories
C-6 Reclining Child Restraint
C-7 Removing Harness System
C-8 Installing Harness System
C-9 Removing Seat Pad for Cleaning
D. General Vehicle Installation .....Pages 29-37
D-1 Understanding Your Vehicle
D-2 Vehicle Seating Position
D-3 Choosing LATCH or Vehicle Belts
D-4 Knowing Your Vehicle Belts
D-5 Using Locking Clip
D-6 Installing on Aircraft
1
F. Installing Forward-Facing Pages 47-54
F-1 Preparing to Install Forward-Facing
F-2 Adjusting Top Anchorage Strap (Tether)
F-3 Preparing to Install LATCH Forward-Facing
F-4 Install Forward-Facing With LATCH
F-5 Install Forward-Facing with Vehicle Belts
G. Installing Belt-Positioning Booster Pages 55-58
G-1 Preparing to Install Belt-Positioning Booster
G-2 Installing Using the Lap and Shoulder Belts
2

A-1 Thank You...
A-2 Registration and Safety Notices
A. Before You Begin
Thank you for choosing this car seat, referred to throughout
this manual as a child restraint. The DJG family is committed
to creating a child restraint with the most comfort and
convenience available today.
Remember, parents are a child’s first teachers and examples.
If you always buckle your seat belt, your child will think it is
the natural thing to do. Make it a firm rule that the vehicle
does not go until everyone is buckled up. Make no exceptions.
No one can predict if use of a child restraint will prevent
injury or death in a particular crash. However, combined with
careful driving, proper use of a child restraint can lower a
child’s risk of injury or death in most crashes.
Your child’s safety is worth the time it will take to read and
follow these instructions. After reading, if you still have
questions or have any problems with this child restraint,
please contact our Consumer Relations Department at:
Dorel Juvenile Group, Inc.
Website: www.djgusa.com
Fax: 1-800-207-8182
Mailing Address: Dorel Juvenile Group, Inc.
P.O. Box 2609
Columbus, IN 47202-2609
Please complete the postage-paid registration card that
came with your child restraint, and send it to us. Child
restraints could be recalled for safety reasons. You must
register this restraint to be reached in a recall. Send
your name, address, email address if available, and the
restraint’s model number and manufacturing date to:
Dorel Juvenile Group, Inc.
PO Box 2609, Columbus, IN 47202-2609
Attn: Consumer Relations
or call 1-800-544-1108 or register online at www.djgusa.
com/registration/carseat/us.
For recall information, call the U.S. Government’s Vehicle
Safety Hotline at 1–888–327–4236
(TTY: 1–800–424–9153), or go to http://www.NHTSA.gov
Model
Number
Manufacture
Date
Telephone: 1-800-544-1108
7 A.M. to 6 P.M. EST M-TH
7 A.M. to 4:30 P.M. EST FRI
On the back of the shell there is an expiration date for use
of this child restraint. Do not use this seat after the
expiration date.
Para recibir las instrucciones en español, llame al
1-800-544-1108 o solicitarse por escrito al dirección por arriba.
3
If you don’t have the card or if your
address changes, you will find the
model number and manufactured date
on the label located on side of plastic
shell.
4
PUSH
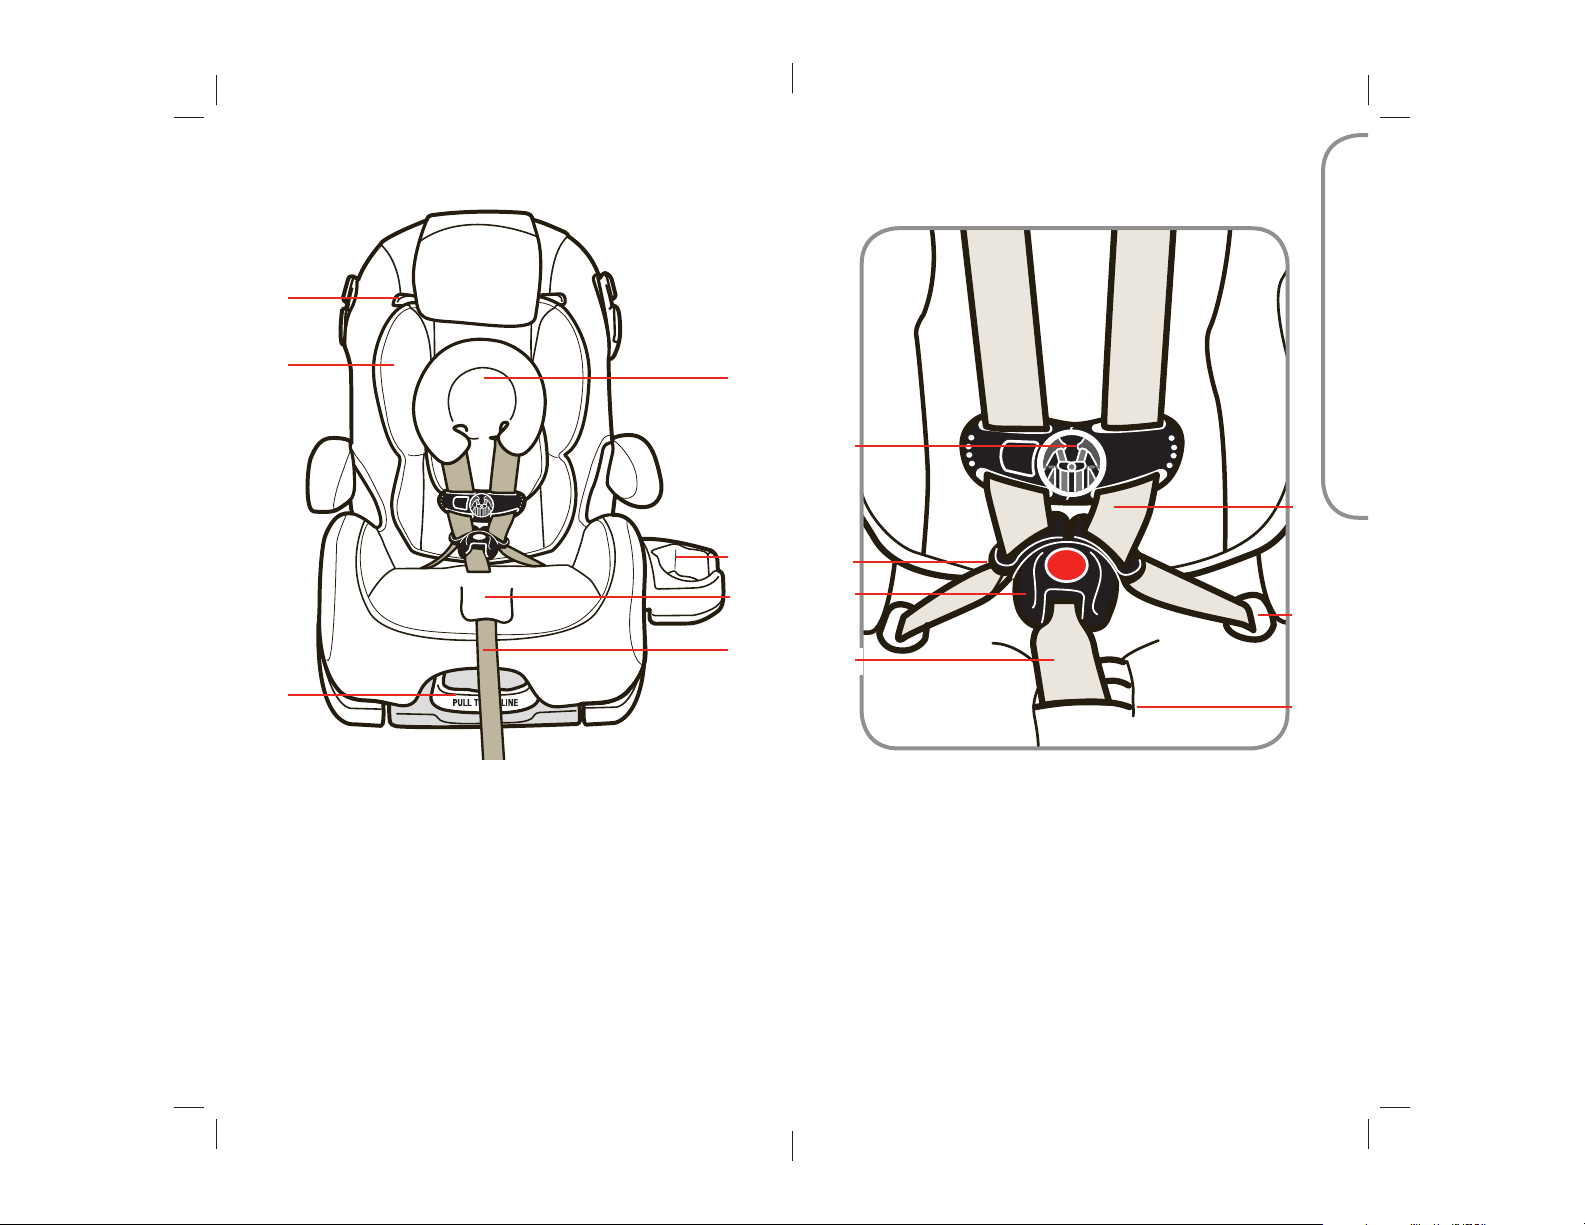
A-3 Understanding Your Child Restraint
A. Before You Begin
Front View
A.
B.
G.
A. Headrest/Harness
Height Adjustment
Levers
B. Adjustable
Headrest
C. Infant Insert
(on select models)
E. Harness Release
Lever (under flap)
F. Harness
Tightening Strap
G. Recline Lever
C.
D.
E.
F.
Harness System Detail
H.
I.
J.
K.
L.
M.
N.
H. Chest Clip
I. Harness Straps
J. Buckle Tongue
K. Buckle
L. Harness Guides
M. Buckle Strap
D. Cup Holder
(on select models)
N. Buckle Strap Slots
5
6
continued on next page.

Back View
Side View
K.
A. Before You Begin
G.
L.
A.
B.
C.
D.
A. Top Anchorage
(Tether) Strap
B. Locking Clip
(behind harness)
C. Splitter Plate
D. Instructions
(in bottom of base)
E. Top Anchorage
(Tether) Hook Storage
F. Non Removable Base
E.
F.
E.
H.
I.
J.
G. Shoulder Belt
Positioning Guide
H. Rotating Armrests
I. Forward-Facing
Belt Path
J. Rear-Facing Belt
Path
K. LATCH Belt
L. LATCH Storage
M.
M. Rear-Facing Level
to Ground Lines
7
8
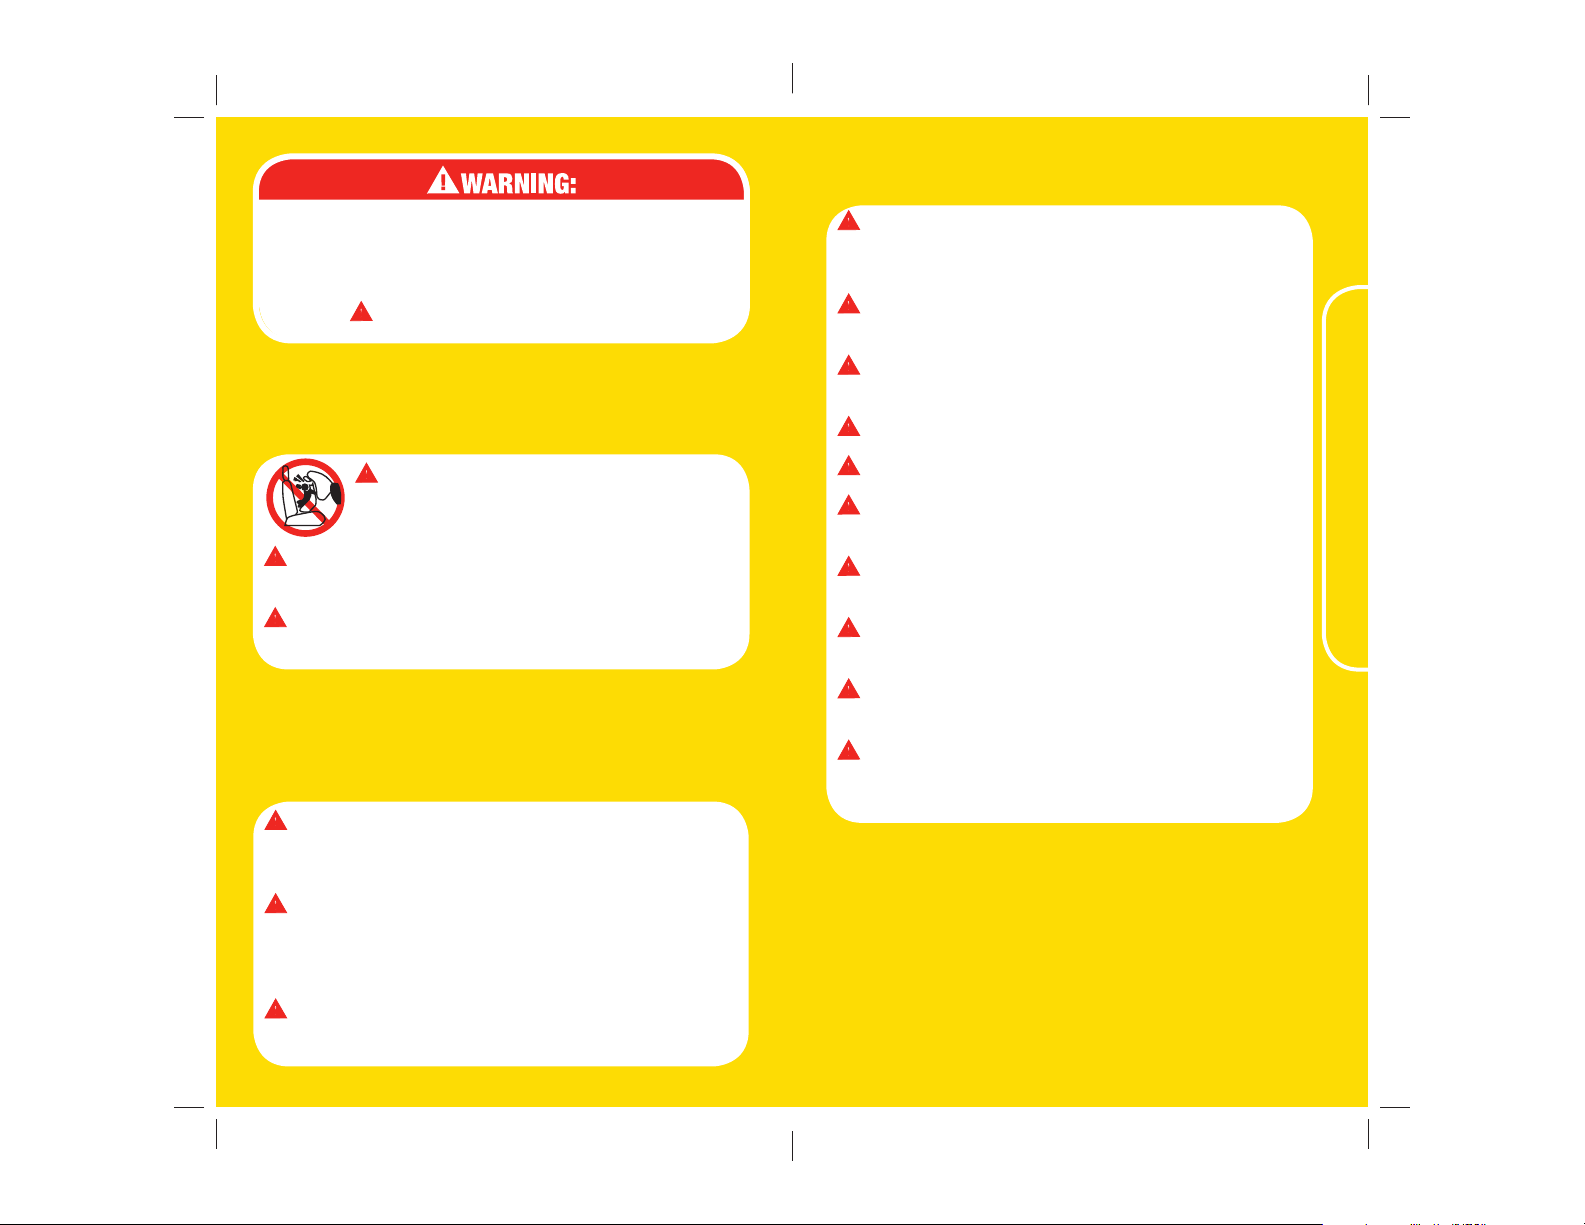
B-3 Child Restraint Use
Failure to follow these warnings can result in
the serious injury or death of your child. To help
you recognize instructions which are most
critical to your child’s safety, we use this
symbol:
B-1 Vehicle Seating Position
Never place a child rear-facing in a
seating position with an active frontal
airbag.
Check the vehicle owner’s manual for more
information about air bag/child restraint use.
For vehicles without a back seat, refer to your
vehicle owner’s manual.
B-2 Installation in Vehicle
Never take your child out of the child restraint
while the vehicle is moving. Never leave child
unattended.
Placing your child in a hot child restraint may
result in burns.
Do not use a child restraint with damaged or
missing parts.
Do not use cut, frayed or damaged harnesses.
Do not lubricate buckles and fasteners.
Do not substitute parts or try to modify the
child restraint in any way.
Do not use any car seat accessory except
those approved by Dorel Juvenile Group.
Never allow any child to play with this child
restraint; it is not a toy.
Do not remove or cover up any of the warning
labels or other labels on the child restraint.
Read all instructions for additional warnings.
B. Safety Information
Check the vehicle belt or LATCH belt before
each use. Use only if the belt is tightened
properly and securely.
This child restraint should be securely belted
in the vehicle even when not in use. In a crash
or sudden stop, an unsecured child restraint
could injure occupants.
Do not use a child restraint that has been in a
crash. You must get a new child restraint.
9
10
C-1 Choose Position for Your Child
Your child’s height, weight and age determine how your child
restraint should be placed in the vehicle.
5-35 lbs (2.3-16 kg)
and 19-36 in. (48-91 cm)
Rear-Facing using
5-point harness
Child and child restraint are
placed in the back seat,
facing the back of the vehicle.
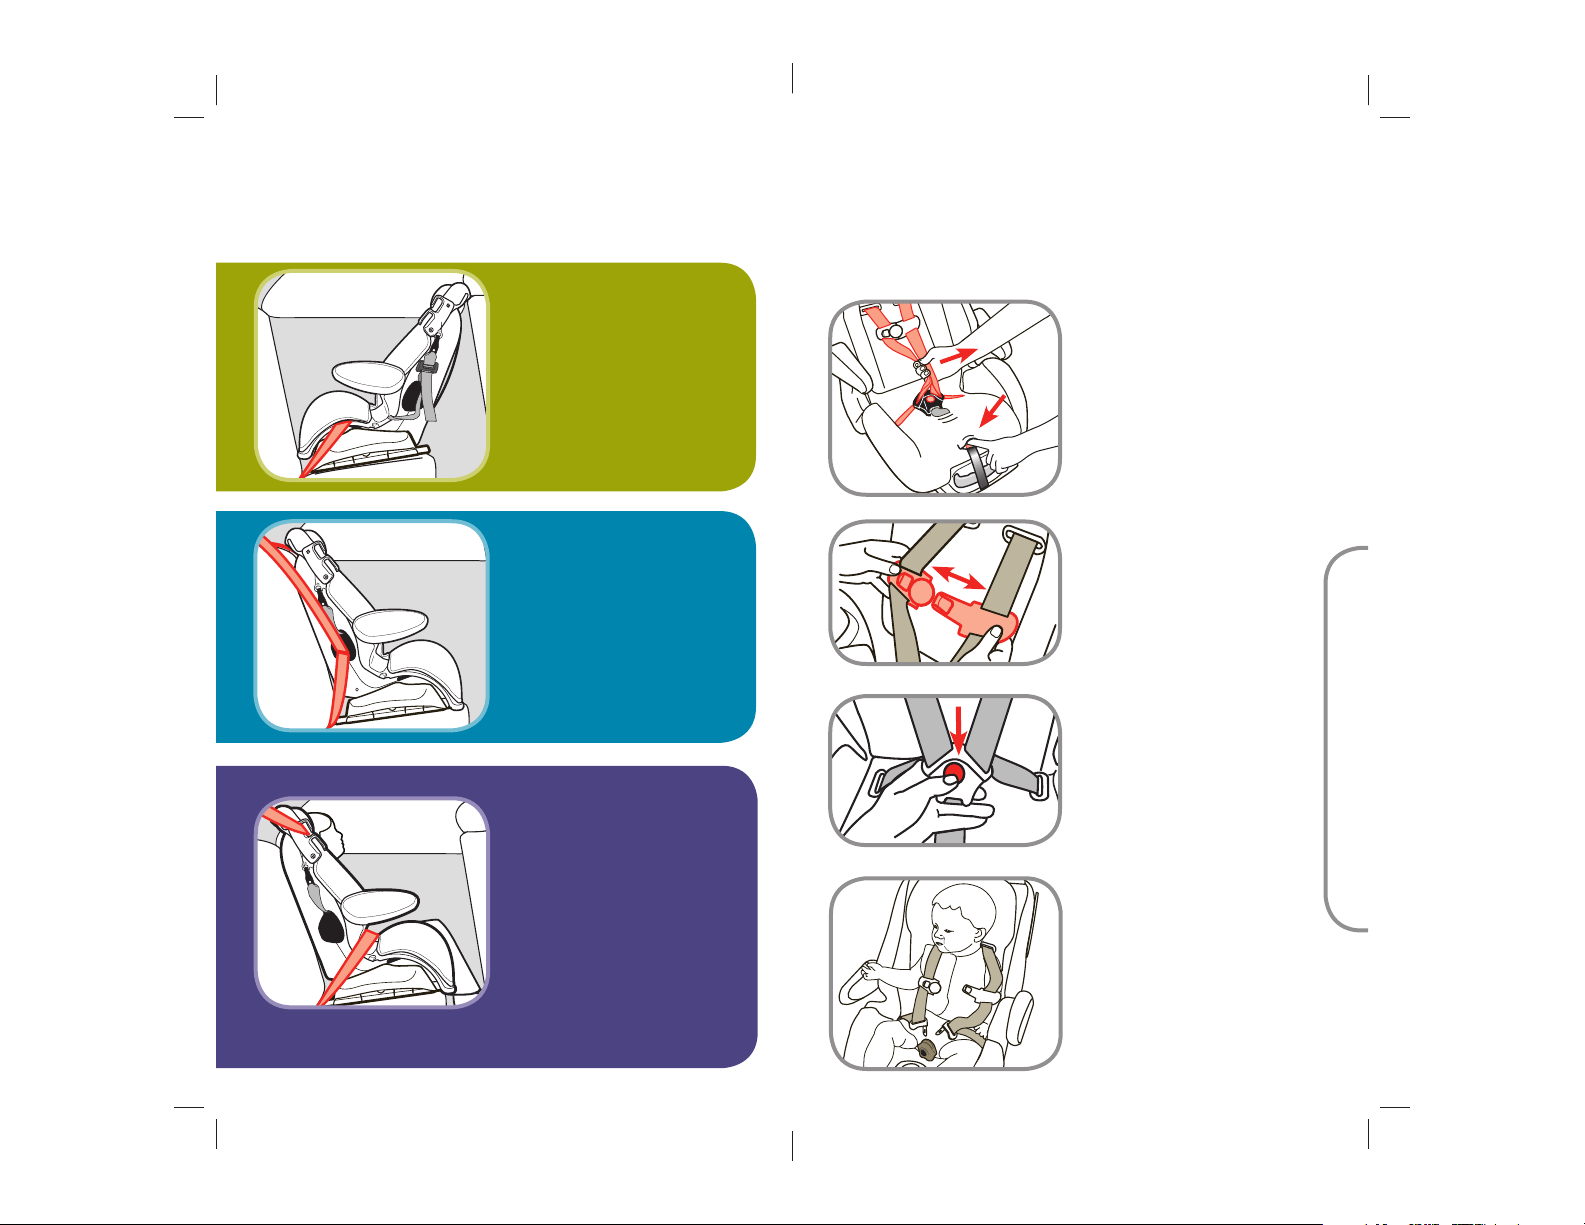
C-2 Preparing Child Restraint to Fit
Your Child
You
MUST make these adjustments with your child
before you install the child restraint in the vehicle.
Loosen Harness
1.
Push down on the harness
release lever (under flap on
the front of child restraint)
while pulling out on the
harness straps just above
the buckle.
22-50 lbs (10.1-22.6 kg)
and 34-45 in.
(85.1-114.3 cm) and
Over 1 Year Old
Forward-Facing using
5-point harness
Child and child restraint are
placed in the back seat,
facing the front of the vehicle.
40-100 lbs (18.1-45.4 kg)
and 43-52 in.
(110.1-1
1 Year Old
Belt-positioning booster
using vehicle lap/shoulder
belt combination
Child and child restraint are
placed in the back seat,
facing the front of the vehicle.
5-point harness is removed.
11
32.1
cm) and Over
Release Chest Clip
2.
Press on chest clip release
button and pull apart.
Unbuckle Harness
3.
Press red button. Pull
buckle tongues out. Place
harness straps out of
the way.
Place Child in Restraint
4.
Place the child’s bottom
and back flat against
the restraint. This will
increase comfort and allow
the harness straps to be
properly tightened.
12
continued on next page.
C. Basic Use
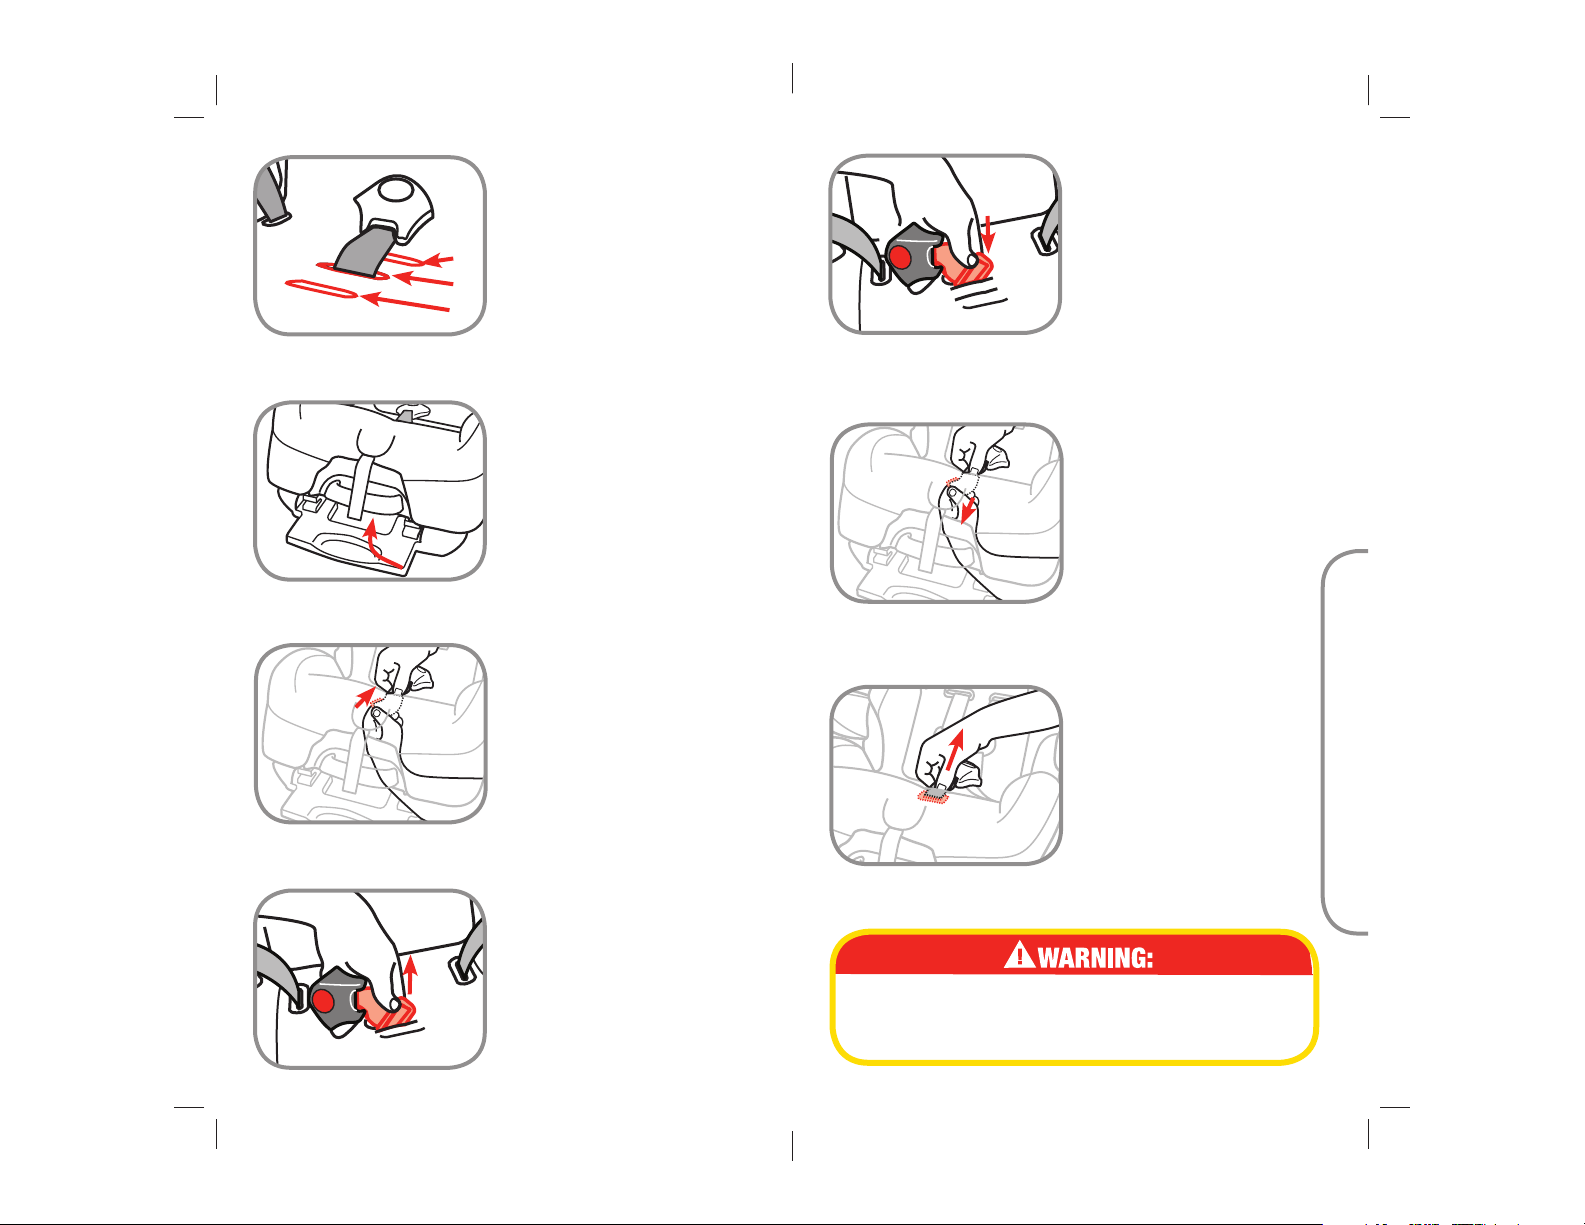
Check Buckle
5.
Position
Determine which of the
1
2
3
available buckle positions
will be comfortable and
provide a snug fit for
your child.
You MUST use the 1st or 2nd buckle strap slots when
rear-facing. Any slot can be used for forward-facing.
To Change Buckle
Position
Fully recline the child
a.
restraint. Reach under the
seat between base and shell.
Locate buckle’s metal
b.
retainer under the shell.
Rotate metal retainer, then
insert retainer up through
the shell and pad.
Reposition buckle location.
d.
Insert the buckle’s metal
retainer through the
desired slot. Make sure
buckle is facing forward.
Reach under seat between
e.
base and shell. Pull
buckle’s metal retainer
completely through pad
and shell.
C. Basic Use
Pull up on buckle to make
f.
sure it is secured. The
buckle must not pull out.
From the top, pull buckle
c.
free from shell and pad.
13
Failure to place buckle’s metal retainer
completely through pad and shell can result
in serious injury or death.
14
continued on next page.

Check Harness/Headrest
6.
Height
To Adjust Harness/
7.
Headrest Height
With child in the seat, check
the location of the harness
guide.
Follow the guidelines below
to determine the correct
harness/headrest height.
Rear-Facing Position
Harness guide must be even
with or just below the
shoulders.
If the harness is above
the child’s shoulders with
the headrest in the lowest
position, do not use this
child restraint.
Forward-Facing Position
Harness guide must be even
with or just above the
shoulders.
If the harness guide is below
the child’s shoulders with the
headrest in the highest position
and the child weighs at least
40 lbs. (18.1 kg) and is over
1 year old, you must convert
the seat to a belt-positioning
booster.
Loosen harness straps.
Rotate headrest/harness
height adjustment levers
inward. Move headrest
to the proper height and
lock into place
Make sure metal bar
is locked into position.
Failure to do this can
result in serious injury
or death.
C. Basic Use
Do not use this child restraint rearfacing if the top of your child’s
head is above the top of the child
restraint’s headrest.
Do not use this child restraint
forward-facing if the midpoint of
your child’s head is above the top of
the child restraint’s headrest.
Make sure the harness height is correct for
your child’s size.
Failure to follow these steps can result in
serious injury or death.
15
16

C-3 Securing Child in Child Restraint
Position Harness
1.
Straps Over the
Child’s Shoulders.
Tighten Harness
4.
Pull on harness
tightening strap to tighten
harness snugly.
NOTE: A snug strap
should not allow any
slack. It lies in a relatively
straight line without
sagging. It does not press
on the child’s flesh or
push the child’s body into
an unnatural position.
Check Harness
5.
Tightness
Buckle Harness
2.
Push each buckle tongue
into buckle until you hear
a “click”. Remember to
always pull up on harness
straps to make sure buckle
is locked.
Close Chest Clip
3.
Insert right half of chest
clip into left half and
snap together.
17
Try to pinch the harness
at the shoulders. If you
can pinch the harness
strap, tighten more. If your
fingers slip off, the harness
is tight enough.
Position Chest Clip
6.
The chest clip must be
placed at mid-chest (even
with armpits) and away
from the child’s neck.
Failure to fasten and tighten the harness
system correctly and snugly can result in
serious injury or death.
18
C. Basic Use
 Loading...