

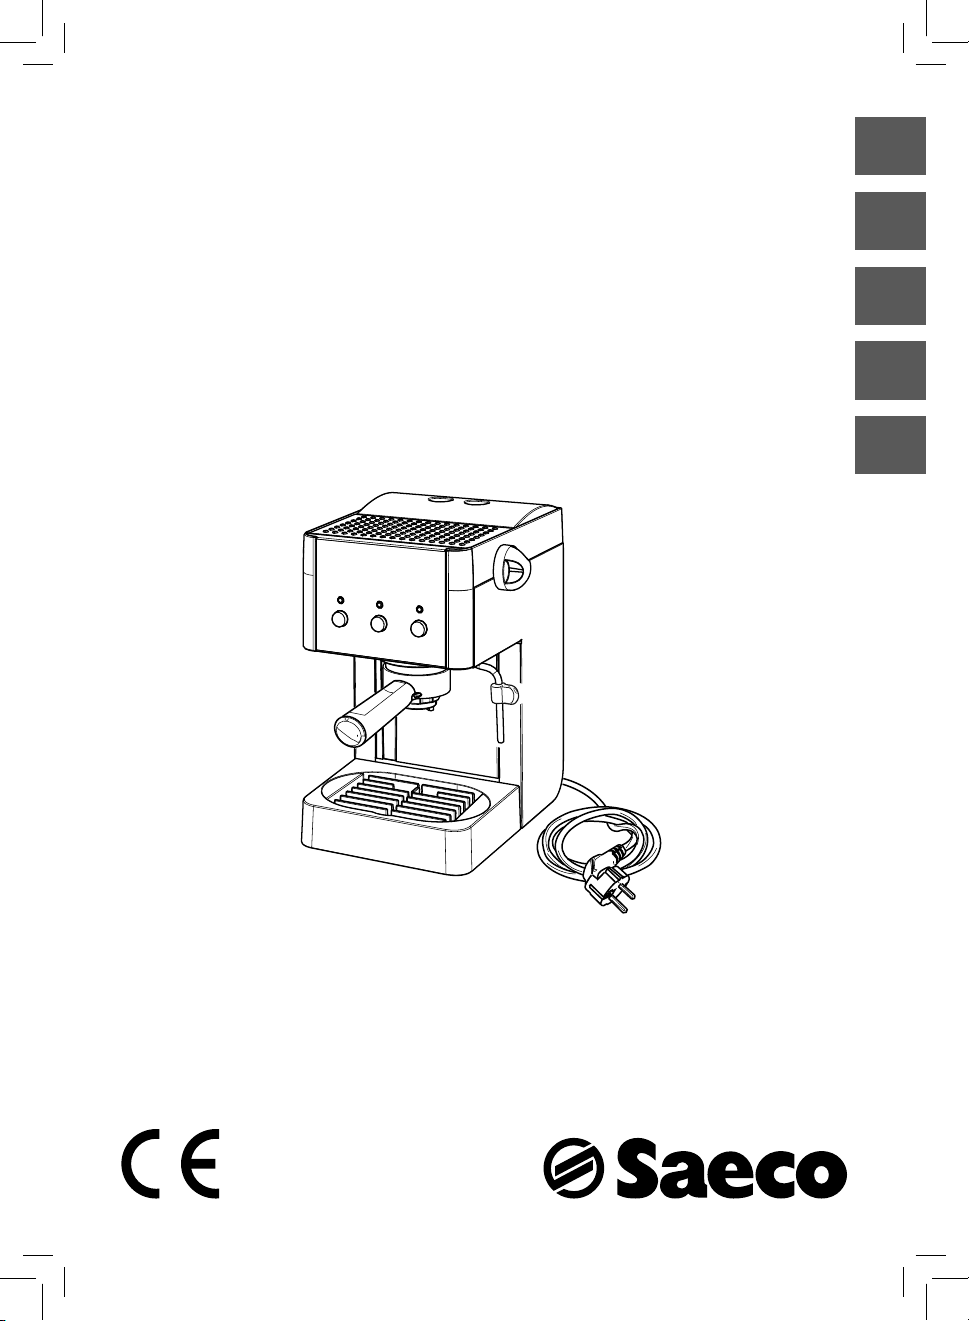
Register your product and get support at
www.philips.com/welcome
Type RI8329
OPERATING INSTRUCTIONS
INSTRUKCJA OBSŁUGI
ИНСТРУКЦИЯ ПО ЭКСПЛУАТАЦИИ
НАСТАНОВА З ЕКСПЛУАТАЦІЇ
ПАЙДАЛАНУ НҰСҚАУЛАРЫ
English
PolskiРусскийУкраїнськаҚазақша
PRZECZYTAĆ UWAŻNIE NINIEJSZĄ INSTRUKCJĘ OBSŁUGI PRZED ROZPOCZĘCIEM UŻYTKOWANIA URZĄDZENIA.
ПЕРЕД ИСПОЛЬЗОВАНИЕМ МАШИНЫ ВНИМАТЕЛЬНО ПРОЧИТАЙТЕ ДАННОЕ РУКОВОДСТВО ПО ЭКСПЛУАТАЦИИ.
ПЕРШ НІЖ КОРИСТУВАТИСЯ МАШИНОЮ, УВАЖНО ПРОЧИТАЙТЕ ЦЮ НАСТАНОВУ З ЕКСПЛУАТАЦІЇ.
ҚҰРЫЛҒЫНЫ ПАЙДАЛАНУ АЛДЫНДА ОСЫ ПАЙДАЛАНУШЫ НҰСҚАУЛЫҒЫН МҰҚИЯТ ОҚЫП ШЫҒЫҢЫЗ.
PLEASE READ THIS USER MANUAL CAREFULLY BEFORE USING THE MACHINE.
2 3
1
7 8 9 10
11
4 65
13
1717
15
• 2 •
1614 18
12
19
20 cm
8 in
20 cm
8 in
Fig. - Rys. - Рис. - Мал. - Сур. (A)
16 in
40 cm
20 cm
8 in
20 cm
8 in
Fig. - Rys. - Рис. - Мал.
- Сур. (B)
Fig. - Rys. - Рис. - Мал. - Сур. (1)
Fig. - Rys. - Рис. - Мал. - Сур. (2)
Fig. - Rys. - Рис. - Мал. - Сур. (3)
Fig. - Rys. - Рис. - Мал. - Сур. (4)
Fig. - Rys. - Рис. - Мал. - Сур. (7)
Fig. - Rys. - Рис. - Мал. - Сур. (10)
Fig. - Rys. - Рис. - Мал. - Сур. (5)
Fig. - Rys. - Рис. - Мал. - Сур. (8)
Fig. - Rys. - Рис. - Мал. - Сур. (11)
Fig. - Rys. - Рис. - Мал. - Сур. (6)
Fig. - Rys. - Рис. - Мал. - Сур. (9)
Fig. - Rys. - Рис. - Мал. - Сур. (12)
• 3 •
Fig. - Rys. - Рис. - Мал. - Сур. (13)
Fig. - Rys. - Рис. - Мал. - Сур. (14)
Fig. - Rys. - Рис. - Мал. - Сур. (15)
Fig. - Rys. - Рис. - Мал. - Сур. (16)
Fig. - Rys. - Рис. - Мал. - Сур. (19)
Fig. - Rys. - Рис. - Мал. - Сур. (22)
Fig. - Rys. - Рис. - Мал. - Сур. (17)
Fig. - Rys. - Рис. - Мал. - Сур. (20)
Fig. - Rys. - Рис. - Мал. - Сур. (23)
Fig. - Rys. - Рис. - Мал. - Сур. (18)
Fig. - Rys. - Рис. - Мал. - Сур. (21)
Fig. - Rys. - Рис. - Мал. - Сур. (24)
• 4 •
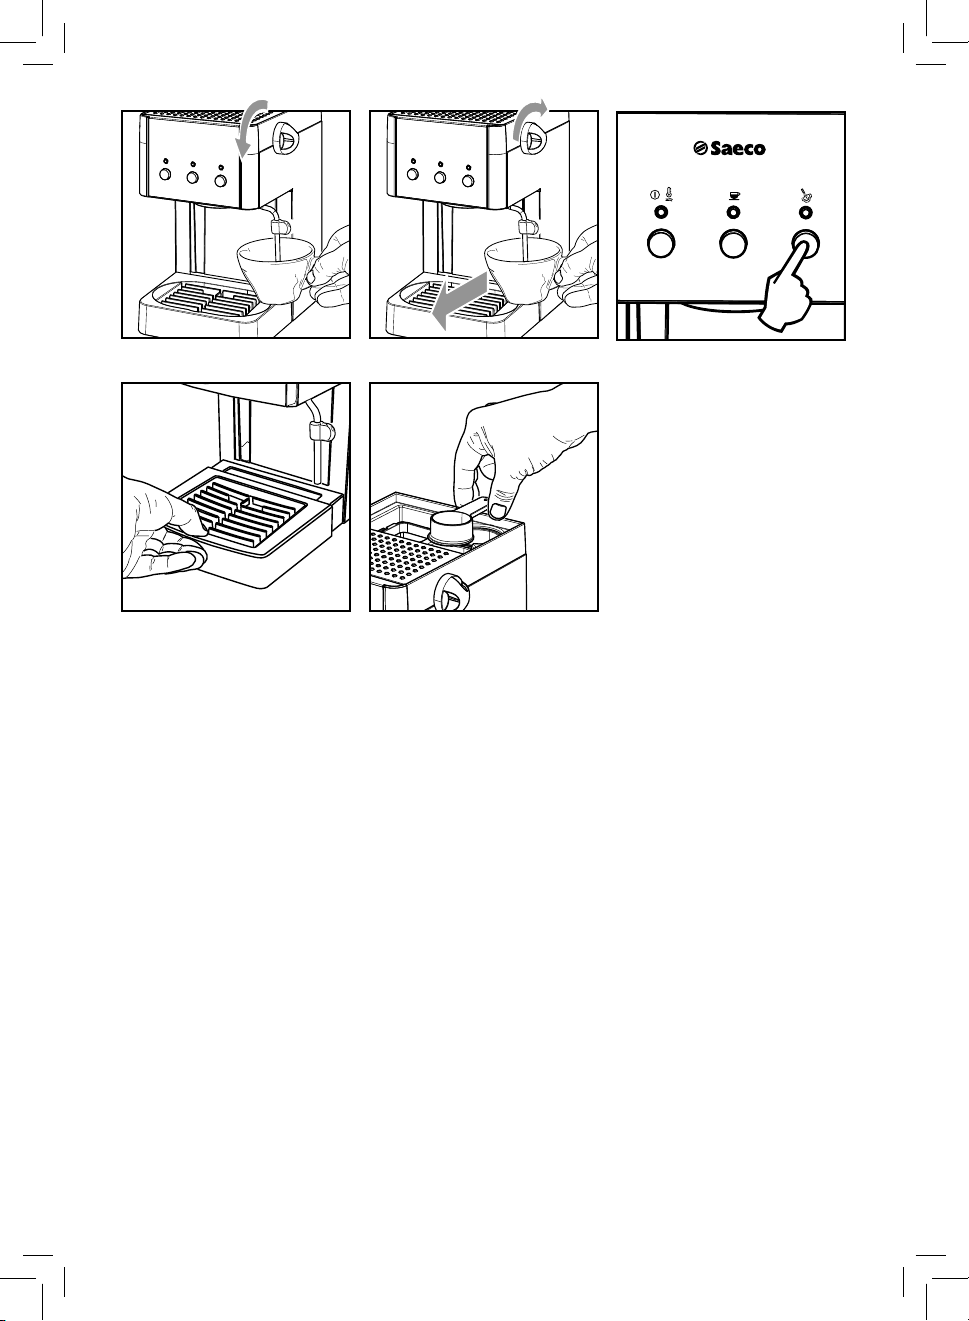
Fig. - Rys. - Рис. - Мал. - Сур. (25)
Fig. - Rys. - Рис. - Мал. - Сур. (26)
Fig. - Rys. - Рис. - Мал. - Сур. (27)
Fig. - Rys. - Рис. - Мал. - Сур. (28)
Fig. - Rys. - Рис. - Мал. - Сур. (29)
• 5 •

1 GENERAL INFORMATION
The co ee machine is suitable for preparing 1 or 2 cups of
espresso co ee and is provided with a swivel steam and hot
water wand. The controls on the front side of the machine are
labelled with easy-to-read icons.
The machine has been designed for domestic use and is not
suitable for professional, continuous use.
Warning. No liability is held for damage caused
by:
• Incorrect use not in accordance with the intended
purposes;
• Repairs not carried out in authorised service centres;
• Tampering with the power cord;
• Tampering with any part of the machine;
• Use of non-original spare parts and accessories;
• Failure to descale the machine and storage at temperatures below 0°C.
In these cases, the warranty is void.
1.1 How to Read the Manual
The warning triangle indicates all
important instructions for the user’s safety. Carefully follow these
instructions to avoid serious injury!
References to illustrations, parts of the appliance or controls,
etc. are indicated by numbers or letters. Whenever possible,
refer to the illustration.
This icon is used to highlight information that
is particularly important to ensure optimal use
of the machine.
The illustrations corresponding to the text can be
found on the rst pages of the manual. Please refer to
these pages while reading the operating instructions.
1.2 How to Use these Operating Instructions
Keep these operating instructions in a safe place and make
them available to anyone who may use the co ee machine.
For further information or in case of problems, please refer to
an authorised service centre.
2 TECHNICAL SPECIFICATIONS
The manufacturer reserves the right to make changes to the
technical speci cations of the product.
Nominal voltage - Power rating - Power supply
See data plate on the appliance
Housing material
Plastic
Size (w x h x d) (mm)
210 x 300 x 280
Weight
3.9 kg
Control panel
Front side
Filter holder
Pressurized type
Water tank
1.25 litres - Removable type
Pump pressure
15 bar
Safety devices
Thermal fuse
3 SAFETY INSTRUCTIONS
Never allow water to come into contact with any of the
electrical parts of the machine: Danger of short circuit!
Overheated steam and hot water may cause burning!
Never direct the steam or hot water jet towards body
parts. Handle the steam/hot water spout with care:
Danger of scalding!
Intended Use
This co ee machine is intended for domestic use only. Do not
make any technical changes or use the appliance for unauthorised purposes since this would create serious hazards! The appliance is not to be used by persons (including children) with
reduced physical, mental or sensory abilities or with scarce
experience and/or expertise, unless they are supervised by a
person responsible for their safety, or they are instructed by
this person on how to properly use the appliance.
Power Supply
Connect the co ee machine only to a suitable socket. The voltage must correspond to that indicated on the appliance data
plate.
• 6 •

Power Cord
Never use the co ee machine if the power cord is defective or
damaged. If the power cord is damaged, it must be replaced
by the manufacturer or by an authorised service centre. Do not
pass the power cord around corners, over sharp edges or over
hot objects and keep it away from oil.
Do not use the power cord to carry or pull the co ee machine.
Do not pull out the plug by the power cord or touch it with
wet hands.
Do not let the power cord hang freely from tables or shelves.
For the Safety of Others
Supervise children at all times and do not allow them to play
with the appliance.
Children are not aware of the risks related to electrical household appliances.
Do not leave the machine packaging materials within the
reach of children.
Danger of Burns
Never direct jets of overheated steam and/or hot water towards
yourself or others. Always use the handles or knobs provided.
Do not disconnect (remove) the lter holder during co ee
brewing. Hot water drips may spill out of the brew unit during
the warm-up phase.
Never brew co ee when button (18 the steam function is on and the temperature of the boiler is
too high.
) is pressed because
Location
Place the co ee machine in a safe place, where there will be no
danger of overturning or injury.
Hot water or overheated steam may spill out of the machine:
Danger of burns!
Do not keep the machine at a temperature below 0°C. Frost
may damage it.
Do not use the co ee machine outdoors.
In order to prevent its housing from melting or being damaged, do not place the machine on very hot surfaces and close
to open ames.
Cleaning
Before cleaning the machine, turn it o by pressing the ON/OFF
button, then pull out the plug from the socket.
Wait also for the machine to cool down. Never immerse the
machine in water!
It is strictly forbidden to tamper with the internal parts of the
machine.
Water left in the tank for several days should not be consumed.
Wash the tank and ll it with fresh drinking water.
Suitable Location for Operation and Maintenance
In order to ensure correct and e cient performance of the coffee machine, we recommend following the instructions below:
• Choose a level surface.
• Choose a location that is su ciently well-lit, clean and
near an easily reachable socket.
• Allow for a minimum distance from the sides of the machine as shown in the gure (Fig.A).
Storing the Machine
If the machine is to remain inactive for a long time, turn it o
and unplug it. Store the machine in a dry place, out of the reach
of children. Keep it protected from dust and dirt.
Repairs / Maintenance
In case of failure, problems or a suspected fault resulting from
the falling of the machine, immediately remove the plug from
the socket. Never attempt to operate a faulty machine. Servicing and repairs may only be carried out by Authorised Service
Centres. All liability for damages resulting from work not carried out by professionals is declined.
Fire Safety Precautions
In case of re, use carbon dioxide (CO2) extinguishers. Do not
use water or dry powder extinguishers.
English
• 7 •

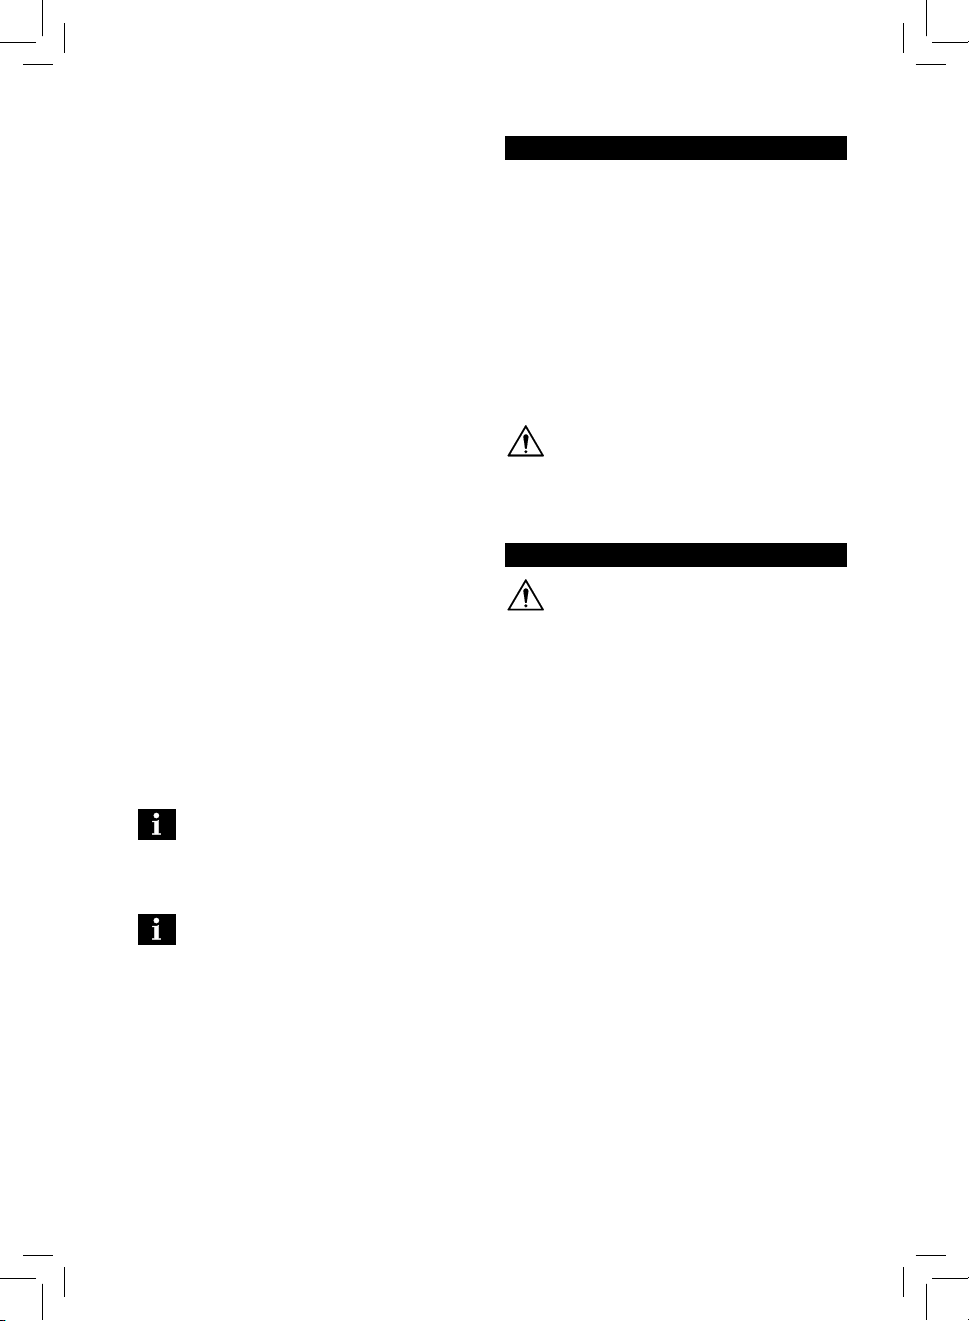
Key to Machine Parts (Page 2)
1 Control panel
2 Water tank lid
3 Hot water / steam knob
4 Seat for accessories
5 Water tank
6 Cup holder surface
7 Water recovery tray + grill (if any)
8 Co ee brew unit
9 Steam wand
10 Power cord
11 Pressurized lter holder
12 Ground co ee measuring scoop
13 Ground co ee lter
(single piece for 1 or 2 co ee(s))
14 ON/OFF button
15 "Machine on" indicator light
Light ON = the machine is on
Light OFF = the machine is o
16 Co ee brew button
17 Co ee/water - "Machine ready" indicator light
Light ON = OK for co ee brewing / hot water dispensing
Light OFF = temperature is too low for co ee brewing /
hot water dispensing
18 Steam button
19 "Steam ready" indicator light
Light ON = OK for steam dispensing
Light OFF = temperature is too low for steam dispensing
4 INSTALLATION
For your own and other people safety, carefully follow
the "Safety Regulations" indicated in chapter 3.
Note: We recommend washing the components
before using them for the rst time and/or af-
ter they have not been used for a certain period of time.
4.3 Water Tank
• (Fig.1A) - Remove the lid from the water tank (2) by lifting
it.
• (Fig.1B) - Remove the water tank (5).
Note: The machine accessories are placed on
the water tank's (5) side.
• (Fig.2) - Rinse the water tank and ll it with fresh drink-
ing water: do not exceed the (MAX) level indicated on the
water tank.
Fill the tank only with fresh, non-sparkling,
drinking water. Hot water or any other liquid
may damage the tank. Do not operate the machine
without water: make sure that there is enough water in
the tank.
• (Fig.3) - Insert the water tank making sure that it has
been properly repositioned in its former seat and then
reposition the lid (2).
Make sure that the tank is fully inserted in the
machine by pressing it gently up to its limit stop
(THE REFERENCE MARK SHOWN IN FIG.4 MUST BE COMPLETELY VISIBLE). This is to avoid water leaks from its
bottom.
4.1 Packaging
The original packaging has been designed and manufactured
to protect the machine during transport. We recommend keeping the packaging material for possible future transport.
4.2 Installation Precautions
Before installing the machine, read the following safety precautions carefully:
• Place the machine in a safe place.
• Make sure children cannot play with the machine.
• Do not place the machine on hot surfaces or near open
ames.
The co ee machine is now ready to be connected to the electric
network.
• 8 •
4.4 Machine Connection
Electric power may be very dangerous! It is
therefore necessary to strictly follow the safety
regulations. Do not use faulty power cords! Faulty cords
and plugs must be replaced immediately by Authorised
Service Centres.
The voltage of the appliance has been pre-set by the manufacturer. Check that the voltage matches the indication on the
identifying data plate at the bottom of the appliance.
• Insert the plug into a wall socket with suitable power volt-
age.
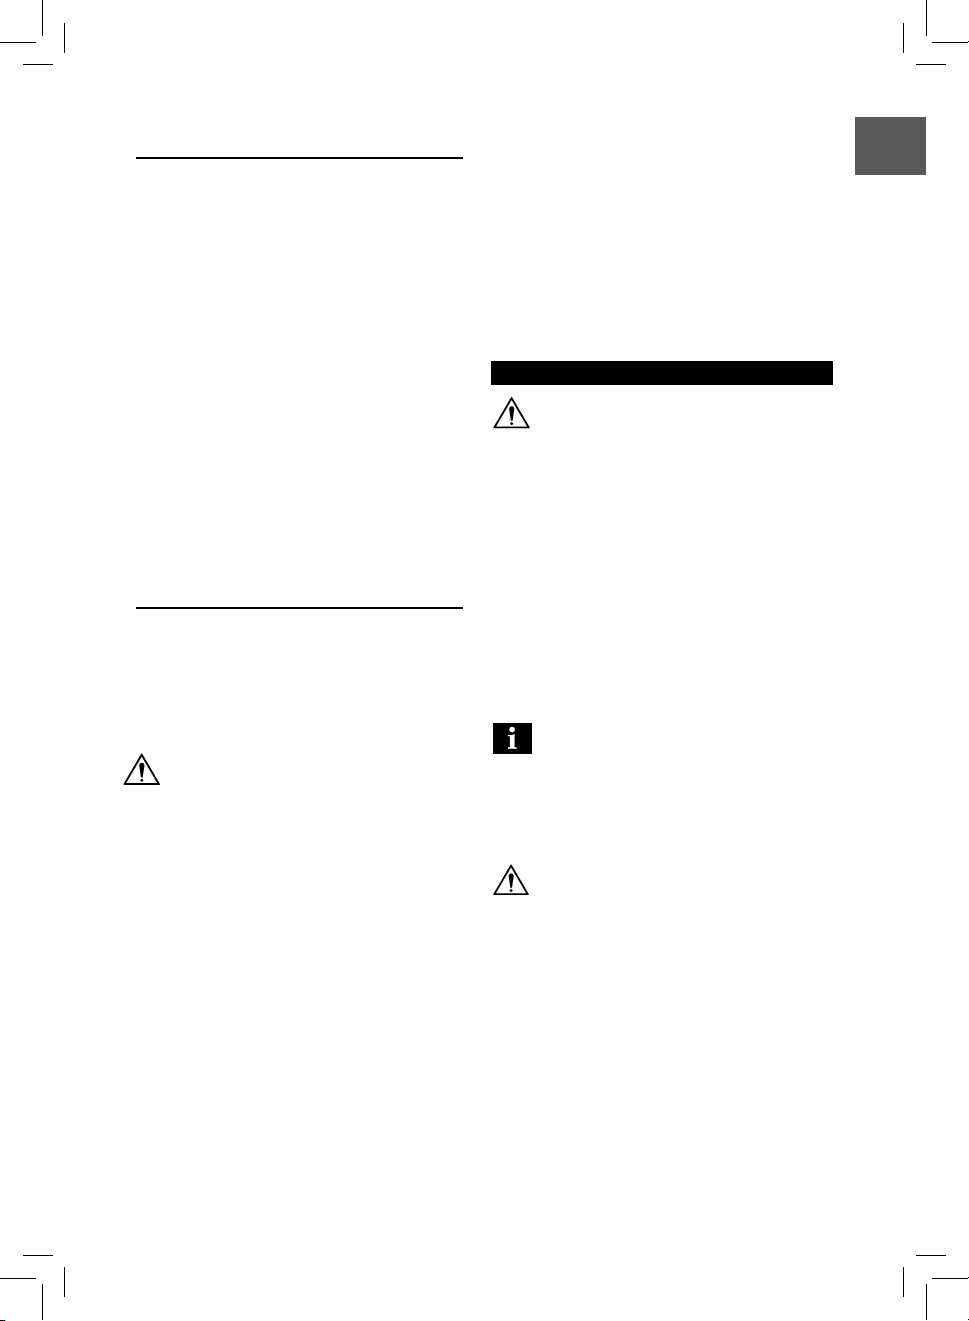
4.5 Circuit Priming
Upon rst use, after dispensing steam or when the water tank
is empty, the machine’s circuit must always be primed.
• (Fig.5) - Press the ON/OFF button (14); the indicator light
(15) will turn on to indicate that the machine is on.
• (Fig.6) - Place a container under the steam wand. Open
the “hot water/steam” knob (3) by turning it counterclockwise.
• (Fig.7) - Press the brew button (16).
• Wait until a steady jet of water ows out of the steam
wand.
• (Fig.7) - Press the brew button (16) again to end the operation.
• (Fig.8) - Close the "hot water/steam" knob (3) by turning
it clockwise. Remove the container.
The machine is now ready to brew co ee and dispense steam.
Please see related chapters for operating details.
4.6 Using the Machine for the First Time
or After a Period of Inactivity
This simple operation ensures optimal brewing and must be
performed:
- At rst start-up.
- When the machine remains inactive for a long time (more
than 2 weeks).
Water dispensed during this process must be
emptied into an adequate drain and is not suitable for food use. If the container lls up during the
cycle, stop dispensing water and empty the container
before resuming the operation.
A (Fig.2) - Rinse the tank and ll it again with fresh drinking
water.
B (Fig.6) - Place a container under the steam wand. Open
the knob (3) slowly by turning it counter-clockwise.
(Fig.7) - Press the brew button (16).
C Dispense the whole water tank content from the steam/
hot water wand.
(Fig.7) - Press the brew button (16) again to end the op-
eration.
(Fig.8) - Close the knob (3) by turning it clockwise.
D (Fig.2) - Fill the tank with fresh drinking water.
E (Fig.12-13) - Insert the lter holder into the brew unit (8)
from the bottom and turn it from left to right until it locks
into place.
F Place a suitable container under the lter holder.
G (Fig.15) - Press the brew button (16) and dispense all the
water in the tank. Once the water tank is empty, stop dispensing by pressing the brew button (16) again.
At the end, empty the container.
H (Fig.17) - Remove the lter holder from the unit by turn-
ing it from right to left and rinse it with fresh drinking water.
I The machine is now ready to be used.
5 COFFEE BREWING
Warning! During the co ee brewing it is forbidden to remove the pressurized lter holder by
manually turning it clockwise. Danger of burns!
• During this operation the "machine ready" light (17) may
ash. This should be considered a standard operation, not
a fault.
• Before using the machine, make sure that the hot water/
steam knob (3) is closed and that there is enough water in
the machine tank.
• (Fig.5) - Press the ON/OFF button (14); the indicator light
(15) will turn on to indicate that the machine is on.
• Wait until the "machine ready" light (17) turns on. The
machine is now ready to brew co ee.
Accessories for co ee brewing are placed in
a specially designed seat to make operations
easy and immediate.
If the ground co ee measuring scoop and/or the lters
are required, lift the lid (2) and take what you need
(Fig.29).
If co ee is NOT brewed after pressing the brew
button (16), press the brew button (16) again
and check the "Troubleshooting" table before removing the lter holder.
• (Fig.9) - Insert the lter (13) in the pressurized lter
holder (11). The lter is already inserted when using the
machine for the rst time.
• (Fig.12) - Insert the pressurized lter holder into the brew
unit (8) from the bottom.
• (Fig.13) - Turn the lter holder from left to right until it
locks into place. Release the grip from the pressurized lter
holder handle. The handle is automatically slightly turned
leftwards.
English
• 9 •
This movement guarantees proper pressurized lter holder
performance.
• (Fig.15) - Preheat the pressurized lter holder by press-
ing the brew button (16). Some water will ow out of the
pressurized lter holder (this operation is only neces-
sary for the rst co ee).
• After 150cc of water has owed out, press the brew button
(16) again to stop hot water dispensing.
• (Fig.17) - Remove the lter holder from the machine by
turning it from right to left and pour out any water left.
• (Fig.29) - Remove the measuring scoop from the machine.
• (Fig.10) - Add 1-1.5 measuring scoop(s) for single co ee
and 2 measuring scoops for double co ee. Remove any
co ee residues from the rim of the lter holder.
• (Fig.12) - Insert the lter holder (11) into the brew unit
(8) from the bottom.
• (Fig.13) - Turn the lter holder from left to right until it
locks into place.
• (Fig.14) - Take 1 or 2 preheated cups and place them
under the lter holder. Make sure that they are correctly
placed under the co ee brewing nozzles.
• (Fig.15) - Press the brew button (16).
• When the desired quantity of co ee has been obtained,
press the brew button (16) again to stop brewing and remove the cups of co ee (Fig.16).
• (Fig.17) - Wait a few seconds after completing the brewing. Then remove the lter holder and empty the remaining co ee grounds out.
Note: if a small quantity of water remains in
the lter holder, this has to be considered as
absolutely normal and is due to the lter holder features.
Important note: The lter (13) should be kept
clean to guarantee perfect results. Clean daily
after use (Fig.18).
6 TIPS FOR CHOOSING COFFEE
As a general rule, any type of co ee available on the market
can be used.
However, co ee is a natural product and its avour changes
according to its origin and blend. It is therefore a good idea to
try di erent types of co ee in order to nd the most suited to
your personal taste. For optimal results, we recommend using
espresso machine blends. As a rule, co ee should always come
out of the pressurized lter holder, without dripping.
The co ee brewing speed can be modi ed by slightly changing the amount of co ee in the lter and/or using a di erent
co ee grind.
BEFORE PERFORMING ANY OPERATIONS RELATED
TO HOT WATER/STEAM DISPENSING, MAKE SURE
THAT THE STEAM WAND IS DIRECTED OVER THE WATER
RECOVERY TRAY.
7 HOT WATER
Danger of burns! Dispensing may be preceded
by small jets of hot water. The steam wand
may reach high temperatures: never touch it with bare
hands.
• Before using the machine, make sure that the hot water/
steam knob (3) is closed and that there is enough water in
the machine tank.
• (Fig.5) - Press the ON/OFF button (14); the indicator light
(15) will turn on to indicate that the machine is on.
• Wait until the "machine ready" indicator light (17) turns
on. The machine is now ready.
• During this operation the "machine ready" light (17) may
ash. This should be considered a standard operation, not
a fault.
• (Fig.19) - Place a container under the steam wand. Open
the “hot water/steam” knob (3) by turning it counterclockwise.
• (Fig.20) - Press the brew button (16).
• (Fig.20) - When the required amount of hot water has
been dispensed, press the brew button (16) again.
• (Fig.21) - Close the "hot water/steam" knob (3) by turning
it clockwise. Remove the container.
• 10 •
8 STEAM / CAPPUCCINO
Danger of burns! Dispensing may be preceded
by small jets of hot water. The steam wand
may reach high temperatures: never touch it with bare
hands.
Warning! Never brew co ee when the steam
function is on, as the temperature is too high
and there is a risk of burns.
Warning! During co ee brewing, do not re-
move the lter holder (if inserted) by manually turning it clockwise. Danger of burns! The lter
holder can only be disconnected after deactivating the
steam function by pressing the (18) button and letting
the machine cool down as described in section 4.5.
• During this operation the "machine ready" light (17) may
ash. This should be considered a standard operation, not
a fault.
• (Fig.27) - Press the steam button (18) again.
• Prime the circuit as described in section 4.5 to make the
machine ready for use.
Never brew co ee when the ( ) button is
pressed or when the 19 indicator light is on, because this means that the steam function is on and the
temperature of the boiler is too high.
Wait for the co ee ready condition to be active (17 indicator light on) before brewing co ee.
Note: The machine is ready when the "machine
ready" light (17) is permanently on.
Important note: If it is not possible to brew a
cappuccino as described, prime the circuit as
explained in section 4.5 and then repeat the steps.
The same procedure can be used to heat other
beverages.
English
• (Fig.5) - Press the ON/OFF button (14); the indicator light
(15) will turn on to indicate that the machine is on.
• Wait until the "machine ready" light (17) turns on.
• (Fig.22) - Press the steam button (18). The "machine
ready" light (17) turns o .
• Wait until the "machine ready" light (17) and the "steam
ready" light (19) turn on. The machine is now ready for
steam dispensing.
• During this operation, the indicator lights (17) and (19)
may ash. This should be considered a standard operation,
not a fault.
• (Fig.23) - Insert a container under the steam wand and
open the knob (3) for a few seconds, so that remaining
water can ow out of the steam wand. In a short time only
steam will come out.
• (Fig.24) - Close the knob (3) and remove the container.
• Fill 1/3 of the container - the one you wish to use to prepare the cappuccino - with cold milk.
Use cold milk to get a better result.
• (Fig.25) - Immerse the steam wand in the milk and open
the knob (3) by turning it counter-clockwise. Turn the milk
container with slow upward movements so that it warms
up evenly.
• (Fig.26) - At the end, close the knob (3) and take the cup
with milk froth.
• After this operation, clean the steam wand with a wet
cloth.
9 CLEANING
Maintenance and cleaning can only be carried out when the
machine is cold and disconnected from the electric network.
• Do not immerse the machine in water or place any of its
parts in a dishwasher.
• Do not use spirits, solvents and/or aggressive chemical
agents.
• We recommend cleaning the water tank and re lling it
with fresh water every day.
• Clean the steam wand daily. To perform this operation,
wash the steam wand with a wet cloth and remove any
milk residue.
• (Fig.28) - Empty and clean the drip tray daily.
• Use a soft, dampened cloth to clean the appliance.
• (Fig.18) - Perform the following operations to clean the
pressurized lter holder:
- (Fig.11) - Remove the lter and wash it thoroughly with
hot water.
- Remove the adapter (if any) and wash it thoroughly with
hot water.
- Wash the internal part of the pressurized lter holder.
• Do not dr y the machine and/or its parts using a microwave
and/or standard oven.
• 11 •

10 DESCALING
Limescale normally builds up with the use of the appliance.
The machine needs descaling every 1-2 months (if used) and/
or whenever a reduction in water ow is noticed. Use the Saeco
descaling product only.
In case of con ict, priority must be given to
what is indicated in the operation and maintenance manual over the instructions provided on separately sold accessories and materials.
Use the Saeco descaling solution only. Its formu-
la has been designed to ensure better machine
performance and operation for its whole operating life.
If correctly used, it also avoids alterations in the brewed
product. The descaling solution is to be disposed of according to the manufacturer’s instructions and/or the
regulations in force in the country
of use.
Never drink the descaling
solution or any products
dispensed until the cycle has
been completed. Never use vinegar as a descaling solution.
1 (Fig.12-13) - Insert the lter
holder (without co ee) into the
brew unit (8) from the bottom
and turn it from left to right until
it locks into place.
2 (Fig.1) - Remove and empty the water tank.
3 (Fig.2) - Pour THE ENTIRE content of the Saeco concen-
trated descaling solution into the water tank, and then ll
the tank with fresh drinking water up to the MAX level.
4 Turn on the machine by pressing the ON/OFF button (14).
The (15) indicator light will turn on to indicate that the
machine is on.
Fill up (as described in the “HOT WATER” chapter of the
manual) 2 cups of water (about 150ml each) from the
steam/hot water wand and turn o the machine by pressing the ON/OFF button (14). The indicator light (15) turns
o .
5 Let the descaling solution take e ect for approx.15-20
minutes with the machine turned o .
6 Turn on the machine by pressing the ON/OFF button (14).
The (15) indicator light will turn on to indicate that the
machine is on.
Fill up (as described in the “HOT WATER” chapter of the
manual) 2 cups of water (about 150ml each) from the
steam/hot water wand. Turn o the machine by pressing
the ON/OFF button (14) and leave it o for 3 minutes.
7 Repeat the operations described in step 6 until the water
tank is completely empty.
8 (Fig.2) - Rinse the water tank and ll it with fresh drinking
water. Turn on the machine by pressing the ON/OFF button
(14). The (15) indicator light will turn on to indicate that
the machine is on.
9 (Fig.6) - Place a container under the steam wand. Open
the knob (3) slowly by turning it counter-clockwise.
(Fig.7) - Press the brew button (16).
10 Dispense the whole water tank content through the
steam/hot water wand.
(Fig.7) - Press the brew button (16) again to end the op-
eration.
(Fig.8) - Close the knob (3) by turning it clockwise.
11 (Fig.2) - Fill the water tank with fresh drinking water.
12 (Fig.14) - Place a suitable container under the lter hold-
er.
13 (Fig.15) - Press the brew button (16) and dispense all
the water in the tank. Once the water tank is empty, stop
dispensing by pressing the brew button (16) again. At the
end, empty the container.
14 Repeat the operations from step (8) once again, for a total
of 4 tanks. The machine is now ready to be used.
(Fig.17) - Remove the lter holder from the unit by turning it
from right to left and rinse it with fresh drinking water.
The descaling cycle is now complete.
(Fig.2) - Fill the tank again with fresh water. If necessary,
prime the circuit as described in section 4.5 of the manual.
• 12 •
11 DISPOSAL
INFORMATION FOR THE USER: In compliance with art. 13 of
the Italian Legislative Decree dated 25 July 2005, no. 151 "Implementation of the Directives 2002/95/EC, 2002/96/EC and
2003/108/EC on the restriction of the use of certain hazardous
substances in electrical and electronic equipment, as well as
waste disposal".
English
The icon of the crossed-out wheeled bin
appliance or its packaging indicates that the product must
be disposed of separately from other waste at the end of its
operational life.
The user must therefore take the appliance to be disposed of
to a suitable recycling centre for electronic and electrotechnical equipment, or alternatively hand it over to the vendor on
a one on one exchange, when purchasing a new appliance of
similar type.
Separating this product for subsequent recycling, treatment
and environmentally-friendly disposal will help prevent potential environmental and health risks, and allow the materials
which make up the appliance to be re-used and/or recycled.
Speci c administrative sanctions provided for by current regulations will be applied for illicit disposal of the product by the
user.
on the
• 13 •
12 TROUBLESHOOTING
Problem Possible Causes Solution
The machine does not switch on.
The pump is very noisy. No water in the tank.
No co ee is brewed after pressing
the brew button (16).
Co ee is too cold.
The milk does not froth.
It is not possible to prepare a cappuccino.
Co ee is brewed too fast, crema
does not form.
Co ee does not come out or drips
only.
Co ee ows out of the edges.
Please contact an authorised service centre for any problems not covered in the above table or when the suggested
solutions do not solve the problem.
The machine is not connected to the electric
network.
Filter holder is clogged.
The "co ee ready" indicator light (17) was
o when the button was pressed (16)
The lter holder is not inserted for preheating (chapter 5).
The cups are cold. Preheat the cups with hot water.
The milk is not suitable: powdered milk,
low-fat milk.
The steam wand is dirty.
There is no more steam in the boiler.
There is too little co ee in the lter holder. Add co ee (chapter 5).
The grind is too coarse. Use a di erent blend (chapter 6).
Co ee is old or not suitable. Use a di erent blend (chapter 6).
No water.
The grind is too ne. Use a di erent blend (chapter 6).
Co ee tamped in the lter holder. Shake the ground co ee.
There is too much co ee in the lter holder. Reduce the quantity of co ee in the lter holder.
Knob (3) is open. Close the knob (3).
The machine has limescale build-up. Descale the machine (chapter 11).
The lter in the lter holder is clogged. Clean the lter (chapter 10).
The lter holder is not correctly inserted in
the brew unit.
The upper rim of the lter holder is dirty. Clean the rim of the lter holder.
There is too much co ee in the lter holder.
Connect the machine to the electric network.
Fill the water tank and prime the circuit again
(section 4.5).
Press the brew button (16) again. Turn the machine o and let it cool down (approx. 1 hour).
Then remove and wash the lter holder thoroughly. If the problem persists, contact the authorised service centre.
Wait until the "co ee ready" indicator light (17)
.
turns on.
Preheat the lter holder.
Use whole milk.
Clean the steam wand as described in Chapter
10.
Prime the circuit (section 4.5) and repeat the
steps described in Chapter 8.
Fill the water tank and prime the circuit again
(section 4.5).
Insert the lter holder correctly (chapter 5).
Reduce the quantity of co ee using the measuring scoop.
• 14 •

English
• 15 •
1 UWAGI OGÓLNE
Ekspres do kawy jest przeznaczony do przygotowywania 1 lub
2 liżanek kawy espresso i jest on wyposażony w nastawną
rurkę do wytwarzania pary i nalewania gorącej wody. Przyciski sterownicze umieszczone na przedniej części urządzenia są
oznaczone łatwymi do zrozumienia symbolami.
Urządzenie zostało zaprojektowane do użytku domowego i nie
nadaje się do intensywnego wykorzystywania profesjonalnego.
Uwaga. Producent nie ponosi odpowiedzialno-
ści za ewentualne szkody spowodowane przez:
• Użytkowanie błędne i niezgodne z przewidzianym
celem;
• Naprawy niewykonane w autoryzowanych centrach
serwisowych;
• Przerobienie kabla zasilającego;
• Przerobienie jakiejkolwiek części urządzenia;
• Stosowanie nieoryginalnych części zamiennych i ak-
cesoriów;
• Brak odwapniania i przechowywanie urządzenia
w pomieszczeniach o temperaturze poniżej 0°C.
W każdym powyższym wypadku gwarancja wygasa.
1.1 Ułatwienie zrozumienia instrukcji
Trójkąt ostrzegawczy sygnalizuje wszystkie ważne instrukcje
dotyczące bezpieczeństwa użytkownika. Należy ich ściśle przestrzegać, aby zapobiec
kalectwu!
Odniesienia do ilustracji, części urządzenia lub elementów
sterowania itd. są oznaczone numerami lub literami. W tym
przypadku użytkownik jest odsyłany do ilustracji.
Ten symbol sygnalizuje ważne informacje, któ-
re pozwalają na jak najlepsze stosowanie urządzenia.
Ilustracje do tekstu znajdują się na pierwszych stronach
instrukcji. Pozostawić tą stronę otwartą podczas zapoznawania się z instrukcją obsługi.
1.2 Zastosowanie niniejszej instrukcji
podczas użytku
Zachować niniejszą instrukcję obsługi w bezpiecznym miejscu
i dołączyć ją każdorazowo do ekspresu do kawy, gdy będzie go
używała inna osoba.
W przypadku potrzeby dodatkowych informacji lub w przypadku pojawienia się problemów, należy zwrócić się do autoryzowanych centrów obsługi klienta.
2 DANE TECHNICZNE
Producent zastrzega sobie prawo do zmian właściwości technicznych produktu.
Napięcie nominalne - Moc nominalna - Zasilanie
Zobacz tabliczkę umieszczoną na urządzeniu
Materiał obudowy
Tworzywo sztuczne
Wymiary (dł. x wys. x gł.) (mm)
210 x 300 x 280
Waga
3,9 kg
Panel sterujący
Z przodu
Uchwyt ltra
Pod ciśnieniem
Pojemnik na wodę
1,25 litra - Wyjmowany
Ciśnienie pompy
15 barów
Urządzenia zabezpieczające
Bezpiecznik termiczny
3 NORMY BEZPIECZEŃSTWA
Elementy pod napięciem nie mogą stykać się z wodą
ze względu na niebezpieczeństwo zwarcia! Rozgrzana para i gorąca woda mogą spowodować oparzenia!
Nie wolno kierować strumienia pary lub gorącej wody
w kierunku części ciała, ostrożnie dotykać dzióbka wylotu pary / gorącej wody: niebezpieczeństwo oparzenia!
Przeznaczenie użytkowe
Ekspres do kawy jest przeznaczony wyłącznie do użytku domowego. Zabronione jest przeprowadzanie jakichkolwiek
przeróbek lub zmian oraz niewłaściwe użytkowanie ze względu na zagrożenia, jakie może to spowodować! Urządzenie
nie jest przeznaczone do użytkowania przez osoby (włącznie
z dziećmi) o ograniczonych możliwościach zycznych, umysłowych oraz o ograniczonych zdolnościach zmysłowych, lub
w przypadku niewystarczającego doświadczenia i/lub odpo-
• 16 •

wiedniego przygotowania. Może się to odbywać jedynie pod
nadzorem osoby odpowiedzialnej za bezpieczeństwo wyżej
wymienionych osób oraz po uprzednim ich pouczeniu co do
sposobu użytkowania urządzenia.
Zasilanie elektryczne
Podłączyć urządzenie tylko do odpowiedniego gniazdka elektrycznego. Napięcie musi odpowiadać napięciu podanemu na
tabliczce umieszczonej na urządzeniu.
Kabel zasilający
Nie wolno używać ekspresu do kawy, jeżeli kabel zasilający
jest uszkodzony. Gdy kabel zasilający jest uszkodzony, musi być
wymieniony przez producenta lub przez autoryzowane centrum obsługi klienta. Nie przeciągać kabla zasilającego przez
narożniki lub ostre krawędzie albo nad gorącymi przedmiotami i chronić go od oleju.
Nie przesuwać i nie ciągnąć ekspresu do kawy, trzymając go za
kabel. Nie wyciągać wtyczki z gniazdka, ciągnąc za kabel, i nie
dotykać jej mokrymi rękami.
Kabel zasilający nie powinien swobodnie zwisać ze stołów lub
półek.
Ochrona osób
Nie pozostawiać dzieci bez opieki, aby uniknąć, by bawiły się
urządzeniem.
Dzieci nie zdają sobie sprawy z zagrożeń związanych ze sprzętem domowego użytku.
Nie zostawiać materiałów użytych do opakowania urządzenia
w zasięgu dzieci.
Niebezpieczeństwo poparzeń
Nie wolno kierować strumienia rozgrzanej pary i/lub gorącej
wody w kierunku własnym i/lub w kierunku innych osób.
Używać zawsze przeznaczonych do tego celu uchwytów lub
pokręteł.
Nie wolno wyjmować uchwytu ltra podczas parzenia kawy.
Podczas fazy rozgrzewania bloku zaparzającego kawę mogą
wypływać krople gorącej wody.
Nie wolno parzyć kawy, gdy wciśnięty jest wyłącznik (18 ponieważ włączona jest funkcja pary, a temperatura bojlera
jest zbyt wysoka.
Usytuowanie
Umieścić ekspres do kawy w bezpiecznym miejscu, w którym
nikt nie będzie mógł go przewrócić lub zostać zraniony.
Możliwość wydostania się gorącej wody lub pary: niebezpie-
czeństwo poparzeń!
Nie trzymać urządzenia w temperaturze niższej niż 0°C. Istnieje niebezpieczeństwo uszkodzenia urządzenia przez lód.
Nie używać ekspresu do kawy na świeżym powietrzu.
Nie umieszczać urządzenia w pobliżu bardzo rozgrzanych powierzchni lub otwartego ognia. Obudowa mogłaby się stopić
lub zostać uszkodzona.
Czyszczenie
Przed wyczyszczeniem urządzenia należy je wyłączyć za
pomocą przycisku ON/OFF, a następnie wyciągnąć wtyczkę
z gniazdka elektrycznego.
Poczekać, aż urządzenie się ochłodzi. Nie wolno zanurzać urządzenia w wodzie!
Surowo zabrania się przeprowadzania interwencji wewnątrz
urządzenia.
Nie używać do celów spożywczych wody, która stała w pojemniku przez kilka dni. Umyć pojemnik i napełnić go świeżą pitną
wodą.
Miejsce przeznaczone do użytku i konserwacji
W celu zapewnienia poprawnego funkcjonowania ekspresu do
kawy zaleca się przestrzeganie następujących warunków:
• Wybrać dobrze wypoziomowaną powierzchnię;
• Wybrać pomieszczenie wystarczająco oświetlone, higieniczne, z łatwo dostępnym gniazdem elektrycznym;
• Umieścić urządzenie w odpowiedniej odległości od ścian
zgodnie ze wskazówkami na rysunku (rys.A).
Ochrona urządzenia
Jeżeli urządzenie nie jest używane przez dłuższy okres czasu,
należy je wyłączyć i wyjąć wtyczkę z gniazdka. Przechowywać
urządzenie w suchym i niedostępnym dla dzieci miejscu. Chronić urządzenie przed kurzem i brudem.
Naprawy / Konserwacja
W przypadku awarii, usterek lub podejrzenia o usterkach powstałych w wyniku upadku należy natychmiast wyjąć wtyczkę
z gniazdka. Nie wolno włączać uszkodzonego urządzenia. Tylko
autoryzowane centra obsługi klienta mogą dokonywać interwencji i napraw. Producent nie ponosi odpowiedzialności za
ewentualne szkody spowodowane przez interwencje niewykonane według powyższych zaleceń.
),
Postępowanie w przypadku pożaru
W przypadku pożaru należy używać do gaszenia gaśnicy
z dwutlenkiem węgla (CO
kowych.
). Nie używać wody ani gaśnic prosz-
2
Polski
• 17 •
 Loading...