

ROCKit
Bluetooth True Wireless Headset
User’s manual

Contents
◼ Brief introduction…………...…………………………..…... 1
◼ Before use……………………………………………………. 1
1. Overview…………………………………………………...……1
2. Charging for headset..……………………………………………2
2. Charging for charging case..…………………………………2
◼ Getting started……..…………………………………………3
1. Wearing headset.............................................................3
2. One earbud connecting with cellphone......................................3
3. Two earbuds connecting with cellphone..........................................5
4. Earbuds pairing/connecting........................................................6
5. Function operation-use one earbud ....................................6
6. Function operation-use two earbuds ....................................8
7. Battery display........................................................................ ......8
8. Prompt tone………………………………… …………… .....9
9. Factory Reset……………………………………………..…..….9
◼ Care and maintenance……………………………..……….10
◼ FAQs……………………………………...…………………..11
◼ Specification……………………………...………………..…11

Welcome to use this True Wireless Bluetoothheadset, ROCKit. Please read
this user’s manual carefully before use.
◼ Brief introduction
ROCKit is a Bluetooth True Wireless Headset ,each ear piece comes with a
Microphone that can be used individually or used together for stereo
sound.The earbudsare equipped with a charging case, which is convenient to
carry and charge. The charging case supports wireless charging, and you can
charge the charging case with your wireless charger.
◼ Before use
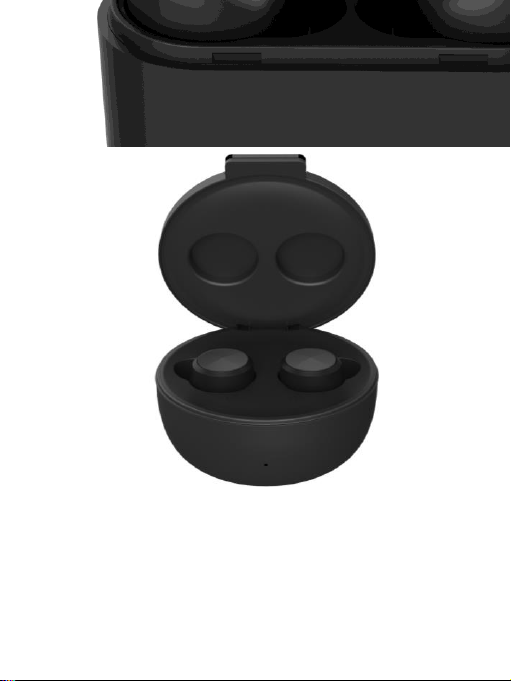
1. Overview
1
1
MFB touch-button
6
Top case
2
Charging metal contact
7
Charging pins
3
LED indicator (white)
8
Charging indicator light
4
Microphone
9
Type-C
5
LED indicator (red)
10
Wireless charge induction
area

2. Charging for headset
When the headset is low on power, thered Ledflashes three times every 1
minute. Please recharge the battery of the headset.
The way of charging for the earbuds as following:
1. Put the earbuds into the charging case to ensure that the charging pins
connect well, and start charging when you see the red indicator light of
the earbuds flashes slowly.
Red LED flashes slowly: Charging
Red LED off: Finish charging
2. Charging should be completed in roughly 1.5 hours.
Remarks:
◆ When charging the headset , please put the left earbud and the right
earbud in the corresponding charging position according to the L and R
mark, otherwise it will not be able to charge the headset.
◆ Please cover the top case, so that the earbuds and the charging case
connect well when they are charging.
3. Charging for charging case
When any of the following situations occurs, it indicates that the charging
case will be low power. You need to charge the charging case:
1) Put the earbuds into the charging case, and find that the white indicator
light of the charging case flashes once every 2 seconds. It means that the
charge case is low power.
2) When the indicator light of the charging casedoesn’t turn on and the
earphone cannot be charged, it means that the battery of the charging case
has been used up
The charging case supports USB cable charging and wireless charging. The
way of charging for the charging case as following:

Using USB cable
1) Plug the Type-C charging cable into the case’s charging jack.
2) Plug the USB cable into a USB port of PC or a 5Volt USB charge.
Wireless charging
1) Connect the wireless charger to the power cable. (some wireless
chargers with built-in batteries may not need to be connected to the power
cable)
2) Put the charging case in the center of the wireless charger as far as
possible for maximum efficiency charging.
White LED flashes: Charging
White LED on: Finish charging
3) Charging should be completed in roughly 1.5 hours.
4) If the earbuds are in the charging case, it can charge the earbuds while
charging the charging case.
Type-C charging Wireless charging
Remarks:
1) The battery is recyclable.
2) Batteries (battery pack or batteries installed) shall not be exposed to
excessive heat place, such as sunshine, fire or the like.
3) Please make sure the charging jack is dry before charge.
2

◼ Getting started
1. Wearing headset
a. Choose the suitable size ear tips
b. Ensure each earbuds is worn on the correct ear. “L” should be worn on the
left ear and “R”worn on the right ear.
Left ear Right ear
2.One earbud connecting with cellphone
Each earbuds can be connected singly to the cellphone.
1. Power on
1)When charging, the earbuds will turn on automatically when they are
taken out of the charging case.The earbuds emit Four Tone_Low Rising
and the white LED light 1 second.
2)If the earbuds are power off, you should press touch-button for about 3s
until white LED flashes as the same time the earbuds emits Four Tone_Low
Rising. Then release. This is now in the “Power on”state.
2.Pairing
1) After the earbud is taken out of the charging case, it will be power on.
Then it will connect back to the phone you paired with before.When the
earbuds and the cellphone fails to connect back, the earbuds will
automatically enter the matching state.
2) If the earbuds are power off, you should press touch-button for about 5s
and release it when the red LED and white LED flash quickly and
alternately. You will hear the Two Tone_Low Rising. The earbuds are
in”Pairing”mode

3
3.Connecting
To connecting your earbuds to a Bluetooth device, first ensure the device
has Bluetooth enable and it is in pairing mode(See your device manual for
setting pairing mode) . Once your earbuds are in pairing mode, you should
be able to see it in the list of Bluetooth devices.
You should see ROCKit-L for left earbuds and ROCKit-R for the right
earbuds appear in your contactable devices list.
You need to connect one of them to use as master.However,if you want to
use them singly,only connect the desired ear L or R, and turn off another
one.
4.Power off
1)Auto power off once put into charging case
2)Press touch-button about 5s and release it till red LED is on,and earbuds
promptFour Tone_High Falling.

Remark:
◆ The earbuds will automatically connect with the latest Bluetooth device
when power on again.If the earbuds are not connected, they will enter
into pairing mode automatically.
4
◆ Each earbuds will automatically switch to standby mode if disconnected
from device, and will power off automatically after 2 minutes to save
power.
3.Two earbuds connecting with cellphone
In this mode use two earbuds at the same time to enjoy stereo sound.
Turn on the master earbud (ROCKit-L) and connect it with you Bluetooth
device,then power on the other earbud and it will connect with each other
automatically.
Remarks:
◆ Pairing mode lasts for 2 minutes,the headsets will switch to power off
mode if no device connected within that time.
◆ The headset will connected with the latest device and successfully paired
automatically when powered on.
◆ If the headset is disconnected from the device beyond the distance, it will
automatically power off after 5 minutes, and it will automatically connect
when it returns to the effective distance within the first 3 minutes.

5
4.Earbuds pairing/connecting
Please use this step if two headset can not be connect with each
other.
1.Turn off two earbuds respectively(don’t put them into the charging case).
2.Clear the pairing list: Choose one of the earbuds. Firstly, enter the pairing
mode.Then hit the touch button 5 times, while the red light turns on for 1
second. The pairing list will be cleared when emits Four Tone_High Falling
after a "dang"prompt. The other headset cleans the pairing list by doing the
same.
3.The earbuds will enter TWS pairing mode automatically when they are
turned on (indicator light status: red and white lights flash slowly).After
successful connection, the master earbud(L) will emits Two Tone_Low
Rising after a "dang"prompt, which indicator light status will be: red LED
and white LED flash alternately(it keeps waiting to be paired with your
phone), while the slave earbud(R) will emits ‘Dang’ and indicator status
will be: white LED flash twice time every 10 seconds.
Remarks:
◆ In normally the two earbuds will connect automatically once you have
taken out of the charging case,which set in factory.
◆ You can connect the two earbuds according above operation if they failed
connecting.
5.Function operation-use one earbud

1. music
Function
Status of
earbuds
L
R
Prompt
tone
Play
Pausing
Double-click
touch-button
Double-click
touch-button
Dang
Pause
Playing
music
Double-click
touch-button
Double-click
touch-button
Dang
Previous
song
Playing
music
Press Left touch button about 2s
N/A
Dang
Next song
Playing
music
N/A
Press Right touch button about 2s
Dang
Volume up
Playing
music
N/A
Once-click Right
touch-button
Du
Volume
down
Playing
music
Once-click Left
touch-button
N/A
Du
2.Calling
Function
Status of earbuds
L
R
Prompt
tone
Cancel
calling
Calling
Once-click
touch-button
Once-click
touch-button
Du
Answering
Incoming call
ringing
Double-click
touch-button
Double-click
touch-button
Dang
Reject
Incoming call
ringing
Press touch button about 2s
Press touch button about 2s
Dang
End calling
During a call
Double-click
touch-button
Double-click
touch-button
Dang
Transfer
audio
During a call
Press touch button about 2s
Press touch button about 2s
Dang
Active SIRI
Connected device
Triple-click
touch-button
Triple-click
touch-button
Dang

Volume up
During a call
N/A
Once-click
touch-button
Du
Volume down
During a call
Once-click
touch-button
N/A
Du
6.Function operation----two earbuds connecting with cellphone
1. music
Function
Status of
earbuds
L
R
Prompt
tone
Play
Pausing
Double-click
touch-button
Double-click
touch-button
Dang
Pause
Playing
music
Double-click
touch-button
Double-click
touch-button
Dang
Previous
song
Playing
music
Press Left touch button about 2s
N/A
Dang
Next song
Playing
music
N/A
Press Right touch button about 2s
Dang
Volume up
Playing
music
N/A
Once-click Right
touch-button
Du
Volume
down
Playing
music
Once-click Left
touch-button
N/A
Du
2.Calling
Function
Status of earbuds
L
R
Prompt
tone
Cancel
calling
Calling
Once-click
touch-button
Once-click
touch-button
Du
Answering
Incoming call
ringing
Double-click
touch-button
Double-click
touch-button
Dang
Reject
Incoming call
ringing
Press touch button about 2s
Press touch button about 2s
Dang
End calling
During a call
Double-click
touch-button
Double-click
touch-button
Dang
Transfer
audio
During a call
Press touch button about 2s
Press touch button about 2s
Dang

Active SIRI
Connected device
Triple-click
touch-button
Triple-click
touch-button
Dang
Volume up
During a call
N/A
Once-click
touch-button
Du
Volume down
During a call
Once-click
touch-button
N/A
Du
3. Gang control to power off
When using two earbuds, either earbud of the left or right turns off, and the
other earbud will be turned off at the same time.
Remarks:
◆ If headset in calling mode, both earbuds have voice and can operate
function, but only the earbud which connecting with cellphone can pick
up sound.
◆ When adjusting the volume, the prompt sound will only be sounded on
the corresponding earbuds.But when the volume is set to the maximum
or the minimum, both earbuds will sound the prompt sound, which is 2
“Du”.
7. Battery display
When the earbuds are connected to an IOS device, it will display the battery
of earbuds on the device. When the earbuds is low on power ,the battery
indicator will turn red and show a depleted battery icon.The headphone
will also give an audio prompt to charge your headset.
Full charge Low battery

8. Meaning of indicator light
indicator light
Prompt tone
Earbuds
Red and white LED flash
quickly alternately
Pairing mode with phone
Red and white LED flash
slowly alternately
TWS pairing mode
Red LED flashes every 8.5
seconds
Unconnected
White LED flashes once every
9.5 seconds
Connected
Red LED flashes three times
every minute
Low battery
Charging
case
White LED flashes every 2
seconds
Low battery
White LED flashes three times
every two seconds
Full battery
White LED kept on
Has been charged
9. Factory Reset
When the earbuds are in the pairing mode, five times click the touch button,
and the factory reset when the red light turns on for 1 second. At the same
time, you will hear Four Tone_High Falling prompt after a "dang"tone and
turn off.
Five times click the touch button
Remarks:
◆ After factory reset, the paired list of two earbuds as well as earbuds and
mobile phone will be deleted. The earbud does not automatically
reconnect the mobile phone and the other earbud after turning on.
◆
◆ After factory reset, when the earbud turns on again, it will automatically
enter the TWS pairing mode (red and white lights flash slowly
alternately). Two earbuds will be pairedautomatically. After TWS

connection, left earbuds will continue to wait for pairing with the mobile
phone (red and white lights flash quickly alternately).
◼ Care and maintenance
Read the following recommendations carefully before using BTH109.
Following these you will be able to enjoy this product for many years.
◆ Keep it dry and don’t put it in the dump place to avoid the product’s
internal circuit being affected. Don’t wear the headset when in strong
exercise toavoid sweat enter.
◆ Keep the product away from direct sunlight or hot places. High
temperatures will shorten the life of electronic devices, destroy the
battery or distort certain plastic parts.
◆ Don’t expose the product to cold areas. It may damage the internal circuit
board.
◆ Don’t try to disassemble the product as it may get damaged if you are not
professional.
◆ Don’t let it fall down onto the floor or other hard surfaces. The internal
circuit might get damaged.
◆ Don’t use intensive chemical products or detergent to clean the product.
◆ Don’t scratch the surface with sharp things.
◆ Don’t use this product during strenuous exercise. It may get damaged by
sweat.
In case the product doesn’t function properly, send it to the store you bought
it. The staff will help you to solve the problem
◼ FAQs
1. What does it mean when red LED flashes slowly three times a
minute?
Battery is low power, need to be recharged.
2. Why is the red LED off when charging?
a) The charging case may not have enough power to charge the headset.
Please charge the charging case.
b) Make sure the metal contacts of the earbud and charging case are free of
obstacles.
a) The battery may dry up. Please charge the battery for 30 minutes, and
then the red LED will be on.
3. Why can’t I hear the sound on the headset?

a) Make sure the volume is not too low or muted;
b) Make sure the headset connects with the mobile phone correctly;
c) Make sure the distance between the headset and the cell phone is in the
available Bluetooth range.
4. Why can’t I hear the sound clearly on the headset?
a) Make sure the mobile phone is in the strong signal area;
b)Make sure the headset is in the available range. and no other block。
5. Why the pause/play, last/next song not function when playing music?
Make sure your Bluetooth device supports AVRCP (Audio/Video Remote
Control profile)
◼ Specifications
Bluetooth version
Bluetooth V5.0
Bluetooth profiles
HFP, HSP,A2DP and AVRCP
Operating distance
10 meters
Music time(one earbud)
Up to 6 hours
Music time(two earbuds)
Up to 5 hours (maximum volume)
Up to 8 hours (50% volume)
Talk time
UP to 6hours
Standby time
About 130 hours
Charging time for earbud
About 1.5 hours
Charging time for case
About 1.5 hours
Charging input for
earbud
DC 5.0V 100mA
Charging inputfor case
USB charging: DC5.0V 500mA
Wireless charging: DC5.0 700mA
Weight
One earbud:5.6 g
Charging case:50g
Measure
Earbud:22*20*26.1mm
Charging case:64*32mm
11
NOTE: This equipment has been tested and found to comply with the
limits for a Class B digital device, pursuant to part 15 of the FCC Rules.
These limits are designed to provide reasonable protection against
harmful interference in a residential installation. This equipment
generates uses and can radiate radio frequency energy and, if not
installed and used in accordance with the instructions, may cause

harmful interference to radio communications. However, there is no
guarantee that interference will not occur in a particular installation. If
this equipment does cause harmful interference to radio or television
reception, which can be determined by turning the equipment off and
on, the user is encouraged to try to correct the interference by one or
more of the following measures:
- Reorient or relocate the receiving antenna.
- Increase the separation between the equipment and receiver.
-Connect the equipment into an outlet on a circuit different from that to
which the receiver is connected.
-Consult the dealer or an experienced radio/TV technician for help
Changes or modifications not expressly approved by the party
responsible for compliance could void the user's authority to operate
the equipment.
This device complies with Part 15 of the FCC Rules. Operation is
subject to the following two conditions:
(1) this device may not cause harmful interference, and
(2) this device must accept any interference received, including
interference that may cause undesired operation.
 Loading...