

Sachtler Video 18 Plus, Video 20 Plus User Manual
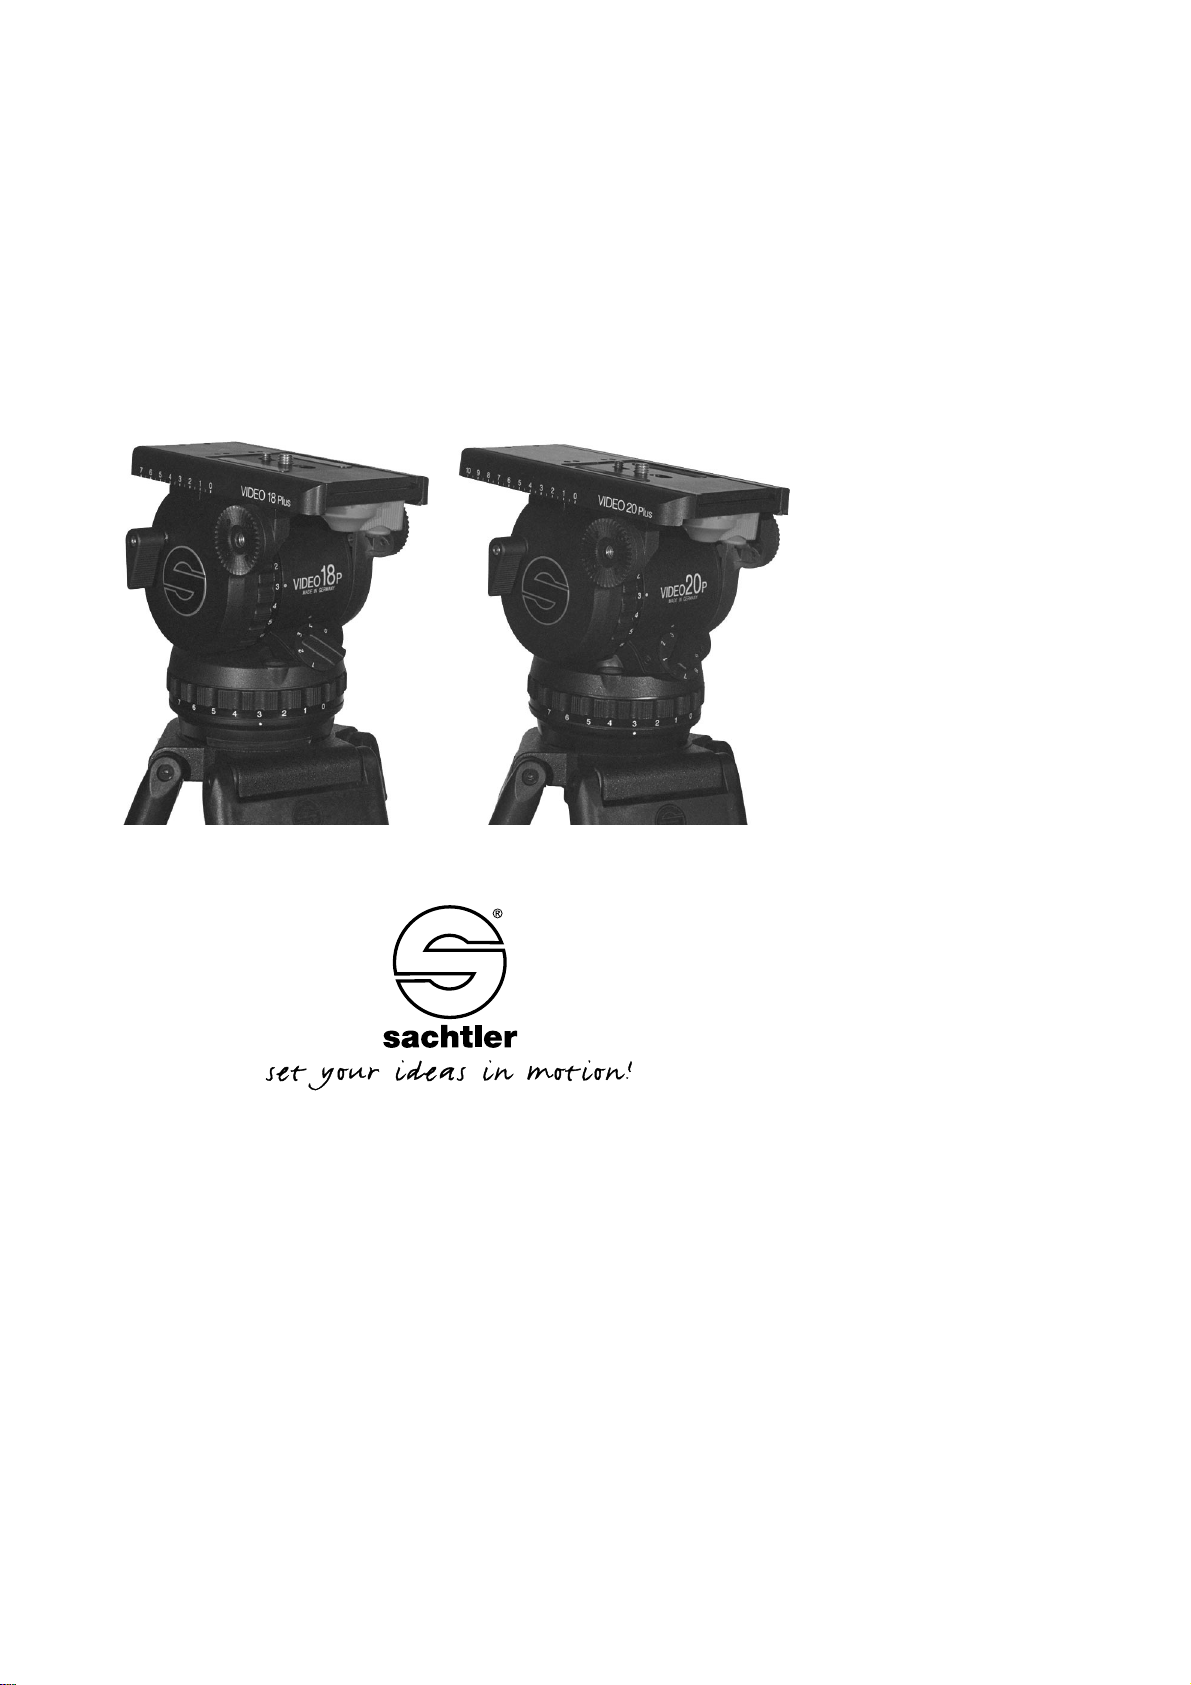
Video 18 Plus
Video 20 Plus
Bedienungsanleitung
Manual
Fluid Head
Hydrokopf

© by sachtler. Alle Rechte vorbehalten / All rights reserved
Version: 1.5/09/02
Ausgabedatum / Issue date: 04/04
Bestellnr./ Order no.: sko13t180a
sachtler GmbH & Co.KG
Gutenbergstrasse 5 Postfach / P.O.BOX 1648
D-85716 Unterschleissheim D-85706 Unterschleissheim
Germany Germany
Telefon: (+49) 89 32 15 82 00
Telefax: (+49) 89 32 15 82 27
E-Mail: contact@sachtler.de
Homepage: http://www.sachtler.com

- I -
Inhaltsverzeichnis / Table of contents
Inhaltsverzeichnis
1 Safety instructions................................................................1
2 Operating elements..............................................................1
3 Operation..............................................................................2
3.1 Levelling of the fluid head............................................2
3.2 Mounting of the camera and / or plate .........................2
3.3 Positioning of the camera.............................................3
3.4 Setting of the damping.................................................4
3.5 Brakes..........................................................................4
3.6 Change of the batteries ...............................................4
4 Technical specifications........................................................5
5 Warranty...............................................................................5
Table of contents
1 Sicherheitshinweise..............................................................7
2 Bedienelemente....................................................................7
3 Betrieb..................................................................................8
3.1 Nivellieren des Hydrokopfes.........................................8
3.2 Entnehmen und Einsetzen der Kamera(platte)............8
3.3 Einstellen der Kamerabalance.....................................9
3.4 Einstellen der Dämpfung............................................10
3.5 Bremsen.....................................................................10
3.6 Austausch der Batterien.............................................11
4 Technische Daten...............................................................11
5 Garantie..............................................................................12

Bedienungsanleitung
Video 18 Plus
Video 20 Plus
- II -

- 1 -
Video 18 Plus
Video 20 Plus
Manual
1 Safety instructions
➪ When placing the camera plate, make sure not to hold
fingers within the range of the locking lever, since it will snap
back.
➪ When the camera is mounted, the clamping screw of the
fluid head must only be released if camera and tripod are
secured against falling over.
➪ When releasing the vertical brake or the clamping for the
balance plate ensure that the camera is secured against any
sudden movement.
➪ Before transport reset fluid damping to “0”.
➪ Don´t change drag while you are panning or tilting.
2 Operating elements
Horizontal setting of fluid damping
Vertical brake
Lock of the sliding
balance plate
Locking lever of Touch &Go
system
Vertical setting of fluid damping
Counterbalance knob
Touch Bubble
Horizontal brake
Battery holder of the
bubble illuminator
Clamping screw of
the fluid head
Safety lock of
Touch & Go
system
VIDEO 18/20 plus
Clamping lever of pan arm
Camera plate
Manual
Video 18 Plus
Video 20 Plus
- 2 -
3 Operation
3.1 Levelling of the fluid head
Apply the vertical brake and hold the camera with one
hand. Open the clamping screw of the fluid head and move
the head in such a way, that the bubble moves into the
level´s black circle.Tighten the clamping screw firmly.
Touch Bubble
The Video 18 Plus and the Video 20 Plus have a self illuminating Touch Bubble which allows easy levelling even under
unfavourable lighting conditions.
The illumination is activated by strong tapping on the bubble.Depending on the force applied the bubble will glow up
to 45 seconds.
3.2 Mounting of the camera and /or plate
The Video 18 Plus and the Video 20 Plus are delivered with
the Touch & Go camera quick locking system.
➪ Apply the horizontal and vertical brake.
➪ Hold the camera and/ or plate with one hand.
➪ Grasp the locking lever with your thumb and index and
pull down the red safety button.
➪ Move the locking lever as far as possible to the left and
take out the camera and/or plate.
➪ Attach the camera plate to the tripod adaptor plate
(camera accessory) around the camera’s centre of
gravity.
➪ By mounting the camera and/ or plate again it will lock
automatically and the locking lever will snap back
audibly into its initial position.
 Loading...