

Sachtler SOOM Users Manual

SOOM
Manual
Benutzerinformation

© by sachtler®. All rights reserved / Alle Rechte vorbehalten
Original Manual / Originalbetriebsanleitung
Version: 2.0/12/13
Issue date / Ausgabedatum: 12/13
Order no / Bestellnr. S2003-4980
sachtler
®
Vitec Group Videocom Division
www.vitecgroup.com
Erfurter Strasse 16 Postfach / P.O.BOX 2039
D-85386 Eching D-85380 Eching
Germany Germany
Telefon: (+49 89) 321 58 200
Telefax: (+49 89) 321 58 227
E-Mail: contact@sachtler.de
Internet: http://www.sachtler.com
Wir wollen, daß Ihre Sachtler
Produkte immer auf dem
aktuellsten Stand sind.
Deswegen behalten wir uns
technische Änderungen vor.
We want you to receive
Sachtler products that are
always state of the art.
Therefore we reserve the
right to make changes based
on technical advances.
- I -
SOOM
Table of contents
1 Safety Instructions / General Information..........................1
2 Intended Use.....................................................................1
3 SOOM TriPod and SOOM TriSpread................................2
3.1 Operating Elements ...................................................2
3.2 Mounting and dismantling of the tripod´s
rubber feet .................................................................3
3.3 Mounting and dismantling of the
TriSpread ...................................................................3
3.4 Height adjustment of the TriPod................................4
3.5 Mounting and dismantling of the
SOOM clamping bowl................................................5
3.6 Mounting and removal of the fluid head....................6
3.7 Use of the SOOM TriSpread as
a baby-tripod .............................................................6
3.8 SOOM TriPod carrying handle...................................8
4 SOOM Tube ......................................................................9
4.1 Operating Elements ...................................................9
4.2 Use as a Tube..........................................................10
4.3 Use as a Monopod ..................................................13
5 Technical Data ................................................................14
6 Accessories.....................................................................15
7 Inspection and Cleaning .................................................15
8 Warranty..........................................................................15

Inhaltsverzeichnis
1 Sicherheitshinweise / Grundlegende Hinweise...............16
2 Bestimmungsgemäße Verwendung ................................17
3 SOOM TriPod und SOOM TriSpread..............................18
3.1 Bedienelemente ..............................................................18
3.2 Montage und Demontage der Gummifüße..............19
3.3 Montage und Demontage des
TriSpread .................................................................19
3.4 Höhenverstellung des TriPods.................................20
3.5 Montage und Demontage der
SOOM Klemmschale ...............................................21
3.6 Montage und Demontage eines Fluidkopfes...........22
3.7 Verwendung des SOOM TriSpreads
als Baby-Stativ.........................................................22
3.8 SOOM TriPod Tragegriff ..........................................24
4 SOOM Tube ....................................................................25
4.1 Bedienelemente .......................................................25
4.2 Verwendung als Tube ..............................................26
4.3 Verwendung als Monopod.......................................29
5 Technische Daten ...........................................................30
6 Zubehör...........................................................................31
7 Inspektion und Pflege .....................................................31
8 Gewährleistung ...............................................................31
- II -
SOOM
- III -
SOOMManual
ManualSOOM
- 1 -
1 Safety Instructions / General Information
-> Before using the SOOM system read the manual first.
-> Before mounting a fluid head or a camera check that
the tripod system has a solid footing and that the tripod
leg-extensions resp. the mid-level spreader arm
extensions are clamped securely.
-> Position the tripod legs so that the center of gravity of
the payload is centered to the tripod’s footprint.
-> The system should always be used with a spreader.
-> Before releasing the clamping bowl from the fluid head
(with a mounted camera), make sure
the tripod is secured against falling over.
WARNING: Extra care should be taken when operating the
SOOM XL System towards its maximum height range due to
reduced stability of the system. Also double check the firmly
mount of camera, fluid head and other equipment, when operating over-head.In addition, the rules and regulations govering
the prevention of accidents must also be observed for the operating site being used.
2 Intended Use
The SOOM products were developed to accept fluid heads,
which in turn enable pan- and tilt movements of cameras. The
maximum payload is specified in chapter 5.
The SOOM products allow - as single product or as a
system - almost continuous adjustment of the camera´s lens
height from approx. 45 cm (18 “) to 2.5 m (99”); just by simple
arrangements of the system´s components. Also readjustments to next camera shots are provided by guide connector
technology.
- 2 -
SOOMManual
3 SOOM TriPod and SOOM TriSpread
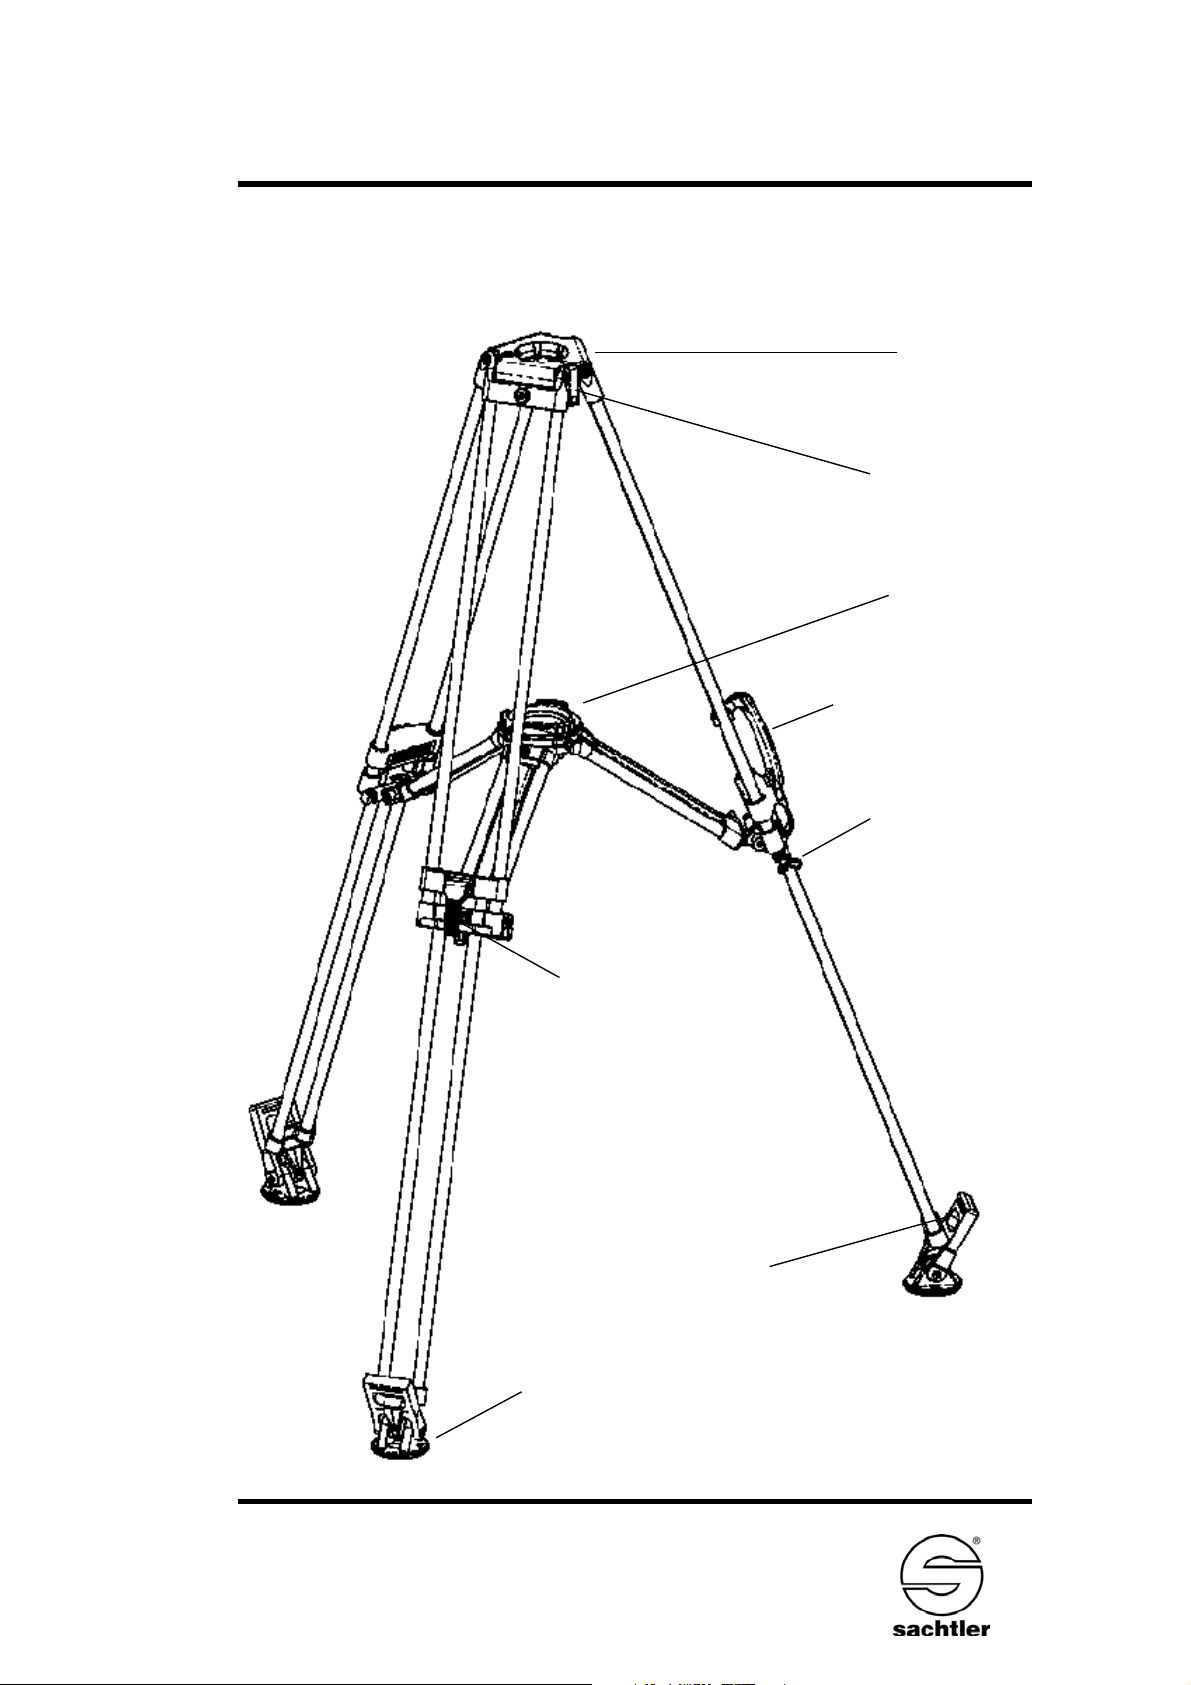
3.1 Operating Elements
Ring bowl
Safety lever
TriSpread
Carrying handle
Bungee cord
Rubber pull-loop
picture 1
Rubber feet
Clamping lever for leg
extension
Manual
- 3 -
SOOM
3.2 Mounting and dismantling of the tripod´s rubber
feet
-> Place a rubber foot on the floor, with the textured
side of the rubber pull-loop facing out.
-> Position a foot of the tripod on top of the roller in
the center of the rubber foot unit.
-> Grasp the pull-loop of the rubber foot and hook it
over the latching nose on the foot of the tripod.
-> Repeat this procedure for the remaining rubber
feet.
-> To dismantle, unhook the rubber pull-loop from the
latching nose and remove the rubber foot unit from
the foot of the tripod.
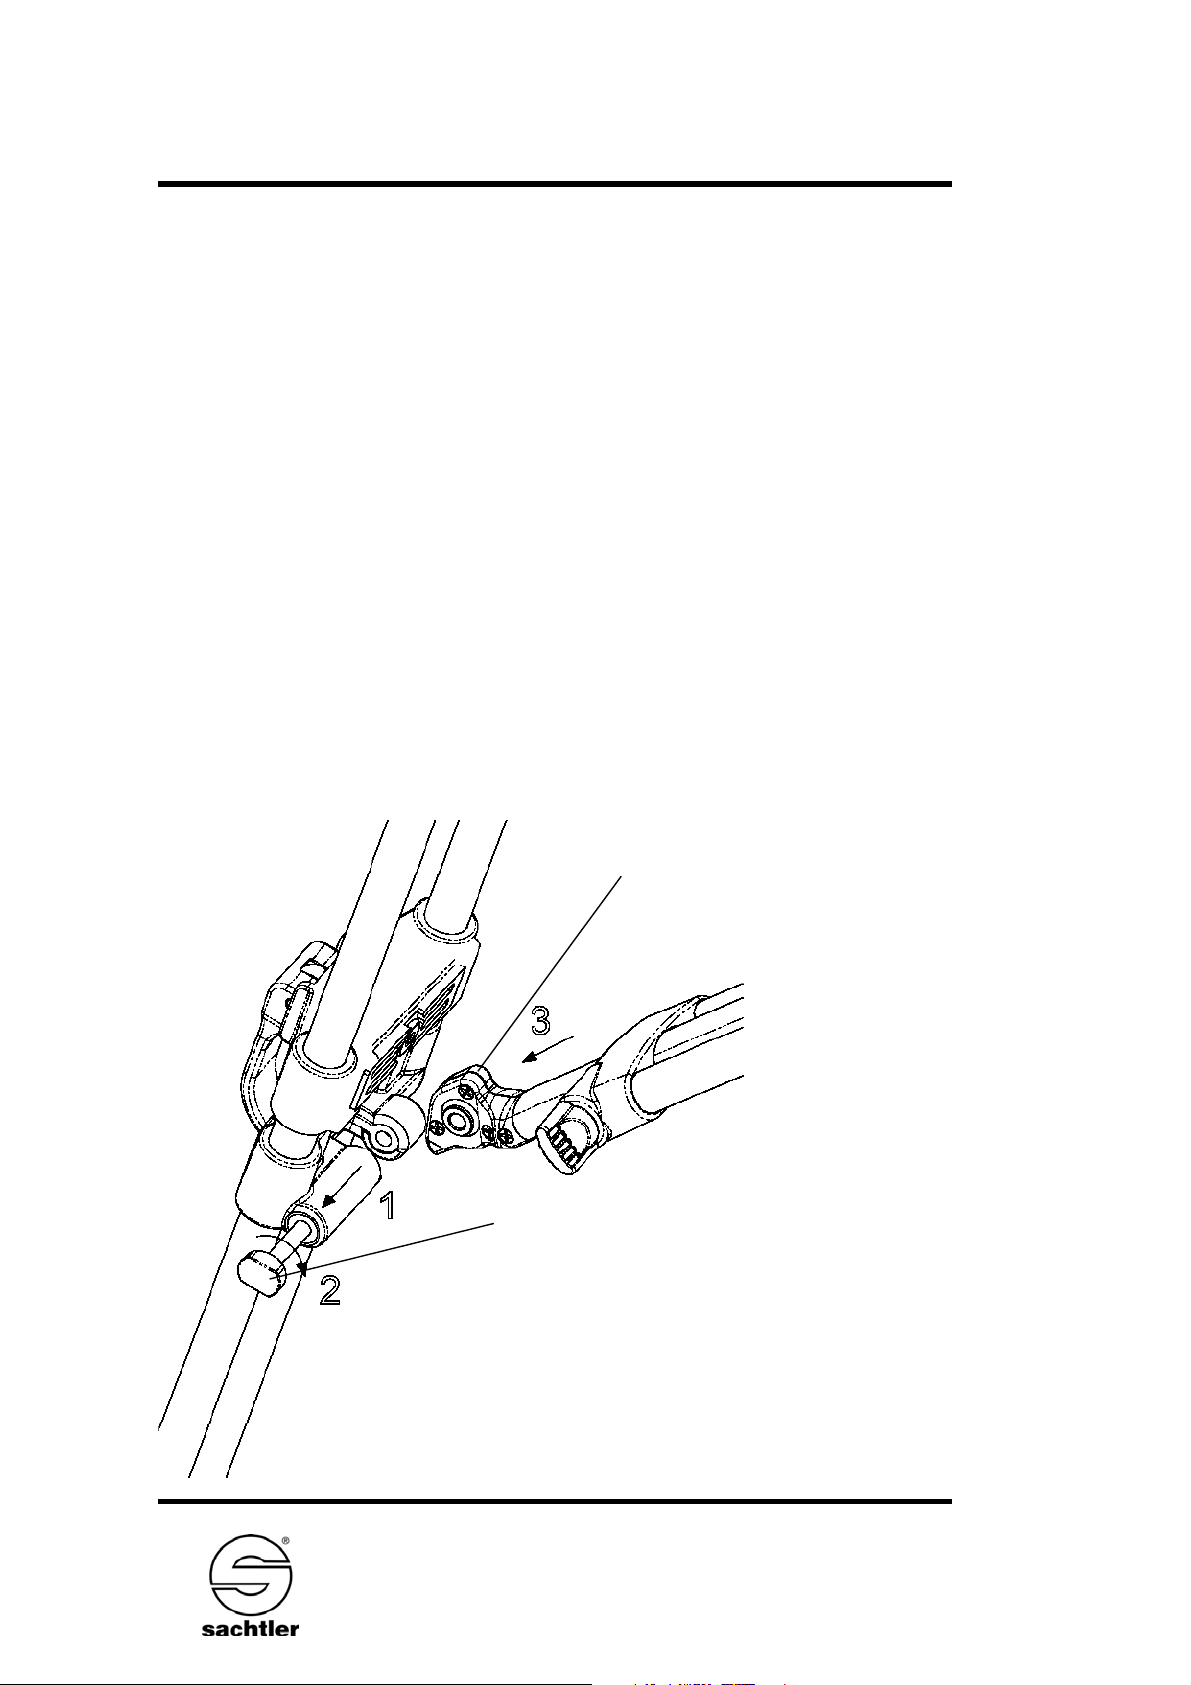
3.3 Mounting and dismantling of the TriSpread
footpiece of the TriSpread
Locking bolt
picture 2

- 4 -
SOOMManual
-> Pull the locking bolt out to its end stop (1) and turn
it 90° (2). The bolt will turn easily in either direction.
-> Once in this position, the locking bolt is effectively
blocked (bayonet lock).
-> Adjust the rotating foot piece of the TriSpread arm
in a straight position.
-> Insert the footpiece into the connecting part of the
TriPod. Insert the foot piece, aligning it between
the bolt and the end portion of the bolt housing to
connect to the tripod (2).
-> Turn the locking bolt back until it snaps in place.
Check to ensure that the bolt has snapped back
completely. It is recommended that the hole of the
locking bolt be kept clean. Otherwise, it may be
necessary to press down on the bolt to snap it in
place.
-> To dismantle, pull the locking bolt back out, turn it
90° and remove the TriSpread arm. Release the
lock position afterwards.
3.4 Height adjustment of the TriPod
-> The level bubble on the TriPod´s ring bowl supports an easy leveling.
-> To fully extend the TriPod, remove the carrying
handle by only pressing it from the TriPod leg
tubes (see also chapter 3.8).
-> In case where the height of the TriPod needs to be
adjusted with a remaining footprint, the length of
the arms of the TriSpread needs to be adjusted
too (as it does with all other tripods with mid-level
spreader).
ManualSOOM
- 5 -
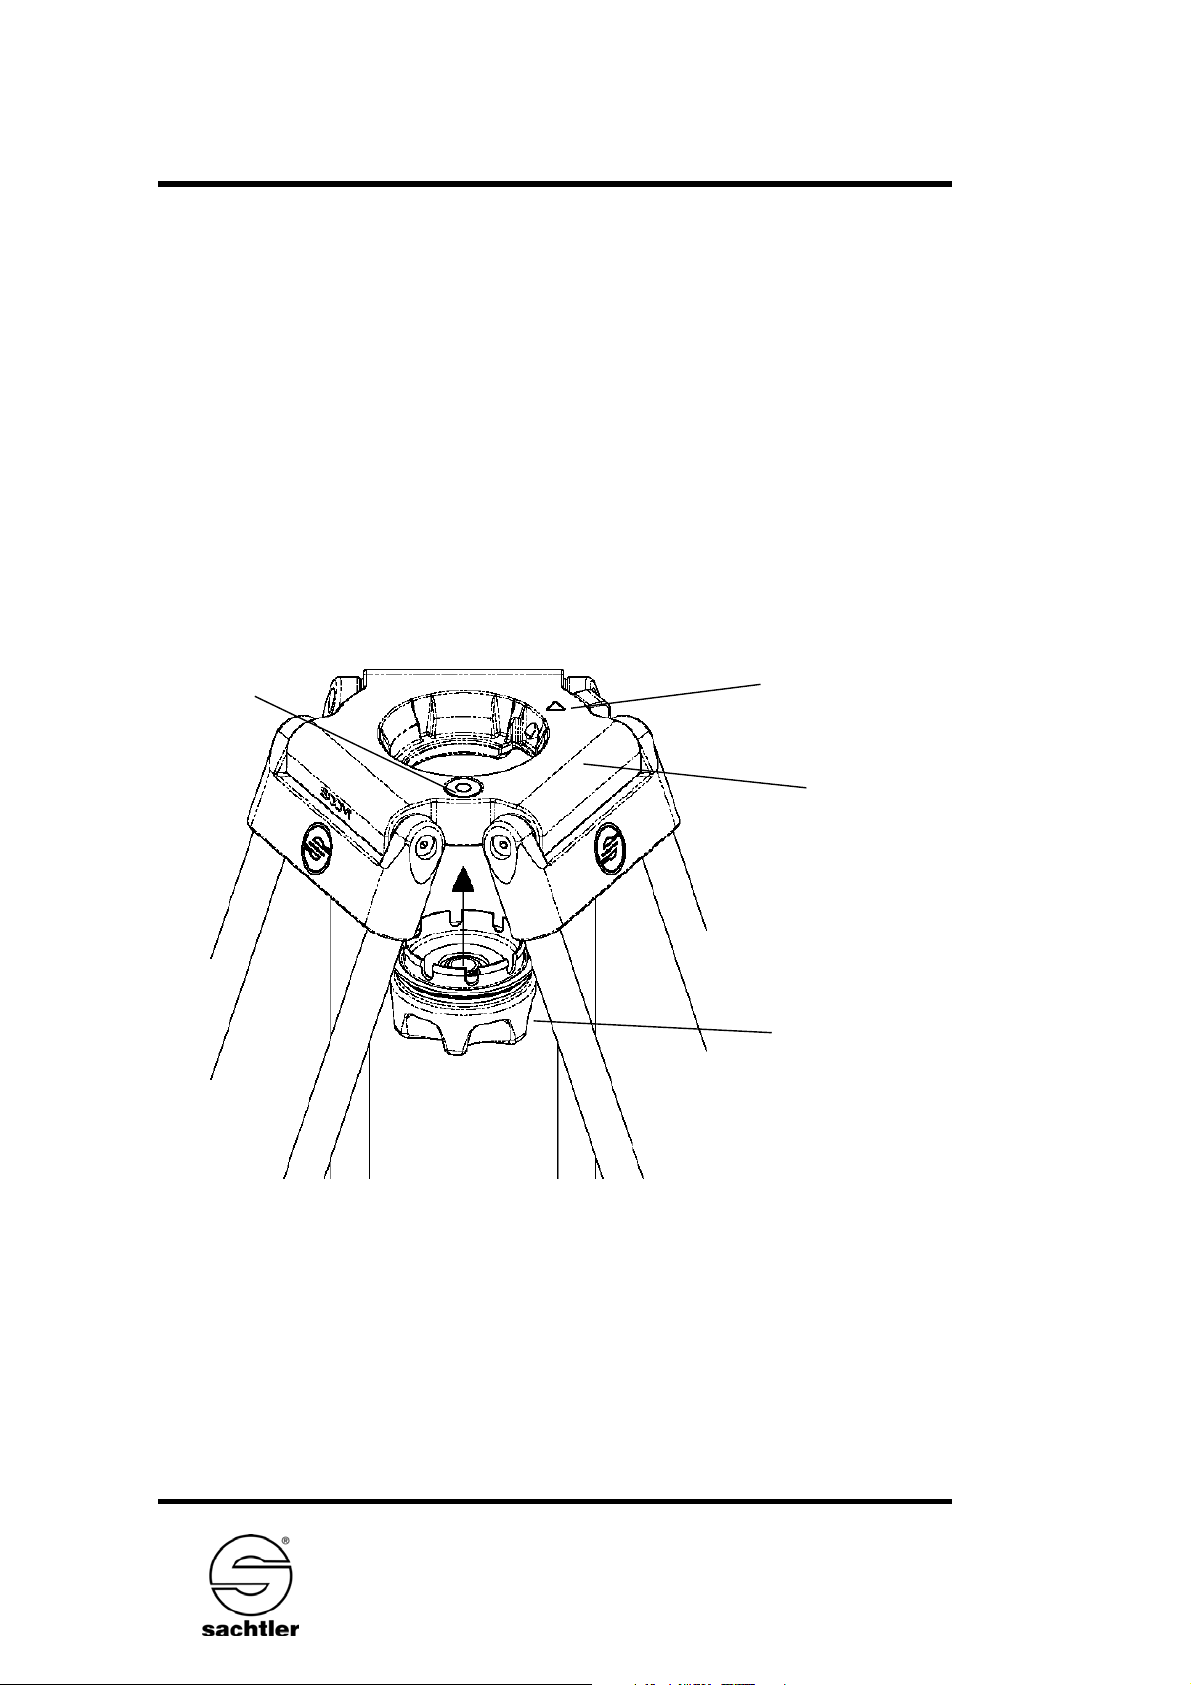
3.5 Mounting and dismantling of the SOOM clamping
bowl
-> The same clamping bowl is used with the TriPod,
the TriSpread and the SOOM Tube.
-> To mount the clamping bowl, press it from the bottom into the bowl ring of the TriPod, TriSpread or
Tube, until it snaps in place.
-> To remove, push from the top of the clamping
bowl until it snaps out of the ring bowl.
-> Therefore open the arm´s clampings before adjusting the height and close them again after the
height adjustment.
-> The angle of the arms of the spreader can be
adjusted in two positions (see also chapter 3.7).
-> Typically the flat position is used for regular use of
the spreader; the stepped position is only recommended if narrow footprints are needed.
Level bubble
Indication for
Tube Mounting
Ring bowl
Clamping bowl
picture 3
- 6 -
SOOMManual
3.6 Mounting and removal of the fluid head
-> Mount the clamping bowl as described in chapter
3.5.
-> Insert the fluid head´s threaded connector bolt
into the threaded hole at the base of the clamping
bowl. Hold the head with one hand while turning
the turning knob of the clamping bowl, until the
head touches the ring bowl.
-> Level the fluid head and anchor it tightly by turning the locking knob at the bottom of the SOOM
clamping bowl.
-> To remove the fluid head, first turn the locking
knob counterclockwise. Turn the fluid head to free
the threaded connector bolt from the clamping
bowl. After a few turns, it should lift off to free the
connector bolt, and the fluid head should lift right
off the ring bowl.
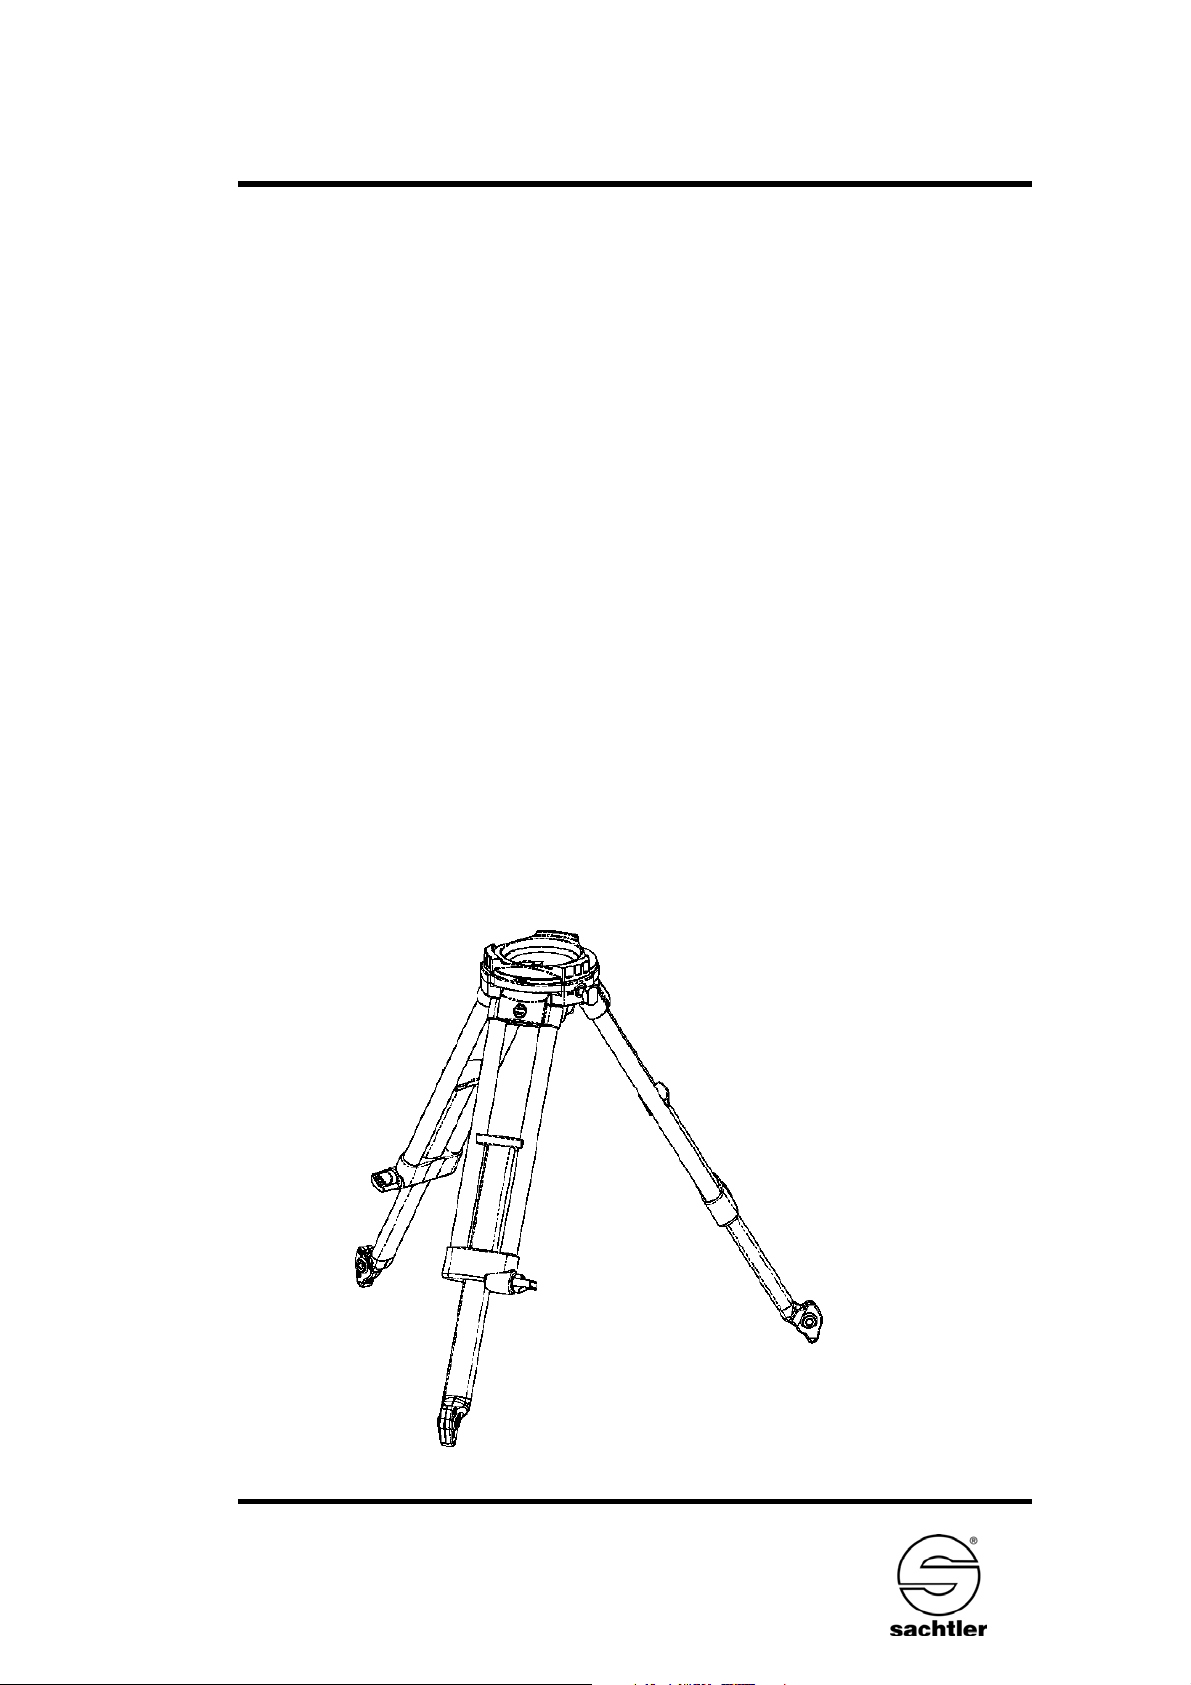
3.7 Use of the SOOM TriSpread as a baby-tripod
picture 4
ManualSOOM
- 7 -
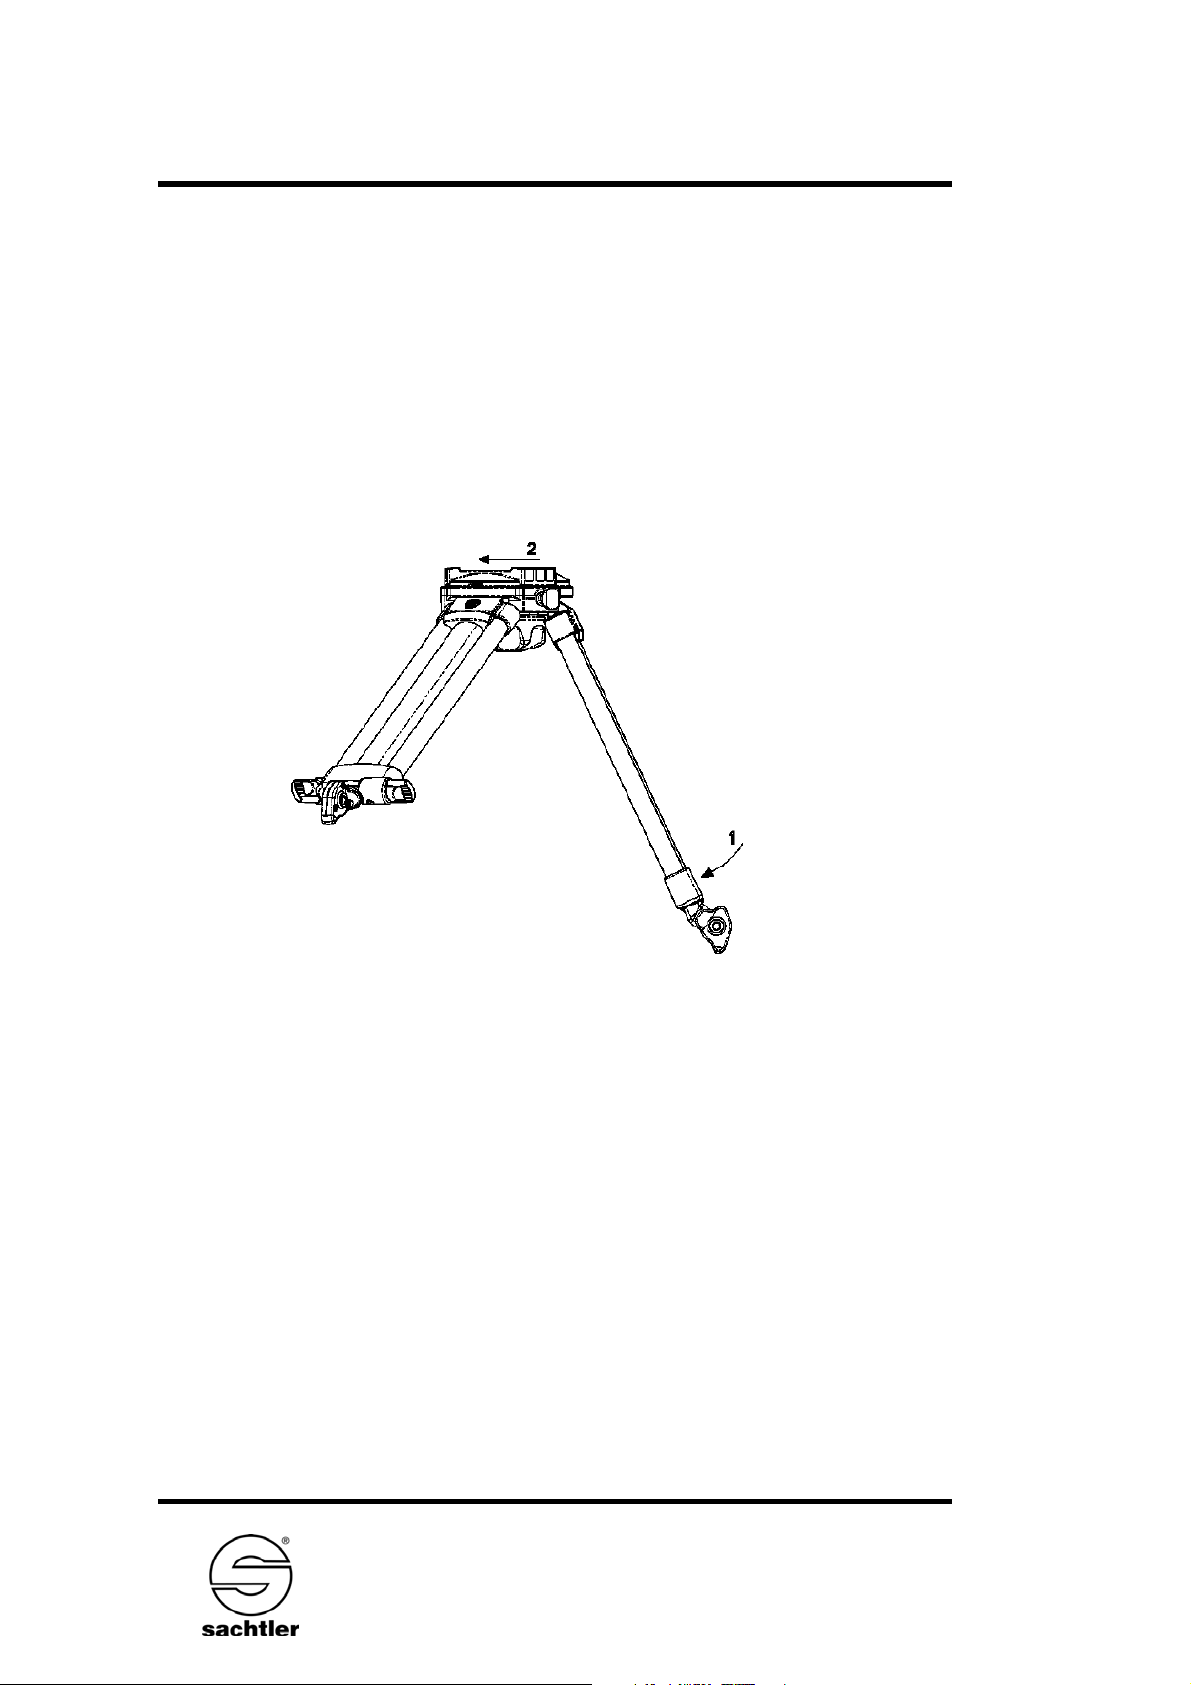
-> Dismantle the TriSpread from the TriPod, as
described in chapter 3.3.
-> Mount the SOOM clamping bowl into the ring bowl
from bottom until it snap in place, as described in
chapter 3.5.
-> The height range can be adjusted via extension of
the arms and by adjusting the arm angles.
Angle setting:
-> Fold them to the inside (1) to release the pressure
on the arms of the TriSpread.
-> Turn the ring at the top of the ring bowl in the
desired direction (2).
-> TriSpread should always be set to HIGH or LOW
position. It is not intended to function at positions
between these settings.
picture 5
 Loading...