

Page 1
The right way to attach almost anything to metal roofs!
Components
Installation Instructions
S-5!® Warning! Please use these products responsibly! Visit our
website or contact your S-5! distributor for available load test
results.
IMPORTANT NOTICE to S-5! users: Due to the many variables
involved with specific panel products and job particulars, -the
manufacturer cannot and does not express any opinions as to the
suitability of any S-5! assembly for any specific application and
assumes no liability with respect thereto.
S-5! products are tested for ultimate holding strength on various
profile types, materials, and brands of manufacture. This information
is available from the S-5! website: www.S-5.com. This document is an
installation guide only and the photographs and drawings herein are
for the purpose of illustrating installation, tools and techniques, not
system designs. Information contained within is intended to apply to
the document as a whole.
The S-5-N and S-5-N Mini are designed to fit numerous (but
dimensionally specific) 1” nail strip profiles. These profile types are vast
with new variations coming into the market regularly. These clamps
may not be suitable for every such profile. To avoid potential damage
to roof seam it is important to verify clamp-to-roof suitability prior to
installation. Consult the S-5! load table for suitability.
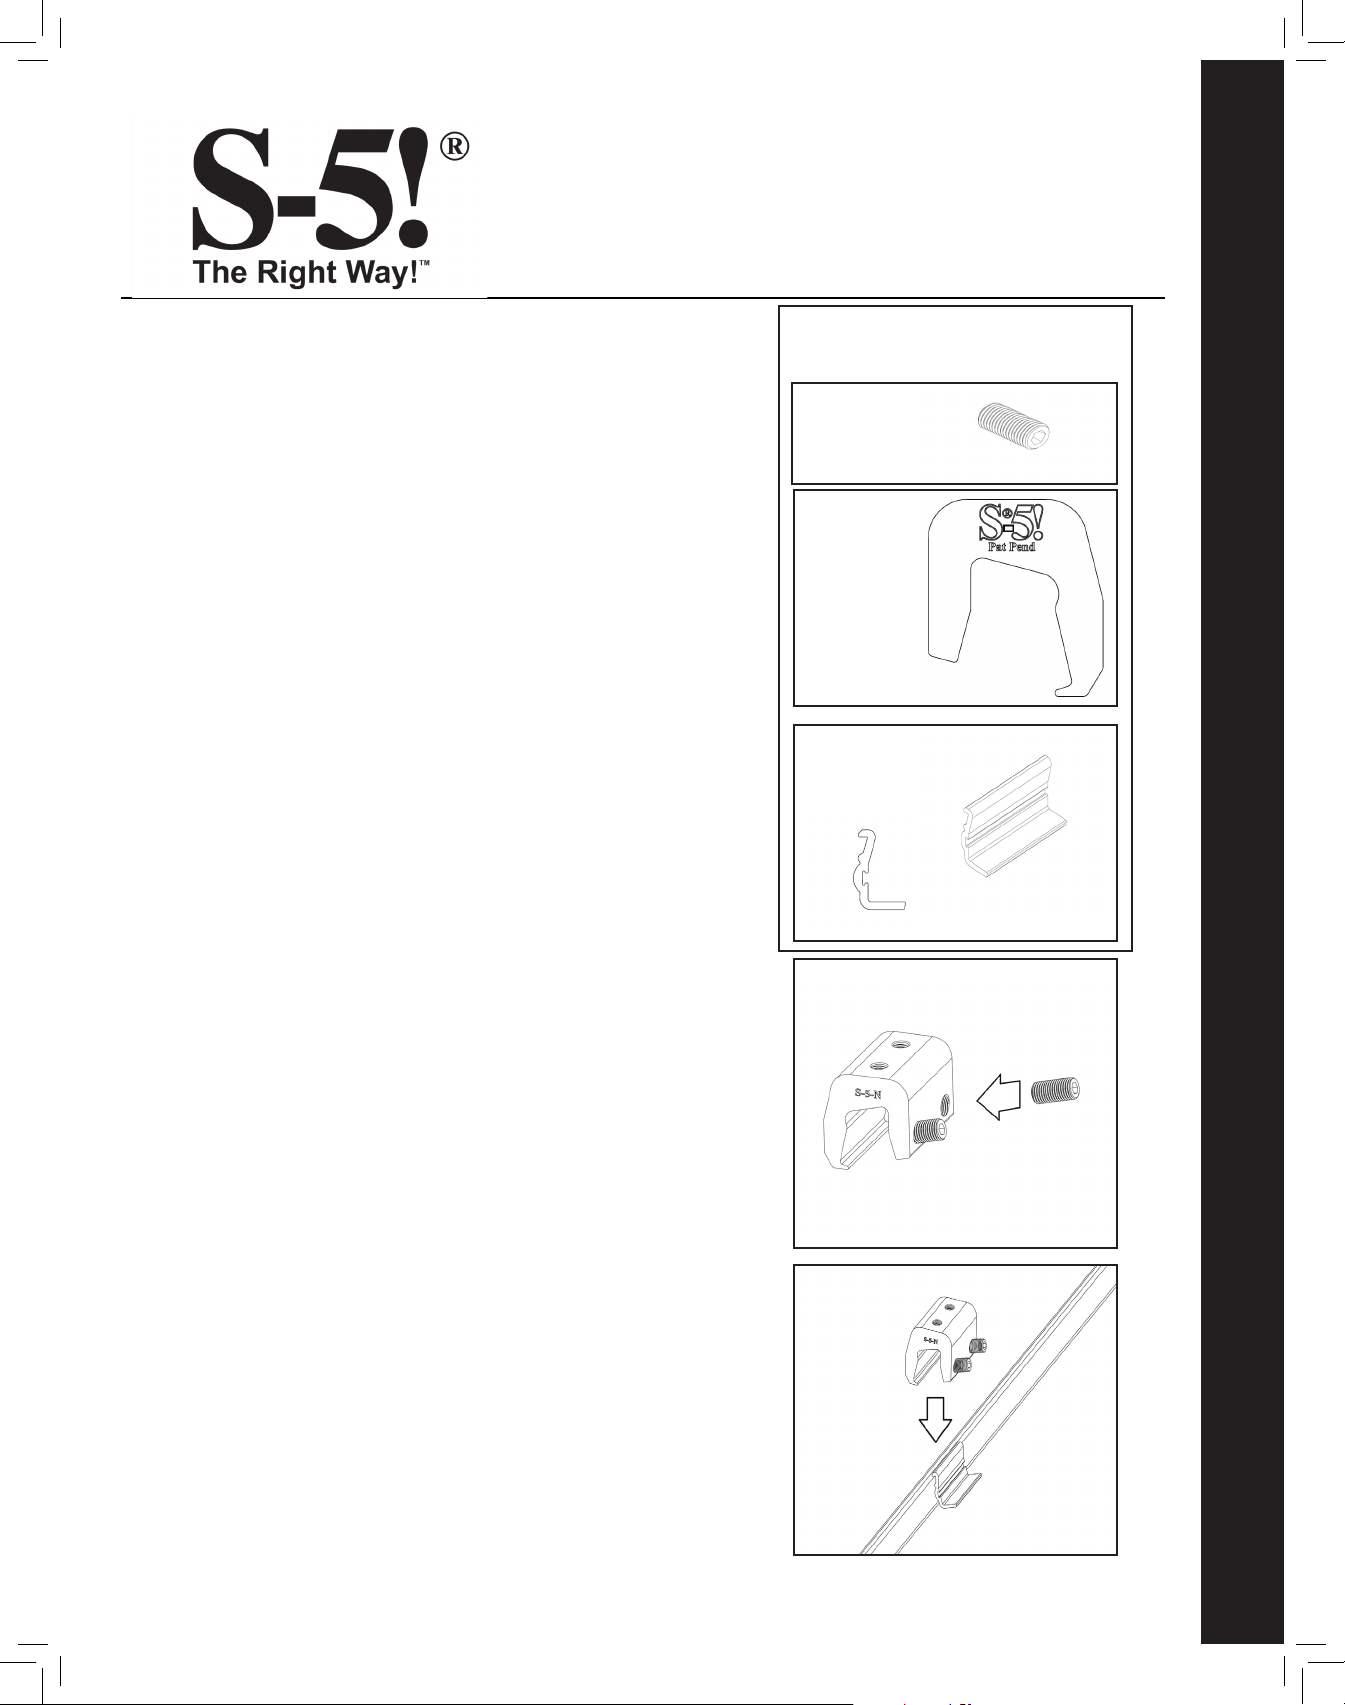
0.80” Round Point
Setscrew
S-5-N Clamp
or S-5-N Mini
Clamp
S-5-N Insert
or S-5-N Mini
Insert
Tools Needed
• Screw Gun*
• 3/16” Allen Bit Tip (provided)
• Dial-Calibrated Torque Wrench
(For accurate tension values, do NOT use a clicking torque
wrench).
To Install S-5-N and
S-5-N Mini
1. Load the setscrew(s) into the clamp. (Fig 1)
2. Position clamp and insert at desired location along
the seam as shown. (Figs 2,3)
NOTE: On some panel proles it may be necessary to
place the clamp onto the seam rst and then slide the
insert into it.
1.
2.
S-5-N and S-5-N Mini Install Instructions
These instructions are for use by those experienced in the trade. Always follow appropriate safety precautions and use appropriate tools.
888-825-3432 www.S-5.com
Page 2
S-5-N and S-5-N Mini Installation Instructions
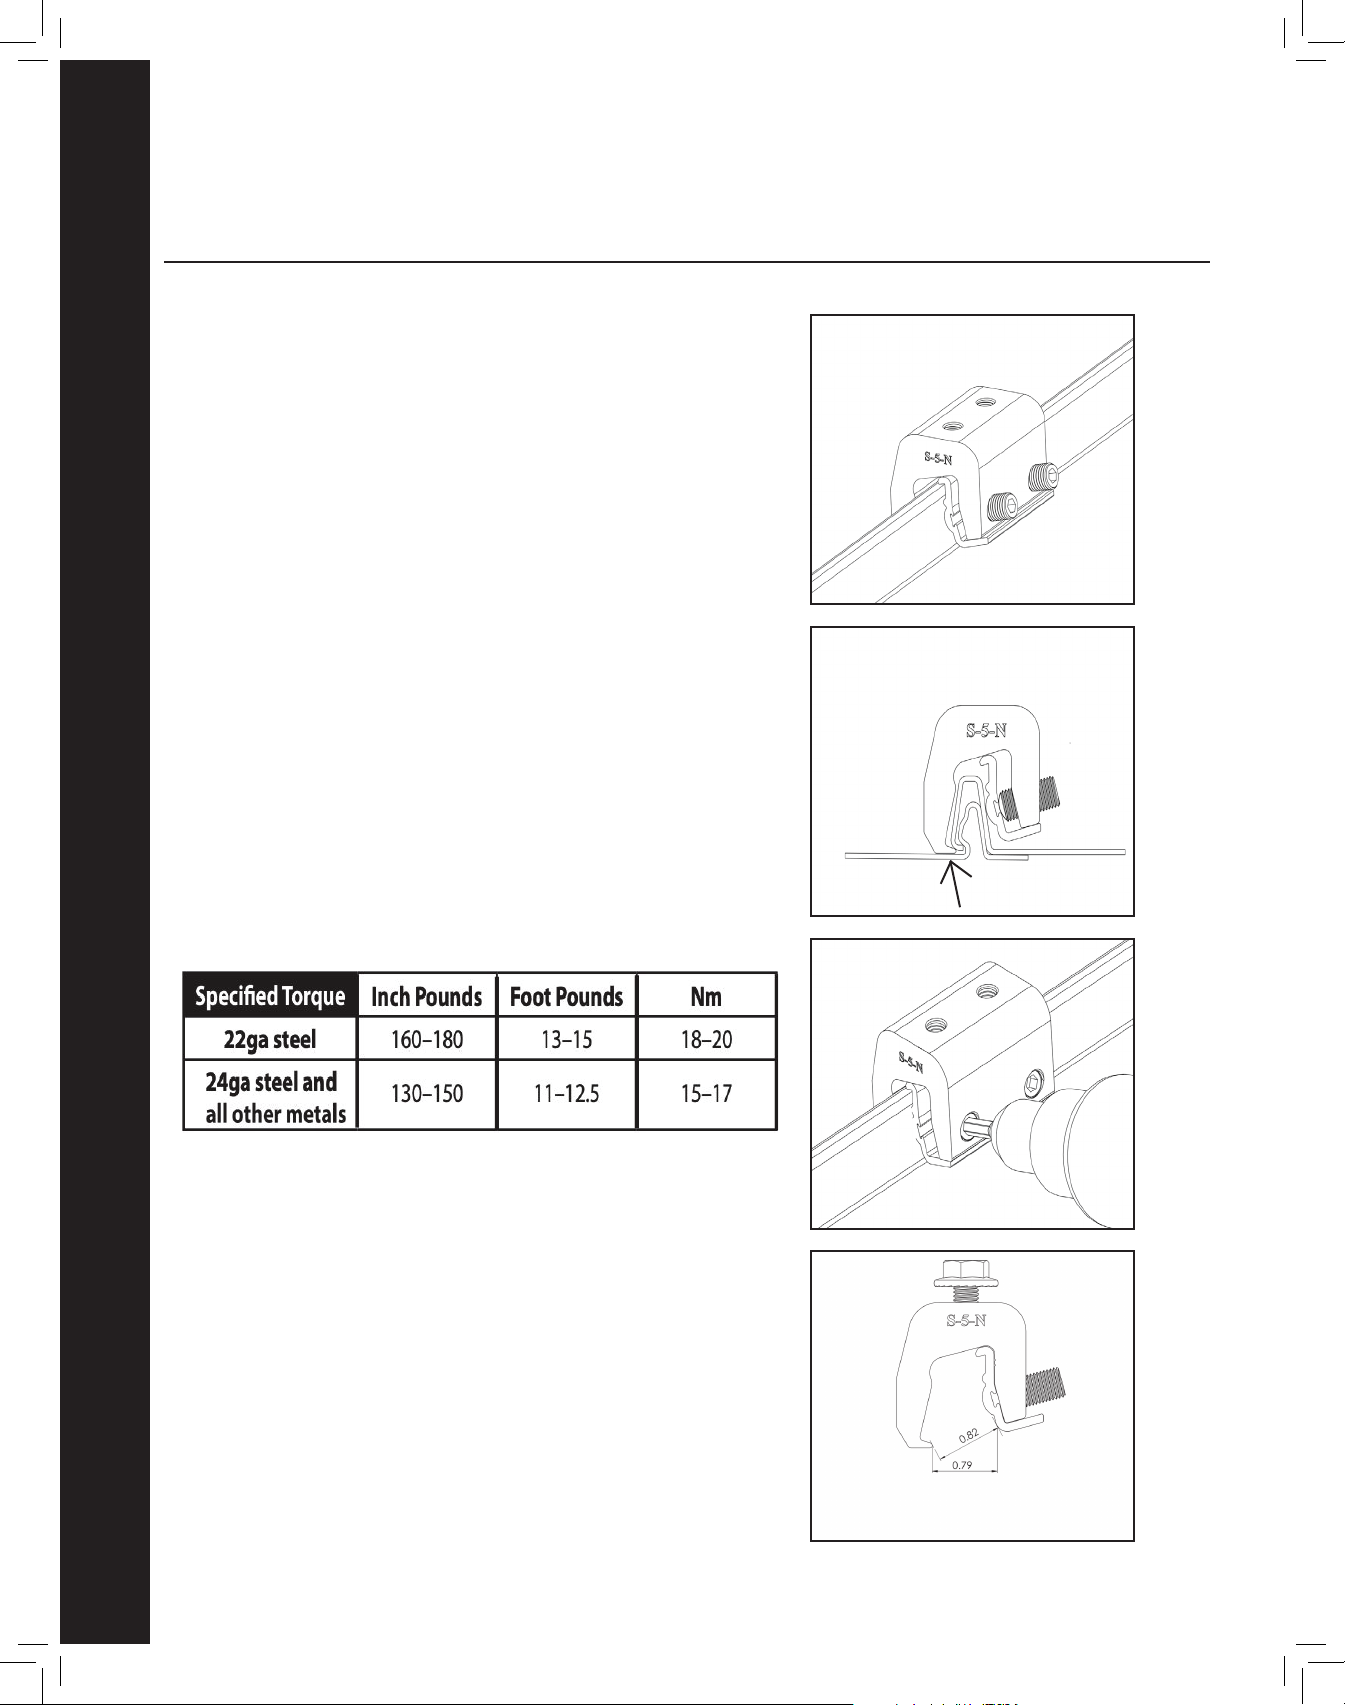
3. The clamp should be over the seam and insert as
shown. (Fig 3a) Make sure the toe of the clamp
engages the female part of the seam as shown.
(Fig 3b)
4. Tighten the setscrew(s) using a screw gun* and the
included bit tip (Fig 4). When relying on published
load values, setscrew tension should be veried
periodically using a dial-indicating calibrated
torque wrench to ensure the tool is consistently
achieving the recommended torque range (Table
1).
Only if installing the Standard-sized Clamp:
- Setscrews should be tensioned and re-tensioned
as the seam material compresses, (i.e. tighten the
rst setscrew, then the second; then repeat).
When installing the Mini-sized clamp:
- The seam material will compress evenly the rst
tightening.
3a.
3b.
* For time-saving tool recommendations, call S-5!
Table 1
Note: Seams that exceed maximum allowance of 0.82” at
the widest part of the seam may require hand crimping to
facilitate clamp t. (Fig 5)
4.
5.
Units in inches
S-5!® Warning! Please use this product responsibly!
Products are protected by multiple U.S. and foreign patents. For published data regarding holding strength, fastener torque, patents, and trademarks, visit the S-5! website at www. S-5.com.
Copyright 2018, Metal Roof Innovations, Ltd. S-5! products are patent protected. S-5! aggressively protects its patents, trademarks, and copyrights.
NNmini-V1.0-0119
 Loading...