

Page 1
VC20HDRG
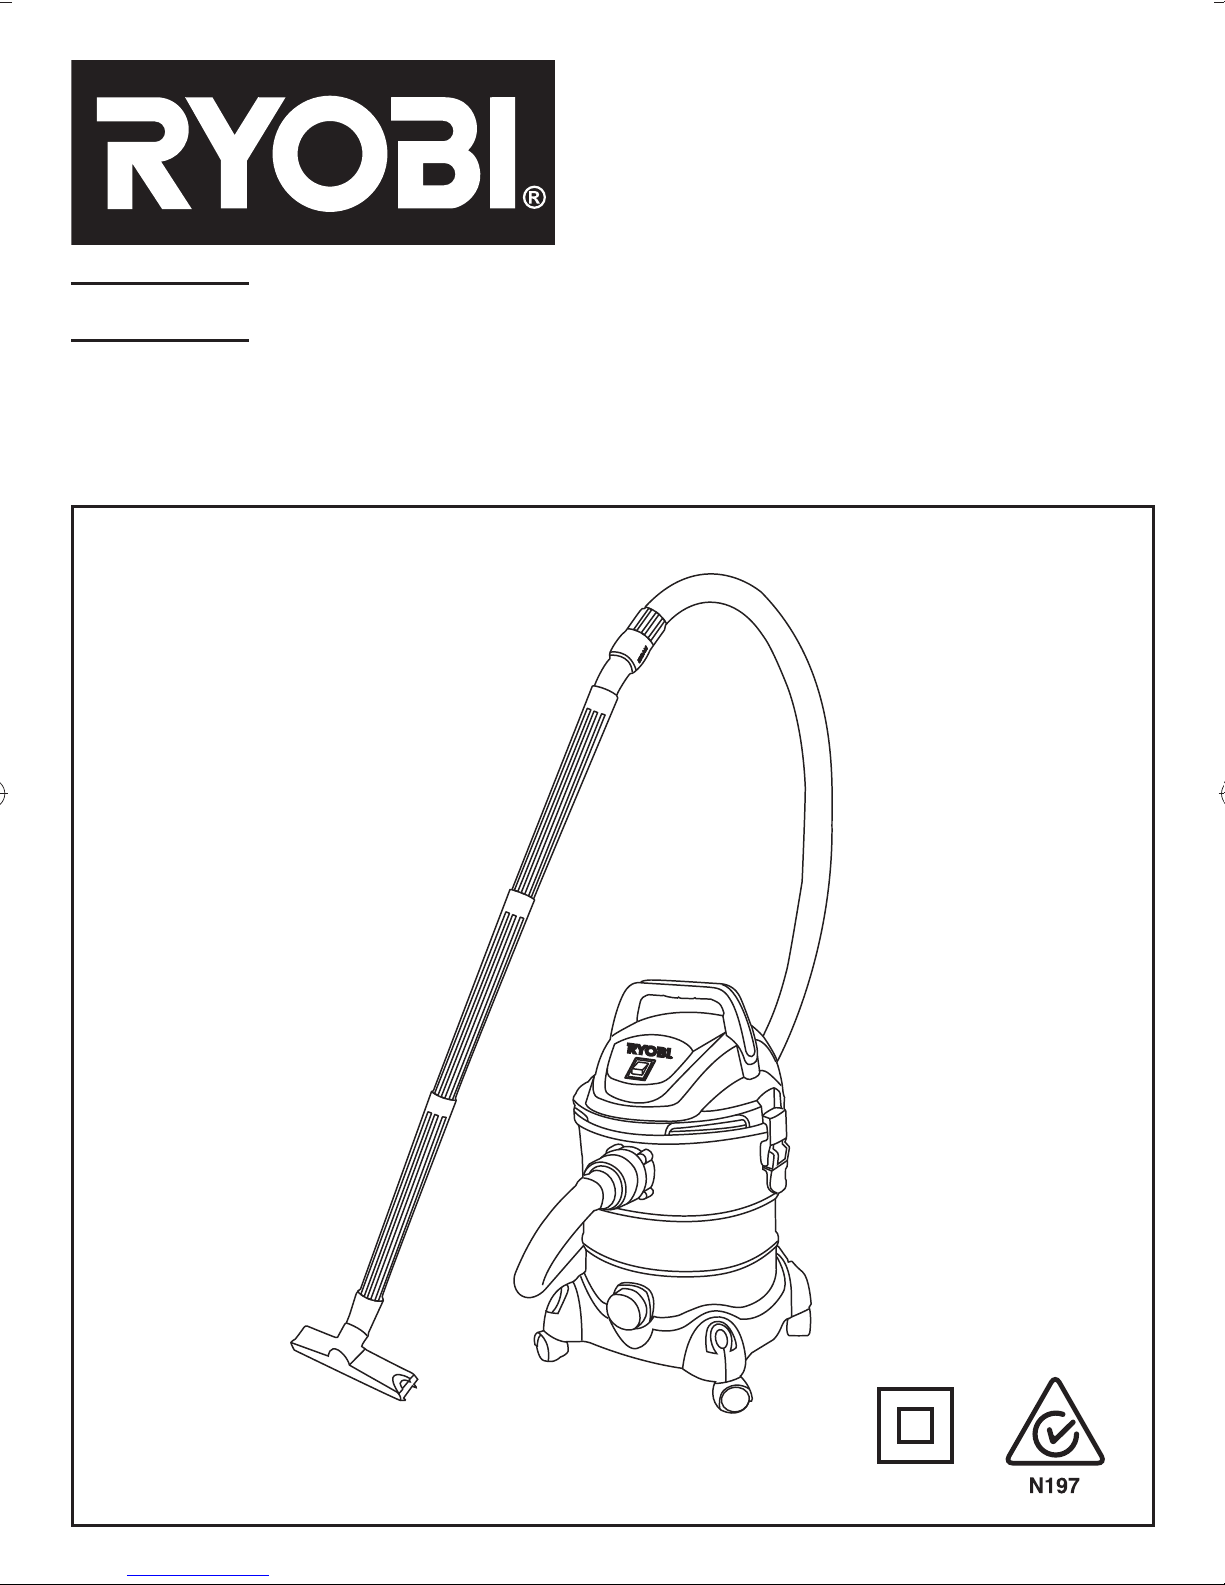
WET & DRY VACUUM CLEANER
OWNER’S OPERATING MANUAL
Page 2

1. 3 Pice W and
2. Floor tool
3. Crevice tool
4. Hose set
5. Wheels (x4)
6. Handle
7. Foam fi lter
8. Screws
9. Dust bag
10. Upper section
11. Float switch
12. Filter basket
13. Cartridge fi lter cap
DESCRIPTION
14. Cartridge fi lter (non washable)
15. ON/OFF switch
16. Connection for the vacuum hose
17. Clamps (x2)
18. Tank
6
10
2
3
4
1
5
789
15
17
16
13
18
11
12
14
Fig. 1
Page 3
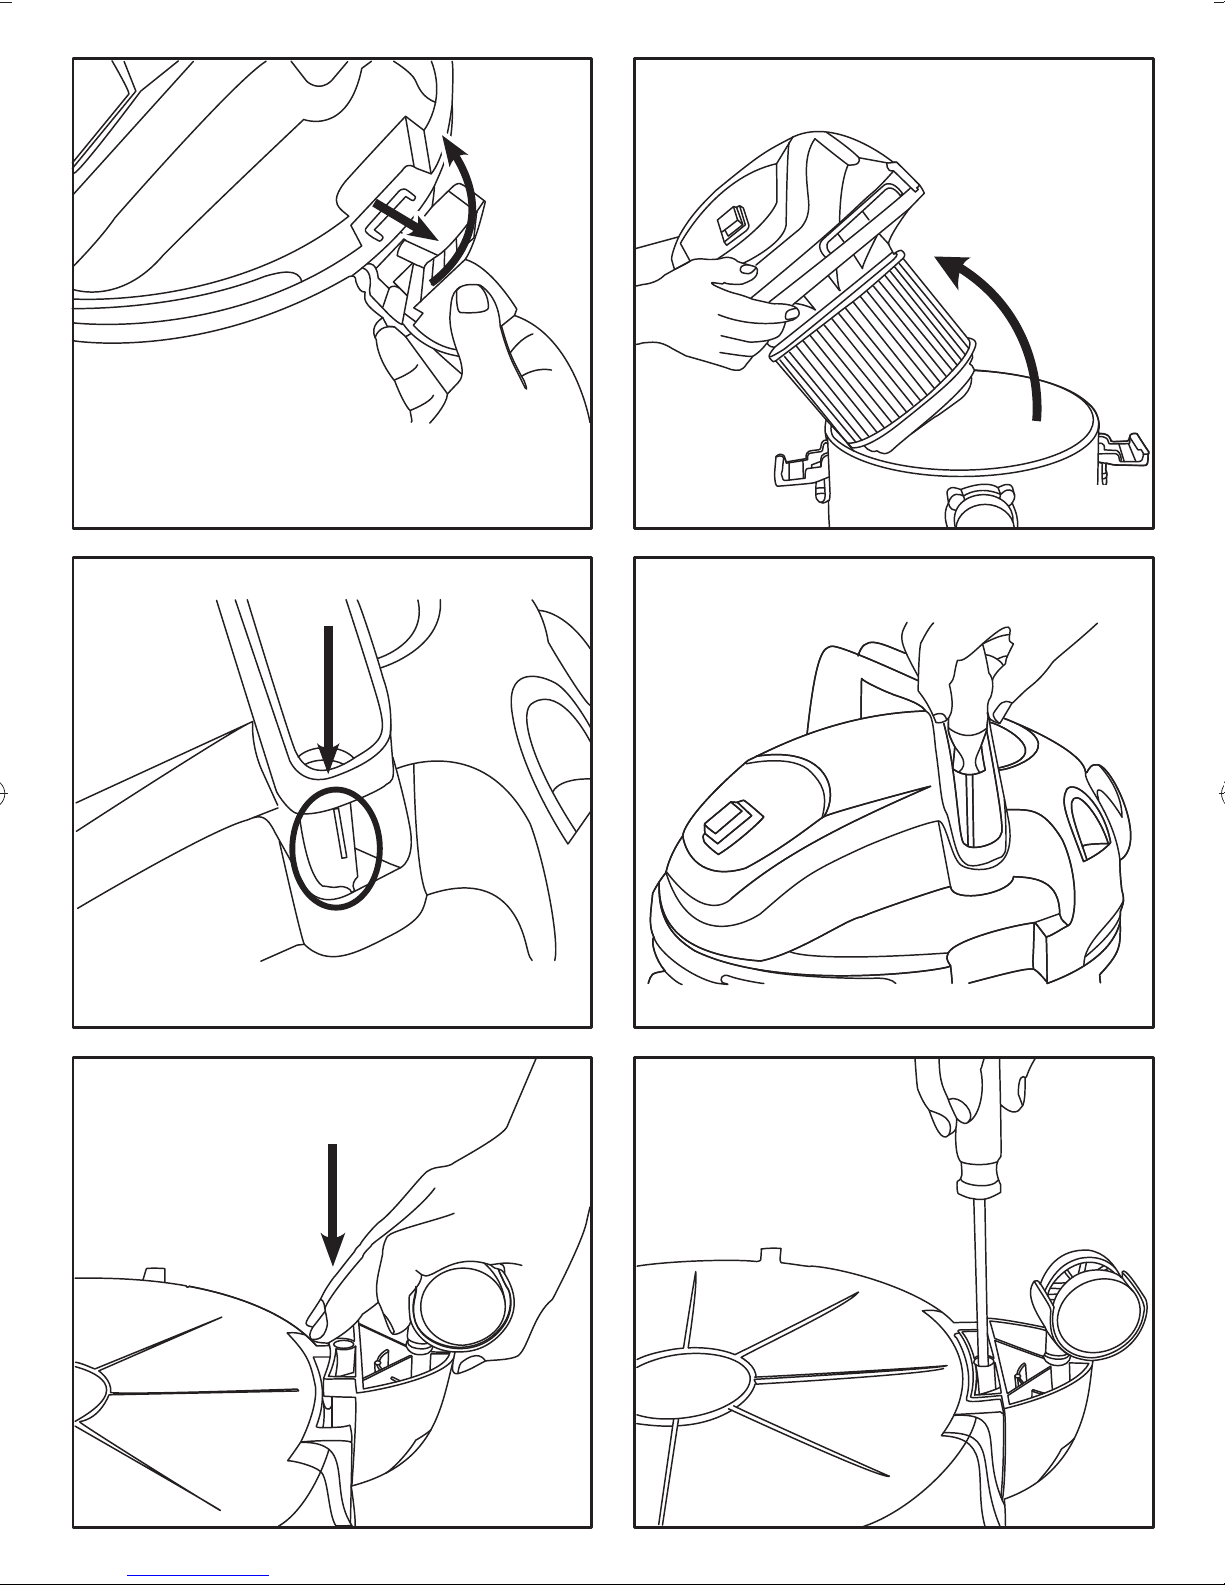
Fig. 2
Fig. 3
Fig. 4
Fig. 5
Fig. 6 Fig. 7
Page 4
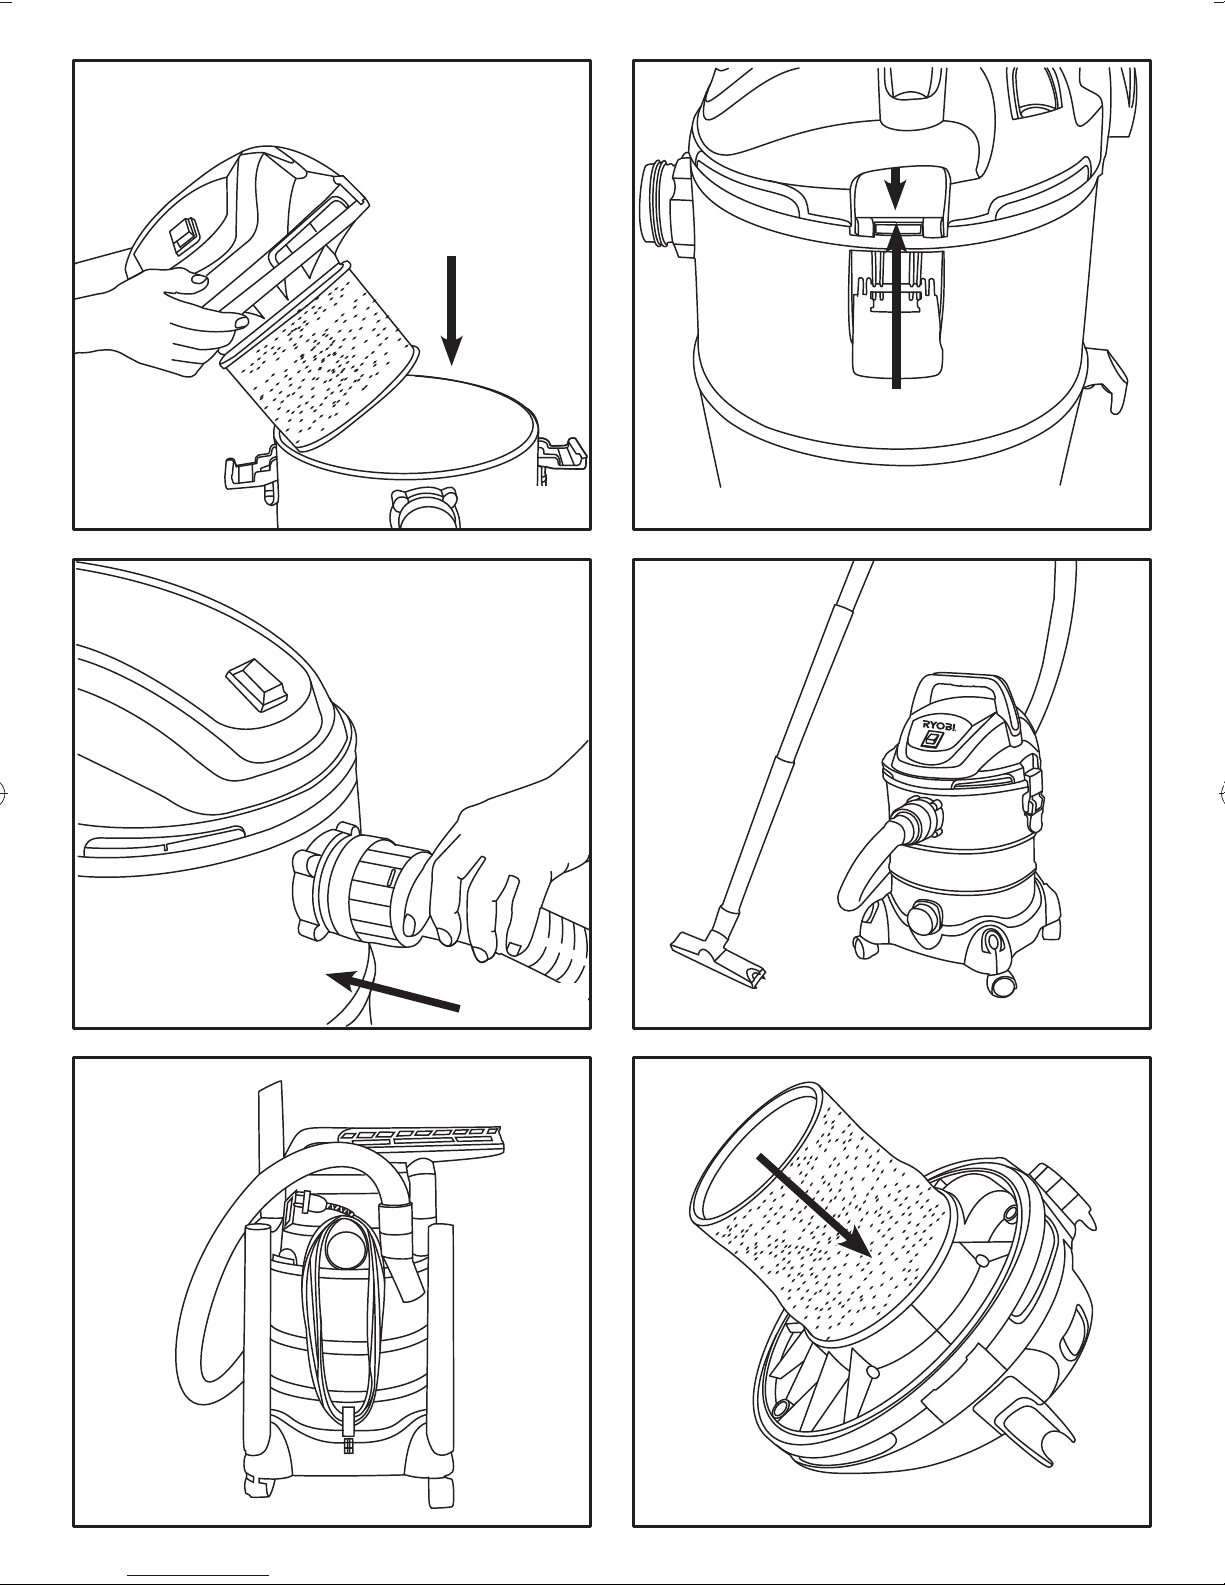
Fig. 8
Fig. 9
Fig. 10
Fig. 11
Fig. 12 Fig. 13
Page 5

Fig. 14
Fig. 15
Fig. 16
Fig. 17
Fig. 18 Fig. 19
Page 6

Important!
It is essential that you read the instructions in this manual before
operating this machine.
Subject to technical modifications.
Page 7

SAFETY INFORMATION AND WARNINGS
WARNING
This appliance complies with the compulsory safety
regulations for electric equipment. However, improper
use can be harmful to people and property. Please read
these operating instructions carefully and completely
before switching the appliance on. Keep the operating
instructions, the guarantee certifi cate, the receipt, as
well as the packaging and packaging material if at all
possible.
This appliance is designed solely for use in the
private sector and for the designated purpose. The
appliance is not suitable for commercial use. Don’t
use the appliance outdoors (unless it has been
specifically designed for use outdoors). Don’t subject
the appliance to heat, direct sunshine or very high
moisture (e.g., rain).
Never immerse the appliance in liquids and be
aware of sharp edges that may damage it. Never
use the appliance with wet or damp hands. Unplug
it immediately if the appliance becomes wet or damp
when it is running. Don’t immerse the appliance in
water.
This wet/dry vacuum cleaner may only be used and
kept in a private home.
The appliance is designed to vacuum up materials
that are not hazardous to your health and that are not
flammable.
Never hold the connectors in front of your face
(especially your eyes, ears, etc.). Never direct the
nozzle towards persons or animals.
Only use the appliance for its designated purpose.
Any other types of use are at your own risk and are
possibly dangerous.
Other uses and unattended operation are not allowed.
The manufacturer cannot be made responsible for
damages that are caused by improper use or incorrect
operation.
Wear protective clothing and gloves.
Connect the appliance only to a 230-240V alternating
current receptacle.
Make sure that the correct dust bag has been inserted
securely in its holder before using the appliance. The
wrong dust bag or incorrectly installed dust bags
can cause damage to the appliance and cause the
guarantee to become void.
If the power cord is damaged, it must be comepletely
replaced along with the cable protector by an
authorised service centre or other qualified service
organisation.
Do not vacuum up ashes, hot coals and the like, large
fragments of glass and sharp objects
Don’t vacuum up any toner dust, which is used
in printers and copiers for example, because it is
electrically conductive. In addition, it is possible that it
will not be completely filtered out by the filter system of
the wet/dry vacuum cleaner and can be released into
the air via the exhaust fan.
Never vacuum flammable or poisonous liquids like
petrol, oil, acids, or other volatile substances.
Don’t vacuum up liquids that are hotter than 60°C or
any poisonous or flammable dusts.
Never lay the appliance on its side. Pay particular
attention to a horizontal position and adequate stability
on stairs.
Always unplug the appliance after use and before
cleaning or changing the filters or accessories.
Only trained specialists may make repairs on
electric equipment. Improper repairs could result in
considerable danger to the user.
Do not store the appliance directly beside a hot oven
or radiator.
Children, disabled persons, and the aged are often
not aware of the dangers that can result from handling
electric appliances. The above mentioned persons
and untrained persons must never work with this
electrical appliance.
When cleaning or removing the appliance, always
switch it off. Pull the plug out of the receptacle, if you
are not going to use the appliance for an extended
period of time. Never pull on the cable to unplug the
appliance, rather pull on the plug itself. Also, remove
any special accessories from the appliance
Always keep the appliance clean. Don’t use any
solvents or cleaners that may damage or be harmful
to the appliance or user.
Never leave the appliance switched on unattended. If
you leave the work area, switch the appliance off or
unplug it from the receptacle (don’t pull the cord, but
use the plug).
In order to protect children from electric household
appliances, make sure that the cable can’t cause
children to stumble and don’t give children access to
the appliance.
Never use the appliance when you are under the
influence of medication, alcohol or drugs, if you are
currently under medical care, or if you are tired.
Check the appliance and the power cord regularly for
any possible damage. Don’t use damaged appliances.
Don’t try to repair the appliance yourself. Always
use an authorized technician for repairs. Always
have faulty power cords replaced immediately by the
manufacturer or a qualified service organization. Use
the same type of cable in order to prevent any danger
of electric shock and injury.
Only use original spare parts and accessories. Non
approved parts or third-party accessories may be a
possible source of danger and cause the guarantee
1
Page 8

to become void.
Check the float often.
If you notice liquid leaking from your appliance, switch
it off immediately and unplug it.
Do not submerge the appliance in water. Make sure
that water is not spilled on the appliance.
When disposing of the wastewater, make sure that
you observe any legal regulations.
Only store the appliance in a safe and dry location
outside the reach of children.
Please also pay particular attention to the following
“Special Safety Rules”.
This appliance is not intended for use by persons
(including children) with reduced physical, sensory
or mental capabilities, or lack of experience and
knowledge, unless they have been given supervision
or instruction concerning use of the appliance by a
person responsible for their safety.
Children should be supervised to ensure that they do
not play with the appliance.
If the supply cord is damaged, it must be replaced
by the manufacturer, its service agent or similarly
qualified persons in order to avoid a hazard.
SPECIAL SAFETY RULES
Never vacuum up hot ashes, pointed or sharp objects.
Never use the appliance in damp rooms.
Don’t use the appliance without a dust bag (an
exception is wet vacuuming or with the cartridge
filter).�Make sure that the dust bag is inserted into the
appliance correctly.
When using the appliance, make sure that no hair,
clothing, or members are drawn in.
Keep the vacuum cleaner away from heat sources
such as radiant heaters, ovens, and so on.
DISPOSAL INFORMATION
The appliance contains electric and electronic
components and may not be disposed of as household
garbage.
The local and currently applicable legislation must be
observed unconditionally.
SPECIFICATIONS
Supply voltage: 230 V - 240 V ~ 50 Hz
Maximum power: 1250 W
Tank volume: 20 L Inox
Hose system: 35 mm Ø
Filter - dry: Paper bag
Filter - wet: Foam fi lter
PACKAGING CONTENT
See Figures 1 - 3.
Carefully unpack the contents of the box.
Hold the two clamps, which hold the upper section in
its position and fold them upwards.
Loosen the clamps, remove the upper section, and
remove the contents from the tank.
Please check the parts using the components list to
make sure they are complete and that there has been
no damage in transport.
If any parts are missing or damaged, then please
contact your dealer immediately.
ASSEMBLY
Make sure that the connector is not plugged in.
Hold the two clamps, which hold the upper section in
its position and fold them upwards. See figure 2.
Loosen the clamps and lift the upper section up and
out. See figure 3.
Slide the handle onto the upper section from the top.
Make sure that the guide of the handle fastener is
inserted on the right side in the handle holder. See
figure 4.
Fasten the handle to the upper section with the two
accompanying screws. See figure 5.
Turn the tank over so that the upper section is on the
bottom.
Put the four rollers in the guides on the bottom of the
tank. See figure 6.
Check that the rollers have been pushed completely
into the guides.
Fasten the rollers with four accompanying screws. See
figure 7.
Insert the foam filter that has been supplied for wet
vacuuming. See the "Wet Vacuuming" section.
Insert the dust bag that has been supplied for dry
vacuuming. See the “Dry Vacuuming” section.
Replace the upper section on the tank. See figure 8.
Align the upper section with the clamps. See figure 9.
Hook the clamps into the upper section and let them
snap into place by pressing the clamps downwards.
Place the large end of the hose on the front air intake
stub on the tank. See figure 10.
Select a nozzle or the wand and slide it over the
suction tube. See figure 11.
After using and cleaning the appliance, store the
accessories by attaching them to the corresponding
holders on the vacuum cleaner. See figure 12.
2
Page 9

OPERATION
WET VACUUM CLEANING
DRY VACUUM CLEANING
WARNING
It is absolutely necessary for you to read, understand,
and observe the “Safety Information and Warnings”
section.
Never vacuum up hazardous materials. If an incorrect
dust bag is used, then the guarantee becomes void.
Make sure that the appliance is not plugged into the
power mains.
Make sure that the foam filter is clean and dry and
installed over the filter basket. See figure 13.
Slide the dust bag over the hose connection in the
tank. Press it until it snaps firmly into place.
In the process, make sure that the dust bag is not
damaged. See figures 14 - 15.
Place the upper section on the tank once again and
close the clamps. See figures 8 - 9.
Place the large end of the hose on the front air intake
stub on the tank. See figure 10.
Select the desired nozzle or the tube;
connect it to the vacuum hose. See figure 11.
Make sure that the ON/OFF switch on the appliance is
in the “OFF” position (position “0”) before you plug the
power plug into the receptacle.
Plug the power plug into the receptacle.
Switch the motor on (ON/OFF switch in position “l”).
When you have finished vacuuming, switch the motor
off by putting the ON/OFF switch into the “OFF”
position (position “O”).
Unplug the power plug.
Check the dust bag regularly and change it when it is
2/3 full. The bag is designed such that only air, and no
dust, can pass through the paper. Therefore a used
dust bag may not be reused.
NOTE: Don’t use the dust bag for vacuuming up objects
with sharp edges or wet objects.
CARTRIDGE FILTER (NON WASHABLE)
When using the cartridge filter, no dust bag is
necessary.
Place the cartridge filter on the filter basket from the
top, turn on the cartridge filter cap. See figure 18.
After extended use, it can be cleaned by tapping out
or brushing out.
WARNING
It is absolutely necessary for you to read, understand,
and observe the “Safety Information and Warnings”
section.
NOTE: Never vacuum up hazardous materials.
Make sure that the appliance is not plugged into the
power mains.
Check to make sure that the tank is free of dust and
dirt.
Remove the dust bag and only leave the foam filter
over the filter basket. See figure 16.
Place the upper section on the tank once again and
close the clamps. See figures 8 - 9.
Place the large end of the hose on the front air intake
stub on the tank. See figure 10.
Select a nozzle or the telescopic tube and slide it over
the suction tube. See figure 11.
Make sure that the ON/OFF switch on the appliance is
in the “OFF” position (position “0”) before you plug the
power plug into the receptacle.
Plug the power plug into the receptacle.
Switch the motor on (ON/OFF switch in position “l”).
When you have finished wet vacuuming, switch the
motor off by putting the ON/OFF switch into the “OFF”
position (position “0”).
Unplug the power plug.
After use, empty and dry the tank.
TIP: If you want to vacuum up a large quantity of
liquid from a sink or a tank, please don’t put the entire
suction nozzle in the liquid; rather leave a little space
so that some air can also be drawn in along with the
liquid.
The appliance is equipped with a float switch that will
stop the vacuuming when the tank is full. In this event,
switch the appliance off and unplug it.
Be aware that the full tank can be very heavy. In this
event, place the appliance over a drain and carefully
open the outlet screw. The contents of the tank can
now drain out to a great extent. See figure 17.
Now, remove the upper section from the tank and pour
the rest of the liquid into a suitable tank or drain. Then,
you can continue vacuuming after you have replaced
the upper section.
After wet vacuuming, switch off the appliance and
unplug it. Empty the container and clean/dry it inside
and outside before putting it away.
3
Page 10

WARNING
After wet vacuuming, please proceed as described in
the “Dry Vacuuming” section before you dry vacuum
again.
MAINTENANCE
Make sure that the appliance is not plugged into the
power mains.
Remove the suction hose from the tank.
Loosen the clamps and separate the upper section
from the tank.
Remove all the dirt and residue from the tank and the
hose.
Clean the foam filter by washing it with a mild
detergent.
Check the hoses and connections and check the
power cord for any damage.
When the foam filter is removed, check the float. To
do this, take the upper section by the handle and tip
it carefully so that the filter basket is facing upwards.
The float should move freely up and down. See Figure
18.
Recycle
Waste electrical products should not be
disposed of with household waste. Please
recycle where facilities exist. Check with your
Local Authority or retailer for recycling advice.
ENVIRONMENTAL PROTECTION
Recycle raw materials instead of disposing
of as waste. The machine, accessories
and packaging should be sorted for
environmental-friendly recycling.
SYMBOL
Safety Alert
V Volts
Hz
min
Hertz
Alternating Current
W
Watts
-
1
Revolutions or reciprocations per minute
Conformity
Please read the instructions carefully before
starting the machine.
Class II equipment
4
Page 11

Techtronic Industries (Australia) Pty. Ltd.
Level 1, 660 Doncaster Road
Doncaster, VIC 3108, Australia
Techtronic Industries New Zealand Ltd.
27 Clemow Drive
Mt. Wellington, Auckland 1060, New Zealand
 Loading...