

Page 1
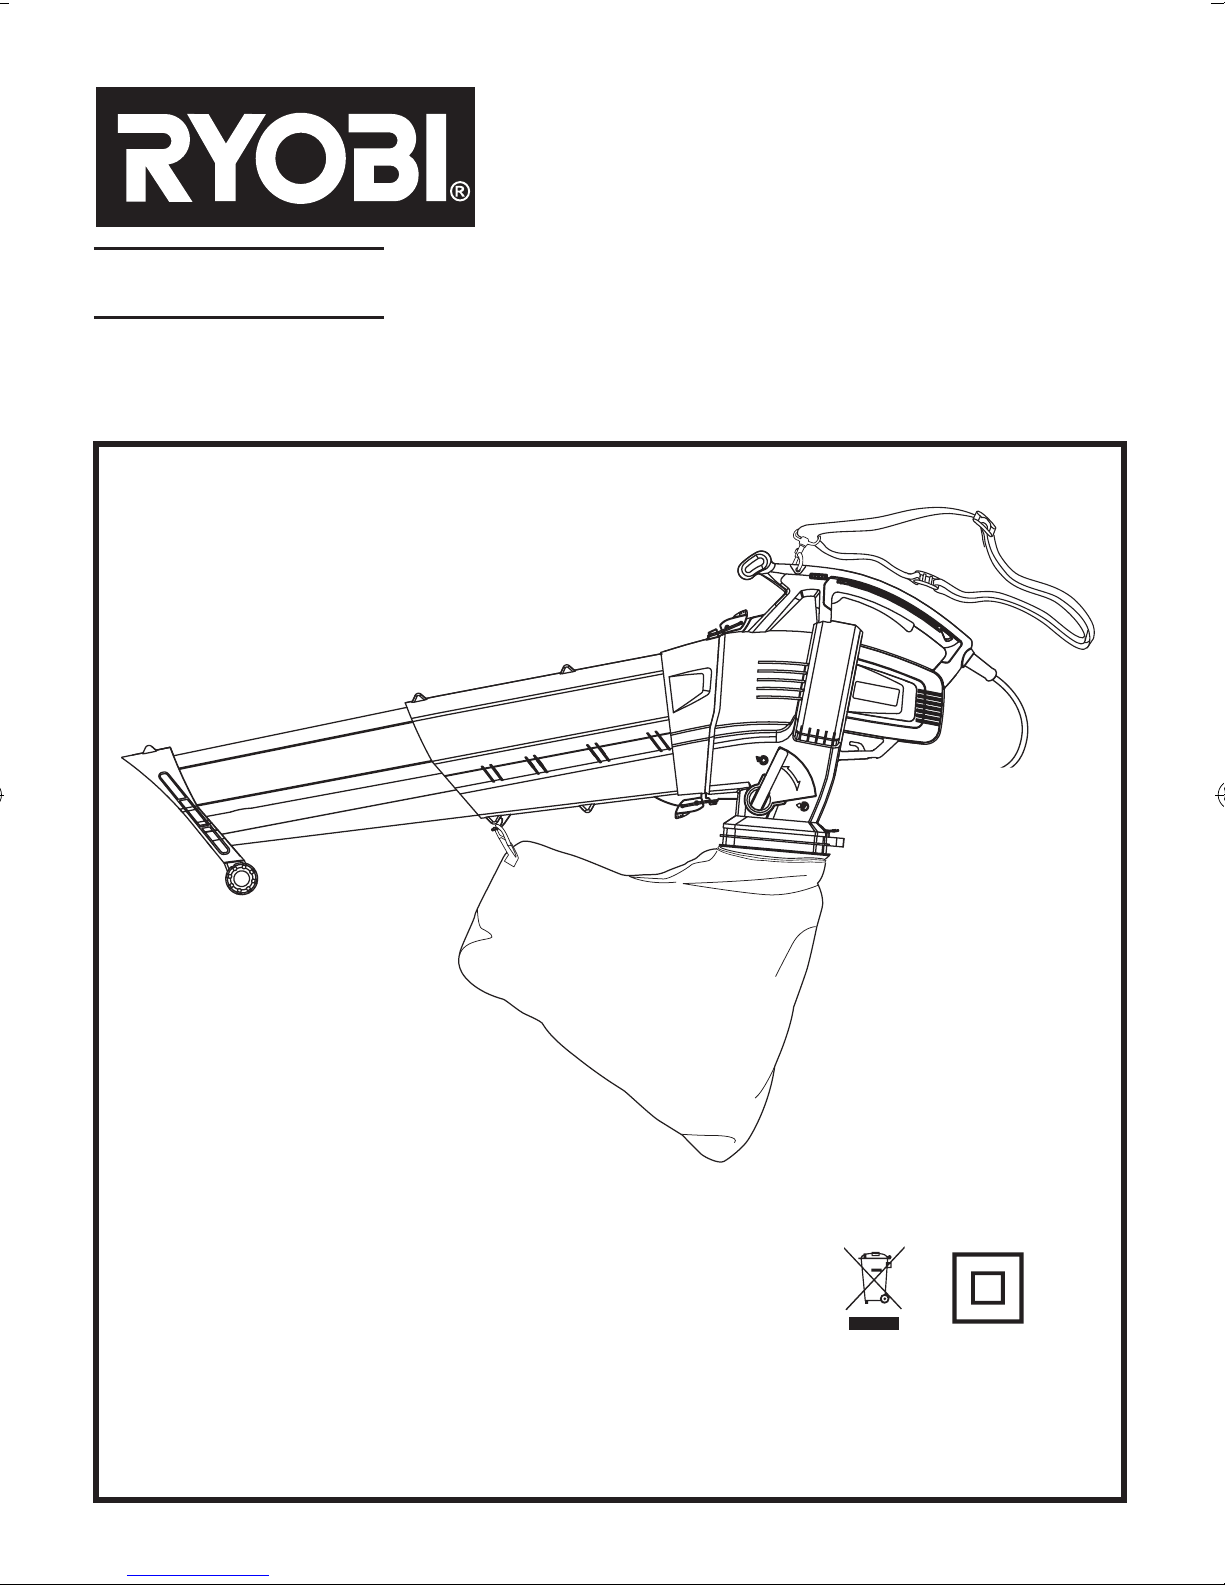
RBV3000VPG
POWERMULCHING™ ELECTRIC MULCHING BLOWER / VAC
OPERATOR’S MANUAL
Important!
It is essential that you read the instructions in this manual before mounting and operating this machine.
Subject to technical modications.
Page 2

ENGLISH
This product has been engineered and manufactured
to Ryobi's high standard for dependability, ease of
operation, and operator safety. When properly cared for,
it will give you years of rugged, trouble-free performance.
Thank you for buying a Ryobi product.
GENERAL SAFETY RULES
Important safety instruction
■ Please read all of the safety and operating instructions
carefully before using this product. Please pay
particular attention to all sections of this operator
manual that carry warning symbols and notices.
■ This appliance is not intended for use by persons
(including children) with reduced physical, sensory
or mental capabilities, or lack of experience and
knowledge, unless they have been given supervision
or instruction concerning use of the appliance by a
person responsible for their safety.
■ Children should be supervised to ensure that they do
not play with the appliance.
■ Do not get distracted and always concentrate on what
you are doing. Use common sense. Never operate the
tool when you are tired, sick or under the influence of
alcohol or other drugs.
Training
■ Read the instructions carefully. Be familiar with the
controls and the proper use of the appliance.
■ Never allow children to use the appliance.
■ Never allow people unfamiliar with these instructions
to use the appliance. Local regulations may restrict the
age of the operator.
■ Never operate the appliance while people, especially
children, or pets are nearby.
■ Keep in mind that the operator or user is responsible
for accidents or hazards occurring to other people or
their property.
Preparation
■ Dress properly. Do not wear loose clothing or jewellery.
They can be caught in moving parts.Use of sturdy
gloves and substantial footwear is recommended
when working outdoors. Wear protective hair covering
to contain long hair.
■ Wear protective goggles while operating.
■ To prevent dust irritation, the wearing of a face mask
is recommended.
■ Before using, check the supply and extension cord for
signs of damage and aging. Do not use the appliance
if the cord is damaged or worn.
■ Never operate the appliance without safety devices or
collection bag in place.
■ Only use a weather proof extension cable correctly
rated to your machine.
■ Appliance should be supplied via a Residual Current
Device (RCD) with a tripping current of not more than
30mA.
Operation
■ Do not switch on the tool in enclosed or poorly
ventilated spaces or in the presence of flammable
and/or explosive substance such as liquids, gases and
powders.
■ Do not start the tool when it is upside down or when it
is not in the operating position.
■ Operate the appliance only in daylight or in good
artificial light.
■ Do not overreach and keep your balance at all times.
■ Always be sure of your footing on slopes.
■ Walk, never run.
■ Never blow debris in the direction of bystanders.
■ Do not operate the tool near bystanders, especially
children or pets. Maintain a safe distance of at least
5m from other people when using the tool.
■ Always direct the cable to the rear away from the
appliance.
■ Do not use the blower / vacuum to pick up any burning
or smoldering materials like ashes, cigarette butts etc.
■ Do not attempt to pick up breakable objects like glass,
plastics, china etc.
■ Keep the extension cord away from heat, oil and sharp
edges.
■ Ensure that the extension lead is secured in a manner
that prevents it from disconnecting from the plug whilst
in use.
■ If the cord becomes damaged during use, disconnect
the cord from the supply immediately. Do not touch the
cord before disconnecting from the supply. Do not use
the appliance if the cord is damaged or worn.
■ Do not carry the appliance by the cable.
■ Do not handle the plug or the tool with wet hands.
■ Avoid dangerous environment. Do not use the
appliance in damp or wet locations.
■ Do not use the blower / vacuum on gravel surfaces.
■ Disconnect the appliance from the mains supply
whenever you leave the machine, before clearing a
blockage, before checking, cleaning or working on the
appliance.
■ If the appliance starts to vibrate abnormally, switch
it off immediately. Disconnect the appliance from the
mains and inspect for obstructions or damage to the
unit.
1
Page 3
ENGLISH
Maintenance and storage
■ Keep all the air intakes and the blower tube free of
dust, lint, hair and other material that may cause a
reduction in air flow.
■ Keep all nuts, bolts and screw tight to be sure the
appliance is in safe working condition.
■ Check the appliance frequently for wear or
deterioration.
■ Replace worn or damaged parts.
■ Use only spare parts and accessories recommended
by the manufacture.
■ When not in use, appliances should be stored indoors
in dry, and high or locked-up place that is out of reach
of children.
■ Do not try to repair the tool or access internal parts.
Contact a authorized service center for repair if
needed.
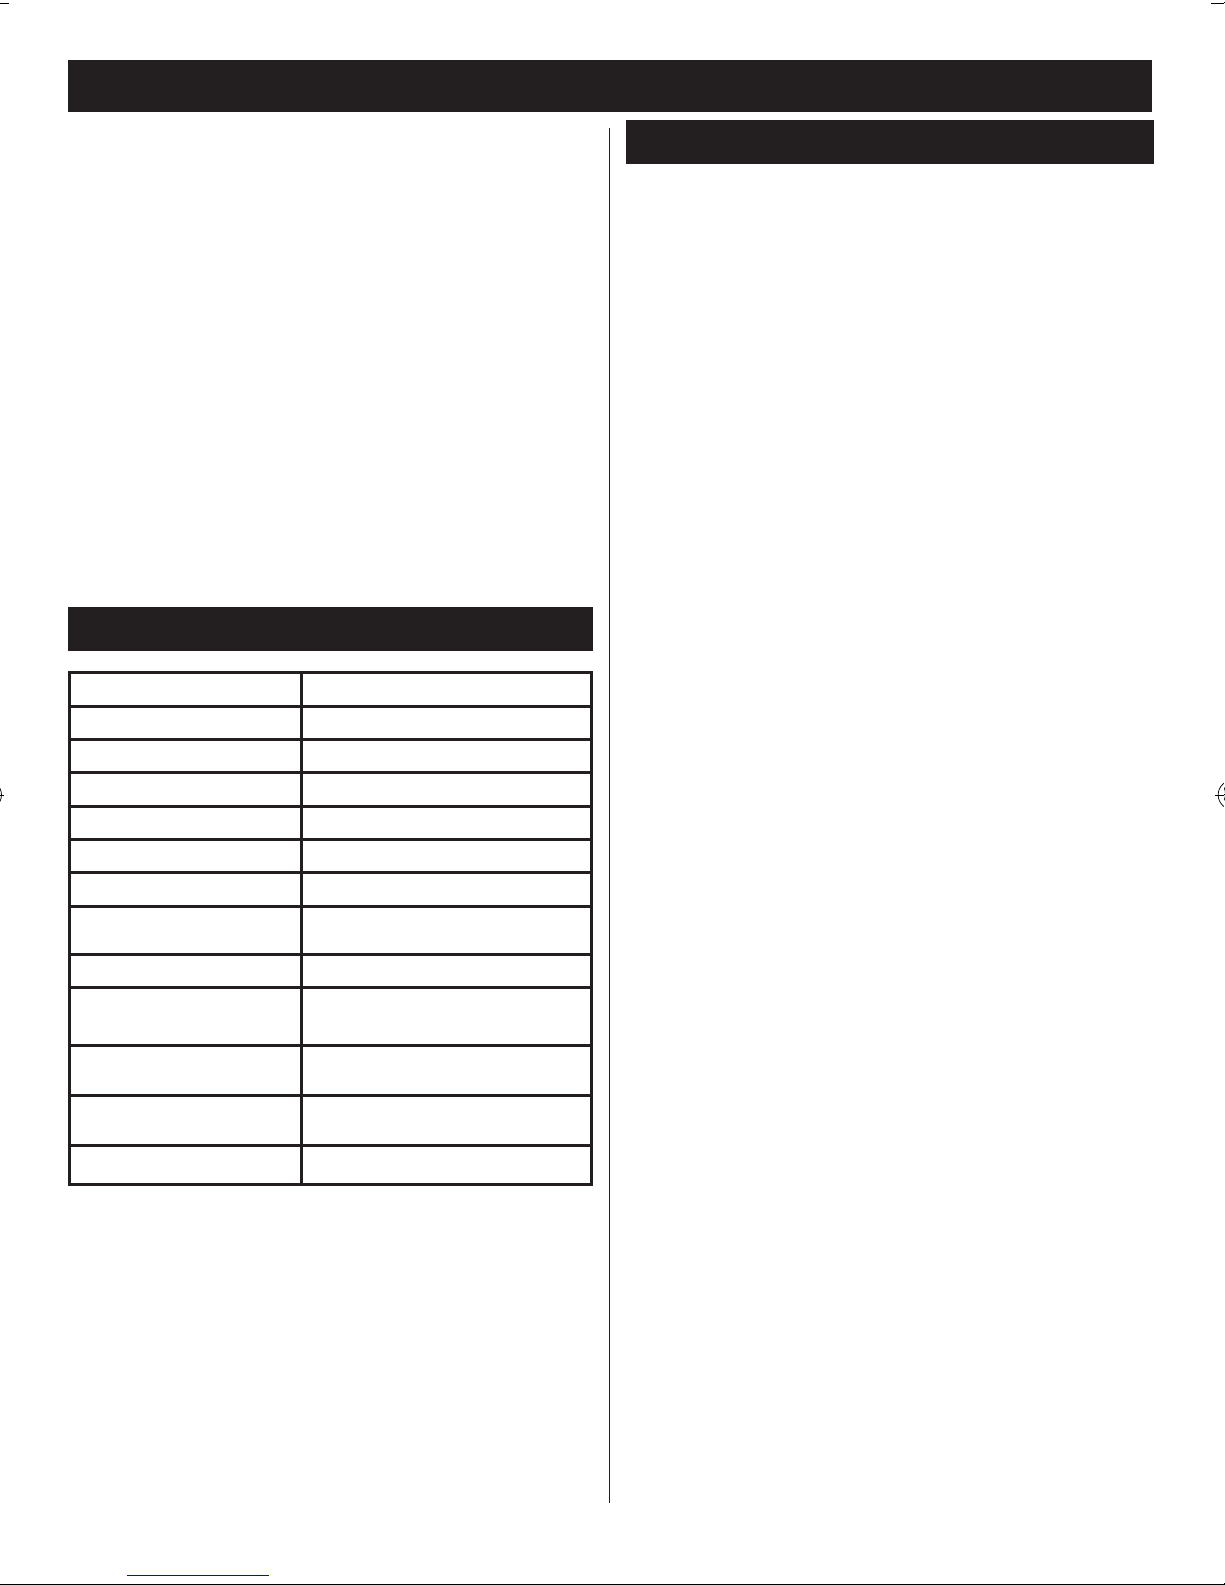
SPECIFICATION
Type RBV3000VPG
Voltage 220-240 V
Frequency 50 Hz
Input Power 1900 W
Insulation Class II
Air velocity 270-320 km/h
Air volume 11-14 m³/min
Net weight
(without cable)
Mulching Ratio 15:1
Measured sound
pressure level
Measured sound
power level
Guaranteed sound
power level
Vibration level ah: 4.6 m/s²; K:1.5 m/s²
5.5Kg
LPA:92.5 dB(A);
KPA:2.0 dB(A)
LWA:108 dB(A)
LWA:110 dB(A)
DESCRIPTION
Figure 1
1. Shoulder strap
2. Trigger
3. Rear handle
4. Livetool indicator™
5. Quick change lever
6. Collection bag holder
7. Power cord
8. Collection bag
9. Front wheels
10. Front bracket
11. Lower tube
12. Upper tube
13. Front handle
14. Motor housing
15. Variable speed control
16. Tube lock button
Figure 2
12. Upper tube
14. Motor housing
17. Upper tube latch
18. Lower tube latch
Figure 3
16. Tube lock button
Figure 4
1. Shoulder strap
14. Motor housing
19. Bag connector
20. Collection bag front hook
21. Shoulder strap connection hook
22. Debris outlet tube
Figure 6
5. Quick change lever
2
Page 4
ENGLISH
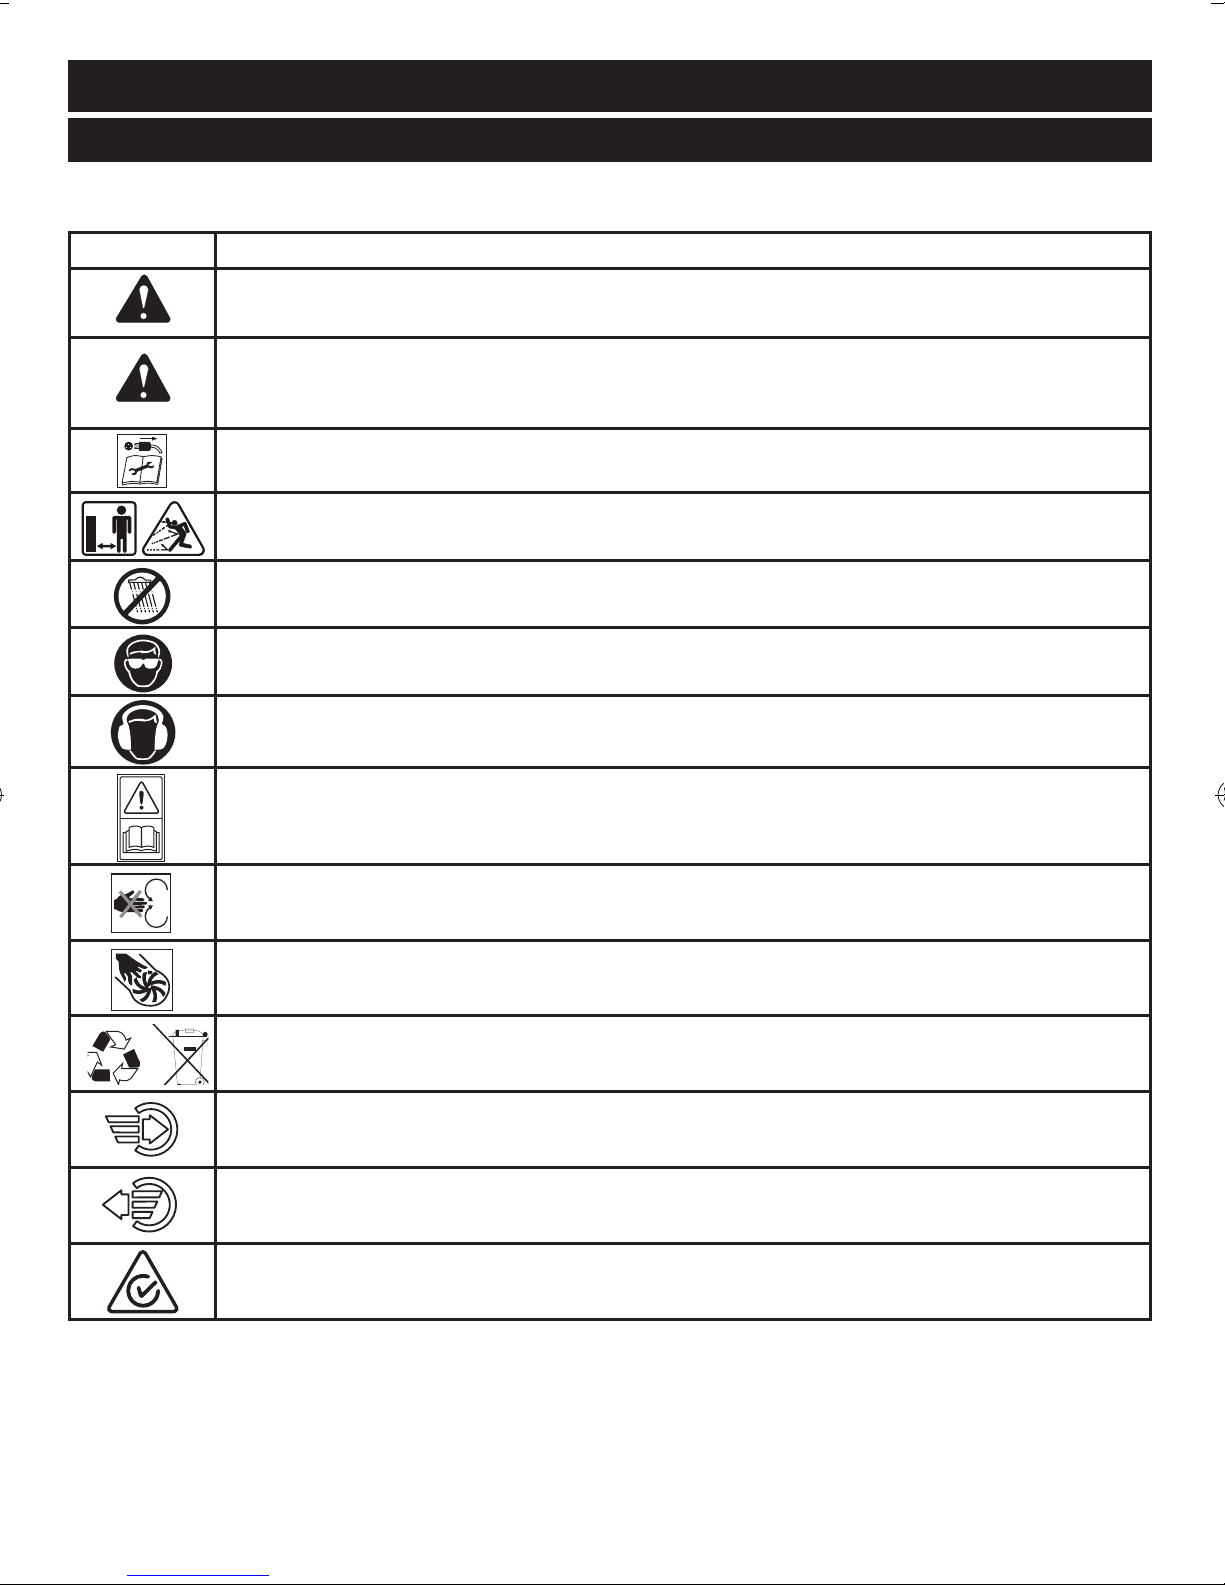
SYMBOLS
Some of the following symbols may be used on your tool. Please study them and learn their meaning. Proper
interpretation of these symbols will allow you to operate the tool safely and effectively.
Symbol Explanation
These warning symbols are displayed on the unit to remind you of the safety precautions you
should take when operating it.
This machine should only be used by those persons who have read and understood all the
safety and operating instruction contained in the operator manual. Be aware of the safety of all
persons in the work area at all times.
Switch the unit OFF and disconnect from the mains supply before making adjustments, cleaning
blockages, or starting any cleaning and maintenance procedures.
Keep other people out of the danger area.
Do not use in the rain. Avoid using it in damp conditions.
When using this equipment, always wear protective glasses.
Wear ear protection.
Read this safety and operating instructions in this booklet and keep it in a safe place for future
reference.
Dangerous feed orifice. Keep hands and feet out of the openings while the machine is running.
Rotating Fans. Keep hands and feet out of the openings while the machine is running.
Waste electrical products should not be disposed of with household waste. Please recycle where
facilities exist. Check with your local authority or retailer for recycling advice.
When the quick change lever is pointing to this symbol, the unit operates in vacuum mode
When the quick change lever is pointing to this symbol, the unit operates in blow mode
Regulatory Compliance Mark (RCM). Product meets applicable regulatory requirements.
3
Page 5
ENGLISH
ASSEMBLY
UNPACKING
■ Carefully remove the product and any accessories
from the box.
■ Inspect the product carefully to make sure no breakage
or damage occurred during shipping.
■ Do not discard the packing material until you have
carefully inspected and satisfactorily operated the
product.
■ If any parts are damaged or missing, please call your
Ryobi service centre for assistance.
ATTACHING AND EXTENDING THE TUBE (Fig. 2-3)
WARNING:
This product features double safety switches.
It will not operate unless the tube is correctly
attached to the motor housing, or if the tube is
not fully extended.
■ Slide the tube (items 12) into the motor housing (item
14).
■ Ensure that the latches (items 17 and 18) are closed
and securely hold the tube and motor housing
together.
■ Push the tube lock button down (item 16 in figure 3)
and pull the lower tube out of the upper tube by holding
the front bracket (item 10) to fully telescope the tubes
out. A "click" sound will be heard when the tubes are
fully extended and lock into place.
ATTACHING THE DEBRIS OUTLET TUBE (Fig. 4a)
CAUTION:
Do not operate the machine without attaching
the debris outlet tube to the unit.
The debris outlet tube (item 22) is fixed by a one time
snap fit.
■ Insert the outlet tube into the motor housing (item 14).
It will lock into place.
■ To remove the collection bag, push the bag connector
handle down and pull the collection bag away from the
tool.
ATTACHING THE SHOULDER STRAP (Fig. 4a)
■ Clip the shoulder strap (item 1) into the shoulder strap
hook (item 21) on the motor housing.
■ Adjust the shoulder strap so that it is in a comfortable
position for you.
OPERATION
INTENDED USE
■ This blower / vacuum is intended for cleaning in dry
areas (both blow mode and suction mode).
■ It is only for domestic use.
PREPARATIONS BEFORE EVERY USE
■ Make sure that you secure your extension cord in the
cord retainer as shown in Figure 5.
■ Choose your mode of operation.
SWITCHING BETWEEN SUCTION MODE AND BLOW
MODE (Fig. 6)
WARNING:
Always ensure that your unit is switched off and
has fully stopped before changing the mode of
operation. Do not force the quick change lever. It
should move smoothly without resistance. If you
encounter problems, disconnect from the power
supply and clean the lever mechanism.
For blow mode:
■ Switch the quick change lever (item 5) down so that it
points at the blow symbol.
For suction/vacuum mode:
■ Switch the quick change lever (item 5) up so that it
points at the vacuum symbol
ATTACHING AND REMOVING THE COLLECTION BAG
(Fig. 4b)
CAUTION:
Do not use the product in vacuum/suction mode
without the collection bag fully assembled and
properly attached to the unit.
■ Manoeuvre the front of the plastic bag connector (item
19) over the debris outlet tube and hold it in place.
■ Push the back of the bag connector up towards the
motor housing until it clicks into place.
■ Clip the front bag hook (item 20) onto the mounting
point on the upper tube.
STARTING AND STOPPING (Fig. 1)
■ Connect the blower / vac to the power supply. The
Livetool indicator™ (item 4) will glow blue once the it is
connected to the electric power supply.
■ Pull the trigger (item 2) to start the blower / vac.
■ To stop the blower / vac, just release the trigger (item
2).
NOTE: For added safety, your blower vac has double
safety switching. If the tubes are not properly connected
to the motor housing or the tubes are not fully extended
and have not locked in place, the blower vac will not
start. Check the troubleshooting guide later in this
manual for more information.
4
Page 6
ENGLISH
ADJUSTING SPEED (Fig. 7)
The suction / blow speed of the unit can be adjusted
by turning the variable speed control forward (increase
speed) or backward (reduce speed).
EMPTYING THE COLLECTION BAG
It is not necessary to remove the collection bag from the
unit when the bag needs to be emptied.
■ Open the full length zip at the rear of the bag and
empty the contents.
■ Ensure the zip is closed prior to operating the blower
/ vac.
MAINTENANCE
WARNING
Never use water to clean the product. Do not
clean with chemicals or solvents as some can
destroy critical plastic parts.
■ Switch off and disconnect from the power supply
before cleaning your product.
■ Use only a dry cloth for cleaning.
■ Empty the collection bag after each use to avoid
deterioration and obstruction of the air flow which will
reduce the performance of the unit.
■ Clean the collection bag as needed. With eye
protection on, turn the dust bag inside out after initial
emptying and vigorously shake out the dust and debris.
■ Check and clear debris around the quick change lever.
Ensure the discharge side of the tube is free of debris
and dirt. Operate the selector lever backwards and
forwards to ensure correct operation
■ Store the blower / vac in a dry place, and out of reach
of children.
POWER CORD MAINTENANCE
If the supply cord needs replacing, the task must be
carried out by the manufacturer, the manufacturer’s
agent, or an authorised service centre in order to avoid a
safety hazard.
DISPOSAL
Waste electrical products should not be
disposed of together with household waste.
Please recycle where facilities exist. Check
with your local authority or retailer for recycling
advice.
20131209v3
5
Page 7
ENGLISH
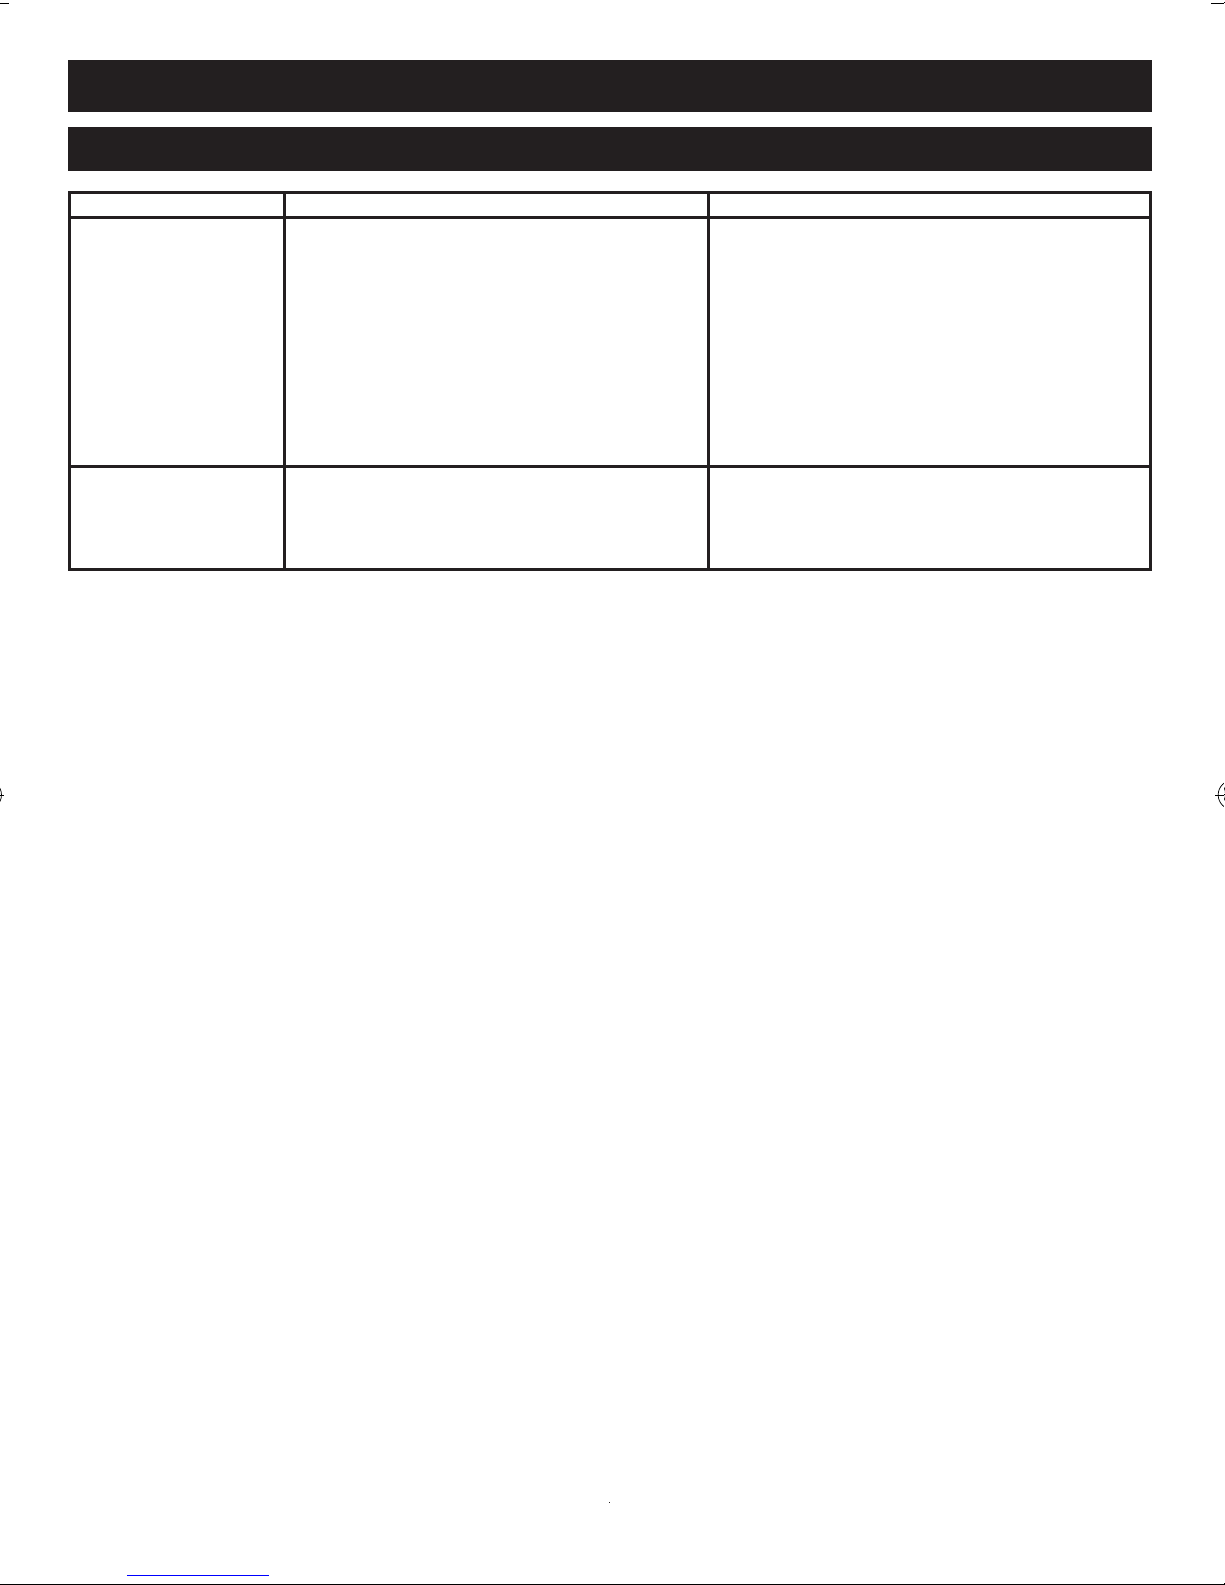
TROUBLESHOOTING
PROBLEM POSSIBLE CAUSE SOLUTION
1. No power (power failure).
2. Connection lead wire defect.
3. Motor or switch defect.
Motor will not start
1. Check the power source.
2. Replace the lead or have it checked by
an electrician.
3. Contact Ryobi customer service centre or
your original place of purchase.
Reduced
vacuuming power
4. Lower tube has not been telescoped out
to its full length.
1. Machine is clogged or blocked.
2. Bag is full.
3. Speed is too low.
4. Pull the lower tube out to its full length.
You will hear a "click" when it locks into
place.
1. Clean the machine.
2. Empty the bag.
3. Adjust to a higher speed.
6
Page 8

Techtronic Industries (Australia) Pty. Ltd.
Level 1, 660 Doncaster Road
Doncaster, VIC 3108, Australia
Techtronic Industries New Zealand Ltd.
18-26 Amelia Earhart Avenue
Mangere, Auckland 2022, New Zealand
 Loading...