

Page 1
1
IMPORTANT
FOR STARTING
INSTRUCTIONS
REFER TO PA GE 10
IMPORTANT MANUAL DO NOT THROW AWAY
OPERATOR’S
MANUAL
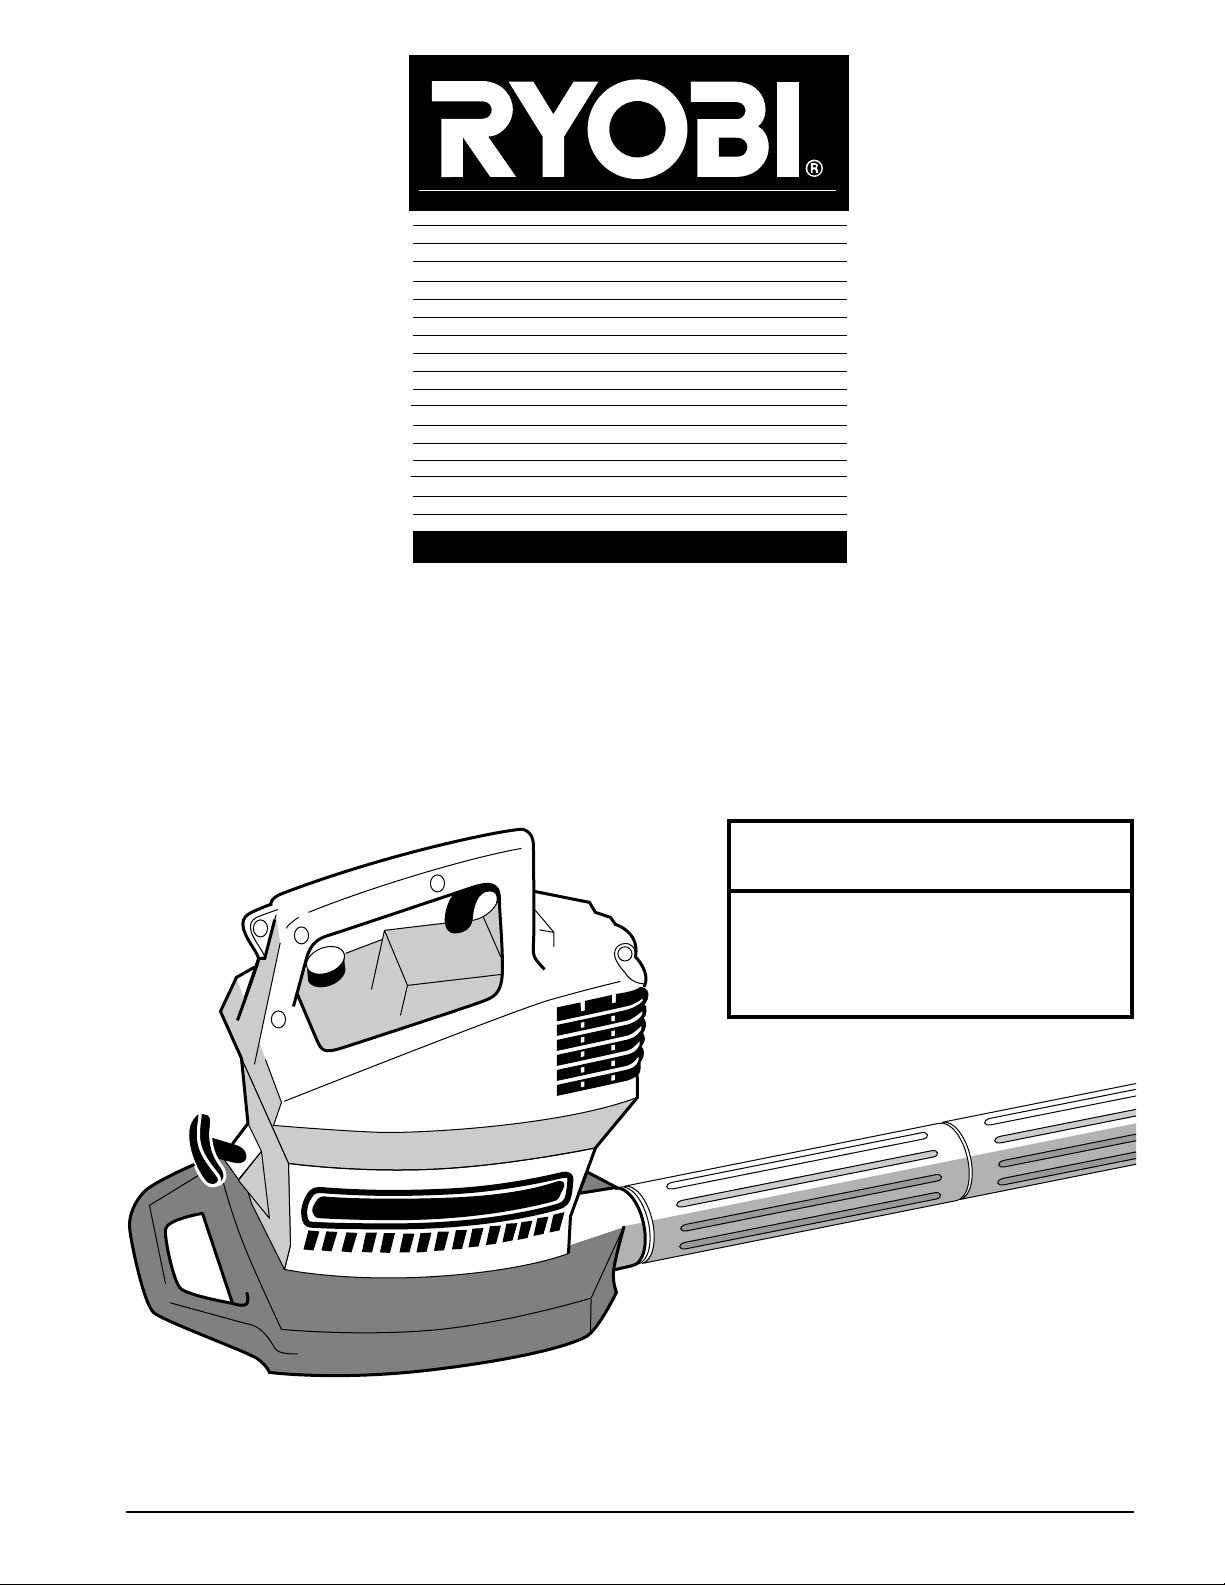
Model 310r
Blower
Model 310BVr
Blower Vac
Page 2
2
I. California Emission Regulations ................................3
II. Safety Warnings ......................................................3-5
A. Operational ........................................................3-4
B. Safety and International Symbols ......................4-5
III. Assembly Instructions ............................................6-8
A. Blower Tube and Nozzle Assembly ......................6
B. Installing the Vacuum Bag Assembly
(Optional for Model 310r) ......................................6
C. Installing the Adapter
(Optional for Model 310r) ......................................7
D. Installing the Vacuum Tubes
(Optional for Model 310r)....................................7-8
IV. Oil and Fuel Information ............................................9
V. Starting/Stopping Instructions..................................10
VI. Operating Procedures ..............................................11
A. Typical Operating Positions ................................11
B. Vacuum Operating Procedures
(Optional for Model 310r) ....................................11
VII. Maintenance and Repair ....................................12-16
A. Maintenance Schedule ........................................12
B. Air Filter Maintenance ....................................12-13
C. Carburetor Adjustment ..................................13-15
D. Replacing the Spark Plug ....................................15
E. Inspecting/Cleaning the Muffler......................15-16
VIII. Cleaning and Storage ..............................................17
IX. Specifications ..........................................................17
X. Troubleshooting ........................................................18
XI. California Emission Control Warranty Statement ....19
XII. Warranty Statement ................................................20
SERVICE INFORMATION
Service on this power equipment within and after
the warranty period can be performed by any
Authorized Service Dealer.
Dial 1-800-345-8746 in the United States and
1-800-265-6778 in Canada to obtain the listing
of
servicing dealers in your area.
DO NOT RETURN UNIT TO RETAILER.
NOTE: PROOF OF PURCHASE WILL BE
REQUIRED FOR WARRANTY
SERVICE.
THANK YOU
Thank you for purchasing this quality product. This modern power tool has been designed to provide you with
many hours of useful service. You will find it to be a great
labor-saving device.
This manual has been prepared to provide you with common sense operating instructions and to ensure that you
will get maximum satisfaction. To keep your unit in top
operating condition, use the maintenance and service procedures in this manual.
PRODUCT REFERENCES,
ILLUSTRATIONS AND SPECIFICA TIONS
All information, illustrations and specifications in this manual are based on the latest product information available at
the time of printing. We reserve the right to make changes
at any time without notice.
TABLE OF CONTENTS
INTRODUCTION
MAKE SURE THIS MANUAL IS
CAREFULLY READ AND UNDERSTOOD
BEFORE STARTING OR OPERATING
THIS EQUIPMENT.
California Proposition 65 Warning:
Page 3
3
CALIFORNIA EMISSION REGULATIONS
SAFETY WARNINGS
FUELING AND PRE-OPERATION
• Gasoline is extremely flammable and its vapors can
explode if ignited. Always stop the engine and allow it
to cool before filling the fuel tank. Do not smoke while
filling the fuel tank. Keep sparks and open flames
away from the area.
• Store the gasoline and fuel only in containers
designed and approved for the storage of such materials.
• Pressure can build up in the fuel tank. Loosen the fuel
tank cap slowly to relieve any pressure in the tank.
• Add fuel in a clean, well-ventilated area. Wipe up any
spilled fuel immediately. If fuel has been spilled, allow
it to dry completely before starting the engine.
• Move the unit at least 10 ft (3 m) from the fueling point
before starting the engine.
• Thoroughly inspect the unit for loose or damaged
parts before each use. Do not use until adjustments or
repairs are made.
• Avoid accidental starting. Be in the starting position
whenever pulling the starting rope.
• Keep all bystanders, especially children, and pets at
least 30 ft (10 m) away from the area.
DURING OPERATION
• Wear safety glasses or goggles at all times when operating the unit.
• Dress properly. Do not operate the unit when barefoot
or wearing open sandals. Always wear sturdy, rubbersoled footwear. The use of gloves, ear/hearing protection, and long pants are recommended.
• Do not wear loose-fitting clothing, or loose articles
such as scarves, strings, chains, ties, etc. because
they could get drawn into the air intake. Also make
sure long hair does not get drawn into the air intake.
• Keep hands, face and feet away from all moving parts.
• Rotating impeller blades can cause severe injury. Stop
the engine before opening the vacuum door or installing/changing tubes. Do not put hands or any other
object into the vacuum tubes while they are installed
on the unit.
• Do not touch the muffler or cylinder. These parts get
extremely hot from operation and remain hot for a
short time after the equipment is turned off.
• Operate the unit only in a well-ventilated area,
outdoors. Carbon monoxide exhaust fumes can be
lethal in a confined area.
• Inspect the area before starting the unit. Remove all
debris and hard or sharp objects such as rocks, glass,
wire, etc.
• Do not point the blower in anyone’s direction or in the
direction of windows. The blower can propel objects
at high speed.
• Do not wear rubber or other insulated gloves when
using the unit to avoid static electricity shock.
• Do not overreach. Keep proper footing and balance at
all times.
• Never run the unit without the proper equipment
attached. When used as a blower, always install the
blower tube. When used as a vacuum, always install
the suction tubes and collection bag assembly. Make
sure the collection bag is completely zipped when the
NOTE: Advises you of information or
instructions vital to the operation or
maintenance of the equipment.
WARNING: Failure to obey a safety warning
can result in injury to yourself and others.
THE PURPOSE OF SAFETY SYMBOLS IS TO ATTRACT
YOUR ATTENTION TO POSSIBLE DANGERS. THE
SAFETY SYMBOLS, AND THE EXPLANATIONS WITH
THEM, DESERVE YOUR CAREFUL ATTENTION AND
UNDERSTANDING. THE SAFETY WARNINGS DO NOT
BY THEMSELVES ELIMINATE ANY DANGER. THE INSTRUCTIONS OR WARNINGS THEY GIVE ARE NOT
SUBSTITUTES FOR PROPER ACCIDENT PREVENTION
MEASURES.
SYMBOL MEANING
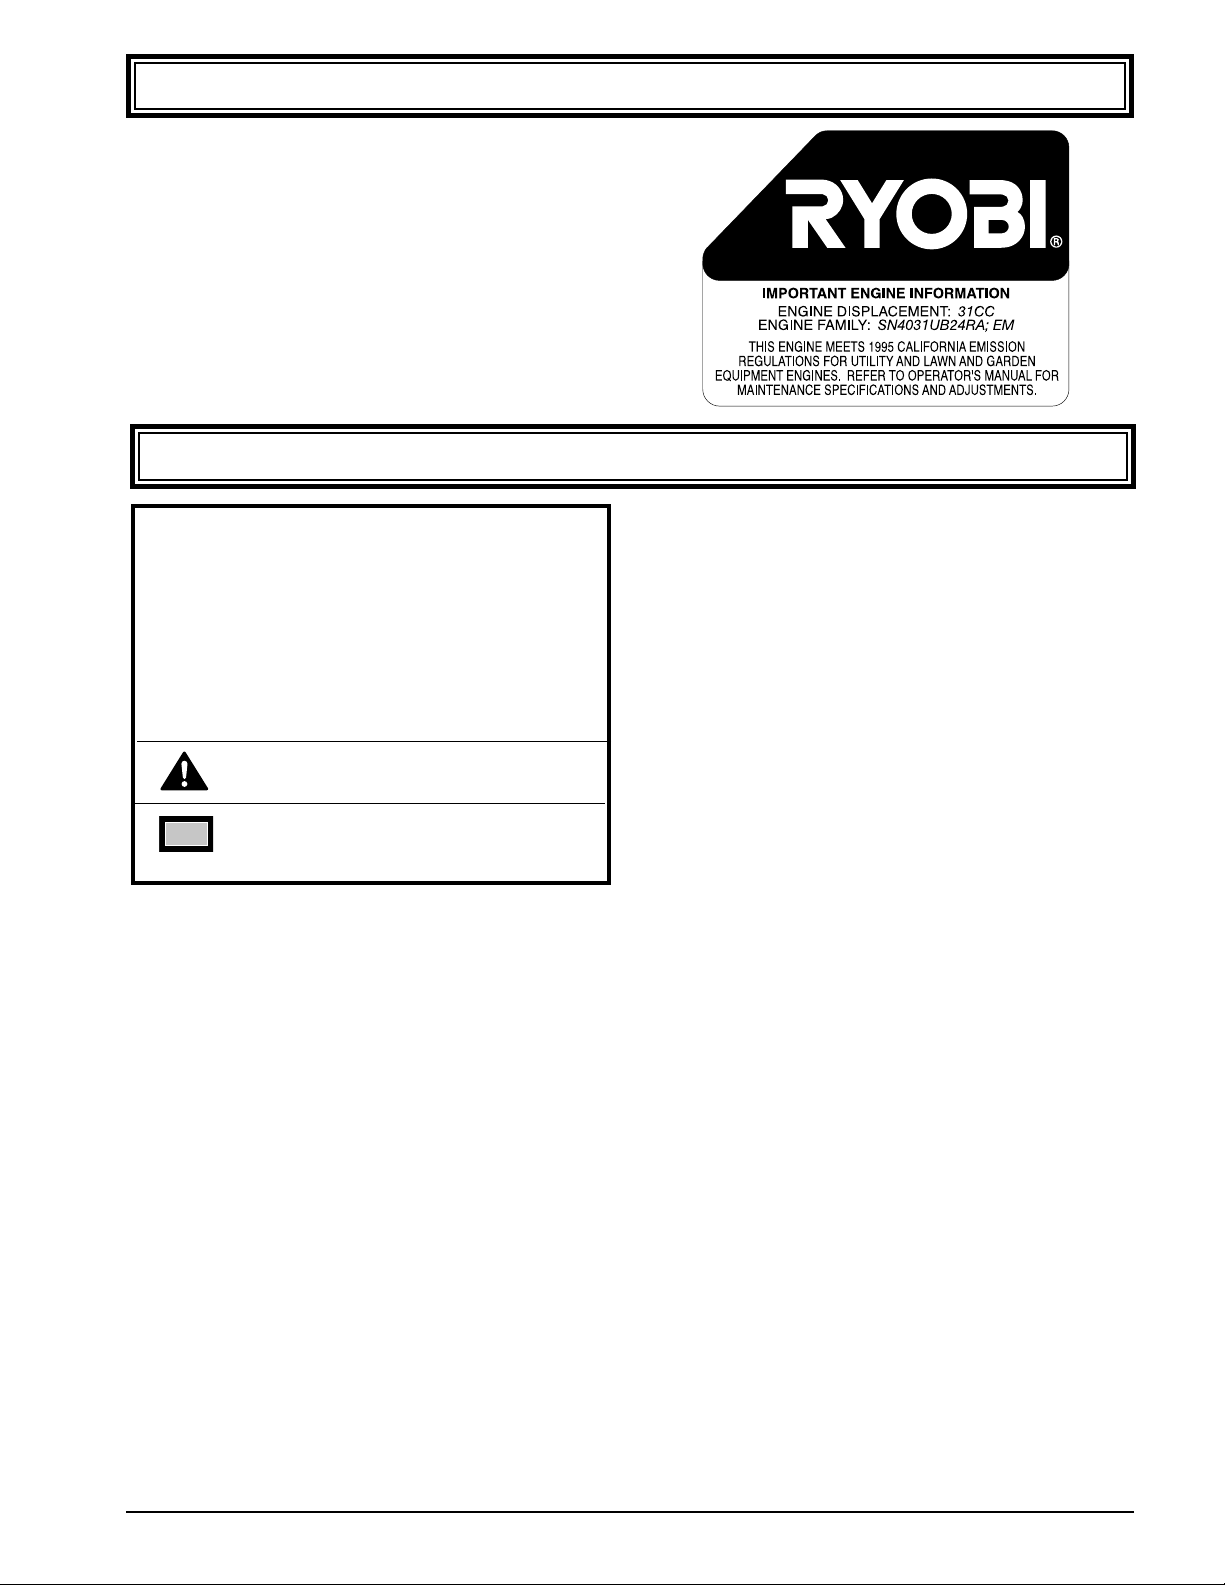
The engine of your lawn and garden care product
meets the 1995 California emissions regulations.
To ensure that your unit continues to meet these
regulations, refer to the following information and
instructions in this operator's manual.
These units are identified by the label on the engine
of your product. A typical identification label is
shown.
Page 4
4
SAFETY WARNINGS (Continued)
unit is running to avoid flying debris.
• Avoid situations that could catch the collection bag on
fire. Do not operate near an open flame. Do not vacuum warm ash from fireplaces, barbeque pits, brush
piles, etc. Do not vacuum discarded cigars or cigarettes unless the cinders are completely cool.
• Use the right tool. Do not use this unit for any job
except that for which it is intended.
• Always remain alert. To prevent injury to yourself and
others, do not operate this unit if you are fatigued.
• Use only genuine replacement parts when servicing
this unit. These parts are available from your authorized dealer. The use of non-standard parts, or other
accessories or attachments not designed for this unit
could result in serious injury to the user or damage to
the unit.
AFTER OPERATION
• Turn off the engine and let it cool before refueling or
before putting the unit in storage.
• Store the unit in an upright position on the feet provided.
• Store the unit in an area free of potential fuel vapor
ignition sources such as open flames (pilot lights) or
electrical sparking devices (switches, electric motors).
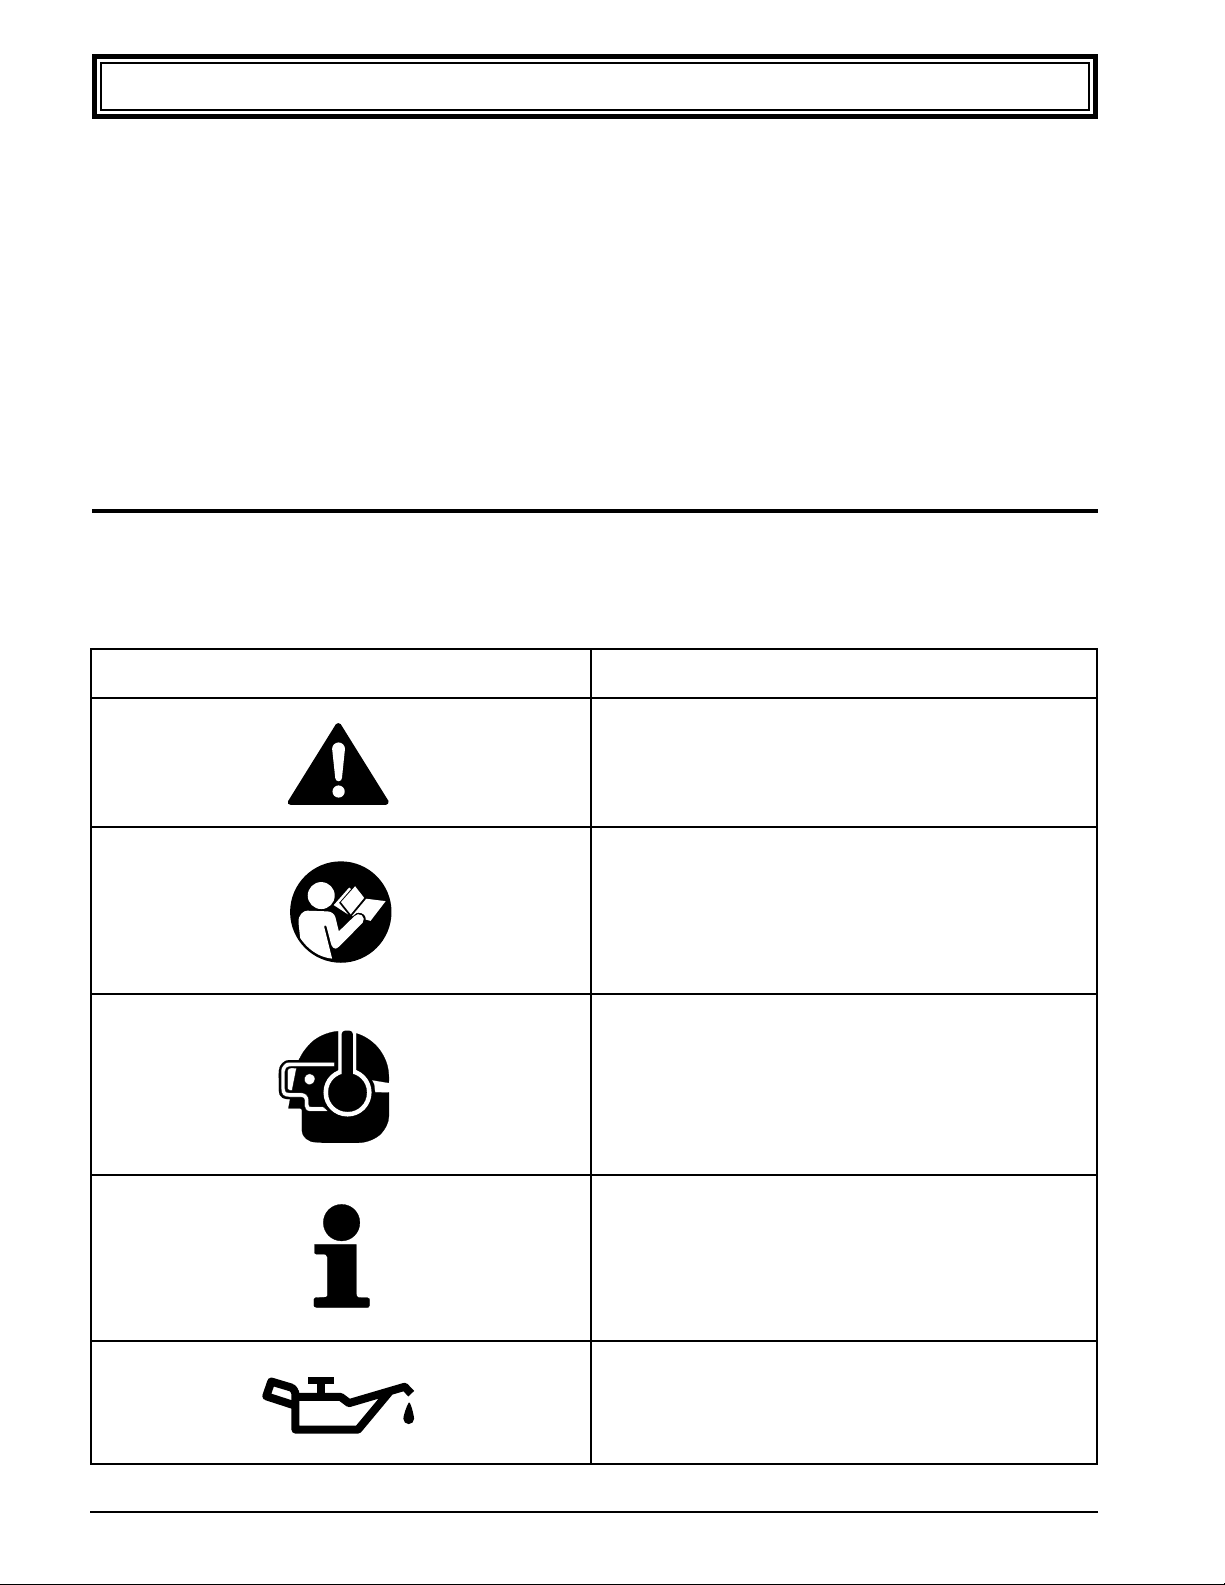
SAFETY AND INTERNATIONAL SYMBOLS
This operator's manual describes safety and international symbols and pictographs that may appear on this product. Read
the operator's manual for complete safety, assembly, operating and maintenance and repair information.
• SAFETY ALERT SYMBOL.
Indicates caution, warning or danger. May be
used in conjunction with other symbols or pictographs.
• READ OPERATOR'S MANUAL.
Failure to follow operating instructions and safety precautions in operator's manual can result in
serious injury. Read operator's manual before
starting or operating this unit.
• WEAR EYE AND HEARING PROTECTION.
Warning. Thrown objects and loud noise can
cause severe eye injury and hearing loss. Wear
ear and eye protection when operating this unit.
• FOR SERVICE INFORMATION, CALL:
USA: 1-800-345-8746
CANADA: 1-800-265-6778
• INDICATES OIL.
Refer to operator's manual for the proper type of
oil.
SIGNIFICATIONSYMBOL
Page 5

5
SAFETY WARNINGS (Continued)
• UNLEADED FUEL.
Always use clean, fresh unleaded fuel.
• PRIMER BULB.
Push primer bulb, fully and slowly, 5 to 7 times.
• CHOKE CONTROL.
FULL CHOKE position.
• CHOKE CONTROL.
PARTIAL CHOKE position.
• CHOKE CONTROL.
RUN position.
• IGNITION / POWER SWITCH.
ON / START / RUN
• IGNITION / POWER SWITCH.
OFF OR STOP
• HOT SURFACE WARNING.
Do not touch a hot muffler, gear box or cylinder.
You may get burned. These parts get extremely
hot from operation and remain hot for a short
time after the unit is turned off.
• BLOWERS AND BLOWER / VACUUMS –
ROTATING BLADES CAN CAUSE SEVERE
INJURY.
Stop the engine or motor before opening the
vacuum door or installing / changing tubes.
Do not put hands or any other objects into the
vacuum tubes while they are installed on this unit.
SYMBOL SIGNIFICATION
I
O
Page 6
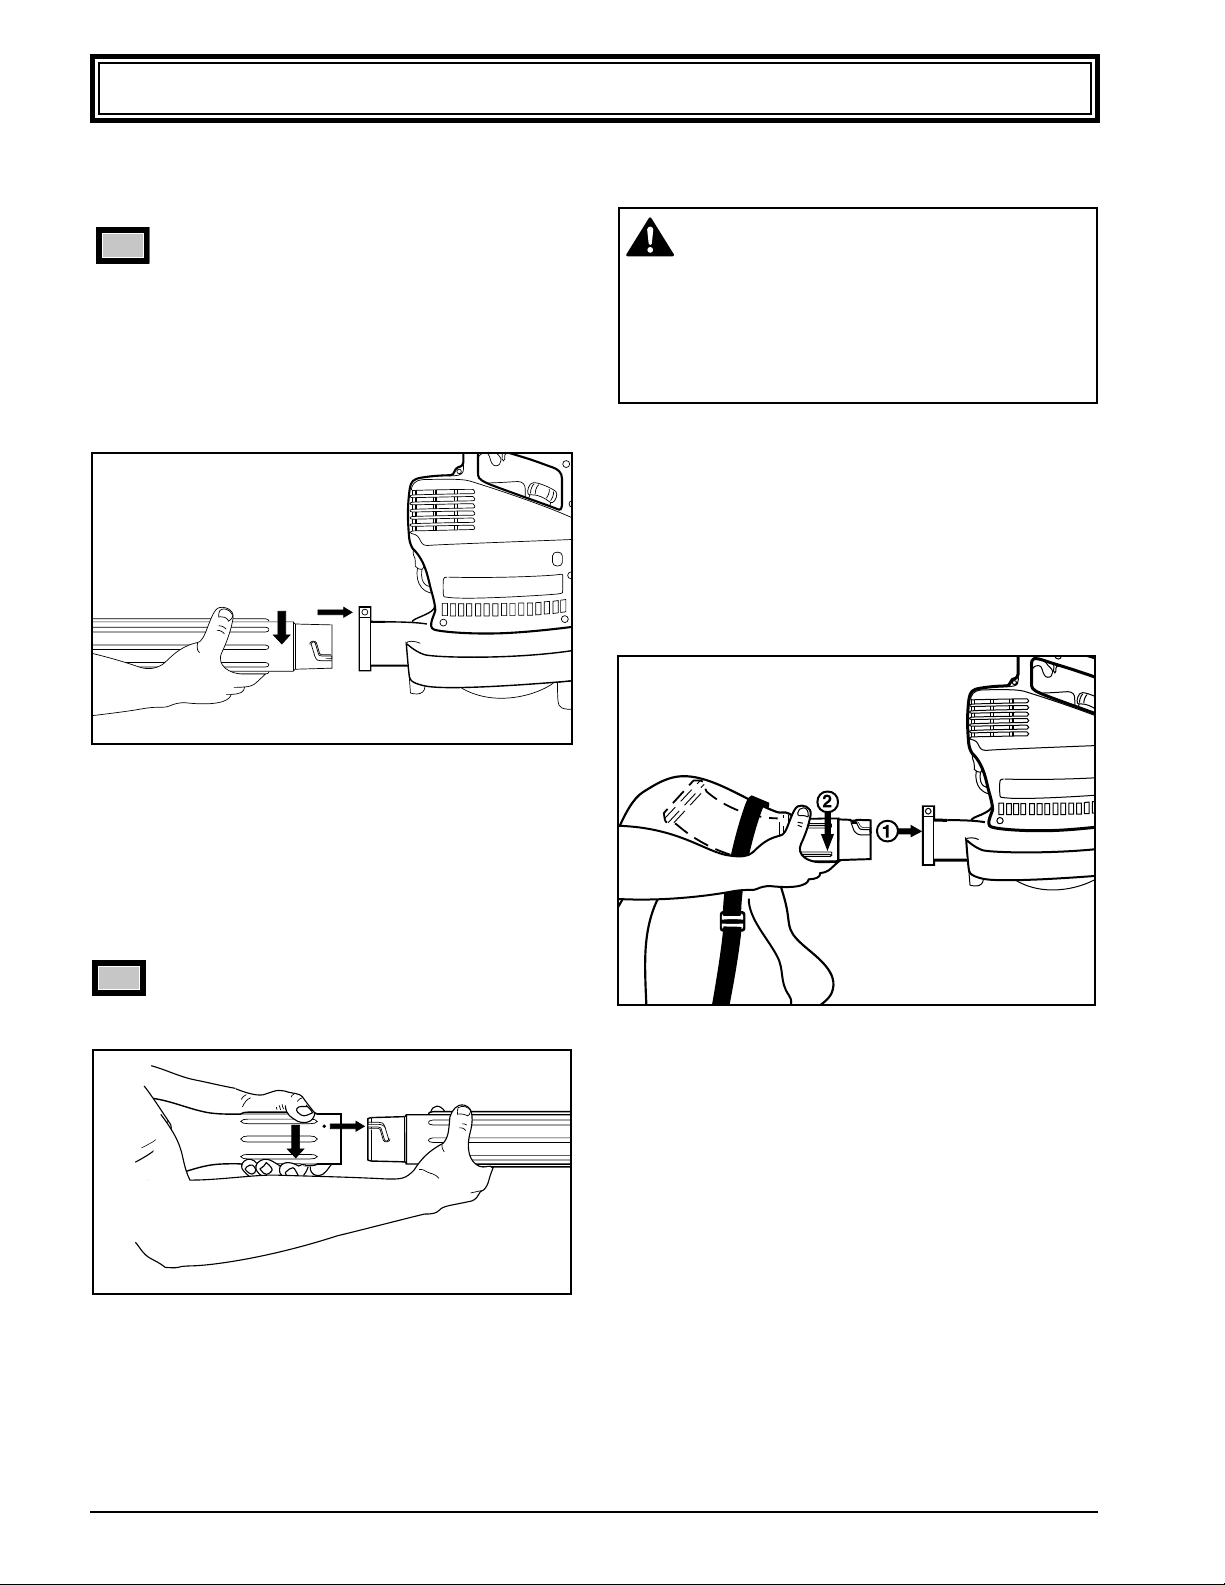
WARNING
Rotating impeller blades can cause severe
injury. Do not attempt to convert the unit while
the engine is running to avoid serious personal
injury. Do not put hands or any other object into
the vacuum tubes while they are installed on
the unit.
1. Remove the blower tubes.
2. Align the grooves in the vacuum bag/elbow tube
assembly with the pins in the blower outlet.
3. Grasping the tube firmly with both hands, push the
vacuum bag/elbow tube assembly into the blower
outlet (Fig. 3). Turn the assembly clockwise until it
snaps into the detent and locks. The curve of the
tube should angle upwards.
6
BLOWER TUBE AND NOZZLE ASSEMBL Y
- BOTH MODELS
NOTE: Do not install tubes while unit is running.
1. Align the grooves in the blower tube with the pins in
the blower outlet.
2. Grasping the tube firmly with both hands, push the
tube into the blower outlet (Fig. 1). Turn the tube
clockwise until it snaps into the detent and locks.
ASSEMBLY INSTRUCTIONS
Fig. 1
3. Align the pins of the blower nozzle with the grooves in
the blower tube (Fig. 2).
4. Grasping the nozzle firmly with both hands, push the
nozzle onto the blower tube. Turn the nozzle
clockwise until it snaps into the detent and locks.
NOTE: The blower tube and nozzle or vacuum
bag must be used at all times to prevent
overheating the engine.
Fig. 2
Fig. 3
INSTALLING THE VACUUM BAG/TUBE
ASSEMBLY (OPTIONAL FOR MODEL 310r)
Page 7

7
ASSEMBLY INSTRUCTIONS (Continued)
INSTALLING THE ADAPTER ONTO THE
UPPER VACUUM TUBE - (OPTIONAL
FOR MODEL 310r)
NOTE: Do not install while unit is running.
1. Turn the blower upside down as shown in Fig. 4.
Hold the blower between your knees to install the
adapter and vacuum tubes.
3. Align the adapter's three (3) slots with the unit's three
(3) hooks. Push firmly so all three (3) hooks snap
through (Fig. 7).
Fig. 7
Fig. 4
Ta b
Fig. 5
2. Push the door lock tab in the direction shown in Fig. 5
and open the door (Fig. 6).
Fig. 6
4. Align the arrow on the upper tube with the arrow on
the adapter. Slide the upper vac tube onto the
adapter (Fig. 8).
NOTE: The arrows must align properly to install
the vacuum tubes correctly.
Fig. 8
Page 8

8
INSTALLING THE VACUUM TUBES (OPTIONAL FOR MODEL 310r)
NOTE: Do not install tubes while unit is running.
1. Align the arrow on the lower vacuum tube with the
arrow on the upper vacuum tube (Fig. 12).
2. Grasping the lower vac tube firmly with both hands,
push the lower vac tube into the upper vac tube. Turn
the lower vac tube clockwise until it snaps into detent
and locks. (The dot on the lower tube aligns with the
dot on the upper tube) when properly assembled.
ASSEMBLY INSTRUCTIONS (Continued)
5. Grasping the upper vac tube firmly with both hands
(Fig. 9), turn the vac tube clockwise (Fig. 10) until
the tabs of the adapter (2) snap into the square
indentations of the upper vac tube (2) (Fig. 11).
NOTE: This assembly requires the use of both
hands because the parts fit together
tightly.
Fig. 9
NOTE: The flat on the upper tube should face the
handle as you install the tube (Fig. 13).
Adapter
Fig. 10
Fig. 11
NOTE: When the tabs lock into the indentations,
the adapter and vacuum tube become a
permanent assembly. The adapter cannot
be removed from the vacuum tube.
Lower Vac Tube
Upper Vac
Tube
Fig. 12
Installing the Vacuum Tubes to the Blower/Vac
NOTE: Do not install tubes while unit is running.
1. Grasp the assembled tube firmly with both hands.
Turn the tube/adapter clockwise as far as possible to
the end of the grooves until it snaps into the detent
and locks (Fig. 13).
NOTE: When the tube is installed correctly, the
flat on the upper tube faces the handle
on the blower/vac (Fig. 13).
Fig. 13
Handle
Flat
Page 9

WARNING
Remove fuel cap slowly to avoid injury
from fuel spray.
NOTE: BE SURE TO READ THESE
INSTRUCTIONS CAREFULLY BEFORE
ATTEMPTING TO START OR OPERATE
THIS UNIT. Using old or improper oil or
fuel, or improperly mixing the oil and fuel
can cause engine damage. This type of
damage will void the engine warranty.
WARNING
Gasoline is extremely flammable and its
vapors can explode if they are ignited. Always
stop the engine and allow it to cool before filling
the fuel tank. Do not smoke while filling the
tank. Keep sparks and open flames away from
the area.
RECOMMENDED OIL TYPE
A 4 oz. (0.118 liter) bottle of 2-cycle engine oil is included
with your product.
RYOBI 2-cycle oil is recommended for this outdoor power
tool. If another brand of 2-cycle oil is used, make sure it is
high quality oil, formulated for 2-cycle, air-cooled engines.
DANGER: Combustible mixture contains petroleum
distillate. Store away from heat or open flame.
Harmful or fatal if swallowed. If swallowed, do
not induce vomiting. CALL PHYSICIAN
IMMEDIATELY. Avoid prolonged contact with
skin. Wash thoroughly after handling.
Do not reuse bottle.
RECOMMENDED FUEL TYPE
Use clean, fresh, unleaded gasoline that is less than 60
days old.
NOTE: Alcohol blended fuel absorbs moisture
(water). As little as 1% moisture in the
fuel can cause fuel and oil to separate
and form acids when stored.
If this type of fuel must be used, use
fresh fuel, (less than 60 days old) and
mix according to the mixing instructions.
DEFINITION OF BLENDED FUELS
Today's fuels are often a blend of gasoline and one or
more oxygenates such as ethanol, methanol or MTBE
(ether).
9
OIL & FUEL INFORMATION
THIS ENGINE IS CERTIFIED TO OPERATE ON UNLEADED GAS AND OIL MIXTURE.
USE OF BLENDED FUELS
If you choose to use a blended fuel or its use is unavoidable, the following precautions are recommended.
1. Always use fresh fuel mix per your operator's manual.
2. Use the special additive STA-BIL® or an equivalent.
3. Always agitate the fuel mix before fueling the unit.
4. Drain the tank and run the engine dry before storing
the unit.
USE OF FUEL ADDITIVES
The use of fuel additive, such as STA-BIL®Gas Stabilizer
or an equivalent, will inhibit corrosion and minimize the
formation of gum deposit. Add 0.8 oz (23 ml) per gallon of
fuel per instructions on container. NEVER add fuel additives directly to the unit's fuel tank. Using a fuel additive
can keep fuel fresh for up to six (6) months.
OIL AND FUEL MIXING INSTRUCTIONS
NOTE: For proper engine operation and maxi-
mum reliability, pay strict attention to the
oil and fuel mixing instructions on the
2-cycle oil container. Use a 32:1 fuel/oil
ratio when you use 2-cycle oil. Using
improperly mixed fuel can severely damage the engine.
Thoroughly mix the proper ratio of 2-cycle engine oil with
unleaded gasoline in a separate fuel can, 32:1. Do not mix
them directly in the engine fuel tank. See the table below
for specific gas and oil mixing ratios.
Page 10

10
5. SQUEEZE THE THROTTLE TRIGGER TO FULL
THROTTLE. Hold the trigger in this position.
6. PULL THE STARTER ROPE BRISKLY until you hear
the engine sounds like it wants to run (normally 2 to 5
pulls).
7. PLACE THE CHOKE LEVER IN THE "PARTIAL"
POSITION. Pull the starter rope briskly 1 to 3 times to
start the engine. See Fig. 15.
NOTE: If the engine does not start immediately,
repeat steps 2 through 7.
8. After the engine warms up for 5 to 10 seconds,
PLACE THE CHOKE LEVER IN THE "RUN" POSITION. See Fig. 15.
STOPPING
To stop the engine, push and hold the stop button until the
engine comes to a complete stop (Fig. 18).
NOTE: To prevent vapor lock, avoid setting the
unit in the sun.
Fig. 17
STARTING/STOPPING INSTRUCTIONS
Fig. 16
STARTING
1. MIX OIL WITH GAS per instructions (page 8).
2. FULLY PRESS AND RELEASE THE PRIMER BULB
UNTIL FUEL IS VISIBLE IN BULB. See Fig. 14 for
the primer bulb location.
4. HOLD THE BLOWER/VAC IN THE STARTING
POSITION (Fig. 16 for blower, Fig. 17 for vacuum).
3. PLACE THE CHOKE LEVER IN THE FULL "CHOKE"
POSITION. See Fig. 15.
Primer
Bulb
Fig. 14
Fig. 15
Fig. 18
Page 11

11
WARNING
DO NOT OPEN THE DOOR WITH THE
ENGINE RUNNING! To do so can result in
serious personal injury caused by contact with
the rotating blades.
NOTE: Do not wear rubber or any other insulated
gloves to avoid static electricity shock.
1. Move the unit slowly back and forth over the debris
to be vacuumed (Fig. 22).
WARNING
Wear goggles or safety glasses at all times when
operating this unit.
TYPICAL OPERATING POSITIONS
1 Use the blower for trees, shrubs, flower beds and
hard-to-clean areas (Fig. 19).
OPERATING PROCEDURES
2. Use the unit around buildings and for other normal
cleaning (Fig. 20).
3. Use the blower for walls, overhangs and screens
(Fig. 21).
Fig. 20
Fig. 21
VACUUM OPERATING PROCEDURES (OPTIONAL FOR MODEL 310r)
Fig. 22
Fig. 19
2. Vacuum a large pile of debris working from the outside of the pile. Do not force the suction tube into the
debris because this can clog the tube.
3. Empty the collection bag after each use. Shake the
bag vigorously while emptying to remove dust from
the bag, which can block the proper amount of air
flow and deteriorate the performance of the vacuum.
NOTE: Use the zipper when emptying the
collection bag. Do not empty the bag
through the nozzle.
Page 12

12
NOTE: CLEAN AND RE-OIL THE AIR FILTER
EVERY 10 HOURS OF OPERATION.
Your unit's air filter is one of the most
important areas to maintain. If it is not
maintained as follows, you will void the
warranty.
1. Press the filter cover with your finger and remove the
cover from the air filter base (Fig. 23).
MAINTENANCE SCHEDULE
These required maintenance procedures should be performed at the frequency stated in the table to ensure that
your unit continues to meet the 1995 California emission regulations. They should also be included as part of
any seasonal tune-up.
MAINTENANCE AND REPAIR INSTRUCTIONS
FREQUENCY MAINTENANCE REQUIRED REFER TO:
Before
Starting
Engine
Every
10 Hours
Every
25 Hours
Every
50 Hours
Fill fuel tank with correct oil and fuel mixture.
Clean and re-oil air filter.
Inspect and clean muffler.
Check spark plug condition and gap.
Page 9
Page 15
Page 16
Page 13
AIR FILTER MAINTENANCE
Fig. 23
2. Remove the air filter from the air filter cover assembly
(Fig. 24).
Fig. 24
3. Wash the filter in detergent and water (Fig. 25). Rinse
the filter thoroughly and allow it to dry.
Fig. 25
Page 13

13
Fig. 26
Fig. 27
Fig. 28
6. Carefully reinstall the air filter. Be sure the filter is
sealed properly before placing it on the air filter base
(Fig. 28).
5. Squeeze the filter to spread the oil (Fig. 27).
MAINTENANCE AND REPAIR INSTRUCTIONS (Continued)
4. Apply clean oil to the filter enough to saturate the
filter (Fig. 26).
CARBURETOR ADJUSTMENT
This unit is equipped with a diaphragm-type carburetor
that has been carefully calibrated at the factory. In most
cases, no further adjustment is required.
NOTE: To meet the 1995 California emission
regulations, the carburetor has
adjustment needle limiter caps to restrict
the amount of adjustment.
The condition of the air filter is important to the operation
of the blower. A dirty air filter will restrict the air flow, which
upsets the fuel-air mixture in the carburetor. The resulting
symptoms are often mistaken for an out-of-adjustment
carburetor. Therefore, check the condition of the air filter
before adjusting the carburetor. Refer to Air Filter
Maintenance.
If the following conditions are experienced, it may be necessary to adjust the carburetor:
• The engine will not idle
• The engine hesitates or stalls on acceleration
• The loss of engine power that is not corrected by
cleaning the air filter and muffler
NOTE: Careless adjustments can seriously
damage your unit.
Adjusting the Carburetor
1. Clean the air filter if it is dirty. Refer to Air Filter
Maintenance.
2. Make the initial settings with the engine stopped.
These initial settings should allow you to start and
warm up the unit before making the final adjustments.
Initial Idle Speed Setting
a) Remove the air filter cover and insert a screwdriver
through the opening in the air filter base (Fig. 29).
b) For Walbro carburetors: Back the idle speed screw
(Fig. 30 - page 14) out (counterclockwise) until it
does not contact the carburetor throttle lever. Then
turn the screw in (clockwise) until it just begins to
move the throttle lever; then continue turning 2 full
turns.
c) For Zama carburetors: Back the idle speed screw
(Fig. 31 - page 14) out (counterclockwise) until it
does not contact the throttle valve located inside of
the carburetor. This is accomplished by carefully
watching for the movement of the throttle lever to
stop. Then turn the screw in (clockwise) until it just
begins to move the throttle lever, then continue
turning 1 1/2 turns.
Page 14

3. Initial High Speed Mixture and Idle Speed Mixture
Needle Settings: Insert the screwdriver through the
hole at the back of the top handle (Fig. 32). Turn both
the high speed mixture and idle speed mixture
needles out (counterclockwise) until the limiter
caps stop.
4. Start the engine and let it run for a minute.
5. Release the throttle trigger and let the engine idle. If
the engine stops, turn the idle speed screw (Figs. 30
and 31) in (clockwise) 1/8 turn at a time (as required)
until the engine idles.
NOTE: Forcing the limiter caps with a
screwdriver will damage the needle tips
and the seat in the carburetor body.
6. Final Idle Speed Screw and Idle Speed Mixture
Needle Settings: Adjust the idle speed screw and idle
speed mixture needle for smoothest engine idle.
a. Turn the idle speed mixture needle (Figs. 30 and
31) in (clockwise) until you hear the fastest idle;
then turn the needle out (counterclockwise) 1/8
turn.
b. Squeeze the throttle trigger. If the engine falters
or hesitates as it accelerates, turn the idle speed
mixture needle (Figs. 30 and 31) out
(counterclockwise) 1/16 turn at a time until the
engine accelerates rapidly.
c. If the idle speed changes significantly because of
Steps a and b, readjust the idle speed screw
(refer to Step 2).
7. Final High Speed Mixture Needle Adjustment:
a. High speed mixture needle adjustment is not
recommended without a precision high speed
tachometer.
b. The factory presets the high speed mixture
needle at 1-1/4 turns out from the closed
position. Your unit should perform well at this
setting. If additional adjustment of the high speed
mixture needle is required, contact your local
authorized service dealer.
14
MAINTENANCE AND REPAIR INSTRUCTIONS (Continued)
Fig. 31
Fig. 29
Fig. 30
WALBRO CARBURETOR
Throttle
Lever
Idle Speed
Screw
High Speed
Mixture Needle
Idle Speed
Mixture Needle
Idle Speed
Screw
Throttle
Lever
High Speed
Mixture Needle
Idle Speed Mixture Needle
ZAMA CARBURETOR
NOTE: If the limiter caps are removed at any
time, your unit will no longer meet the
1995 California emission regulations and
you will void the warranty.
Page 15

NOTE: If the carburetor adjustments do not help
the unit to run properly, contact your
authorized service dealer.
15
MAINTENANCE AND REPAIR INSTRUCTIONS (Continued)
INSPECTING/CLEANING THE MUFFLER
The muffler should be removed every 25 hours of operation to inspect for excessive carbon build-up. Excessive
deposits around the exhaust ports or exhaust holes will
cause poor engine performance.
Use the following procedure to remove, inspect and clean
and reinstall the muffler.
Fig. 34
WARNING
Make sure the muffler is cool before inspecting
and cleaning it.
1. Remove the muffler mounting bolts (Fig. 34).
2. Remove the muffler (with heat shield) and gasket.
Discard the old gasket.
Fig. 32
REPLACING THE SPARK PLUG
Use a Champion RDJ7Y spark plug (or equivalent). Correct
air gap is .025 in (0.635 mm). Remove plug after every 50
hours of operation and check its condition.
1. Stop the engine and pull the wire off of the spark
plug.
2. Clean around the spark plug and remove it from the
cylinder head.
NOTE: Replace a cracked, fouled or dirty spark
plug. Do not sand blast, scrape or clean
electrodes because the engine could be
damaged by grit entering thecylinder.
3. Set the air gap at .025 in (0.635 mm) using a wire
feeler gauge (Fig. 33). Install a correctly gapped spark
plug into the cylinder head. Torque to 110-120 in•lb
(12.3-13.5 N•m).
Fig. 33
Exhaust Exit Tube Removal
The exhaust exit tube is removable on blower and
blower/vac mufflers. To remove the exhaust exit tube:
1. Remove the screws securing the exhaust exit tube to
the muffler body (Fig. 35).
2. Remove the exhaust exit tube and gasket.
Muffler Mounting Bolts
.025 in
(0.635 mm)
Page 16

16
MAINTENANCE AND REPAIR INSTRUCTIONS (Continued)
If carbon build-up cannot be cleaned, replace the muffler.
3. Inspect the muffler mounting holes for elongation.
Replace the muffler if the holes are elongated.
Muffler Reassembly
1. Install a new gasket*. Make sure the arrow stamped
into the gasket is to your right. Tuck the tab (with the
arrow) between the cylinder and plastic shroud
(Fig. 38).
2. Install the muffler with the muffler mounting bolts (see
Fig. 35) and torque the bolts to 80-90 in•lb
(9-10.1 N•m).
Inspection and Cleaning
1. Check the inlet port of the muffler and outlet port of
the cylinder for excessive carbon deposits (Fig. 36).
Clean as required.
Fig. 35
Fig. 36
2. Inspect the baffle inside the muffler for carbon buildup. Clean baffle by scraping carbon as required. Use a
piece of wire to clear obstructions from the small
holes in baffle (Fig. 37).
Fig. 37
Fig. 38
* Some earlier units have a muffler gasket with slots.
Muffler Gasket
Inlet Port
Exhaust
Exit Tube
Screws
Page 17

17
ENGINE
Manufacturer ..........................Ryobi Outdoor Products,
Inc.
Type ..........................................2-Cycle, Air-Cooled
Displacement............................31 cc (1.9 cu. in)
Bore ..........................................1.37 in (34.79 mm)
Stroke ......................................1.25 in (31.75 mm)
Operating RPM ........................7200-7500
Ignition ......................................Electronic Ignition
Lubrication................................Fuel/Oil Mix
Carburetor ................................Diaphragm, All Position
Ignition Switch ..........................Push Button
Starter ......................................Auto Rewind
Muffler ......................................Baffled With Guard
Clutch ......................................None
Throttle......................................Manual Spring Return
Bearings....................................Needle & Ball
Crankshaft ................................Cantilevered
Connecting Rod........................Steel
Fuel Tank ..................................Clear Sight
Fuel Tank Capacity ..................18 fl. oz (0.51 L)
BLOWER
Max. Blower Velocity................150 mph (241.4 kmh)
Max. Blower Volume ................324 cfm (9.18 cmm)
Operating Weight......................12 lbs (5.22 kg)
BLOWER / VACUUM
Vacuum Bag Capacity..............1.4 bushels (0.066m3)
SPECIFICATIONS
WARNING
Always turn off your unit before you clean
or perform any maintenance on it.
Cleaning
Use a small brush to clean off the outside of the unit. Do
not use strong detergents on plastic housing or handle.
They can be damaged by household cleaners that contain
aromatic oils such as pine and lemon, and by solvents
such as kerosene.
Storage
If the unit will be stored for an extended period of time,
use the following storage procedure.
1. Drain all fuel from the fuel tank. Make sure that the
fuel is drained into a container with the same 2-cycle
fuel mixture. Do not use fuel that has been stored for
more than 60 days. Dispose of the old fuel/oil mix in a
safe manner and use a fresh mix.
2. Start the engine and allow it to run until it stalls.
3. Allow the engine to cool. Remove the spark plug and
put approximately 1 ounce of any high quality motor
oil or 2-cycle oil into the cylinder. Pull the starter rope
slowly to distribute the oil. Reinstall the spark plug.
NOTE: Remove the spark plug and drain all of
the oil from the cylinder before attempting to start the unit after storage.
4. Thoroughly clean the unit and inspect it for any loose
or damaged parts. Repair or replace the damaged
parts and tighten any loose screws, nuts or bolts.
The unit is now ready for storage.
5. Store the unit in a dry, well-ventilated area.
CLEANING AND STORAGE
Page 18

18
TROUBLESHOOTING
PROBLEM CAUSE ACTION
Engine Will Not Start Choke in incorrect position Refer to starting/stopping instructions
on page 10
Empty fuel tank Fill fuel tank
Primer bulb wasn't pushed Press primer bulb fully and slowly until
enough fuel is visible in bulb
Engine flooded Use starting procedure WITHOUT
USING CHOKE
Engine Will Not Idle Carburetor misadjusted Adjust carburetor
Engine Will Not Accelerate Carburetor misadjusted Adjust carburetor
Throttle wire has come loose Thread throttle wire through the
carburetor throttle lever. Tighten screw.
Engine Lacks Power or Stalls Dirty air filter Clean or replace air filter
No oil in fuel Add oil to fuel
If further assistance is required, contact your local authorized service dealer.
Page 19

19
The California Air Resources Board and Ryobi America Corp. (RAC), is pleased
to explain the emission control system warranty on your 1995 lawn and garden
equipment engine. In California, new lawn and garden equipment engines must be
designed, built and equipped to meet the State's stringent anti-smog standards.
RAC must warrant the emission control system on your lawn and garden equipment engine for the periods of time listed below provided there has been no abuse,
neglect or improper maintenance of your lawn and garden equipment engine.
Your emission control system may include parts such as the carburetor or fuel
injection system, the ignition system, and catalytic converter. Also included may be
hoses, belts, connectors and other emission-related assemblies.
Where a warrantable condition exists, RAC will repair your lawn and garden equipment engine at no cost to you including diagnosis, parts and labor.
The 1995 and later utility and lawn and garden equipment engines are warranted
for two years. If any emission-related part on your engine is defective, the part will
be repaired or replaced by RAC.
OWNER'S WARRANTY RESPONSIBILITIES:
• As the lawn and garden equipment engine owner, you are responsible for the
performance of the required maintenance listed in your operator's manual.
RAC recommends that you retain all receipts covering maintenance on your
lawn and garden equipment engine, but RAC cannot deny warranty solely for
the lack of receipts or for your failure to ensure the performance of all
scheduled maintenance.
• As the lawn and garden equipment engine owner, you should however be aware
that RAC may deny you warranty coverage if your lawn and garden equipment
engine or a part has failed due to abuse, neglect, improper maintenance or
unapproved modifications.
• You are responsible for presenting your lawn and garden equipment engine to
an Ryobi Authorized Service Center as soon as a problem exists. The warranty
repairs should be completed in a reasonable amount of time, not to exceed 30
days.
If you have any questions regarding your warranty rights and responsibilities, you
should call 1-800-345-8746.
MANUFACTURER'S WARRANTY COVERAGE:
• The warranty period begins on the date the engine or equipment is delivered to
the retail purchaser.
• The manufacturer warrants to the initial owner and each subsequent purchaser,
that the engine is free from defects in material and workmanship which cause
the failure of a warranted part for a period of two years.
• Repair or replacement of warranted part will be performed at no charge to
the owner at an Authorized Ryobi Service Center. For the nearest location,
please contact Ryobi at: 1-800-345-8746.
• Any warranted part which is not scheduled for replacement, as required
maintenance which is scheduled only for regular inspection to the effect of
"Repair or replace as necessary" is warranted for the warranty period. Any
warranted part which is scheduled for replacement as required maintenance will
be warranted for the period of time up to the first scheduled replacement point
for that part.
• The owner will not be charged for diagnostic labor which leads to the
determination that a warranted part is defective, if the diagnostic work is
performed at an Authorized Ryobi Service Center.
• The manufacturer is liable for damages to other engine components caused by
the failure of a warranted part still under warranty.
• Failures caused by abuse, neglect or improper maintenance are not covered
under warranty.
• The use of add-on or modified parts can be grounds for disallowing a warranty
claim. The manufacturer is not liable to cover failures or warranted parts caused
by the use of add-on or modified parts.
• In order to file a claim, go to your nearest Authorized Ryobi Service Center.
Warranty services or repairs will be provided at all Authorized Ryobi Service
Centers.
• Any manufacturer approved replacement part may be used in the performance
of any warranty maintenance or repair of emission related parts and will be
provided without charge to the owner. Any replacement part that is equivalent in
performance or durability may be used in non-warranty maintenance or repair
and will not reduce the warranty obligations of the manufacturer.
• The following components are included in the emission related warranty of the
engine, air filter, carburetor, primer, fuel lines, fuel pick up/fuel filter, ignition
module, spark plug and muffler.
CALIFORNIA EMISSION CONTROL WARRANTY STATEMENT
YOUR WARRANTY RIGHTS AND OBLIGATIONS
Page 20

20 Operator's Manual Part Number 181146 3/95
RYOBI AMERICA CORP. warrants each new RYOBI Product for two (2) years according to the following terms.
This warranty extends to the original retail purchaser only and commences on the
date of original retail purchase.
Any part of the RYOBI Product manufactured or supplied by RYOBI and found in the
reasonable judgement of RYOBI to be defective in material or workmanship will be
repaired or replaced by an authorized RYOBI service dealer without charge for parts
and labor.
The RYOBI Product including any defective part must be returned to an authorized
service dealer within the warranty period. The expense of delivering the RYOBI
Product to the dealer for warranty work and the expense of returning it back to the
owner after repair or replacement will be paid for by the owner. RYOBI’s responsibility in respect to claims is limited to making the required repairs or replacements and
no claim of breach of warranty shall be cause for cancellation or rescission of the
contract of sale of any RYOBI Product. Proof of purchase will be required by the
dealer to substantiate any warranty claim. All warranty work must be performed by
an authorized RYOBI service dealer.
This warranty is limited to ninety (90) days from the date of original retail purchase
for any RYOBI Product that is used for rental or commercial purposes, or any other
income-producing purpose.
This warranty does not cover any RYOBI Product that has been subject to misuse,
neglect, negligence, or accident, or that has been operated in any way contrary to
the operating instructions as specified in the RYOBI Operator’s Manual. This war-
ranty does not apply to any damage to the RYOBI Product that is the result of
improper maintenance or to any RYOBI Product that has been altered or modified so
as to adversely affect the products operation, performance or durability or that has
been altered or modified so as to change its intended use. The warranty does not
extend to repairs made necessary by normal wear or by the use of parts or accessories which are either incompatible with the RYOBI Product or adversely affect its
operation, performance or durability.
In addition, this warranty does not cover:
A. Tune-ups - Spark Plugs, Carburetor Adjustments, Filters
B. Wear items - Bump Knobs, Outer Spools, Cutting Line, Inner Reels, Starter Pulley,
Starter Ropes
RYOBI reserves the right to change or improve the design of any RYOBI Product
without assuming any obligation to modify any product previously manufactured.
ALL IMPLIED WARRANTIES ARE LIMITED IN DURATION TO THE TWO (2) YEAR
WARRANTY PERIOD OR NINETY (90) DAYS FOR PRODUCTS USED FOR ANY
COMMERCIAL PURPOSE. ACCORDINGLY, ANY SUCH IMPLIED WARRANTIES INCLUDING MERCHANTABILITY, FITNESS FOR A PARTICULAR PURPOSE, OR OTHERWISE, ARE DISCLAIMED IN THEIR ENTIRETY AFTER THE EXPIRATION OF THE
APPROPRIATE TWO-YEAR OR NINETY DAY WARRANTY PERIOD. RYOBI’S OBLIGATION UNDER THIS WARRANTY, IS STRICTLY AND EXCLUSIVELY LIMITED TO
THE REPAIR OR REPLACEMENT OF DEFECTIVE PARTS, AND ROP DOES NOT
ASSUME OR AUTHORIZE ANYONE TO ASSUME FOR THEM ANY OTHER OBLIGATION. SOME STATES DO NOT ALLOW LIMITATIONS ON HOW LONG AN IMPLIED
WARRANTY LASTS, SO THE ABOVE LIMITATION MAY NOT APPLY TO YOU.
RYOBI ASSUMES NO RESPONSIBILITY FOR INCIDENTAL, CONSEQUENTIAL OR
OTHER DAMAGES INCLUDING, BUT NOT LIMITED TO EXPENSE OF RETURNING
THE RYOBI PRODUCT TO AN AUTHORIZED SERVICE DEALER AND EXPENSE OF
DELIVERING IT BACK TO THE OWNER, MECHANIC’S TRAVEL TIME, TELEPHONE
OR TELEGRAM CHARGES, RENTAL OF A LIKE PRODUCT DURING THE TIME
WARRANTY SERVICE IS BEING PERFORMED, TRAVEL, LOSS OR DAMAGE TO
PERSONAL PROPERTY, LOSS OF REVENUE, LOSS OF USE OF THE PRODUCT,
LOSS OF TIME, OR INCONVENIENCE. SOME STATES DO NOT ALLOW THE
EXCLUSION OR LIMITATION OF INCIDENTAL OR CONSEQUENTIAL DAMAGES,
SO THE ABOVE LIMITATION OR EXCLUSION MAY NOT APPLY TO YOU.
This warranty gives you specific legal rights, and you may also have other rights
which vary from state to state.
This warranty applies to all RYOBI Products manufactured by RYOBI and sold in the
United States and Canada.
To locate your nearest service dealer dial 1-800-345-8746 in the United States or
1-800-265-6778 in Canada.
RYOBI AMERICA CORP.
5201 Pearman Dairy Rd
Anderson, SC 29622-1207 U.S.A.
RYOBI CANADA INC.
275 Industrial Rd
Cambridge, Ontario NIR 6K2 CANADA
 Loading...