

Page 1
OWNER’S OPERATING MANUAL
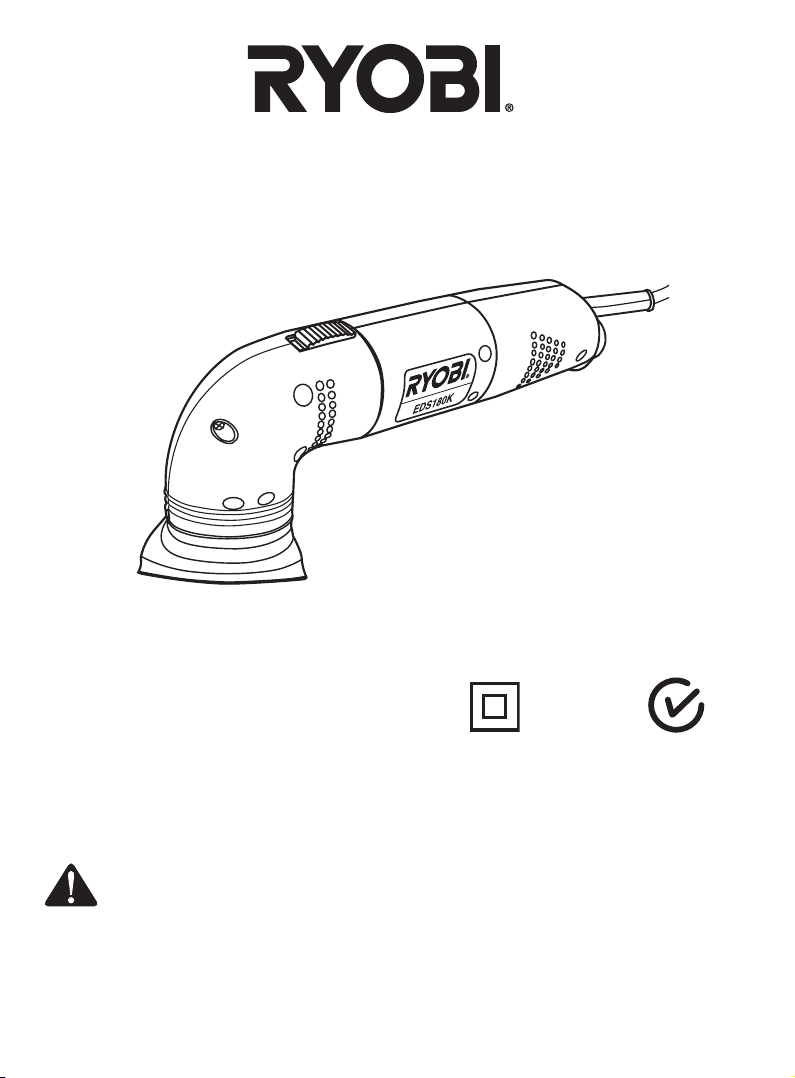
DETAIL SANDER
MODEL EDS180K
SPECIFICATIONS :
Input ................................. 180 watt
No Load Speed ................ 10000 min
Base Plate Size ................ 90 x 90 x 90 mm
Orbit Diameter .................. 1.0 mm
Weight .............................. 1.27 kg
THANK YOU FOR BUYING A RYOBI DETAIL SANDER
Your new detail sander has been engineered and manufactured to Ryobi's high standard for
dependability, ease of operation and operator safety. Properly cared for, it will give you years
of rugged, trouble free performance.
CAUTION: Carefully read through this entire owner's manual before using your
detail sander.
Pay close attention to the Rules for Safe Operation, Warnings and Cautions.
If you use your detail sander properly and only for what it is intended, you will enjoy years of
safe, reliable service.
Thank You again for buying Ryobi tools.
SAVE THIS MANUAL FOR FUTURE REFERENCE.
-1
1
DOUBLE
INSULATED
N197
Page 2
2
The purpose of safety rules is to attract your attention to
possible dangers. The safety symbols and the explanations with
them, require your careful attention and understanding. The
safety warnings do not by themselves eliminate any danger.
The instruction or warnings they give are not substitutes for
proper accident prevention measures.
1. K
NOW YOUR POWER TOOL. Read owners manua l
carefully. Learn its applications and limitations as well as
the specic potential hazards related to this tool.
2. G
UAR D AGA INS T E L EC TRI CA L SH OC K BY
PRE VE NTING BODY CONTACT WITH GROUNDE D
SUR FACES . For example, pipes, radiat or s, ran ges,
refrigerator enclosures.
3. K
EEP WORK AREA CLEAN. Cluttered areas and benches
invite accidents.
4. A
VOID DANGEROUS ENVIRONMENT. Don't use power
tools in damp or wet locations or expose to rain. Keep work
area well lit.
5. KEEP
CHILDREN AND VISITORS AWAY. Visitors should
wear safety glasses and be kept a safe distance from work
area. Do not let visitors contact tool or extension cord.
6. ST
ORE IDLE TOOLS. When not in use, tools should be
stored in a dry and high or locked-up place, out of reach of
children.
7. DON'T
FORCE TOOL. It will do the job better and safer at
the rate at which it was designed.
8. USE
RIGHT TOOL. Don't force small tool or attachment to
do the job of a heavy duty tool. Don't use tool for purpose
not intended.
9. D
RES S PROPE RLY. Do not wear loos e clothin g or
jewellery. They can be caught in moving par ts. Rubber
gloves and non-skid footwear are recommended when
working outdoors. Also wear protective hair covering to
contain long hair.
10. A
LWAYS WE AR SAF ET Y GL AS SES . Every d ay
eyeglasses have only impact resistant lenses, they are
not safety glasses.
11. PR
OTECT YOUR LUNGS. Wear a dust mask if operation
is dusty.
12. P
ROTECT YOUR HEARING. Wear hearing protection
during extended periods of operation.
13. DO
N'T OVERREACH. Keep proper footing and balance at
all times. Do not use tool on a ladder or unstable support.
Secure tools when working at elevated levels.
14. M
AINTAIN TOOLS WITH CARE. Keep tools sharp and
clean for better and safer performance. Follow instructions
for lubricating and changing accessories.
15. REMO
VE ADJUSTING KEYS AND WRENCHES. Form a
habit of checking to see that keys and adjusting wrenches
are removed from tool before turning it on.
16. N
EVER USE IN AN EXPLOSIVE ATMOSPHERE. Normal
sparking of the motor could ignite fumes.
17. KEEP
HANDLES DRY, CLEAN AND FREE FROM OIL
AND GREASE. Always use a clean cloth when cleaning.
Never use brake uids, gasoline, petroleum based products,
or any strong solvents to clean your tool.
18. ST
AY ALERT AND EXERCISE CONTROL. Watch what
you are doing and use common sense. Do not operate tool
when you are tired. Do not rush operation of tool.
19. C
HECK DAMAGED PARTS. Before further use of the
tool, a guard or any other part that is damaged should be
carefully checked to determine that it will operate properly
and perform its intended function. Check for alignment
of moving par ts, binding of moving parts, breakage of
parts, mounting and any other conditions that may affect
its operation. A guard or any other part that is damaged
should be properly repaired or replaced by an authorised
service centre.
20. DO
NOT USE TOOL IF SWITCH DOES NOT TURN IT ON
AND OFF. Have defective switches replaced by authorised
service centre.
21. D
O N OT OPE RAT E TH IS TOO L WH ILE UND ER
THE INFLUE NCE OF DRUGS, ALCO HOL OR ANY
MEDICATION.
22. T
HE AP PL IAN CE IS NOT IN TE N DE D FOR US E
BY YOUNG O R I NFI RM PE RS O NS WI T HO UT
SU PE RV IS ION . YOU NG CH IL D RE N SH O UL D BE
SUPERVISED TO ENSURE THAT THEY DO NOT PLAY
WITH THE APPLIANCE.
RULES FOR SAFE OPERATION
SAVE THESE INSTRUCTIONS
FOR FUTURE REFERENCE
SAFETY ALERT SYMBOL. Indicates caution or
warning. May be used in conjunction with other
symbols or pictures.
WARNING: Failure to obey a safety warning can
result in serious injury to yourself or to others.
Always follow the safety precautions to reduce the
risk of re, electric shock and personal injury.
WARNING: Do not attempt to operate this tool
until you have read thoroughly and understood
completely, safety rules, etc. contained in this
manual. Failure to comply can result in accidents
involving re, electric shock or serious personal
injury. Save owners manual and review frequently
for continuing safe operation and ins truc ting
others who may use this tool.
The operat io n of any tool can
result in fore ig n obj ec ts being
thrown into your eyes, which can
result in severe eye damage. Before
beginning power tool operation,
alw ays wear safet y gog gl es or
safety glasses with side shields
and a full face shield when needed. We recommend
Wide Vision Safety Mask for use over eyeglasses or
standard safety glasses with side shields.
Page 1
Due to continued product
renement policy, product features
and specications can and will
change without notice. Check
current features and specications
with your retailer.
Page 3
1
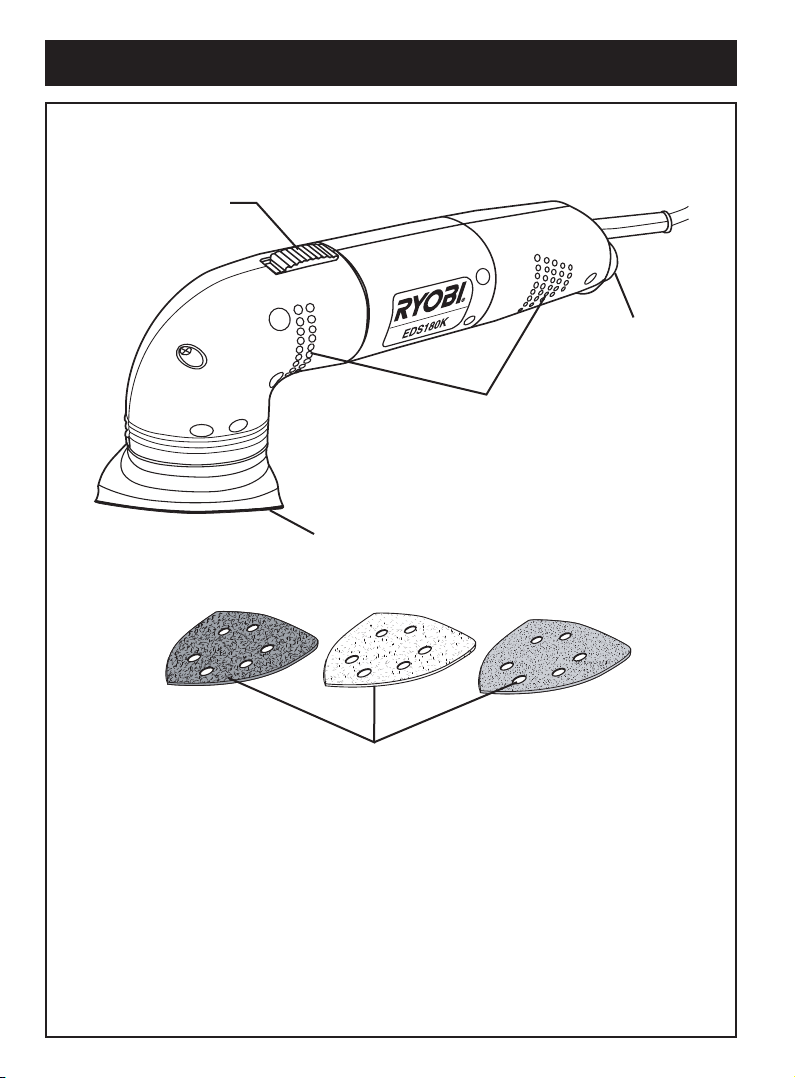
FEATURES
4
2
3
1. On / Off Slide Switch
2. Air Vents
3. Sanding Pad
5
4. Dust Port
5. Sanding Sheet
Page 2
3
Page 4
APPLICATIONS
OPERATION
You may use the sander for the purposes listed below:
Sanding on wood surfaces.
Removing rust from and sanding steel surfaces.
Polishing and scrubbing porcelain and metal.
CHOOSE SANDING PAPER CAREFULLY FOR EACH
APPLICATION FOR BEST OPERATION AND FINISH.
ASSEMBLY
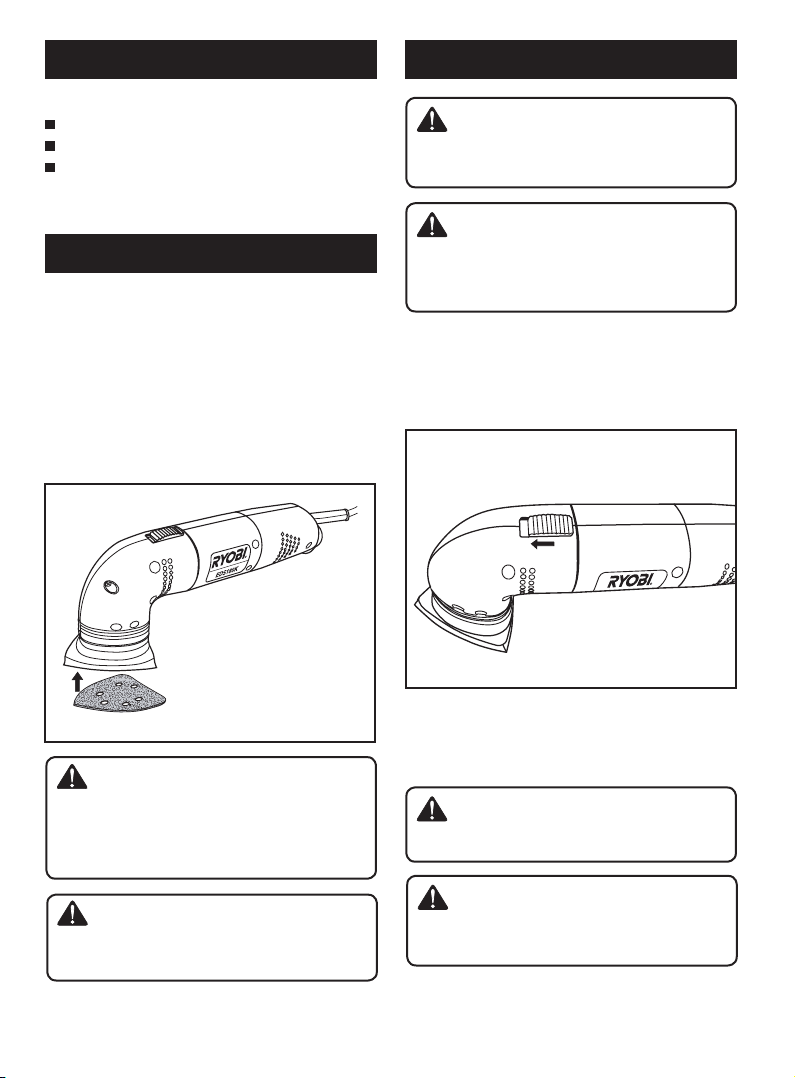
ATTACHING HOOK AND LOOP SANDING PAPER (Fig. 1)
1. Unplug the sander.
2. Align holes in hook and loop type sanding sheet with holes
in pad, then carefully press fuzzy side of sanding sheet
against pad as tightly as possible.
Note: Hook and loop type sanding sheet can be reused
for the life of the sanding abrasive. It is recommended
that you keep the sanding pad clean to provide best
adhesion. Clean occasionally by brushing lightly with a
small brush.
CAUTION:
Keep the cord away from the sanding pad and position the
cord so that it will not be caught on timber, tools or other
objects during sanding.
WARNING:
Always wear safety goggles or safety glasses with side
shields when operating this tool. Failure to do so could result
in dust, shavings or loose particles being thrown into your
eyes, resulting in possible serious injury.
TURNING THE SANDER ON/OFF (Fig. 2)
Follow these steps to turn the sander ON/OFF.
1. Turn on the sander: Push the slider switch forward.
2. Turn off the sander: Push the slider switch backward.
IO
Fig. 2
Fig. 1
WARNING:
The sander should never be connected to a power supply
when you are assembling parts, making adjustments,
cleaning, performing maintenance or when the tool is not
in use. Disconnecting the tool will prevent accidental starting
that could cause serious injury.
WARNING:
Exercise caution when using this tool. Careless actions,
for even a fraction of a second, can result in serious
personal injury.
OPERATING THE SANDER (Fig. 3&4)
Follow these steps to operate the sander.
1. Secure the work piece to prevent it from moving under the
sander.
WARNING:
Unsecured work pieces could be thrown towards the
operator, causing injury.
WARNING:
Keep your head away from the sander and the sanding
area. Your hair could be drawn into the sander causing
serious injury.
4
Page 3
Page 5
5
OPERATION
To avoid damaging the motor from overheating, be careful
not to let your hand cover the air vents.
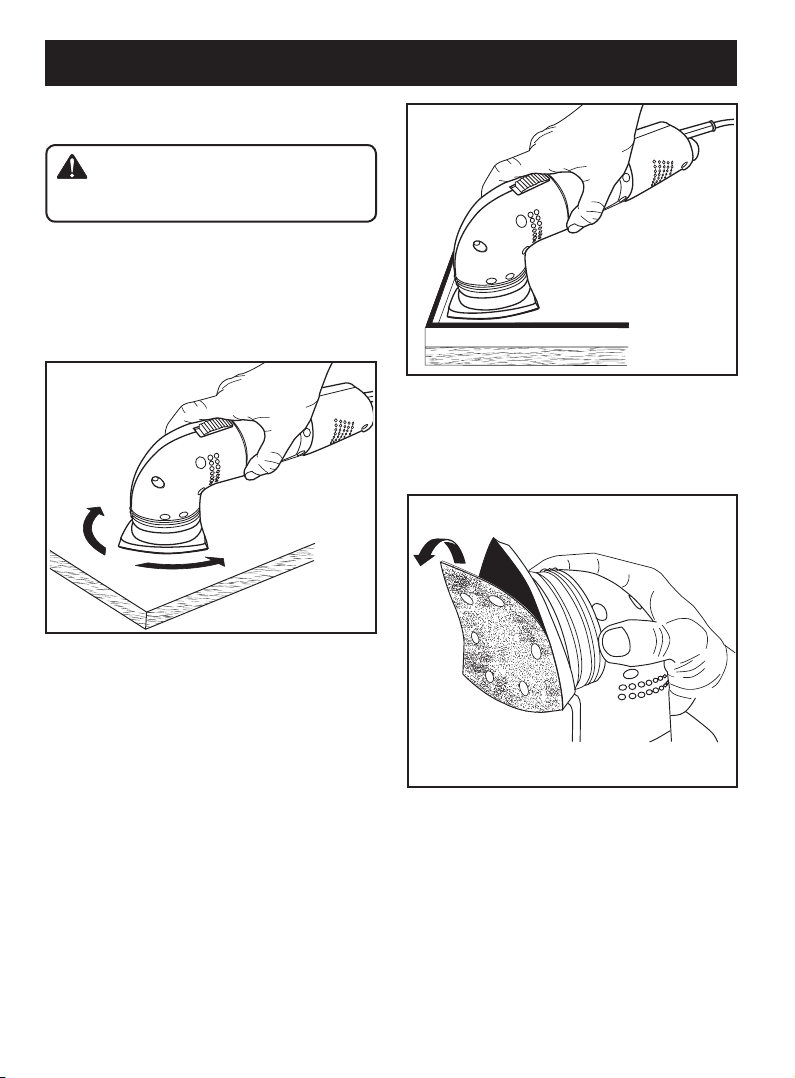
3. Turn on the sander and move it slowly over the work
piece.
Hold the sander in front and away from you, keeping it clear
of the work piece. Start the sander and let the motor build to
its maximum speed, then gradually lower the sander onto the
work piece. Move the sander slowly across the work piece
using small circular motions. See Figure 3.
Do not force. The weig ht of the uni t supplies ade quate
pressure, so let the sanding sheet and sander do the work.
Applying additional pressure only slows the motor, rapidly
wears sanding sheet and grea tly reduces sander speed.
Excessive pressure will overload the motor causing possible
damage from motor overheating and can result in inferior work.
Any nish or resin on wood may soften from the frictional heat.
Do not allow sanding on one spot too long as the sander’s
rapid action may remove too much mat erial, making the
surface uneven.
Fig. 3
Extended periods of sanding may tend to overheat the motor.
If this occurs, turn the sander off and wait until the sanding pad
comes to a complete stop, then remove it from the work piece.
Remove your hand from the vent area, remove the sanding
sheet, then with your hand removed from vent area, turn the
sander on and run it free without a load to cool the motor.
For detail sanding such as corners and crevices, use the
tip of the sanding pad with small back and forth motions, as
shown in gure 4.
Fig. 4
CAUTION:
CHANGING THE SANDING SHEETS (Fig. 5)
The sander is packed with sanding sheets and pads designed
for a variety of uses. To change sheets, simply pull the used
sheet off the base and attach the desired sheet by pressing
the sheet or pad onto the base of the sander.
Fig. 5
2. Place the sander on the work piece so that all of the
sanding pad surface is in contact with the work piece.
Page 4
Page 6
6
RYOBI TECHNOLOGIES AUSTRALIA PTY. LTD.
GUARANTEE
RYOBI TECHNOLOGIES AUSTRALIA PTY. LTD.
A.B.N. 98 002 277 509
SYDNEY: 359-361 Horsley Road, Milperra, N.S.W. 2214.
Contact during normal business hours.
Tel: (02) 9792 9888 - Fax: 1800 807 993 - www.ryobi.com.au
RYOBI NEW ZEALAND PTY. LTD.
AUCKLAND: 27 Clemow Drive, Mt Wellington, N.Z.
Tel: (09) 573 0230 - Free Call: 0800 279 624 - Fax: (09) 573 0231 - www.ryobi.co.nz
Contact during normal business hours.
Subject to the guarantee condition below, this Ryobi
tool(hereinafter called “the product”) is guaranteed by
Ryobi(hereinafter called “the Company”) to be free
from defects in material or workmanship for a period of
24 months from the date of original purchase covering
bot h parts and labour. Under the terms of this
guarantee, the repair or replacement of any part shall
be the opinion of the Company or its authorised agent.
Should service become necessary during the warranty
period, the owner should contact the Authorised Ryobi
Retailer from whom the Product was purchased, or the
nearest Company Branch Ofce. In order to obtain
guarantee service, the owner must present the sales
docket and Guarantee Certicate to conrm date of
purchase. This product is sold by the dealer or agent
as principal and the dealer has no authority from
the Company to give any additional guarantee on
the Company’s behalf except as herein contained or
herein referred to.
Guarantee Conditions
This guarantee only applies provided that the Product
has been used in accordance with the manufacturer’s
recommendations under normal use and reasonable
care (in the opinion of the Compa ny) and such
guarantee does not cover damage, malfunction or
failure resulting from misuse, neglect, abuse, or
used for a purpose for which it was not designed
or is not suited and no r ep air s, alt er ation s or
modica ti on s have be en attempted by other than
an Authorised Service Agent. This guarantee will not
apply if the tool is damaged by accident or if repairs
arise from normal wear and tear.
The Company accepts no additional liability pursuant to
th i s g u ara n t ee f or t he c ost s of t rav e lli n g o r
transportation of the Product or parts to and from the
service dealer or agent - such costs are not included
in this guarantee.
Certain legislation, including the Trade Practices Act,
1974 (as amended) and other state and territorial laws
give rights to the buyer and impose liability on the seller
in certain circumstances. Nothing herein shall have the
effect of excluding, restricting or modifying any
condition, guarantee, right or liability imposed, to the
extent only th at such exclusion, re striction or
modication would render any term herein void.
BRISBANE: All enquiries Tel : 1300 361 505
TOWNSVILLE: All enquir
ies Tel : 1300 361 505
MELBOURNE: 960 Stud Road, Ro
wville,Vic. 3178
Tel : (03) 9764 8655
HOBART:
All enquiries Tel : 1300 360 216
ADELAIDE:
All enquiries Tel : 1300 360 216
PERTH:
33-35 Sorbonne Cres., Canning Vale,W.A. 6155.
Tel : (08) 9455 7775
Purchased From
Address Of Dealer
Date Model No Serial No
This Guarantee Form Should Be Retained By The Customer At All Times
For your record and to assist in establishing date of purchase (necessary for in-guarantee service)
please ke ep y ou r purchase docket a nd t hi s fo rm completed wi th t he f ol lowing particul ar s.
Present This Form With Your Purchase Docket When Guarantee Ser vice Is Required.
 Loading...