

Page 1
Instruction Manual
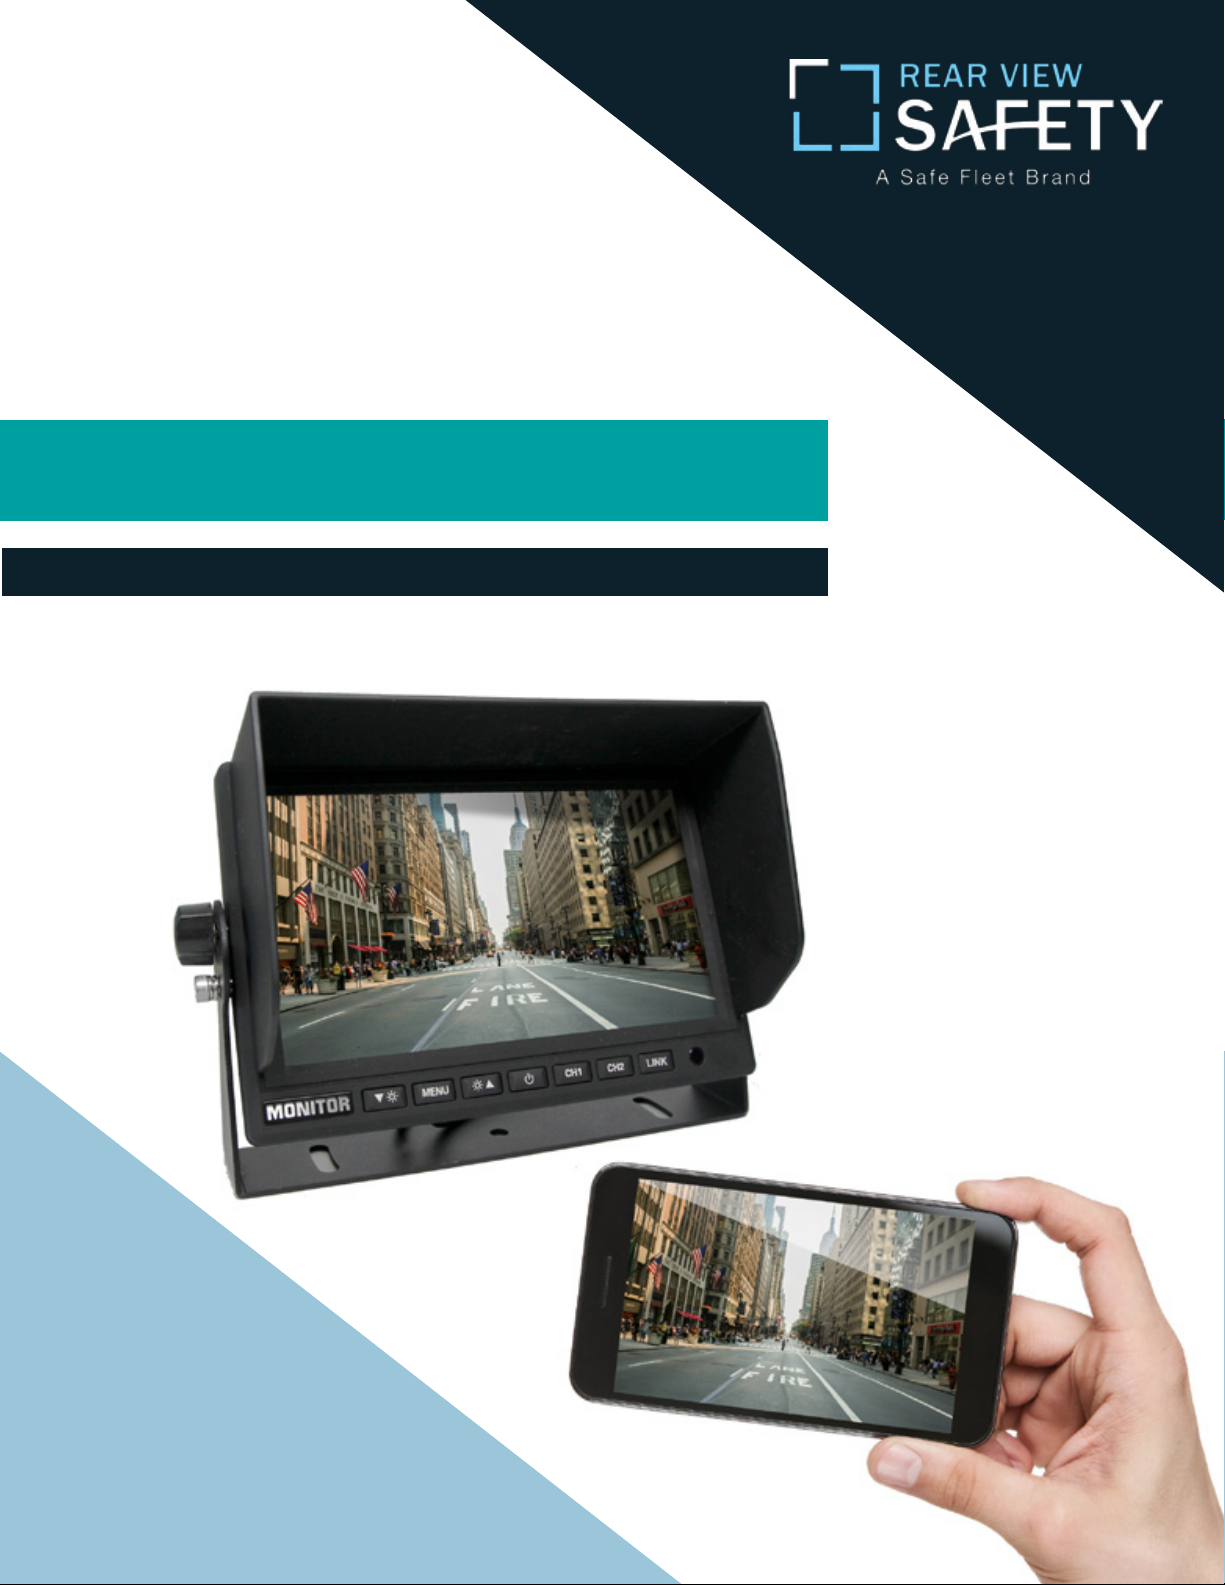
7” Digital Color Monitor With MirrorLink
RVS-ML7
Before operating the Monitor, please read this manual thoroughly and retain it for future reference
Page 2
Introduction.............................. 03
Safety Information.............................. 04-06
Before You Begin ........................ . ......07
Precautions.......................... . . . . 08-09
Sepecification...............................10-11
Settings.................................12-15
TABLE OF CONTENTS
2
Mirroring.................................16-25
DLNA..................................26
Upgrade........................... . . . . 27
Troubleshooting.......................... . 28-29
Rear View Safety
Page 3

NOTE!
Please read all of the installation instructions
carefully before installing the product. Improper
installation will void manufacturer’s warranty.
Congratulations on purchasing a Rear View Backup
Camera System!
With this manual you will be able to properly install and
operate the unit.
The monitor is intended to be installed as a
supplement aid to your standard rear view mirror that already exists
in your vehicle. The monitor should not be used as a substitute for the
standard rear view mirror or for any other mirror that exists in your
vehicle.
In some jurisdictions, it is unlawful for a person to drive a
motor vehicle equipped with a TV viewer or screen located forward of
the back of the driver’s seat or in any location that is visible, directly
or indirectly, to the driver while operating the vehicle.
INTRODUCTION
Reverse With Condence ™
3
Page 4

Please read the entire manual and follow the instructions and
warnings carefully. Failure to do so can cause serious damage and/or
injury, including loss of life. Be sure to obey all applicable local
trac and motor vehicle regulations as it pertains to this product.
Improper installation will void manufacturer’s warranty.
USAGE:
• The Rear View Camera System is
designed to help the driver safely detect people and/or objects
helping to avoid damage or injury.
However, you the driver, must use it
properly. Use of this system is not a
substitute for safe, proper or legal
driving.
• Never back up while looking at the
monitor alone. You should always
damage or injury. Always back up
slowly.
• The Rear View Camera System is
not intended for use during extensive back-up maneuvers or backing
into cross trac or pedestrian walkways.
•Please, always remember, the area
displayed by the Rear View Camera
check behind and around the vehi-
SAFETY INFORMATION
cle when backing up, in the same
way as you would if the vehicle did
not have the Rear View Camera
System. If you back up while looking
only at the monitor, you may cause
4
System is limited. It does not display
the entire panorama that is behind
you.
Rear View Safety
Page 5

INSTALLATION:
• Electric shock or product
malfunction may occur if this
product is installed
incorrectly.
• Use this product within
the voltage range specied. Failure
to do so can cause
electronic shock or product
malfunction.
or disconnected wire may cause a
re.
• While installing the Rear View
System be careful with the wire
positioning in order to avoid wire
damage.
• The Rear View System should only
be used when the vehicle is in
reverse.
SAFETY INFORMATION
• Take special care when
cleaning the monitor.
• Make sure to rmly ax the prod-
uct before use.
• If smoke or a burning smell
is detected, disconnect the
system immediately.
• Where the power cable may touch
• Do not watch movies or
operate the monitor while driving;
as it may cause an
accident.
• Do not install the monitor
where it may obstruct driver's
view or obstruct an air bag
device.
a metal case, cover the cable with
friction tape. A short circuit
Reverse With Condence ™
• Dropping the unit may cause me-
chanical failure.
5
Page 6

If you have questions about this product, contact:
Rear View Safety
1797 Atlantic Avenue
Brooklyn, NY 11233
Tel: 1.888.881.2601
IN NO EVENT SHALL SELLER OR MANUFACTURER BE
SAFETY INFORMATION
LIABLE FOR ANY DIRECT OR CONSEQUENTIAL DAMAGES OF
ANY NATURE, OR LOSSES OR EXPENSES RESULTING FROM
ANY DEFECTIVE PRODUCT OR THE USE OF ANY PRODUCT.
6
Rear View Safety
Page 7

Before drilling please check that no cable or wiring is on the other side
of the wall. Please clamp all wires securely to reduce the possibility
of them being damaged while vehicle is in use. Keep all cables away
from hot or moving parts and electrical noisy components.
We recommend doing a benchmark test before installation
to insure that all components are working properly.
Step 1: Choose the monitor location.
Step 2: Install all cables in vehicle.
Step 3: Once all cables and wiring have been properly routed, perform
a system function test by temporarily connecting the system.
BEFORE YOU BEGIN
Reverse With Condence ™
7
Page 8

1. Do not expose the monitor to excessive heat/cold. The storage temperature of this device is -30°C~+80°C, and the operating temperature is -20°C~+70°C. The battery operating temperature is 0°C-70°C.
Humidity is Rh 90%.
2. Never use this monitor near water or in damp locations.
3. Never use this monitor in environments with excessive moisture,
dust or smoke.
4. Avoid dropping or hitting monitor.
5. Avoid using this monitor in enclosed spaces, areas with excessive
vibration or areas subject to severe impacts.
6. Never puncture, scratch or use abrasive cleaning materials on this
monitor.
7. Do not place cables where they may be pinched or stepped on.
8. Leave at least a 2” space between the monitor and walls, cabinets or
other objects to allow adequate air circulation.
9. The monitor is not designed to be waterproof.
PRECAUTIONS
8
Rear View Safety
Page 9

Operating Precautions
1. The monitor can be powered by a 12/24 volt battery, or the vehicle's
electrical system.
2. Make sure all cables are connected properly. Improper cable connections may damage the monitor. Remove the power cable connections
when not using the device.
3. The back-up battery can be recharged when the power is on.
4. When battery is fully charged, recharging will stop automatically.
5. If batteries are not used for a while, they may take longer to charge.
Warning!
1. This monitor is high voltage. Only professionals should open the monitor's case.
2. Do not watch the video while driving unless you are monitoring the
rear view camera display.
Special Note
Occasionally, a few highlights or dark spots may appear on the LCD screen. This
doesn’t necessarily indicate any monitor defects. Never try to repair this device
yourself. If any problems occur, immediately turn the display o and notify our
company or an authorized dealer. Any disassembly/modication may lead to
PRECAUTIONS
damage and will also void the warranty.
Reverse With Condence ™
9
Page 10

Specications
1. Size: 7" Digital Color Monitor
2. Screen Ratio: 16:9
3. Resolution: 1024 X RGB X 600
4. Two AV inputs
5. Built-in Miracast
6.Built-in Speaker (Can Be Muted)
7. Auto Reverse Trigger Wire W/Adjustable Delay (0-10 Sec)
8. USB 2.0 Input
9. System: NTSC/PAL Auto Switch
10. OSD Menu/Remote Control
11. Automatic Shut O After 15 Minutes Of Inactivity
12. Power Supply: DC12V
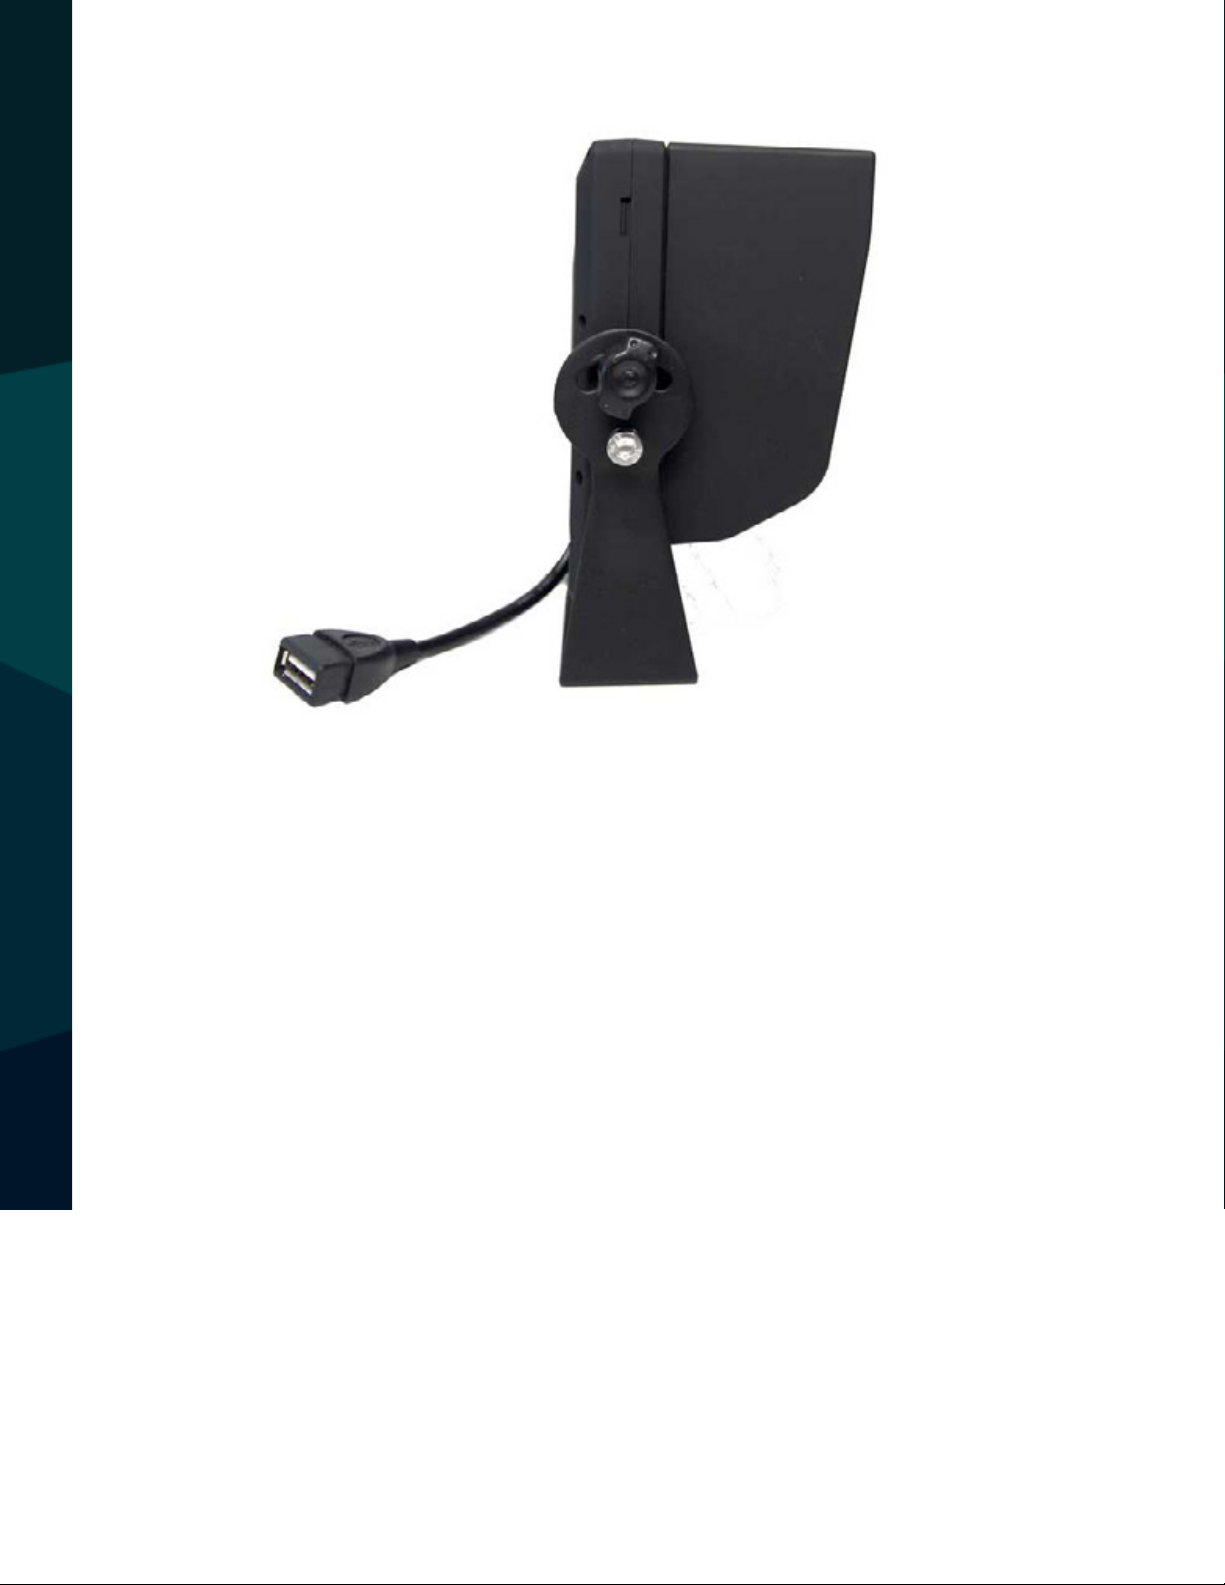
13. U-shaped Metal Bracket
14. Removable Sunshade
Accessories
SPECIFICATIONS
10
Rear View Safety
Page 11

Monitor
1. Volume Decrease/Setting Quantity Decrease/LEFT
2. Menu 3. Volume Increase/Setting Quantity Increase/RIGHT
4. Power 5. CH 1/UP 6. CH 2/DOWN
7. LINK/Conrm Menu 8. Remote Control Sensor 9. Bracket Knob
10. Reset Button 11. Speaker
Remote
SPECIFICATIONS
Reverse With Condence ™
11
Page 12

Connection
Menu
Display options for each mode (AV1/AV2/LINK) can be individually set.
After turning the system on, press "MENU" to enter menu and use "UP/
DOWN" to toggle menu options. Press “LEFT/RIGHT” on the remote control/monitor or “LINK” on the monitor to enter into current submenu. Then
press “LEFT” and “RIGHT” to adjust setting. Press “MENU” to exit current
menu.
Volume: Press “LEFT” or "RIGHT" on the monitor/remote control to enter
SETTINGS
volume menu and also to adjust volume. Press “MENU” to exit the volume
setting.
Auto Picture: Select option in the image menu, use “LEFT/RIGHT" to
toggle between ve options (Standard/Movie/Eco/Personal/Vivid). Press
12
“UP/DOWN” to select next menu option.
Rear View Safety
Page 13

Brightness: Select option in the image menu, use “LEFT/RIGHT" to adjust brightness, and press “MENU” to conrm desired choice. Press “UP/
DOWN” to select next menu option.
Contrast: Select option in the image menu, use “LEFT/RIGHT" to adjust
contrast, and press “MENU” to conrm desired choice. Press “UP/DOWN”
to select next menu option.
Color: Select option in the image menu, use “LEFT/RIGHT" to adjust color, and press “MENU” to conrm desired choice. Press “UP/DOWN” to select next menu option.
Sharpness: Select option in the image menu, use “LEFT/RIGHT" to adjust sharpness, and press “MENU” to conrm desired choice. Press “UP/
DOWN” to select next menu option.
Color Temperature: Select option in the image menu, use “LEFT/
RIGHT" to toggle between four options (Normal/Warm/User/Cool). Press
“UP/DOWN” to select next menu option.
Panel Rotate: Select option in the image menu, use "LEFT/RIGHT" to
toggle between four options: Normal, RLUD (Rotate 180°), LR, UD. Press
“UP/DOWN” to select next menu option.
Sound Mode: Select option in the sound menu, use “LEFT/RIGHT" to
toggle between four options (Standard/Music/Speech/Personal). Press
“UP/DOWN” to select next menu option.
Balance: Select option in sound menu, use “LEFT/RIGHT" to adjust
SETTINGS
channel balance and press "MENU" to conrm desired choice. Press “UP/
DOWN” to select next menu option.
Reverse With Condence ™
13
Page 14

Virtual Surround: Select option in the sound menu, and use "LEFT/
RIGHT" to toggle virtual surround on/o. Press “UP/DOWN” to select next
menu option.
Auto Volume: Select option in the sound menu, and use "LEFT/RIGHT"
to toggle auto volume on/o. Press “UP/DOWN” to select next menu option.
Speaker Mute: Select option in the sound menu, and use "LEFT/RIGHT"
to toggle speaker mute on/o. Press “UP/DOWN” to select next menu option. (Note: this function will only mute the speaker, and cannot control
the audio output).
Menu Language: Select option in the settings menu, and use “LEFT/
RIGHT" to toggle between three languages (Simplied Chinese/English/
Japanese). Press “UP/DOWN” to select next menu option.
Picture Format: Select option in the settings menu, and use “LEFT/
RIGHT" to toggle between ve options (16:9/4:3/Zoom 1/Zoom 2/Just
Scan). Press “UP/DOWN” to select next menu option.
Menu Timeout: Select option in the settings menu, and use “LEFT/
RIGHT" to toggle menu timeout length. There are seven options: 10 Sec/20
SETTINGS
Sec/30 Sec/40 Sec/50 Sec/60 Sec/close. Press “UP/DOWN” to select next
menu option.
Menu Transparency: Select option in the settings
menu, and use “LEFT/RIGHT" to toggle between four options (Close/Low/
14
Middle/High). Press “UP/DOWN” to select next menu option.
Rear View Safety
Page 15

Power On Status: Select option in settings menu, and use "LEFT/
RIGHT" to toggle between three options (Last Memory/Standby/Power
On). Press “UP/DOWN” to select next menu option.
Blue Screen: Select option in settings menu, and use "LEFT/RIGHT" to
turn blue screen on/o when there is no signal. Press “UP/DOWN” to select next menu option.
ACC Line: Select option in settings menu, and use "LEFT/RIGHT" to open
or close the ACC Line. Press “UP/DOWN” to select next menu option.
ACC Delay (Sec): Select option in settings menu, and use "LEFT/RIGHT"
to toggle between two options (Close/1-10 sec). Press “UP/DOWN” to select next menu option.
Reset Default: Select option in settings menu, and use "LEFT/RIGHT"
to reset current channel image setting to default. Press “UP/DOWN” to
enter select next menu option.
Input Source: Press "VIDEO SELECT" on the remote control to enter input source menu, and use "LEFT/RIGHT" to choose desired display channel and press “MENU” to conrm.
SETTINGS
Reverse With Condence ™
15
Page 16

Miracast
1. Compatible with Airplay mirroring/latest iOS system. Compatible with
iPad/iPhone/Mac notebook.
2. Supports Miracast Screen Mirroring, supports Android 4.2 (and above)
Windows 8.1 system (computer should support HDCP).
3. Supports DLNA pushing.
4. Supports Tablet PC or notebook with WiDi function.
5. All windows devices can use Screen Share by installing AirParrot software.
6. Supports online movies, online TV channels, online radio and online
webpage browsing.
MIRRORING
7. Automatically detects variety of operating systems.
16
Rear View Safety
Page 17

Miracast Basic Operating Introduction
1. Airplay Mirroring (for iPhone, iPad, Mac notebook)
Find monitor’s hot spot (ex: DONGLE-ACA213068A04)
from “Settings’’ of Apple devices and connect. Default
password: 12345678
(Tips: the hot spot name has been displayed on the top of the screen and the password
is behind the PIN)
1-2. Open the Airplay interface of Apple device, choose the monitor’s
MIRRORING
Reverse With Condence ™
17
Page 18

hot spot name, then start Airplay. The Apple device will share
screen with the monitor.
Open Apple device control center
(Note: At this time, the Apple device is connected with the monitor,
without WiFi connection, so it can only mirror local data, or mirror on-
MIRRORING
line data by using 2G/3G/4G from mobile network)
18
Rear View Safety
Page 19

Enter into Airplay interface, choose
the device name and then start airply
iOS 6: Double-click the HOME key or at the bottom of the main screen,
you will see “Airplay”.
iOS 7 (or above): From main screen slide screen up, Click “Airplay” and select the monitor's hot spot name. Exit mirror by swiping the “Mirroring”
icon to the left.
MIRRORING
Reverse With Condence ™
19
Page 20

Open internet browser and input web site IP “192.168.49.1”
to enter into the setting page. Click the WiFi symbol, click “Scan”
and nd out available WiFi network (include hot spot from mobile
device, such as smartphone, tablet PC and PC). For example: Click "QC"
and enter password, then click “connect”.
MIRRORING
Open browser, input website IP: 192.168.49.1 to enter setting interface
20
Rear View Safety
Page 21

Click Scan, search the available wireless network
Choose the available wireless network, then input the password to connect
MIRRORING
Tips: IP is shown on the top of main interface. The monitor
will be restarted and refresh automatically when connected
to the WIFI network. If NO SIGNAL appears on the screen, wait for a few
minutes. If NO SIGNAL still shows after a few minutes switch the signal
channel on the monitor or remote.
Reverse With Condence ™
21
Page 22

After sucessfully connecting to the internet, the connected WIFI name
after the WIFI icon and refresh the monitor’s IP address. At this time, the
apple device have connected the WIFI network (QC), and can share the
screen with “Mirroring”.
Tip: After initial WIFI setup, any Apple device can Airplay Mirroring directly after connected this WIFI network, no need setup again. If you
want to exit the network, please input the new IP on the top of screen
in the browser, and choose "forget".
2. Miracast Mirroring ( for Android and Win 8.1)
2-1. Miracast Mirroring (for Android 4.2 (and up) device and with Miracast function) Open cell phone’s screen mirroring function, choose
monitor hot spot to connect. Example: DONGLE-ACA213068A04. Share
MIRRORING
screen after successfully connected. If cell phone connected to WiFi or
2G/3G/4G network, it could mirror local data and network video, no
need any other setup.
Note: For dierent cell phones, the method to open screen mirroring function
may vary. Please refer to your cell phone user manual for more detailed information.
22
Rear View Safety
Page 23

2-2. Miracast Mirroring ( for Windows 8.1 tablet )
2-2-1. Move mouse to the right corner, pop up list, select “Device”
MIRRORING
Reverse With Condence ™
23
Page 24

2-2-2. From device list, select “Project”
2-2-3. The rst time to use project function, you need to add a wireless
display.
MIRRORING
2-2-4. After adding the monitor, the computer will automatically nd
the monitor hotspot. After this occurs click add.
24
Rear View Safety
Page 25

Tip 1: The device DONGLE-ACA213068A04 in this manual is an example
device. Dierent monitors will have dierent names. Please refer to the
displayed name on the top of main interface.
Tip 2: When adding a device, “press the button on your DONGLE-ACA213068A04” will appear. Ignore this warning.
2-2-5. After successfully connecting you may start mirroring.
Tip 3: After intial connection, just click Device—Project to nd DONGLE-ACA213068A04. Press to connect and start mirroring, no need add
device again.
Note: Laptops with Win 8.1 need combined Intel graphics card/network
with WIDI function to use miracast. If your laptop doesn't have a com-
MIRRORING
bined Intel graphics card/network card, it cannot use miracast even if upgraded to Win 8.1.
Reverse With Condence ™
25
Page 26

3.DLNA Video Pushing (Apple and Android devices)
Some devices have a built-in DLNA function, allowing you to push video
from your wireless devices (Apple or Android) onto the monitor. You can
also download third party DLNA software in the app store. If you have
DLNA function, push video by selecting device.
Note: If device is not connected to WiFi, you may only push local video.
4. OTA Upgrade
4-1. On connection with WiFi screen "New
update found, press the button to update." message will appear if upgrade exists.
4-2. Short press reset button on the back of the monitor to automatically download the latest software version.
DLNA
Tip: The update may take longer depending on internet connection and
WiFi signal.
4-3.The monitor will start OTA upgrade mode automatically after
downloading the software. It will restart after upgrading. Latest soft-
26
Rear View Safety
Page 27

ware version will display on the top right corner
of the screen.
UPGRADE
Reverse With Condence ™
27
Page 28

Miracast Restore
Press reset button on the back of the monitor for 10 seconds to delete
Miracast Link user data and restore to factory settings. Tip: The monitor will be restarted and refresh screen automatically after restoring
to factory settings. If NO SIGNAL appears on the screen, wait for a few
minutes. If NO SIGNAL is still on screen after a few mintues, switch the
signal channel on the monitor or remote.
Miracast FAQ
1. Video is not smooth
a. The quality of video playing depends on many factors, including network environment, WiFi signal intensity, and video bit rate. If local video is not smooth, the video bit rate may be too high.
b. If online video is not smooth, it could indicate weak WiFi signal. Place
the monitor close to the WIFI router.
2. How to display Miracast pictures or videos on unsupported devices
TROUBLESHOOTING
(including Android systems lower than version 4.2)
a. Use DLNA pushing function. Some players have a built-in DLNA
function, or you can download third party DLNA software in APP STORE.
3. Use screen monitoring with systems lower than Windows 8.1.
a. Download and install AirParrot. Website: http://airparrot.com/
28
Rear View Safety
Page 29

Notes
TROUBLESHOOTING
Reverse With Condence ™
29
Page 30

If you have any questions
about this product, contact:
Rear View Safety, Inc.
1797 Atlantic Avenue
Brooklyn, NY 11233
800.764.1028
Better Cameras. Better Service.
IT’S OUR GUARANTEE.
30
Rear View Safety
 Loading...