

Page 1
DIM-1
Doorbell Interface Module
Instruction Manual
DOORBELL INTERFACE
POWER
DB3
DB2
DB1
+12VDC
TRANS
TRIG
TRIG OUT
Page 2
Product Overview
The DIM-1 Doorbell Interface Module’s primary purpose is to mute a multisource/multi-zone audio system so a preexisting doorbell can be heard when it
rings. The DIM-1 does not generate an audible chime, but provides a six-second
12V trigger to the multi-zone system which is used to mute the system so the
doorbell can be heard. The DIM-1 connects the Russound CA4.4i, CA6.4i,
CAV6.6 and the PR-4Zi multi-zone systems to the doorbell of the home by a
few simple connections.
Installation Instructions
DIM-1 installation requires an existing doorchime with door button that
operates on 12-18VAC or DC. It also requires a 12VDC power supply
(Russound 846C, not included).
1) Turn off the power to the doorbell transformer and the audio distribution
system. You will be making open wire connections to the doorbell.
2) The DIM-1 should be located indoors and mounted within 3 feet of the
multi-zone audio system and convenient to the electrical outlet that the
12VDC power supply will use. The DIM-1 should be positioned so that the
LED indicators can be seen during installation.
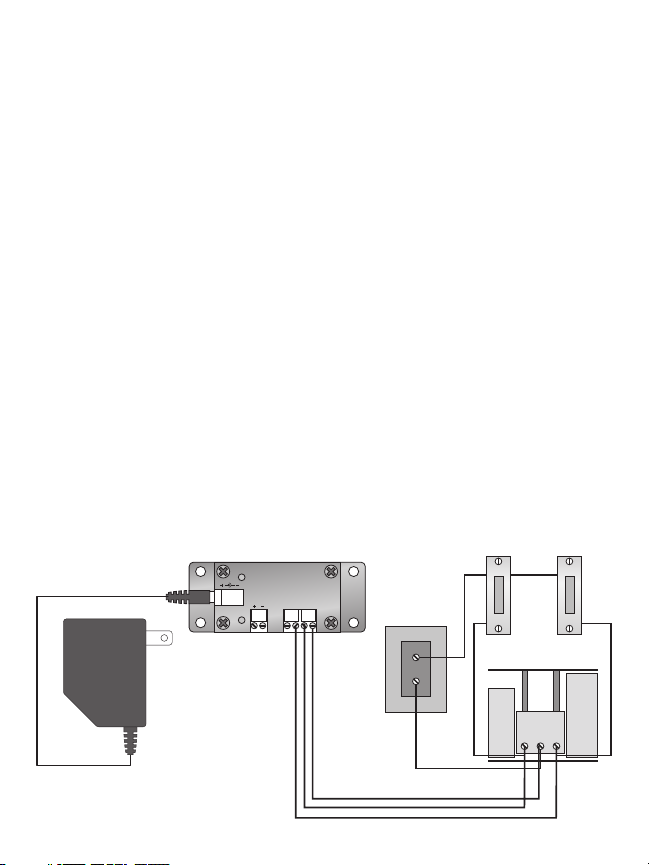
3) Connect the DIM-1 "TRANS" terminal to the transformer terminal that is
connected directly to the doorbell chime module. Connect the doorbell
Figure 1
+12V DC
POWER
TRIG
DIM-1
DOORBELL INTERFACE
TRIG OUT
Rear Door
DB3
DB2
DB1
TRANS
16VAC
Transformer
Front Door
Doorbell
Russound 846C
12VDC Power Supply
(not included)
REAR
TRANS
FRONT
Page 3

switched contacts at the doorbell chime module to the connections
labeled “DB1,” “DB2” and “DB3” on the DIM-1. This connects up to 3
separate doorbell buttons to the DIM-1. Refer to Figure 1. Note that the
connectors can be unplugged for easy wiring.
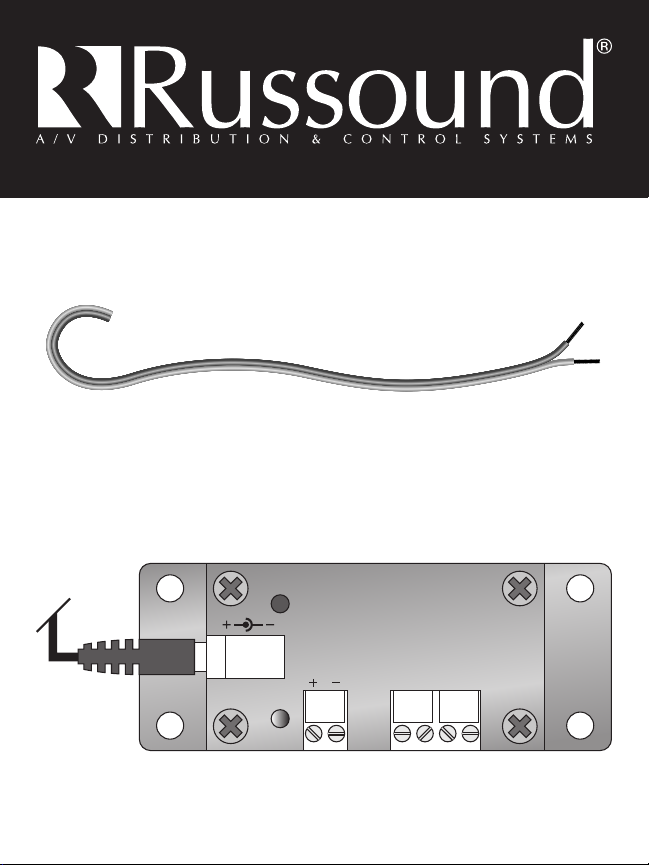
4) Connection to Multi-zone System: The trigger
output of the DIM-1 connects to the audio
system using a 1/8" mono plug. Connect the
mono plug to the controller (see below for
specific system connections) and snip off the
excess length from the other end of the cable.
Strip the two wires from this end and
determine which wire comes from the tip by
using a continuity meter. The wire from the
tip (+) connects to the "TRIG OUT (+)"
terminal of the DIM-1. The other wire from the
sleeve (-) connects to the "TRIG OUT (-)" of
the DIM-1. Refer to Figure 2.
4a) PR-4Zi Connection: For operation with the PR-4Zi, connect the 1/8” mini
plug into the Mute Input connection. Refer to Figure 3.
4b) CAi Series Connection: For operation with the CA4.4i/CA6.4i, connect the
1/8” mini plug into the Mute Input connection. Refer to Figure 4.
4c) CAV Series Connection: For operation with the CAV6.6, connect the 1/8”
mini plug into the Page Trigger Input connection. Refer to Figure 5.
Figure 2
Figure 3
Figure 4
Figure 5
PR-4Zi CAi Series
CAV6.6
+12V DC
POWER
TRIG
DOORBELL INTERFACE
DB3
TRIG OUT
DB2
DB1
TRANS
(-) Sleeve
(+) Tip
+12V DC
POWER
TRIG
DOORBELL INTERFACE
TRIG OUT
DOORBELL INTERFACE
POWER
DB3
DB2
DB1
TRANS
+12V DC
DB3
DB2
DB1
TRANS
TRIG
TRIG OUT
+12V DC
POWER
TRIG
DOORBELL INTERFACE
TRIG OUT
DB3
DB2
DB1
TRANS
(-) Sleeve
(+) Tip
(-) Sleeve
(+) Tip
MUTE
IN OUT
(-) Sleeve
(+) Tip
Page 4

Operating Instructions
1) Power the doorbell system and your audio distribution system.
2) Plug the 12VDC power supply into the DIM-1. The red and green LED
should be on. After 6 seconds the green LED will go out.
3) Ring the doorbell. The green LED on the DIM-1 should illuminate for 6
seconds and then go out.
4) Play audio through the audio system.
5) Ring the doorbell while the audio is playing. The audio should mute for 6
seconds and then return.
Limited Warranty
The Russound DIM-1 is fully guaranteed against all defects in materials and workmanship for
two (2) years from the date of purchase. During this period, Russound will replace any defective parts and correct any defect in workmanship without charge for either parts or labor.
For this warranty to apply, the unit must be installed and used according to its written instructions. If service is necessary, it must be performed by Russound. The unit must be returned to
Russound at the owner's expense and with prior written permission. Accidental damage and
shipping damage are not considered defects, nor is damage resulting from abuse or from servicing by an agency or person not specifically authorized in writing by Russound. This
Warranty does not cover: Damage caused by abuse, accident, misuse, negligence, or improper installation or operation; Power surges and lightning strikes; Normal wear and maintenance; Products that have been altered or modified; Any product whose identifying number,
decal, serial number, etc. has been altered, defaced or removed. Russound sells products only
through authorized Dealers and Distributors to ensure that customers obtain proper support
and service. Any Russound product purchased from an unauthorized dealer or other source,
including retailers, mail order sellers and online sellers will not be honored or serviced under
existing Russound warranty policy. Any sale of products by an unauthorized source or other
manner not authorized by Russound shall void the warranty on the applicable product.
Damage to or destruction of components due to application of excessive power voids the
warranty on those parts. In these cases, repairs will be made on the basis or the retail value of
the parts and labor. To return for repairs, the unit must be shipped to Russound at the owner's
expense, along with a note explaining the nature of service required. Be sure to pack the unit
in a corrugated container with at least three (3) inches of resilient material to protect the unit
from damage in transit. Before returning a unit for repair, call Russound at (603) 659-5170 for
a Return Authorization number. Write this number on the shipping label and ship to:
Russound, ATTN: Service,5 Forbes Road, Newmarket, NH 03857
5 Forbes Rd. Newmarket, NH 03857, USA
☎ 603.659.5170 • Fax 603.659.5388
e-mail: tech@russound.com
Rev. 1 28-1102
 Loading...