

Russound Acclaim 5 Series OutBack, Acclaim 5B45, Acclaim 5B55, Acclaim 5B65, Acclaim 5B65S Installation Manual

Acclaim™ 5 Series OutBack
Outdoor Loudspeaker
Installation Manual

2
Russound Acclaim OutBack Loudspeaker Installation Manual
INTRODUCTION
Introduction
Thank you for selecting the Russound Acclaim 5 Series Outdoor Speakers.
Like all Russound speakers, they combine acoustic technology with durability
and will provide years of musical enjoyment.
The Acclaim 5 Series line provides solutions for background music and
dedicated music listening. They combine premium acoustic materials with
advanced drivers to deliver exceptional performance in every application.
A key benet to using these speakers is the high-eciency design, which
means less amplication power is needed - less power does not mean quiet!
The speaker comes with two installation options: a free-standing base and
a bracket mount. The base attaches to one end of the speaker and provides
a stable vertical placement option for shelf or table. The bracket mount
accommodates at surface and corner locations, plus the bracket accepts
U-bolts for attaching the speaker to a pole. Once the bracket is installed, the
speaker slips into slots on the bracket so you don’t have to hold the speaker
in place while securing it. The bracket and speaker have knurls for secure
alignment to the desired angle.
Designed and built to withstand the rigors of outdoor environments, the 5
Series outdoor speakers will provide years of trouble-free service. They work
in a wide range of temperatures and be unaected by extremes of humidity.
A corrosion-resistant aluminum grille and bracket coupled with the speaker’s
rugged environmental design assures durability in any kind of weather. Sealed
enclosure oers greater durability against the environment's rigors.
3
Russound Acclaim OutBack Loudspeaker Installation Manual
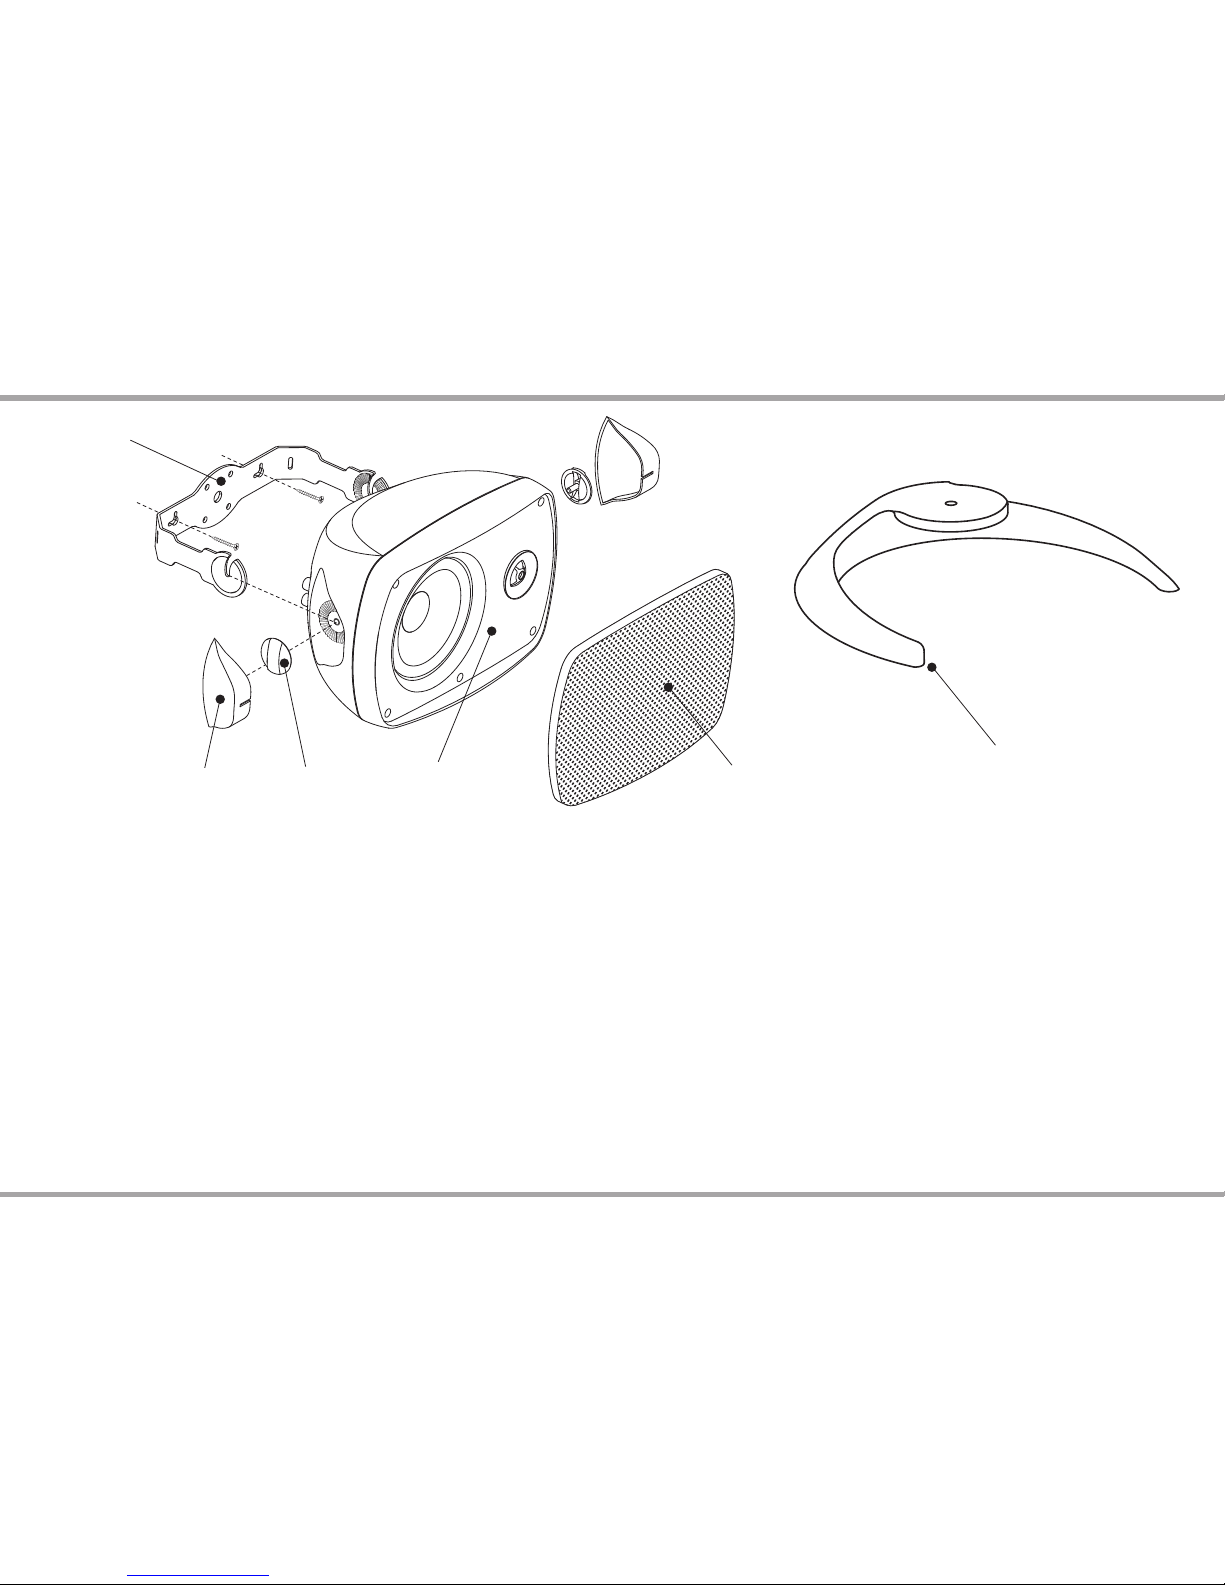
Speaker
Mounting bracket
End cap Mounting knob
Grille
Bookshelf foot option
Speaker assembly
The bracket has screw slots to accommodate both wall and pole installation
options. The speaker sits in the speaker bracket's "C" openings and is pivoted
into place and secured with the mounting knobs. End caps provide a cosmetic
covering over the bracket's attach points.
An included bookshelf foot option mounts in place of the bracket for an
attractive upright shelf installation for a speaker pair.
SPEAKER ASSEMBLY
Painting the speaker
The speaker mounting bracket, enclosure, end caps, and grille can be
painted. If you paint the speaker, do not get paint on the speaker drivers. Also
be sure to minimize paint buildup so as not to clog the grille holes.
Gently pull o the speaker grille, making sure not to distort it.1.
Mask the speaker terminals and bae (the area on the front of the 2.
enclosure that houses the drivers).
Paint the bracket, enclosure, end caps, and grille separately. Spraying is 3.
ideal, but if you can’t spray the paint, a roller with a short or medium nap
will work better than a brush. Apply one or two light coats.
While the paint is still wet, clear any clogged holes in the grille with bursts 4.
of compressed air.
After the paint has thoroughly dried, remove the masking. Gently press 5.
the grille into place on the speaker, using even pressure around the edge.
4
Russound Acclaim OutBack Loudspeaker Installation Manual
WIRING INFO
Speaker cable
The amount of wire needed varies with speaker placement. Label speaker
wires with left, right, and location.
Use Russound AW series speaker cable or any reputable brand of 16 to 12
gauge multi-stranded wiring for amplier- to-speaker connections.
Wire is measured in gauges: the greater the number, the smaller the wire. The
gauge of wire needed is determined by the distance between the amplier/
receiver and the speakers. The longer the run, the heavier the gauge needed.
Use the following chart as a guide:
Length Minimum Gauge
0' to 100' 16
50' to 150' 14
100' to 200' 12
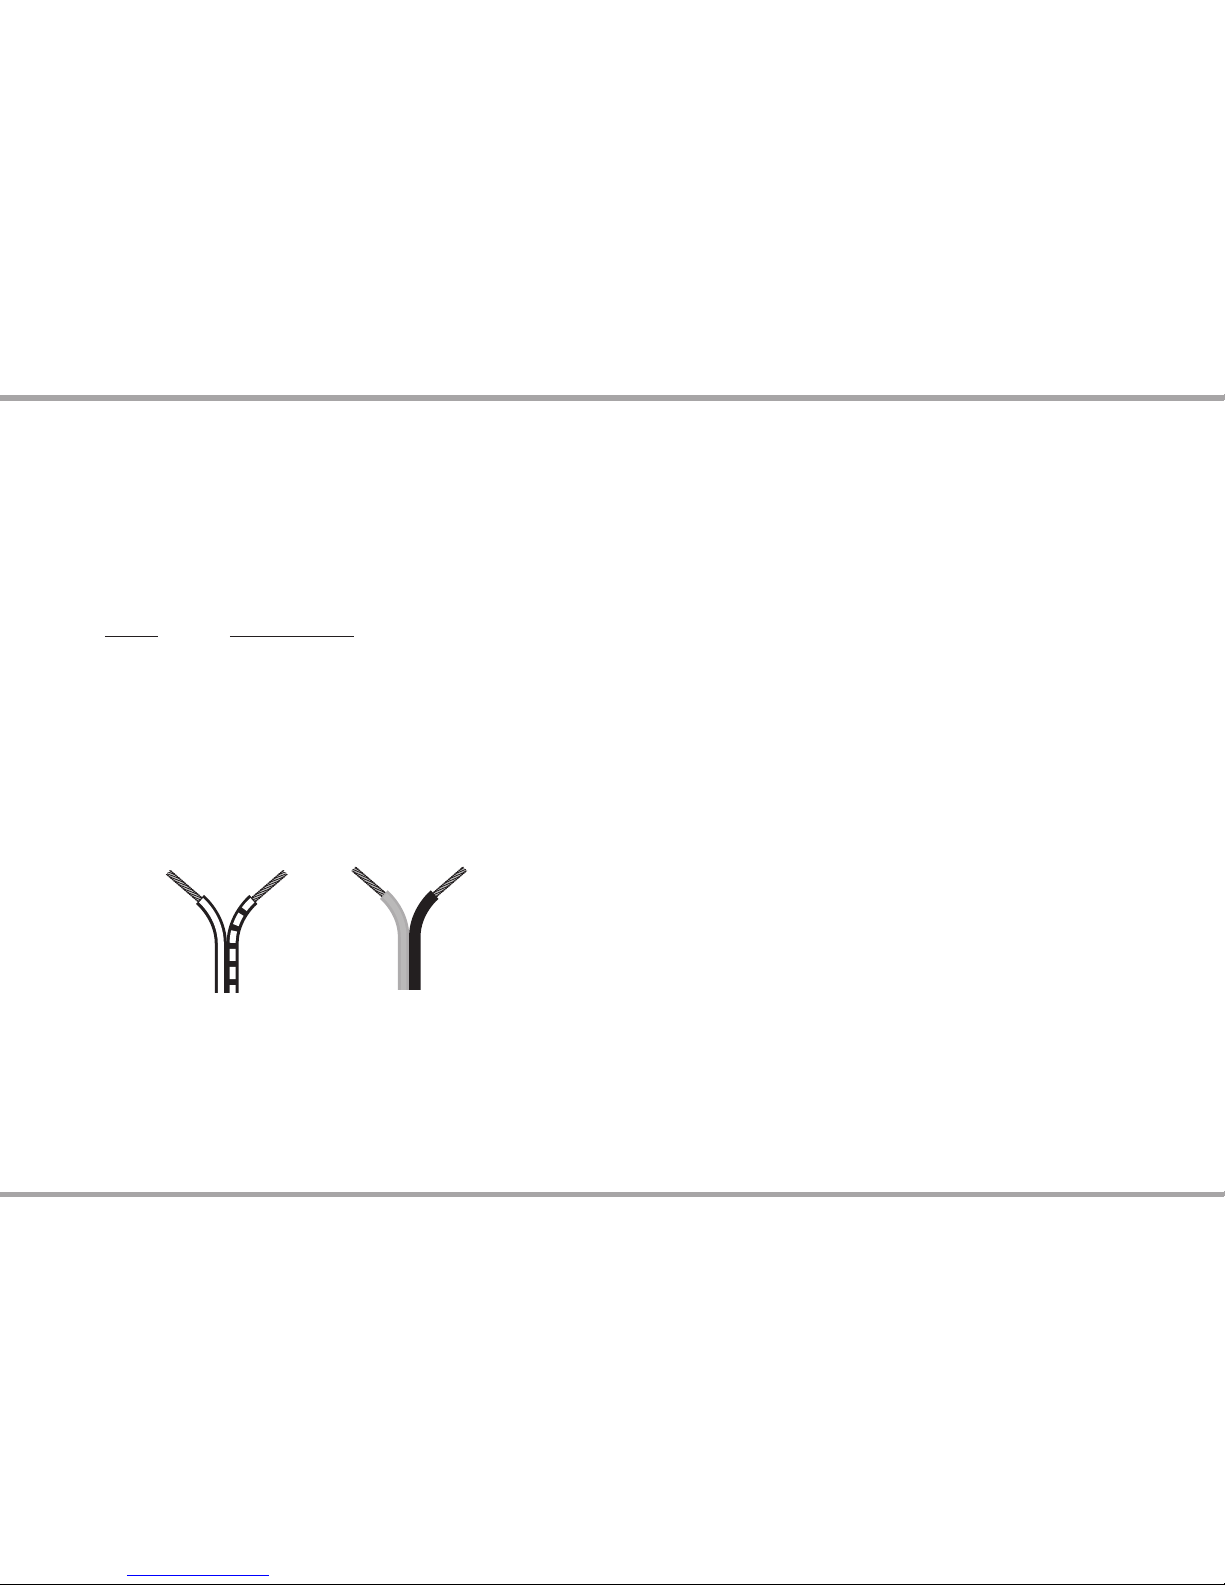
The standard colors on the terminals are red Positive (+) and black Negative
(-). If the wire has transparent insulation, one conductor will be copper-colored
(+) and the other silver-colored (-). If the wire has an opaque insulation, the
conductors are dierentiated by a series of ribs or grooves, a stripe, or dotted
line on one conductor. Use and mark these as the Positive (+) conductor.
Prewiring
Run a separate 2-conductor stranded copper speaker cable of at least 16
AWG (1.5 mm) from the amplier to each speaker. Be sure to use cable with the
appropriate re resistance rating for the application.
When running a speaker cable parallel to an AC power cable, keep them at
least 12 inches (30 cm) apart to minimize electromagnetic interference. If the
speaker cables must cross AC wiring, cross them at right angles.
Leave about 2 feet (0.6 m) of cable at each end for connecting to the speakers
and amplier. Label the cables so you will know which cable connects to each
keypad or amplier output channel.
Avoid running speaker wires close to house electrical wiring for any •
distance. If you have to run them parallel, leave two feet between the
wiring. Speaker wires should cross AC lines at a 90° angle.
The entire path between speakers and amplier should be clear and •
unobstructed. Conrm the placement for the wall port close to the
intended location of the amplier or receiver.
Label speaker wires at each end with left and right and location. •
Impedance matching for ampliers and speakers
If you intend to use more than one pair of speakers at a time it’s important
to consider both the impedance of the speakers and the capabilities of the
amplier or receiver. Not all ampliers or receivers can safely operate two sets
of speakers at once.
Typical usage of speaker wire conductors
-
+
-
+
 Loading...