

Russell Hobbs RHTOV25 User Manual for RHTOV25
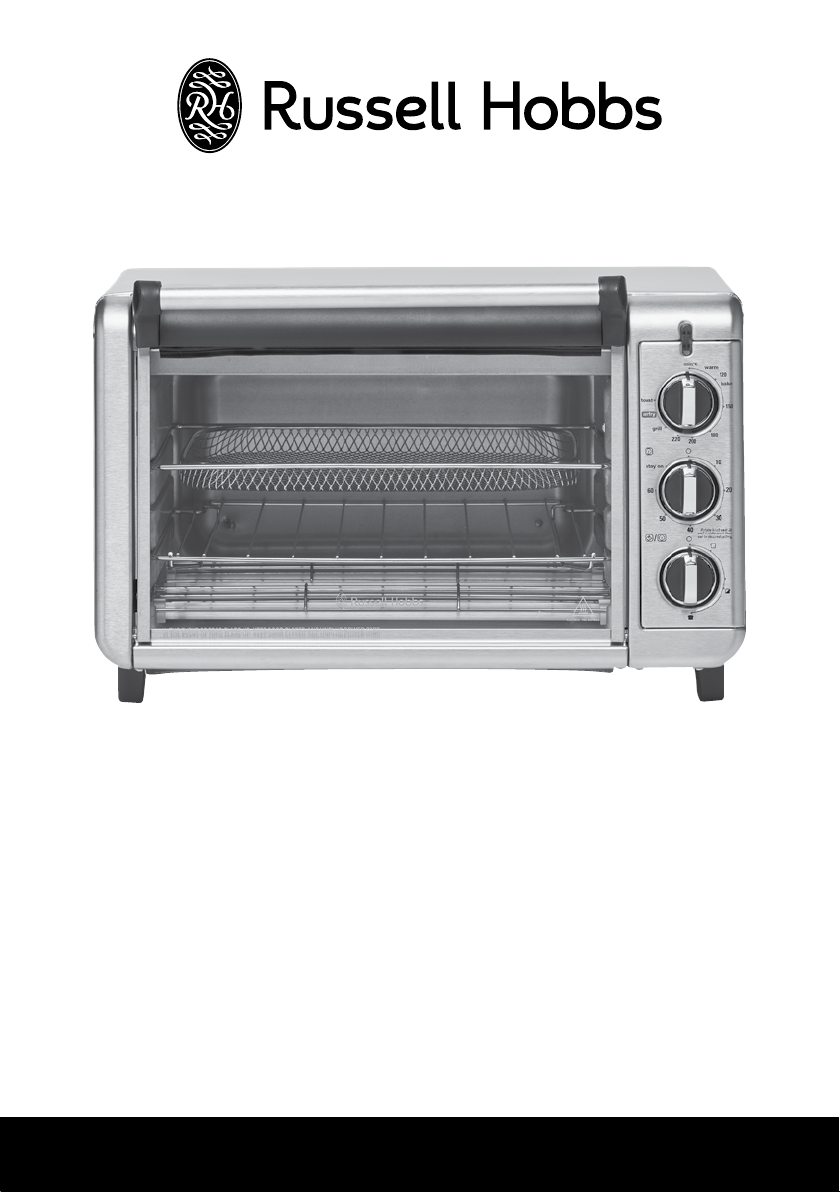
AIR FRY CRISP’N BAKE
TOASTER OVEN
2 YEAR WARRANTY
RHTOV25_IB&RB_FA_200220 Part No. T22-9001460
INSTRUCTIONS & WARRANTY
RHTOV25

IMPORTANT SAFEGUARDS
When using this appliance, basic safety precautions should always be followed, including but not limited to the
following:
1. To protect against electrical hazards do not immerse the power cord, plug or toaster oven in water or any
other liquid.
2. Do not use in the bathroom or near any source of water.
3. Do not use outdoors.
4. Always use the appliance’s handles or use oven gloves/mitts as some parts will be hot.
5. The temperature of accessible surfaces/parts may become very hot when the appliance is operating and
may remain hot for some time after the appliance has been switched off.
6. This appliance is not intended for use by persons (including children) with reduced physical, sensory or
mental capabilities, or lack of experience and knowledge, unless they have been given supervision or
instruction concerning use of the appliance by a person responsible for their safety.
7. Keep the toaster oven and the power cord away from the edge of table or countertops and out of reach of
children and persons with reduced physical, sensory or mental capabilities.
8. This appliance is not a toy. Children should be supervised to ensure they do not play with the appliance.
9. Do not leave this appliance unattended when in use.
10. Always switch off and unplug from the power outlet when not in use.
11. Always switch off and unplug from the power outlet and allow the toaster oven to cool before cleaning.
12. To disconnect, set controls to OFF. Switch off the wall power outlet, then grasp the plug and remove from
wall power socket. Never pull by the cord.
13. Do not operate this appliance with a damaged cord/plug or after the appliance has malfunctioned, or been
dropped or damaged in any manner. Contact Customer Service for replacement, examination, repair or
adjustment.
14. There are no user serviceable parts. If power cord or appliance is damaged, it must be replaced by the
manufacturer or similarly qualified person in order to avoid a hazard.
15. Do not use on an inclined plane or unstable surface.
16. Do not move the toaster oven while it is switched on.
17. Do not cover the toaster oven when in use.
18. Oven gloves should be used when removing food items.
19. Always take care when removing hot food items from the toaster oven.
20. Food may burn. Always monitor when using this appliance.
21. Heat rises from the toaster oven when in use. To avoid possible damage, do not use directly below overhead
cupboards.
22. Do not use the toaster oven near or below any curtains or other combustible materials.
23. Do not cook food items too large for the toaster oven.
23. Do not use the toaster oven without the crumb tray fitted.
24. Do not cook food wrapped in plastic film or polythene bags. It will cause a fire hazard.
25. Do not place on or near any heat sources.
26. Do not clean with metal scouring pads. Pieces can break off the pad and touch electrical parts, creating a
risk of electric shock.
27. Follow the instructions when cleaning this appliance.
28. Do not use appliance for anything other than its intended purpose.
29. Do not store any material, other than manufacturer’s recommended accessories, in this toaster oven when not
in use.
30. Do not place any of the following materials in the oven: paper, cardboard, plastic, and the like.
31. Clean the toaster oven and crumb tray regularly. Failure to do so may cause a fire hazard.
32. Do not cover crumb tray or any part of this oven with metal foil. This will cause overheating of the toaster
oven.
2

33. This appliance is not intended to be operated by means of an external timer or separate remote control system.
34. For added safety, electrical appliances should be connected to a power outlet that is protected by a residual
current device (RCD), also often referred to as a ‘Safety Switch’. Your switchboard may already incorporate
an RCD. If unsure, call an electrician for verification and fit ting if necessary.
35. The appliance must be disconnected from the main outlet and allowed to cool down before cleaning any
surfaces including internal racks and crumb tray.
CAUTION: Do not leave toaster oven unattended when in operation. Food ignition may occur. If this happens, unplug
unit but DO NOT open door. To reduce the risk of fire, keep oven interior completely clean and free of food residues,
oil, grease and any other combustible materials.
CAUTION: A fire may occur if the toaster oven is covered or touching flammable materials including curtains,
draperies, walls and the like when in operation or after, when still hot. Do not place any of the following materials
in the toaster oven, on top of the toaster oven, or in contact with the toaster oven sides or bottom surfaces: paper,
cardboard, plastic or the like.
SAVE THESE INSTRUCTIONS
THIS APPLIANCE IS INTENDED TO BE USED IN HOUSEHOLD AND SIMIL AR APPLICATIONS SUCH AS:
STAFF KITCHEN AREAS IN SHOPS, OFFICES AND OTHER WORKING ENVIRONMENTS;
FARM HOUSES;
BY CLIENTS IN HOTELS, MOTELS, AND OTHER RESIDENTIAL TYPE ENVIRONMENTS;
BED & BREAKFAST TYPE ENVIRONMENTS
HOT SURFACE:
The areas with the hot surface symbol may be hot during and after appliance use.
Use caution when touching these areas, as there is a burn risk. Wear protective gloves for protection
when possible.
3
Congratulations on the purchase of your new Air Fry Crisp’n Bake Toaster Oven. Each unit is
manufactured to ensure safety and reliability. Before using the appliance for the first time,
please read this instruction booklet carefully and keep it for future reference. Pass it on if
you pass on the appliance.
When using this appliance, basic safety precautions should always be followed.
5
4
1
3
2
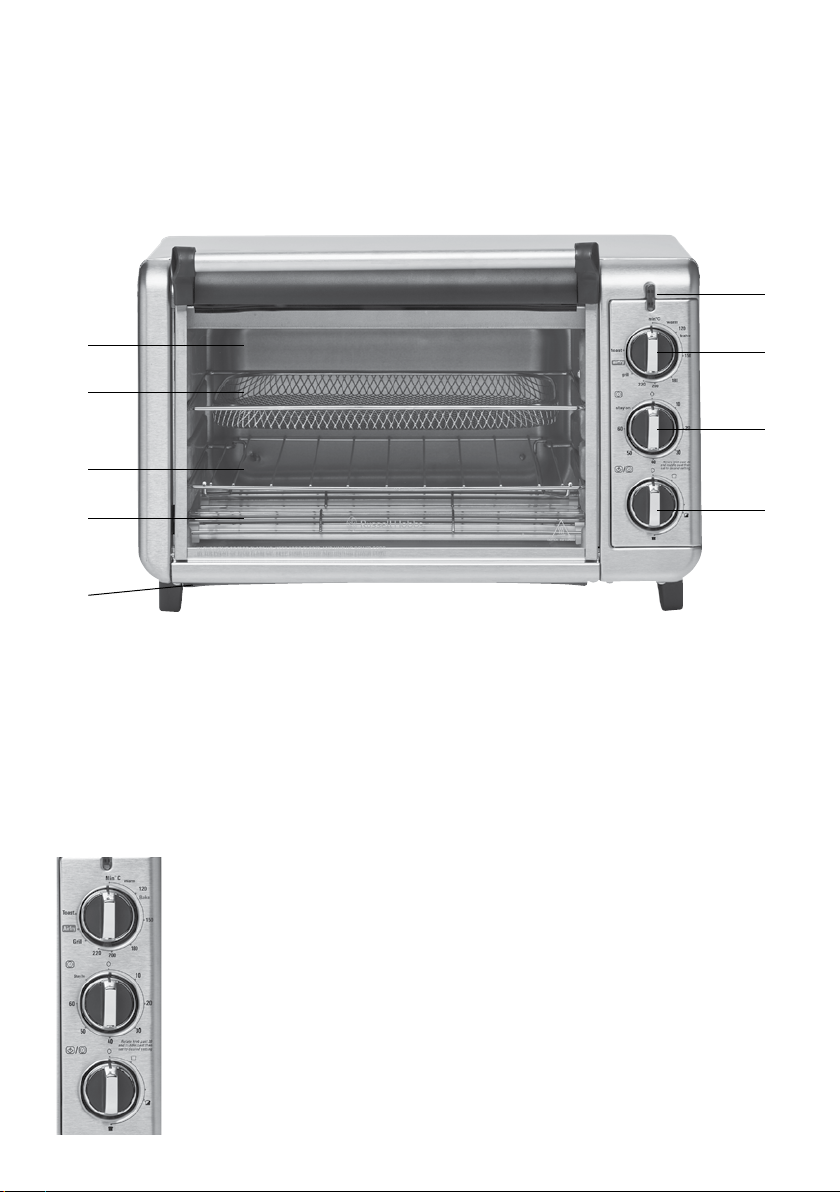
9
1. Air fry mesh cooking rack
2. Bake pan/Drip tray
3. Wire rack
4. Easy-view glass door
5. Power indicator light
There are two ways to turn the toaster oven ON:
1. For cooking functions, use the top control to select a bake temperature,
AirFry mode or Grill mode. Then, using ‘Timer 1’, select a cooking time or
set to ‘Stay On’.
2. For toasting, set the top control to ‘Toast’. Then, rotate ‘Timer 2’ to the
desired toast shade.
6
7
8
6. Temperature/Cooking function control
7. Timer 1 - Warm/Bake/Grill/Air Fry
8. Timer 2 - Toast
9. Crumb tray
To turn OFF the toaster oven:
- Rotate the timers to the ‘O’ position and the top control to the ‘Min’ position.
4

BEFORE FIRST USE
• Read all of the instructions included in this manual.
• Remove all packing material and any stickers.
• Wash all removable parts in warm soapy water.
• Thoroughly dry all parts before reassembling.
• Position your toaster oven in a well ventilated area, on a rm, level, heat-resistant surface,
clear of curtains, drapes, overhead cupboards and other combustible materials.
• Leave enough space (≈150mm/6 inches) around the unit to allow heat to ow without
damage to adjacent cabinets and walls.
• Plug unit into power outlet and switch the outlet on.
NOTE: It is normal during this process for the new elements to give off some odour and a small
amount of vapour.
IMPORTANT INFORMATION ABOUT YOUR TOASTER OVEN
• This toaster oven gets hot. When in use, always use oven mitts or pot holders when
touching any outer or inner surface of the toaster oven.
• During rst few minutes of use you may notice smoke and a slight odor. This is normal and
should cause no concern.
• Temperatures in the toaster oven will be lower than your set point. This is due to advanced
heating elements used in this toaster oven. Temperature dial settings have been calibrated to
provide expected results for most recipes taking into account the advanced heating elements.
• You must set the timer or select Stay On for the toaster oven to function.
• Be sure food or baking dish does not come within 1½ inches of the top heating elements.
• Food should not extend beyond the edges of the bake pan/drip tray to avoid drippings
from falling onto the heating elements.
• You can cook your food 3 ways:
- Use the bake pan/drip tray placed on the slide rack.
- Place the bake pan/drip tray under the slide rack / grilling rack .
- Place food on Air Fry mesh rack with bake pan/drip tray underneath
TOAST
It is not necessary to preheat the oven for toasting.
CAUTION: This toaster oven gets hot. Always use oven mitts when touching any outer or
inner surface of the toaster oven.
1. Set the Temperature/Cooking function control to TOAST position.
2. Open toaster oven door and insert the wire rack in the bottom slot.
3. Place items to be toasted directly onto the wire rack and close the door.
4. Turn the TIMER 2 control to the middle and then turn back or forward to set the desired
toast shade.
5

5. The power indicator light will illuminate and remain on until the toasting cycle is complete.
NOTE: Watch the toast to ensure the desired level of browning is obtained. The Toast/Timer
knob can be rotated to extend the toasting time or to the Off position at any time.
6. When the toast cycle is complete, there will be an audible signal. The oven and the power
indicator light will turn off.
7. Open the toaster oven door. Using oven mitts, slide the wire rack outward, just far enough
to remove the toast.
8. Unplug appliance when not in use.
NOTE: The toast shade knob must be set as desired for the toaster oven to begin toasting.
GRILL
When grilling, preheat until oven is warm. For optimal results use top rack position. Be sure
food or baking dish does not come within 40mm (1 1/2 inches) of the top heating element.
1. Set temperature selector knob to GRILL.
2. Set the TIMER 1 selector control to 20 then turn back or forward to desired grilling time.
Select Stay On to bake longer than 60 minutes or to control cooking time yourself. The
power indicator light comes on and remains on during the entire grilling time.
NOTE: You must set the timer for the oven to function.
3. Once the oven is preheated, open oven door and insert food. Close toaster oven door.
4. If using the oven timer, there will be an audible signal once the grilling cycle is complete.
The oven turns off and the power indicator light goes out. If not using the oven timer, turn
the oven off once the cooking cycle is complete.
5. Open the oven door. Using oven mitts or pot holders, slide the rack out to remove the
cooked food.
6. Unplug appliance when not in use.
AIR FRY
It is not necessary to preheat the toaster oven in the air fry function as it may cook slightly
faster than recommended cooking times.
1. Place food on Air Fry mesh rack
2. Open door and slide Air Fry mesh rack with food into the middle or lower rack position
3. Set Temperature selector knob to AIR FRY position
4. Turn TIMER 1 selector control to 20 and then turn to desired Air Frying time. Select
Stay On to air fry longer than 60 minutes or to control cooking time yourself. The power
indicator light comes on and remains on during the entire Air Frying time.
NOTE: You must choose Stay On or set the timer for the oven to start.
5. If using the toaster oven timer, there will be an audible signal once the Air Fry cycle is
complete. The toaster oven turns off and the power indicator light goes out. If not using the
toaster oven timer, turn the toaster oven off once the cooking cycle is complete.
6. Open the toaster oven door. Using oven mitts or pot holders, slide the rack out to remove
the cooked food.
NOTE: Clean out the crumb tray frequently when using the air fry setting.
7. Unplug the appliance when not in use.
6
 Loading...