

Page 1
INSTRUCTIONS AND WARRANTY
MODEL NO. RHEM21L
RUSSELL HOBBS 20L ELECTRONIC MIRROR MICROWAVE OVEN
Page 2

Congratulations on purchasing our Russell Hobbs 20L Electronic Mirror Microwave Oven. Each unit is
manufactured to ensure safety and reliability. Before using this appliance for the first time, please read the
instruction manual carefully and keep it for future reference.
FEATURES OF THE RUSSELL HOBBS 20L ELECTRONIC MIRROR MICROWAVE OVEN
20L Capacity
Digital LED display with Clock
Power output: 700W
11 power levels
Programmable multi-stage cooking
8 Auto menus: cook, defrost, popcorn, potato, frozen vegetable, beverage, dinner plate, pizza
95 minute cooking timer with end signal
Defrost by time or weight
With quick start and delay start functions
Smart Info function
Elegant mirror finish front
255mm glass turntable diameter
User friendly control panel
Easy to use push button door
Enamel interior for easy cleaning
With child lock safety feature
For domestic use only
1 year warranty
IMPORTANT SAFEGUARDS
When using any electrical appliance, basic safety precautions should always be followed including the following:
1. Please read the instructions carefully before using any appliance.
2. Always ensure that the voltage on the rating label corresponds to the mains voltage in your home.
3. Incorrect operation and improper use can damage the appliance and cause injury to the user.
4. The appliance is intended for household use only. Commercial use invalids the warranty and the supplier
cannot be held responsible for injury or damage caused when using the appliance for any other purpose
than that intended.
5. Avoid any contact with moving parts.
6. Close supervision is required when any appliance is used near or by children or invalids.
7. Check the power cord and plug regularly for any damage. If the cord or the plug is damaged, it must be
replaced by the manufacturer or a qualified person in order to avoid an electrical hazard.
8. Do not use the appliance if it has been dropped or damaged in any way. In case of damage, take the unit in
for examination and/or repair by an authorised service agent
9. Do not operate the oven when empty.
10. Do not operate this appliance if it has a damaged cord or plug, if it is not working properly or if it has been
damaged or dropped. If the supply cord is damaged, it must be replaced by the manufacturer or its service
agent or a similarly qualified person in order to avoid a hazard.
Page 3

11. This appliance is not intended for use by persons (including children) with reduced physical, sensory or
mental capabilities, or lack of experience and knowledge, unless they have been given supervision or
instruction concerning use of the appliance by a person responsible for their safety.
12. WARNING: Only allow children to use the oven without supervision when adequate instructions have been
given so that the child is able to use the oven in a safe way and understands the hazards of improper use.
13. Do not operate the microwave unit without any food contents inside the cavity.
14. To reduce the risk of fire in the oven cavity:
When heating food in a plastic or paper container, check the oven frequently in terms of the possibility of
ignition.
Remove wire twist-ties from paper or plastic bags before placing the bag in oven.
If smoke is observed, switch off or unplug the appliance and keep the door closed in order to stifle any
flames.
Do not use the cavity for storage purposes. Do not leave paper products, cooking utensils or food in the
cavity when not in use.
WARNING: Liquid or other food must not be heated in sealed containers since they are able to explode.
15. Microwave heating of beverages can result in delayed eruptive boiling, therefore care has to be taken when
handling the container.
16. Do not fry food in the oven. Hot oil can damage oven parts and utensils and even result in burns.
17. Eggs in their shell and whole hard-boiled eggs should not be heated in microwave ovens since they may
explode even after microwave heating has ended.
18. Pierce foods with heavy skins such as potatoes, whole squashes, apples and chestnuts before cooking.
19. The contents of feeding bottles and baby jars should be stirred or shaken and the temperature should be
checked before serving in order to avoid burns or scalding.
20. Cooking utensils may become hot because of heat transferred from the heated food. Potholders/ oven gloves
may be needed to handle the utensil.
21. Utensils should be checked to ensure that they are suitable for use in microwave oven.
22. WARNING: It is hazardous for anyone other than a trained person to carry out any service or repair operation
which involves the removal of any cover which gives protection against exposure to microwave energy.
23. This product is Group 2 Class B ISM equipment. The definition of Group 2 which contains all ISM (Industrial,
Scientific and Medical) equipment in which radio-frequency energy is intentionally generated and/or used in
the form of electromagnetic radiation for the treatment of material, and spark erosion equipment. For Class B
equipment is equipment suitable for use in domestic establishments and in establishments directly
connected to a low voltage power supply network which supplies buildings used for domestic purpose.
24. Never immerse the unit in water or any other liquid for cleaning purposes.
25. Remove the plug from the socket by gripping the plug. Do not pull on the cord to disconnect the appliance
from the mains. Always unplug the unit when not in use, before cleaning or when adding or removing parts.
26. The use of accessory attachments that are not recommended or supplied by the manufacturer may result in
injuries, fire or electric shock.
27. A short cord is provided to reduce the hazards resulting from becoming entangled in or tripping over a longer
cord.
28. Do not let the cord hang over the edge of a table or counter. Ensure that the cord is not in a position where it
can be pulled on inadvertently.
Page 4

29. Do not allow the cord to touch hot surfaces and do not place on or near a hot gas or electric burner or in a
heated oven.
30. Do not use the appliance on a gas or electric cooking top or over or near an open flame.
31. Use of an extension cord with this appliance is not recommended. However, if it is necessary to use an
extension lead, ensure that the lead is suited to the power consumption of the appliance to avoid overheating
of the extension cord, appliance or plug point. Do not place the extension cord in a position where it can be
pulled on by children or animals or tripped over.
32. This appliance is not suitable for outdoor use. Do not use this appliance for anything other than its intended
use.
33. DO NOT carry the appliance by the power cord.
34. Do not leave this appliance unattended during use. Always unplug the unit when not in use or before
cleaning.
35. Always operate the appliance on a smooth, even, stable surface. Do not place the unit on a hot surface.
36. Ensure that the switch is in the “Off” or “0” position after each use.
37. The manufacturer does not accept responsibility for any damage or injury caused by improper or incorrect
use, or for repairs carried out by unauthorised personnel.
38. In case of technical problems, switch off the machine and do not attempt to repair it yourself. Return the
appliance to an authorised service facility for examination, adjustment or repair. Always insist on the use of
original spare parts. Failure to comply with the above mentioned pre-cautions and instructions, could affect
the safe operation of this machine.
39. The microwave oven should not be placed in a cabinet unless it has been tested in a cabinet.
40. Appliances are not intended to be operated by means of an external timer or separate remote-control
system.
41. The door or the outer surface may get hot when the appliance is in operation.
42. The rear surface of the appliance should be placed against a wall.
INSTALLATION
1. Make sure that all the packing materials are removed from the inside of the door.
2. WARNING: Check the oven for any damage, such as a misaligned or bent door, damaged door seals and
sealing surface, broken or loose door hinges and latches and dents inside the cavity or on the door. If there
is any damage, do not operate the oven and contact qualified service personnel.
3. This microwave oven must be placed on a flat, stable surface to hold its weight and the heaviest food likely
to be cooked in the oven.
4. Do not place the oven where heat, moisture, or high humidity are generated, or near combustible materials.
5. For correct operation, the oven must have sufficient airflow. Allow 20cm of space above the oven, 30cm at
back and 20cm at both sides. Do not cover or block any openings on the appliance. Do not remove feet.
6. Do not operate the oven without a glass tray, roller support, and shaft in their proper positions.
7. Make sure that the power supply cord is undamaged and does not run under the oven or over any hot or
sharp surface.
8. The socket must be readily accessible so that it can be easily unplugged in an emergency.
9. Blocking the intake and/or outlet openings can damage the oven.
10. Remove any protective film found on the microwave cabinet surface. Do not remove the light brown Mica
cover that is attached to the oven cavity to protect the magnetron.
11. Never place the glass tray upside down. The glass tray should never be restricted.
12. Both glass tray and turntable ring assembly must always be used during cooking.
Page 5
13. All food and containers are always to be placed on the glass tray for cooking.
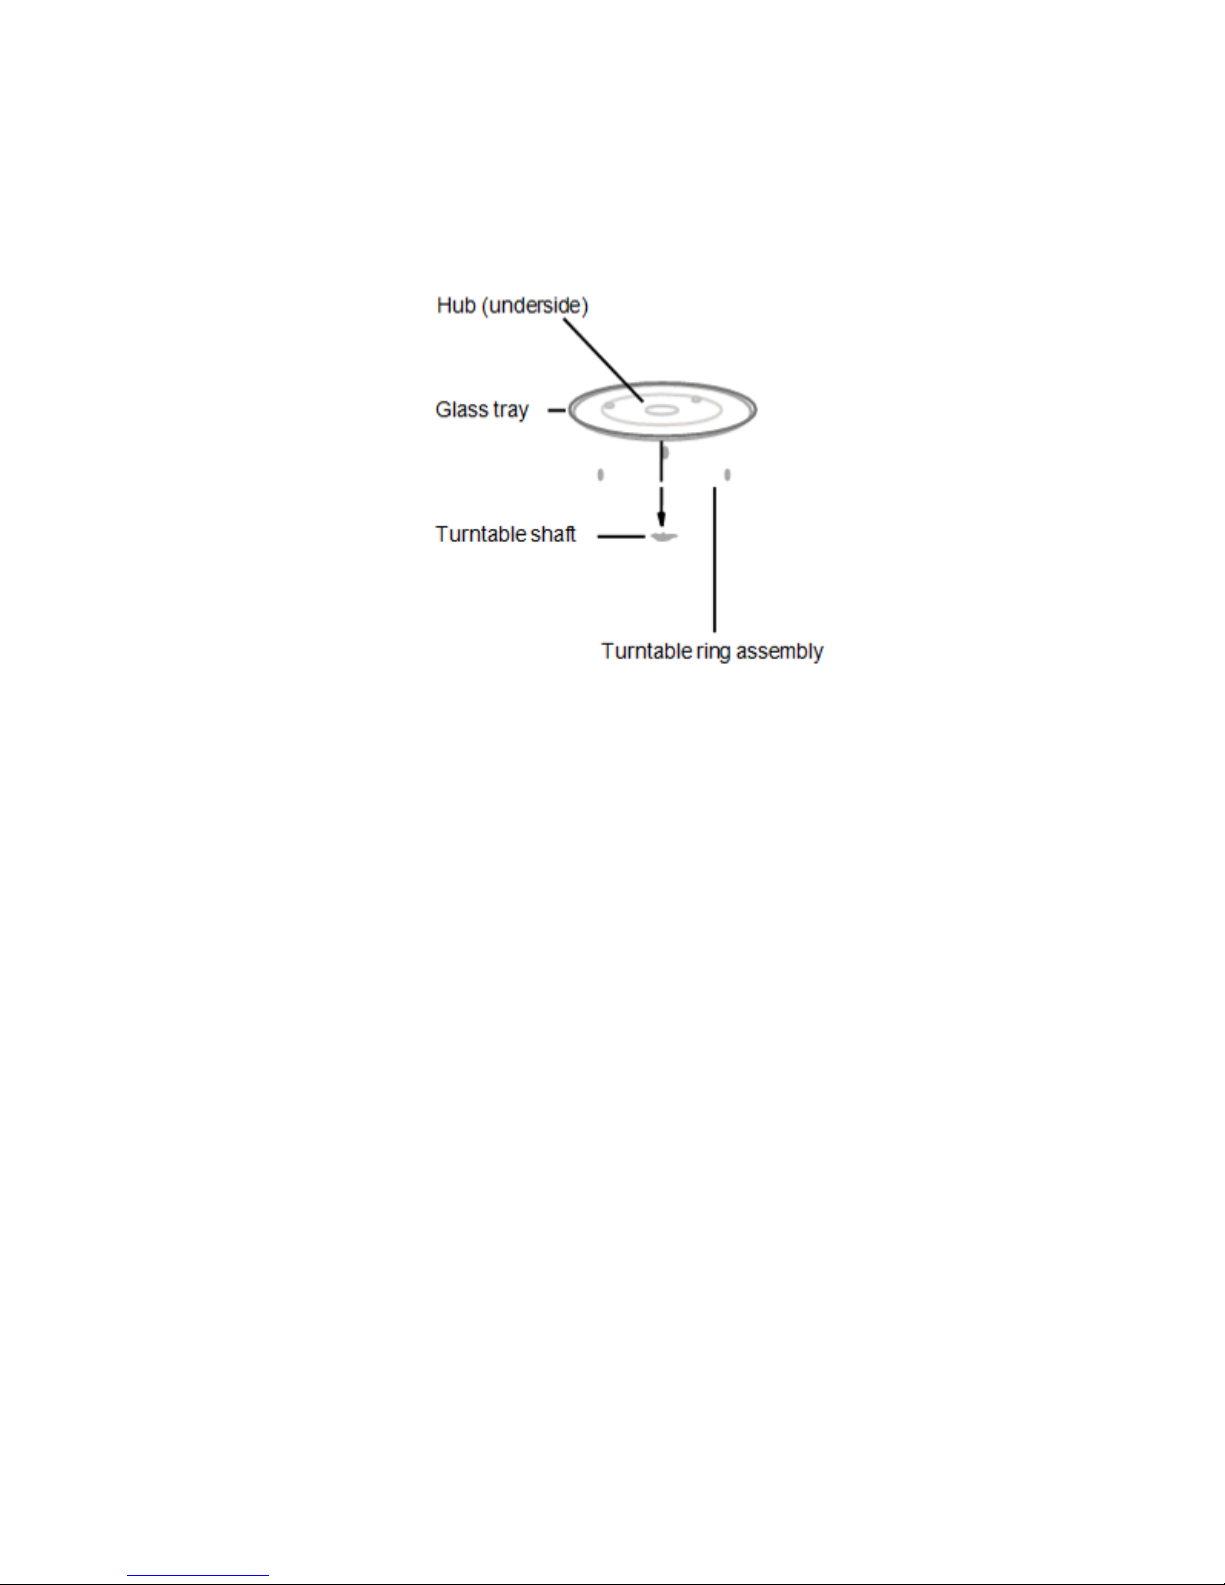
TURNTABLE INSTALLATION
RADIO INTERFERENCE
Operation of the microwave oven can cause interference to your radio, TV, or similar equipment. When
there is interference, it may be reduced or eliminated by taking the following measures:
Clean the door and sealing surface of the oven.
Reposition the receiving antenna of the radio or television.
Relocate the microwave oven with respect to the receiver.
Plug the microwave oven into a different outlet so that microwave oven and receiver are on different
branch circuits.
MICROWAVE COOKING PRINCIPLES
Arrange food carefully. Place thickest areas towards outside of dish.
Watch cooking time. Cook for the shortest amount of time indicated and add more as needed. Food
severely overcooked can smoke or ignite.
Cover foods while cooking. Covers prevent spattering and help foods to cook evenly.
Turn foods over once during microwave cooking to speed cooking of such foods as chicken and
hamburgers. Large items like roasts must be turned over at least once.
Rearrange foods such as meatballs halfway through cooking both from top to bottom and from the
center of the dish to the outside.
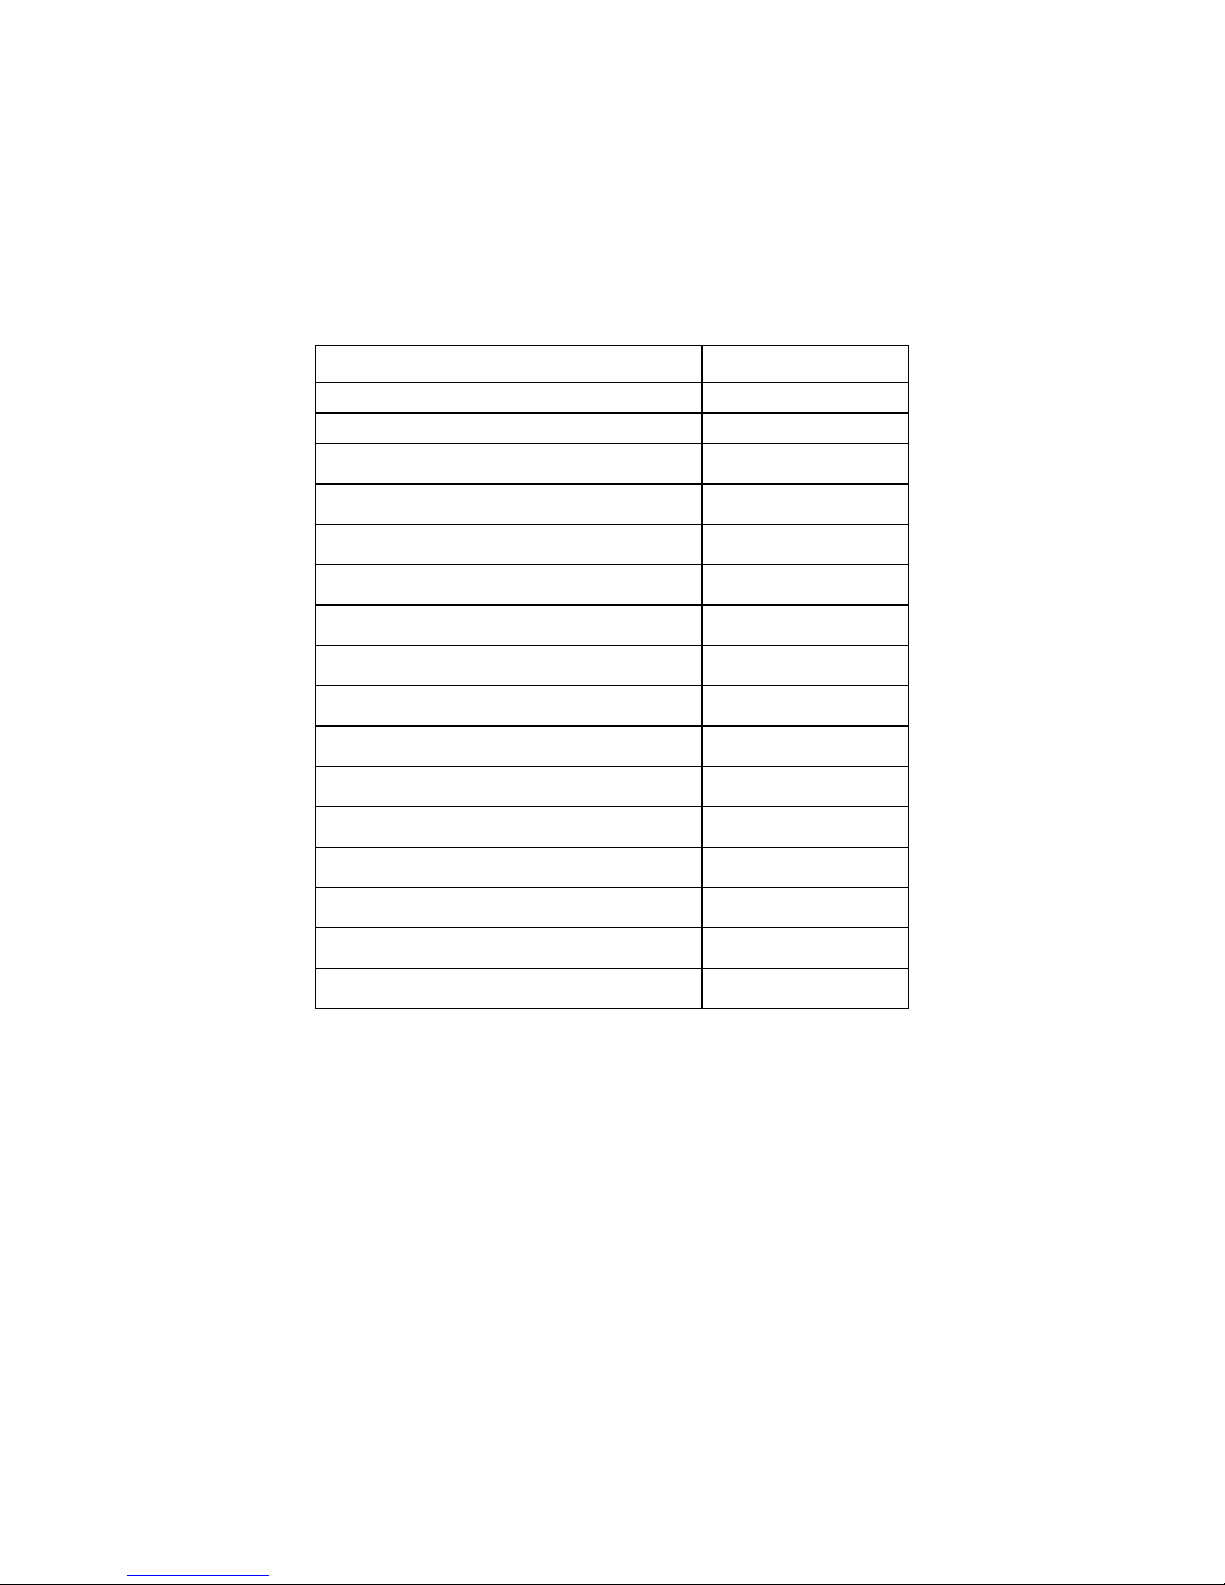
UTENSILS GUIDE
The ideal material for a microwave utensil is material which is transparent. This allows energy to pass
through the container and heat the food.
Page 6
A microwave cannot penetrate metal, so metal utensils or dishes with metallic trim should not be used.
Do not use recycled paper products when microwave cooking, as they may contain small metal
fragments which may cause sparks and/or fires.
Round /oval dishes rather than square/oblong ones are recommended, as food in corners tends to
overcook.
The list below is a general guide to help you select the correct utensils:
COOKWARE
MICROWAVE
Heat–Resistant Glass
Yes
Non Heat–Resistant Glass
No
Heat–Resistant Ceramics
Yes
Microwave–Safe Plastic Dish
Yes
Paper Kitchen Towels
Yes
Metal Tray
No
Metal Rack
No
Aluminium Foil & Foil Containers
No
Parchment Paper
Yes
Plastic Wrap
Yes
Wax Paper
Yes
Containers containing metal parts
No
Metal Twist-ties
No
Paper Bags
No
Plastic Foam
No
Wood
No
Page 7
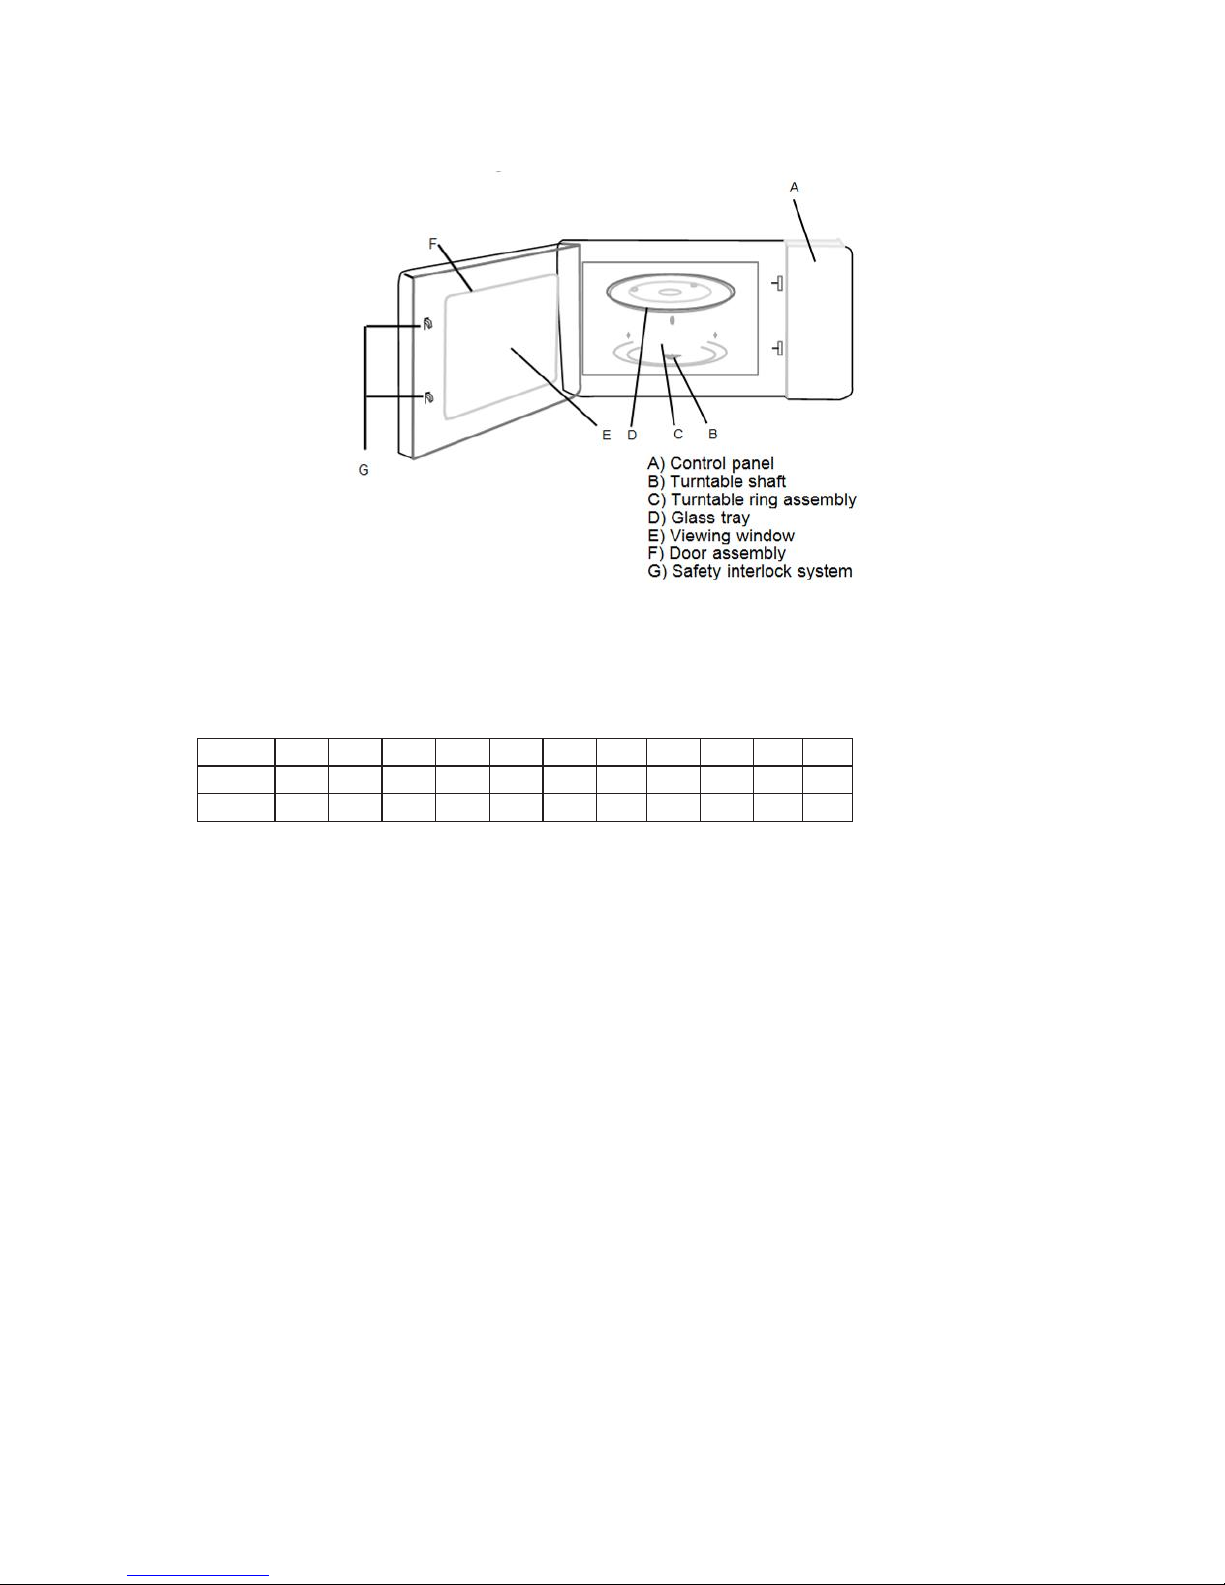
PARTS DIAGRAM
OPERATING INSTRUCTIONS
POWER LEVEL
11 power levels are available.
Level
10 9 8 7 6 5 4 3 2
1
0
Power
100%
90%
80%
70%
60%
50%
40%
30%
20%
10%
0%
Display
PL10
PL9
PL8
PL7
PL6
PL5
PL4
PL3
PL2
PL1
PL0
CLOCK SETTING
1. Press "CLOCK ", "00:00" will display.
2. Press the number keys and enter the current time. For example, time is 12:10 now, press "1, 2, 1, 0" in that
order.
3. Press "CLOCK “ to finish clock setting. ":" will flash and the clock will be displayed.
4. If the numbers you have used are not within the range of 1:00--12:59, the setting will be invalid until valid
numbers are inputted.
5. Note: (1) In the process of clock setting, if the "STOP/CANCEL" button is pressed or if there is no operation
within 1 minute, the oven will go back to the former setting automatically.
6. If the clock needs to be reset, please repeat step 1 to step 3.
KITCHEN TIMER
1. Press "KITCHEN TIMER ", LED will display 00:00.
2. Press the number keys and enter the timer time. (The maximum cooking time is 99 minutes and 99 seconds)
3. Press " START/+30SEC. " to confirm setting.
4. When the timer time arrives, the buzzer will ring 5 times.
5. If the clock has been set (12-hour system), LED will display the current time.
Note: 1) The kitchen time is different from 12-hour system. Kitchen Timer is a timer.
2) During kitchen timer, no other program can be set.
Page 8

MICROWAVE COOK
1. Press "TIME COOK" once, LED will display "00:00".
2. Press number keys to input the cooking time; the maximum cooking time is 99 minutes and 99 seconds.
3. Press "POWER" once, LED will display "PL10". The default power is 100% power.
4. You can now press number keys to adjust the power level. Press " START/+30SEC." to start cooking.
5. Example: to cook the food with 50% microwave power for 15 minutes.
a. Press "TIME COOK" once. "00:00" displays.
b. Press "1", "5", "0", "0" in that order.
c. Press "POWER" once, then press "5" to select 50% microwave power.
d. Press "START/+30SEC." to start cooking.
6. Note: 1) In the process of cooking, if the "STOP/CANCEL" button is pressed or if there is no operation within
1 minute, the oven will go back to the former setting automatically.
2) If "PL0" is selected, the oven will work with fan for no power. You can use this level to remove odour from
the oven.
3) During microwave cooking, "POWER" can be used to change the power you need. After pressing
"POWER", the current power will flash for 3 seconds, now you can press the number button to change the
power. The oven will work with the selected power for the remaining time.
SPEEDY COOKING
1. In waiting state, instant cooking at 100% power level can be started by selecting a cooking time from 1 to 6
minutes by pressing number pads 1 to 6. Press " START/+30SEC." to increase the cooking time. The
maximum cooking time is 99 minutes and 99 seconds.
2. In waiting state, instant cooking at 100% power level with 30 seconds' cooking time can be started by
pressing "START/+30SEC". Each press on the same button will increase cooking time by 30 seconds. The
maximum cooking time is 99 minutes and 99 seconds.
3. Note: During microwave cooking and time defrost, time can be added by pressing "START/+30SEC." button.
WEIGHT DEFROST FUNCTION
1. Press "WEIGHT DEFROST", LED will display "dEF1". Press numerical buttons to input weight to be
defrosted.
2. Input the weight ranged between 100~2000 g.
3. If the weight input is not within 100~2000, the input will be invalid.
4. The oven will not work until valid numbers are inputted.
5. Press " START/+30SEC. " to start defrosting and the remaining cooking time will be displayed.
TIME DEFROST FUNCTION
1. Press "TIME DEFROST", LED will display "dEF2".
2. Press number pads to input defrosting time. The effective time range is 00:01~99:99. The default microwave
power is power level 3. If you want to change the power level, press "POWER" once, and the LED will
display "PL 3", and then press the number pad of the power level you wanted.
3. Press "START/+30SEC." to start defrosting. The remaining cooking time will be displayed.
Page 9

POPCORN
1. Press "POPCORN" repeatedly until the number you wish appears in the display, "50","100" grams will
display in order.
2. For example, press "POPCORN" once, "50" appears.
3. Press "START/+30 SEC." to cook the popcorn, buzzer sounds once. When cooking has finished, buzzer will
sound five times and then turn back to the waiting state.
Important Information About Microwave Popcorn Feature:
When selecting 100 grams of popcorn, it is suggested that you fold down a triangle on each corner of the bag
before cooking.
If/when the popcorn bag expands and no longer rotates properly, please press STOP/CANCEL button once and
open the oven door and adjust the bag position to ensure even cooking.
POTATO
1. Press "POTATO" repeatedly until the number you wish appears in the display, "1", "2", "3" will display in
order.
2. "1" SET: 1 potato (approximate 230 gram) "2" SETS: 2 potatoes (approximate 460 gram) "3" SETS: 3
potatoes (approximate 690 gram). For example, press "POTATO" once, "1" appears.
3. Press "START/+30 SEC." to cook, buzzer sounds once. When cooking has finished, buzzer sounds five
times and then turns back to waiting state.
FROZEN VEGETABLE
4. Press "FROZEN VEGETABLE" repeatedly until the number you wish appears in the display, "150", "350",
"500" grams will display in order.
5. For example, press "FROZEN VEGETABLE" once, "150" appears.
6. Press "START/+30 SEC." to cook, buzzer sounds once. When cooking has finished, buzzer sounds five
times and then turns back to waiting state.
BEVERAGE
1. Press "BEVERAGE" repeatedly until the number you wish appears in the display, "1", "2", "3" cup will display
in order. One cup is about 120ml. For example, press "BEVERAGE" once, "1" appears.
2. Press "START/+30 SEC." to cook, buzzer sounds once. When cooking has finished, buzzer sounds five
times and then turns back to waiting state.
DINNER PLATE
1. Press "DINNER PLATE" repeatedly until the number you wish appears in the display, "250", "350", "500"
grams will display in order. For example, press "DINNER PLATE" once, "250" appears.
2. Press "START/+30 SEC." to cook, buzzer sounds once. When cooking has finished, buzzer sounds five
times and then turns back to waiting state.
Page 10

PIZZA
1. Press "PIZZA" repeatedly until the number you wish appears in the display, "100", "200", "400" grams will
display in order. For example, press "PIZZA" once, "100" appears.
2. Press "START/+30 SEC." to cook, buzzer sounds once. When cooking has finished, buzzer sounds five
times and then turns back to waiting state.
PROGRAMMABLE MEMORY FUNCTION
1. Press "0/MEMORY" to choose memory 1-3 procedure. The LED will display 1, 2, 3. If the procedure has
been set, press "START/ +30 SEC." to use it. If not, continue to set the procedure. Only one or two stages
can be set.
2. Once set, press "START/ +30 SEC." once to save the procedure. If you press "START/ +30 SEC." again, it
will start cooking.
3. Example: To set the following procedure as the second memory, that is memory 2.
4. To cook the food with 80% microwave power for 3 minutes and 20 seconds. The steps are as follow:
a. In waiting state, press "0/MEMORY" twice, stop pressing until the screen displays "2".
b. Press "TIME COOK" once, and then press "3", "2", "0" in order.
c. Press "POWER" once, "PL10" display, and then press "8" and "PL8" displays.
d. Press "START/ +30 SEC." to save the setting. Buzzer sounds once and "2" displays. If you press
"START/+30SEC." again, the procedure will be saved as the memory 2 and operated.
e. If you want to run the saved procedure, in waiting state, press "0/MEMORY" twice, screen displays "2",
then press "START/+30SEC." to run.
MULTI-STAGE COOKING
1. At most, 2 stages can be set for cooking. In multi-stage cooking, if one stage is defrosting, then defrosting
shall be placed at the first stage automatically.
2. Note: Auto cooking cannot work in the multi-stage cooking.
3. Example: if you want to cook with 80% microwave power for 5 minutes + 60% microwave power for 10
minutes. The cooking steps are as following:
a. Press "TIME COOK" once, and then press "5", "0", "0" to set the cooking time.
b. Press "POWER" once, and then press "8" to select 80% microwave power.
c. Press "TIME COOK" once, then press "1", "0", "0", "0" to set the cooking time;
d. Press "POWER" once, then press "6" to select 60% microwave power. (5) Press "START/ +30 SEC." to
start cooking.
SMART INFO FUNCTION
1. In cooking state, press "CLOCK", the LED will display clock for three seconds.
2. In the microwave cooking state, press "POWER" to inquire microwave power level, and the current
microwave power will be displayed. After three seconds, the oven will turn back to the previous state. In
multi-stage state, the inquiring way can be done by the same way as above.
CHILD LOCK SAFETY FEATURE
1. Lock: In waiting state, press "STOP/CANCEL" for 3 seconds, there will be a long "beep" denoting entering
Page 11

into the child-lock state; meanwhile, LED will display
2. Lock quitting: In locked state, press "STOP/CANCEL" for 3 seconds, there will be a long "beep" denoting that
child-lock is released.
CYCLE REMINDER FUNCTION
1. When the cycle has finished, the buzzer will go off 5 "beeps" to alert the user that cooking has completed.
OTHER SPECIFICATIONS
1. In standby state, if the set clock LED displays current time, the icon “:” would flash; otherwise, it shows
"0:00".
2. In setting function state, LED displays corresponding setting.
3. In working or pause state, LED displays surplus cooking time.
CLEANING AND MAINTENANCE
This appliance is for household use only and is not user-serviceable.
Do not open or change any parts by yourself. Please refer to a qualified electrical service department or
return to the supplier if servicing is necessary.
Turn off the oven and remove the power plug from the wall socket before cleaning.
Keep the inside of the oven clean. When food splatters or spilled liquids adhere to oven walls, wipe with
a damp cloth. Mild detergent may be used if the oven gets very dirty. Avoid the use of spray and other
harsh cleaners as they may stain, streak or dull the door surface.
The outside surfaces should be cleaned with a damp cloth. To prevent damage to the operating parts
inside the oven, water should not be allowed to seep into the ventilation openings.
Wipe the door and window on both sides as well as the door seals and adjacent parts frequently with a
damp cloth to remove any spills or spatters. Do not use abrasive cleaner.
Do not allow the control panel to become wet. Clean with a soft, damp cloth. When cleaning the control
panel, leave oven door open to prevent oven from accidentally turning on.
If steam accumulates inside or around the outside of the oven door, wipe with a soft cloth. This may
occur when the microwave oven is operated under high humidity condition. And it is normal.
It is occasionally necessary to remove the glass tray for cleaning. Wash the tray in warm soapy water or
in a dishwasher.
The roller ring and oven floor should be cleaned regularly to avoid excessive noise. Simply wipe the
bottom surface of the oven with mild detergent. The roller ring may be washed in mild soapy water or
dishwasher. When removing the roller ring from cavity floor for cleaning, be sure to replace in the proper
position.
Remove odors from your oven by combining a cup of water with the juice and rind of one lemon in a
deep microwaveable bowl, microwave for 5 minutes. Wipe thoroughly and dry with a soft cloth.
When it becomes necessary to replace the oven light, please consult a dealer to have it replaced.
The oven should be cleaned regularly and any food deposits removed. Failure to maintain the oven in a
clean condition could lead to deterioration of the surface that could adversely affect the life of the
appliance and possibly result in a hazardous situation.
Page 12

Please do not dispose this appliance into the domestic rubbish bin; it should be disposed to the
particular disposal center provided by the municipalities.
Do not use bleach or other abrasive substance or solvents to clean your appliance as it can be
damaging to the finish.
STORING THE APPLIANCE
Unplug the unit from the electrical outlet and clean all the parts as instructed above. Ensure that all parts
are dry before storing.
Store the appliance in its box or in a clean, dry place.
Never store the appliance while it is still wet or dirty.
Never wrap the power cord around the appliance.
SERVICING THE APPLIANCE
There are no user serviceable parts in this appliance. If the unit is not operating correctly, please check the
following:
You have followed the instructions correctly
That the unit has been wired correctly and that the wall socket is switched on.
That the mains power supply is ON.
That the plug is firmly in the mains socket.
If the appliance still does not work after checking the above:
- Consult the retailer for possible repair or replacement. If the retailer fails to resolve the problem and you need to
return the appliance, make sure that:
The unit is packed carefully back into its original packaging.
Proof of purchase is attached.
A reason is provided for why it is being returned.
If the supply cord is damaged, it must be replaced by the manufacturer or an authorised service agent, in order to
avoid any hazard. If service becomes necessary within the warranty period, the appliance should be returned to
an approved Amalgamated Appliance (Pty) Ltd service centre. Servicing outside the warranty period is still
available, but will, however, be chargeable.
CHANGING THE PLUG
Should the need arise to change the fitted plug, follow the instructions below.
This unit is designed to operate on 230V~240V current only. Connecting to other power sources may
damage the appliance. Connect a three-pin plug as follows:
The wires in this mains lead are coloured in accordance with the following code:
Green/Yellow = Earth
Blue = Neutral
Brown = Live
Page 13

PLEASE AFFIX YOUR PROOF OF PURCHASE/RECEIPT HERE
IN THE EVENT OF A CLAIM UNDER WARRANTY THIS RECEIPT MUST BE PRODUCED.
W A R R A N T Y
1. Home of Living Brands (Pty) Limited (“Home of Living Brands”) warrants to the original
purchaser of this product (“the customer”) that this product will be free of defects in quality
and workmanship which under normal personal, family or household use and purpose may
manifest within a period of 1 (one) year from the date of purchase (“warranty period”).
2. Where the customer has purchased a product and it breaks, is defective or does not work
properly for the intended purpose, the customer must notify the supplier from whom the
customer bought the product (“the supplier”) thereof within the warranty period. Any claim in
terms of this warranty must be supported by a proof of purchase. If proof of purchase is not
available, then repair, and/or service charges may be payable by the customer to the supplier.
3. The faulty product must be taken to the supplier's service centre to exercise the warranty.
4. The supplier will refund, repair or exchange the product in terms of this warranty subject to
legislative requirements. This warranty shall be valid only where the customer has not broken
the product himself, or used the product for something that it is not supposed to be used for.
The warranty does not include and will not be construed to cover products damaged as a
result of disaster, misuse, tamper, abuse or any unauthorised modification or repair of the
product.
5. This warranty will extend only to the product provided at the date of the purchase and not to
any expendables attached or installed by the customer.
6. If the customer requests that the supplier repairs the product and the product breaks or fails
to work properly within 3 (three) months of the repair and not as a result of misuse, tampering
or modification by or on behalf of the customer, then the supplier may replace the product or
pay a refund to the customer.
7. The customer may be responsible for certain costs where products returned are not in the
original packaging, or if the packaging is damaged. This will be deducted from any refund
paid to the customer.
HOME OF LIVING BRANDS (PTY) LTD (JOHANNESBURG)
JOHANNESBURG TEL NO. (011) 490-9600
CAPE TOWN TEL NO. (021) 552-5161
DURBAN TEL NO. (031) 792-6000
www.homeoflivingbrands.com
www.russellhobbs.co.za
www.facebook.com/RussellHobbsSA
Page 14

Russell Hobbs vous félicite pour Four À Micro-Ondes De 20L À Finition Miroir. Chaque unité est produite pour
garantir un maximum de sécurité et de fiabilité. Avant d'utiliser cet ustensile pour la première fois, veuillez lire
attentivement le manuel d'utilisation et le conserver pour toute référence future.
CARACTERISTIQUES DU FOUR À MICRO-ONDES DE 20L À FINITION MIROIR
20L de capacidade
Mostrador de LED digital com relógio
Potência: 700W
11 Níveis de potência
Cozimento multifases programável
8 Automenus: ecuisinier, dégivrage, pop-corn, pommes de terre, legumes surgelés, boissons, assiette à
pizza
Timer de 95 minutos com sinal de término
Descongelamento por tempo ou por peso
Com funções de início rápido e adiamento
Com função
Smart Informações
Parte frontal com acabamento elegante espelhado
Diâmetro da plataforma de vidro de 255 mm
Utilisateur panneau de commande convivial
Fácil de usar maçaneta impulso
Interior em esmalte para uma limpeza fácil
Grâce à la fonction de verrouillage de sécurité pour enfants
Réservé uniquement à un usage domestique
1 an de garantie
MESURES DE PROTECTION IMPORTANTES
Lorsqu'on utilise un appareil électrique, il est toujours important de suivre les consignes de sécurité y compris ce
qui suit :
1. Avant d'utiliser un appareil électrique lire attentivement les instructions.
2. S'assurer que le voltage indiqué sur l'étiquette corresponde au voltage de la maison.
3. Une utilisation incorrecte ou non appropriée peut endommager l'appareil et provoquer des blessures à
l'usager.
4. Cet appareil est conçu uniquement pour l'utilisation domestique. L'utilisation à des fins commerciales de cet
appareil annule la garantie et le fournisseur ne pourra être tenu responsable de tout dommage ou accident
causé par l'appareil lorsque son usage diffère de celui prévu.
5. Eviter tout contact avec les parties en mouvement.
6. Une surveillance étroite est requise quand tout appareil est utilisé près de ou par des enfants ou des
personnes handicapées.
7. Inspecter et brancher régulièrement le fil électrique pour vérifier qu'il ne soit pas endommagé. Si le fil ou la
prise sont endommagés, leur substitution sera faite par le producteur ou par une personne qualifiée afin
d'éviter tout risque d'accident électrique
Page 15

8. Ne pas utiliser le micro-ondes manuel de s'il a été endommagé d'une manière quelconque ou en cas de
chute. En cas de dommage, faire examiner et/ou réparer l'unité par un agent agréé. Ne pas faire fonctionner
le four quand il est vide.
9. Ne pas faire fonctionner cet appareil si le cordon ou la prise de courant sont endommagés, s’il ne fonctionne
pas correctement, ou s’il a été endommagé ou laissé tomber. Si le cordon d’alimentation est endommagé, il
doit être remplacé par le fabricant ou son représentant ou une personne pareillement qualifiée de sorte à
éviter un risque.
10. Cet appareil ne doit pas être utilisé par des personnes (y compris les enfants) à mobilité réduite, dont les
capacités sensorielles ou mentales sont amoindries, ou manquant de l'expérience ou des connaissances
nécessaires, à moins qu'elles ne soient sous la surveillance d'une personne responsable de leur sécurité ou
qu'elle aient reçu de cette dernière des instructions d'utilisation de l'appareil.
11. AVERTISSEMENT: Ne permettre aux enfants d’utiliser le four sans surveillance que quand des instructions
adéquates ont été données de sorte que l’enfant est capable d’utiliser le four de façon sûre et comprends les
risques d’une utilisation incorrecte.
12. Ne pas faire fonctionner l’unité micro-ondes sans aucuns aliments à l’intérieur de la cavité.
13. Pour réduire le risque d’incendie dans la cavité du four:
14. En réchauffant des aliments dans un récipient en plastique ou papier, contrôler le four fréquemment en
terme de possibilité d’embrasement.
15. Retirer les liens de fermeture en fil de fer des sacs en papier ou plastique avant de placer le sac dans le
four.
16. Si de la fumée est observée, éteindre ou débrancher l’appareil et maintenir la porte fermée de sorte à
étouffer toute flamme.
Ne pas utiliser la cavité pour emmagasinement. Ne pas laisser de produits en papier, ustensiles de cuisine
ou aliments dans la cavité quand elle n’est pas utilisée.
AVERTISSEMENT: Les liquides ou autres aliments ne doivent pas être chauffés dans des récipients scellés
parce qu’ils peuvent exploser.
17. Le réchauffement au micro-ondes de boissons peut conduire à l’ébullition éruptive retardée, donc il faut faire
attention en prenant le récipient.
18. Ne pas frire d’aliments dans le four. L’huile chaude peut endommager les pièces et ustensiles du four et
même avoir pour résultat des brûlures.
19. Les œufs dans leur coque et les œufs entiers cuits ne doivent pas être réchauffés dans des fours microondes parce qu’ils peuvent exploser même après que le réchauffement au micro-ondes soit fini.
20. Percer les aliments avec de grosses peaux tels que les pommes de terre, potirons entiers, pommes et
châtaignes avec de les cuire.
21. Les contenus de biberons et pots de bébé doivent être mélangés ou agités et la température doit être vérifiée
avant de servir de sorte à éviter des brûlures ou échaudage.
22. Les ustensiles de cuisine peuvent devenir chauds dû à la chaleur transférée des aliments réchauffés. Des
gants isolants peuvent être nécessaires pour tenir l’ustensile.
23. Les ustensiles doivent être vérifiés pour assurer qu’ils sont appropriés pour l’utilisation dans le four à microondes.
24. AVERTISSEMENT: Il est dangereux pour quelqu’un autre qu’une personne qualifiée de réaliser toute
opération de maintenance ou réparation qui implique l’enlèvement de toute couverture qui protège contre
l’exposition à l’énergie micro-ondes.
25. Ce produit est un équipement de Groupe 2 Classe B ISM. La définition de Groupe 2 contient tous les
Page 16

équipements ISM (Industriel, Scientifique et Médical) pour lesquels une énergie de fréquence radioélectrique
est intentionnellement générée e/ou utilisée sous la forme de radiation électromagnétique pour le traitement
de matériau, et équipement d’électro érosion. L’équipement Classe B est un équipement approprié pour
l’utilisation dans des établissements domestiques et des établissements directement liés à un réseau
d’alimentation électrique de basse tension qui alimente des édifices utilisés pour finalité domestique.
26. Ne pas immerger l'unité de base dans l'eau ou dans tout autre liquide pour la nettoyer.
27. Pour enlever la prise la tenir fermement. Ne pas tirer le fil pour déconnecter l'appareil de la prise de courant.
Déconnecter l'unité lorsqu'elle n'est pas en fonction ou lors du nettoyage ou du démontage.
28. L'utilisation d'accessoires qui ne sont pas recommandés ou fournis par le producteur pourrait provoquer des
accidents, des incendies ou des électrocutions.
29. Le fil fourni est court afin d'éviter tout risque de suffocation ou de blessure suite au trébuchement sur un fil
plus long.
30. Ne pas laisser le fil pendre d'une table ou d'un plan de travail. S'assurer que le fil ne soit pas en une position
où il pourrait être tiré par mégarde.
31. Ne pas laisser le fil en contact avec des surfaces chaudes et ne pas placer sur ou près d'un réchaud au gaz
ou électrique ou dans un four chaud.
32. Ne pas utiliser l'appareil sur une taque ou gaz ou près d'une flamme libre.
33. L'utilisation d'une rallonge électrique n'est pas recommandée. Cependant si l'utilisation d'une rallonge
s'avère nécessaire, s'assurer qu'elle soit adaptée à la consommation de courant de l'appareil afin d'éviter
tout risque de surchauffe de la rallonge, de l'appareil ou de la prise. Ne pas placer la rallonge dans un
endroit où elle peut facilement être tirée par un enfant ou un animal ou où elle peut provoquer des
trébuchements.
34. Cet appareil ne convient pas à l'utilisation à l'extérieur. Uniquement pour usage domestique. Ne pas utiliser
cet appareil pour tout autre but sauf celui pour lequel il a été conçu.
35. NE PAS transporter l'appareil en le soulevant par le fil d'alimentation.
36. Pendant l'utilisation ne pas laisser l'appareil sans surveillance. Débrancher toujours l'appareil lorsqu'il n'est
pas en fonction ou avant le nettoyage.
37. Poser toujours l'appareil sur une surface lisse, plate et stable. Ne pas placer l'unité sur une surface chaude.
38. Après chaque usage, s'assurer que le bouton soit en position "Off".
39. Le producteur n'est pas responsable de dommages ou accidents causés par une utilisation incorrecte du
produit ou suite à des réparations effectuées par un agent non agréé.
40. En cas de problèmes techniques, éteindre la machine et ne pas essayer de la réparer soi-même. Rapporter
l'appareil à un agent agréé pour qu'il soit examiné, réglé ou réparé. Insister pour que les pièces utilisées
soient des originaux. Le manque de respect de ces précautions et instructions pourrait compromettre le
fonctionnement de la machine.
41. Le four à micro-ondes ne doit pas être placé dans un meuble à moins qu’il ait été testé dans un meuble.
42. Les appareils ne sont pas destinés à être opérés au moyen d’une minuterie externe ou d’un système de
télécommande séparé.
Page 17

INSTALLATION
1. S’assurer que tous les matériaux d’emballage sont retirés de l’intérieur de la porte.
2. AVERTISSEMENT : Contrôler le four pour tout dégât, tel que porte désalignée ou tordue, joints de porte et
surface de scellage endommagés, charnières et loquets de porte cassés ou desserrés et bosses à l’intérieur
de la cavité ou sur la porte. S’il y a un dégât, ne pas faire fonctionner le four et contacter le personnel de
maintenance qualifié.
3. Ce four à micro-ondes doit être placé sur une surface plane et stable pour supporter son poids et les
aliments les plus lourds probables d’être cuisinés dans le four.
4. Ne pas placer le four là où de la chaleur, buée ou haute humidité sont générées ou prés de matériaux
inflammables. Pour un fonctionnement correct, le four doit avoir un flux d’air suffisant. Laisser 20cm
d’espace libre au-dessus du four, 30cm à l’arrière et 20cm des deux côtés. Ne pas couvrir ou bloquer les
ouvertures de l’appareil. Ne pas retirer les pieds. Pour s'assurer qu'il y a assez d'espace entre le microondes et la paroi, il faut installer le séparateur :
5. Ne pas opérer le four sans le plateau en verre, porte rouleau, et arbre dans leurs positions correctes.
6. S’assurer que le cordon d’alimentation n’est pas endommagé et ne court pas sous le four ou au-dessus de
toute surface chaude ou tranchante.
7. La prise doit être facilement accessible de sorte qu’elle puisse être facilement débranchée en cas d’urgence.
8. Bloquer les ouvertures d’entrée et/ou de sortie peut endommager le four.
9. Retirer tout film protecteur trouvé sur la surface du four à micro-ondes. Ne pas retirer la couverture ‘Mica’
marron clair qui est attachée à la cavité du four pour protéger le magnétron.
10. Ne jamais placer le plateau en verre à l’envers. Le plateau en verre ne doit jamais être restreint.
11. Le plateau en verre et l’anneau d’assemblage de la plaque tournante doivent toujours être utilisés pendant la
cuisson.
12. Tous les aliments et récipients doivent toujours être placés sur le plateau en verre pour la cuisson.
13. Si le plateau en verre ou l’anneau d’assemblage de la plaque tournante se fêlent ou se cassent, contacter
votre centre de maintenance autorisé le plus proche.
INSTALLATION DE LA PLAQUE TOURNANTE
Moyeu (dessous)
Plateau en verre
Arbre de la plaque
tournante
Anneau d’assemblage de la
plaque tournante
Page 18

INTERFÉRENCE RADIO
Le fonctionnement du four à micro-ondes peut causer une interférence radio, télé, ou similaire. Quand il
ya une interférence, elle peut être réduite ou éliminée en prenant les mesures suivantes:
Nettoyer la porte et surface de scellage du four.
Repositionner l’antenne de réception de la radio ou télévision.
Repositionner le four à micro-ondes par rapport au récepteur.
Brancher le four à micro-ondes sur une prise différente de sorte que le four à micro-ondes et le récepteur
sont sur des circuits de branchement différents.
PRINCIPES DE CUISSON AU MICRO-ONDES
Disposer les aliments avec soin. Placer les parties plus grosses vers l’extérieur du plat.
Contrôler le temps de cuisson. Cuire pour le plus court temps indiqué et additionner plus de temps si
nécessaire. Les aliments beaucoup trop cuits peuvent fumer ou prendre feu.
Couvrir les aliments pendant la cuisson. Les couvercles évitent les éclaboussements et aident les aliments
à cuire uniformément.
Retourner les aliments une fois pendant la cuisson au micro-ondes pour accélérer la cuisson d’aliments tels
que le poulet ou les hamburgers. Les grands morceaux tels que le rôti doivent être retournés au moins une
fois.
Re-disposer les aliments tels que les boulettes de viande à la moitié de la cuisson du haut vers le bas et du
centre vers l’extérieur du plat.
GUIDE D’USTENSILES
Le matériau idéal pour un ustensile de micro-ondes est un matériau qui est transparent. Ceci permet à
l’énergie de passer au travers du récipient et de réchauffer les aliments.
Une micro-onde ne peut pas pénétrer le métal, donc les ustensiles en métal ou plats avec des bords
métalliques ne doivent pas être utilisés.
Ne pas utiliser de produits en papier recyclé pour la cuisson au micro-ondes, parce qu’ils peuvent contenir
de petits fragments de métal qui peuvent provoquer des étincelles et/ou incendies.
Des plats ronds/ovals plutôt que des plats carrés/rectangulaires sont recommandés parce que la nourriture
dans les coins a tendance à surchauffer.
Des bandes étroites de papier d’aluminium peuvent être utilisées pour éviter la cuisson excessive de parties
exposées. Mais faites attention, n’en utilisez pas trop et maintenez une distance de 1 pouce.
La liste ci-dessous est un guide général pour vous aider à sélectionner les ustensiles corrects:
Page 19

USTENSILES DE CUISINE
MICRO-ONDES
Verre résistant à la chaleur
Oui
Verre non résistant à la chaleur
Non
Céramique résistante à la chaleur
Oui
Plat en Plastique pour Micro-Ondes
Oui
Torchons de Cuisine en Papier
Oui
Plateau en Métal
Non
Grille en Métal
Non
Papier d’Aluminium & Récipients en Papier
d’Aluminium
Non
Parchemin
Oui
Film Étirable
Oui
Papier de Cire
Oui
Récipients contenant des Pièces en Métal
Non
Liens de Fermeture en Métal
Non
Sacs en Papier
Non
Mousse Plastique
Non
Bois
Non
SCHEMA DES ELEMENTS
A) Commandes
B) Arbre de la plaque tournante
C) Anneau d’assemblage de la plaque tournante
D) Plateau en verre
E) Fenêtre de vision
F) Assemblage de la porte
G) Système d’enclenchement de sécurité
Page 20

INSTRUCTIONS D’UTILISATION
NIVEAU DE PUISSANCE
11 niveaux de puissance disponibles.
Niveau
10 9 8 7 6 5 4 3 2
1
0
Puissan
100 %
90 %
80 %
70 %
60 %
50 %
40 %
30 %
20 %
10 %
0 %
Affichag
PL10
PL9
PL8
PL7
PL6
PL5
PL4
PL3
PL2
PL1
PL0
RÉGLAGE DE L'HORLOGE
1. Appuyez sur « HORLOGE » ("CLOCK "), « 00:00 » s'affichera.
2. Appuyez sur les touches nombre et saisissez l'heure actuelle. Par exemple, s'il est maintenant 12:10,
appuyez sur « 1, 2, 1, 0 » dans cet ordre.
3. Appuyez sur « HORLOGE » pour terminer le réglage de l'horloge. « : » clignotera et l'horloge s'affichera.
4. Si les nombres que vous avez utilisés ne sont pas dans la fourchette 1:00 -- 12:59, le réglage ne sera pas
valide jusqu'à ce que des nombres valides soient saisis.
5. Note : (1) Pendant le processus de réglage de l'horloge, si le bouton « STOP/ANNULATION »
("STOP/CANCEL") est pressé ou si aucune opération n'est effectuée pendant 1 minute, le four reviendra à
son réglage précédent automatiquement.
6. Si l'horloge doit être réinitialisée, veuillez répéter les étapes 1 à 3.
MINUTERIE DE CUISINE
1. Appuyez sur « MINUTERIE DE CUISINE » ("KITCHEN TIMER"), la LED affiche 00:00.
2. Appuyez sur les touches nombre et saisissez la durée de la minuterie. (La durée maximale de cuisson est
de 99 minutes et 99 secondes)
3. Appuyez sur « DÉMARRER/+30SEC. » ("START/+30SEC.") pour confirmer le réglage.
4. Lorsque la minuterie arrive à sa fin, la sonnerie sonne 5 fois.
5. Si l'horloge a été réglée (système sur 12 heures), la LED affiche l'heure actuelle.
Note : 1) La minuterie de cuisine est différente du système sur 12 heures. La minuterie de cuisine est une
minuterie.
2) Pendant que la minuterie de cuisine est en cours d'utilisation, aucun autre programme ne peut être utilisé.
CUISSON AU MICRO-ONDES
1. Appuyez sur « TEMPS DE CUISSON » ("TIME COOK"), la LED affiche 00:00.
2. Appuyez sur les touches nombre pour saisir le temps de cuisson ; la durée maximale de cuisson est de 99
minutes et 99 secondes.
3. Appuyez sur « PUISSANCE » ("POWER") une fois, la LED affiche « PL10 ». La puissance par défaut est de
100 % de puissance.
4. Vous pouvez maintenant appuyer sur les touches nombre pour ajuster le niveau de puissance. Appuyez sur
« DÉMARRER/+30SEC. » pour démarrer la cuisson.
5. Exemple : cuire un aliment à 50 % de puissance du micro-ondes pendant 15 minutes.
a. Appuyez sur « TEMPS DE CUISSON » une fois. « 00:00 » s'affiche.
b. Appuyez sur « 1 », « 5 », « 0 », « 0 » dans cet ordre.
c. Appuyez sur « PUISSANCE » une fois, puis appuyez sur « 5 » pour sélectionner 50 % de puissance de
micro-ondes.
Page 21

d. Appuyez sur « DÉMARRER/+30SEC. » pour démarrer la cuisson.
6. Note : (1) Pendant le processus de cuisson, si le bouton « STOP/ANNULATION » est pressé ou si aucune
opération n'est effectuée pendant 1 minute, le four reviendra à son réglage précédent automatiquement.
2) Si « PL0 » est sélectionné, le four fonctionnera avec le ventilateur sans puissance. Vous pouvez utiliser ce
niveau pour évacuer les odeurs du four.
3) Pendant la cuisson au micro-ondes, « PUISSANCE » peut être utilisé pour modifier la puissance dont
vous avez besoin. Après avoir appuyé sur « PUISSANCE », puissance clignote pendant 3 secondes, puis
vous pouvez appuyer sur les touches nombre pour modifier la puissance. Le four fonctionne avec la
puissance sélectionnée pour le temps restant.
CUISSON RAPIDE
1. En mode attente, la cuisson instantanée à 100 % de puissance peut être démarrée en sélectionnant une
durée de cuisson de 1 à 6 minutes en appuyant sur le clavier numérique de 1 à 6. Appuyez sur
« DÉMARRER/+30SEC. » pour augmenter la durée de cuisson. La durée maximale de cuisson est de 99
minutes et 99 secondes
2. En mode attente, la cuisson instantanée à 100 % à 30 secondes de cuisson peut être démarrée en appuyant
sur « DÉMARRER/+30SEC. ». Chaque pression sur la même touche augmente le temps de cuisson de 30
secondes. La durée maximale de cuisson est de 99 minutes et 99 secondes
3. Note : Pendant la cuisson au micro-ondes et la décongélation, la durée peut être allongée en appuyant sur
« DÉMARRER/+30SEC. ».
FONCTION POIDS DÉCONGÉLATION
1. Appuyez sur « POIDS DÉCONGÉLATION » ("WEIGHT DEFROST") la LED affiche « dEF1 ». Appuyez sur
les touches numériques pour saisir le poids à décongeler.
2. Saisissez un poids compris entre 100 et 2 000 g.
3. Si le poids saisi n'est pas compris dans la fourchette 100 et 2 000 g, la saisie sera invalide.
4. Le four ne fonctionnera pas tant que des chiffres valides ne sont pas saisis.
5. Appuyez sur « DÉMARRER/+30SEC. » pour démarrer la décongélation et le temps de cuisson restant
s'affiche.
FONCTION DURÉE DÉCONGÉLATION
1. Appuyez sur « DURÉE DÉCONGÉLATION » ("TIME DEFROST"), la LED affiche « dEF2 ».
2. Appuyez sur le clavier numérique pour saisir le temps de décongélation. Les durées possibles sont
comprises entre 00:01 et 99:99. Le niveau de puissance du micro-ondes par défaut est de 3. Si vous
souhaitez modifier le niveau de puissance, appuyez sur « PUISSANCE » une fois, la LED affiche « PL 3 »,
puis appuyez sur le clavier numérique pour sélectionner le niveau de puissance souhaité.
3. Appuyez sur « DÉMARRER/+30SEC. » pour démarrer la décongélation. Le temps de cuisson restant
s'affiche.
POPCORN
1. Appuyez sur « POPCORN » plusieurs fois jusqu'à ce que le nombre souhaité apparaisse, « 50 », « 100 »
grammes s'affiche en fonction.
Page 22

2. Par exemple, appuyez sur « POPCORN » une fois, « 50 » s'affiche.
3. Appuyez sur « DÉMARRER/+30SEC. » pour cuire le popcorn, la sonnerie retentit une fois. Lorsque la
cuisson est terminée, la sonnerie retentit cinq fois, puis se remet en attente.
Informations importantes relatives à la fonction popcorn du micro-ondes :
Lorsque vous sélectionnez 100 grammes de popcorn, rabattez en triangle chaque coin du sachet avant de
démarrer la cuisson.
Si/lorsque le sachet de popcorn se dilate et ne tourne plus correctement, appuyez sur le bouton
STOP/ANNULATION une fois et ouvrez la porte du four pour repositionner le sachet et assurer une cuisson
uniforme.
POMME DE TERRE
1. Appuyez sur « POMME DE TERRE » ("POTATO") plusieurs fois jusqu'à ce que le nombre souhaité
apparaisse, « 1 », « 2 », « 3 » s'affiche en fonction.
2. RÉGLAGE « 1 » : 1 pomme de terre (environ 230 grammes) RÉGLAGE « 2 » : 2 pommes de terre (environ
460 grammes) RÉGLAGE « 3 » : 3 pommes de terre (environ 690 grammes). Par exemple, appuyez sur
« POMME DE TERRE » une fois, « 1 » s'affiche.
3. Appuyez sur « DÉMARRER/+30SEC. » pour lancer la cuisson, la sonnerie retentit une fois. Lorsque la
cuisson est terminée, la sonnerie retentit cinq fois, puis se remet en attente.
LÉGUMES SURGELÉS
1. Appuyez sur « LÉGUMES SURGELÉS » ("FROZEN VEGETABLE") plusieurs fois jusqu'à ce que le nombre
souhaité apparaisse, « 150 », « 350 », « 500 » grammes s'affichent en fonction.
2. Par exemple, appuyez sur « LÉGUMES SURGELÉS » une fois, « 150 » s'affiche.
3. Appuyez sur « DÉMARRER/+30SEC. » pour lancer la cuisson, la sonnerie retentit une fois. Lorsque la
cuisson est terminée, la sonnerie retentit cinq fois, puis se remet en attente.
BOISSON
1. Appuyez sur « BOISSON » ("BEVERAGE") plusieurs fois jusqu'à ce que le nombre souhaité apparaisse,
« 1 », « 2 », « 3 » s'affiche en fonction. Une tasse représente environ 120 ml. Par exemple, appuyez sur
« BOISSON » une fois, « 1 » s'affiche.
2. Appuyez sur « DÉMARRER/+30SEC. » pour lancer la cuisson, la sonnerie retentit une fois. Lorsque la
cuisson est terminée, la sonnerie retentit cinq fois, puis se remet en attente.
ASSIETTE REPAS
1. Appuyez sur « ASSIETTE REPAS » ("DINNER PLATE") plusieurs fois jusqu'à ce que le nombre souhaité
apparaisse, « 250 », « 350 », « 500 » grammes s'affichent en fonction. Par exemple, appuyez sur
« ASSIETTE REPAS » une fois, « 250 » s'affiche.
2. Appuyez sur « DÉMARRER/+30SEC. » pour lancer la cuisson, la sonnerie retentit une fois. Lorsque la
cuisson est terminée, la sonnerie retentit cinq fois, puis se remet en attente.
PIZZA
1. Appuyez sur « PIZZA » plusieurs fois jusqu'à ce que le nombre souhaité apparaisse, « 100 », « 200 »,
Page 23

« 400 » grammes s'affichent en fonction. Par exemple, appuyez sur « PIZZA » une fois, « 100 » s'affiche.
2. Appuyez sur « DÉMARRER/+30SEC. » pour lancer la cuisson, la sonnerie retentit une fois. Lorsque la
cuisson est terminée, la sonnerie retentit cinq fois, puis se remet en attente.
FONCTION MÉMOIRE PROGRAMMABLE
1. Appuyez sur « 0/MÉMOIRE » ("0/MEMORY") pour choisir la procédure mémoire 1-3. La LED affiche 1, 2, 3.
Si la procédure a été réglée, appuyez sur « DÉMARRER/+30SEC. » pour l'utiliser. Sinon, continuez à régler
cette procédure. Seulement une ou deux étapes peuvent être réglées.
2. Une fois réglée, appuyez sur « DÉMARRER/+30SEC. » une fois pour sauvegarder la procédure. Si vous
appuyez sur « DÉMARRER/+30SEC. » à nouveau, la cuisson commencera.
3. Exemple : Pour régler la procédure suivante comme deuxième mémoire, c'est-à-dire mémoire 2.
4. Cuire un aliment à 80% de puissance du micro-ondes pendant 3 minutes et 20 secondes. Les étapes sont
les suivantes :
f. En mode attente, appuyez sur « 0/MÉMOIRE » deux fois, arrêtez d'appuyer lorsque l'écran affiche
« 2 ».
g. Appuyez sur « TEMPS DE CUISSON » une fois, puis appuyez sur « 3 », « 2 », « 0 » en fonction.
h. Appuyez sur « PUISSANCE » une fois, « PL10 » s'affiche, puis appuyez sur « 8 » et « PL8 » s'affiche.
i. Appuyez sur « DÉMARRER/+30SEC. » pour sauvegarder la procédure. La sonnerie retentit une fois et
« 2 » s'affiche. Si vous appuyez sur « DÉMARRER/+30SEC. » à nouveau, la procédure sera
sauvegardée comme mémoire 2 puis exécutée.
j. Si vous souhaitez exécuter la procédure sauvegardée, en mode attente, appuyez sur « 0/MÉMOIRE »
deux fois, l'écran affiche « 2 », puis appuyez sur « DÉMARRER/+30SEC. » pour l'exécuter.
CUISSON MULTI-ÉTAPE
1. Au plus, 2 étapes peuvent être réglées pour la cuisson. En cuisson multiétapes, si une étape est la
décongélation, la décongélation est placée en première étape de cuisson automatiquement.
2. Note : La cuisson auto ne fonctionne pas en mode multiétapes.
3. Exemple : si vous souhaitez cuisiner avec 80 % de puissance de micro-ondes pendant 5 minutes puis 60 %
de puissance de micro-onde pendant 10 minutes. Les étapes de cuisson sont les suivantes :
e. Appuyez sur « TEMPS DE CUISSON » une fois, puis appuyez sur « 5 », « 0 », « 0 » pour régler le
temps de cuisson.
f. Appuyez sur « PUISSANCE » une fois, puis appuyez sur « 8 » pour sélectionner 80 % de puissance de
micro-ondes.
g. Appuyez sur « TEMPS DE CUISSON » une fois, puis appuyez sur « 1 », « 0 », « 0 », « 0 » pour régler
le temps de cuisson.
h. Appuyez sur « PUISSANCE » une fois, puis appuyez sur « 6 » pour sélectionner 60 % de puissance de
micro-ondes. (5) Appuyez sur « DÉMARRER/+30SEC. » pour démarrer la cuisson.
FONCTION INFORMATION INTELLIGENTE
1. En mode cuisson, appuyez sur « HORLOGE », la LED affiche l'horloge pendant trois secondes.
2. En mode cuisson micro-onde, appuyez sur « PUISSANCE » pour afficher le niveau de puissance du micro-
onde, et la puissance de micro-onde en cours d'utilisation s'affiche. Après trois secondes, le four revient à
l'affichage précédent. En mode multiétapes, la méthode est identique à la précédente.
Page 24

FONCTION VERROU DE SÉCURITÉ ENFANTS
1. Verrouiller : En mode attente, appuyez sur « STOP/ANNULATION » pendant 3 secondes, un long « bip »
retentit indiquant que l'appareil est en mode verrou-enfant ; simultanément, la LED affiche
2. Quitter le verrou : En mode verrouillé, appuyez sur « STOP/ANNULATION » pendant 3 secondes, un long
« bip » retentit indiquant que l'appareil quitte le mode verrou-enfant.
FONCTION RAPPEL DE CYCLE
1. Lorsque le cycle est terminé, la sonnerie retentit 5 « bips » pour avertir l'utilisateur que la cuisson est
terminée.
AUTRES SPÉCIFICATIONS
1. En mode veille, si la LED de l'horloge affiche l'heure actuelle, l'icône « : » clignote ; sinon, elle affiche
« 0:00 ».
2. En mode réglage de fonction, la LED affiche le réglage correspondant.
3. Lorsque l'appareil est en fonctionnement ou en mode pause, la LED affiche le temps de cuisson restant.
NETTOYAGE ET ENTRETIEN
Cet appareil est destiné uniquement à un usage domestique et son entretien ne peut être effectué par
l'usager.
Ne pas ouvrir ni remplacer des pièces soi-même. Si un entretien s'avérait nécessaire, s'adresser à un
service électrique qualifié ou remettre l'appareil au fournisseur.
Éteindre le four et retirer la prise de courant de la prise du mur avant de nettoyer.
Maintenir l’intérieur du four propre. Quand la nourriture éclabousse ou des liquides débordés s’adhèrent
aux murs du four, essuyer avec un chiffon humide. Un détergent délicat peut être utilisé si le four
devient très sale. Éviter l’utilisation de spray et autres produits de nettoyage forts parce qu’ils peuvent
tâcher, rayer ou ternir la surface de la porte.
Les surfaces externes doivent être nettoyées avec un chiffon humide. Pour éviter le dommage des
pièces d’opération à l’intérieur du four, il ne doit pas être permis à l’eau de s’infiltrer dans les ouvertures
de ventilation.
Essuyer fréquemment la porte et la fenêtre des deux côtés, les joints de la porte et les pièces
adjacentes avec un chiffon humide pour retirer les renversements ou éclaboussements. Ne pas utiliser
de produit de nettoyage abrasif.
Ne pas laisser les commandes se mouillées. Nettoyer avec un chiffon doux et humide. En nettoyant les
commandes, laisser la porte du four ouverte pour éviter que le four ne s’allume accidentellement.
Si de la vapeur s’accumule à l’intérieur ou du côté extérieur de la porte du four, essuyer avec un chiffon
doux. Ceci peut survenir quand le four à micro-ondes est opéré dans des conditions de grande
humidité. Et c’est normal.
Il est occasionnellement nécessaire de retirer le plateau en verre pour le nettoyer. Laver le plateau avec
de l’eau chaude et mousseuse ou dans un lave-vaisselle.
L’anneau du rouleau et le parterre du four doivent être nettoyés régulièrement pour éviter un bruit
excessif. Essuyer simplement la surface du four avec un détergent délicat. L’anneau du rouleau peut
Page 25

être en eau tempérée et mousseuse ou dans le lave-vaisselle. En retirant l’anneau du rouleau de la
cavité du parterre pour le nettoyage, s’assurer de le replacer dans la position correcte.
Retirer les odeurs de votre four en mélangeant une tasse d’eau avec le jus et l’écorce d’un citron dans
un bol profond qui peut aller au micro-ondes, chauffer au micro-ondes pendant 5 minutes. Essuyer
complètement et sécher avec un chiffon doux.
Quand il devient nécessaire de remplace la lumière du four, s’il vous plaît consulter un distributeur pour
la remplacer.
Le four doit être nettoyé régulièrement et tout dépôt de nourriture retirés. Le manque de maintenance du
four en condition propre pourrait amener à la détérioration de la surface ce qui pourrait affecter
défavorablement la durée de vie de l’appareil et possiblement conduire à une situation dangereuse.
S’il vous plaît ne pas jeter cet appareil dans la poubelle domestique ; il doit être jeté dans un centre de
mise au rebut particulier fournit par les municipalités.
Ne pas utiliser eau de javel ou autre substances abrasive ou solvants pour nettoyer l'appareil, ces
produits pourraient endommager la finition.
RANGEMENT DE L’APPAREIL
Débrancher l'appareil de la prise de courant et nettoyer tous les éléments suivant les indications ci-
haut. Avant de ranger l'appareil s'assurer que toutes ses parties soient bien sèches.
Ranger l'appareil dans sa boîte ou dans un endroit propre et sec.
Ne jamais ranger l'appareil quand il est encore mouillé ou sale.
Ne jamais enrouler le câble d'alimentation autour de l'appareil.
ENTRETIEN DE L’APPAREIL
Aucun élément de cet appareil ne peut être entretenu par l'usager. Si l'unité ne fonctionne pas correctement
vérifier ce qui suit :
Les instructions ont été suivies correctement
L'unité a été branchée correctement et la prise de courant est bien allumée.
L'alimentation générale de courant est ALLUMEE.
La prise est bien insérée.
Si l'appareil ne marche toujours pas après ces vérifications :
- Consulter le revendeur pour qu'il répare ou remplace l'appareil. Si le revendeur ne parvient pas à résoudre le
problème et le retour de l'appareil s'avère nécessaire, s'assurer que :
L'unité soit emballée avec soin dans son emballage d'origine.
La preuve d'achat soit jointe.
Il y ait une explication des raisons du retour.
Si le câble d'alimentation est endommagé il doit être remplacé par le producteur ou par un agent agréé afin
d'éviter tout accident. Si pendant la période couverte par la garantie il est nécessaire d'effectuer un entretien,
l'appareil devrait être apporté chez un centre d'entretien approuvé par Home of Living Brands (Pty) Limited. En
dehors de la période couverte par la garantie il est possible d'effectuer les entretiens mais aux frais du client.
Page 26

CHANGER LA PRISE
Au cas où le changement de prise s'avérait nécessaire, suivre les instructions ci-dessous.
Cette unité est conçue pour fonctionner uniquement au courant établi. La connexion à d'autres sources
de courant pourrait endommager l'appareil. Connecter une prise à trois broches de la manière suivante :
Les files de ce câble sont colorés selon le code suivant :
Vert/jaune = Terre
Bleu = Neutre
Brun = Conducteur
Page 27

VEUILLEZ APPOSER VOTRE PREUVE D’ACHAT / RECU ICI EN CAS DE RECLAMATION PENDANT
LA PERIODE DE GARANTIE CE RECUS DOIT ETRE PRESENTE.
GARANTIE
1. Home of Living Brands (Pty) Limited garantie à l’acheteur d’origine de ce produit (« le client »), que
ce dernier ne présentera pas de défauts de qualité, ni de fabrication qui dans le cadre d’une
utilisation normale, familiale ou domestique pourrait apparaître en l’espace d’1 (d’une) année suivant
la date d’achat (« période de garantie »).
2. Lorsque le client a acheté un produit qui se casse, présente des défauts ou qui ne fonctionne pas
correctement pour l’utilisation pour laquelle il était destiné, le client doit signaler cela au fournisseur
auprès duquel il a acheté le produit (« le fournisseur ») durant la période de garantie. Toute
réclamation selon les conditions de la garantie doit être accompagnée d’une preuve d’achat. Si la
preuve d’achat, n’est pas disponible, à ce moment-là, les frais de réparation et / ou d’entretien
peuvent être à la charge du client vis-à-vis du fournisseur.
3. Un produit défectueux doit être rapporté au centre d’entretien du fournisseur pour faire jouer la
garantie.
4. Le fournisseur remboursera, réparera ou échangera le produit selon les termes de cette garantie qui
est assujettie aux exigences légales. Cette garantie devrait être valable uniquement quand le client
n’a pas cassé lui-même l’appareil, ou utilisé ce dernier pour faire quelque chose pour lequel il n’était
pas destiné. La garantie ne comprend pas et ne peut pas être saurait être considérée comme
couvrant les dommages affectant l’appareil, qui seraient le résultat d’un accident, d’une mauvaise
utilisation, d’une modification, d’un abus ou de toute modification ou réparation non-autorisée de
l’appareil.
5. La garantie couvrira uniquement le produit fournit à la date d’achat et elle ne s’appliquera pas à
toute pièces ajoutée ou installée par le client.
6. Si le client demande au fournisseur de réparer le produit et si le produit casse ou ne fonctionne pas
correctement dans les 3 (trois) mois de la réparation, et si ceci n’est pas le résultat d’une mauvaise
utilisation, à ce moment-là le fournisseur pourrait remplacer le produit ou rembourser le client.
7. Le client pourrait être tenu pour responsable de certains frais lorsque les produits ne sont pas
renvoyés dans leur emballage d’origine, ou si l’emballage est endommagé. Ceci sera déduit de tout
remboursement fait au client.
HOME OF LIVING BRANDS (PTY) LTD
www.homeoflivingbrands.com
011 490-9600 (Johannesburg)
031 792-6000 (Durban)
021 552-5161 (Cape Town)
www.russellhobbs.co.za
www.facebook.com/RussellhobbsSA
Page 28

Parabéns pela aquisição do Micro-Ondas Electronico De 20L Comacabamento Espelhado. Cada unidade é
fabricada para dar segurança e confiabilidade. Antes de usar o aparelho pela primeira vez, leia cuidadosamente
o manual de instrução e guarde-o para futuras referências.
CARACTERÍSTICAS DO MICRO-ONDAS ELECTRÓNICO DE 20 L COM ACABAMENTO
ESPELHADO
Capacité de 20 L
Affichage numérique LED avec horloge
Puissance de sortie: 700W
11 niveaux de puissance
Cuisson composée programmable
Menus automatiques: rcozinheiro, degelo, pipoca, batata, vegetais congelados, bebidas, prato de jantar,
a pizza
Minuterie de cuisson de 95 minutes avec signal de fin
Dégèlement par temps ou poids
Avec fonctions démarrage rapide et démarrage retardé
Avec la fonction Infos intelligente
Avant avec finition miroir élégante
Plateau tournant en verre d’un diamètre de 255 mm
Painel de controle de fácil utilização
Porte avec poignée facile à utiliser
Intérieur émaillé pour un nettoyage facile
Com o recurso de segurança de bloqueio de crianças
Apenas para utilização doméstica
1 ano de garantia
PRECAUÇÕES IMPORTANTES
Ao usar um aparelho elétrico, devem-se tomar precauções básicas de segurança, incluindo o seguinte:
1. Leia as instruções cuidadosamente antes de usar qualquer aparelho.
2. Sempre se certifique se a voltagem na etiqueta de classificação corresponda à voltagem principal da sua
casa.
3. O uso incorreto ou impróprio pode danificar o aparelho e causar danos ao usuário.
4. O aparelho é para uso doméstico apenas. O uso comercial invalida a garantia e o fornecedor não será
responsável por danos ou prejuízos causados pelo uso inapropriado do aparelho.
5. Evite qualquer contato com as partes removíveis.
6. É preciso supervisão atenta quando o aparelho estiver sendo usado perto ou por criança e inválidos.
7. Verifique regularmente o fio e a tomada. Se o fio ou a tomada estiverem danificados, o fabricante ou uma
pessoa qualificada deverá substituí-los para evitar problemas elétricos.
8. Não use o aparelho se ele tiver caído ou danificado de algum modo. Em caso de dano, leve o aparelho para
exame e/ou conserto a um agente de serviço autorizado.
9. Não use o forno vazio.
10. Não use este aparelho se ele estiver com o fio danificado, se não estiver funcionando apropriadamente,
Page 29

estragado ou se tiver caído. Se o fio estiver danificado, deverá ser substituído pelo fabricante ou seu agente
de serviços autorizado ou uma pessoa similarmente qualificada.
11. Este aparelho não deve ser usado por pessoas com capacidade física, sensorial ou mental reduzida
(inclusive crianças) ou por pessoas com falta de experiência e conhecimento, a menos que elas tenham
supervisão ou recebam instruções concernente ao uso do aparelho por uma pessoa responsável pela
segurança delas.
12. AVISO: Somente permita que as crianças usem o forno sem supervisão quando estiverem devidamente
instruídas e sejam capazes de usá-lo com segurança e entenderem os perigos do uso impróprio.
13. Não use o micro-ondas com o interior vazio.
14. A fim de reduzir o risco de fogo no interior do forno:
Ao esquentar comida numa embalagem de papel ou de plástico, verifique com frequência o forno para ver
a possibilidade de alguma ignição.
Retire as amarras dos sacos de papel ou de plástico antes de colocar os sacos no micro-ondas.
Se observar alguma fumaça, desligue o aparelho ou retire-o da tomada e mantenha a porta fechada até
que as chamas se apaguem.
Não guarde nada dentro do micro-ondas. Não deixe produtos de papel, utensílios de cozinha ou comida no
interior do aparelho quando ele não estiver em uso.
AVISO: Líquidos ou outras comidas não devem ser esquentados em embalagens lacradas, pois elas podem
explodir.
15. Ao esquentar bebidas no micro-ondas pode acontecer erupção tardia da fervura, portanto tome cuidado ao
manusear o recipiente.
16. Não faça frituras no micro-ondas. O óleo quente pode estragar as peças do forno e os utensílios e até
mesmo causar queimaduras.
17. Ovos na casca e ovos inteiros cozidos não devem ser esquentados no micro-ondas pois podem explodir
mesmo depois de ter cessado o aquecimento pelo micro-ondas.
18. Perfure os alimentos com casca grossa tais como batatas, abóboras inteiras, maçãs e castanhas antes de
cozinhar.
19. O conteúdo das mamadeiras e de potes de comida de bebê devem ser mexidos ou agitados e a temperatura
deve ser verificada antes de servir os alimentos para evitar queimaduras.
20. Os utensílios de cozinha podem ficar quentes, porque o calor é transferido pela comida. É preciso usar luvas
de fogão para manusear os utensílios.
21. Certifique-se de que os utensílios sejam apropriados para uso no micro-ondas.
22. AVISO: É perigoso para todos os que não sejam treinados fazer qualquer tipo de conserto que envolva a
remoção de qualquer tampa que dá proteção contra a exposição à energia micro-onda.
23. Este produto é um equipamento do Grupo 2 Classe B ISM. A definição do Grupo 2 é a que contém todo
equipamento ISM (Industrial, Científico e Médico) no qual a energia rádio frequência é intencionalmente
gerada e ou usada na forma de radiação eletromagnética para tratamento de material e para provocar
faíscas no equipamento. Quanto ao equipamento da Classe B, ele é apropriado para estabelecimentos
domésticos e estabelecimentos diretamente conectados ao suprimento de energia de baixa voltagem
fornecida a prédios para uso doméstico.
24. Nunca mergulhe o aparelho na água ou noutro líquido para limpá-lo.
Page 30

25. Retire o fio da tomada pegando pelo plugue. Não puxe o fio ou desconecte o aparelho pela fiação. Sempre
desconecte o aparelho quando não estiver em uso, antes de limpá-lo ou de colocar ou retirar as peças
removíveis.
26. O uso de acessórios que não são recomendados ou fornecidos pelo fabricante podem causar danos ou
prejuízos, ou choque elétrico.
27. Fornecemos um fio curto a fim de reduzir as chances de enrolar ou de se tropeçar num fio comprido.
28. Não deixe o fio pendurado na beirada da mesa ou do balcão. Certifique-se que o fio não esteja numa
posição onde possa ser puxado inadvertidamente.
29. Não deixe o fio em cima de superfícies quentes e não o coloque perto do queimador de gás ou elétrico do
fogão ou sobre o fogão quente.
30. Não use o aparelho na chama do gás ou de fogão elétrico ou próximo a chamas.
31. Não se recomenda o uso de extensões neste aparelho. Contudo, se for necessário usar uma extensão,
certifique-se que o fio seja apropriado para o consumo de energia do aparelho para evitar
superaquecimento do fio, do aparelho ou da tomada. Não coloque a extensão numa posição onde possa ser
puxada por crianças ou por animais, ou se possa tropeçar nela.
32. Este aparelho não é apropriado para uso ao ar livre, apenas para uso doméstico. Não use o aparelho para
outros fins.
33. NÃO carregue o aparelho segurando-o pelo fio.
34. Não deixe o aparelho sem supervisão enquanto em uso. Sempre o desconecte quando não estiver eu uso
ou antes de limpá-lo.
35. Sempre use o aparelho numa superfície lisa, plana e estável. Não o coloque numa superfície quente.
36. Certifique-se que o interruptor esteja na posição ”Off” ou “O” depois de cada uso.
37. O fabricante não será responsabilizado por quaisquer danos ou prejuízos causados pelo uso impróprio ou
incorreto, ou por consertos feitos por pessoas não autorizadas.
38. No caso de problemas técnicos, desligue o aparelho não tente consertá-lo você mesmo. Leve-o a um
serviço autorizado para exame, ajuste ou conserto. Sempre insista no uso de peças originais. O
descumprimento das precauções e instruções mencionadas acima pode afetar o uso seguro do aparelho.
39. O micro-ondas não deve ser colocado num armário, a menos que tenha sido testado antes.
40. Os aparelhos não foram feitos para serem usados com timer externo ou sistema de controle remoto
separado.
41. A porta ou a superfície exterior pode ficar quente quando o aparelho estiver em uso.
42. A parte de trás do aparelho deve ser colocada contra a parede.
INSTALAÇÃO
1. Certifique-se de que todo o material de embalagem seja removido da porta interna.
2. AVISO: Verifique o forno para ver se há algum defeito, tais como portas desalinhadas ou entortadas,
vedadores e superfície vedadora da porta danificados, trincos e dobradiças da porta e no interior do forno
quebrados ou bambos. Se houver algum defeito, não use o forno e contate o pessoal especializado.
3. Este forno deve ser colocado numa superfície plana, estável para aguentar seu peso e o peso da comida.
4. Não coloque o forno em lugares que geram calor, ou alta umidade ou próximo a materiais combustíveis.
Para uso correto, o forno deve ter corrente de ar suficiente. Deixe 20 cm de espaço acima do forno, 20 cm
na parte de trás e 20 cm em ambos os lados. Não cubra ou bloqueie quaisquer aberturas do aparelho. Não
retire os pés. Para garantir que existe distância suficiente entre o micro-ondas e a parede, é necessário
instalar um limitador de distância:
Page 31

5. Não use o aparelho sem o prato de vidro, suporte de rolagem e eixo na posição correta.
6. Certifique-se de que o fio esteja bom e não passe debaixo do forno ou de qualquer superfície afiada ou
quente.
7. A tomada deve estar prontamente acessível de modo a ser prontamente desconectada numa emergência.
8. Não bloqueie as aberturas de saída e ou entrada.
9. Retire qualquer filme protetor encontrado na superfície do armário do micro-ondas. Não retire a Mica
marrom clara que está anexada no interior do forno e que protege o magnetron.
10. Nunca coloque a bandeja de vidro de cabeça para baixo. O prato de vidro nunca deve ser imobilizado.
11. Tanto a montagem do prato de vidro quanto o prato giratório devem sempre ser usados durante o uso.
12. Toda a comida e recipientes devem sempre ser colocados no prato giratório para cozinhar.
13. Se o prato de vidro ou a montagem giratória estalar ou rachar, contate o centro de serviço especializado.
INSTALAÇÃO DO PRATO GIRATÓRIO
INTERFERENCIA NO RÁDIO
O uso do micro-ondas pode causar interferência no rádio, TV, ou equipamentos similares. Quando
houver interferência, ela poderá ser reduzida ou eliminada por se tomar as seguintes medidas:
Limpe a porta e a superfície vedante do forno.
Reposicione a antena do rádio ou da televisão.
Recoloque o forno com cuidado no receptor.
Ligue o micro-ondas numa tomada diferente para que fique em circuitos diferentes do receptor.
PRINCÍPIOS PARA COZINHAR NO MICRO-ONDAS
Arrume a comida cuidadosamente. Coloque as áreas mais grossas viradas para o lado de fora do prato.
Observe o tempo de cozimento. Cozinhe pela quantidade menor de tempo indicada e acrescente mais se
for necessário. A comida supercozida pode fumegar ou pegar fogo.
centro
prato de vidro
eixo giratório
montador do aro giratório
Page 32

Tampe a comida enquanto estiver cozinhando. A cobertura impede que a comida espirre e ajuda a cozinhar
de modo homogêneo.
Vire a comida uma vez durante o cozimento para acelerar o cozimento de alimentos tais como frango e
hambúrgueres. Itens grandes, como assados, devem ser virados pelo menos uma vez.
Reorganize a comida, tal como almôndegas, na metade do cozimento, virando-a de lado e do centro do
prato para a beirada.
GUIA DE UTENSÍLIOS
O utensílio ideal para o micro-ondas é o de material transparente. Isso permite a energia passar pelo
recipiente e esquentar a comida.
Uma micro-onda não penetra metais, portanto utensílios ou pratos com bordas de metal não devem ser
usados.
Não use produtos de papel reciclado no micro-ondas, pois eles podem conter pequenos fragmentos de
metal que podem causar faíscas ou fogo.
Recomenda-se usar pratos redondos ou ovais em vez de quadrados ou oblongos, visto que a comida que
fica no canto tende a cozinhar demais.
Tiras estreitas de papel alumínio podem ser usadas para impedir o supercozimento das áreas expostas.
Mas tome cuidado, não use demais e mantenha uma distância de 1 polegada.
A lista abaixo é um guia geral para ajudá-lo a escolher os utensílios corretos:
UTENSÍLIOS
MICRO-ONDAS
Vidro resistente ao calor
Sim
Vidro não resistente ao calor
Não
Louças resistentes ao calor
Sim
Prato de plástico para uso em micro-ondas
Sim
Toalhas de cozinha de papel
Sim
Bandeja de metal
Não
Rack de metal
Não
Papel alumínio & embalagens de papel alumínio
Não
Papel pergaminho
Sim
Embalagem plástica
Sim
Papel manteiga
Sim
Recipientes contendo partes de metal
Não
Amarras de metal
Não
Sacos de papel
Não
Isopor plástico
Não
Madeira
Não
Page 33

DIAGRAMA DAS PEÇAS
INSTRUÇÕES DE FUNCIONAMENTO
NÍVEL DE POTÊNCIA
Estão disponíveis 11 níveis de potência.
Nível
10 9 8 7 6 5 4 3 2
1
0
Potência
100%
90%
80%
70%
60%
50%
40%
30%
20%
10%
0%
Visor
PL10
PL9
PL8
PL7
PL6
PL5
PL4
PL3
PL2
PL1
PL0
DEFINIÇÃO DE RELÓGIO
1. Pressione "CLOCK" (RELÓGIO); será apresentado "00:00".
2. Pressione as teclas numéricas e introduza a hora actual. Por exemplo, a hora é 12:10 agora, pressione "1,
2, 1, 0" por essa ordem.
3. Pressione "CLOCK" (RELÓGIO) para concluir a definição do relógio. ":" irá piscar e o relógio será
apresentado.
4. Se os números utilizados não se encontrarem dentro do intervalo de 1:00--12:59, a definição estará inválida
até serem inseridos números válidos.
5. Nota: (1) No processo de definição do relógio, se o botão "STOP/CANCEL" (PARAR/CANCELAR) for
pressionado ou se não ocorrer nenhuma operação num espaço de 1 minuto, o forno regressa
automaticamente à definição anterior.
6. Se necessitar de reiniciar o relógio, repita o passo 1 ao passo 3.
TEMPORIZADOR DE COZINHA
1. Pressione "KITCHEN TIMER” (TEMPORIZADOR DE COZINHA); o LED apresenta 00:00.
2. Pressione as teclas numéricas e introduza a hora do temporizador. (O tempo de cozedura máximo é de 99
minutos e 99 segundos)
A) Painel de controle
B) Eixo giratório
C) Aro de montagem giratório
D) Prato de vidro
E) Visor
F) Montagem da porta
G) Sistema de trava de segurança
Page 34

3. Pressione "START/+30SEC." (INICIAR/+30SEG.) para confirmar a definição.
4. Quando alcançar a hora do temporizador, a campainha toca 5 vezes.
5. Se o relógio tiver sido definido (sistemas de 12 horas), o LED irá apresentar a hora actual.
Nota: 1) A hora da cozinha é diferente do sistema de 12 horas. O Temporizador de cozinha é um
temporizador.
2) Durante o temporizador de cozinha, não é possível definir nenhum outro programa.
COZINHAR NO MICROONDAS
1. Pressione "TIME COOK" (TEMPO COZINHAR); o LED apresenta "00:00".
2. Pressione as teclas numéricas para introduzir o tempo de cozedura; (O tempo de cozedura máximo é de 99
minutos e 99 segundos)
3. Pressione “POWER” (POTÊNCIA) uma vez; o LED apresenta "PL10". A potência predefinida é 100% de
potência.
4. Agora, pode pressionar as teclas numéricas para ajustar o nível de potência. Pressione "START/+30SEC."
(INICIAR/+30SEG.) para iniciar a cozedura.
5. Exemplo: para cozinhar alimentos com 50% da potência do microondas durante 15 minutos.
a. Pressione "TIME COOK" (TEMPO COZINHAR) uma vez. É apresentado "00:00".
b. Pressione "1", "5", "0", "0" nessa ordem.
c. Pressione "POWER (POTÊNCIA) uma vez e, em seguida, pressione "5" para seleccionar 50% da
potência do microondas.
d. Pressione "START/+30SEC." (INICIAR/+30SEG.) para iniciar a cozedura.
6. Nota: 1) No processo de definição da cozedura, se o botão "STOP/CANCEL" (PARAR/CANCELAR) for
pressionado ou se não ocorrer nenhuma operação num espaço de 1 minuto, o forno regressa
automaticamente à definição anterior.
2) Se seleccionar "PL0", o forno funcionará com a ventoinha para não ter nenhuma potência. Pode utilizar
este nível para remover o odor do forno.
3) Durante a cozedura do microondas, "POWER" (POTÊNCIA) pode ser utilizado para mudar a potência de
que necessita. Depois de pressionar "POWER" (POTÊNCIA), a potência actual piscará durante 3 segundos.
Agora, pode pressionar o botão do número para mudar a potência. O forno funcionará com a potência
seleccionada durante o restante tempo.
COZEDURA RÁPIDA
1. No estado de espera, a cozedura instantânea ao nível de potência de 100% pode ser iniciada ao
seleccionar um tempo de cozedura de 1 a 6 minutos ao pressionar as teclas numéricas 1 a 6. Pressione
"START/+30SEC." (INICIAR/+30SEG.) para aumentar o tempo de cozedura. O tempo de cozedura máximo
é de 99 minutos e 99 segundos.
2. No estado de espera, a cozedura instantânea ao nível de potência de 100% com um tempo de cozedura de
30 segundos pode ser iniciada ao pressionar "START/+30SEC" (INICIAR/+30SEG.). Cada pressão do
mesmo botão irá aumentar o tempo de cozedura em 30 segundos. O tempo de cozedura máximo é de 99
minutos e 99 segundos.
3. Nota: Durante a cozedura no microondas e descongelamento por tempo, o tempo pode ser adicionado ao
pressionar o botão "START/+30SEC." (INICIAR/+30SEG.).
Page 35

FUNÇÃO DE DESCONGELAMENTO POR PESO
1. Pressione "WEIGHT DEFROST" (DESCONGELAMENTO POR PESO); o LED irá apresentar "dEF1".
Pressione os botões numéricos para inserir o peso a ser descongelado.
2. Introduza um peso entre 100~2000 g.
3. Se o peso introduzido não estiver entre 100~2000, a introdução será inválida.
4. O forno não funcionará até à introdução de números válidos.
5. Pressione "START/+30SEC." (INICIAR/+30SEG.) para iniciar o descongelamento e o tempo de cozedura
restante será apresentado.
FUNÇÃO DE DESCONGELAMENTO POR TEMPO
1. Pressione "TIME DEFROST" (DESCONGELAMENTO POR TEMPO); o LED irá apresentar "dEF2".
2. Pressione as teclas numéricas para introduzir o tempo de descongelamento. O intervalo de tempo efectivo é
00:01~99:99. A potência predefinida do microondas é o nível de potência 3. Se pretende alterar o nível de
potência, pressione "POWER" (POTÊNCIA) uma vez e o LED irá apresentar "PL 3". Em seguida, pressione
a tecla numérica do nível de potência que queria.
3. Pressione "START/+30SEC." (INICIAR/+30SEG.) para iniciar o descongelamento. Será exibido o tempo de
cozedura restante.
PIPOCAS
1. Pressione "POPCORN" (PIPOCAS) repetidamente até o número que pretende ser visualizado no visor;
"50","100" gramas serão visualizados por ordem.
2. Por exemplo, pressione "POPCORN" (PIPOCAS) uma vez e aparece "50".
3. Pressione "START/+30 SEC." (INICIAR/+30SEG.) para cozinhar as pipocas e a campainha toca uma vez.
Quando a cozedura estiver concluída, a campainha toca cinco vezes e depois regressa ao estado de
espera.
Informações importantes sobre a função de pipocas no microondas:
Quando seleccionar 100 gramas de pipocas, sugere-se que dobre um triângulo em cada canto do saco antes de
cozinhar.
Se/quando o saco de pipocas expandir e já não roda correctamente, pressione o botão STOP/CANCEL
(PARAR/CANCELAR) uma vez e abra a porta do forno e ajuste a posição do saco para garantir uma cozedura
uniforme.
BATATAS
1. Pressione "POTATO" (BATATAS) repetidamente até o número que pretende ser visualizado no visor; "1",
"2", "3" serão visualizados por ordem.
2. "1" DEFINE: 1 batata (aproximadamente 230 gramas); "2" DEFINE: 2 batatas (aproximadamente 460
gramas); "3" DEFINE: 3 batatas (aproximadamente 690 gramas). Por exemplo, pressione "POTATO"
(BATATAS) uma vez e aparece "1".
3. Pressione "START/+30 SEC." (INICIAR/+30SEG.) para cozinhar e a campainha toca uma vez. Quando a
cozedura estiver concluída, a campainha toca cinco vezes e depois regressa ao estado de espera.
Page 36

VEGETAIS CONGELADOS
1. Pressione "FROZEN VEGETABLE" (VEGETAIS CONGELADOS) repetidamente até o número que pretende
ser visualizado no visor; "150", "350", "500" gramas serão visualizados por ordem.
2. Por exemplo, pressione "FROZEN VEGETABLE" (VEGETAIS CONGELADOS) uma vez e aparece "150".
3. Pressione "START/+30 SEC." (INICIAR/+30SEG.) para cozinhar e a campainha toca uma vez. Quando a
cozedura estiver concluída, a campainha toca cinco vezes e depois regressa ao estado de espera.
BEBIDAS
1. Pressione "BEVERAGE" (BEBIDAS) repetidamente até o número que pretende ser visualizado no visor; "1",
"2", "3" copos serão visualizados por ordem. Um copo tem cerca de 120 ml. Por exemplo, pressione
"BEVERAGE" (BEBIDAS) uma vez e aparece "1".
2. Pressione "START/+30 SEC." (INICIAR/+30SEG.) para cozinhar e a campainha toca uma vez. Quando a
cozedura estiver concluída, a campainha toca cinco vezes e depois regressa ao estado de espera.
PRATO DE JANTAR
1. Pressione "DINNER PLATE" (PRATO DE JANTAR) repetidamente até o número que pretende ser
visualizado no visor; "250", "350", "500" gramas serão visualizados por ordem. Por exemplo, pressione
"DINNER PLATE" (PRATO DE JANTAR) uma vez e aparece "250".
2. Pressione "START/+30 SEC." (INICIAR/+30SEG.) para cozinhar e a campainha toca uma vez. Quando a
cozedura estiver concluída, a campainha toca cinco vezes e depois regressa ao estado de espera.
PIZZA
1. Pressione "PIZZA" repetidamente até o número que pretende ser visualizado no visor; "100", "200", "400"
gramas serão visualizados por ordem. Por exemplo, pressione "PIZZA" uma vez e aparece "100".
2. Pressione "START/+30 SEC." (INICIAR/+30SEG.) para cozinhar e a campainha toca uma vez. Quando a
cozedura estiver concluída, a campainha toca cinco vezes e depois regressa ao estado de espera.
FUNÇÃO DE MEMÓRIA PROGRAMÁVEL
1. Pressione "0/MEMORY" (0/MEMÓRIA) para escolher o procedimento 1-3 de memória. O LED irá apresentar
1, 2, 3. Se o procedimento tiver sido definido, pressione "START/ +30 SEC." (INICIAR/+30 SEG.) para o
usar. Caso contrário, continue e defina o procedimento. É possível definir apenas uma ou duas fases.
2. Quando estiver definido, pressione "START/ +30 SEC." (INICIAR/+30 SEG.) uma vez para guardar o
procedimento. Se pressionar "START/ +30 SEC." (INICIAR/+30 SEG.) novamente, começará a cozinhar.
3. Exemplo: Para definir o procedimento que se segue como a segunda memória, ou seja a memória 2.
4. Para cozinhar alimentos com 80% da potência do microondas durante 3 minutos e 20 segundos. Os passos
são os seguintes:
k. No estado de espera, pressione "0/MEMORY" (0/MEMÓRIA) duas vezes e pare de pressionar até o
ecrã apresentar "2".
l. Pressione "TIME COOK" (TEMPO COZINHAR) uma vez e em seguida, pressione "3", "2", "0" por
ordem.
m. Pressione "POWER" (POTÊNCIA) uma vez, "PL10" é apresentado e, em seguida, pressione "8" e
"PL8" é apresentado.
n. Pressione "START/ +30 SEC." (INICIAR/+30 SEG.) para guardar a definição. A campainha toca uma
vez e é apresentado "2". Se pressionar "START/ +30 SEC." (INICIAR/+30SEG.) novamente, o
procedimento será guardado como a memória 2 e operado.
Page 37

o. Se pretender executar o procedimento guardado, no estado de espera, pressione "0/MEMORY"
(0/MEMÓRIA) duas vezes; o ecrã apresenta "2" e, em seguida, pressione "START/+30SEC."
(INICIAR/+30SEG.) para executar.
COZEDURA DE VÁRIAS FASES
1. No máximo, podem ser definidas 2 fases para a cozedura. Na cozedura de várias fases, se uma fase for o
descongelamento, então o descongelamento deve ser colocado na primeira fase automaticamente.
2. Nota: A cozedura automática não funciona na cozedura de várias fases.
3. Exemplo: se pretende cozinhar com 80% da potência do microondas durante 5 minutos + 60% da potência
do microondas durante 10 minutos. Os passos de cozedura são os seguintes:
i. Pressione "TIME COOK" (TEMPO COZINHAR) uma vez e, em seguida, pressione "5", "0", "0" para
definir o tempo para cozinhar.
j. Pressione "POWER" (POTÊNCIA) uma vez e, em seguida, pressione "8" para seleccionar 80% da
potência do microondas.
k. Pressione "TIME COOK" (TEMPO COZINHAR) uma vez e, em seguida, pressione "1", "0", "0", "0" para
definir o tempo para cozinhar;
l. Pressione "POWER" (POTÊNCIA) uma vez e, em seguida, pressione "6" para seleccionar 60% da
potência do microondas. (5) Pressione "START/+30 SEC." (INICIAR/+30 SEG.) para iniciar a cozedura.
FUNÇÃO SMART INFO
1. No estado de cozedura, pressione "CLOCK" (RELÓGIO); o LED irá apresentar o relógio durante três
segundos.
2. No estado de cozedura de microondas, pressione "POWER" (POTÊNCIA) para questionar o nível de
potência do microondas e será apresentada a potência actual do microondas. Após três segundos, o forno
regressa ao estado anterior. No estado de várias fases, a forma de questionar pode ser efectuada da
mesma forma acima.
FUNÇÃO DE SEGURANÇA DE BLOQUEIO PARA CRIANÇAS
1. Bloqueio: No estado de espera, pressione "STOP/CANCEL" (PARAR/CANCELAR) durante 3 segundos e
tocará um longo "bip" indicando a introdução do estado de bloqueio para crianças; entretanto, o LED irá
apresentar
2. Desactivar o bloqueio: No estado de bloqueio, pressione "STOP/CANCEL" (PARAR/CANCELAR) durante 3
segundos e tocará um longo "bip" indicando a desactivação do bloqueio para crianças.
FUNÇÃO PARA RELEMBRAR CICLO
1. Quando o ciclo estiver concluído, a campainha emite 5 "bips" para informar o utilizar que a cozedura está
concluída.
OUTRAS ESPECIFICAÇÕES
1. No estado de espera, se o LED do relógio definido apresentar a hora actual, o ícone ":" pisca; caso
contrário, mostra "0:00".
2. Na definição do estado de função, o LED apresenta a definição correspondente.
3. No estado de funcionamento ou pausa, o LED apresenta o tempo de cozedura excedente.
Page 38

LIMPEZA E MANUTENҪÃO
Este aparelho é para uso doméstico apenas e não pode ser consertado pelo usuário.
Não abra ou mude as peças você mesmo. Leve o aparelho a um departamento de serviços elétricos
qualificado ou devolva ao fornecedor se for necessário algum conserto.
Desligue o forno e retire a tomada da energia da parede antes de fazer a limpeza.
Mantenha o interior do forno limpa. Quando a comida entornar ou espirrar líquidos que aderem à
parede do forno, esfregue com um pano úmido. Pode-se usar detergente suave se o forno ficar muito
sujo. Evite o uso de spray e de outros limpadores agressivos, pois eles podem manchar, rachar ou
borrar a superfície da porta.
As superfícies exteriores devem ser limpas com um pano úmido. Para impedir danos nas partes de uso
dentro do forno, não deixe a água entrar nas aberturas de ventilação.
Esfregue frequentemente a porta e janela em ambos os lados, o vedador da porta e as partes
adjacentes com um pano úmido para remover quaisquer espirros e sujeiras. Não use limpadores
abrasivos.
Não deixe o painel de controle ficar molhado. Limpe com um pano úmido e macio. Ao limpar o painel de
controle, deixe a porta do forno aberta para impedir que vire acidentalmente.
Se acumular vapor dentro ou em volta do lado de fora da porta do forno, esfregue com um pano macio.
Isso pode acontecer quando o micro-ondas é usado em condições de alta umidade. E isso é normal.
Ocasionalmente é necessário retirar o prato de vidro para limpeza. Lave o prato em água morna
ensaboada ou numa lavadora de pratos.
O aro giratório e o piso do forno devem ser limpos regularmente para evitar barulho excessivo.
Simplesmente esfregue a superfície do fundo do forno com detergente suave. O anel girador deve ser
lavado com água levemente ensaboada ou na lavadora de pratos. Ao retirar o aro giratório da cavidade
do piso do forno para limpeza, certifique-se de recolocá-lo na posição correta.
Remova os odores do seu forno com uma mistura água com suco de um limão numa tigela funda que
possa ir ao micro-ondas, deixe-a por 5 minutos. Esfregue completamente e seque com um pano limpo
e macio.
Se for necessário substitua a luz do forno, consulte um representante para fazer a substituição.
O forno deve ser limpo regularmente e quaisquer depósitos de comida removidos. Caso não mantenha
o forno limpo pode levar à deterioração da superfície que pode afetar adversamente a vida útil do
aparelho e possivelmente resultar numa situação perigosa.
Não jogue este aparelho na lata de lixo doméstico; ele deve ser descartado num centro de disposição
particular provido pela municipalidade.
Não use alvejante, limpadores abrasivos ou solventes para limpar o aparelho, pois podem danificar o
acabamento.
AO GUARDAR O APARELHO
Desconecte a panela da tomada na parede e limpe todas as peças como instruído acima. Certifique-se
de todas as peças estejam secas antes de guardar.
Guarde o aparelho na sua caixa ou num lugar limpo e seco.
Nunca guarde o aparelho enquanto ele estiver molhado ou sujo.
Nunca enrole o fio em volta do aparelho.
Page 39

CONSERTO DO APARELHO
Não existem peças que possam ser consertadas pelo usuário neste aparelho. Se a panela não estiver
funcionando corretamente, verifique o seguinte:
Se você seguiu as instruções corretamente.
Se o aparelho foi instalado corretamente e se a tomada está ligada na parede.
Se o aparelho está ligado na energia /ON.
Se o plugue está firme na tomada.
Se o aparelho ainda assim não funcionar após a verificação acima:
- Consulte o varejista para conserto ou substituição. Se o varejista não puder resolver o problema e você
necessitar devolver o aparelho, certifique-se que:
O aparelho esteja cuidadosamente embalado na sua embalagem original.
O recibo de compra esteja anexado.
O motivo pelo qual o aparelho está sendo devolvido.
Se o fio estiver estragado, deverá ser substituído pelo fabricante ou pelo agente de serviço autorizado a fim de
evitar quaisquer danos. Se for necessário algum conserto dentro do tempo da garantia, o aparelho deverá ser
devolvido para um centro de serviço do Home of Living Brands (Pty) Limited. Consertos fora do período de
garantia também estão disponíveis, mas serão cobrados.
SUBSTITUIÇÃO DA FICHA
Cumpra com as instruções seguintes caso seja necessário substituir a ficha.
Esta unidade destina-se a operar apenas na corrente indicada. A ligação a outras fontes de alimentação
poderá danificar o aparelho. Ligue uma ficha de três pinos da seguinte maneira:
Os fios neste terminal de alimentação estão coloridos de acordo com o seguinte código:
Verde/Amarelo = Terra
Azul = Neutro
Castanho = Vivo
Page 40

ANEXE A SUA PROVA DE COMPRA/RECIBO AQUI
EM CASO DE RECLAMAÇÃO AO ABRIGO DE GARANTIA, É NECESSÁRIO PRODUZIR ESTE
RECIBO.
GARANTIA
1. Home of Living Brands (Pty) Limited garante ao comprador original deste produto (“o cliente") que
este produto não apresenta defeitos de material e fabrico que se manifestam na utilização normal
pessoal, familiar ou doméstica num período de 1 (um) ano desde a data de compra (“período de
garantia”).
2. No caso de um cliente comprar um produto e este se quebrar, apresentar defeitos ou não
funcionar corretamente para a finalidade prevista, o cliente tem de notificar o fornecedor ao qual
comprou o produto ("o fornecedor") desse fato dentro do período de garantia. Qualquer reclamação
nos termos da garantia deve ser acompanhada por uma prova de compra. Caso não esteja
disponível uma prova de compra, então as despesas da reparação e/ou manutenção poderão ter de
ser pagas pelo cliente ao fornecedor.
3. O produto avariado tem de ser devolvido ao centro de assistência do fornecedor para aplicar a
garantia.
4. O fornecedor irá reembolsar, reparar ou trocar o produto nos termos desta garantia, sujeito aos
requisites legislativos. Esta garantia será válida apenas quando o cliente não tiver quebrado ele
próprio o produto ou utilizado o produto para outro fim que não o previsto. A garantia não inclui e
não será interpretada como abrangendo produtos danificados como resultado de um desastre,
utilização imprópria, manipulação, abuso ou qualquer modificação não autorizada ou reparação do
produto.
5. Esta garantia aplicar-se-á apenas ao produto fornecido na data de compra e não a quaisquer
acessórios incluídos ou instalados pelo cliente.
6. Se o cliente solicitar que o fornecedor repare o produto e o produto se quebrar ou não funcionar
corretamente nos 3 (três) meses após a reparação, considerando que não seja resultado de
utilização imprópria, manipulação ou modificação por ou em nome do cliente, então o fornecedor
poderá substituir o produto ou pagar um reembolso ao cliente.
7. O cliente poderá ser responsável por certos custos quando os produtos devolvidos não estiverem
na embalagem original, ou caso a embalagem esteja danificada. Este custo será deduzido de
qualquer reembolso pago ao cliente.
HOME OF LIVING BRANDS (PTY) LTD
www.homeoflivingbrands.com
011 490-9600 (Joanesburgo)
031 792-6000 (Durban)
021 552-5161 (Cidade do Cabo)
www.russellhobbs.co.za
www.facebook.com/RussellhobbsSA
 Loading...